
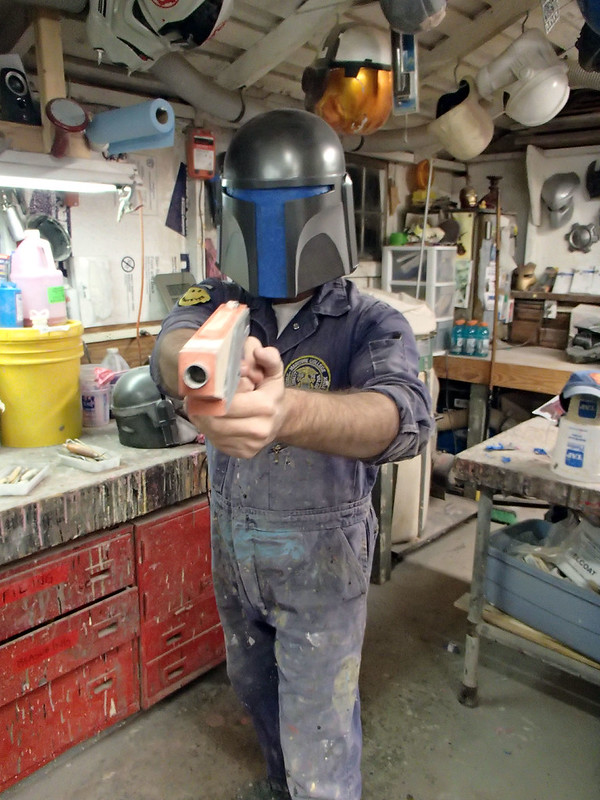
Part1: the Death Watch Helmets
Part 2: the Night Owl Helmets
Part 3: the Armor
Part 4: the Soft Parts
At this point in the build my friend Matt and I realized that we were going to need an awful lot of weapons to arm our growing group of Mandalorians. Rewatching the episodes of the Clone Wars in which they appear, we found the primary weapon of the Death Watch:

That's it? Really? Surely they have to have something more interesting to carry around? What's that? Some of them carry a sort of carbine instead of a pistol? Cool. What's that look like?

Dammit.
Since we'd already come up with armor plates for the thighs with integrated holsters, we were stuck making pistols. Since I couldn't quite stomach the notion of making them as plain and boring as they looked in the series, I ended up adding a couple of lines and recesses here and there. Not enough to make them unrecognizable, but enough to keep them from being as plain and uninspired as they were supposed to be.
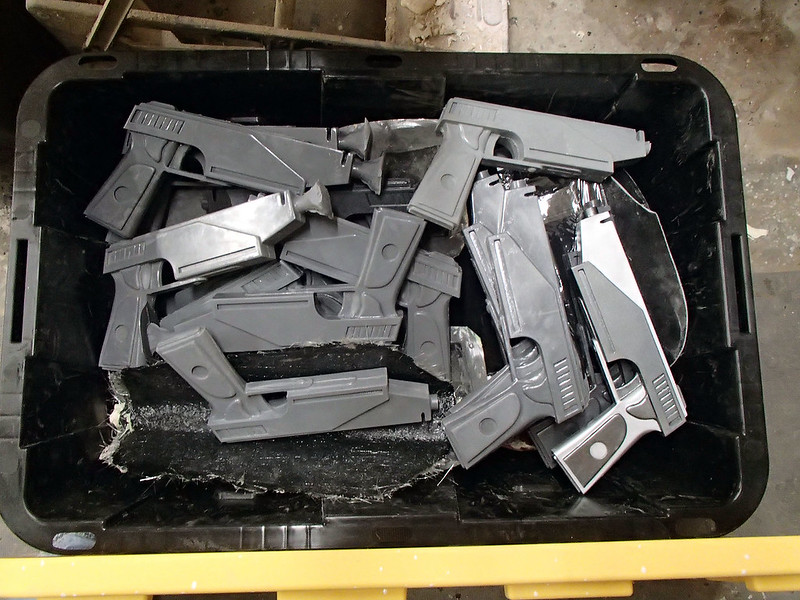
After a lot of repetitive casting and some very rushed, slapdash painting and weathering, the end result was a whole lot of these:
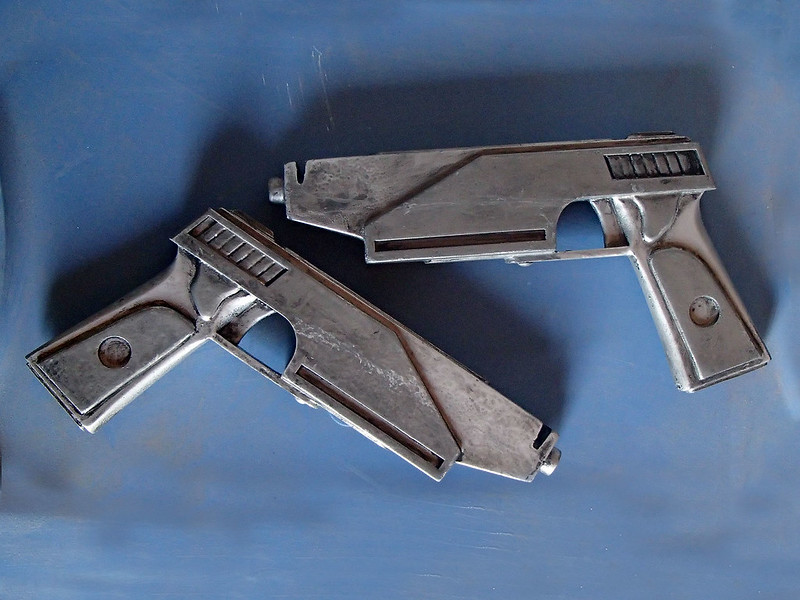
They're pretty unremarkable, but there were a lot of them. If you'd like to see more about how they were made, read on...
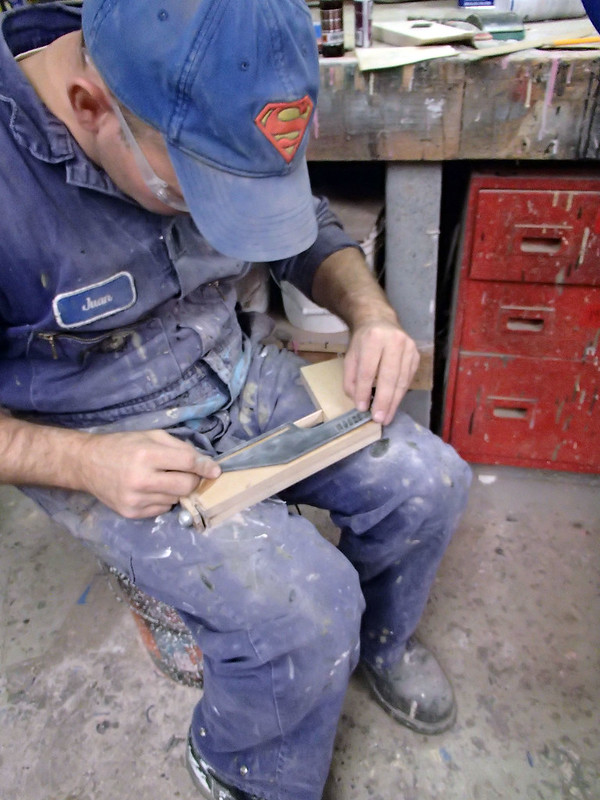
The whole thing started with a paper template and a couple of pieces of MDF. Here's the main body cut out of two pieces of 1/2" MDF with a small piece of 1/2" electrical conduit inserted for a barrel:
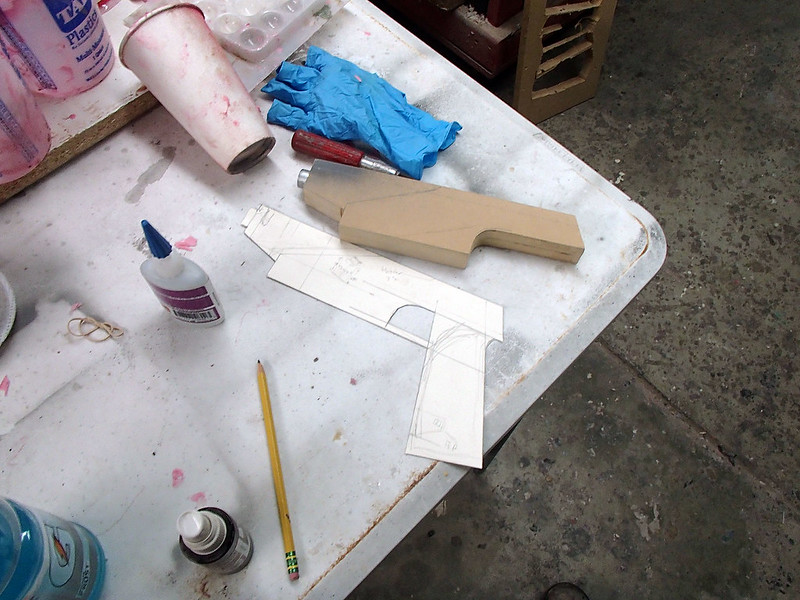
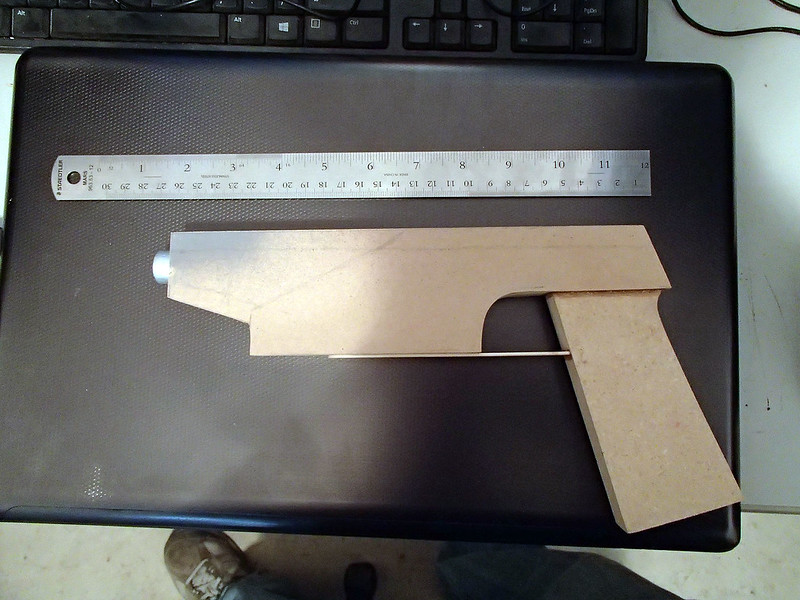
The handle was cut from a piece of 3/4" MDF and the trigger guard was a tongue depressor glued in place. Here is a shot showing us test-fitting it to the prototypes for the thigh plate holsters:
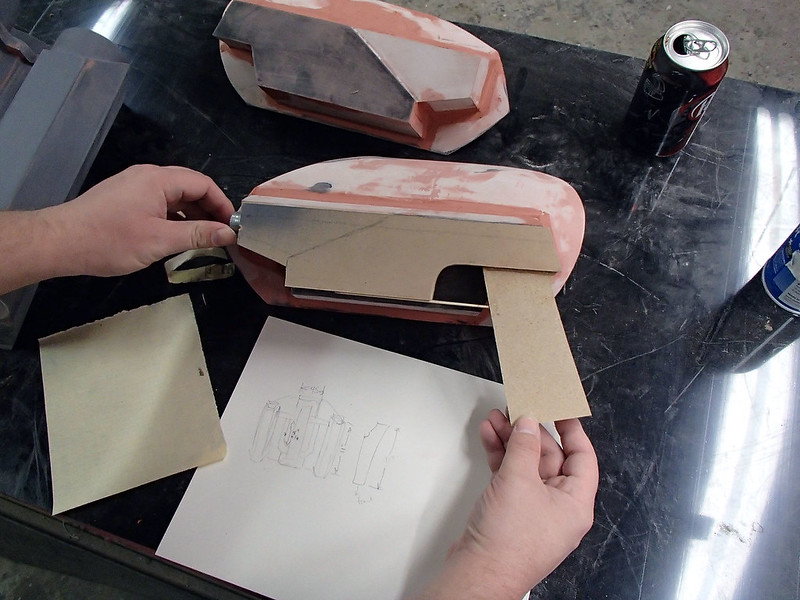
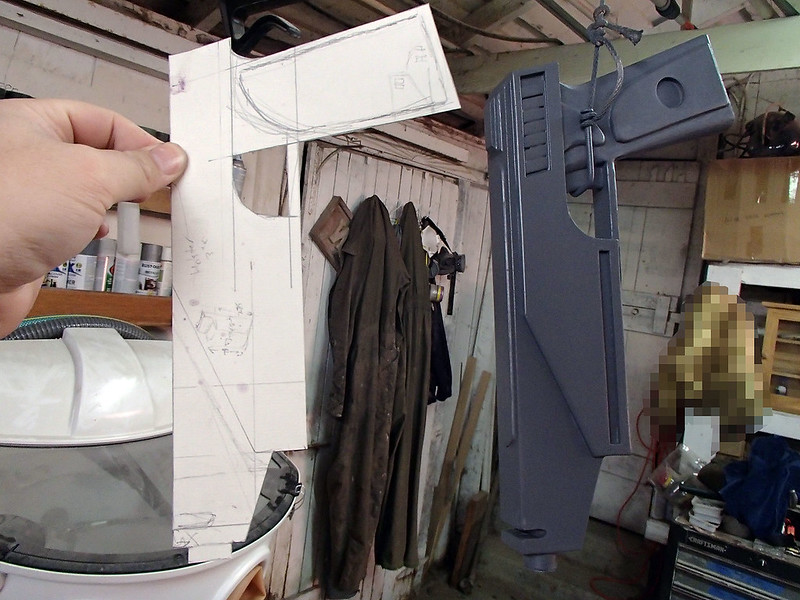
Later, I took some measurements so I could design detail panels for the sides and back:
After the panels were made, I installed them on the MDF body:
This was a pretty cheesy pistol:
I'd like to say it looked a lot cooler once I'd done some more filling and sanding, but it didn't even come close to cool until it was in the same frame as the helmet:
Mostly I think that's because you're not looking at the pistol as much.
I used grey primer to seal up the porous surface of the MDF:
Then made it all shiny with the first can of gloss spraypaint I could reach:
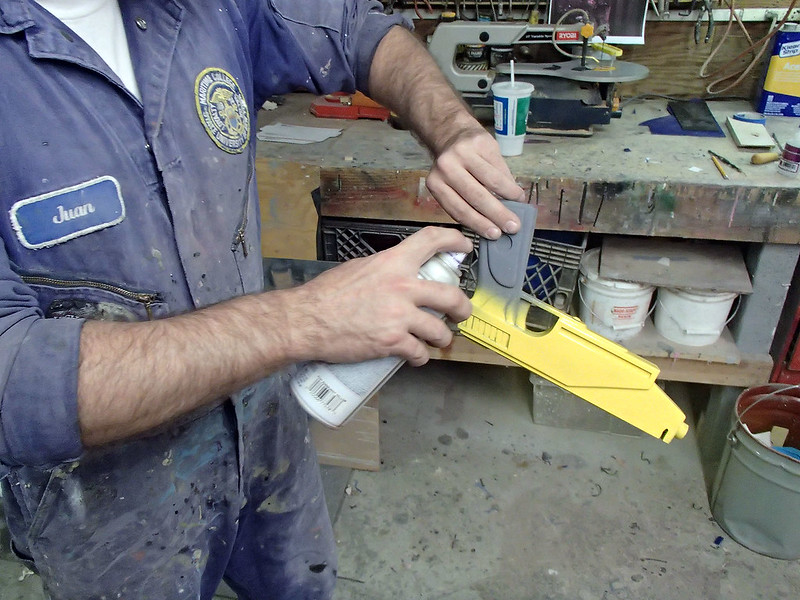
Seriously. Who cares what color it is at this stage?

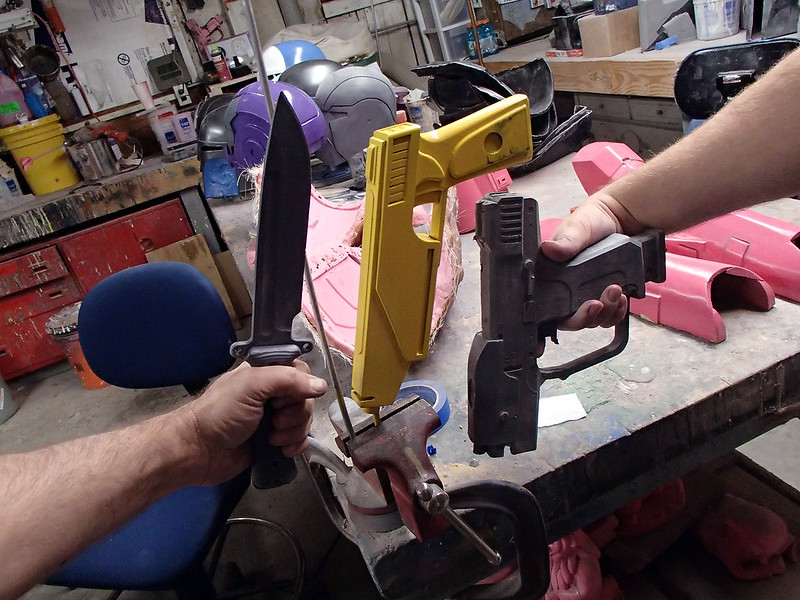
Here it is with a couple of other things I'd recently cast:
Later I decided that it would need a bit more sanding and smoothing before it was ready for molding, so I ended up painting it pink after all. In case you were worried.
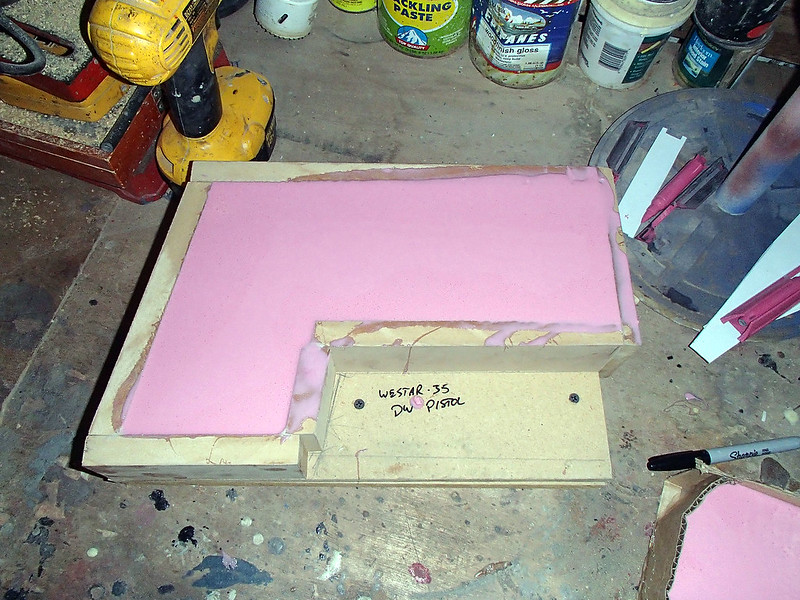
Of course, our squads of Mandalorians will need more than just one pink blaster pistol between them, so I had to make a mold. It all started with making a box out of MDF with at least 1/2" of clearance all the way around the part:

Then I built up a clay bed to nest the pistol into. The shape of this bed would determine the shape of the 2nd half of the mold, so I carved in a few grooves and pushed in some dimples that would proved registration keys to keep the two halves of the mold aligned:

Once I was sure that the mold box was watertight and there'd be no way for the silicone to leak past the original pistol, I filled it with pourable silicone moldmaking rubber:
When I got back to the shop the next morning, the rubber had cured. So I flipped over the mold box, removed the bottom (which was now on top) and started picking out the clay:

here's what it looked like once the clay had been completely removed:
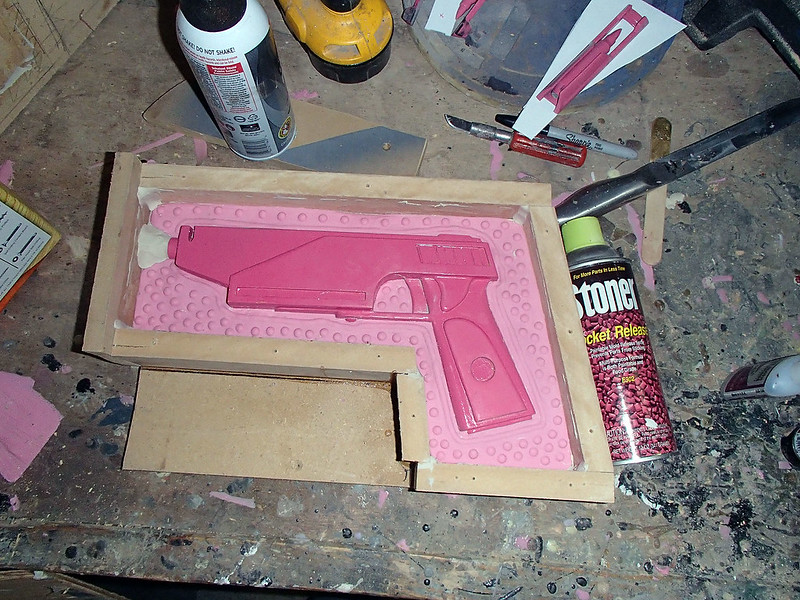
Okay, I know it wasn't completely removed. I left clay in each of the corners of the box in order to keep it watertight. I also left a lump of clay to act as a pour spout (or "sprue" if you need the lingo) so I could fill it with resin.
Then I sprayed on a copious amount* of release agent, gave it a few minute to dry, and filled the mold with silicone again:

The mold release keeps the two pieces of silicone from bonding to one another.
Once the second chunk of rubber had solidified, it was time to pull the mold apart, remove the bright yellow prototype, fit the box with hanger bolts so I could clamp it shut again, and pour a new copy of the pistol:
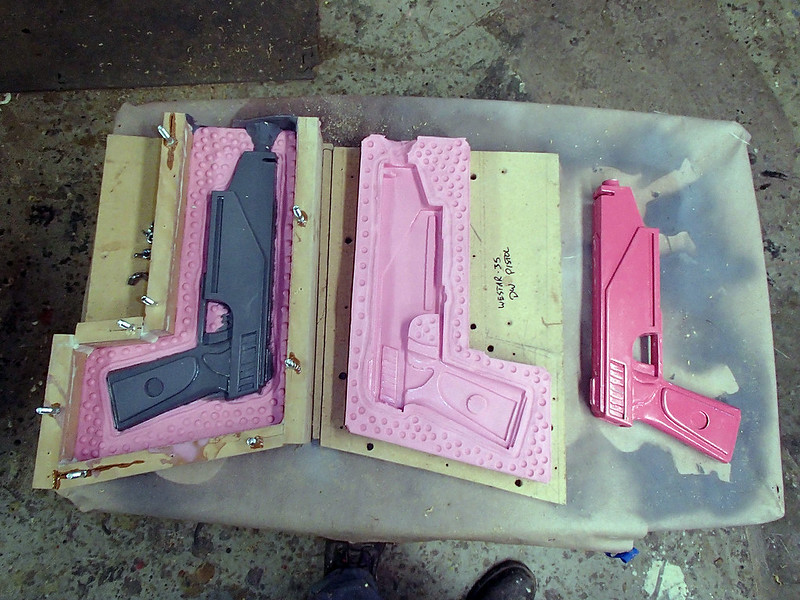
This was poured in plain urethane casting resin with a bunch of Microballoon filler added in to cut down on the weight and a bit of black pigment mixed in to make any scratches in the paint less noticeable.
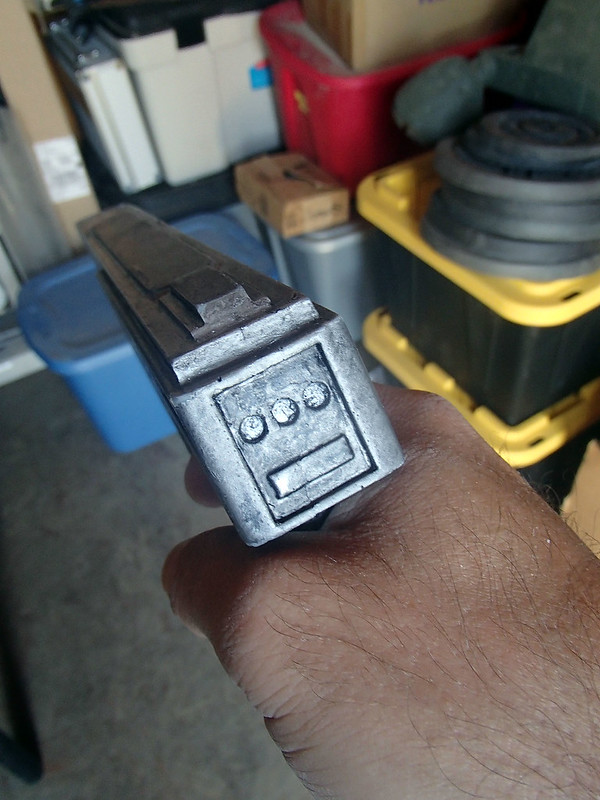
Each cast came out of the mold with the sprue still attached:
Which is fun:
After cutting off the sprue, sanding down the flashing from the mold seams, and adding a bit of spot putty to eliminate a few pinhole bubbles in the surface, the whole thing was ready for primer:
Then we made another one. Here's the first pair with the light red prototype:

Then we made a bunch of them:
And a bunch more:
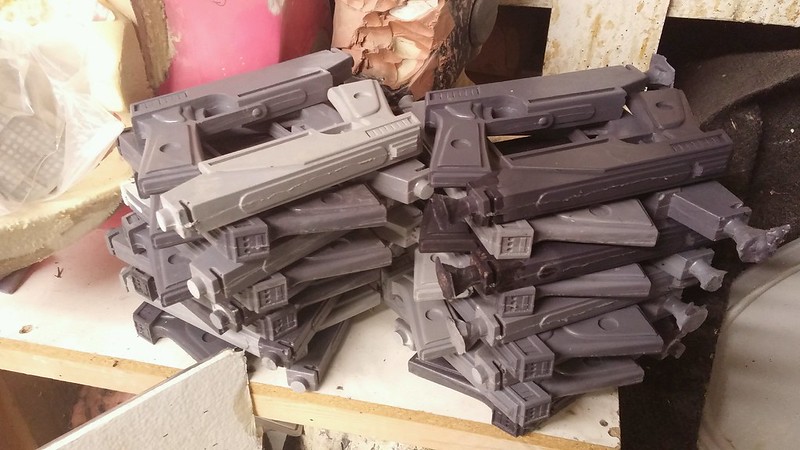
And even more:

And yet more:
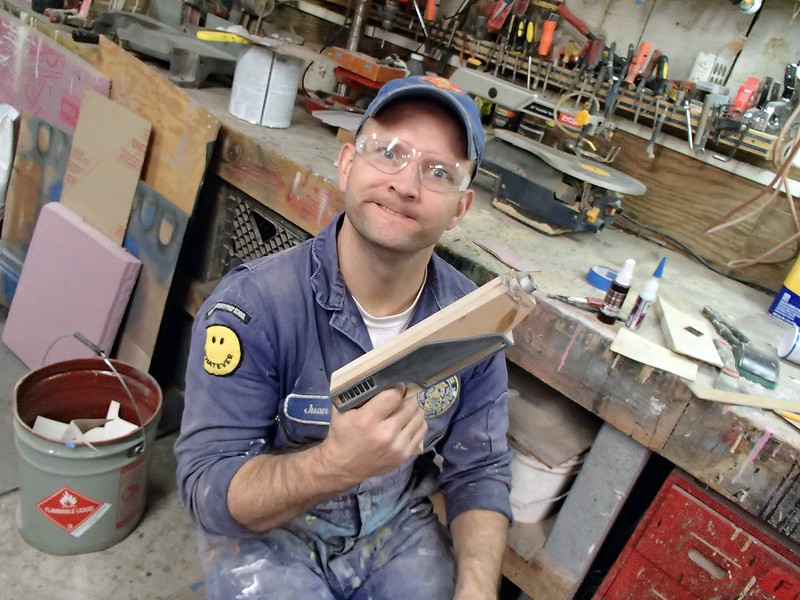
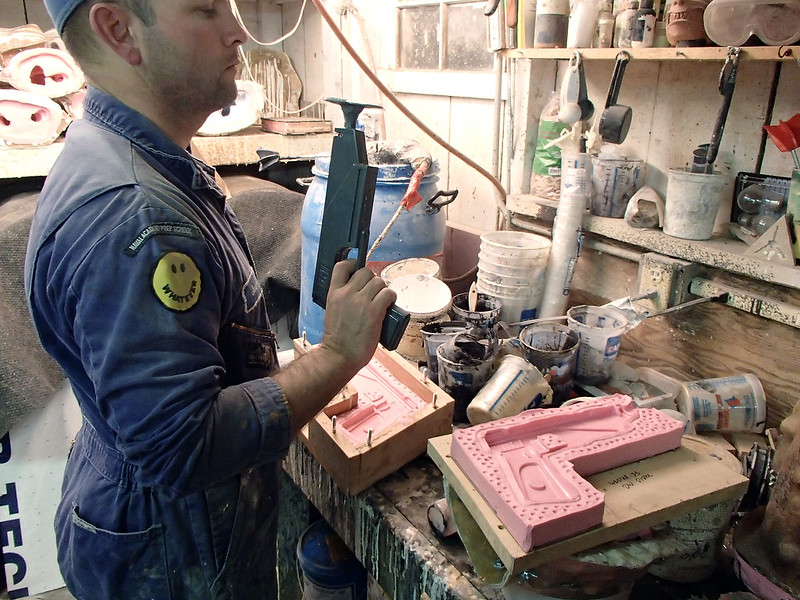
Somewhere along the way, my friend Trevor (slated to become Death Watch Commando #15) decided he was best suited to doing all of the prep work on all of the pistols. So whenever he wanted to get out of his house and take a break from the real world, I'd find him in my workshop about like this:
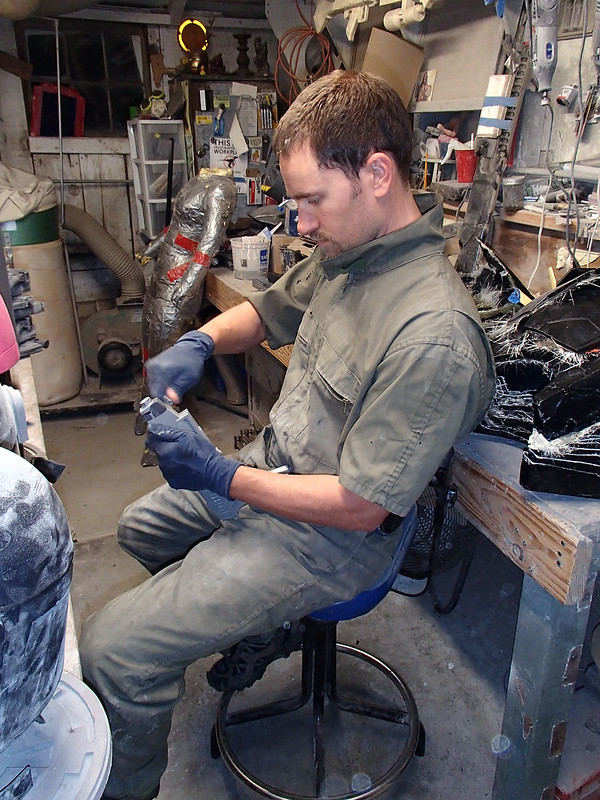
Or like this:
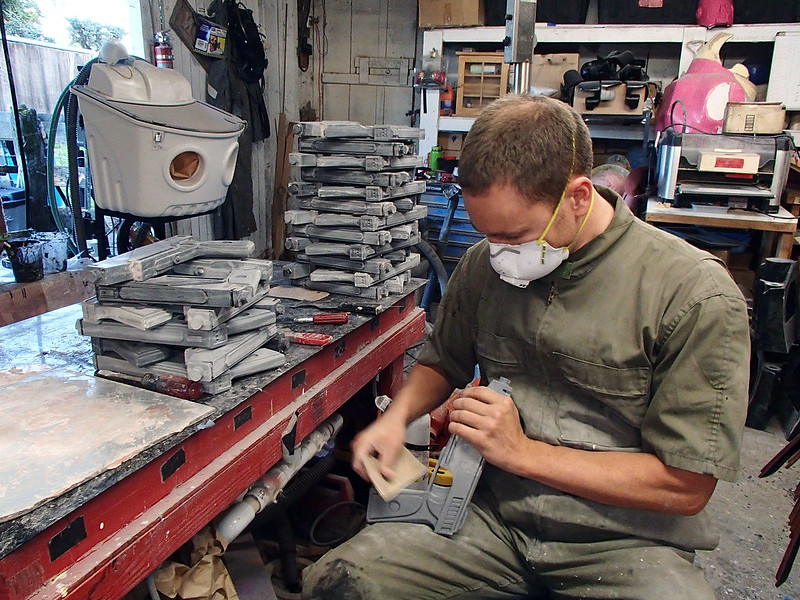
But eventually he'd come up with this:
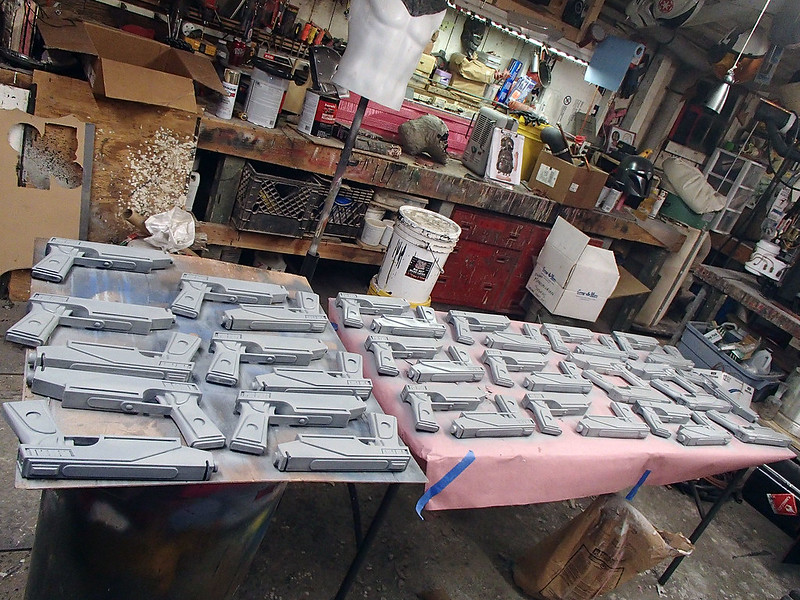
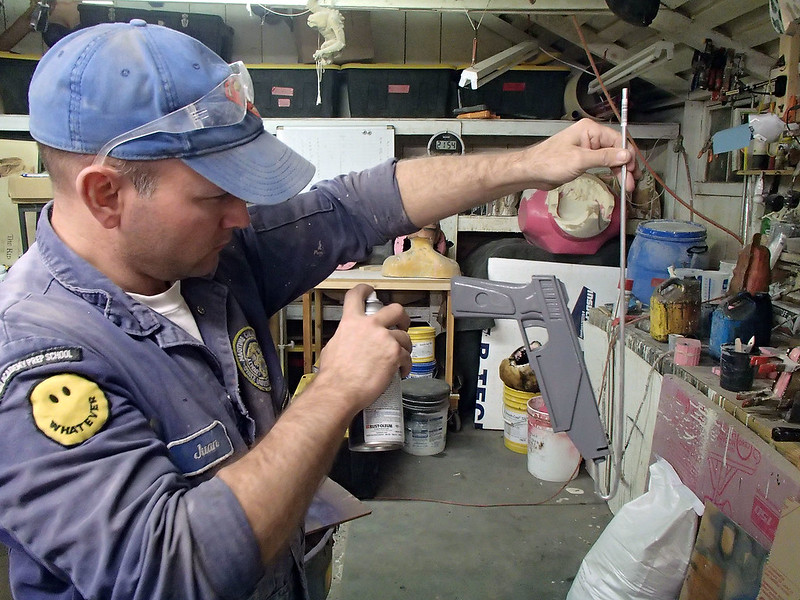
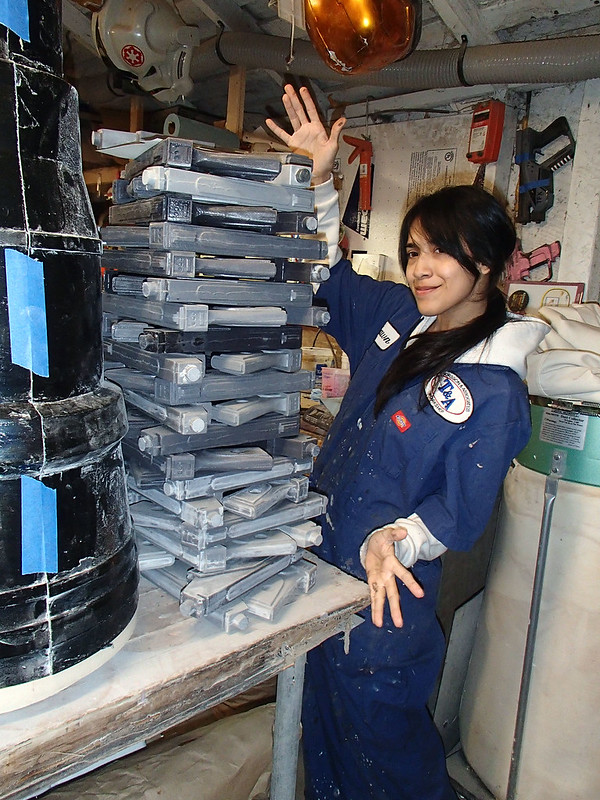
Once the whole stack of pistols had been primed, they were given a base coat of Satin nickel metallic from Rustoleum:
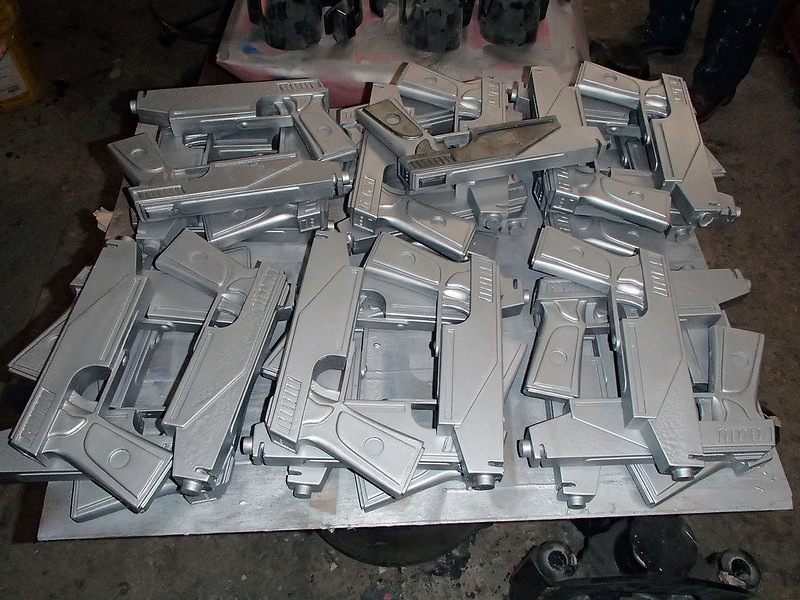
Then, the stack of pistols kept getting moved and re-stacked for the next few days while we continued to work on the other parts of the armor:
Somewhere along the way, Matt had pulled one out of the stack and painted it up very nicely, picking out each of the raised areas by hand and he did a great job. You can see it in Daniella's right hand in this photo we took while test-fitting her armor:
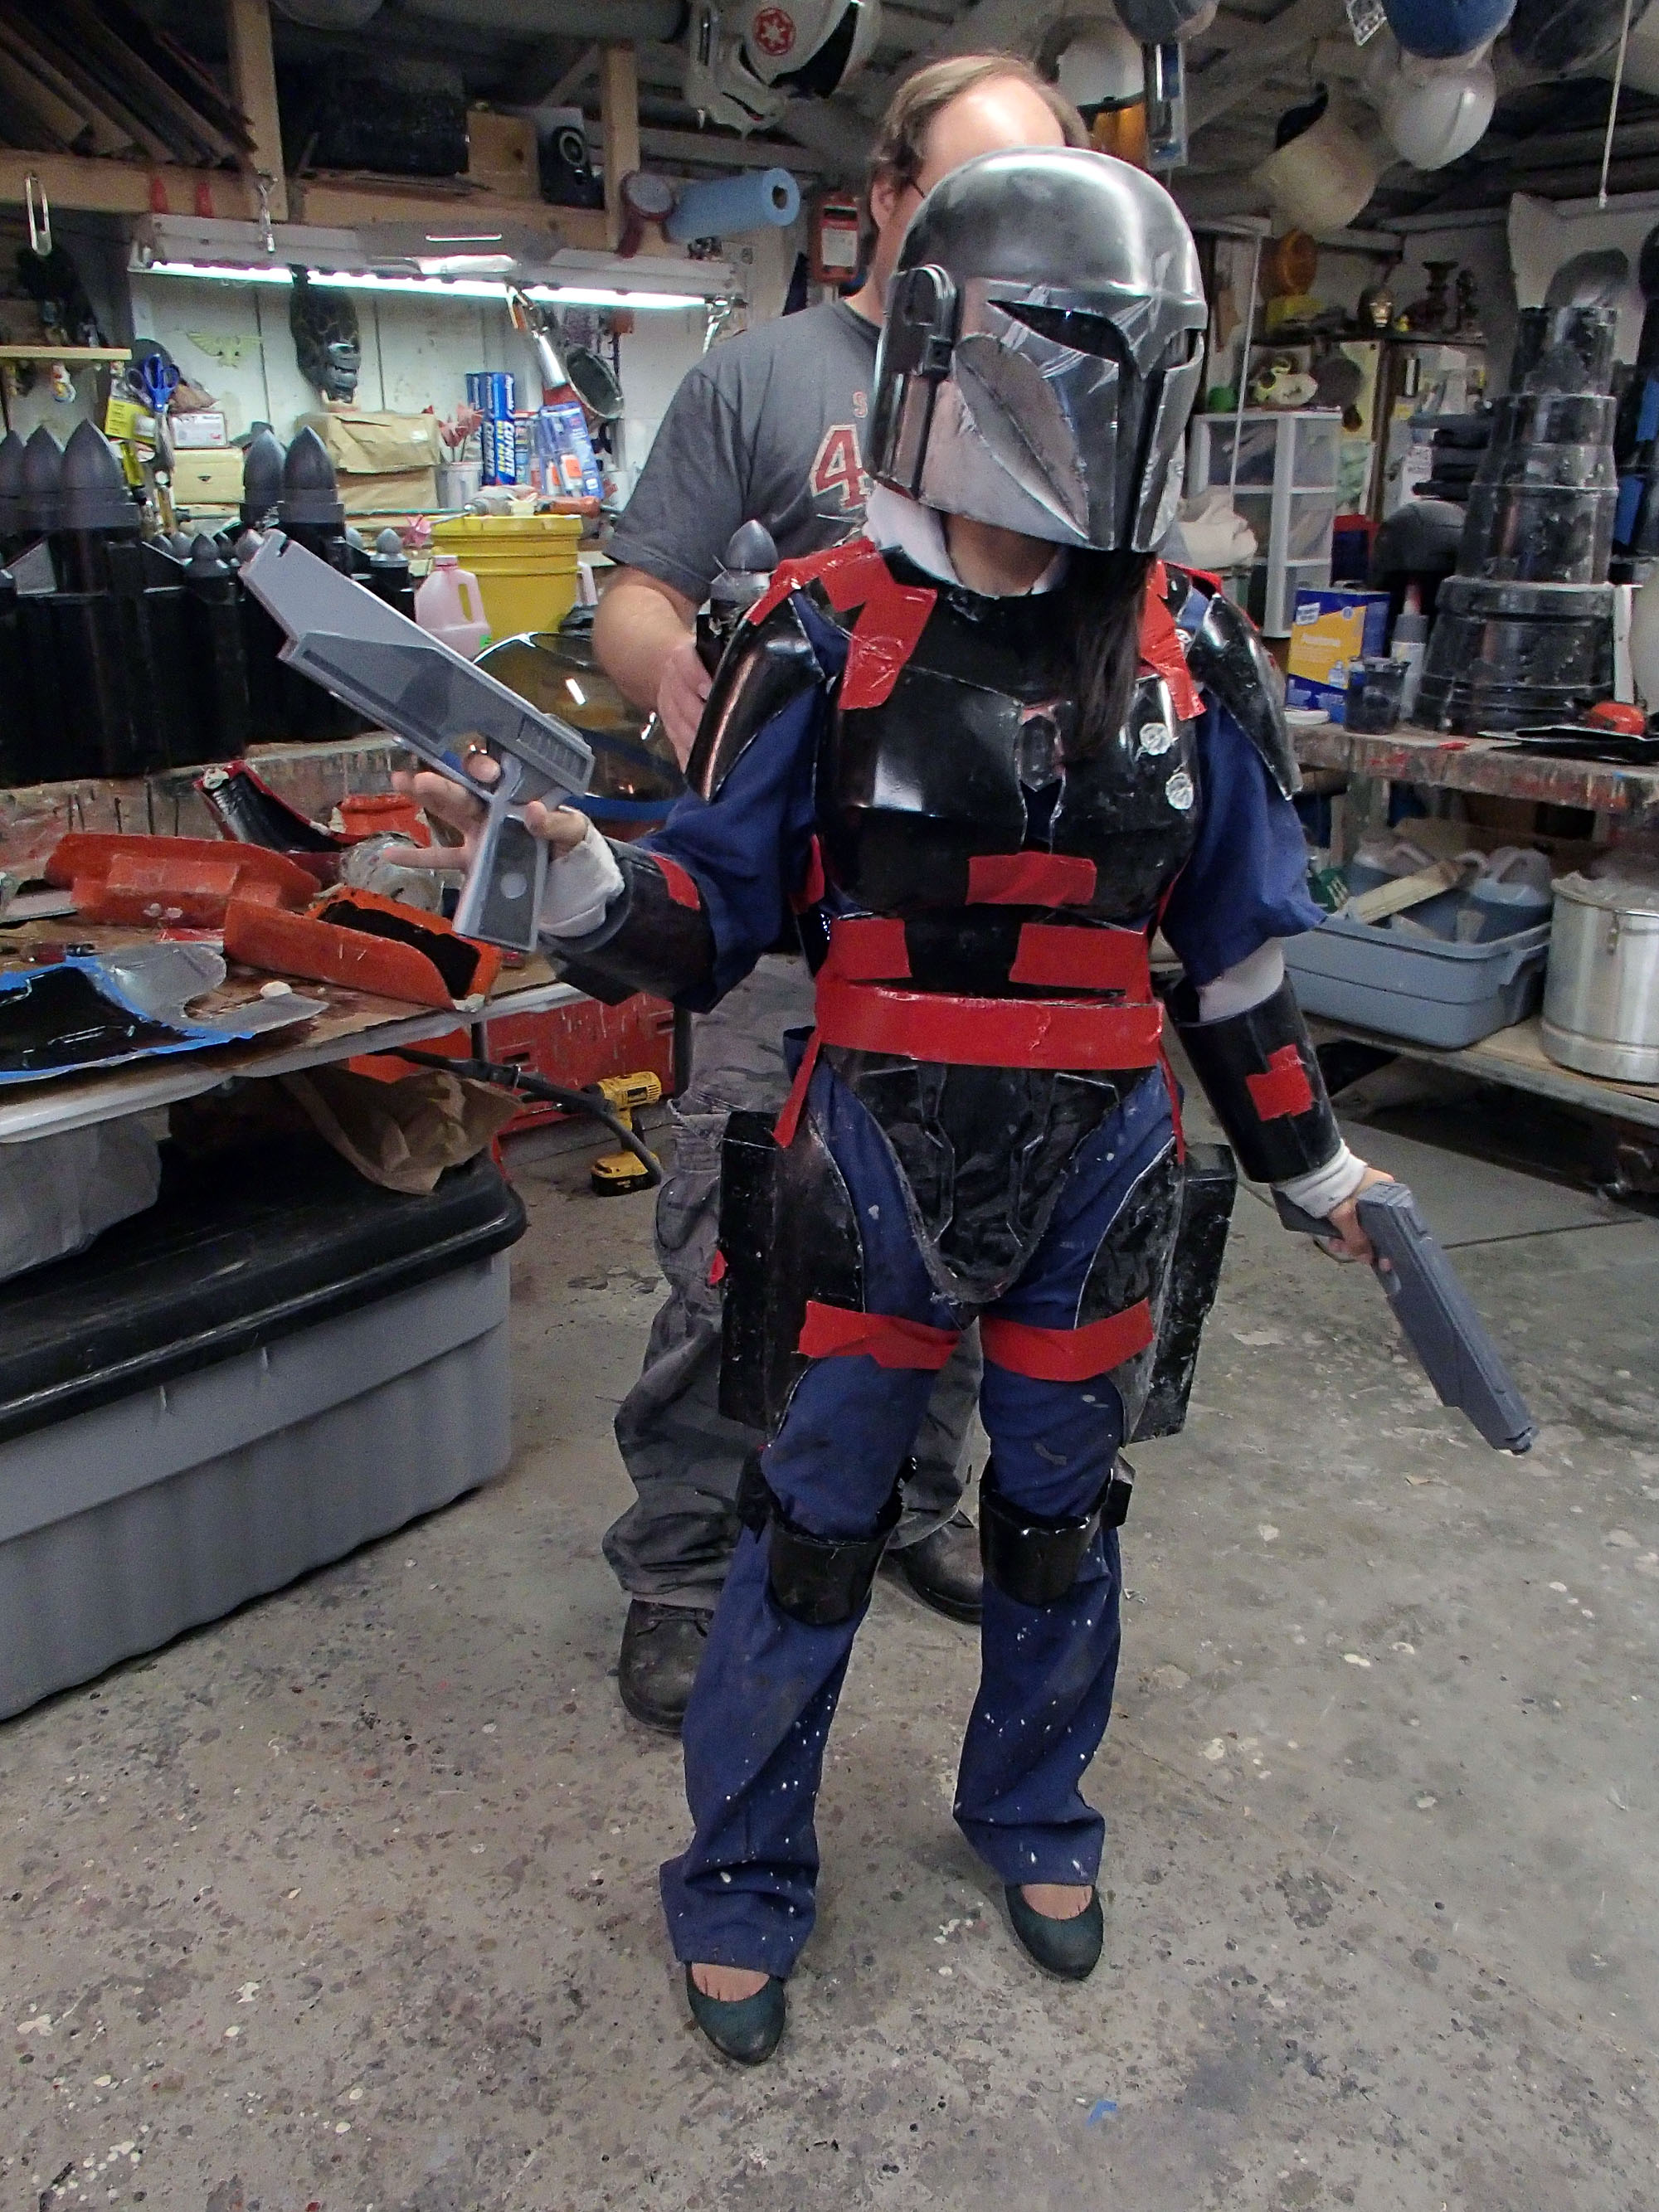
Matt was very proud of it.
It took all damned day.
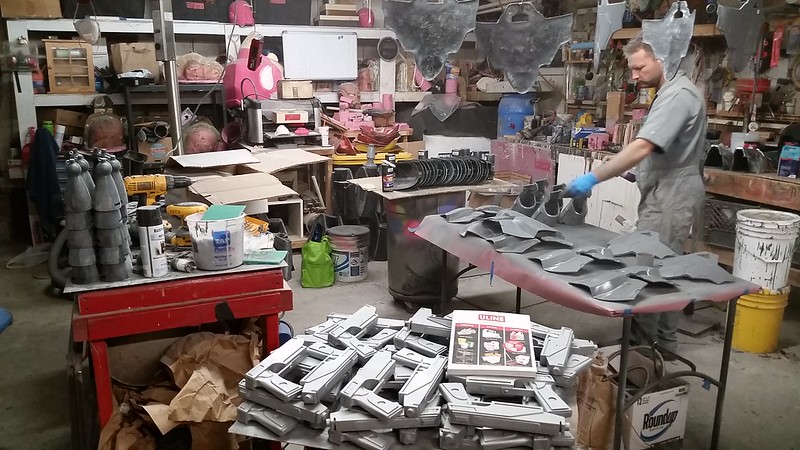
At this point, we didn't have all damned day for each of the THIRTY-EIGHT pistols we were going to have to paint. Plus, they'd probably spend most of their time tucked into their respective holsters anyway. So we ended up doing most of the detail painting with a couple of rollers.
Seriously. Rollers.
Matt's wife Jen had been at the craft store at some point and spotted these adorable little foam rollers that were probably intended to simplify the stenciling of flowers on nursery walls or something. We ended up mixing a bit of aluminum colored enamel with some gloss black enamel to make a sort of gunmetal color that made us all shrug and say, "meh, okay."
Then we started rolling them out.
Since we were neck deep in the high-speed, last-minute costuming rush, nobody thought to take pictures of the actual painting process, so hopefully I can describe it for you. Imagine a cold, dark, dusty place that reeks of paint fumes, stress sweat, and days-old pizza crust. Put a handful of buckets in a circle somewhere off in the corner and put a box in the middle of it. Now add a red-eyed, cranky, exhausted shell of a human being seated on each of those buckets.
Put a plastic pistol in each of their left hands and a flimsy foam roller in each of their right hands and listen to them grumble as they roll dark metallic enamel slurm first on one side of each of thirty-eight pistols and then, after almost enough time for the paint to dry, they go back and smudge paint on the raised details on the other side.
That's about how it went. Right up until three o'clock in the morning or thereabouts.
The next day, one of the guys made it his mission to add some blackwashing to all of them and hide all of the parts where we'd painted outside the lines on a few (okay, all) of them.
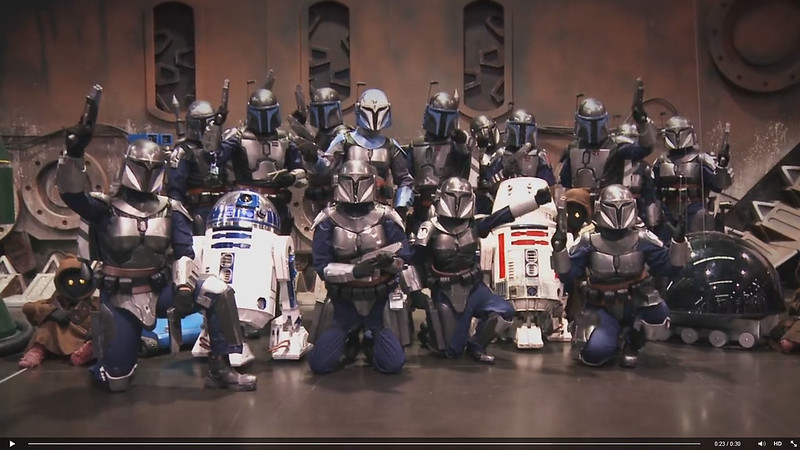
In any case, the day was won and we managed to arm all of our Mandalorians:
I never did get any photos of the pile of finished pistols when the paint was fresh, but here's a closeup of one of them after it had survived all of the convention abuse on its way to being tucked back into storage:
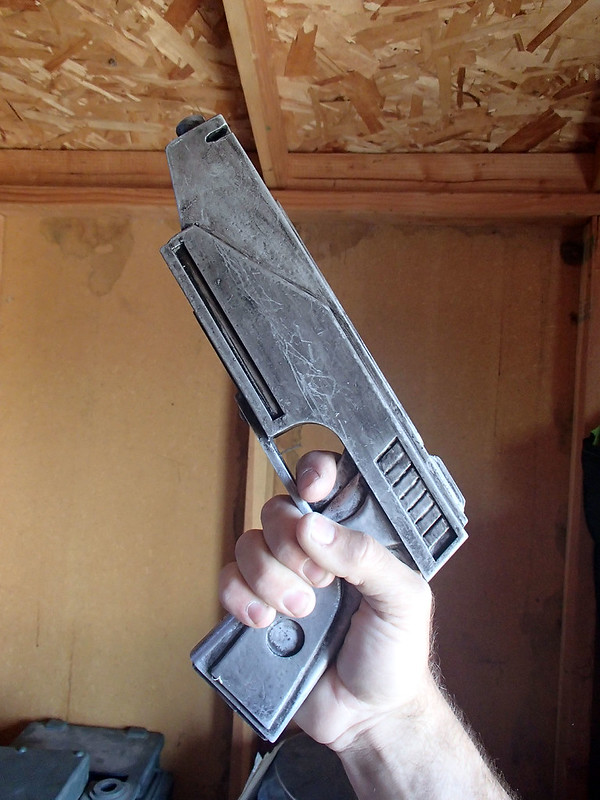
And here it is from a more interesting angle showing all of the non-canon details I felt compelled to add:
I hope you're enjoying this series of articles. I'm trying to churn them out as I remember the details of the project, but I'll admit that as we got closer to the deadline on the day we were going to have to pack everything and drive down to the convention, a lot of the details get lost in the fuzzy, late-night, frustrations of just trying to get the whole thing done.
I've made a lot of bigger, cooler, and more complex things than these costumes, but I will admit that as this project drew to a close it had really taken on a life of its own. By that point, I wanted it to die. I can't remember being quite so thoroughly exhausted by any of my other builds.
Hopefully I'll be able to write the rest of this series of articles without too much of the angry part coming out.
*The label on the can of release agent actually has a line which reads, "a little goes a long way and a lot does no better." Still, I tend to err on the side of "screw it, I don't want to have to cut these two halves of the mold apart later."
Brilliant. Inspirational. Thanks for taking the time to write it all up so thoroughly - it makes a superb tutorial.
ReplyDeleteKinda makes you wonder if they designed the pistols like that so they were cheaper to render? The low poly count would make rendering a lot faster and save the animation money.
ReplyDelete(or "sprue" if you need the lingo) - Always!
ReplyDeleteCan we buy you one ? :)
ReplyDeleteCan we buy you one ? :)
ReplyDeleteThose are amazing, how can I get one?
ReplyDelete