About Me

My photo
I make toys for kids who don't want to grow up. I'm on the lookout for new projects. If you're interested in commissioning me to build something ridiculous, shoot me an email.
Showing posts with label make magazine. Show all posts

Thursday, May 26, 2016

Rushed Project: Makey the Robot Part 3, The Done Thing

Somewhere around the thirteenth actual day worth of work on this project, the folks from Make Media stopped by and brought along the poor bastard who was going to be wearing this thing at the Maker Faire.  Here's a video introducing him and showing the initial walk-through and test fitting:


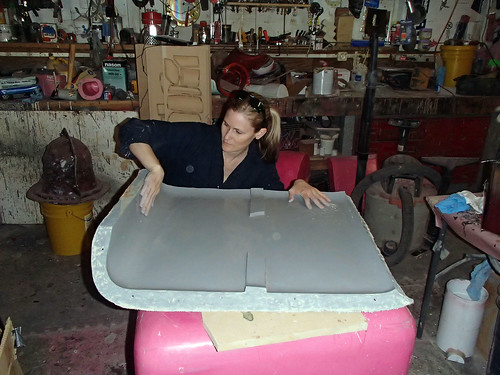
At that point, we still needed to make the other leg, arm, and shoulder, but at least it looked like the whole thing was going to work.

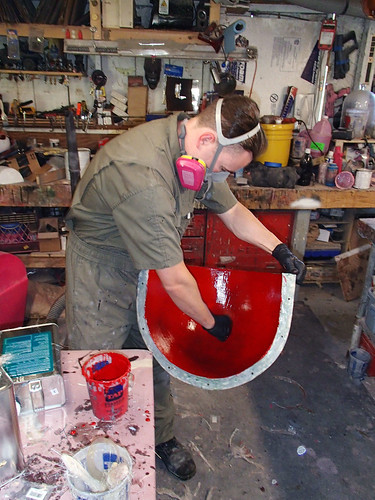
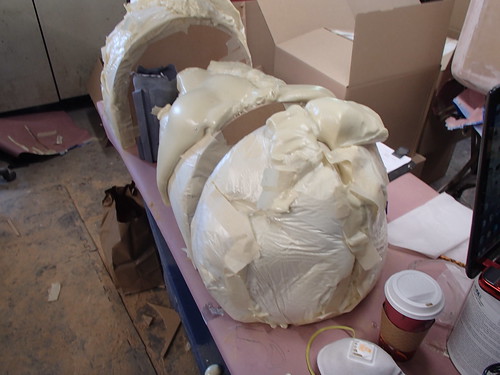
The remaining parts came out pretty good, but everything still needed a little cleanup on the corners and edges.  Once everything was trimmed, sanded, filled, and smooth, the whole thing got a shiny, red paintjob:


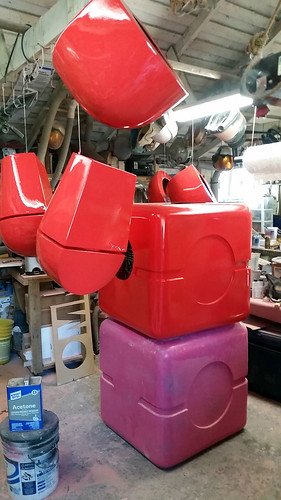
Of course, as luck would have it, this was just a couple of days before the delivery date and those two days happened to coincide with one of my naval reserve drill weekends.  So while I was spending my daylight hours keeping the world safe for democracy in a classroom in Alameda, the Lady Shawnon took care of masking off the main body and spraying on the white paint in the recessed areas:


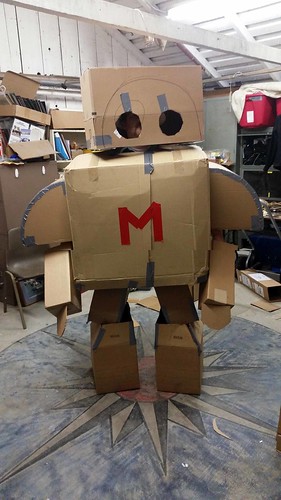
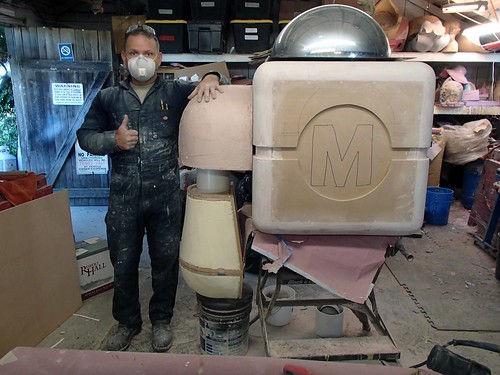
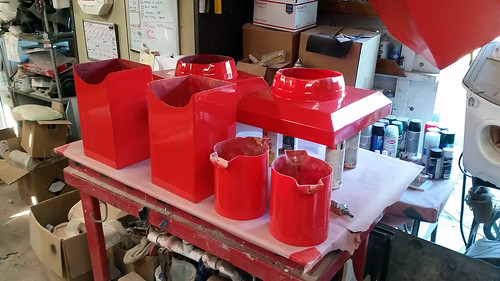
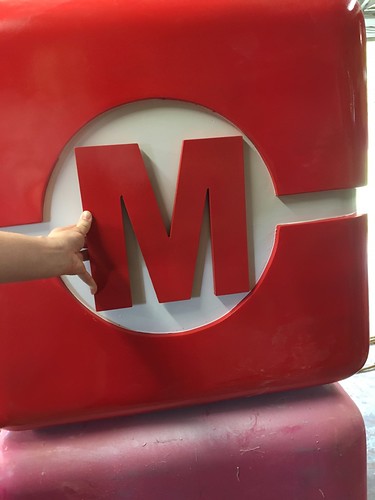
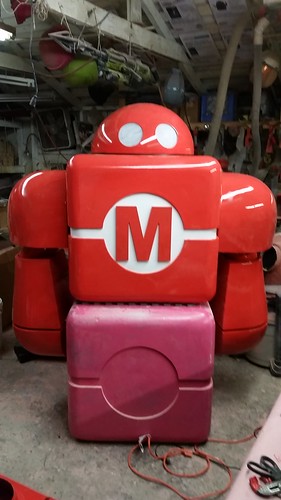
Along the way I had Lopez the Robot Whittler (my Carvewright CNC machine) cut out a pair of giant letter M's to go into the circles on the front and back.  They were both painted red to match everything else:


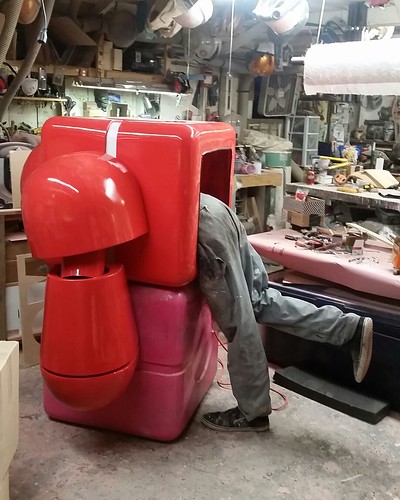
When I got done with drill for the day, I made a mad dash back to the workshop and got started assembling the main body, head, and arms:


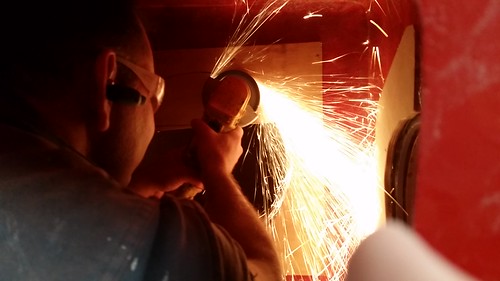
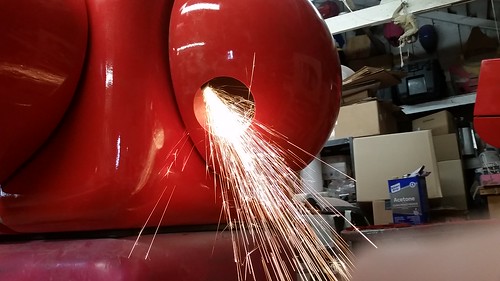
The head and shoulders were each attached to the body with a lazy susan bearing (like this one: LINK) to allow them to swivel.  The inside of the body was reinforced with plywood everywhere these parts were screwed on.  To make sure the tips of the screws wouldn't stab the wearer, I went ahead and ground them flat with a flapwheel grinder:


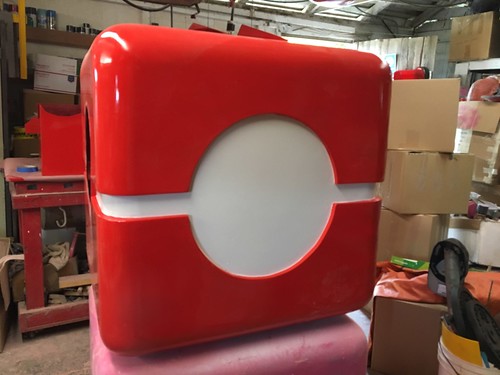
Which looked kinda cool from the outside:


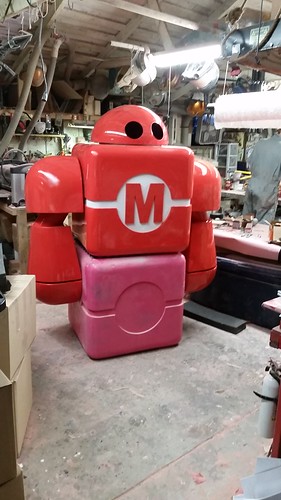
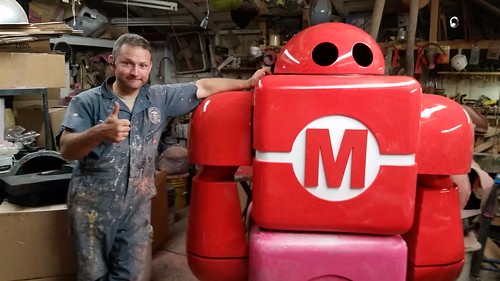
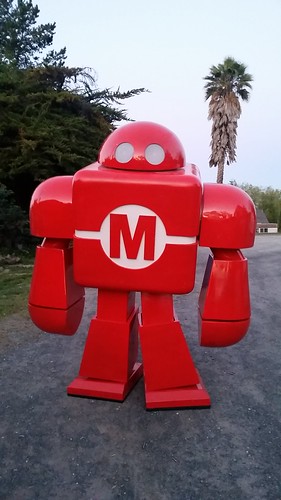
At that point, the assembly was complete:


The only thing missing was the white mesh in the eye holes.  For that, I had Loki the scrawny tall kid reach in and glue them in place:
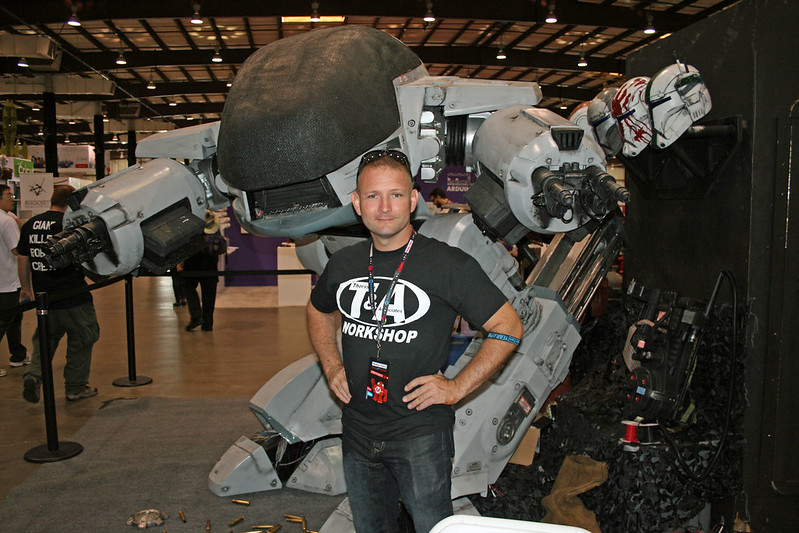

Ta-da:


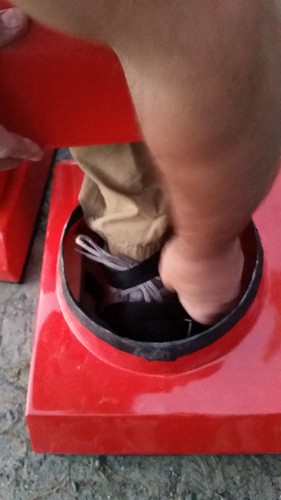
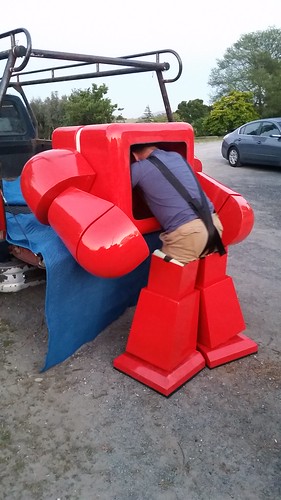
The last thing that needed to happen was a quick and dirty functionality test.  Here I am strapping myself into one of the legs:


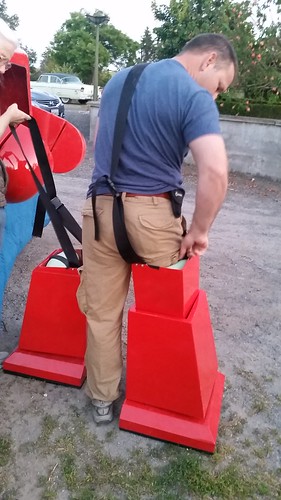
I was just about able to dress myself without help.  The only challenge was tightening the foot straps.  Having a second pair of hands made it a bit easier:


Once the legs were on, it was a simple matter of grabbing the main body and lifting it up and into place:


Then it was time to take him for a stroll:


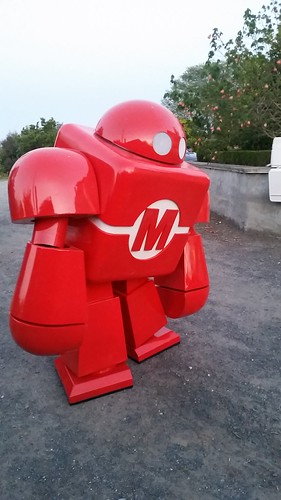
I was pretty well exhausted at this point, so I only gave it a few minutes of walking around before I was happy that it was at least going to work.  Then I hopped on a plane across the country to attend the Lady Shawnon's graduation and had to rely on my folks to drop the whole thing off at the Maker Faire on their way to visit my sister down the road.

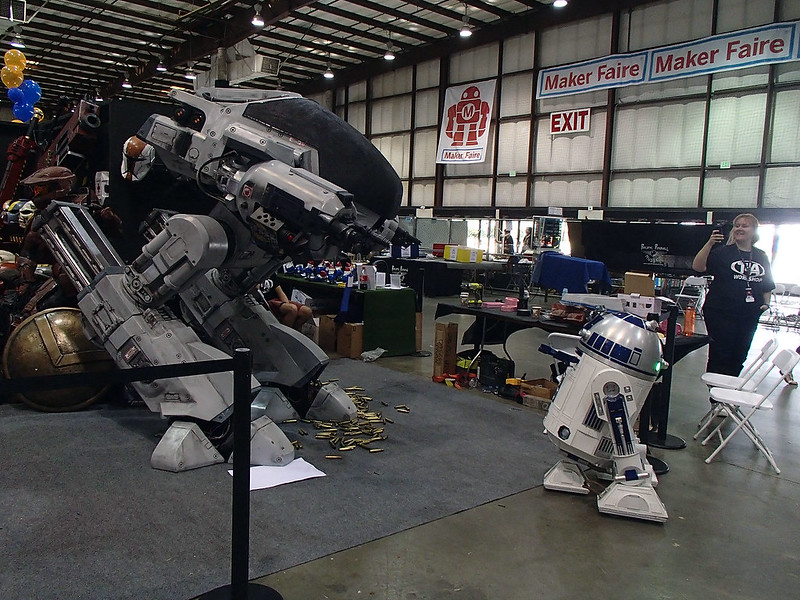
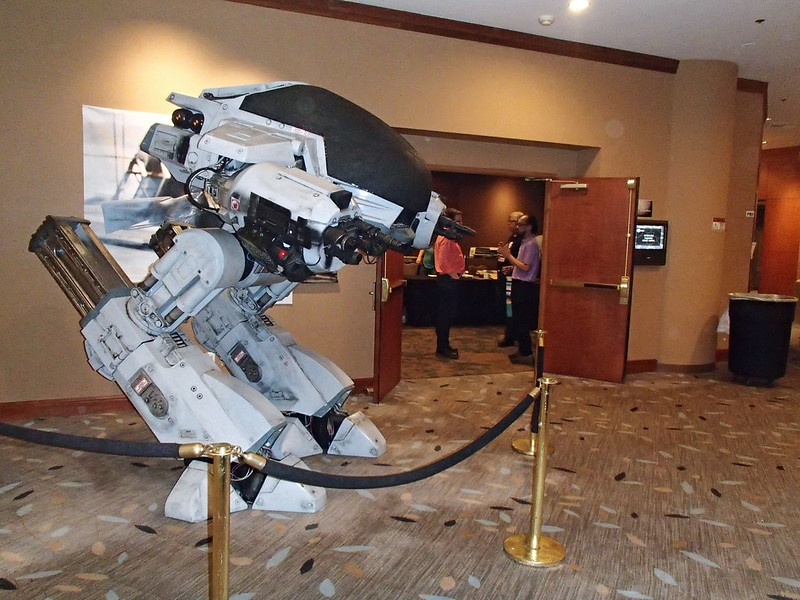
A few days later, I started seeing photos from the Maker Faire pop up on social media.  All of the on-location photos were shamelessly stolen from the Makezine.com (LINK):


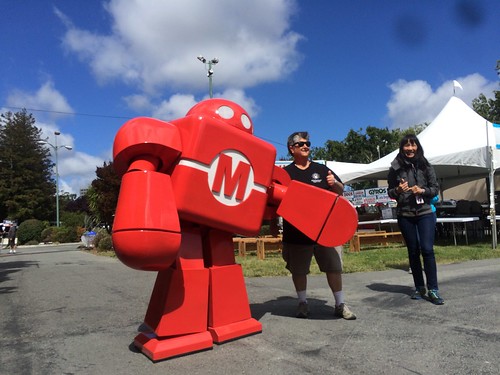
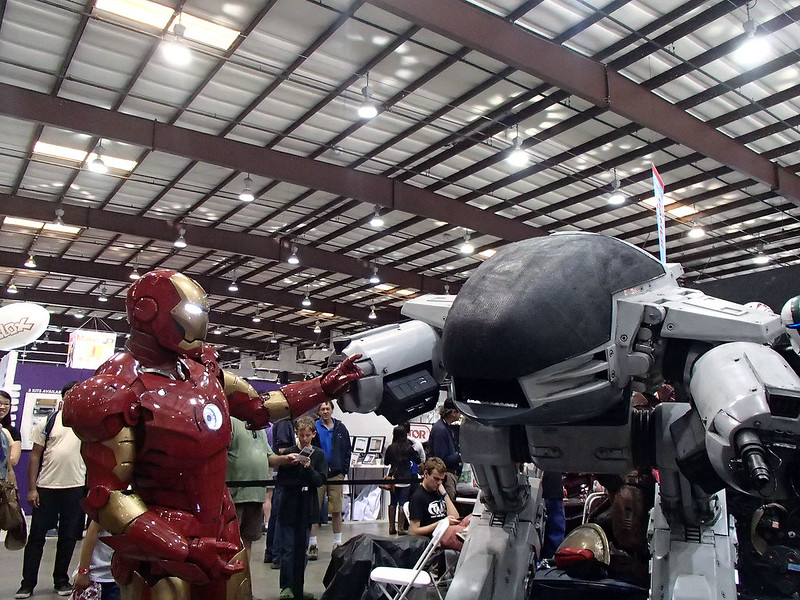
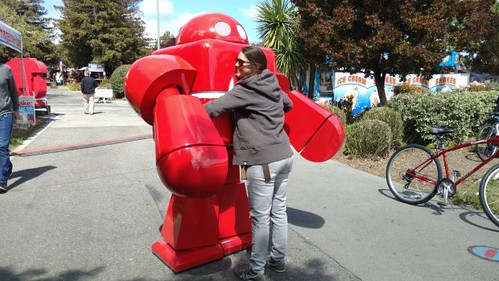
Makey was a big hit with the ladies:


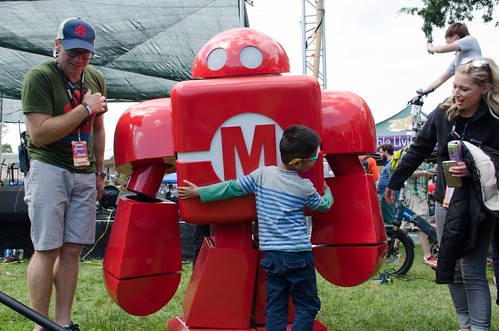
Kids seemed to like him too:


I was worried that the poor bastard inside would succumb to heat stroke or have trouble moving around, but he seemed to be managing somehow:


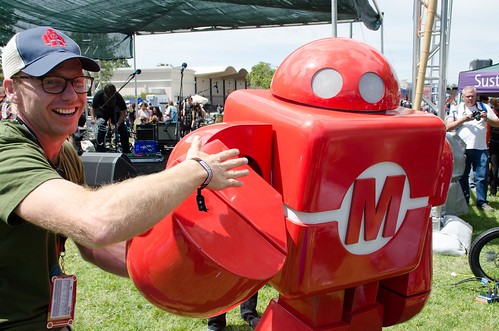
By the end of the weekend, he managed to get around quite a bit:


And then there's this one:


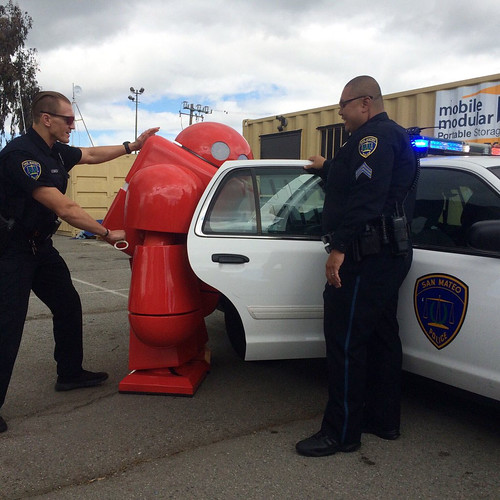
I don't know what he got up to, but I hope he had fun along the way.

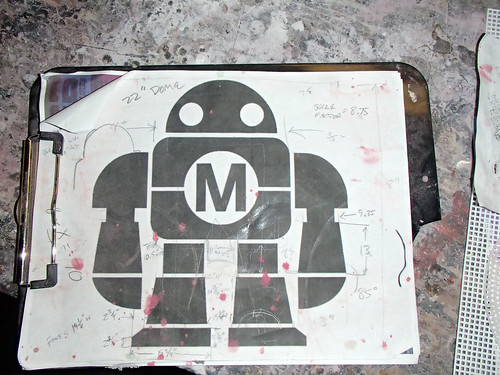
The funniest thing, this is still the only bit of design reference and all of the math that went into this build.


Special thanks to Matt, Cary, Trevor, Loki, Gordon, Tyler, Anthony, the Lady Shawnon, and of course my folks for helping me get this thing together in just a shade over two weeks worth of shop time.

More insane projects in the works as always.  Stay tuned...

Wednesday, May 25, 2016

Rushed Project: Makey the Robot Part 2, Moldmaking and Laying up Parts

Continuing along at the breakneck pace of this project, all of the pieces were prototyped in a mad rush.  Then it was time to move on to making the molds.

Since most of the shapes are pretty simple, I was able to get away with making rigid fiberglass molds of all of the parts.  Here's a video explaining that process:


I also got a few snapshots of the molds in progress.  Each mold started with a layer of gelcoat.  Since I was going to make the parts red, I opted for a grey gelcoat so the contrast would make it easy to spot any gaps in coverage.  Here's the layer of gelcoat on the top of the main body prototype:


Here's the mold for the forearm after all three separate parts were laid up:


Given the mad rush to get the whole thing done, I neglected to set aside time to snap progress photos.  Here's a rare shot of two of the five panels that made up the mold for the main body:


Somewhere along the way, the Lady Shawnon came home on a break from veterinary school.  Proving once again that she's the absolute perfect woman for me, she slipped into some coveralls and spent more of her vacation than any sane person should helping me put this project to bed.  Here she is polishing up one of the body molds:


Once the molds were made, it was time to start laying up the actual parts.  Here's the Make: behind-the-scenes video showing the part lay-up:


Once again, I didn't have much time to take pictures along the way, but the very first piece I pulled was the head.  Here it is sitting in a pile of random crap in the corner of the shop:


Here's a snapshot of Trevor applying gelcoat in part of the shoulder mold:


Fascinating stuff, I know.  Stay tuned for the exciting conclusion of this project!

Saturday, April 30, 2016

Rushed Project: Makey the Robot

For the past few years now, the folks at Make Magazine have been asking me if I'd be willing to build a wearable mascot suit based on their "Makey the Robot" logo:


This year, they finally gave me the go-ahead to begin work so they can have this guy walking around at the Maker Faire.

The main challenge is, as you can see, the thing isn't at all proportioned like a person.  It's a problem, but I've had worse things to overcome in previous costume projects.

In order to get an idea for how the thing would move and fit, we started by building a cardboard mockup:


Here's a video detailing the scaling process:


After that, it was time to get started cranking out all of the pieces.  Most of them were made out of MDF with expanding foam used to create any necessary contoured edges:


You can see more about that process in this video:


Here's a quick snapshot of some of the pieces shaping up:


The whole thing will be done in no time at all, complete with more photos and video updates.

Stay tuned...

Saturday, May 24, 2014

Lifesize ED-209 Build Part 7: IT IS DONE

There are only a few projects that have made it onto my bucket list and I'm glad to say that this one is finished.  It's been three very demanding months, but the final product makes up for it:
Untitled

Hotel Security 1

Hotel Security 2

Here's the video showing this guy on display at the Maker Faire:


As with all of the videos, there's an accompanying article at MAKE:  http://makezine.com/2014/05/23/building-up-to-maker-faire-shawn-thorsson-brings-ed-209-to-life-the-grand-reveal/

If you're just now tuning in, you can see the whole series of articles here: http://makezine.com/building-up-to-maker-faire/

I was also interviewed by Norm from Tested.com:


Here's a couple more photos of him at the Maker Faire:


ED209 wins all of the things.

He made a few friends there:
Maker Faire 04

ED209 vs R2D2

Now he's got a gig doing hotel security:
Hotel Security 4

The whole build was a resounding success and it couldn't have happened without my amazing crew:
Saturday Evening Crew Portrait

I couldn't be more proud:
Me and My Murderbot

More insane projects coming up.  Be sure to subscribe so you don't miss any updates.

 .

Sunday, March 9, 2014

Lifesize ED-209 Build, Part 1

The folks at MAKE Magazine have been working with me to chronicle the building of a lifesize replica of ED-209 from the original Robocop movie.  They've been sending their video crew to the workshop to get updates on the project and this is the first one they've posted:


You can read the article I wrote to accompany the video by clicking HERE.  This thing is going to be huge:
Gun Pod Progress

Stay tuned...

Monday, August 19, 2013

Moldmaking Tutorial for Maker Camp

A while back I was asked by MAKE Magazine to come out to their headquarters and teach a quick lesson as part of their Maker Camp, a virtual summer camp conducted via Google Hangouts.  Each day they host a number of hangouts to discuss different projects their virtual campers are working on as well as a demonstration of various tools or techniques for making all sorts of interesting things.

My demonstration: making a couple of simple molds for prop building.  You can watch the whole thing right here:


 I did a detailed write-up about the one-sided mold a few days ago, but I'll also be doing an in-depth article about the two-sided mold just as soon as I get a chance to get a few more photos of the molds in progress.


Stay tuned!