About Me

My photo
I make toys for kids who don't want to grow up. I'm on the lookout for new projects. If you're interested in commissioning me to build something ridiculous, shoot me an email.
Showing posts with label cobra. Show all posts

Sunday, June 15, 2025

G.I. Joe Hydro Viper Helmet: a Sidetrack Project

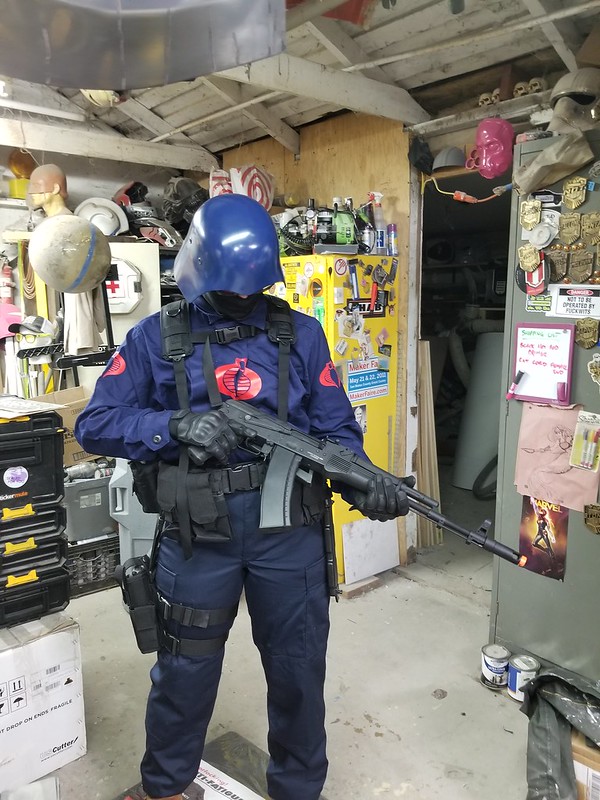
A few weeks ago I was scrolling through posts in one of my toy collectors' groups and was reminded of this guy:

Hydro Viper Trading Card

This was the "Hydro-Viper" one of the last G.I. Joe action figures I bought as a kid before I'd finally lost interest in that particular toy line.  Here's what the package and the action figure looked like:
Hydro Viper Toy References

At this point, the G.I. Joe line had started veering hard toward goofy science fiction concepts and bright colors.  That was just some of what helped me outgrow those particular toys.*
  This character was definitely a goofy science fiction concept in bright colors, but for some reason this guy struck a chord with me.  I was fascinated with all things military and scuba diving as a kid and this covered both.

The action figure wasn't particularly well sculpted and the colors seemed wrong, but I absolutely loved the artwork on the package.  Even their lore was cool:
Hydro Viper File Card

It's also fascinating to me that he came with a manta ray.  While a lot of the named, one-off characters had their animal sidekicks (i.e. Snake Eyes had a wolf named "Timber" and Shipwreck had a parrot named "Polly") this was not a unique, individual character.  Instead, he was one of presumably many rank and file troops that were given a series of surgical alterations for deep diving and then issued a specially trained manta ray to assist in their duties as part of an evil terrorist organization determined to rule the world.

Neat.

But I digress.

Stricken by an overwhelming wave of nostalgia, I decided I needed to bring this very distinctive dive helmet to life.  So I dug up all of the reference images I could and put Jeff to work on the digital sculpt.  In no time at all, he delivered this thing of beauty:
Hydro Viper by 3djefe

With the huge ears and dorsal fin, it was going to be easy for this helmet to get comically large.  So I told Jeff to keep the rest of the helmet as close fitting as possible.  He nailed it:
Hydro Viper Transparent Render

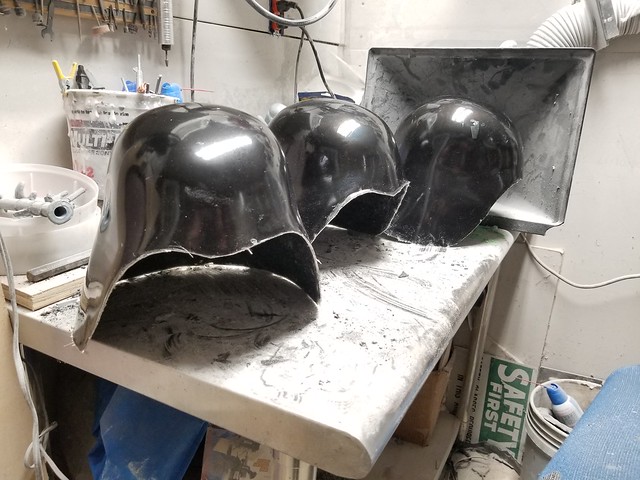
So I split it into separate parts to speed up the FDM** printing process and overnight my fleet of printers grew the whole set.  Here's the initial helmet roughed together:
Hydro Viper 3D Print Assembled

I didn't do the prettiest job on the seams, but a bit of sanding and Bondo made quick work of them:
Bodyshop Work Begins on Hydro Viper Helmet

And even at this stage, the helmet looked pretty spiffy:
Vamping Test Fit

After a couple of rounds of sanding and filling, the whole thing was given a two coats of red primer:
First Primer Drying Side

And I couldn't resist the urge to take dusty mirror selfies:
Mirror Test

For the almost burgundy red color, I applied a basecoat of Dupl-Color Bordeaux Red Metallic:
Hydro Viper First Color Coat

This was a nice, deep red which did a great job of adding depth to the details:
Hydro Viper First Color Coat

And with a clearcoat, the metallic effect was downright gorgeous:
Snoot Details Closeup

I masked off the dorsal fin and the forehead arrow and painted them with Rustoleum satin "Canyon Black" and gloss "Marigold" respectively:
Black and Yellow Details

The masking tape lifted a bit of the clearcoat, so apparently I didn't tack cloth the helmet enough before I sprayed the clear.  I'd have to go back and re-apply that later.

In the meantime, I used the scroll saw to cut some 1/8" smoke tinted acrylic sheet to make lenses to fit in the eye holes:
Cutting Out Acrylic Lenses

These pieces were heated in a toaster oven until they were soft and floppy*** then pressed into the eye hole from inside with a soft rag.  Then the soft acrylic was held in place, bulging out of the eye hole until it cooled and became rigid again.  This makes a perfectly bubbled, custom fit lens for the eye hole:
Hand Formed Tinted Acrylic Lens

The lenses were glued in place with cyanoacrylate adhesive, then I made up a pair of LED throwies to make the eyes more interesting:
LED Throwie

An LED throwie is literally just an LED taped onto a button cell battery.  It's about the simplest bit of electronics you can make and it did just what I needed to give me an idea of how the final effect would look:
Glowy Eye Test

Here you can just about make out the masking tape holding the LED throwie inside the eye from the test lighting:
Initial Lighting Test

Clearly I'd need a more elegant solution.

But the effect was just sinister enough and visibility was largely unimpaired:
Test Fit with Glowy Eyes

Success!

The LED throwies have enough juice to stay lit for several days, but I didn't want to have to re-make them every time I wanted to light up the helmet.  Instead, I wired up a pair of LEDs to a AA battery pack:
Hydro Viper LED Array

Then I shrink-wrapped the leads with a piece of aluminum armature wire, leaving just a tiny bit of the LED's tip showing on the end:
Heat Shrink with Armature Wire

This gave me a nice, stiff, posable stalk with the glowy bit on the end:
Poseable Eye Stalk

The battery pack was mounted up in the dorsal fin with a patch of velcro and the leads and armature wire were gaff taped into place.  The wire was bent to hold the LEDs in exactly the right spot in the center of the eye lens:
LED Array Rough Installation

The result was an appropriately menacing final touch to the character's glare:
Finished Hydro Viper

Unfriendly face is unfriendly:
Finished Hydro Viper Mean

And with a new application of clearcoat, it's done:
Finished Hydro Viper Helmet

Here's a nifty little turnaround:

I did go ahead and add a couple lengths of wiring loom to approximate the weirdly narrow air lines feeding into the snoot:
Finished Hydro Viper with Hoses

I need an ever-so-slightly bigger size though.  They don't look quite right.

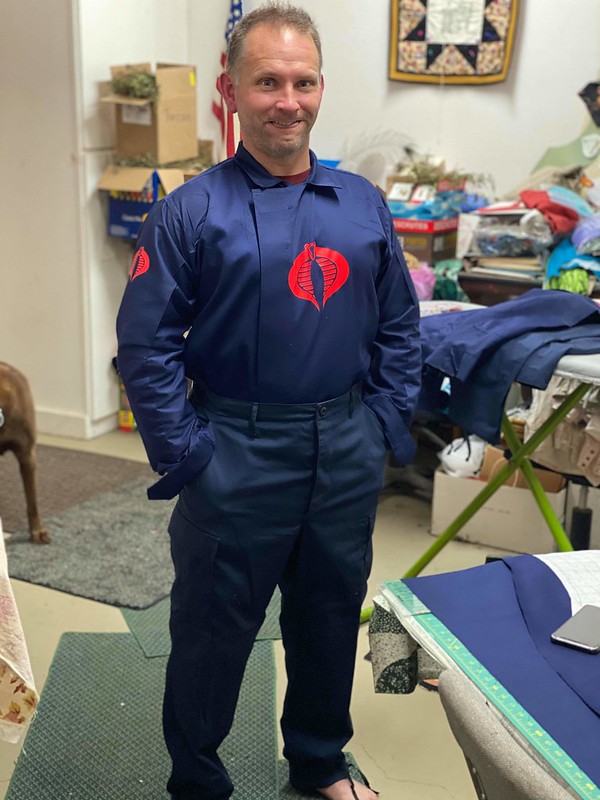
In the meantime, I just need to talk myself out of making the rest of the costume and doing an underwater cosplay photoshoot.  

It sounds like fun though, so I'll probably end up doing it anyway.  In fact, I should start training a manta ray now.

Stay tuned...


*Girls.  The other main thing was girls.

**FDM Stands for "Filament Deposition Modeling," the more common type of 3D printing for at-home users.  It tends to take a lot of time for larger parts, so I cut them into smaller parts so they can all be printed simultaneously to speed things up.

***Made you look.

Tuesday, November 22, 2022

XMLR Laser Rifles

Some time ago I made a couple of Cobra Infantry trooper costumes.  I ran out of momentum on that project when it turned out that the only model I had available at the time was my assistant Rachel.  Somehow she didn't quite look the part: 

VanDerp as Cobra Trooper

The other problem was the rifle.  This was an airsoft AK74 from Lancer Tactical.  It looks good, has a folding stock and plenty of weight, but it would never be allowed into any convention and I can't imagine there's any other time or place where someone would want to wear one of these getups.

Some time later I was collaborating with my friend Sean Fields on a tiny project for the Snake Eyes: G.I. Joe Origins movie and found out that he was a huge GI Joe fan.  So much so that he just happens to have made a digital model of the XMLR laser rifle that shows up big in the original cartoon series and a bunch of the old toys.

He offered to send me the model so I could use it to make a physical prop and I figured I might as well go ahead and print it.

Then for an exceedingly long amount of time after that, this thing has been knocking around my shop with a couple of coats of primer on it, waiting for me to do anything at all with it.  Eventually I got a wild hair and decided to make it shiny and pink:
XMLR in Pink

In my shop, that's typically the last step before a prototype gets molded.  So we covered it in plastic food wrap, mounted it on a board and made up a quick clay matrix:
shop progress 019

Then we laid up a fiberglass mothermold over the whole thing:
shop progress 022

Once that was set up, we flipped the whole thing over and did the same thing for the other side.  When the second half of the mothermold was cured, we removed the clay from the first side, cleaned up the edges, sealed it all back up before pouring silicone into the void left behind where the clay used to be:
XMLR Mold Pour Done

Once the rubber had cured, we flipped the mold over, removed the clay from the other side, and filled the second half with silicone.  After that had cured, we had a nice, new mold that was ready for making castings of the main body of the rifle:
XMLR Mold

The muzzle, sights, and butt pad were molded and cast separately.  With no real goal in mind, we ended up casting a handful of these:
XMLR Casts Stacking Up

Three were painted in a blue Cobra theme:
XMLR Base COlors

XMLR Base Colors

The muzzles were given an appropriate scorched look:
XMLR Muzzles

One was done in a khaki G.I. Joe color scheme.  All of them were weathered:
XMLR Weathering

Even with the weathering, they still look a lot like toys:
XMLR Weathered

But since the aim was to make a "convention friendly" weapon prop that we could carry around in public, the end result was more than adequate:


Cobra on the Scene

Now I just need to make the infantry officer version of this costume and maybe the anti-tank trooper as well...

Stay tuned.

Thursday, October 7, 2021

Cobra Trooper Costumes

In the GI Joe cartoons, they always said "knowing is half the battle."  Assuming I know what I need to know, I figured I should get a handle on the other half of the battle: enemy cannon fodder 

The Cobra Infantry troopers were this cannon fodder.  This horde of nameless soldiers showed up en masse whenever the show needed a big battle scene.  In case you don't remember the cartoon, they looked like so:

When I was a kid, I often wondered what would compel someone to join the bad guys in a fictional universe.  It seems like it's probably not easy to recruit for an outfit touted as "an evil terrorist organization, determined to rule the world," especially when it looks like your primary job responsibility is to get wiped out by the good guys at the end of every weekly episode.  The motives of the thousands of unnamed dudes were always fascinating to me.  It turns out, there's in-universe explanations for their actions.  From Joepedia:

 Before Cobra started to have more specialized personnel, there were the Cobra Troopers. These men served as the basic infantrymen of Cobra. Each man swore absolute loyalty to Cobra Commander. While serving as the infantrymen of the organization, they are also cross-trained to be proficient in at least two other support skills. Cobra Troopers are mercenaries, criminals and people who are angry at the world who have taken up Cobra's offer of wealth and power.

 Or the file card on the back of the action figure package:


So yeah.  They're just bad guys and apparently there's no shortage of them looking for work.  Got it.

Over the years, the depictions of the Cobra infantry troopers have changed a bit:

The action figures have also been updated from time to time:

They've almost always had their vaguely Nazi looking helmets, Eastern Bloc weapons, and the big, red Cobra logo emblazoned at center mass, like a convenient bullseye for the GI Joes to aim at.  Over the past three decades, there must have been dozens of variations on this theme.  Out of all of them, my favorite rendition is the one-sixth scale figure offered by Sideshow Collectibles a few years back:
Starting with the general aesthetic of the Cobra Troopers, they managed to "un-cartoon" them and create a believable real-world look.  So if there was a costume version to build, this one was perfect for me.

I'd already made a kinda right looking helmet for my Cobra Commander costume:

Painted Cobra Commander Helmet

A while back I'd made the mistake of leaving the helmet mold out where I could see it, so whenever I find myself doing fiberglass work and have some leftover material, I tend to just crank out another copy of this helmet.  It's a problem:
20210112_212625

But with most of the skirt trimmed off of the bottom and a coat of darker blue paint, the Cobra Commander helmet is the Cobra Trooper helmet:
20210119_003613

For the most part, the rest of the Cobra trooper ensemble was made of off-the shelf items.  I even put together an Amazon re-order list so I could replicate the whole thing in a hurry if need be.  You can check it out here: https://amzn.to/3d4Bzyq

Here's all of the store-bought parts laid out with one of the helmets:
Tactical Pouches and Whatnots

That was the easy part.  

The hard part was, try as I might, I couldn't find a shirt that looked the part.  A lesser maker might have been happy with a BDU shirt with a logo on the shoulder, or a pullover combat shirt with no collar, but in order to achieve the look I wanted, I needed a closed collar shirt built like a fatigue shirt with no visible buttons and the placket closing way over to the right-hand side so there would be no visible opening in the middle.  

Since I couldn't just buy the shirt I needed off the rack somewhere, the next best thing was to have it custom made.  Having no real desire to spend money on this project and no skilled seamstress chomping at the bit to make the thing for me for free, it was time to grit my way through picking up some more sewing skills.

To be clear, I hate sewing.  Most of the reason I hate sewing is that I have no formal training and, while I'm capable of muddling my way through and making fabric stick together and look professional, I spend the entire time thinking the following:

I don't know what I'm doing.
Someone out there knows how to do this right.
Someone out there would actually enjoy doing this.
Why the hell can't I find that someone and talk them into doing this?

It also doesn't help that I'm usually using a 1950's vintage industrial machine that has no built-in functions other than stitching in one direction.  This is why most photos of me sewing are angry looking photos:
Shawn Sewing Anger

This time around it would be different.  I've been largely enjoying an unprecedented amount of isolation and free time on account of the global pandemic.  So I decided to take advantage of the lull and watch a bunch of YouTube videos telling me all the things I've been doing wrong over the years.  The most helpful channel I found for learning the basics of sewing was Tock Custom.  That guy has dozens of videos explaining everything the sewing-illiterate needs to know including how to read patterns, what tools you need, types of seams, and sewing machine basics.  It turns out this is all I needed in order to get past most of my historical frustrations with the process.

Since I didn't have a pattern to work with, I'd have to make one.  I started by digging one of my old Navy Working Uniform shirts out of storage:
NWU Uniform Shirt


The various panels of this shirt were traced out on paper so I would have the shapes I'd need.  Then I used pattern tracing paper to make smoother versions of them with an additional 5/8" margin added to the outside (which I now know is called a "seam allowance"). While I left off the chest and sleeve pockets, I decided to retain the reinforced patches on the elbows and the tabs for the sleeve button closures.

So here's the beginning of me laying out the patterns for cutting on some navy blue poly/cotton twill:
Pattern Layout for Cutting

The fabric also came from Amazon.  You can get it here: LINK or here: LINK
 
Once I'd cut out all of the panels, it was time to start sticking them together.  In this case, I started by making the button tabs for the sleeves, then assembling the collars with the interfacing inside for stiffness.  Then I sewed the reinforcement patches onto the elbows and made the placket where the shirt front would close.  Then it was time to make the parts look like shirts.

Taking a cue from my old uniform shirt, I needed the seams to look like this:
Flat Felled Seams


I've now learned that this is called a "flat felled seam," common on heavy duty garments such as jeans and work clothes.  I might have opted for something simpler, but it was also the way the seams were made up on the BDU pants I was using:
Flat Felled Seam

If you don't know how to make this type of seam, check out that Tock Customs YouTube channel I mentioned.  It's a bit of a pain, but the resulting look is just what I needed to match the store-bought pants that would go with the costume.

After a couple of surprisingly calm, un-angry evenings, I had two shirts made:
Assembled Shirts

I made two sizes of cobra logos on my vinyl cutter and then used my T-shirt press to fix the logos in place:
Shirt with Logos

At this point, I had to try everything on.  In case you're wondering why the Cobra Troopers always wear facemasks and helmets, it's probably to keep them from looking like this:
Test Fit 2

The very last step in the shirt sewing process was to learn how to use the automatic butthole feature on Dr. Girlfriend's sewing machine to make button holes in the sleeve tabs:
Buttons installed

Then it was a matter of strapping everything together: 
VanDerp as Cobra Trooper

That's my assistant Rachel.  She wasn't nearly big enough to look right in this outfit, but it was a start.

The rifle is an airsoft AK74 from Lancer Tactical.  It looks good, has a folding stock and plenty of weight, but it would never be allowed into any convention.

Of course, I can never make just one of anything.  At this point I did happen to have four helmets: 
  Cobra Trooper Helmet Lineup

You'll note the big black emblem on the helmet in the foreground.  That's apparently the distinguishing mark that indicates he's an officer.  That, and replacing the black balaclava with a red one:


In order to make it cheaper and possibly more logical, I decided that my version of this guy would have the same black harness and pouches as the rest of the troops.  Bad enough that the red mask makes him stand out so much from the crowd.  It seems weird to outfit the officers with completely different kit. 

Also, since I had some rank devices left over, I decided this guy will be a major in the Cobra infantry.

Someday I may go through the trouble of making another shirt so it can have silver logos like the old action figures did:


For now, I have two finished costumes and can call this a done thing.  I just need to find a couple of models and do a photoshoot.

So far, I just can't take the costume seriously when my shop assistant Rachel is wearing it:
20210108_224402

Stay tuned for proper finished photos of a couple of henchmen for an evil terrorist organization, determined to rule the world...