About Me

My photo
I make toys for kids who don't want to grow up. I'm on the lookout for new projects. If you're interested in commissioning me to build something ridiculous, shoot me an email.

Tuesday, December 31, 2013

2013: the Year in Review

This one's been one helluva ride.  The year started off slow with me tinkering on a handful of projects and generally going nowhere in life.  I suppose there are those who would call it "comfortable," but for me it feels more like "stagnant."

Somewhere in January I was invited to take a tour of Rancho Obi-Wan, where Steve Sansweet has on display his record-setting collection of Star Wars memorabilia:


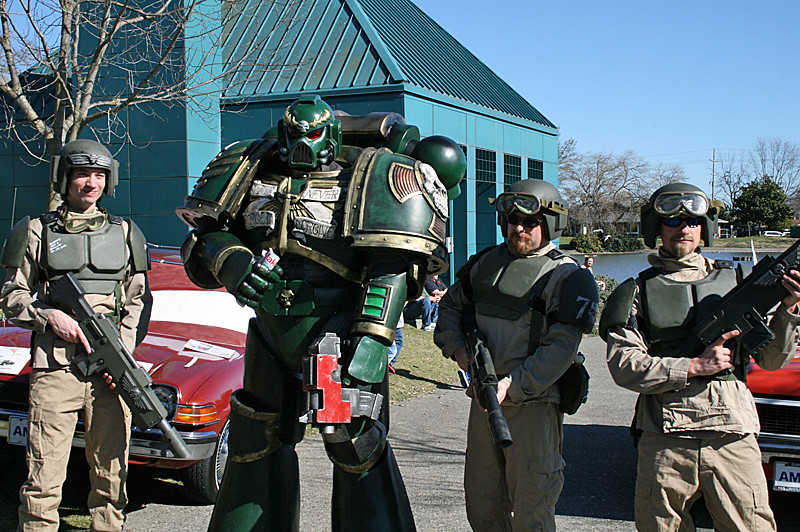
Life started to pick up speed sometime in February when I was invited to bring a handful of characters to the Petaluma Hobby Expo. This meant that I got to scramble to put together a few suits of Imperial Guard armor to escort my Space Marines around at the event:
Sentry Duty

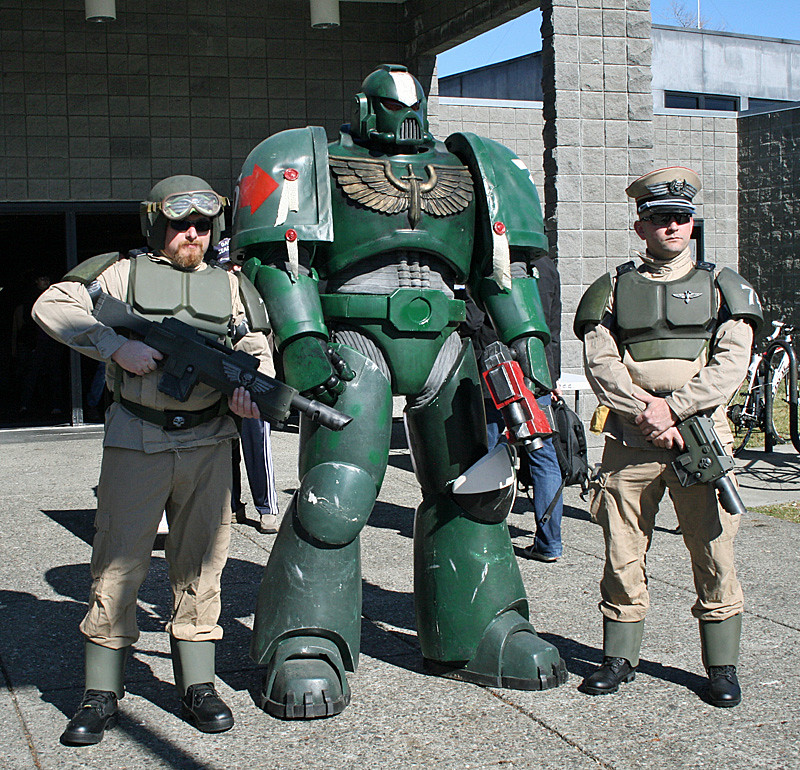
I also decided that I had to make one more much more elaborate suit of Space Marine armor:
Chillin

Between late February and early March, I ended up making a couple more Halo Spartans:


About the same week that they were finished up, I met up with my sister and a few of her friends for dinner.  One of her friends brought along a stunningly gorgeous leggy blonde woman who I'd never met before.  She was the kind of beautiful that made me instantly sad because, in my mind, there was no way we'd ever have anything in common.  Her name was Shawnon.  In just under six weeks, she was leaving the country to study veterinary medicine overseas.

Somehow we struck up a conversation and it turns out that she's a huge video game and science fiction nerd who makes a lot of her own very high quality costume replicas.  I'm not sure how I managed it, but somehow I got her to go out with me on some really geeky dates.  Here we are at Facebook headquarters:


When she mentioned she'd like to help out in the workshop from time to time, I was dubious.  When she actually showed up and did it, I knew I was in love:


Shortly after that, I was asked to give a quick presentation to a local group called "Young Makers."  This was an opportunity to show some teenagers what's possible with a little bit of determination and effort.  Here's one of the many pics from my talk:


Shortly after that, Shawnon flew off to a tropical island to start learning how to fix broken dogs and cats.  That's when I finally began my much-delayed preparations for my third annual appearance at the Bay Area Maker Faire:


Unlike last year, I really didn't have anything new to show off.  My various projects still got plenty of attention:


And all of them got plenty of chance to shine:


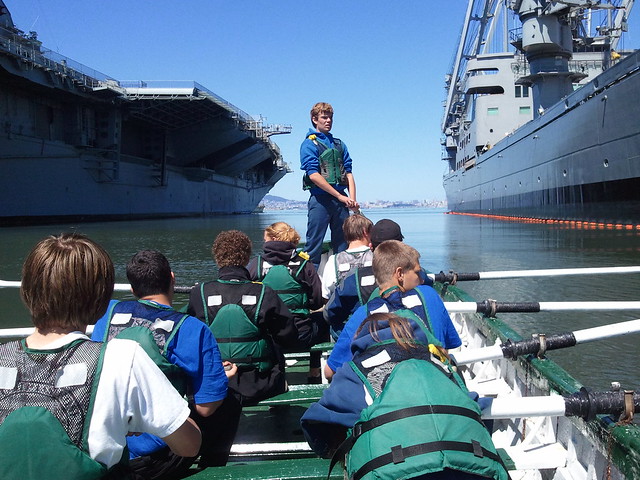
One week later I was underway with the Sea Scout Ship Compass Rose on the way to the Ancient Mariners Regatta:


Once again I served as the chief judge for flotilla drill, which means I spent a whole weekend watching high school kids perform precision rowing:
Compass Rose and Sea Fox During Flotilla Drill

June saw me serving as a presenter for the first Quartermaster Award ceremony that the Petaluma Sea Scouts have had in over fifteen years.  Quartermaster is the Sea Scouts' equivalent to the Boy Scouts rank of Eagle Scout, but it's much more rare for anyone to actually attain it.  Monica, the recipient, has quite a lot to be proud of:


I spent the second half of June doing my annual training with the Naval Reserve.  It was two weeks worth of tedious office chores for the most part, but I did get a little bit of down time.  I spent it as far down as I could manage:


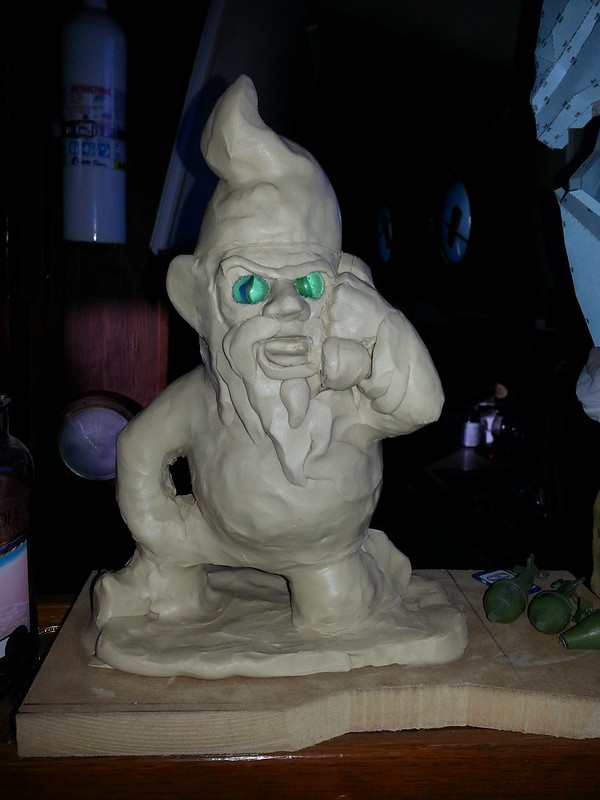
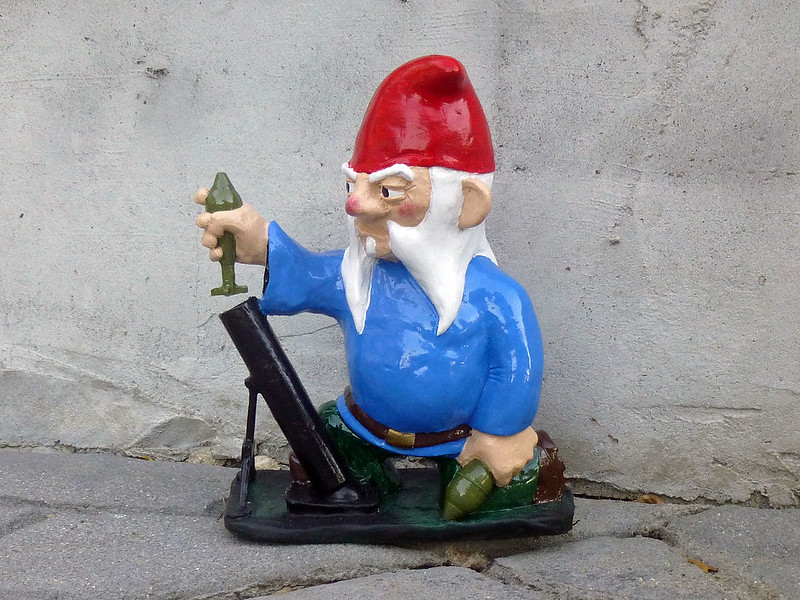
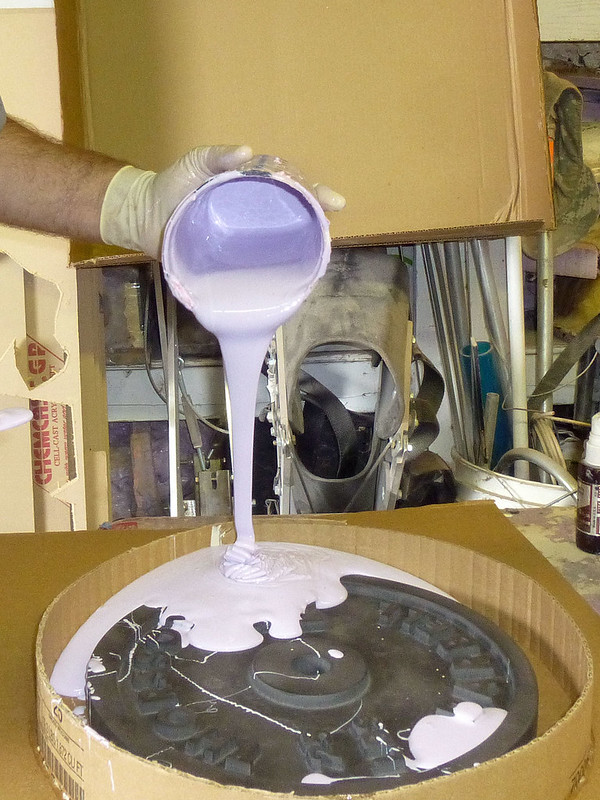
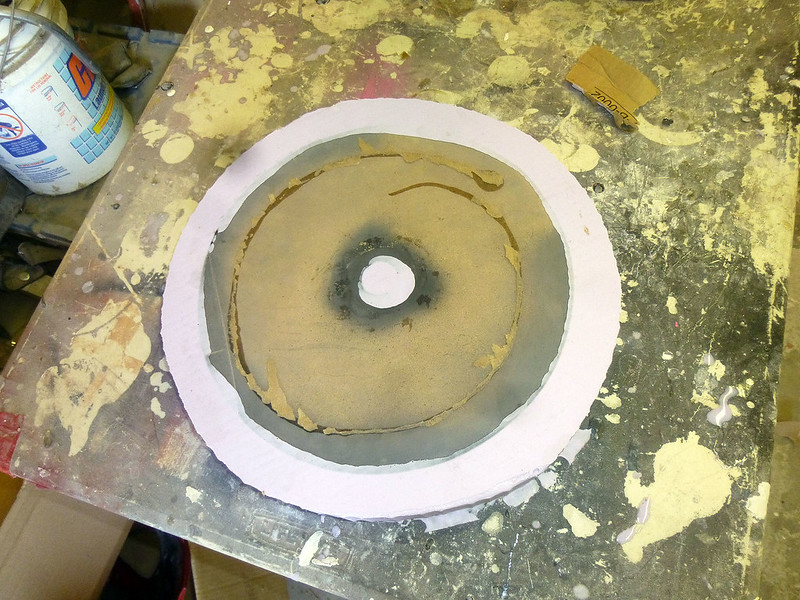
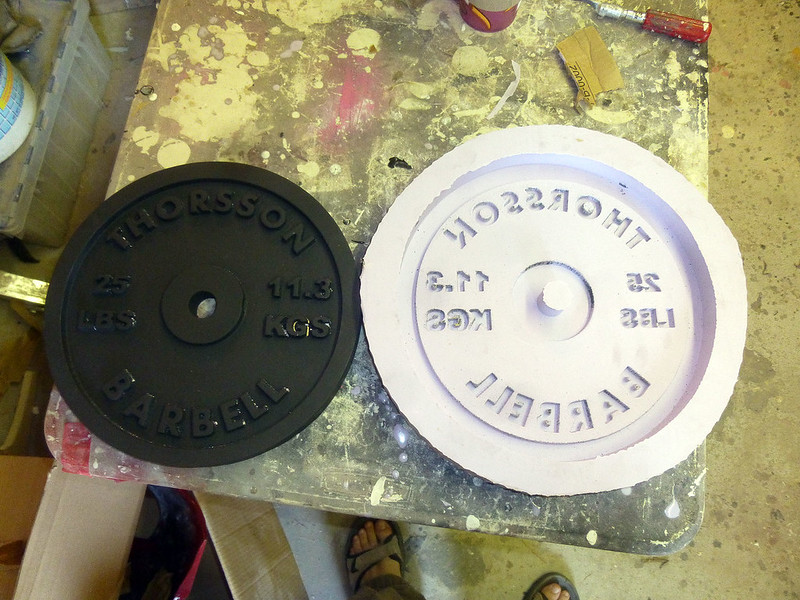
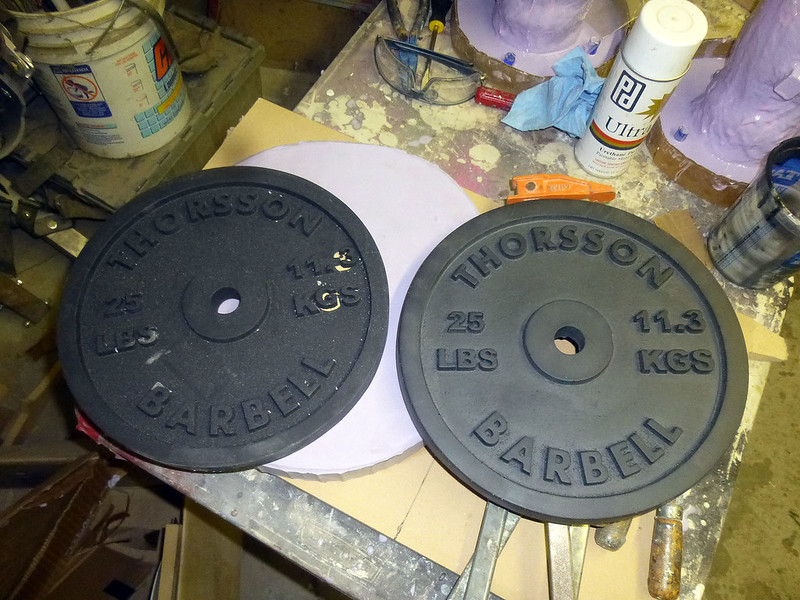
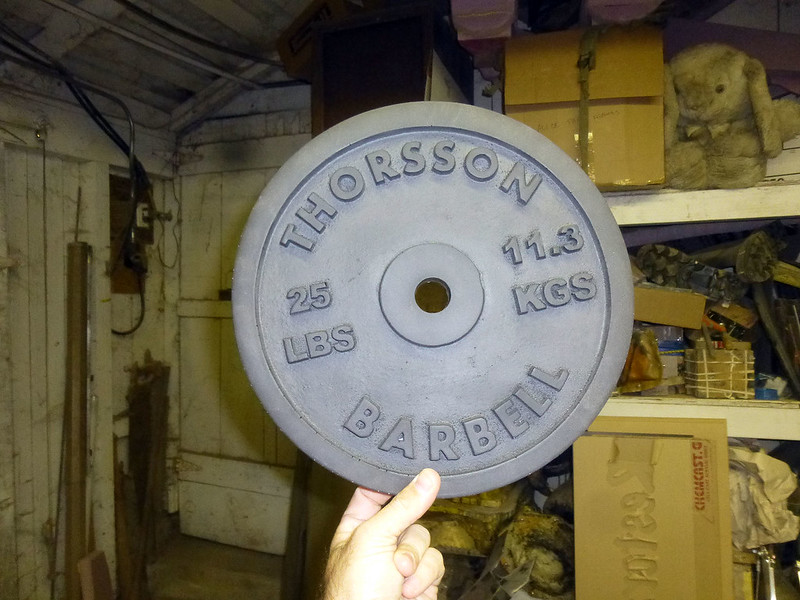
While all of this was going on, my Combat Garden Gnome sales continued to grow.  I'd been increasing production steadily and even hired additional help in order to keep up with the demand:


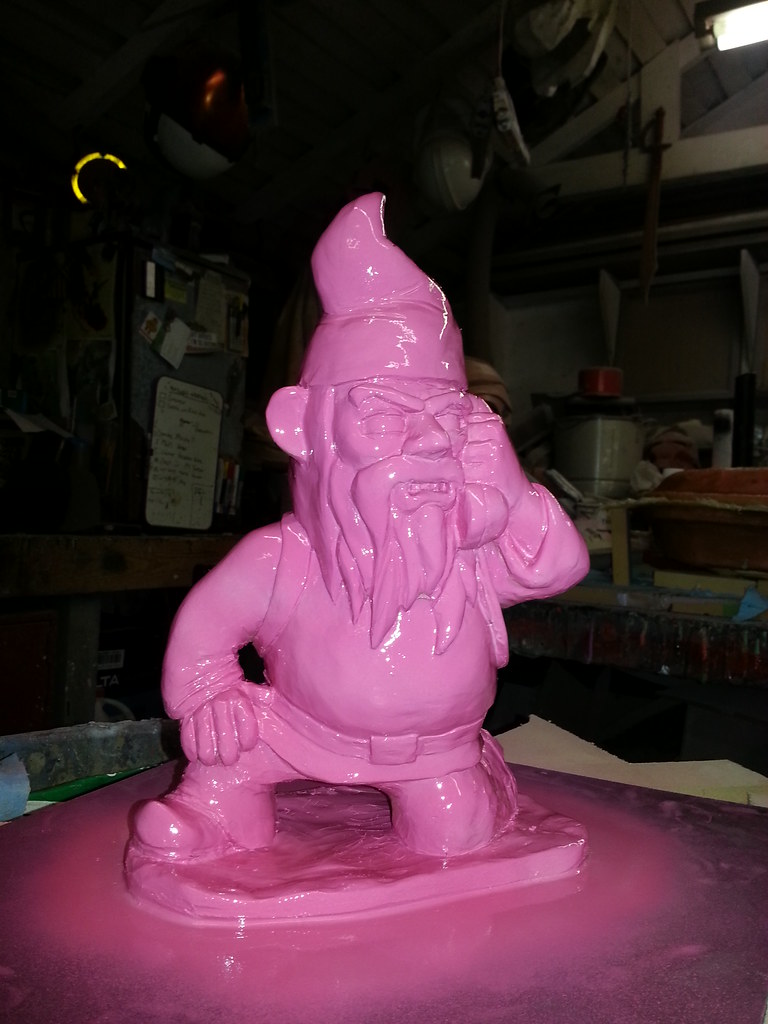
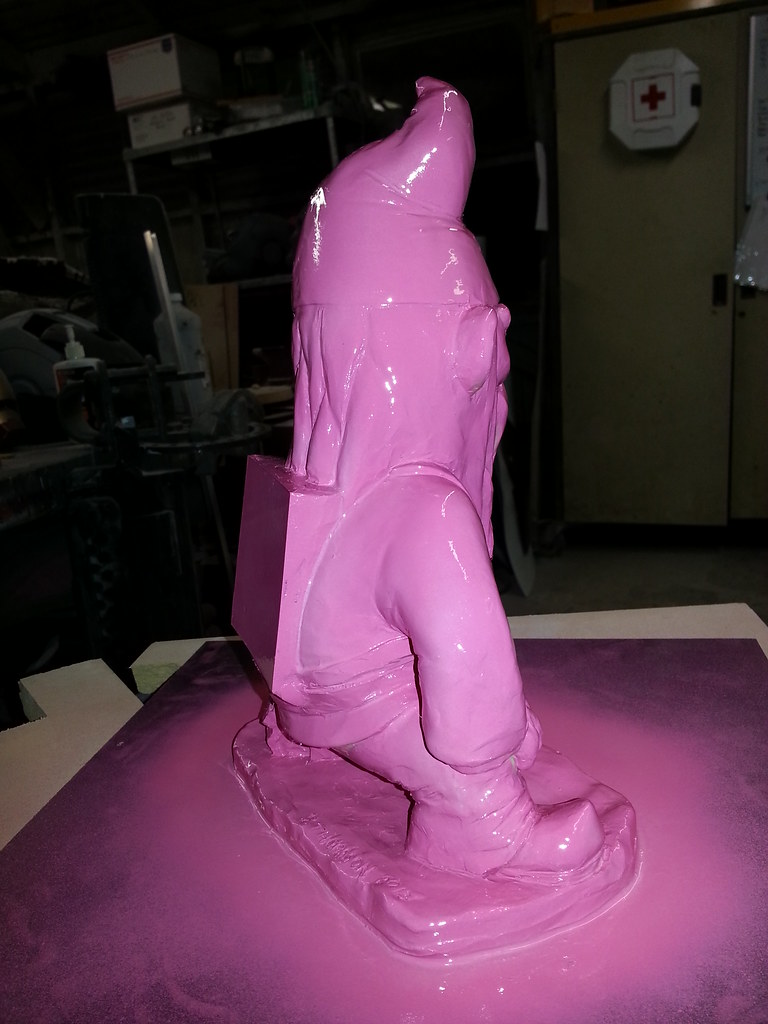
Over the course of the year I also sculpted three new poses.  The first was the Bayonet Attack Gnome:


Then the Mortar Launcher Gnome:


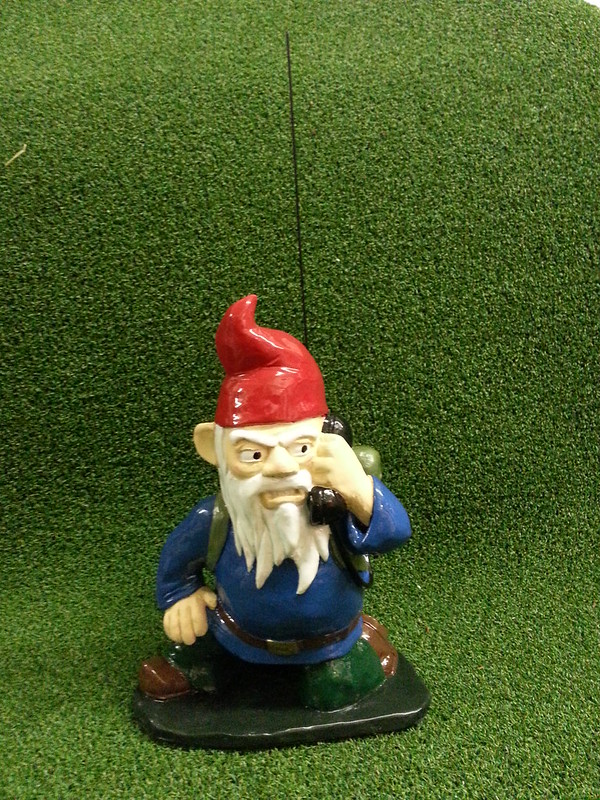
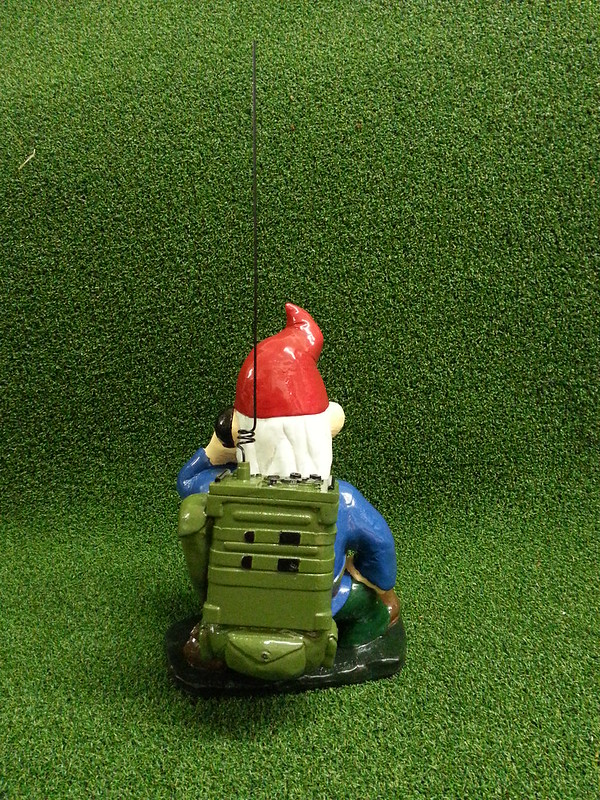
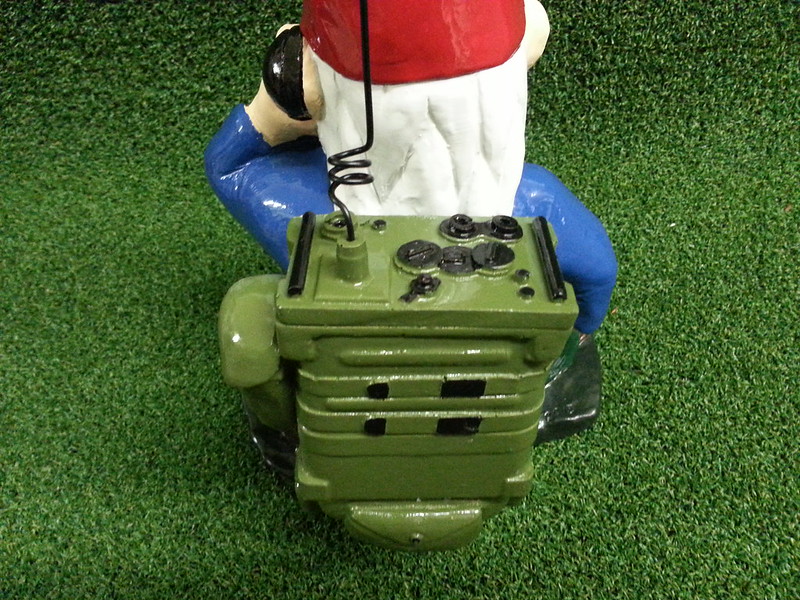
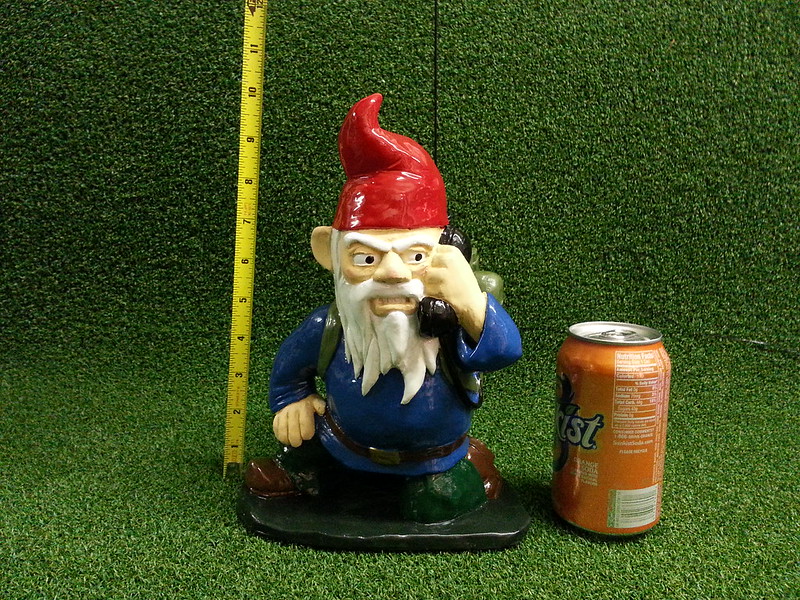
And the Radio Gnome:


By the time August rolled around, things were going great with Shawnon.  I went ahead and booked a flight out to St. Kitts to spend a few weeks vacationing with her during one of her breaks:


We managed to get out and about all over the little island:


and make new friends:


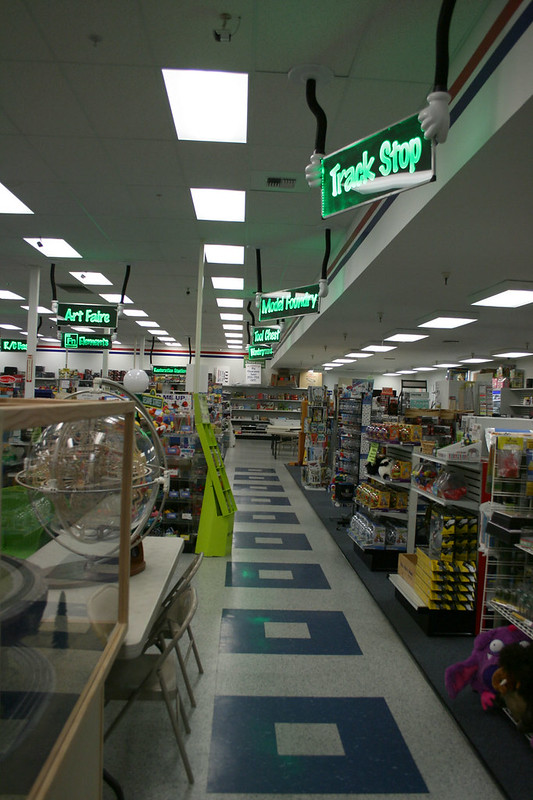
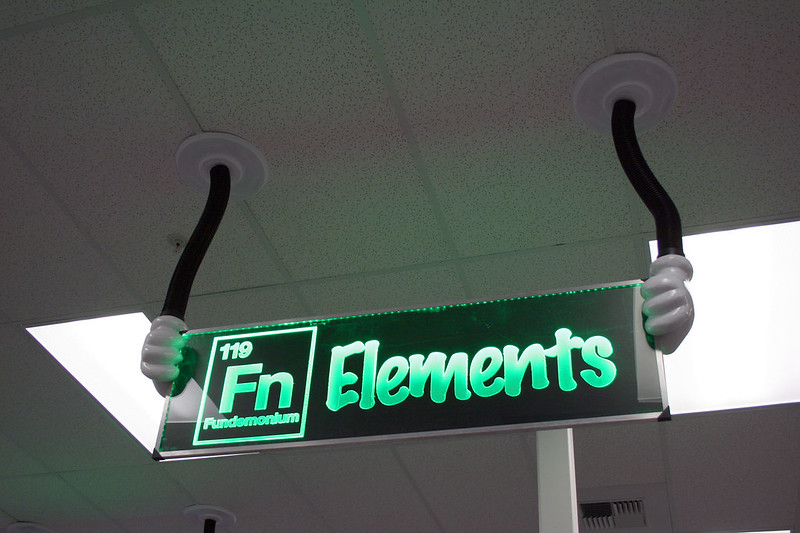
When I got back to the States, I knuckled down and got to work on a couple of projects I'd been making progress on all summer.  First, I finished the installation of some signs that I'd made custom for "Fundemonium" a local toy store:


In all, I ended up making ten of them:


While that was going on, I also made the upper half of a practical robot costume for a short film entitled "GA6E."  Here I am on location getting the actor suited up:


The plan was to have me make the head and put the actor in a skintight suit so they could add the rest of the robot in postproduction.  Apparently I managed to make it fast enough to get them to re-evaluate and decide to go with a complete practical suit instead.  It was a mad scramble right up to the last second, then I handed the top half of the suit off to Fonco Creative Services so they could make the legs and paint the whole thing.  The day before shooting began, I stopped in at Fonco to see how it had shaped up and ended up pulling an all-nighter helping the crew finish up the last bits of fabrication and painting.  In the end GA6E looked pretty good:


It looks real because it is real.

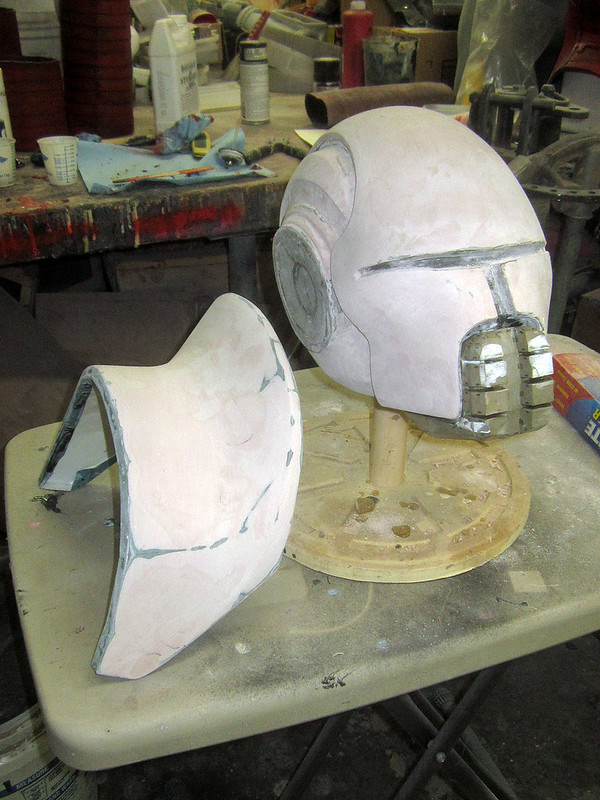
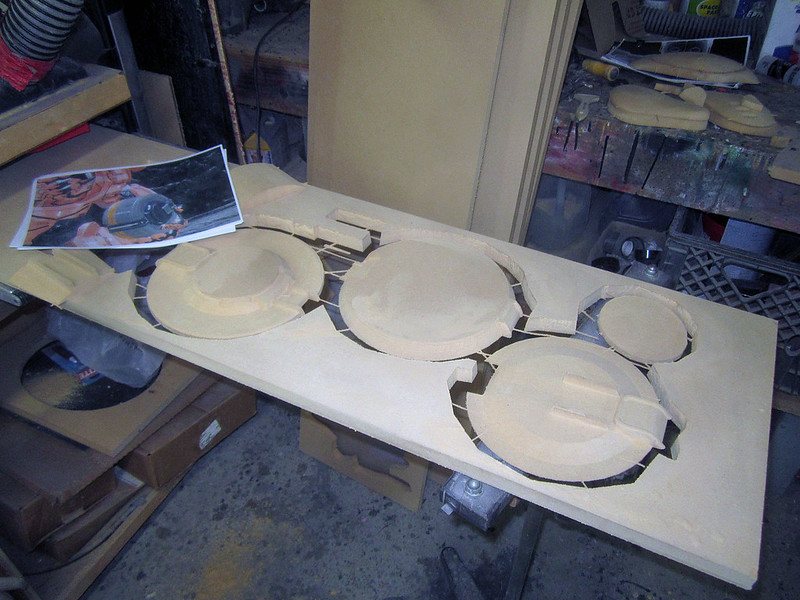
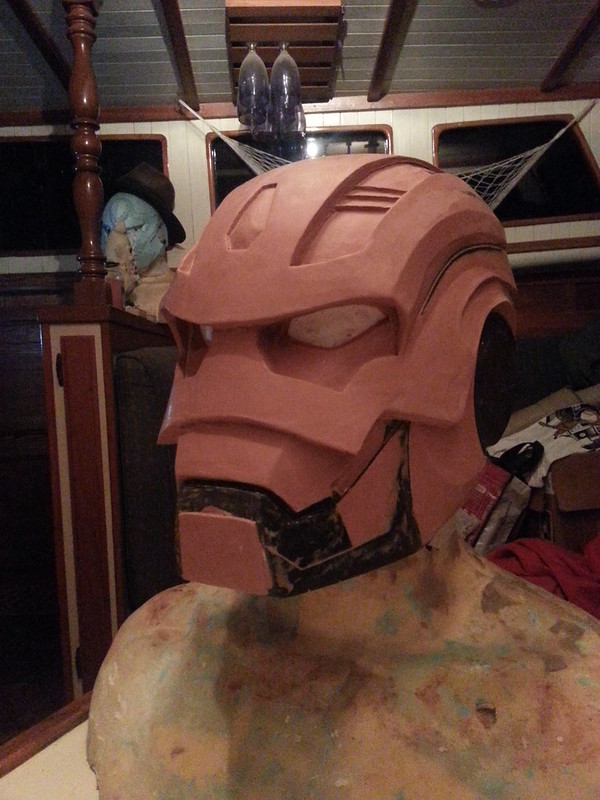
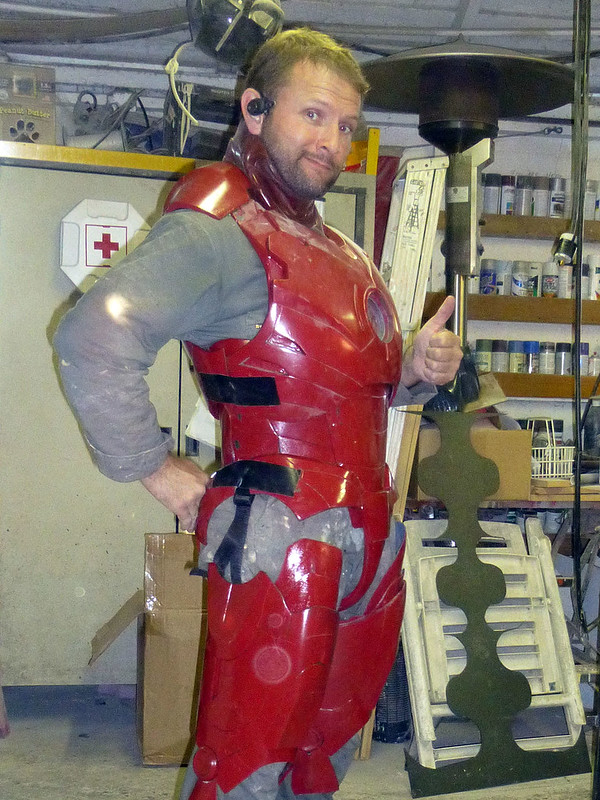
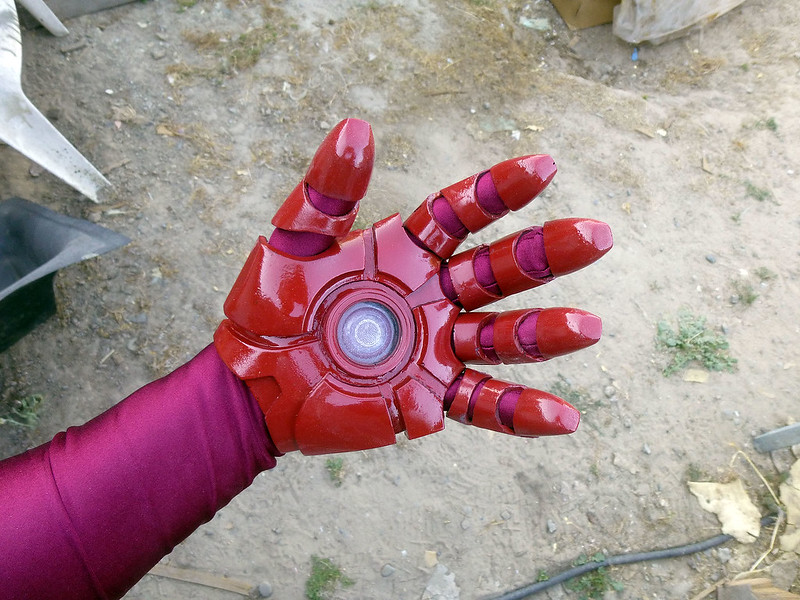
After some amazing on-location filming for GA6E, I got back to the workshop and dove into the final assembly and finish work for the Ironman suit I'd been working on.  Here's a shot of all of the separately cast parts:


At some point I counted the pieces and came up with something like 150 separately cast parts.  Each of those pieces had to be prototyped, prepped, molded, cast, trimmed, primed, painted, and clearcoated:


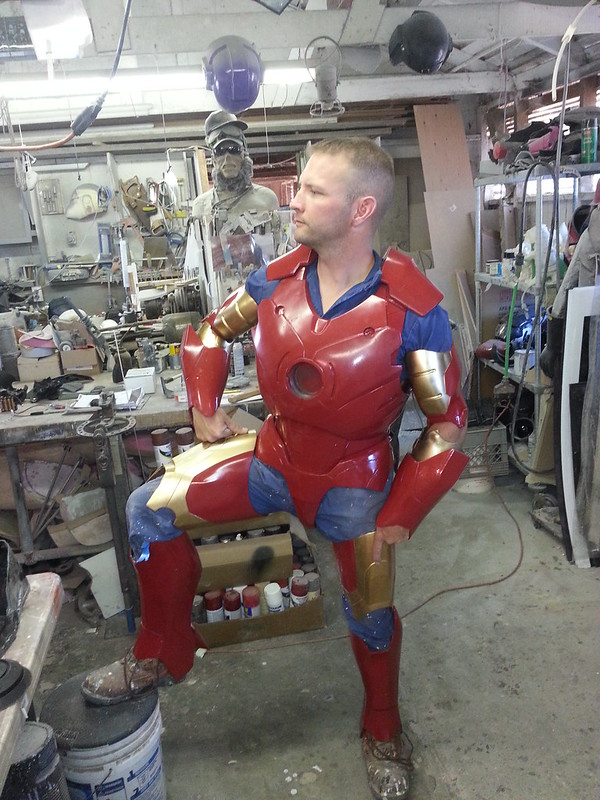
I had the whole thing assembled about a week and a half before Halloween:


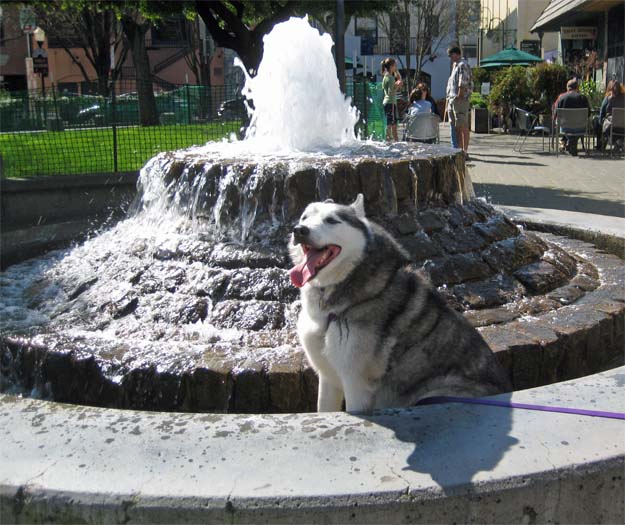
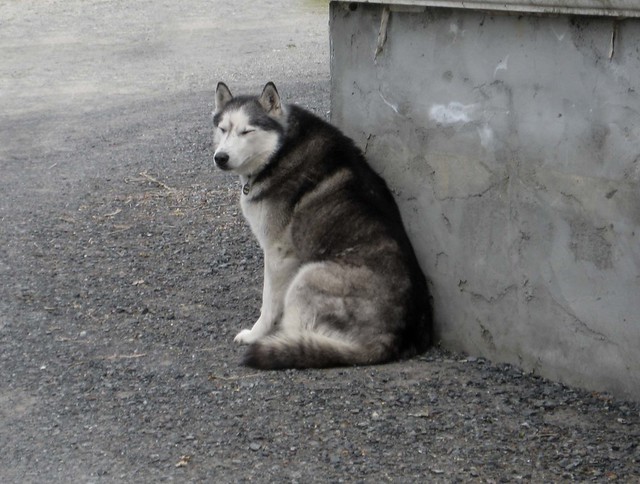
After a pretty low-key Halloween and Thanksgiving, things took a bit of a downturn.  My dog Kira, who I've had ever since she was twelve weeks old, suddenly lost the use of her hind legs.  After a very difficult week of hoping that steroid treatments might be able to have some effect, I finally had to have her put down.  She was a pretty cool dog:
Kira Fountain

Kira Stone

A week later, Shawnon came home for her holiday break and we set to running around getting her all caught up on family and friends time.  Along the way we stole a Christmas tree, drove all over Sonoma County and down to Los Angeles.  We ended the year at Disneyland:


So it's been quite a rollercoaster of a year. The highs keep getting higher and the lows keep getting lower, but I'm very much excited about the things I've got to look forward to in 2014:


I hope you have a happy new year in 2014.  Stay tuned for more and more fascinating things to come...

Sunday, December 29, 2013

Ironman Costume Part 4: the Gloves

This is the fourth installment in my Ironman replica building series so far.  Here's links to the first three:

Part 1: Rapid Prototyping the Helmet
Part 2: the Hard Parts
Part 3: the Soft Parts

On a build like this, with all of the parts designed to look like metal, getting the joints to look right while still being functional gets a bit tricky.  The problems compound when you get to the hands.

Here's the finished hands I made:


To see how they were made, read on...

Sunday, December 8, 2013

Combat Garden Gnome Radioman is Ready to Ship Out!

Somewhere in the wilds of a suburban garden plot right now there's a platoon of garden gnomes pinned down by suppressing fire from a hedgerow.  In the past they'd have to hunker down and wait until the opposing forces ran out of ammo or hope some friendly unit happened to be within yelling distance. 

That was before they enlisted the help of the Combat Garden Gnome Radioman:
Combat Garden Gnome Radioman

At first glance he's mostly harmless. He doesn't even have a weapon, just the comically oversized A/N PRC-25 Portable Radio set:
Combat Garden Gnome Radioman Back

But that's before he calls in an aerial bombardment and churns the very earth beneath your feet into a broiling hell that Dante could never have imagined.
Radio Kaboom

The Radioman is carefully chosen. He has to be someone with experience and steady nerves who won't get rattled under fire. He has to be able to read maps, too. If something happens to the commanding officer, the Radioman is essentially in command of the unit, calling in fire support, medevacs, and reinforcements. It's also an exceptionally dangerous job, since the conspicuous radio antenna says to the enemy "Shoot ME first!"

Here's a closeup of the details on top of his radio pack:
Radio Gnome Pack Details

The A/N PRC-25 (called the "prick 25" by GIs) is a compact, lightweight, tactical, VHF solid-state portable radio set. Over its service life more than 130,000 sets were produced. Although mainly designed for manpack use, the PRC-25 can be mounted in vehicles or aircraft as well. It can survive a 50-foot drop from a helicopter onto a steel plank runway or up to an hour submerged in six feet of water and still function reliably. It was the most widely used piece of communication equipment in Vietnam and no suburban lawn is truly secure without one.

I've got a handful of these guys listed in the Etsy shop.  You can order your own by clicking HERE.
Radio Gnome Scale Reference

More projects in the works as always.  Be sure to subscribe so you don't miss any updates.

Tuesday, November 19, 2013

COMING SOON: Radio Gnome

When the fight on the ground gets too thick and the infantry is at the risk of being overrun, garden defenders know they can always count on the radioman for help.  The enemy might think he looks harmless armed with nothing more than his A/N PRC-25 portable radio, but they'll change their tune when he calls in an airstrike and levels the playing field.

Here's a shot of the sculpt in progress:
Radio Gnome Front

I tried to capture the expression of a gnome in the middle of calling for an F-bomb.

I still have to sculpt his radio pack.  For right now, he just has a blank space:
Radio Gnome Right

As soon as I've finished the molds, it'll be time to crank out copies and list them in my Etsy shop: http://etsy.com/shop/thorssoli

In the meantime, I need some more ideas for a backstory to go with this guy.  Any suggestions?

Tuesday, November 12, 2013

Prop Building 101: Making a Two-Sided Silicone Mold

In this article I'm going to detail the process of making a 2-piece silicone mold.  The same methods can be used mold and cast all manner of things with details on both sides.  If you're looking to make a mold of something flat that has no details on one side, check out my last "Prop Building 101" article, "Making a One-Sided Silicone Mold."

For the purpose of this demonstration I will be making molds to copy a few hammers.

Hammers are hard and heavy.  One of the basic tenets of society is that throwing hammers at your friends will rapidly result in not having friends.

But what if you want to keep your friends and you can't resist the urge to throw hammers at them?  Well my friend, you've come to the right place.  Here's how to simulate a variety of typical, run-of-the-mill hammers with soft, pliable, non-concussion-inducing flexible foam.


Here's a picture of a fully-finished foam rubber hammer:
Finished Hammer

If you'd like to know how to make one, read on...


Friday, November 8, 2013

Building Signage for the Fundemonium Toy and Hobby Store

A while back I was contacted by one of the owners of the local hobby store about helping out with their project to re-brand the store.  For my part, what they needed was a series of glowing signs to point out the different departments inside the store.  The design called for a very thin sign stylized to look like an old-school monochromatic display being held between a couple of cartoon robot hands.

Here's a pic of the end result:
Fundemonium Signs Done 02

And a close-up:
Fundemonium Signs Done 03


For details on how they were made, read on...

Sunday, October 27, 2013

Ironman Costume Part 3: Making the Soft Parts

This is the third installment in my Ironman replica building series so far.  Here's links to the first two:

Part 1: Rapid Prototyping the Helmet
Part 2: the Hard Parts


The whole suit is supposed to look like it's made of metal (I know, a gold-titanium alloy).  So for me nothing detracts from an otherwise well-done Ironman costume like gaps around the joints showing that there's just a spandex-clad nerd inside.  

While I'm not about to go through the trouble of engineering a series of compression articulations for these areas, I still need to fill them in with something that I can convincingly paint to look the part.

This is why I needed to make the rubber bits:
 Fit Testing Neck 2

To see how I made these parts, read on...

Friday, October 18, 2013

Recent UFO Sightings in the Workshop

I apologize for not writing more, but it's mostly due to the fact that I've been scrambling on so many projects simultaneously.  I've just delivered a couple of them and should have posts going up soon.  The most interesting one can be seen HERE.

Since I haven't had the energy to generate a full project narrative lately, I'm just going to share another shotgun blast of UnFinished Objects I've been working on over the past week or two.

I've been making all manner of silly things.  Like these foam rubber stunt hammers:
Stunt Hammers Nearly Done

As I've mentioned before, I'm also working on the next Combat Garden Gnome sculpt:
Untitled

Since that's not keeping me busy enough, I've decided to begin work on the full costume for the Sith Stalker version of Galen Marek from Star Wars The Force Unleashed:
Smoothing Progress

That's a Pepakura-based project though.  Since that's pretty low-tech, I've decided I need to step it up by having Lopez get started on another Halo project.  This time I'm building the M739 Light Machine Gun (aka Squad Automatic Weapon or "SAW") from Halo 4.  Here's the desired end product:

For right now, I've got the pieces of the drum magazine carved out:
H4 SAW Mag Start
But Lopez is working nights carving out the main body of the machine gun while I work on other things.

On the subject of digital fabrication, I've been 3D printing a prototype for the Mark 33 Ironman helmet (aka the "Silver Centurion"):
Mk33 First Gloss Coat

I've also had Jarvis crank out the mount parts for the War Machine gatling gun so I've got something else to tinker with:
arm progress.

But all of the computer-based builds have had me feeling like maybe I'm losing my touch for sculpting things out by hand, so I sat down with one of the reject castings of the Mark 3 helmet and a couple of blocks of clay and modified it into the Mark 3 Space Armor from the Godkiller
 story arc in the Ironman comics:

Untitled
Once I'm done smoothing it out and sharpening the edges, I'll mold it, cast it, and make it wearable.

And lastly, there's still the Mark 3 Ironman build:
 Untitled

It's become the bane of my existence, but it's so very near to being done:
IM 3

I'll be writing more about all of these things as I get them completed.  On top of all that, there's even more projects lined up.  

Stay tuned...

Saturday, September 28, 2013

Mortar Launcher Gnomes in Stock

For those of you who've been waiting for an opportunity to add some more firepower to your garden gnome squad, I've finally managed to get a handful of these guys painted up:
Mortar Gnome 4


Loading a round into the M120 Mortar Launcher, this little guy is ready to rain deadly fire on gophers and squirrels alike from a safely entrenched position behind your planter boxes or across the lawn: Mortar Gnome 3

You can pick one up at http://etsy.com/shop/thorssoli.  They sell pretty fast, so don't delay.

On the off chance that the mortar doesn't provide heavy enough fire support for your garden pest problems, I'm also working on a radio gnome so your squad can call in air strikes:
Untitled

More to come.  Stay tuned...

Tuesday, September 3, 2013

Unseaworthy Vessel of the Week: Sun Cruise Resort and Yacht in South Korea

Back in 2006 I was sailing as 3rd Mate on board a hydrographic survey ship.  One afternoon we were cruising along the coast of South Korea when I came up to the pilothouse to take over as watch officer.  When it came time to get an appraisal of the shipping traffic in the area, I couldn't help but notice this particularly unsettling ship in the distance:

This is Sun Cruise Resort and Yacht, a hotel designed and built to look like some implausibly horrific maritime disaster.  We were in the area for a few days and I still couldn't help but be weirded out every time I turned around and saw this hotel which was clearly designed to look like something left behind by Godzilla.  It was just as bad at night:

Many folks might ask why someone would build such a thing.  Not me.  I figure it started with some absurdly wealthy South Korean going on a cruise and getting seasick.  Then they thought, "this would be great if only it would stop moving."  A few years later, there it is.  Problem solved.

If it was up to me, the next step would be setting it up with wheels so I could back it into downtown Seoul every month or two just to see how much destruction it could cause.  It's things like this that should make the world glad I'm not a billionaire.


If you get bored, check out their website for some fascinating Engrish.  Especially if you'd like to make reservations for a "romantic propose," so you can come to "the special resort for making your impressiver love confession."

Tell me that doesn't sound like a good time.

Monday, September 2, 2013

Ironman Costume Part 2: Making the Hard Parts

A while back I posted about making a Mark 3 Ironman helmet using my 3D printer named "Jarvis."  I'm very pleased with the finished piece, but being me I couldn't be satisfied to stop there.

Since I still had some amazingly detailed digital models for the rest of the suit, I decided it was time to go ahead and build it. 

Here's a "during" shot from that last post:


Of course, there's been an awful lot of progress since then:
Untitled

If you'd like to see more progress pics as well as a description of the process involved in making the rest of the armor, read on...

Monday, August 19, 2013

Moldmaking Tutorial for Maker Camp

A while back I was asked by MAKE Magazine to come out to their headquarters and teach a quick lesson as part of their Maker Camp, a virtual summer camp conducted via Google Hangouts.  Each day they host a number of hangouts to discuss different projects their virtual campers are working on as well as a demonstration of various tools or techniques for making all sorts of interesting things.

My demonstration: making a couple of simple molds for prop building.  You can watch the whole thing right here:


 I did a detailed write-up about the one-sided mold a few days ago, but I'll also be doing an in-depth article about the two-sided mold just as soon as I get a chance to get a few more photos of the molds in progress.


Stay tuned!

Wednesday, August 14, 2013

Prop Building 101: Making a One-Sided Silicone Mold

A while back, the folks at MAKE Magazine asked me to do a quick moldmaking demonstration as part of their "Maker Camp," a virtual summer camp program conducted via Google+ Hangouts.  I was happy to oblige.  I usually have a handful of simple projects on my get-around-to-it list and this was an excuse to knock a couple of them out. 

The first type of mold I demonstrated was a one-sided mold occasionally referred to as a "block mold."  This is the type of mold you make when you need to replicate something with a flat side that has no details.  When laid on that side, the piece has to have no significant undercuts where bubbles will be trapped.


I decided that the perfect candidate for reproduction would be a simple barbell plate.  I started by carving out a quick prototype on my CNC machine:
Barbell Carved

Here it is after a light sanding:
Barbell Cleaned


I gave it a couple of coats of primer to seal up the surface and then it was time to set it up for molding.  

First, I glued it down to a piece of cardboard so it wouldn't float away once I poured silicone over it.  Then I used more cardboard to glue together a watertight wall around the plate with an approximate standoff of one inch.

Here's a shot of the painted prototype with mold box built around it:
Barbell Mold Box Setup

After double-checking to be sure that the box wouldn't leak, I mixed up a batch of silicone RTV moldmaking rubber and began pouring:
Barbell Mold Pouring Silicone 2


When pouring the rubber, it's a good idea to start pouring into a low part of the mold.  This way the rubber will flow up and over the part in the mold without trapping as many bubbles against the surface of the part.

After filling the mold box so that there was at least 1/2" of silicone over the top of the part, I left it overnight to cure.  You want that half inch of rubber so that any bubbles will have a chance to rise up and away from the surface of the piece you're replicating.  Any bubbles in the rubber now will become warts on the copies when it comes time to make castings.
 
Once the rubber had completely cured, the next step was to flip the mold over and remove the cardboard:
Mold Peeled Off of Backing

With the cardboard peeled off, you can peel the rubber off of the prototype:
Prototype Removed

To make a copy of the prototype, it's just a quick matter of filling the silicone mold with a lightweight casting resin or expanding foam:
First Casting

Depending on the quality of the silicone rubber you use, you can get anywhere from twenty to sixty castings out of a mold like this.

While it looks just like any other 25-lb barbell plate, this particular casting weighs about 4 ounces.  It makes it look like I have really strong fingers:
Lightweight

Since I cast this particular plate in flexible foam, it'll bounce when you throw it at someone.

Fun!

Friday, August 2, 2013

Gnomes in Stock

The votes are in and the results were overwhelmingly in favor of sculpting the Mortar Launcher as the next Combat Garden Gnome.  Here's a few snapshots of the sculpt in progress:


There's still a few details to sort out, then I'll be ready to start making the mold for this guy.  Meanwhile, I've got a lot of other gnomes in stock:
Gnomes in Stock

You can pick up one (or many) of your very own at http://etsy.com/shop/thorssoli right now.  Use the coupon code "BLOGGER" at checkout for 10% off your order.

Also, I had someone ask me a while back if it's possible to buy prints of the photos I use in the Etsy listings.  So I went ahead and set up my Deviant Art gallery to offer prints.  You can check it out here: http://thorssoli.deviantart.com/gallery/

I've got four or five big projects that are rapidly approaching their finish lines.  Be sure to check back soon for updates.

Saturday, July 20, 2013

Recent UFO Sightings in the Workshop

I haven't been posting enough lately, so here's the latest round of UnFinished Objects I've been tinkering with in the shop...
Pip-Boy 3000 from Fallout 3:
Pip Boy Parts Stacked Together
Printed out using the files in posted by "dragonator" on instructables.com.  Get your own here: http://www.instructables.com/id/A-3D-printable-Pip-Boy-3000/

25-lb barbell plate:
Barbell Primed
I'll be doing a moldmaking demonstration as part of the Maker Camp on Google+ next month and decided this would be as good a project as any for molding.  I'll also be making a variety of hammers.

The biggest thing that's eating up my time lately is the Ironman build:
IM Right Side

It's going to be pretty damned cool when it's finished, but first I've got a lot of detail work to do:
IM Glove Completed 
Since I've been long overdue for the opportunity to call something finished, I dusted off a kit that I picked up from another maker a while back and put together a replica of the mask worn by Karl Ruprecht Kroenen, one of the key villains in the first Hellboy movie:
Untitled
I'd call it done, but for some reason I suddenly want to make the whole costume instead.

I've also got one more very exciting project I'm working on, but I'm not allowed to show it off just yet:
Secret Project 6

Stay tuned...