I make toys for kids who don't want to grow up. I'm on the lookout for new projects. If you're interested in commissioning me to build something ridiculous, shoot me an email.
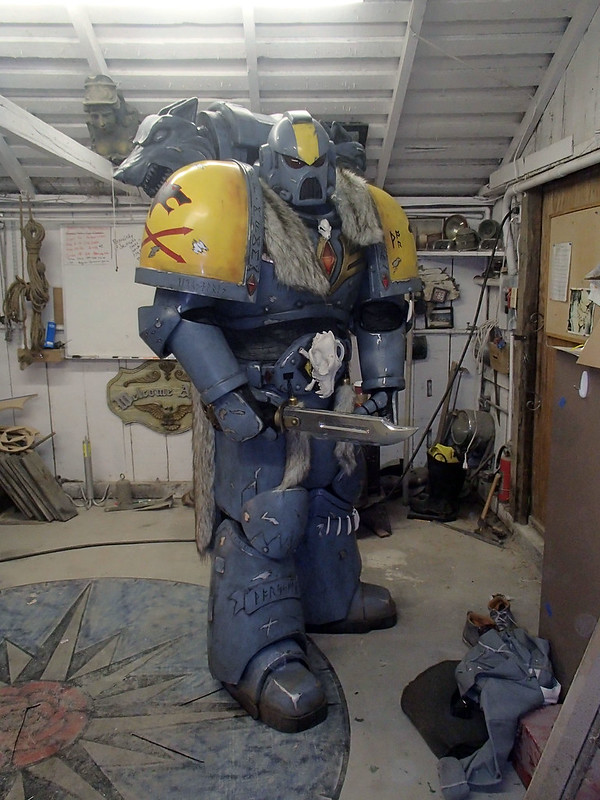
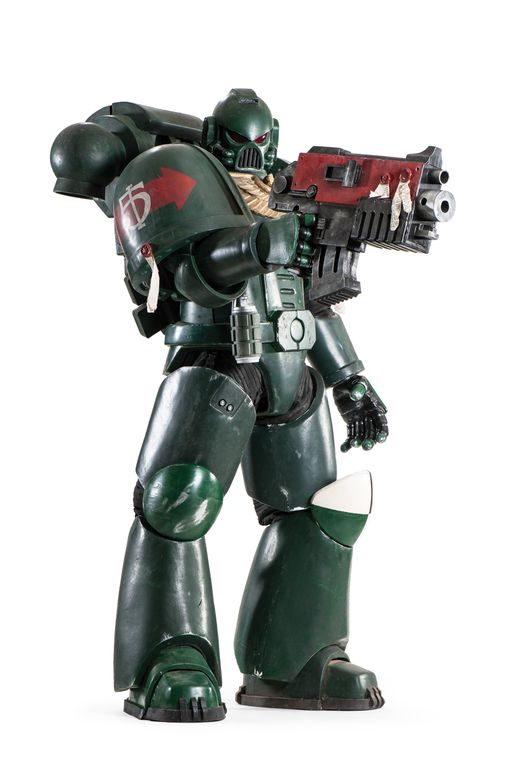
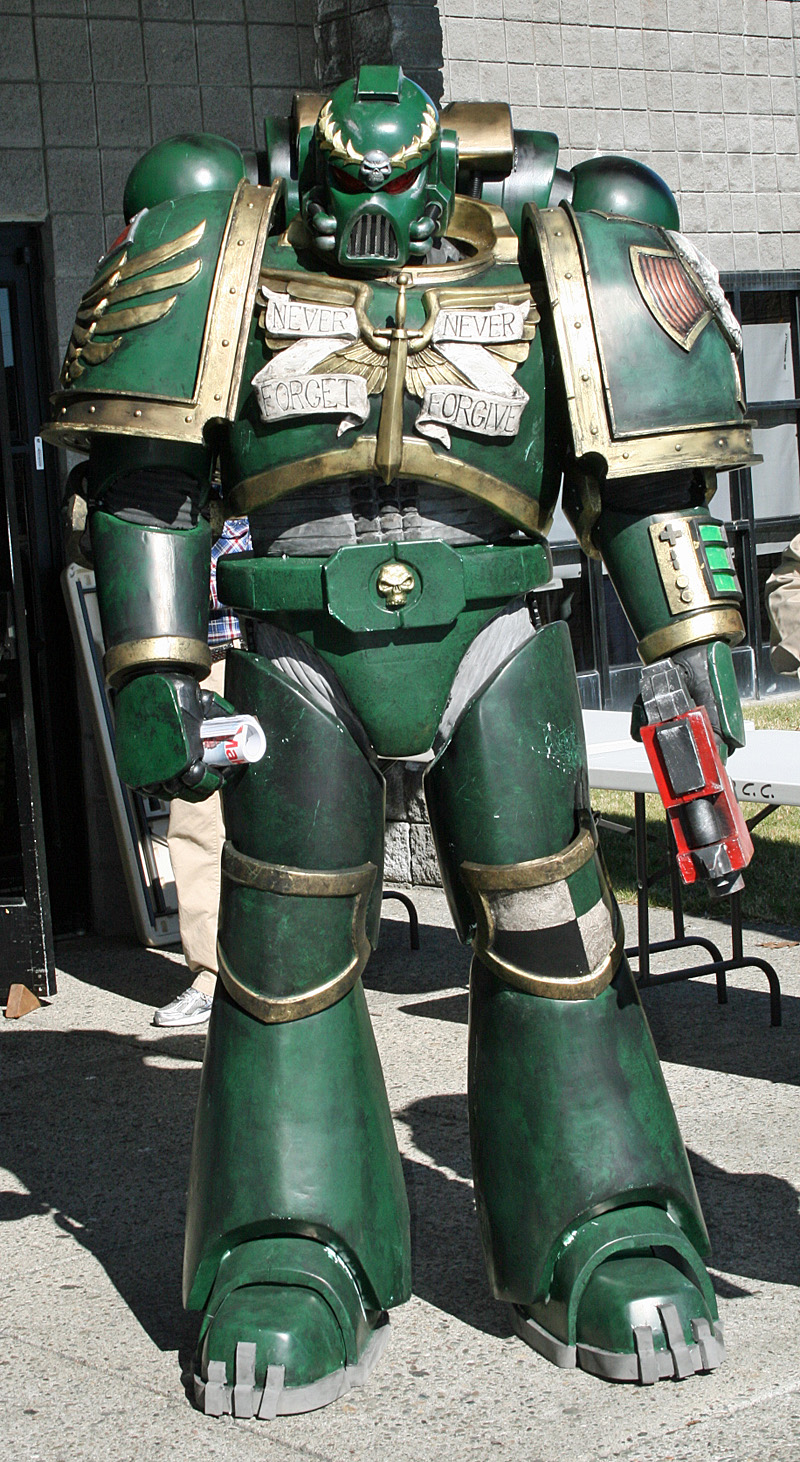
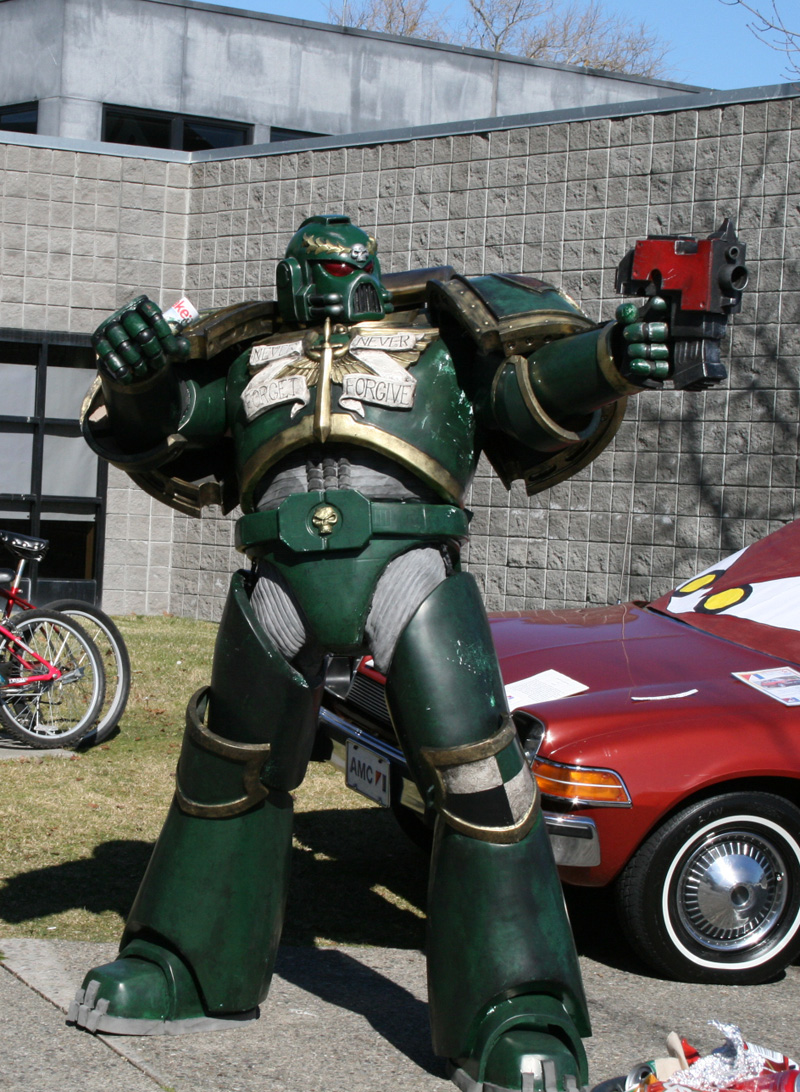
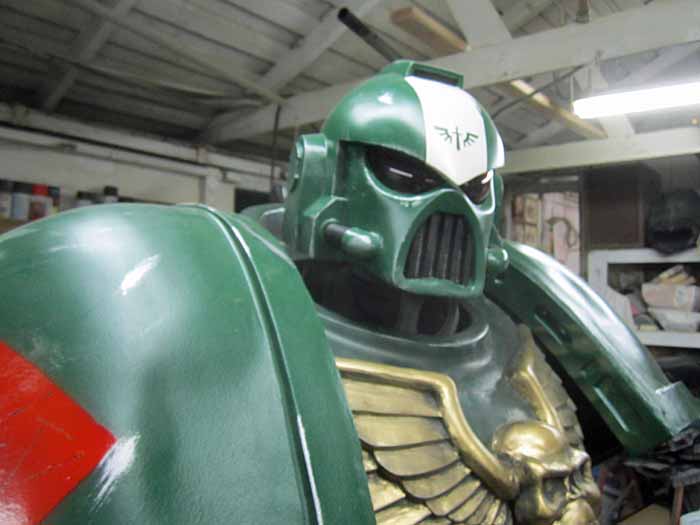
A few years back, I made a bit of a splash in certain corners of the internet when I made a handful of Space Marine costumes based on the Dark Angels Chapter of the Adeptus Astartes. I've always been a big fan of the Warhammer 40K universe and the Dark Angels have a very striking, gloomy, look and feel that offered up a lot of interesting opportunities for custom details. They were pretty cool, but there's also 999 other chapters of Space Marines to choose from. So the next challenge was to make another set of armor from my molds and dress it up in the iconography of a completely different chapter. The result: a Space Wolf! While the Dark Angels tend to look like they're covered in relics handed down from the Catholic church, Space Wolves are the aesthetic descendants of Vikings. Their Codex offers up a rich tapestry of bits and pieces to add to the standard armor and I'm really happy with the finished project: For more details on this build, read more...
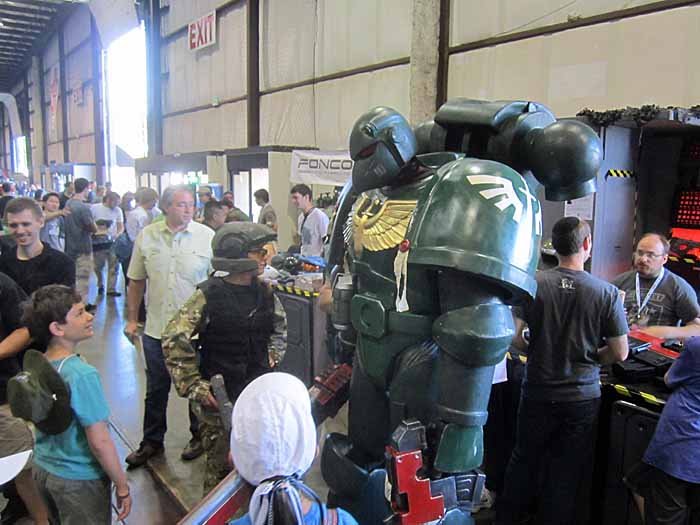
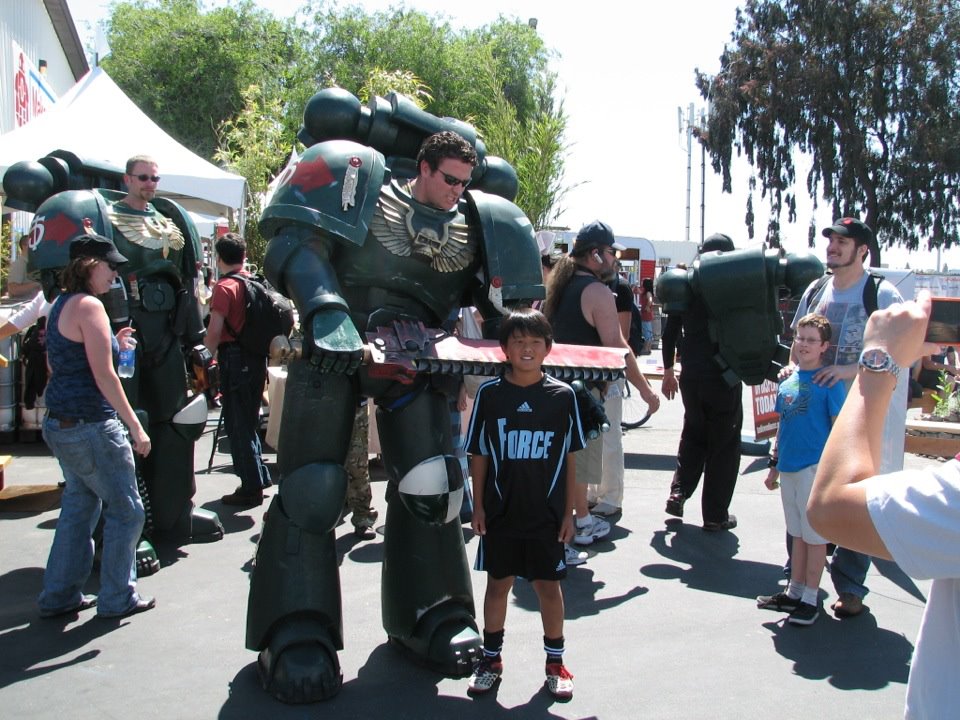
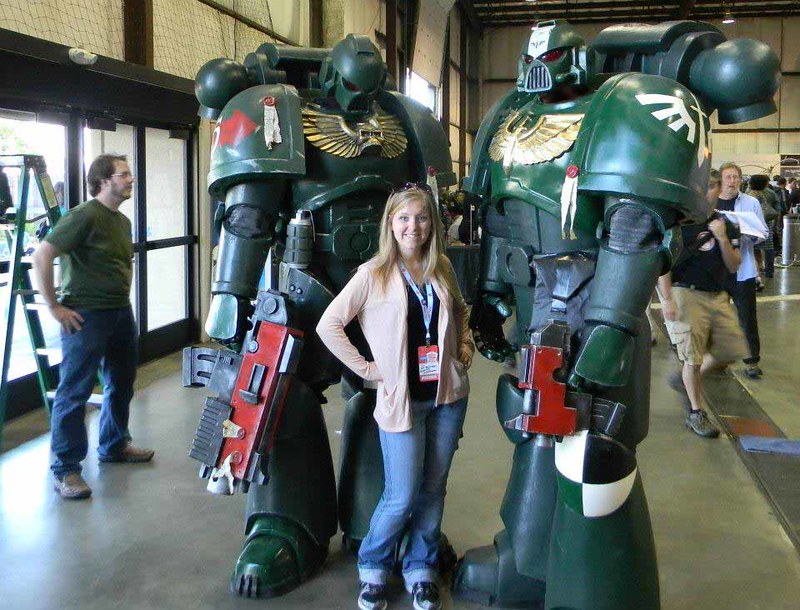
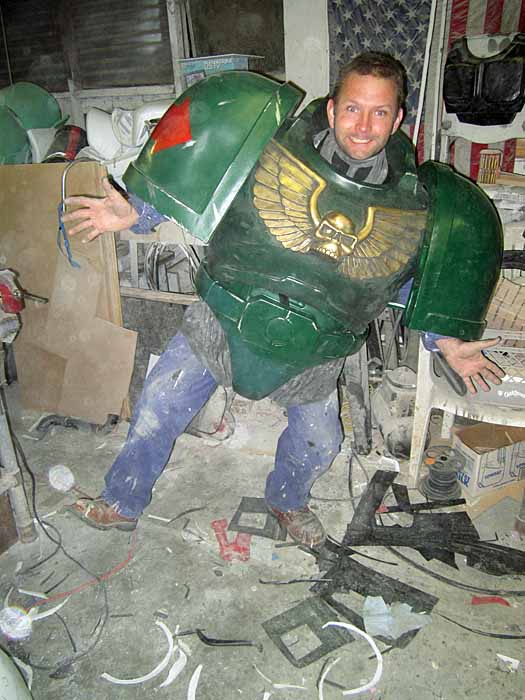
But the absolute best part about any of these builds is seeing the response they get when they're out in public. Here's a few pictures and videos of the Space Marines out and about. Their initial debut was in May at the 2012 Bay Area Maker Faire. If you were there, they were hard to miss: In addition to oodles and gobs of photos that people took, there were also a few video teams that interviewed me: When the event began we had two suits all put together and walking around. The third suit was assembled on location and was walking around by the middle of the second day.
Everyone seems to have had a good time:
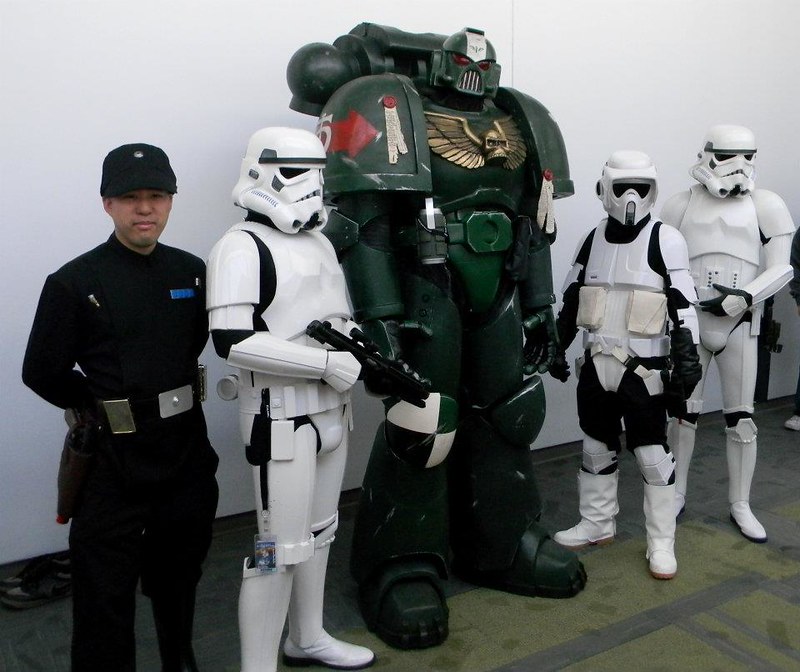
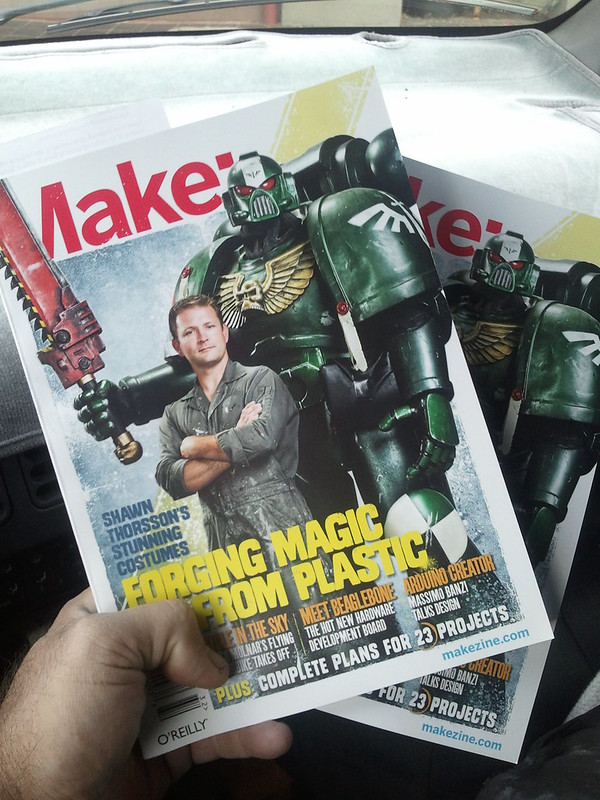
A short while later, my friend Matt wore one of them to Fanime, a local convention. He got a lot of attention there. It turns out these suits really stand out: At about that same time, I did an interview with Make Magazine. What started as a quick "let's take a look around your workshop" visit soon spread into a much bigger piece including the cover:
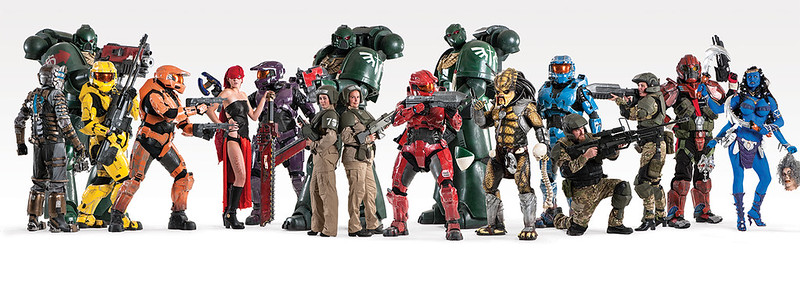
In addition to the cover, there was a four-page spread showing much of my costume portfolio. Here's the whole image stitched together, courtesy of Make: While that spread does a good job of providing a sense of scale for the Space Marines, it doesn't really showcase the details. Fortunately, the good people at Make were kind enough to send me some of the pictures of each suit by itself. Here they are:
You can see more about that issue of Make magazine at http://makezine.com/32.
While I really loved all three of those suits, I really felt I could do a better job of making one with more trim and embellishments. So I knuckled down and built another one:
My favorite part about this particular suit is the insanely heavy sculpt of the Crux Terminatus on the left shoulder:
I think the suit is pretty sexy: Chicks dig it:
I'm sure there will be plenty more opportunities to get these guys out and about. So expect more pics like this: In case you're wondering, that guy's not at all short for a stormtrooper.
This web site is completely unofficial and in no way endorsed by Games Workshop Limited.
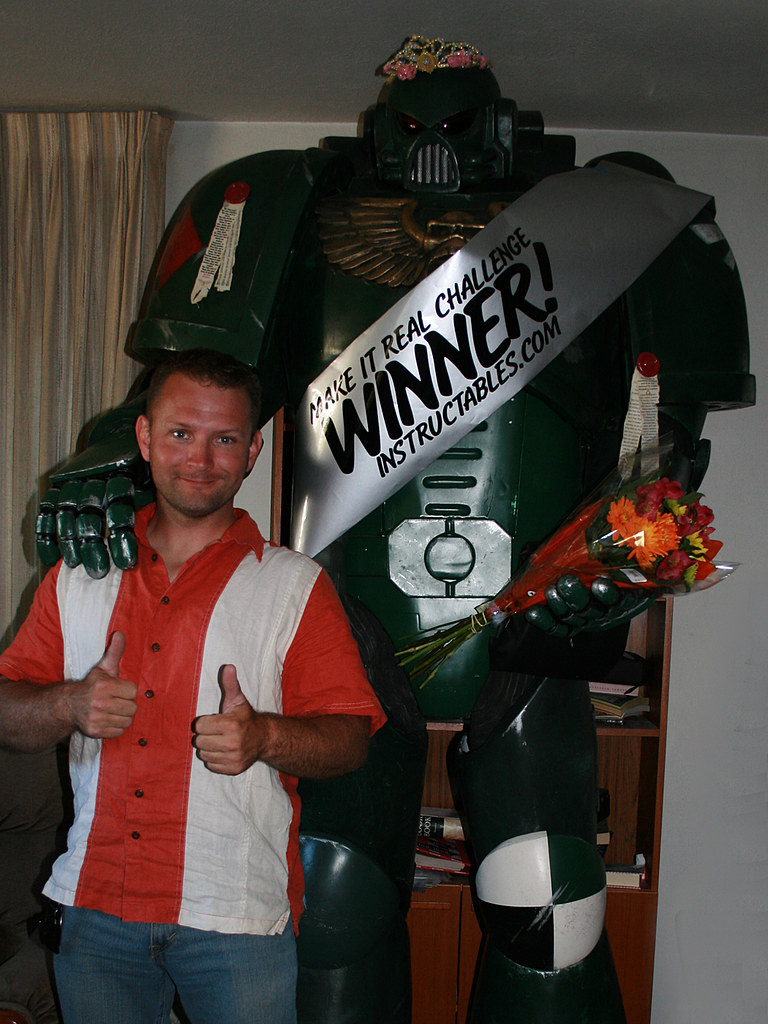
Last month I sat down and wrote out a tutorial article describing the construction of the Space Marine costumes on Instructables.com and entered it in their "Make it Real" challenge.
The contest guidelines: take something that started out as something on the computer (a 3D model, CAD drawing, or even a Photoshop sketch) and make it into a tangible, real-life something.
I figured the Space Marine project really fit the bill. It turns out the contest judges agreed with me and I was selected to win their grand prize:
I'll admit that I was more than a bit surprised.
The prize in question is a very impressive 3D printer. This is a device that will take a 3D object file from the computer and actually build it out of seven different materials in real life.
So now I'm dreaming up all sorts of frivolous uses for it. First I'll be printing 3D models of my own head in various sizes to replace the heads on action figures to match costumes I've built. Then I'll need an MRI so I can get a 3D model of my own skull to print out and set on the shelf. I think my skull would make a great bookend. I may also make a mold of it so I can cast copies in flexible foam. Then I can throw my skull at passers-by without harming them.
Somewhere along the way I'll be doing more practical things with this new toy as well. Any suggestions? Feel free to leave them in the comments.
When last I posted about this project, I covered the making of the helmets. The next vital part of the build was the hands. Since I was turning a group of under-six-foot guys into a squad of over-seven-foot warrior demigods, I had to add a bit of length to their arms in order to avoid this look:
For full details on how I made the hands, read on...
I've entered my Space Marine build in the "Make it Real" Challenge at instructables.com and I could use your votes to help me win the contest. Please go to my tutorial, by clicking HERE!
Once you're there, click on the "vote" button beneath the questions "is this a winner?"
I do still intend to write the rest of the series of detailed articles here in my blog explaining many of the steps with even more pictures, so stay tuned. Eventually I'll catch up on the whole narrative.
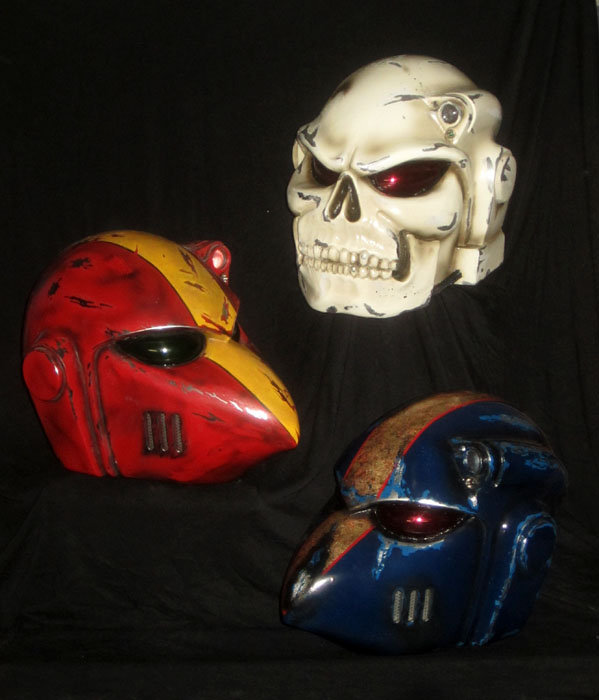
Back in ancient history, I built some 40K helmets:
In order to have the kind of variety I wanted for my full-sized Space Marine build, I needed to make one more, the Mark VII version seen in the latest incarnation of the games.
Here's the finished product:
For details of how it was made (and more pictures) read on...
Someone else building this armor costume might be satisfied to just insert some black fabric around the joints and call it good enough. I am not someone else. I'm someone who has to be able to say it was done and done well.
It needed the spaces between the armor parts to show an "undersuit" that looked ribbed and heavy while still being flexible and inexpensive. This was a job for slipcast latex.
If you'd like to see pictures and an in-depth description of the latex slipcasting process, read on...
Continuing on with the saga of the Space Marine build, one of the more distinguishing parts of the character is the giant backpack. Per the in-game mythology, the backpack contains the suit's main power source, some life support systems, and a series of thrusters for mobility in zero-gravity environments.
Here's a crappy, grainy picture of one of the backpacks for the miniatures:
Here's the fully assembled, full-sized version:
For more pics and a detailed account of the construction, read on...
I've been a fan of Warhammer 40K since the original Rogue Trader version came out 25 years ago. In middle school I even got a job at a local hobby store specifically so I could afford to buy more Space Marine miniatures from the game. Now that I've got a few skills and a respectable workshop, I've been slowly bringing parts of the game to life in between paying projects.
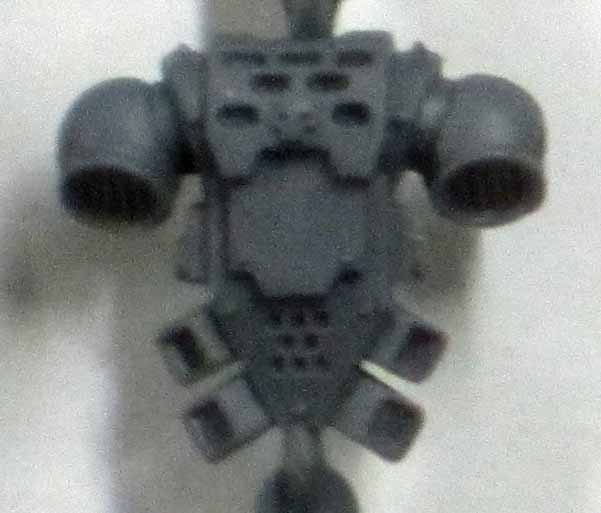
Years ago I sculpted out a Space Marine helmet. It was the first time I'd sculpted a helmet by hand and I made a mold so I could make more than one. I also modded one with a skull face to look the part of the Space Marine Chaplains. Here's a shot showing the finished ones as of sometime in May of 2011:
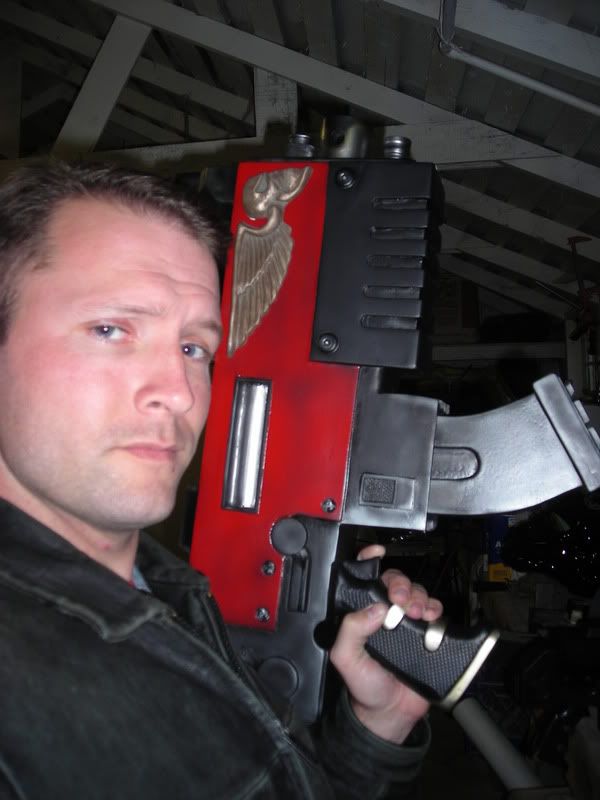
A while back I wrote an entry about building the bolter rifle I made to go with them:
That was years ago though. Since then, the good people at Games Workshop have released several new video games based on the Warhammer 40k universe and each one has reminded me how much I love everything about it. After making a handful of little parts, and some prompting from my friend Matt (a.k.a. my primary project addiction enabler), I decided to take another look at building the rest of the Space Marine armor.
Notionally, we were going to crank this out as a Halloween costume for 2011. Sadly, this project fell victim to Squid's Law. According to David Malki of Wondermark.com, Squid’s Law states: “Things take twice as long as you expect, three times as long as you have, and four times as long as you want.” So it didn't end up getting done in time for Halloween, but there's a Halloween every year, so we just soldiered on.
Since I'm in between major projects right now, I'm finally able to focus on this build. The problem is, working on just this one thing means I don't have any other finished work to show off. So I'm going to break this build down into parts to share progress as it's coming along.
Here's a photo of the costume as it looks right now:
If you'd like to read through the gritty details and see tons of blurry progress pictures, read on.
Sometimes in the midst of a really big project, it's hard to stay motivated. In the fine-tuning stage, weeks can pass without really giving me something to brag about. When this happens, it's time to focus on a smaller tangent project.
This is one of those tangents:
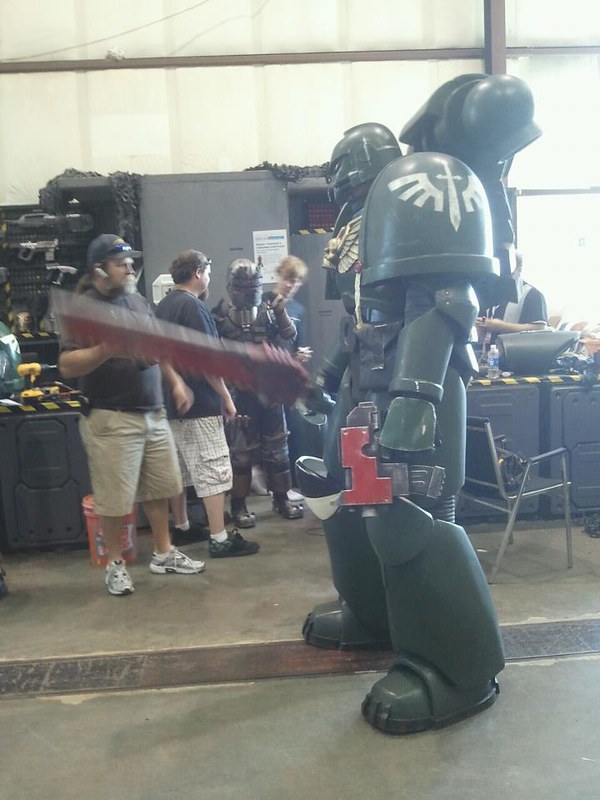
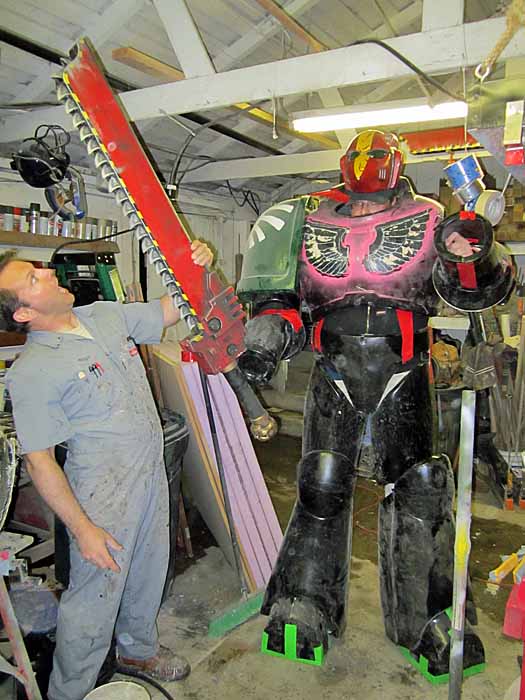
This is the "chainsword," the melee weapon of choice from the Warhammer 40,000 universe. If a lightsaber was "an elegant weapon, from a more civilized time," the chainsword is the other thing. Big, ugly, and brutal, it exemplifies everything I've always liked about Warhammer 40K.
In a game where the Imperium of Man makes the "evil empire" of Star Wars look like something that belongs in Disneyland, the chainsword is a perfect fit. There's no notion of a kinder, gentler anything. It's simply made for carnage.
More pictures and a thorough description of how it was made after the jump.
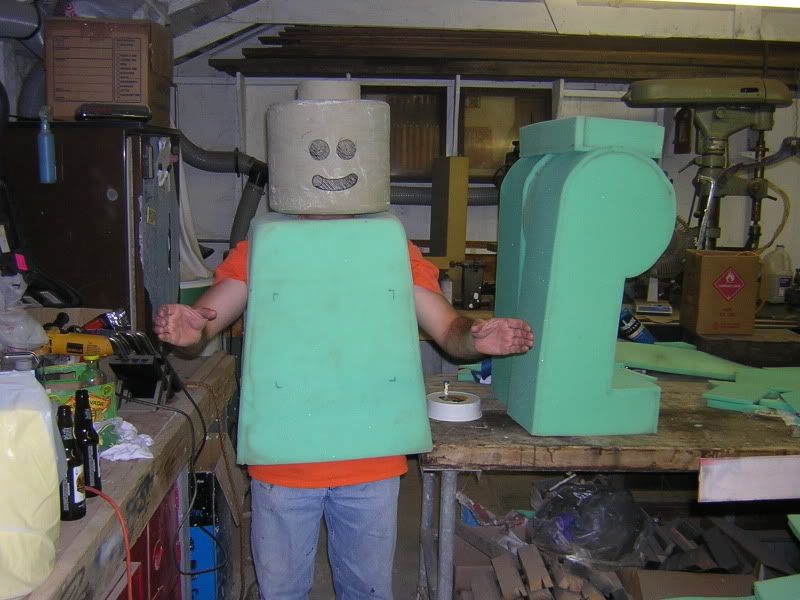
When I was in junior high school, I spent countless hours and almost all of my money collecting, building, and painting Space Marine miniatures from the tabletop wargame known as Warhammer 40,000. Years later, after finishing my stormtrooper armor and my Predator costume (and failing to finish my LEGO minifig costume) I finally had the skills and tools to build a costume that would really do justice to the characters of the WH40K universe. With the release of the new Warhammer 40k: Space Marinevideo game, I'm back to working on it.
With that in mind, here's the parts I've made years ago...
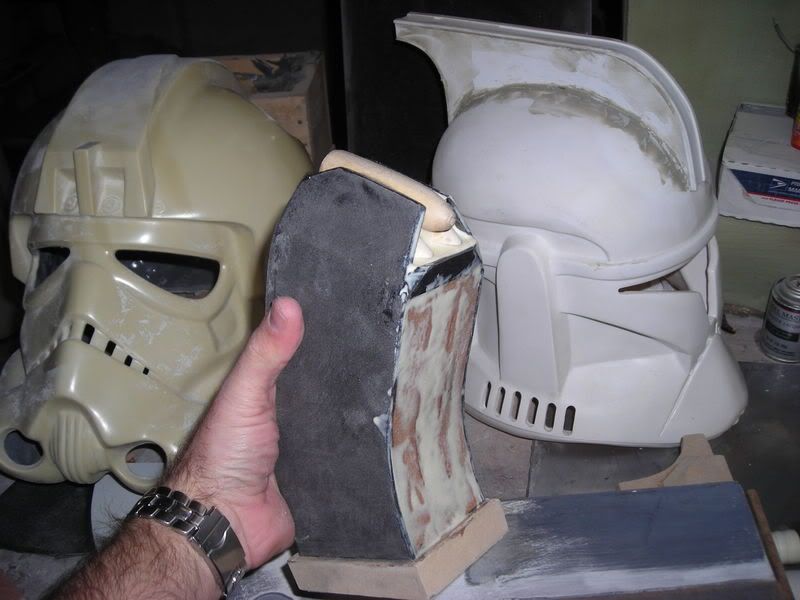
Over quite a long time, I manage to make a couple of helmets for the Mk6 version of the armor:
The next logical step (for someone like me) was making sure that these characters would be properly armed whenever I got around to building the rest of the costume. I took on this project back before I really knew anything about what I was doing, so I made a lot of mistakes learned a lot along the way.
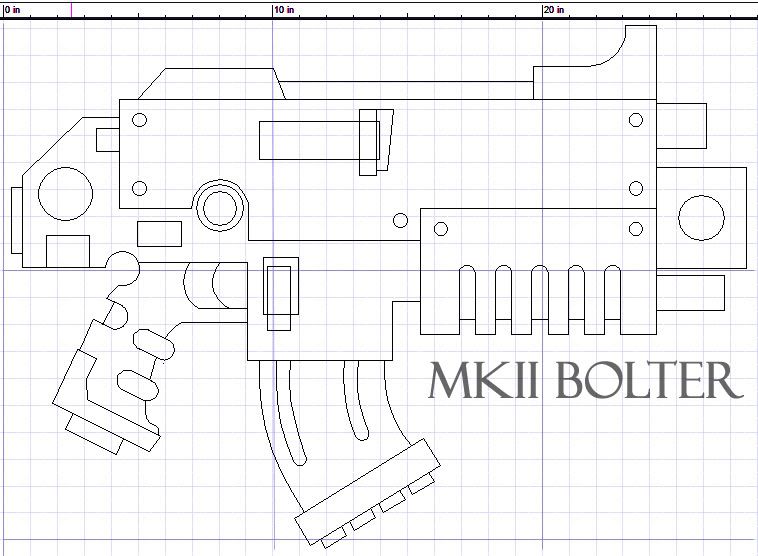
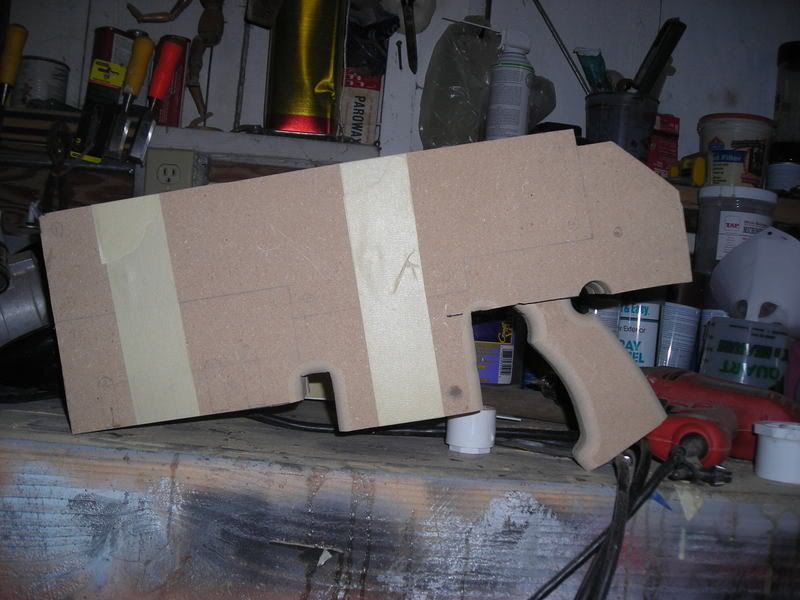
I start with a 1/1 scale drawing of the bolter. I finished this late at night with the assistance of TurboCAD and most of a bottle of wine, but I think it looked okay:
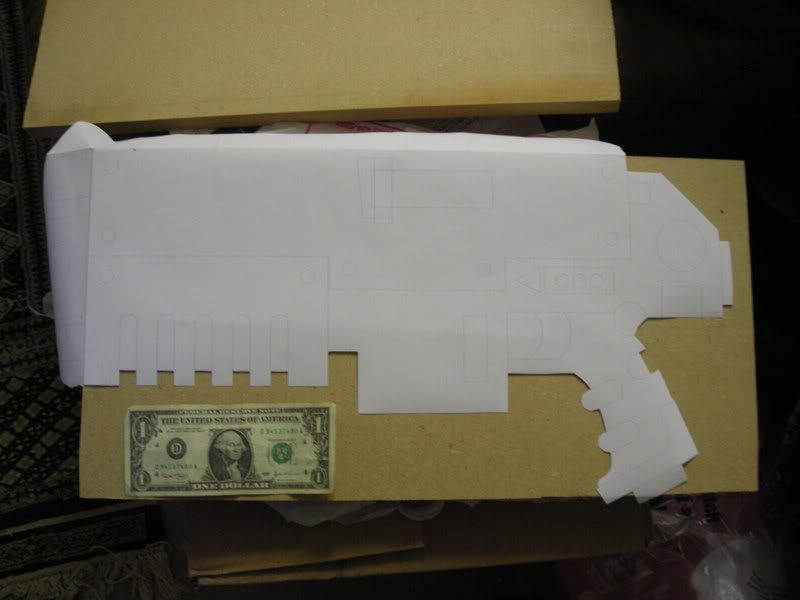
Then I convinced an engineer friend of mine to print it out on his plotter and transferred the drawing to a piece of 3/4" MDF like so:
Then I screwed together four pieces of it (making the whole piece 3 inches thick) and cut it all out on the band saw. After that I cut the grip off of the two outside pieces and did some work with the router which got it here:
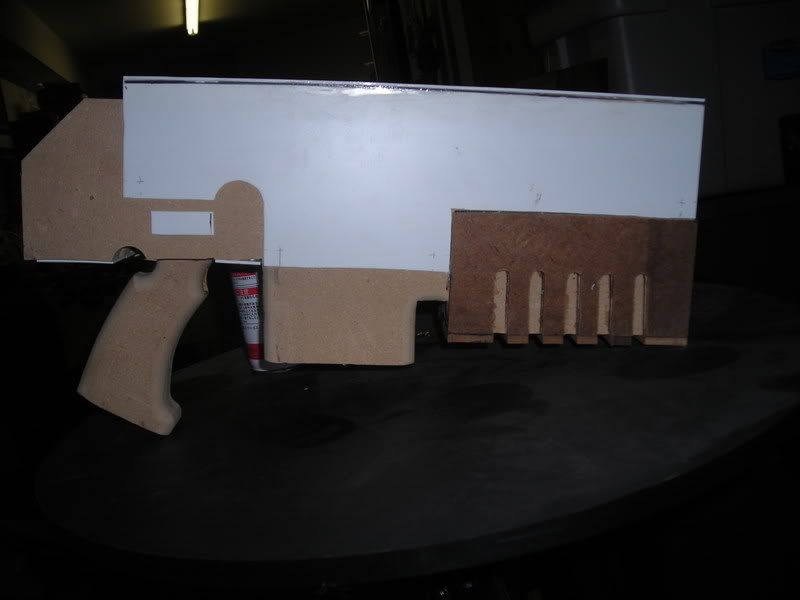
Digging through my pile of scraps in the workshop, I found some sheet styrene and fiberboard scraps that I added to the outside:
Here's the bottom:
With a bit more work things were really starting to shape up:
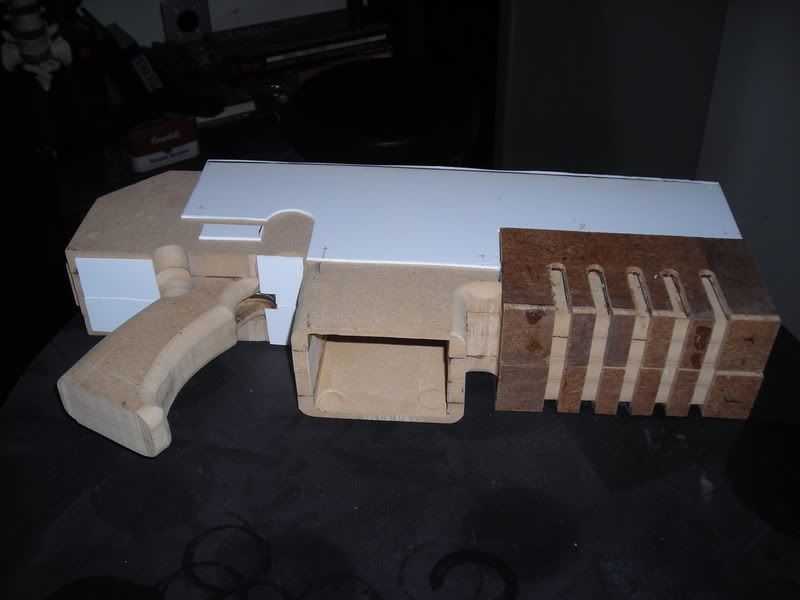
The magazine was made using more MDF and skinning the sides with foam PVC sheet. Then I turned down three faux bullets on the lathe to be visible at the top. Here's the magazine removed:
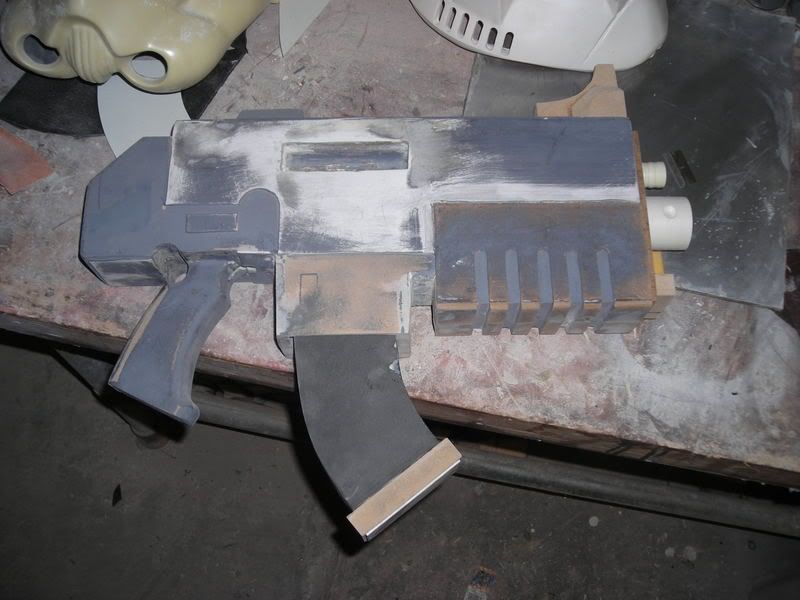
Once I was happy with the overall appearance of the piece, I went ahead and gave it a coat of satin black paint:
That done, it was time to block it up for molding. Let me say up front that this was one of my earliest experiences with moldmaking and that I've since learned many ways to make the same mold cheaper, lighter, stronger, and faster. Still, here's how I began:
The clay it's bedded in in the above picture is intended to establish a parting line for a two-piece mold. Here's the whole arrangement boxed up and ready to pour silicone in:
In order to prevent bubbles from being stuck in the silicone, I mixed each batch and then poured it into a bucket with a hole in the bottom. Then the bucket was suspended over the mold box so it was high enough that the silicone would stretch out into a thread, popping any bubbles along the way:
It worked, but only so well. Here's the mold box with the beginning of silicone poured in:
Here's the huge chunk of rubber that made up the most of the mold:
With the clay removed from the other end:
The next step was to apply a mold release to the cured silicone and then pour more silicone into the void left behind by the clay plug in order to make the second half of the mold. It turns out I used the wrong mold release. Either that or I didn't use enough. Or maybe I forgot altogether. In any case, the second pour bonded to the rest of the rubber and the only way to move forward to was to cut the silicone open instead. It worked well enough though. Here's a shot of the first casting coming out of the mold:
The end result was a block of silicone that weighs upwards of 40lbs and is an absolute bear to use for rotocasting. I can do it, it's just labor intensive. The better answer (I've since learned) would be to do a matrix mold like I did with my HALO Assault Rifle to minimize the amount of (very expensive) silicone needed and make the whole thing easier to handle. Such is life.
I made one for me and one for a friend who was also into Space Marines back in the day. Here they are after a bit of prep work and cleanup:
In the midst of the rest of this project, I also sculpted out some winged skull details for the sides of the body. Here they are with some of the other small details all ready for molding:
The mold was a simple block mold for one-sided castings:
The castings were made with cold cast bronze:
If they look to you like they're made of actual bronze, that's because they are. I'll write a how-to about cold casting later on.
I used the same process to make an imperial eagle logo as well as a plain skull. It's good to have options.
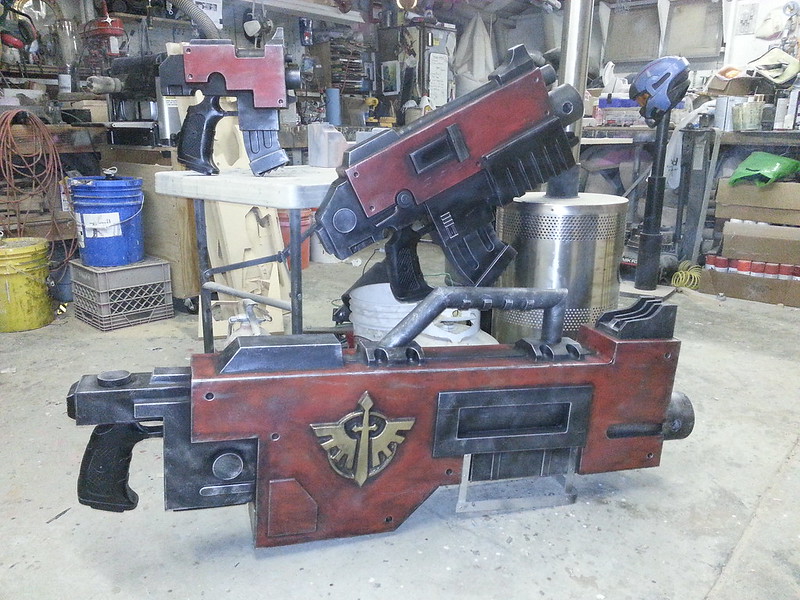
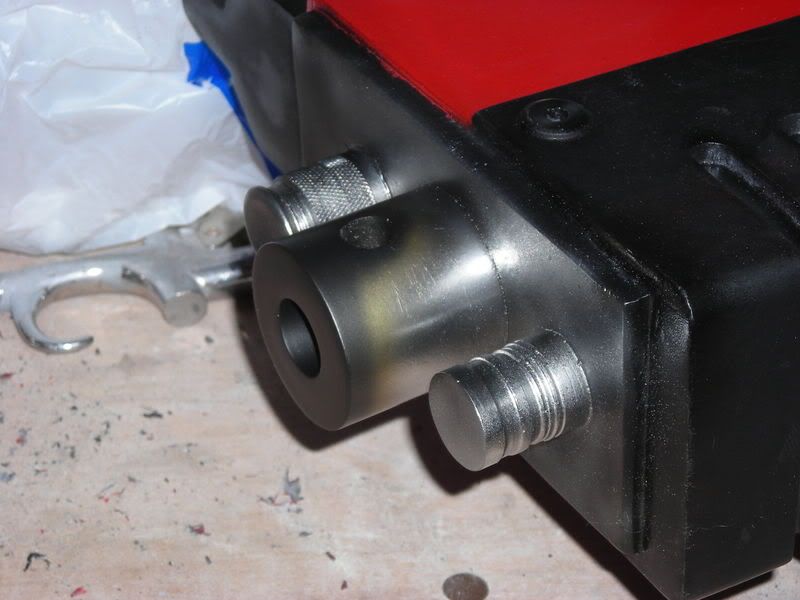
The muzzle details were also modeled and molded separately. Here's a shot showing all of the parts that I cast in order to build the whole rifle:
Here you can see the whole thing tacked together:
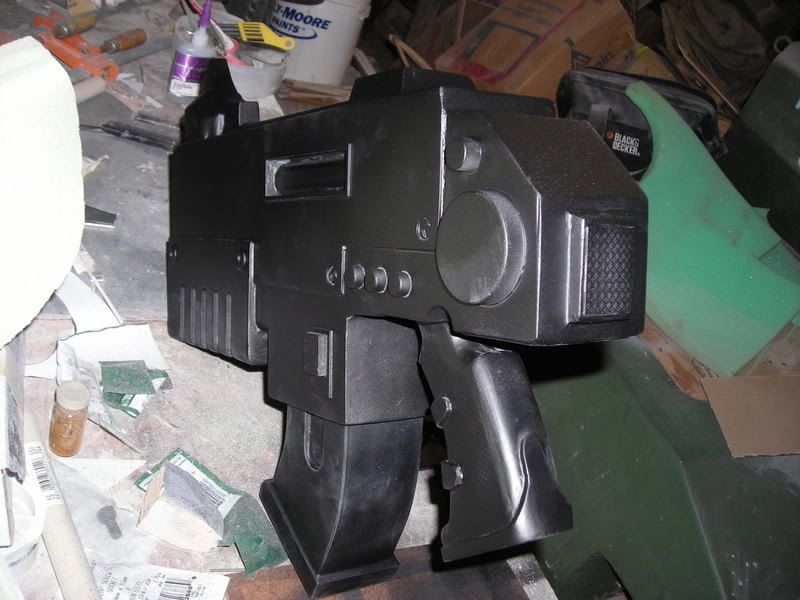
Here you can see the main portion with most of the paint job done:
I made quite a few of the magazines. The worn edges and visible rounds are painted with Model Masters metalizer paints and the airbrush:
Action shot:
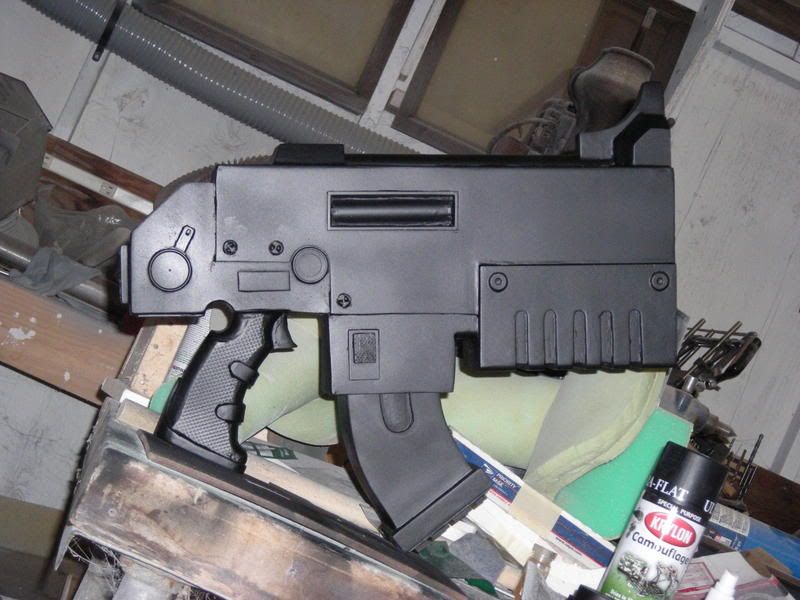
Here's the end result:
It's rather large.
I'm especially proud of the job I did on the muzzle. I was trying to make it look like a nicely polished piece of metal that has seen some abusive heat (think motorcycle exhaust pipe):
I think it goes really well with the helmet:
I still need to make the rest of the outfit though...


