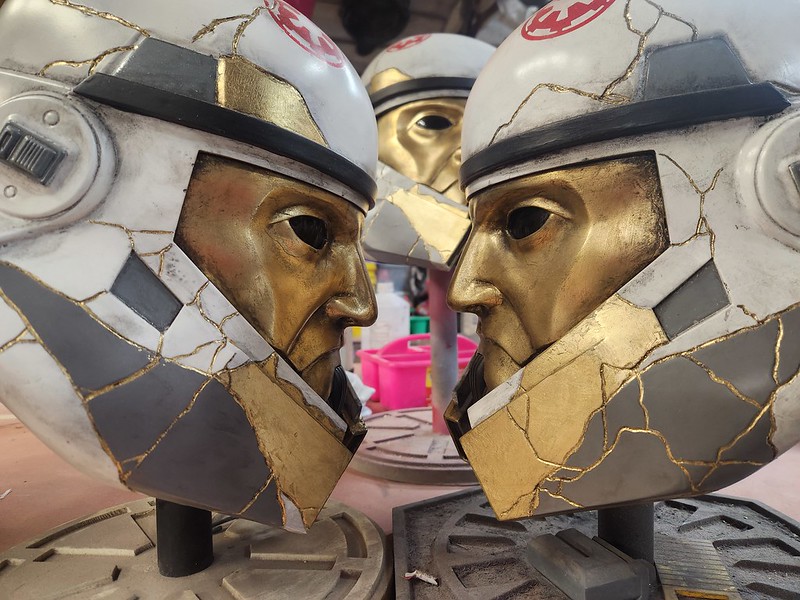
A few years back I made a handful of First Order TIE Fighter Pilot costumes. You can read about them here: LINK.
But ever since we saw the AT-AT and AT-M9 walkers in Episode 8: The Last Jedi, I've been hoping we'd see what their crew's costumes look like so I can take a stab at those as well. Over the years there were a few toys an bits of concept art that came out that seemed like they might give us an idea of what they look like, but nothing really definitive.
Then the Rise of the Resistance ride opened in Disneyland's Galaxy's Edge. If you've ever been on the ride, you'll remember a moment when you wind up in a hangar with a pair of AT-AT walkers. At this point the ride splits and half of the riders stay down low at foot level with the walkers. The other half of the riders get whisked up an elevator of some sort, pop around a corner, and end up face-to-face with the walker's head. There you can see the crew inside like so:
Then the Rise of the Resistance ride opened in Disneyland's Galaxy's Edge. If you've ever been on the ride, you'll remember a moment when you wind up in a hangar with a pair of AT-AT walkers. At this point the ride splits and half of the riders stay down low at foot level with the walkers. The other half of the riders get whisked up an elevator of some sort, pop around a corner, and end up face-to-face with the walker's head. There you can see the crew inside like so:
All told, they're only visible for about eight seconds, but it seems like the most concrete indication of what these guys look like:

Not long after the ride opened, they released a Black Series action figure:

Any time some toy company decides to make an action figure, there's always some kind of distortion or alteration needed in order to make the character posable or whatever. That said, the Black Series figures from Hasbro usually do a pretty good job of incorporating all of the details of the character in question.
So, armed with the figure and the artwork from the box it comes in, we set out to replicate this look. I figured it was fairly safe to assume that the armor parts would be the same geometry as other similar First Order characters such as stormtroopers and TIE pilots. So we decided to start by scanning the parts we already had molds for in order to make the new parts to fit them:

We also scanned one of the Black Series First Order Stormtrooper helmets as well, then used it and my chest armor as a base to model the AT-AT Driver helmet and chest boxes on top of:

In no time at all, Jeff had finalized the digital model of the helmet and I'd printed the whole thing. Here's Jeff with the printed master before we'd started doing the smoothing over the seams:

So, armed with the figure and the artwork from the box it comes in, we set out to replicate this look. I figured it was fairly safe to assume that the armor parts would be the same geometry as other similar First Order characters such as stormtroopers and TIE pilots. So we decided to start by scanning the parts we already had molds for in order to make the new parts to fit them:
We also scanned one of the Black Series First Order Stormtrooper helmets as well, then used it and my chest armor as a base to model the AT-AT Driver helmet and chest boxes on top of:
In no time at all, Jeff had finalized the digital model of the helmet and I'd printed the whole thing. Here's Jeff with the printed master before we'd started doing the smoothing over the seams:
Then this is what it looked like once we started filling in the seams:

After a few rounds of filler, sanding, primer, sanding, primer, sanding, gloss coat, and so on, I gave it a coat of my customary lightish red gloss paint in preparation for molding:

Then Rachel was tasked with making the mold matrix for the helmet:

I didn't take nearly enough photos of this process, but we made matrix molds for the helmet, the chest box, and the back box. Here's the chest box mold in progress:

Here's the fiberglass mothermold laid up on the helmet:

And here's the first half of the mothermold set up for pouring silicone to make the mold for the noseplate:

This is the chest box and back box molds once the silicone was poured:

Jumping ahead, the molds came out great and I ended up casting a few copies of the AT-AT driver as well as the TIE pilot helmet:

The AT-AT Driver Helmets were given a bit of prep work before they were primed and taken into the spray booth for a solid coat of gloss white:

Same goes for the armor, chest boxes, and back boxes:

Then Rachel was tasked with making the mold matrix for the helmet:
I didn't take nearly enough photos of this process, but we made matrix molds for the helmet, the chest box, and the back box. Here's the chest box mold in progress:
Here's the fiberglass mothermold laid up on the helmet:
And here's the first half of the mothermold set up for pouring silicone to make the mold for the noseplate:
This is the chest box and back box molds once the silicone was poured:
Jumping ahead, the molds came out great and I ended up casting a few copies of the AT-AT driver as well as the TIE pilot helmet:
The AT-AT Driver Helmets were given a bit of prep work before they were primed and taken into the spray booth for a solid coat of gloss white:
Same goes for the armor, chest boxes, and back boxes:
Over the next few days, whenever we found a few minutes we'd mask off a section and paint more of the helmets. The mohawk details were picked out with satin black and the brow and chin were painted with a gloss rustoleum color called "pewter gray." Then the little greeblie bits were added on and a pair of vinyl cut First Order logos were applied on either side of the dome:

At this point, things were really starting to come together:

Here's the back box with all of the buttons and switches in place:

The hoses were a pair of respirator hoses I picked up on Aliexpress, but they're basically the same as these ones: LINK. Otherwise, the whole kit and kaboodle came out of my shop. One of the tricky bits was getting the hoses to stay where they belong on top of the shoulders instead of rolling off and just being a major nuisance. On the action figure, the rubber hoses were just made in the shape they needed to be in order to lay were they should:

For the costume, I opted to add a zip tie around the hose where it lined up on top of the shoulder. Then I sandwiched the tail of the zip tie between a couple pieces of adhesive backed velcro:

That little tab mated with velcro under the shoulder area of the armor to keep the hose from rolling off and making me look silly:

Another thing that took a bit of thinking was the belt. For the TIE pilot ensembles, I made the ribbed rubber belt by cutting strips of this ribbed rubber floormat like this one: LINK. But since the ATAT drivers had white belts (and not a lot of idiots make white rubber floormats), I'd need to find another way.
So we cut a piece of the black rubber floormat like we normally would for the First Order TIE Pilots, split it into two sections, and made a mold using Mold Max 30 silicone from Smooth-On. Then we cast a couple of them in expanding foam and urethane rubber to try and find a material that would have the right durability, stretch, and ability to take pigment. The first two sets were throwaway castings tinted black:

Then we tried white.
Then we tried white.
Ultimately I wasn't happy with any of our test pulls. I tried casting a copy using white pigment in I forget which urethane rubbers, but everything I had on hand would cure to an amber color without any pigment added. When we tried to color it white, it seemed like no matter how much pigment I added, the castings cured a bit yellowish. I needed white.
Then I was at Douglas and Sturgess, my favorite local art supply shop (check them out at artstuf.com and tell them Shawn Thorsson sent you) and stumbled across "Clearflex 50" a water-clear, urethane rubber that cures to a shore 50A harness (which is pretty squishy) and resists degradation from sunlight.
Clear is better than yellow for a starting point. Adding white to no color at all should just leave me with white. This was exactly the breakthrough I needed.
So I picked up a trial-sized kit, rushed back to the workshop, and mixed up a batch with some white UVO pigment. The mold was ready to go:

I set a small scrap of wood under one end of the mold and poured just enough rubber to cover all of the grooves without catching any bubbles. Then I laid a piece of white knit fabric into the wet rubber and poured more rubber on top of it:

I didn't have any data on tear strength for this particular rubber, but since it was going to have to function as an actual load-bearing belt, the fabric would allow it to hold up to tension without putting any strain on the rubber.
I set a small scrap of wood under one end of the mold and poured just enough rubber to cover all of the grooves without catching any bubbles. Then I laid a piece of white knit fabric into the wet rubber and poured more rubber on top of it:
I didn't have any data on tear strength for this particular rubber, but since it was going to have to function as an actual load-bearing belt, the fabric would allow it to hold up to tension without putting any strain on the rubber.
The next day I demolded the cast belt parts:

Very white!
Once I'd trimmed off the edges of the rubber and cut the belt halves to length, I got to work riveting on the belt boxes and nylon webbing that would attach the ends of the belt together:

Each hole was poked through the webbing and the rubber belt with a hot soldering iron. Then a 1/8" hole was pre-drilled into the resin belt boxes. Finally, a few drops of CA glue were dripped into the drilled hole before a pop rivet was set in place. I may have gotten a bit carried away:

But in end, all of the resin boxes should be very difficult to remove from the belt and I'm happy with the end result:

The rest of the costume was a bunch of pieces I didn't do in my shop. For starters, there was the neckseal made by my friend Teresa Nuthall of "Geeky Pink's Phantastic Gaskets" who has made all of my First Order neck seals. This time though, they were greay:

The boots were First Order TIE Pilot boots from the good people at keeptrooping.net. Luckily they were able to make them in white with a greay sole:

The gloves were made by my friend Giovanni at crowprops.com. Again, these were First Order TIE pilot gloves, but in white leather.
Finally, I had the flight suit made by Jim Tripon out in the Philippines, since he'd made all of my TIE pilot flightsuits and I wanted the fit and finish to look right if they were all together:

With all the parts collected into a box, I headed off to Wondercon in Anaheim, CA. It didn't occur to me until halfway there that I'd never actually tried the whole costume on all at once. Fortunately, I'm pretty good at things and it took almost no effort to jump into costume:

WonderCon:

So much WonderCon:

I'm hugely fond of this little convention. It used to be held in San Francisco every year and I never got to go back when that was the case. Instead, I had to wait until it was a big pain in the butt.
Still, it really feels like someone decided to gather up all of my favorite parts of San Diego Comic Con, leave out most of the stress and noise, and invite all kinds of characters to make it fun:


I managed to find some pretty great photo ops:


Having gotten into costume it was time to head in to WonderCon:
WonderCon:
So much WonderCon:
I'm hugely fond of this little convention. It used to be held in San Francisco every year and I never got to go back when that was the case. Instead, I had to wait until it was a big pain in the butt.
Still, it really feels like someone decided to gather up all of my favorite parts of San Diego Comic Con, leave out most of the stress and noise, and invite all kinds of characters to make it fun:
I managed to find some pretty great photo ops:
And it was all kinds of good times goofing around in costume, catching up with friends, and making new connections.
Sooner or later we'll put together another photoshoot weekend event and I'll get more catalogue photos of this outfit. But every time I start thinking that will be a good idea, we come up wit another project to work on instead.
Stay tuned...
Sooner or later we'll put together another photoshoot weekend event and I'll get more catalogue photos of this outfit. But every time I start thinking that will be a good idea, we come up wit another project to work on instead.
Stay tuned...