
Of all the ideas that came up, the one that struck a chord with me was the idea of building a suit of Halo armor, making a mold, casting a few copies, painting them different colors, and going out dressed as the characters from Red vs. Blue.
Fast forward three years, two ships, and one war and who knows how much money and I finally managed to get it done.
Here's a picture of the whole crowd together:

More about the build process and other craziness after the jump. It's pretty heavy on the pictures though, so if you're on a dailup connection you should go grab something to drink after you click below.
If you're only now just joining my blog and you really want all of the details of the entire build process, here's a link to all of my HALO posts in reverse chronological order: http://protagonist4hire.blogspot.com/search/label/HALO
The short version is that I used a program called "pepakura" to print out papercraft versions of the various parts to the armor that looked about like so:
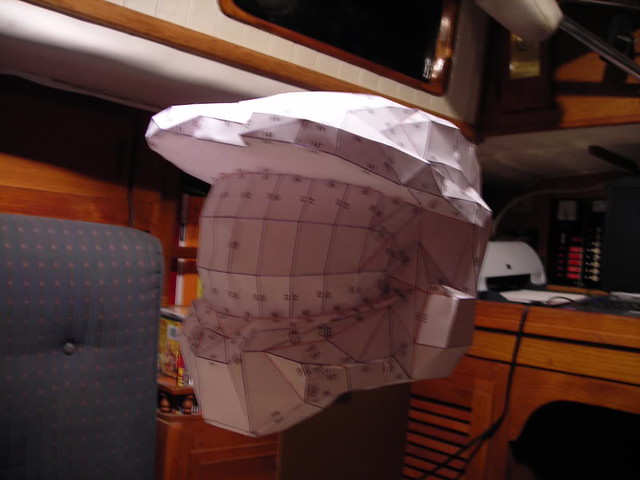
Then I spent weeks in painstaking smoothing and detailing until they looked like so:
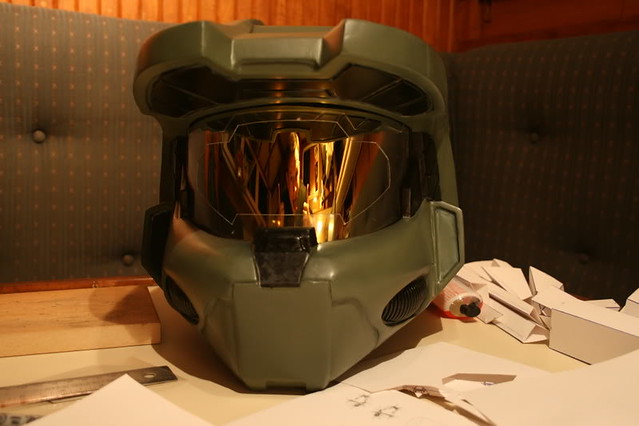
Once that was done, I made a silicone rubber mold and rotocast a copy out of urethane resin.
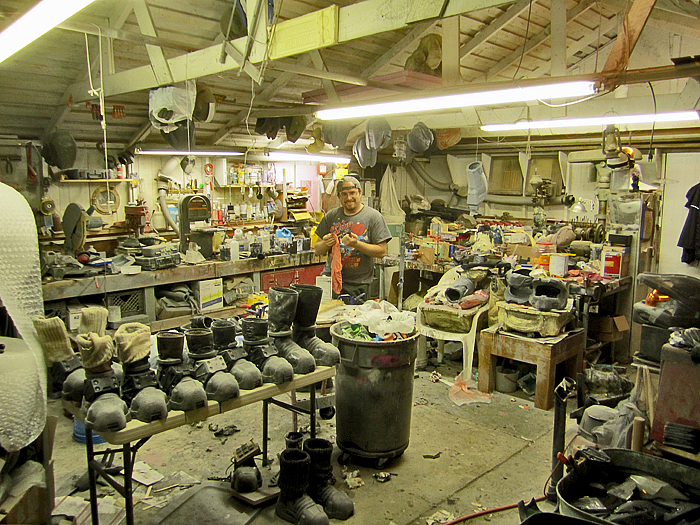
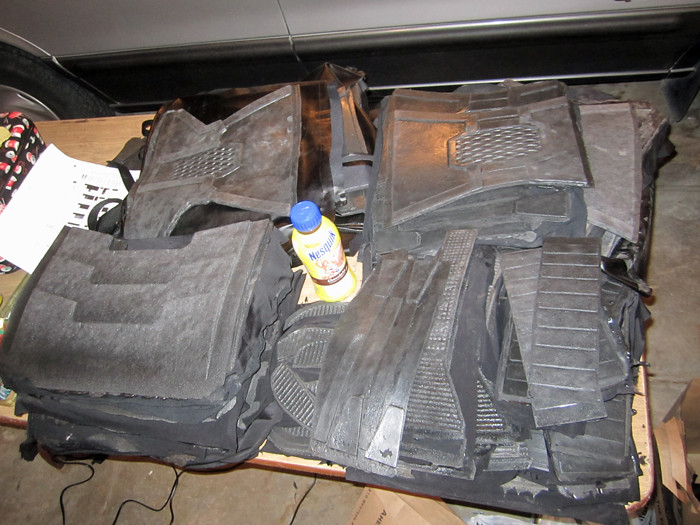
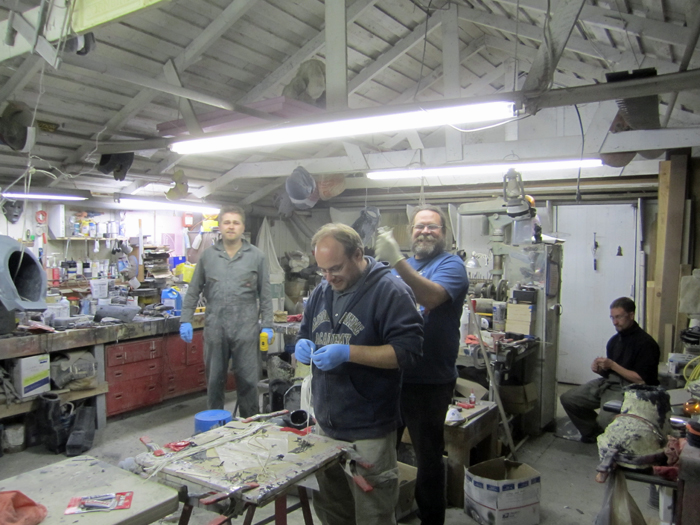
Repeating this process with all of the other pieces over the next three years, I finally managed to put together raw castings of most of the parts I needed to build the entire cast of Red vs. Blue. Then it was time to invite all of the folks who would be wearing these outfits over to the workshop so we could start cranking out armor:
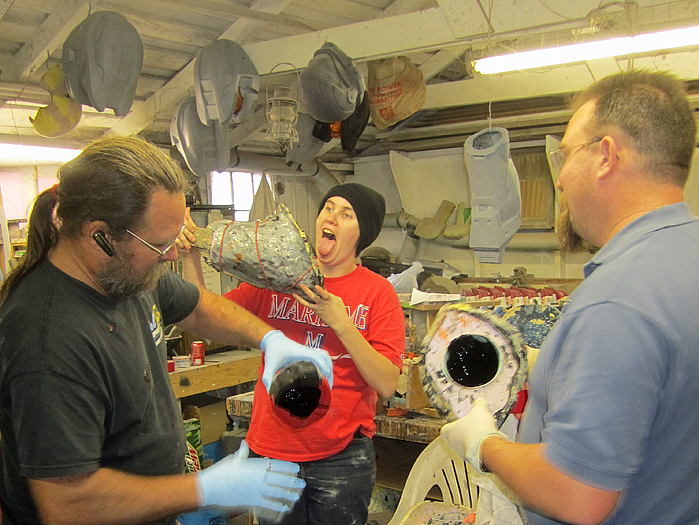
The rest of these pictures are pretty scattered, but I figured they're all worth posting.
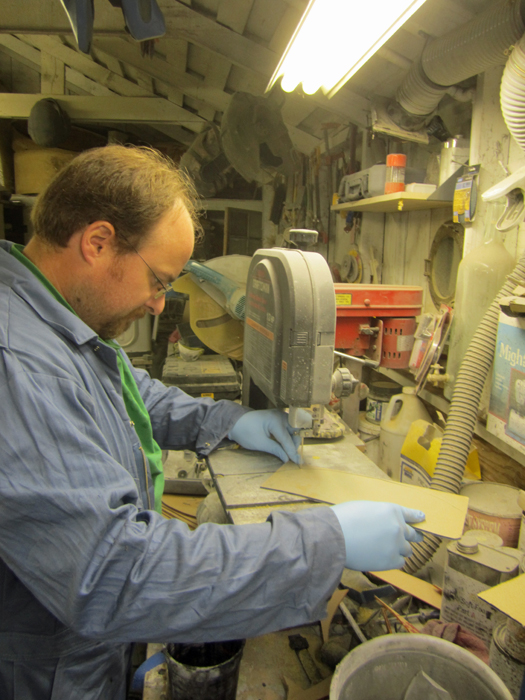
Here's a shot of Matt cutting out amber-tinted acrylic to be vacformed into faceshields:
I made two different sizes of torso armor. Here's Don sanding down one of the smaller backplates:
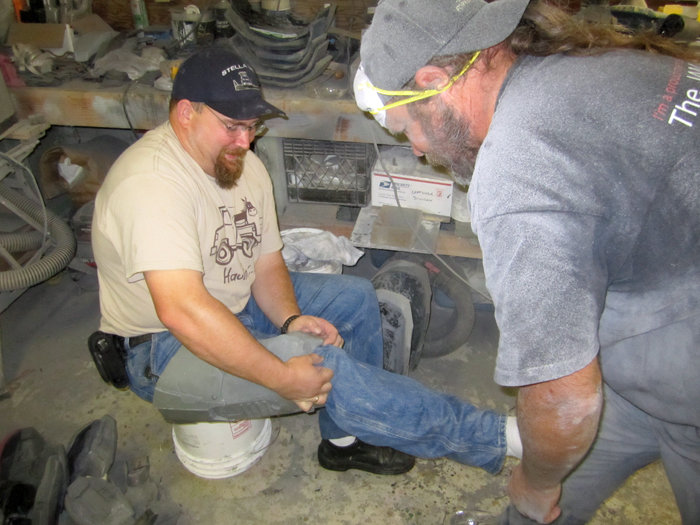
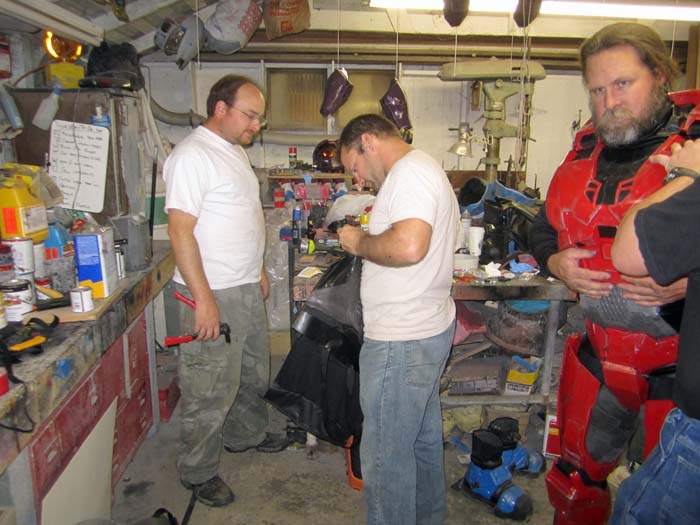
The rest of the armor parts were all one-size-fits-most. For some of the bigger guys, a few parts took a bit more work. Here's Don and Daniel fitting thigh armor:
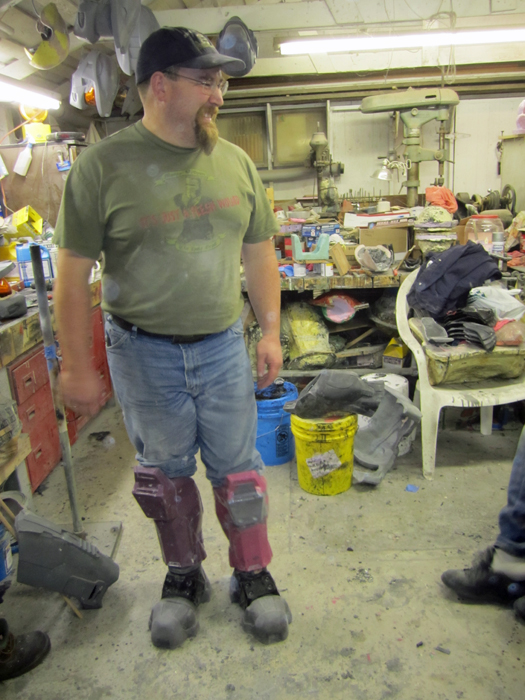
With all of the work going on, there was also frequent goofiness. When we'd made everyone's boots, everyone had to try them on. Here's Jen and Trevor showing off some sci-fi footwear:

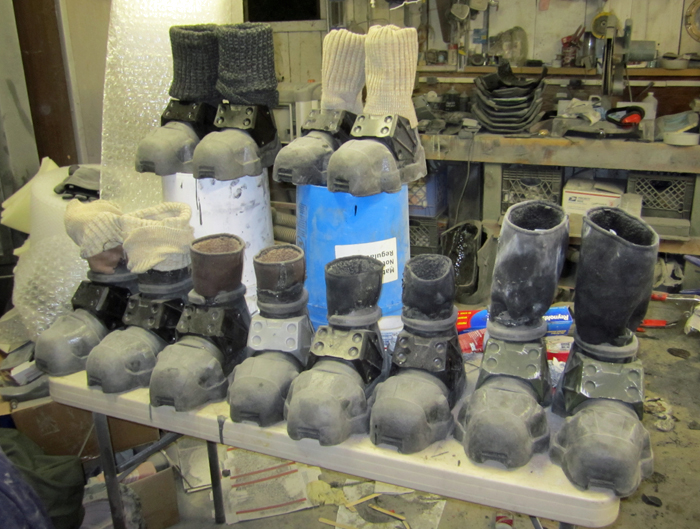
Here's the rest of the boots lined up. The were built around a pair of cheap Ugg boot knock-offs, which is why some of them have those goofy legwarmers attached:
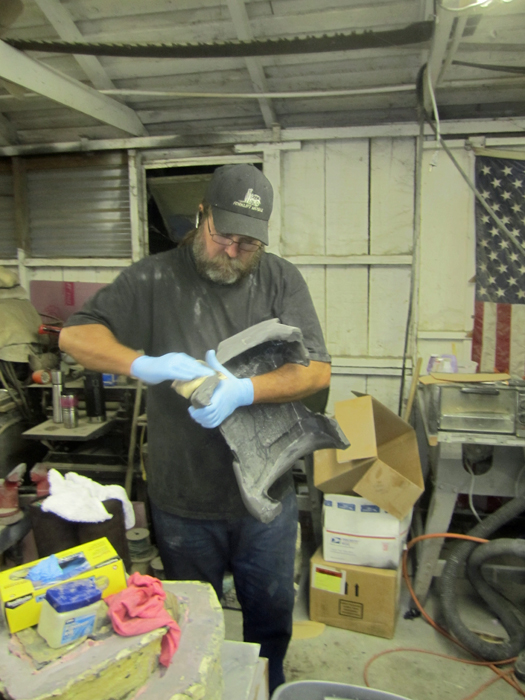
Here I am showing someone how to clean up the mold flashing around the boot soles:
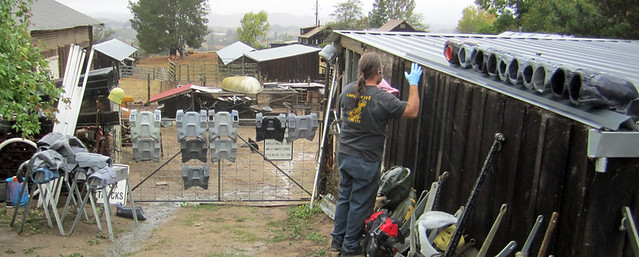
With most of the castings hanging on the fence outside the workshop, this is as uncluttered as the show would get:
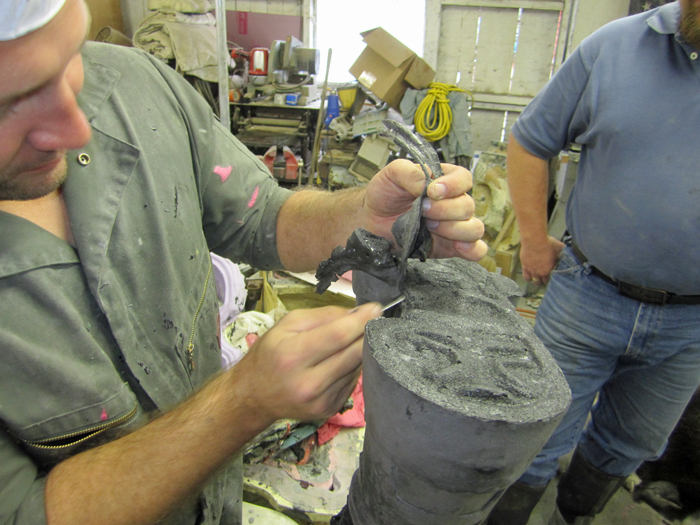
Early on in the mass casting process the mold for the shin armor failed catastrophically. Here's a shot of me and Matt smoothing out the mothermold for the new shin mold:

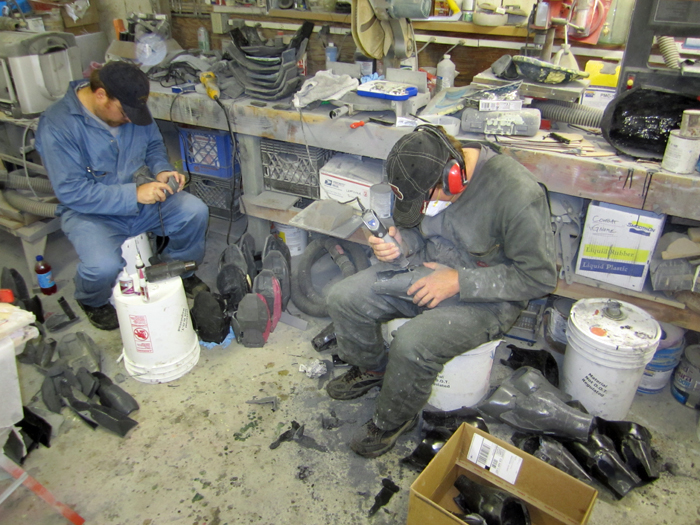
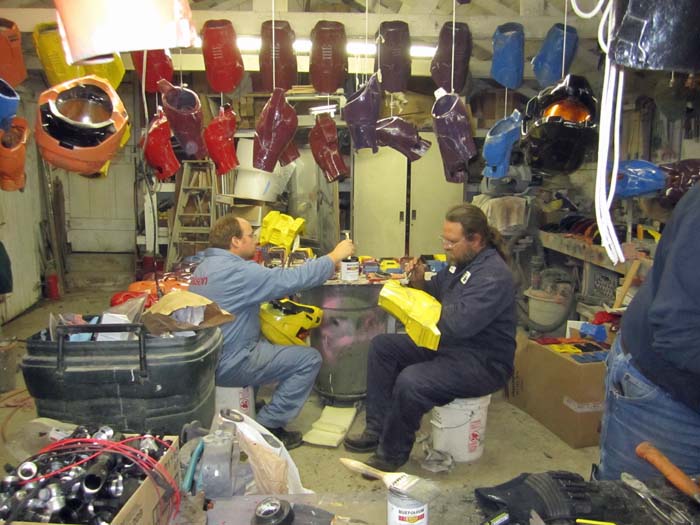
As we started to muster enough castings, Matt and Chris set about cleaning up and assembling all of the arm parts. Here's Chris in the middle of the pile:
While Chris was grinding out all of the wrist holes in the gauntlets, my dog Bain kept him company:

To frustrate Chris, everyone else was making more gauntlet castings while he was finishing them out:
Here's another shot of Matt and Chris assembling and cleaning arm bits. This process would continue until less than a week before Halloween:
Here's Don and I pouring the final pair of boots:
Daniel trying on his boots and shins:
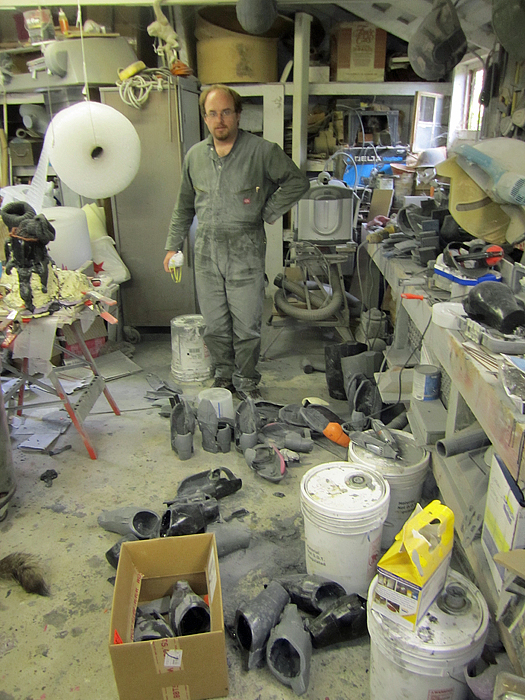
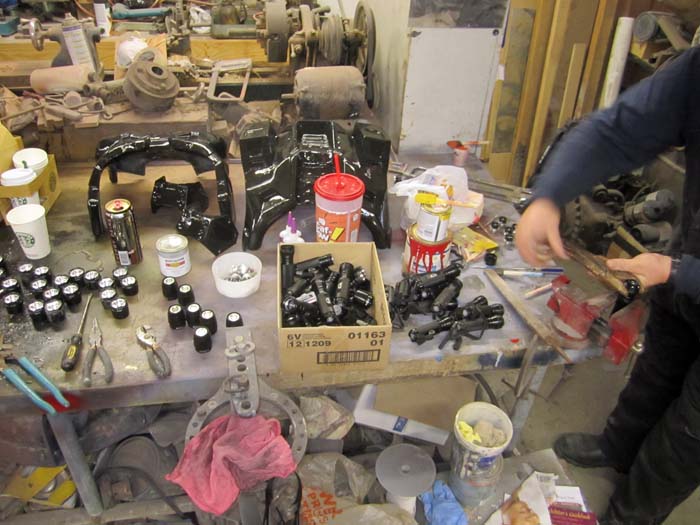
Meanwhile, I was steadily casting the foam undersuit parts non-stop for weeks:
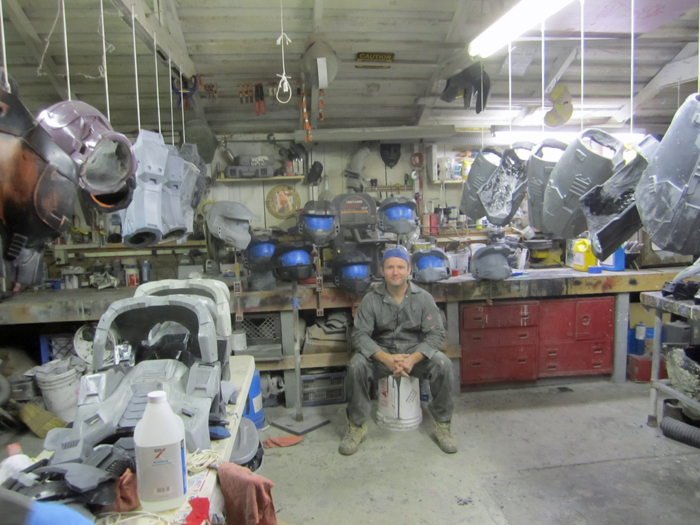
Whenever we had made all of the castings, and the sanding and grinding was finished, I finally took a break for a moment:

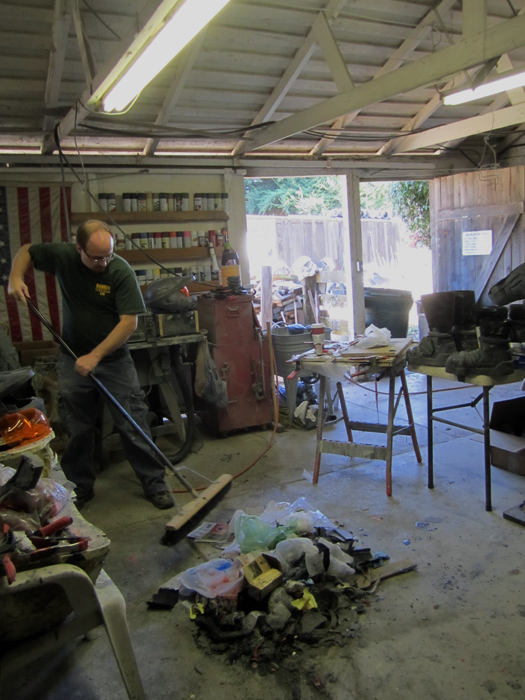
The first step towards getting everything painted was cleaning out all of the dust and trash in the shop. Chris showed up to help me out with that:
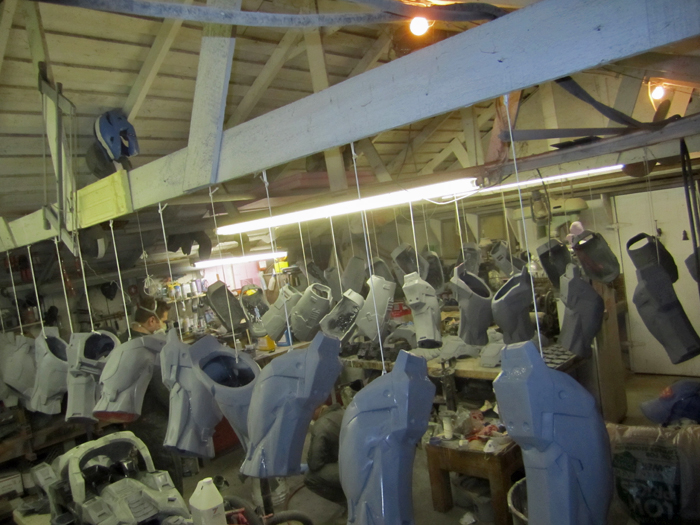
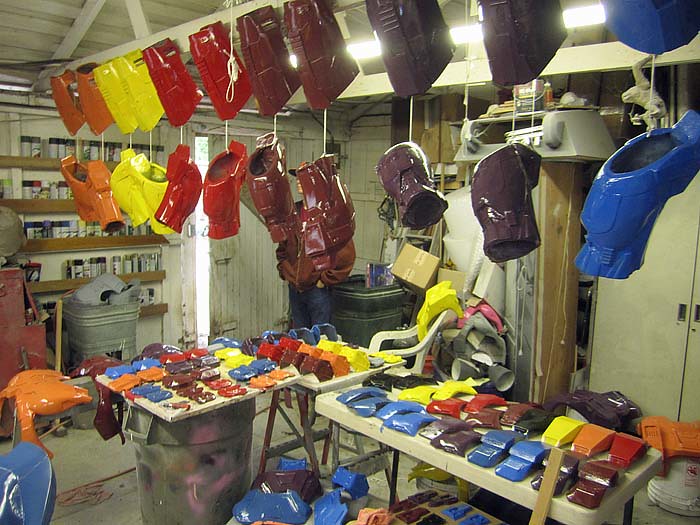
Then we put screws every foot or so along the length of the rafters, tied lengths of string with hooks to them, and suspended all of the castings:
It was hard to get a picture to demonstrate the scale of the project, but we tried:

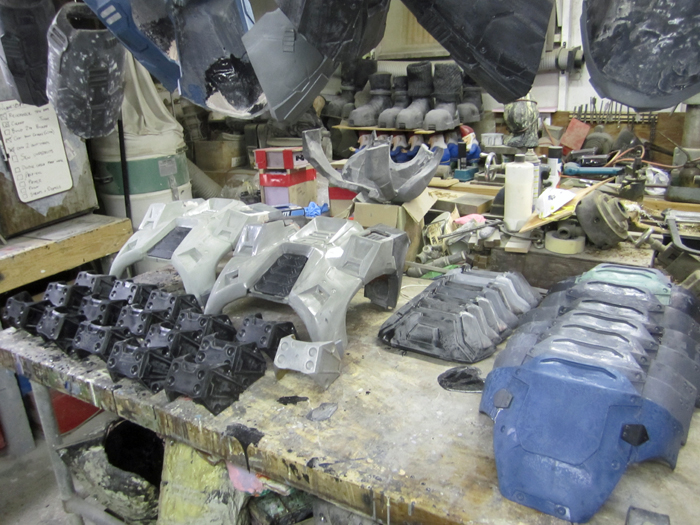
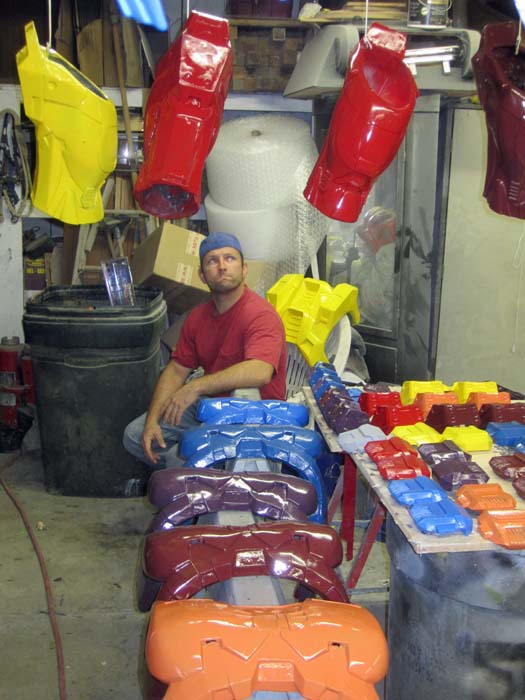
Some of the parts didn't really lend themselves to being hung from the overhead. Those were the ones that took up what precious little horizontal space I had:
I'd figured that the absolute latest time I could get away with spraying primer was the Wednesday before Halloween. I had hoped to have it all knocked out that day, but some of it didn't get finished until Thursday afternoon.
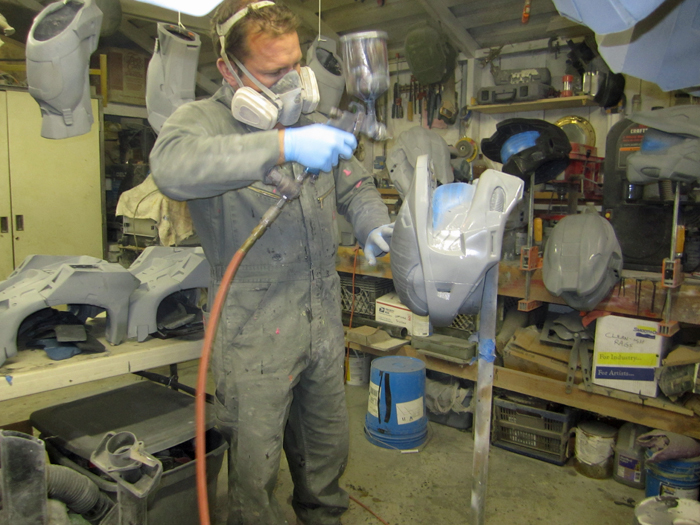
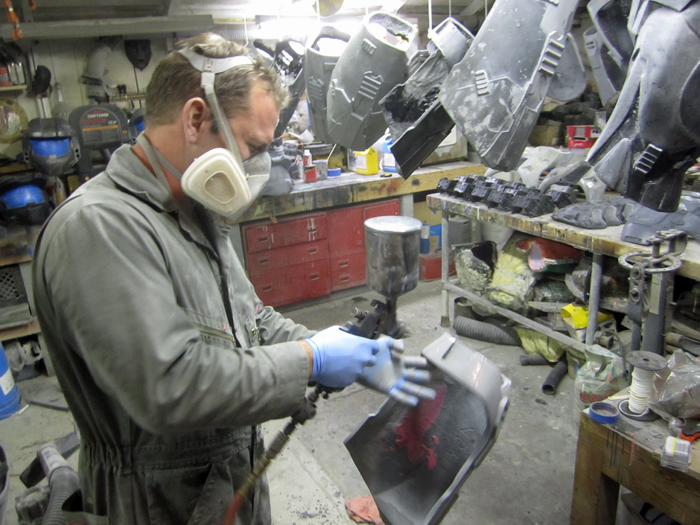
Here's a shot of me starting the priming using an HVLP gun and an automotive-grade epoxy primer:
The trickiest part was making sure I got all of the nooks and crannies in the torso armor:

By comparison, the thighs were simple:
After a long day's work, all of the parts were primed:
The main advantage to using an epoxy primer was that I could spray on the color coat after only two hours. The main problem was that we'd have to rearrange things so that all of the parts could dry somewhere without touching each other and still leaving the bench open so I could spray on the base colors. We managed and here's a shot of me spraying parts of the first suit:
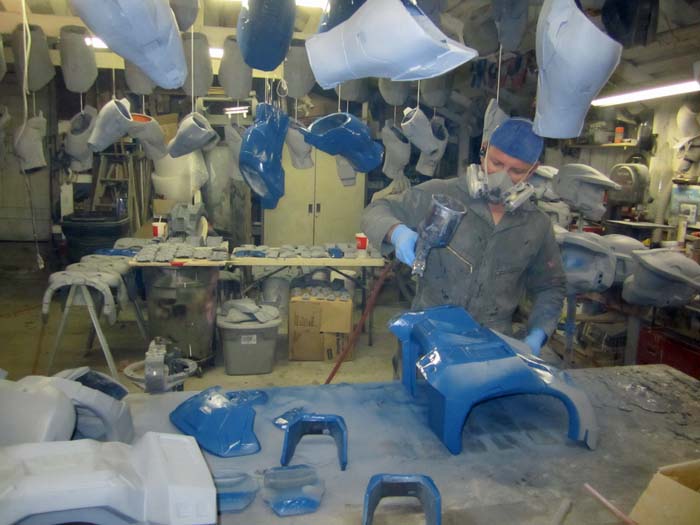
With all of the delays stacking up, I didn't start spraying the different colors until 9:30 on Thursday night. Rushing it as fast as I could, I still worked all night and didn't manage to finish the last one until almost 6:30 on Friday morning.
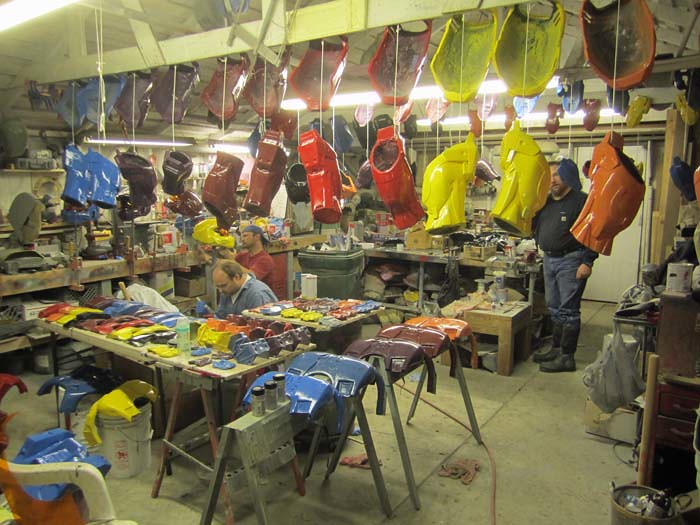
I crashed before I had a chance to take any pictures, but here's what the technicolor armor workshop looked like on Friday:
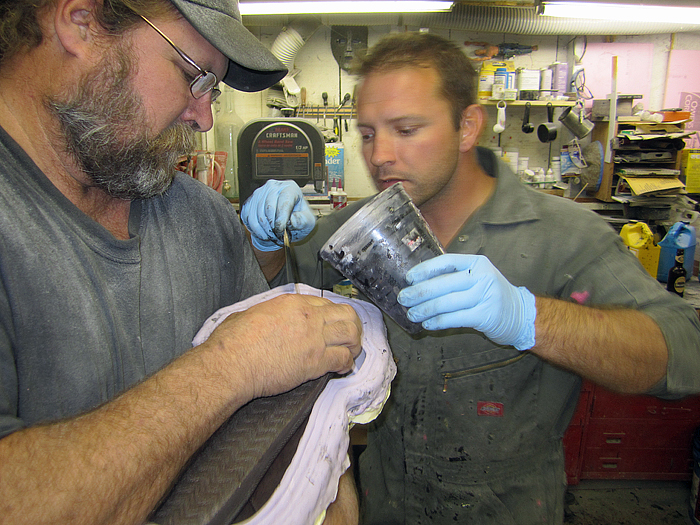
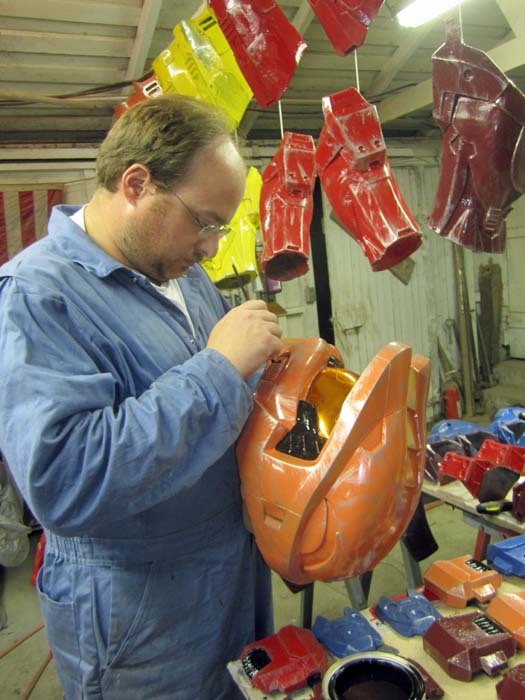
When they were done with work for the day, some of the guys showed up and started helping out with the weathering and detailing:
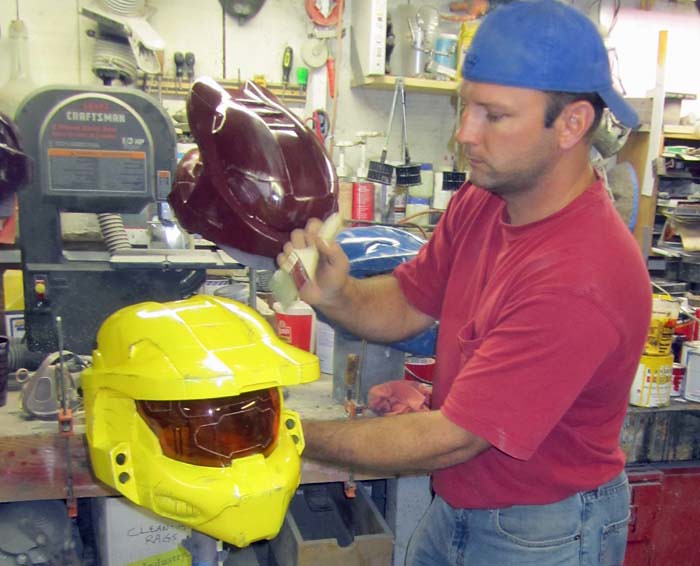
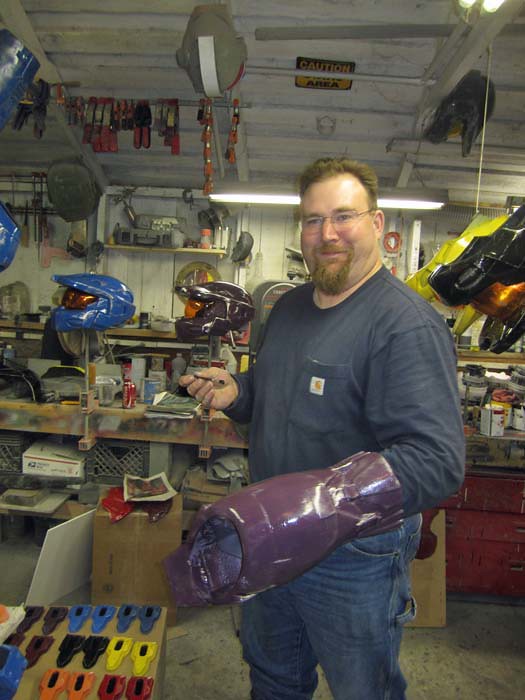
Here I am drybrushing some battle damage and wear marks on the helmets:
This is Daniel adding some damage to his shin armor:
Here's the Grif chest plate with some wear and tear added:

Once the scuff marks were done, we set about adding the black details:
The final step for the helmets was the installation of lights, cooling fans, and some padding. Here's Jen strutting around in her shiny new helmet:
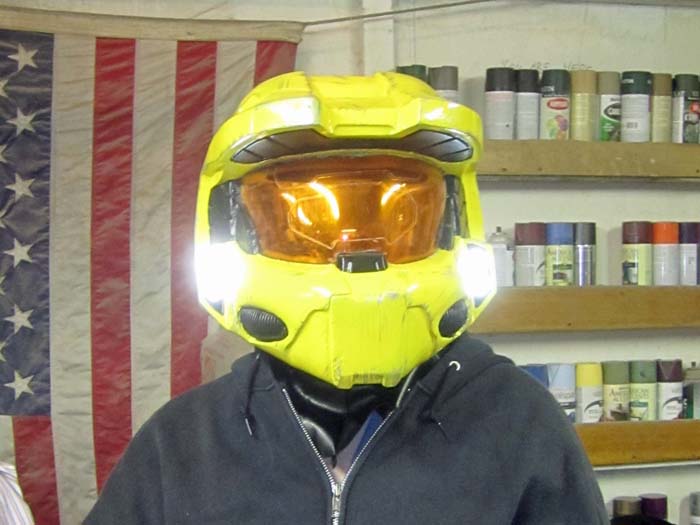
The lights were luxeon LEDs and reflectors harvested from a metric butt-ton of flashlights:
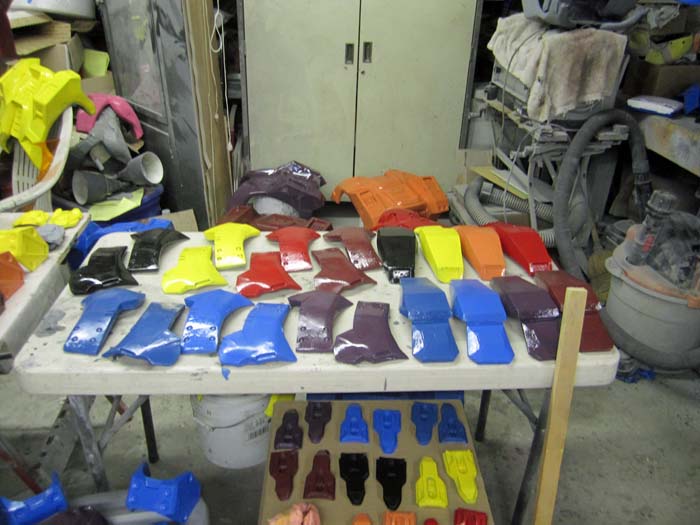
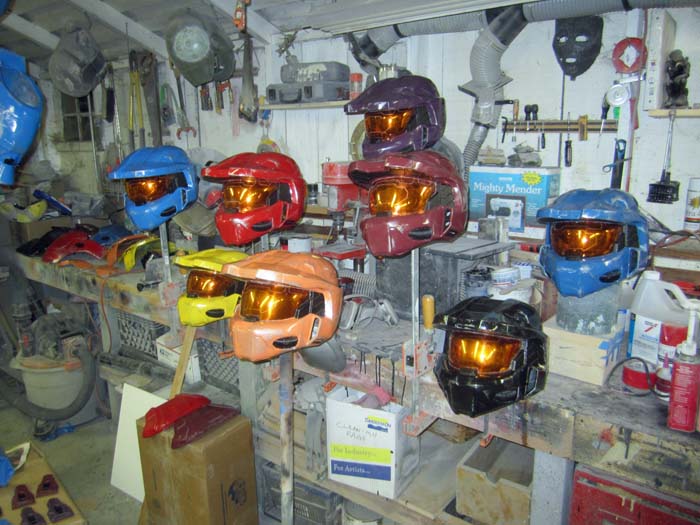
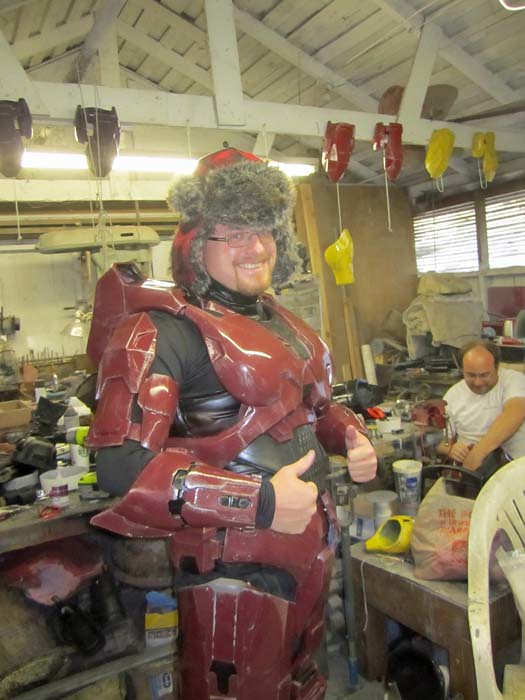
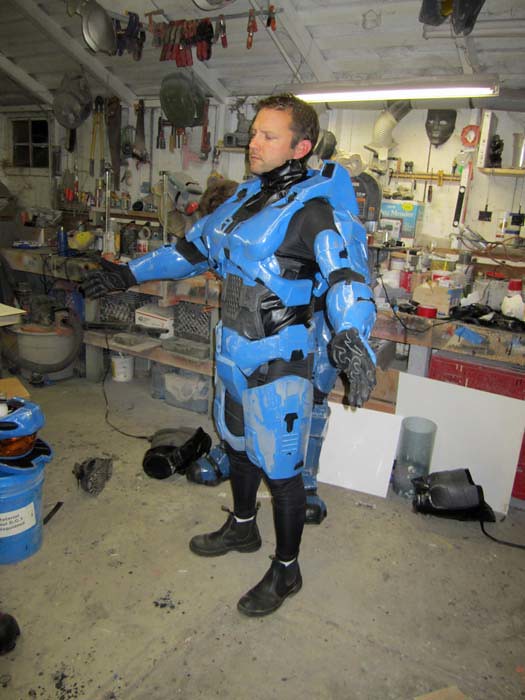
And here's the whole cast painted up:
The boots too:

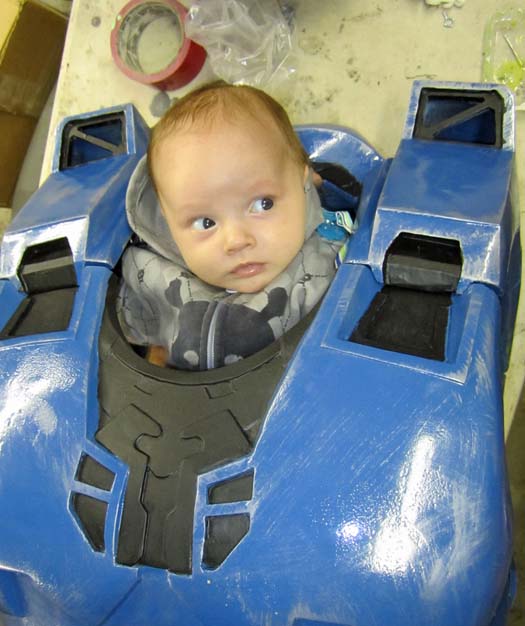
Once the paint was dried, there was a moment for levity involving an infant:
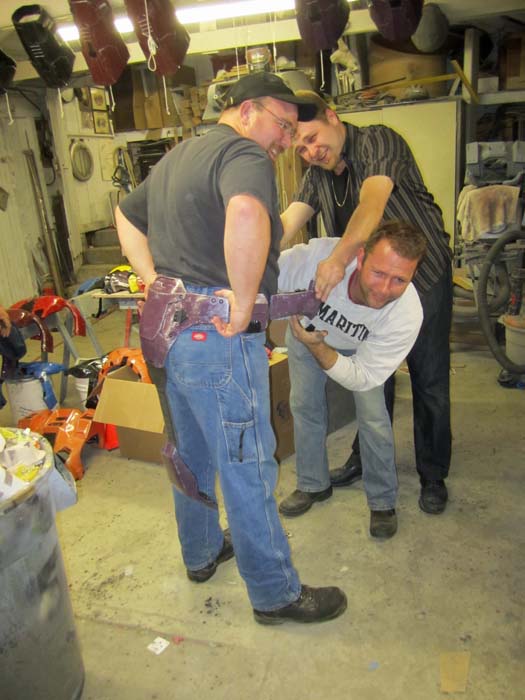
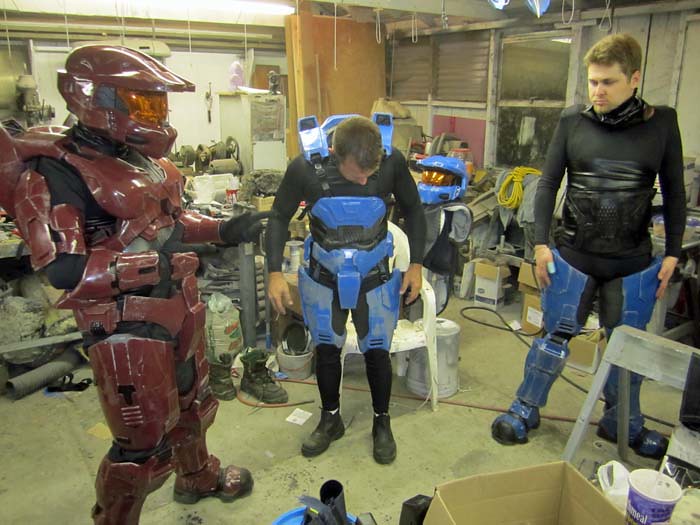
Then it was time to start strapping all of the pieces together:
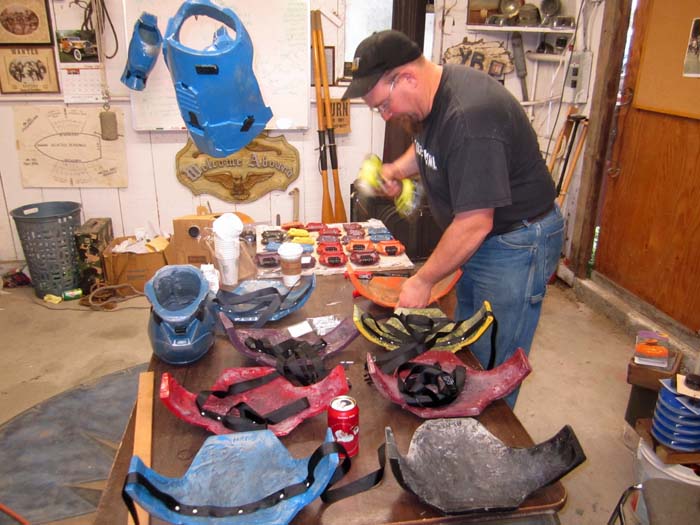
After spending a small fortune worth of nylon web straps, buckles, and pop rivets, it was time to start getting people into their suits:
Some of them still needed a bit of adjustment even into the final hours of the afternoon on Halloween:
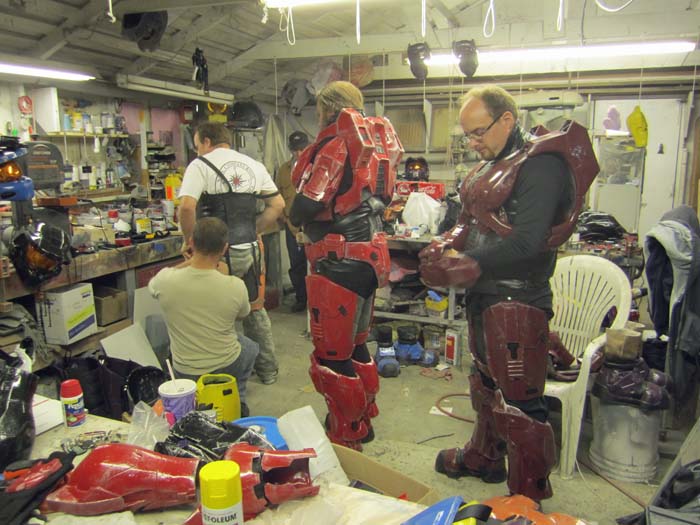
Still, at some point we had to just call everything good enough and get everyone put together:
The first guy we managed to dress was Noah (Caboose). The process was apparently exhausting:
The next one was Chris (Simmons 2.0) who managed to look good in the whole rig despite his hat:
While we were working to dress everyone, Noah decided to unhook most of his gear:
Since his hands were ungloved, I had Noah help strap on a few of my hard to reach parts:
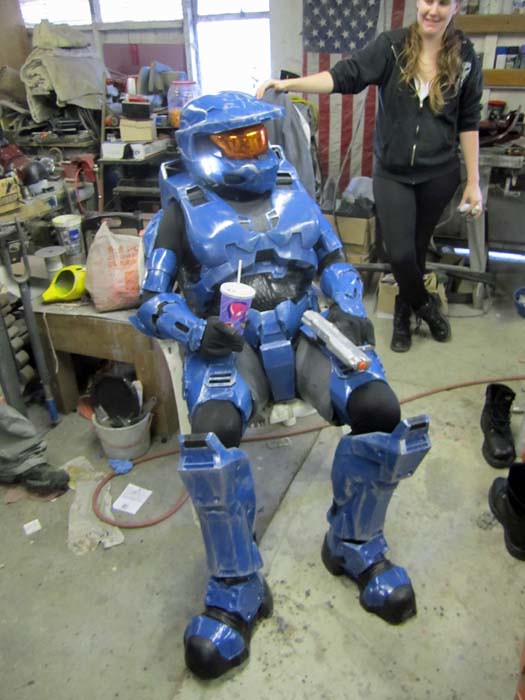
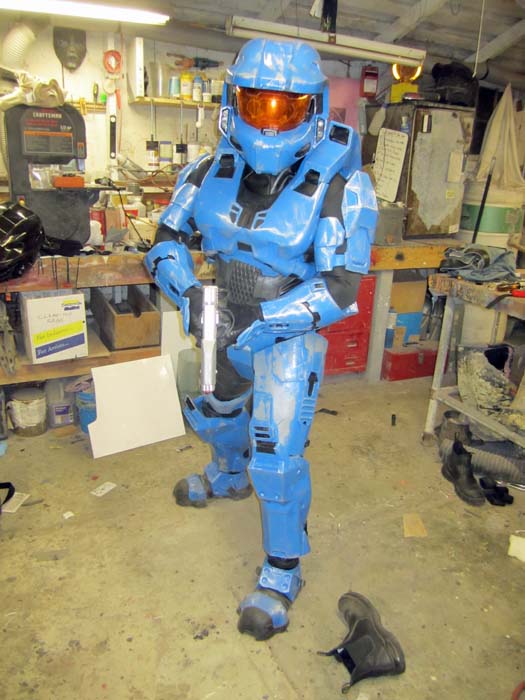
The dressing process was a bit difficult, but the final result was more than worth it:
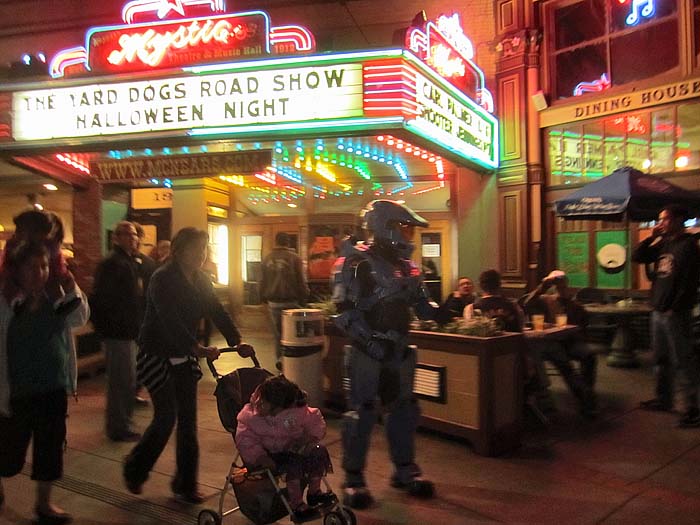
Here's a shot of me out in town:
Here's a shot of some of us screwing around in front of the local museum (which has a Vietnam War exhibit on display inside):
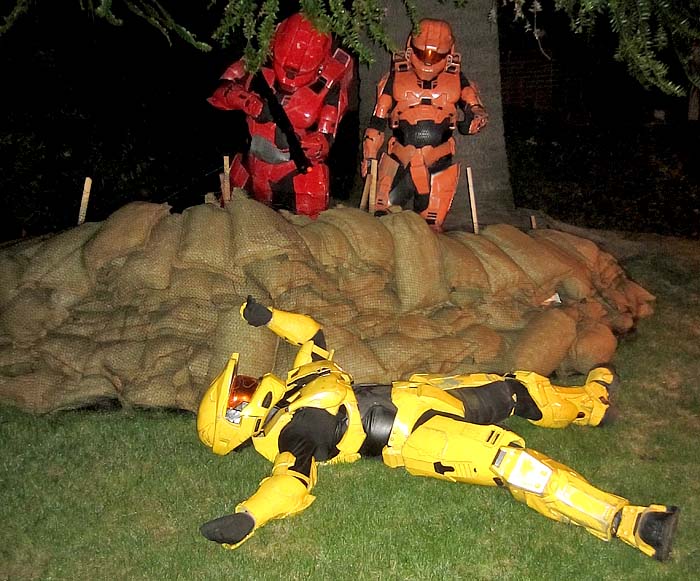
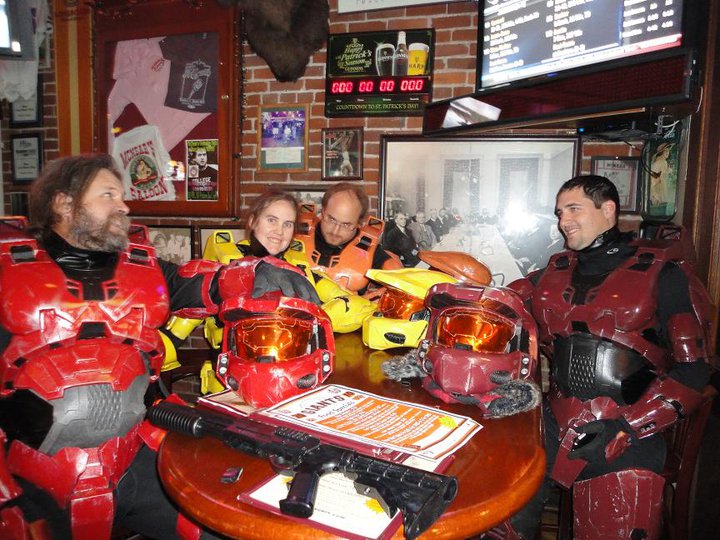
Here's a bunch of us stopping for a drink:
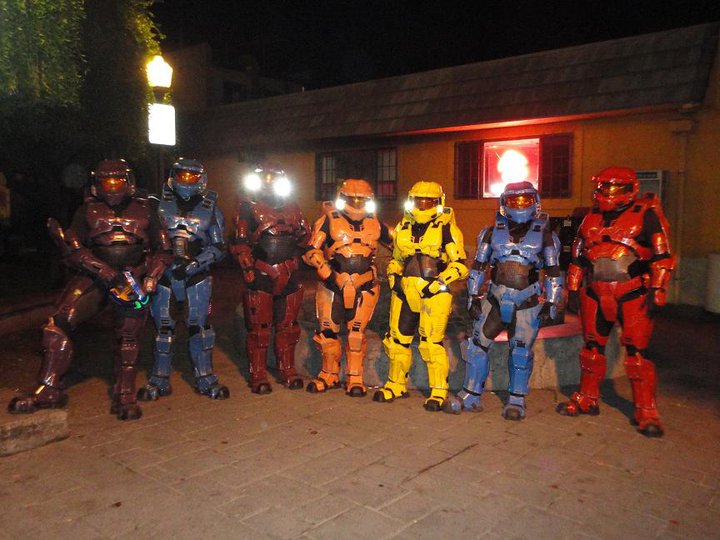
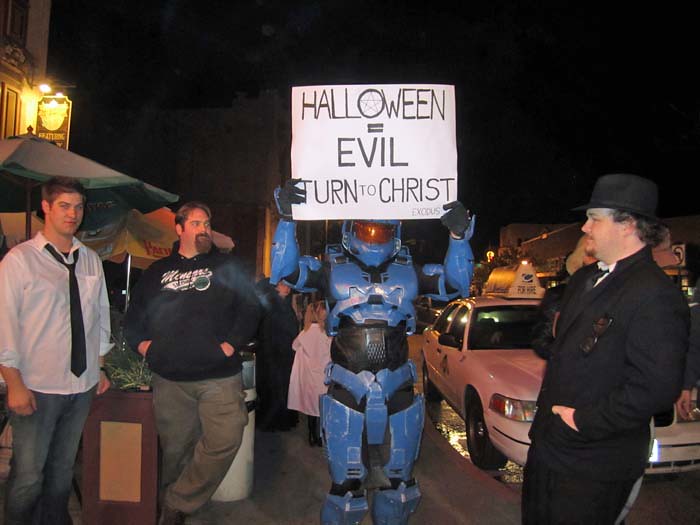
We managed to get a few pics of the whole cast all lined up together, but the lighting was terrible:
Still my favorite shot of the evening was when some guy was proseletyzing on the street corner and Noah offered to hold his sign for him so he could preach straight from his bible:
Sooner or later I'll get everybody together for a photoshoot with a real photographer.
Until then, stay tuned...
Holy. Cow.
ReplyDelete3 years? Thats amazing!
Fantastic Job on it all!
Yeah, it's been an embarrassingly long build. In my defense, during that three years I also spent seven months out at sea for my day job, nine months deployed with the reserves and two or three months bouncing around the country doing other things. So it's really been more like eighteen months of off and on work.
ReplyDeleteMoreover, I had all of the prototypes for the smaller size armor roughed out by September of 2008. So if I hadn't deployed to Afghanistan, I'm confident it would've been wearable in time for Halloween that year. I also had all of the larger prototypes done in time for Halloween last year. I just ended up being out at sea starting on the 30th of October.
badass men build badass spartans
ReplyDeleteHey Shawn,
ReplyDeleteGreat stuff man. Really impressive. Would like to use some of your techniques to build a stormtrooper outfit.
Just out of curiosity, when you get so much feedback from people about your projects, does this lead to any work or any leads on stuff?
I mean, it's a fantastic portfolio.
Thanks
Miguel
You have great talent. I applaud your efforts whole heartedly. That is some awesome work.
ReplyDeleteCould you go into more detail about how you went from the paper to the finished helmet? Did you use foam, paper mache etc. Thanks!
ReplyDeleteThere's a few more details in my first post about this project:
ReplyDeletehttp://protagonist4hire.blogspot.com/2009/06/project.html
Essentially, I reinforce the inside of the paper model with polyester or urethane resin and fiberglass. Then I use bondo to smooth the shape of the outside as needed before fine tuning the rest of the details.
have you ever thought about making and selling them?
DeleteAmazing! One of the best things I've ever seen! :)
ReplyDeleteSvend.
I want one too :(
ReplyDeletegreat job!
ReplyDeleteWhat, no love for Tucker? :(
ReplyDeleteAmazing job, everyone. That's dedication I wish more people had, including myself!
ReplyDeleteThose look awesome, was there a person missing that was supposed to wear the black suit?
ReplyDeleteYou rock
ReplyDeleteAwesome.
ReplyDeleteWhere are you located? I do photography, would LOVE to photograph these suits and all of you guys in this. Let me know.
ReplyDeletehttp://www.facebook.com/chrisstring
http://www.facebook.com/christopherstring
Job well done, I want one!!
have you talked to the RvB guys? If not, I'll send them a link
ReplyDeleteAbsolutely fantastic! It's great seeing how it's made. I still wanna make a Borg costume for myself some day. I might get some ideas here of how to produce the parts.
ReplyDeleteAnyway, well done mate!
V.
You should send this stuff to a Hollywood outfit, this is real professional stuff.
ReplyDeletenice work guys. unreal!
ReplyDeleteThat is absolutely amazing.
ReplyDeletehaha how much to get one made?
ReplyDeletewish my friends were as cool as you guys!! :(
ReplyDeleteYou guys made a black suit but no one is wearing it in the pics. What happened to it?
ReplyDeleteGO PETALUMA! I grew up in P-town and currently live in SR and saw this on Reddit.
ReplyDeleteAMAZING! That is incredibly impressive. I agree with someone above, you def. should hook up with some kind of Hollywood costume designer. I figured you must design stuff on sets and things, but perhaps not? What kind of background do you have? And such dedicated friends! Can't wait to see professional photos!
ReplyDeleteIncredible job! I have been a HUGE halo fan since day one of Halo 1... its been my DREAM to skydive in one of these suits since the day I started skydiving! Want to see one of your suits skydive??? Contact me on Facebook... www.facebook.com/supremetaco
ReplyDeleteWow...its good to know there are still real, modern, artisans out there somewhere. Great job!
ReplyDeleteNow all you need are Brutes and Elites. Great Job. you should get together with bungie/ activision and work something out.
ReplyDeleteYeah!! Representing Sonoma County!! You guys rock!! I wish I would have made it out to he Mystic that night.
ReplyDeleteHahaha I found this in a random forum and I'm from here. Couldn't believe it. Way to go P-town.
ReplyDeleteHey,
ReplyDeleteAs an artist, halo fan, and sonoma county resident I find this to be awesome! I am a student but also a semi-professional photographer and would be willing to lend my photography if you are interested. Great project.
Camden
This is amazing. My boyfriend has a bit of a Halo obsession. He would probably whizz his pants if he saw you guys.
ReplyDeleteYour amazing. I NEED one of these costumes :L Great job, can't wait to see the 'proper' photos of the lot of you :D
ReplyDeleteWhoever said Bungie/Activision made me laugh a little :p Bungie/Microsoft is more like it! You should still contact me on facebook (billy purta) and we can figure out how I can skydive in one of these :D
ReplyDeleteThis comment has been removed by the author.
ReplyDeletewow! what a great job! we gave you and your team our NERDZ GODZ Award, hahahaha. we are a little nerd blog from germany http://nerdzonfire.de/
ReplyDeleteawesome work! greets from germany
ALeks_M
ups sorry, this is the direct link http://nerdzonfire.de/index.php/2010/11/10/3-jahre-produktionszeit-umwerfende-halo-kostume/
ReplyDeleteDRUNK TANK!!!
ReplyDeleteDrunk Tanked.
ReplyDeleteDrunk Tank!
ReplyDeleteawesome!! Great work!! I admire your hardwork & dedication. (Geo from Malaysia)
ReplyDeleteYou guys are fucking amazing. Seriously.
ReplyDeleteAnd that baby is adorable.
I saw you wandering around Petaluma and it was a sight to see. I'd really love to get together I'm processing for Army currently but I'd love to start work on my suit before I head off to basic.
ReplyDeleteSpartan.5150@gmail.com
Excellent job ! Looks amazing!
ReplyDeleteI very much admire your hard work and I am very impressed and envious
ReplyDeleteDUDE, you guys are frickin AMAZING, those are definitely the most detailed Halo Costumes ever made. I reckon they need to get you guys on board for the Halo movie franchise (if they ever do one).
ReplyDeleteMy only question is....where was the green Halo armour (Master Chief)? any odst armour in the works?
I want to know, how much would it take for you to build me a suit of armor like that?
ReplyDeleteI made the green suit and wore it to the midnight launch of HALO: Reach. But since Master Chief doesn't appear in Red vs. Blue, it didn't fit to have him out with the rest of the characters.
ReplyDeleteI've started work on a Reach suit by trading parts with another maker. I've also got a pair of ODSTs in progress, but the going's been slow.
Check this guy out.
ReplyDeletehttp://www.youtube.com/watch?v=Wzb7hmOs1H8
So what happens to all the suits now? Do they just sit in the shed gathering dust, or do you wear them when you go shopping?
ReplyDelete20% Discount for intimidating aura!
Oh, and great work!
Losers
ReplyDeleteMan looking at this post I kinda wished I would have seen it early in the year. I stumbled upon this blog through a news feed from my email. From reading the blog I could tell that you worked on the suits for a long time and to carry it out so long must have been a pain, but well worth it. I have always had an idea about making Halo Armor and with the new release of the Halo Reach I really want to make one. After seeing you do it I know I could do it. The only thing is that How would one go about starting a project like this? Any tips on how I should begin a project like this? I saw you mentioned a few things like molding and fiberglass stuff. I didn't know you can buy that stuff, or rather I never really looked into it. Thanks.
ReplyDeleteCrusader Ghuto
AMAZING! That's some dedication there and it paid off!
ReplyDeleteTime to post up pricing. :)
ReplyDeleteHey man, first off, excelent job on those suits. Do you think you'd be willing on doing another more specific build incorporating mechanical, robotic, and pneumatic systems? It would save me a lot of time and money to have people experienced in fabrication to convert the latest inovations into a working supersoldier prototype by 2014. My e-mailis :w_neff@otmail.com let me know if you're interested and I'll get started on fund raising.
ReplyDeleteRespect! They look great and I'm sure you had a blast building them.
ReplyDeleteThis is the best thing I've ever seen, and I've seen children being born.
ReplyDeleteWant.
i wish i had enough skills and money to do this kind of stuff.... i wouldnt go out in public in regular clothes anymore...
ReplyDeleteDear God, I wish I had one of those. I'd never take it off!
ReplyDeleteDear Lord, I want one of those! I think I'd sell a kidney for one.
ReplyDeleteVery good show!
There's definitely some business to do with those, watch out for the Army guys to show up some day too ;)
ReplyDeleteGreat job.
Can't wait for some quality pics.
This whole thing is seriously very very epic. Awesome job. Major kudos :D
ReplyDeleteYOU SHOULD MAKE THEM FOR A PROFESION THEY ARE GREAT
ReplyDeleteThis is unbelievably amazing... I saw a link for your exhibit at maker's fair from a cnet.com article and I just HAD to check this out!! I'll say it- I'm a Halo and RvB fangirl!
ReplyDeleteI have to ask, though; if you were to sell a complete suit (w/all the straps and stuff), how much would you charge?
Congrats on the build! These suits are awesome looking and a great group theme.
ReplyDeleteI also wanted to just add a thank you, from one vet to another, for your service to your country. It is truly appreciated.
cool very nice !!!!!can make me one armor (sory for my english il franch and i am 12 years old thank you price 100 euro please
ReplyDeletesize 150 cm please thank you
ReplyDeleteand the weapons no colored armor ans weapons please (130 euro the pack)
ReplyDeleteno ,no for the armor no make i havent got money
ReplyDeleteThis is EPIC. LOVE it. ... I need a HOT pink one... Lemme know when I can stop by for a fitting... ;)
ReplyDeleteHi! Just a couple questions if you don't mind me asking.
ReplyDeleteFirst: I was wondering what you used for the visores and how did you add the detail.
Second: I've made a few helmets myself and one of them is the Recon. I was wondering if you guy would be interested in buying a copy :) . I know you guys are pro at making helmets but I could save you time :/
Noone wanted to go as Tex? that's just sad...
ReplyDeletehow much for one ?
ReplyDeleteI honestly did not expect so many people would go one to make spartan armor after I built mine :)
ReplyDeleteCan you make me one of those costumes? And how much would it cost to be done if so?
ReplyDeleteSuch an awesome and beautiful labor of love man... Definitely made it worthwhile for the molds in doing multiple suits for friends. Wish I had the equipment to do something like that. Kudos to you and your crew. AND thank you for your service.
ReplyDelete