Welp, it's that time again. We've got a few things in the pipeline and none of them are quite at a point where I can call them done. So, since I'm determined to keep posting one way or another, it's time to share another rundown of various UnFinished Objects floating around the workshop.
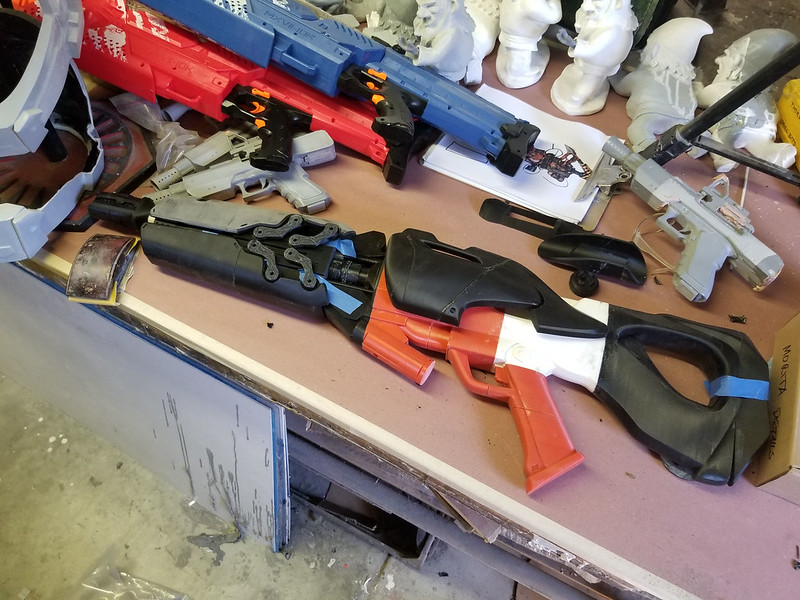
First off, my assistant Rachel mentioned that she wanted to put together a Widowmaker costume from the Overwatch video game. With that goal in mind, we've printed out all of the pieces of her convertible rifle, called the "Widow's Kiss." Here it is on the cluttered bench folded into it's compact assault rifle mode:
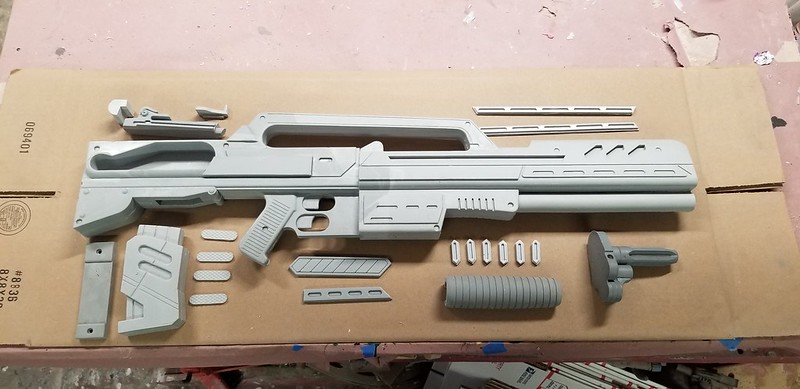
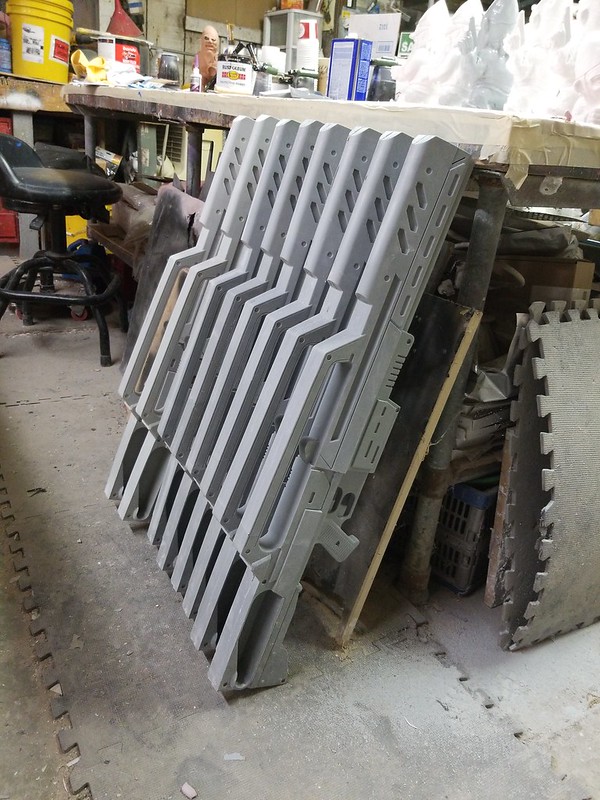
As long as we're looking at rifles, I've also made molds of all of the parts for the Morita Assault Rifle from the sci-fi classic Starship Troopers. Here's the full set of parts:
Of course, having made molds, there's no way I could make just one. Here's a handful in progress:
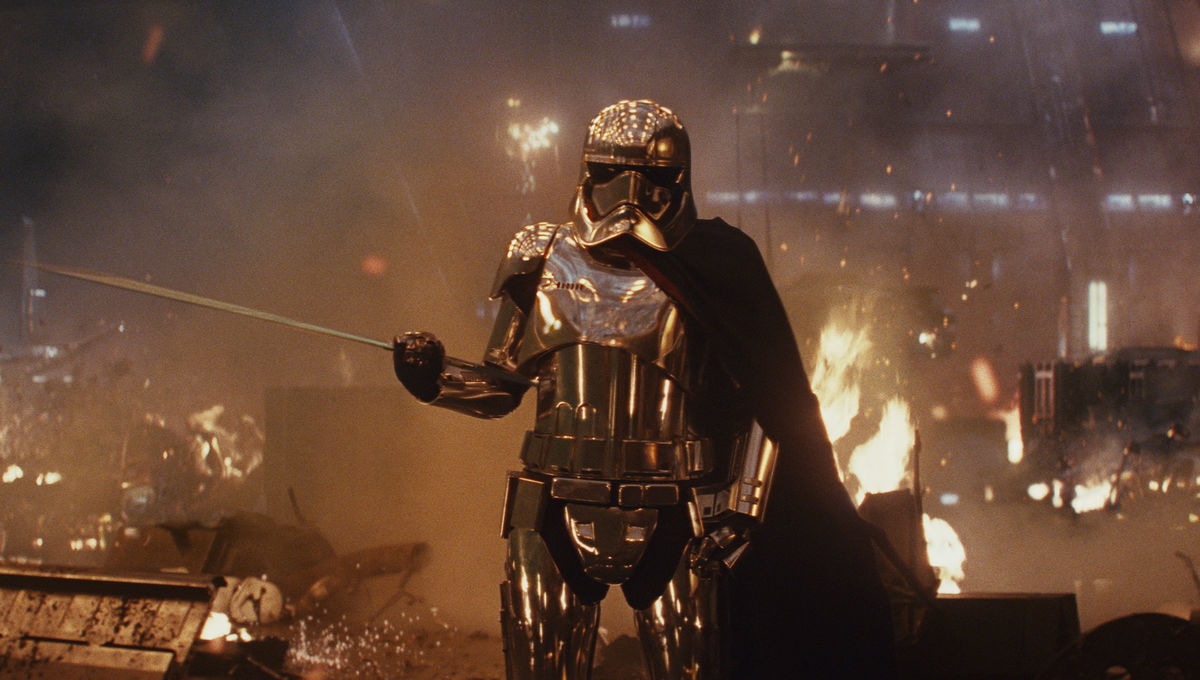
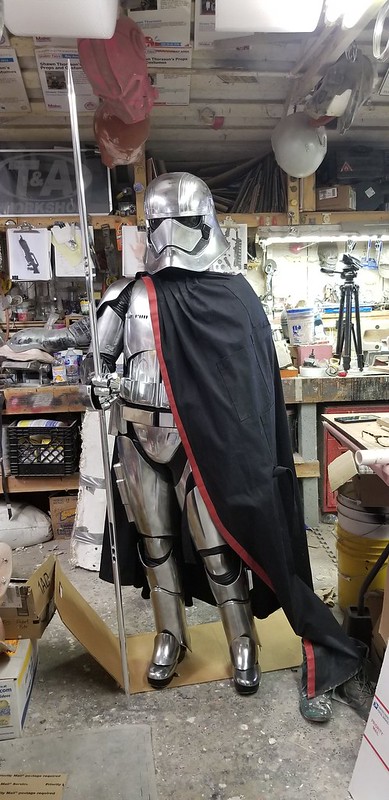
Speaking of changing the subject, I've got a good jump on the first costume I'll be making for next year's Star Wars Celebration in Anaheim:
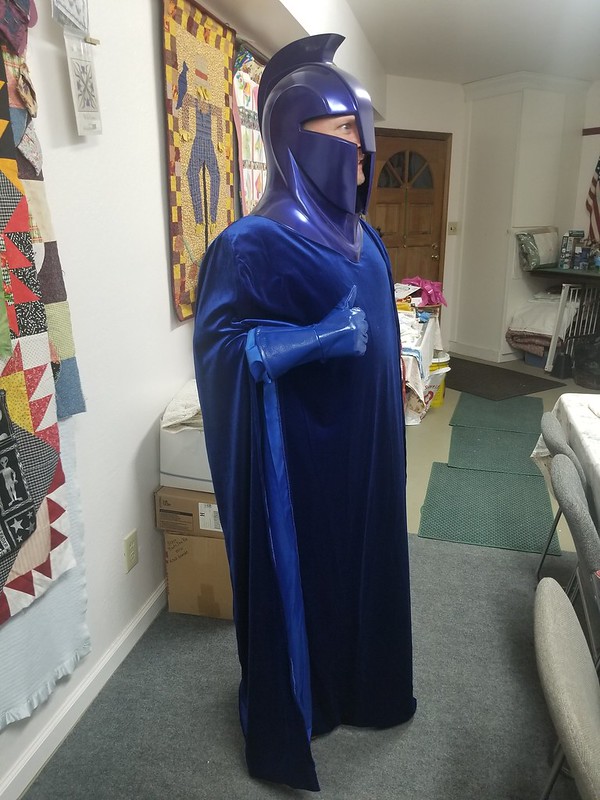
I commissioned a sewing-savvy friend to make the robes and the helmet started as a raw cast kit. I'm absolutely tickled with how well the paint job came out on this guy. Here it is with the visor installed:
Another nearly-done thing is my rendition of Samus Aran's helmet from Metroid. Here's the Lady Shawnon trying it on for size:
 The only challenge is convincing myself to not make the rest of the armor to go with it.
I've also got this other video game helmet in the works:

That's the Doom Guy (or "Doom Marine" depending who you ask. With the upcoming release of Doom: Eternal due next year, I'm thinking it'll be a good time to get this guy prepped for molding.
Soon.
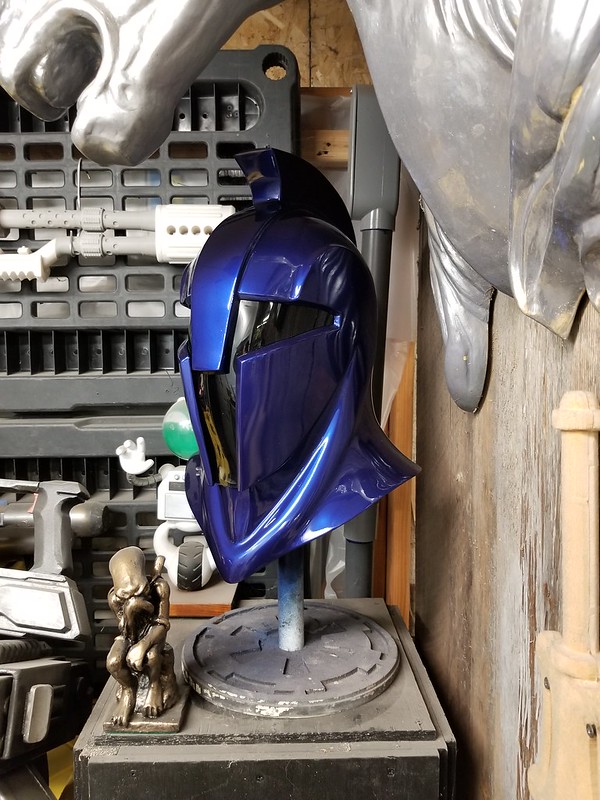
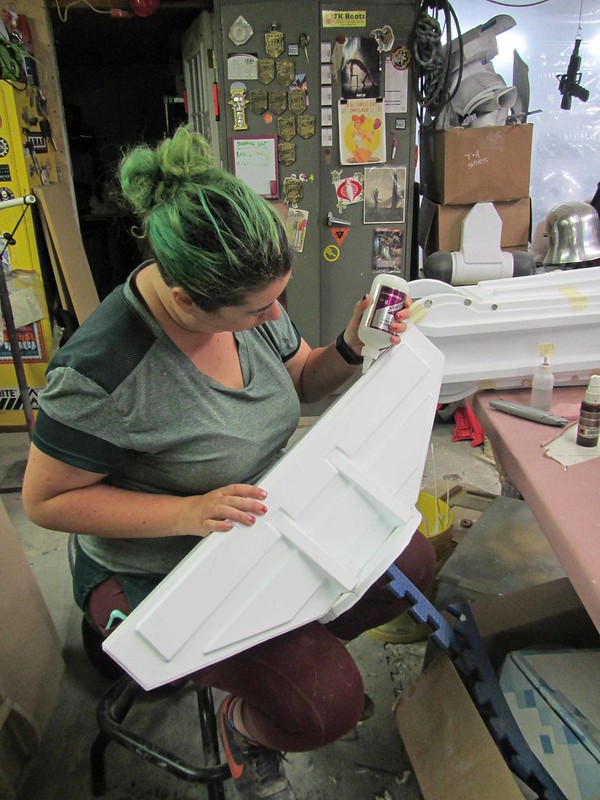
Meanwhile, I've been watching the Mandalorian on Disney Plus and fell absolutely in love with this lady's entire ensemble:

So, starting with a 3D model by Sean Fields at Project 842, I've been prototyping the helmet:

She'll need a few adjustments and some cleanup before I can mold her, but I'm excited about this one so it should go pretty quick. Then I'll just need to make the chestplate and the belt widgets and coerce someone into sewing all of the soft parts.
Then maybe I can move these things off of the backburner:
Stay tuned...
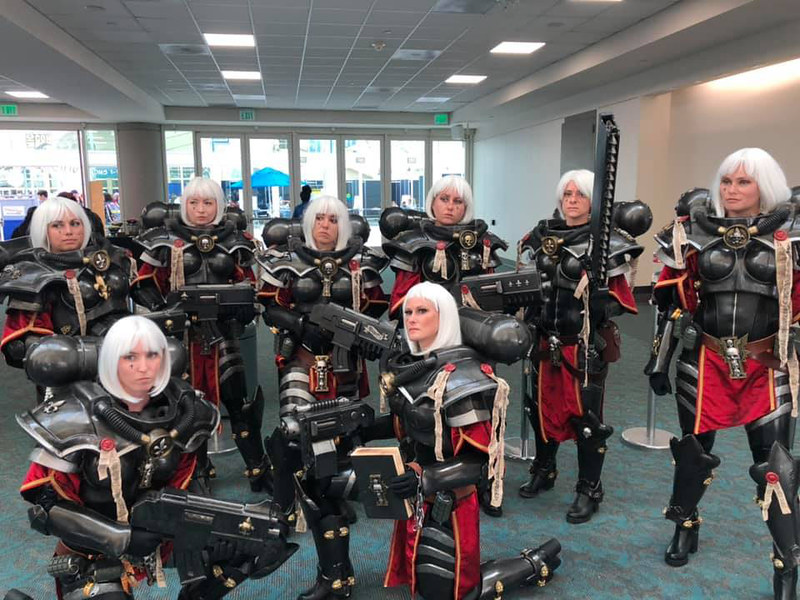
Since Games Workshop is about to release their new Adepta Sororitas boxed set, I suppose I really need to finish writing up the last blog entry about my Sisters of Battle squad.
If you're just now tuning into this build, you can see the other posts here
Part 1: the Armor
Part 2: the Weapons and Backpacks
Part 3: the Soft Parts
Part 4: Mass Production
What's left?
SHOWTIME!
Here's just one of the many pics of the squad out and about:
For a ton more photos and some details on their deployments, read on...
Hello all,
A while back I got involved with a charity called Magic Wheelchair, they find builders like me to volunteer building cosplay projects for disabled kids going to comic conventions and other events. I'd done a build for them last year and they asked me if I'd be willing to do another one.
The only problem was they didn't have anybody on their list that was located near me. What they did have was a detailed list of prospective recipients that included the kids' locations, the events they were planning to attend, and the thing they hoped they'd be able to dress up as. Most of them were various cartoon characters and things I didn't really recognize, but eventually I found the most awesome kid on the list. Her name was Jazmine and she wanted to dress up as Ripley in the Powerloader fighting a xenomorph.
That's the kid I wanted to build for.
Magic Wheelchair put me in touch with Jazmine's mom so we could talk through her needs for the costume. We agreed that we couldn't have the powerloader fighting a full-sized alien queen because it wouldn't be able to fit through a doorway. Instead, we'd have an alien warrior climbing on the top and back of the powerloader. Also, in order to avoid interfering with the wheels and mechanical components of the wheelchair, we'd avoid building the legs and just truncate the character at the waist section.
With all of that in mind, it was time to get started.
Since the Powerloader parts were going to be relatively quick to put together, we started with the difficult part: the alien warrior. This started out as a duct tape dummy pulled off of a friend of mine. We filled it with rigid expanding foam, let it cure, then cut off the duct tape:


Now we had a lightweight, rigid mannequin, but it was a bit too beefy. My girlfriend Shawnon set about the task of shaving it down to make it a bit leaner:

With the body started, we also began making foam sculpting armatures for the other parts. Here's Lewis with the beginning of the tail being made out of a slab of insulation foam:

Vinny here is working on the foam base for one of the back spines:
Each of these parts was skinned over with clay so they could be detailed and textured:

We also pulled a lifecast off of my friend Freddy's hands (since his fingers were the longest of all of us working on this project) and Noelle got started sculpting out the xeno hands:

I had an old lifecast of my feet in storage, so we used them as a sculpting base for the creature's feet:

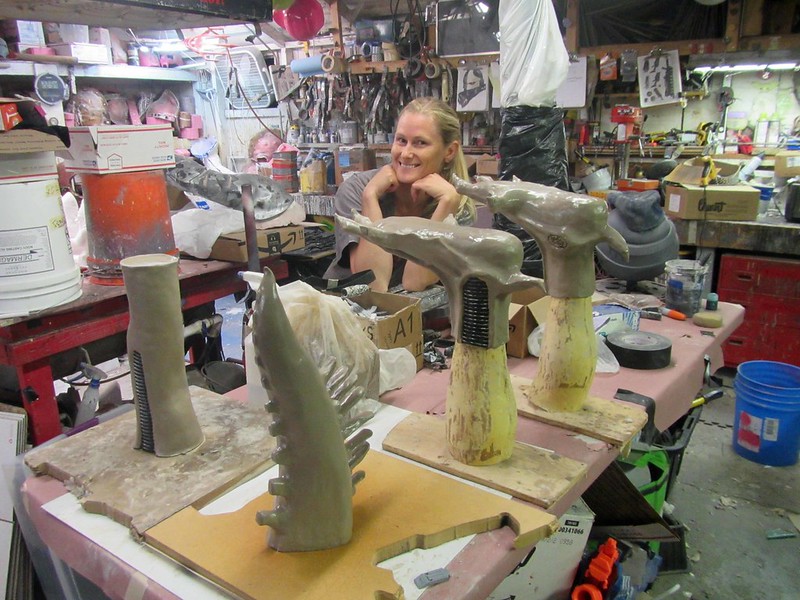
Each part got at least a bit of sculpting work from everyone who was involved in the project. Here's Shawnon wrapping up the feet and spine sculpts:
My friend Kate working on the sculpt for the first half of the tail:

Here's my assistant Rachel putting the finishing touches on the tail sculpt:

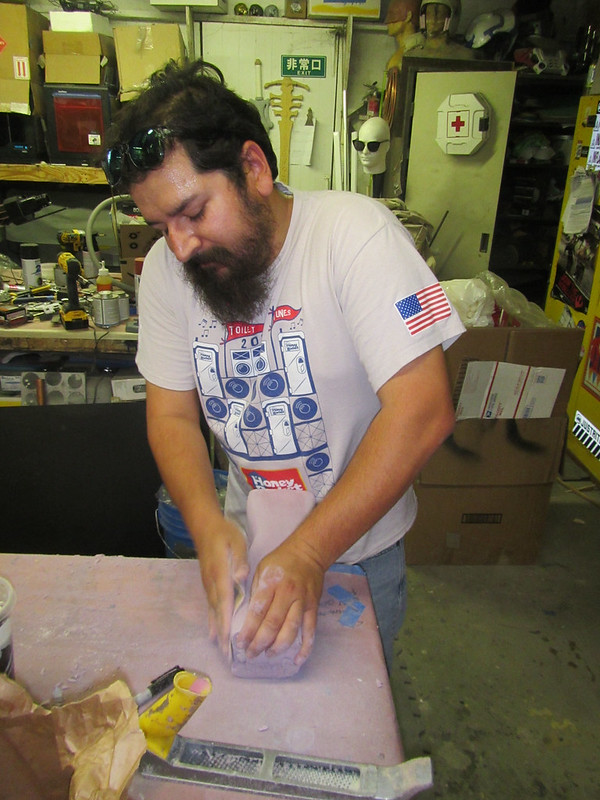
Each of these pieces was molded in Ultracal 30 and slipcast in black latex. I left most of the moldmaking to my friend Freddy. Here he is while I'm walking/talking him through the process on the first half of the tail:

The molds were typically two-part molds. Here's a shot of me and Freddy prepping the second side of the sculpt for molding:

After the molds had cured, the next step was to pry them open, remove the original sculpt, and pick out any remaining clay. Here's Shawnon and Kate cleaning out the molds for the first half of the tail:

Once the molds were cleaned and had plenty of time to dry out, they were strapped together and filled with liquid latex. The latex would be left in the mold for about half an hour of "dwell time." This allows the porous surface of the gypsum mold to wick moisture away from the latex wherever it contacts the inside of the mold, effectively drying a layer of latex skin for each part. Then the liquid latex is poured back into the bucket to be used on the next piece and the molds are set out where they can air dry until the latex on the inside of the parts is also dry:

With the latex dry, each piece was filled with low-density flexible expanding foam. Once that had cured, the parts could be de-molded:

Then it was just a matter of cleaning up the seams with a sanding drum on the Dremel:

The hands were cast around a wire armature in order to make the fingers pose-able:

Here's the first half of the tail once it was pulled from the mold:

When we cast the tip of the tail, we embedded a length of rope into the rubber before we poured in the foam. This rope was fed through the first half of the tail and they were glued together in order to make everything stronger when the two sections were glued together. The end result was a nice, strong single piece with a rope sticking out of it so you could securely attach it to the rest of the body:

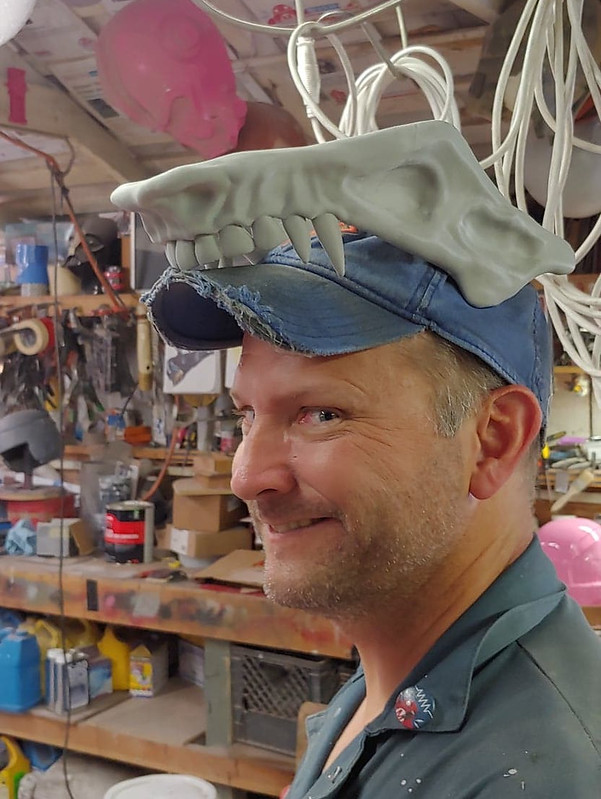
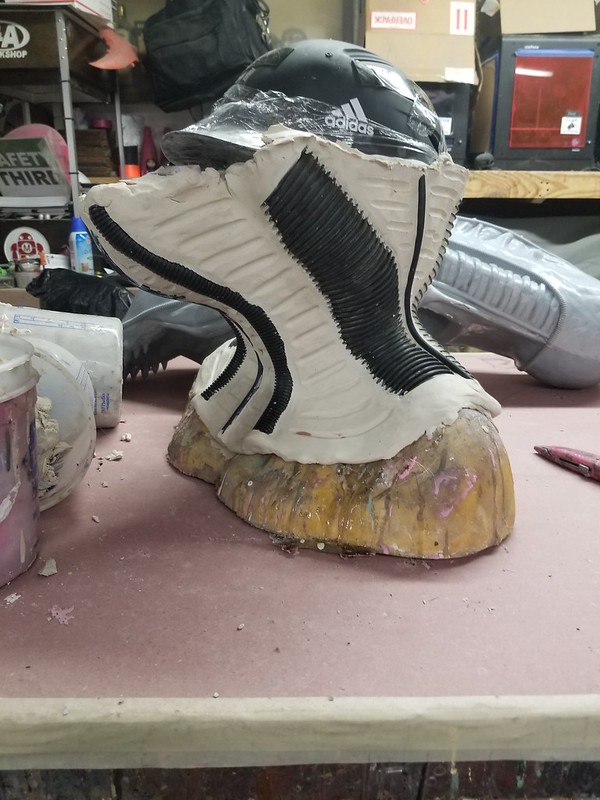
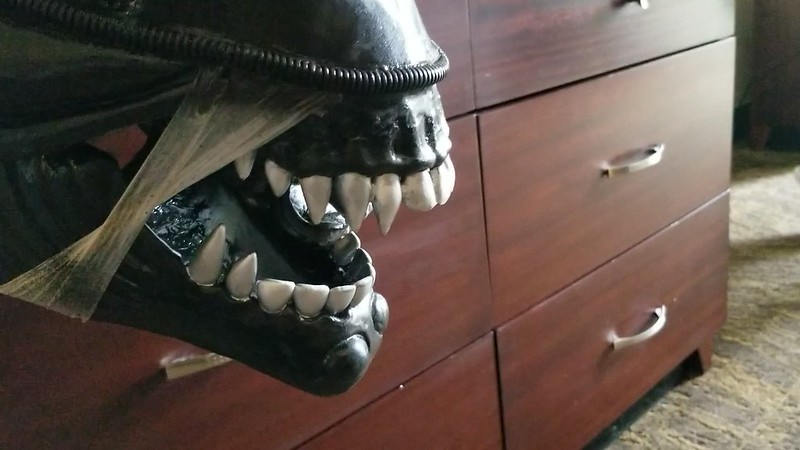
While everybody else was working on those parts, I busied myself with the creature's head. In order to keep the proportions right, I started with a 3D model of a xenomorph skull I found here: LINK I printed the jaw first:
I also printed the upper teeth, but the rest of the skull was CNC carved out of foam. Since I was going to flesh it out by hand, I started by filling the void on either side with expanding foam. Here's the whole conglomeration skinned over with epoxy:

After a few hours with some clay, I was starting to be pretty happy with the sculpt:

The jaw also got fleshed out with some more clay:

In order to ensure symmetry, most of the detail sculpting was done in front of a mirror:

During the day I was usually helping everyone else with their various parts of sculpting and molding the body parts, so I did most of my xeno head sculpting at night. My dog Tiki kept me company:

The very last part of the sculpt was a quick smoothing pass my friend Sierra did to make sure I didn't leave any fingerprints or tool marks behind:

Then it was time to do a brush-up mold of the whole thing with silicone rubber:

The mold was a 2-part rubber jacket with a 3-part fiberglass mothermold:

Here I am de-molding the sculpt:

The mold itself was pretty weird looking:


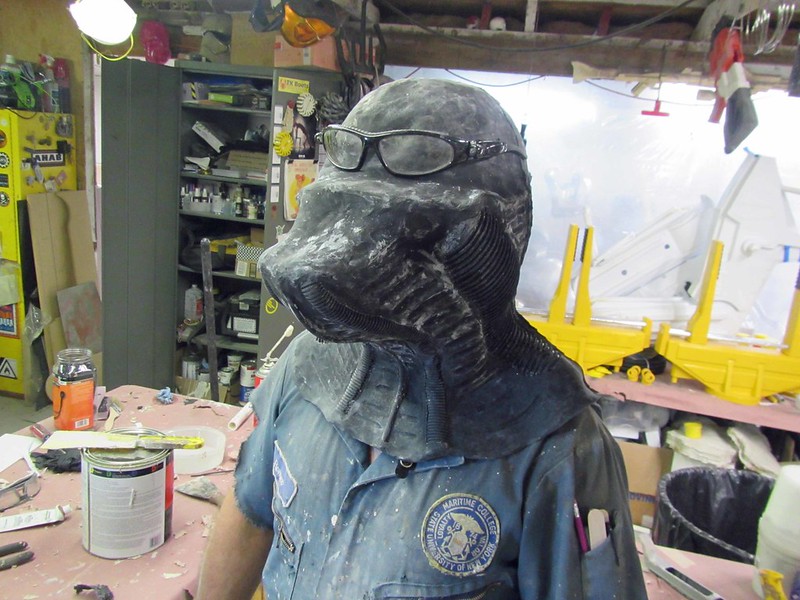
The head itself was rotocast in urethane resin, then filled with expanding foam to make a strong, lightweight piece. Here's Shawnon modelling the first cast:

Thats about the same time I decided I was done with the jaw scupt:

Then it was mounted for molding:

I built a quick and dirty mold box around it:

Then poured in a whole lot of silicone:

After the rubber had cured, the sculpt was demolded and the jaw was cast in resin with microsphere filler to reduce the weight. Here it is bolted into place with a strip of rubber band in place to pull the mouth closed:


I also sculpted a neck for the creature:
Here's a latex cast once we'd pulled it from the mold:
And the head in place:
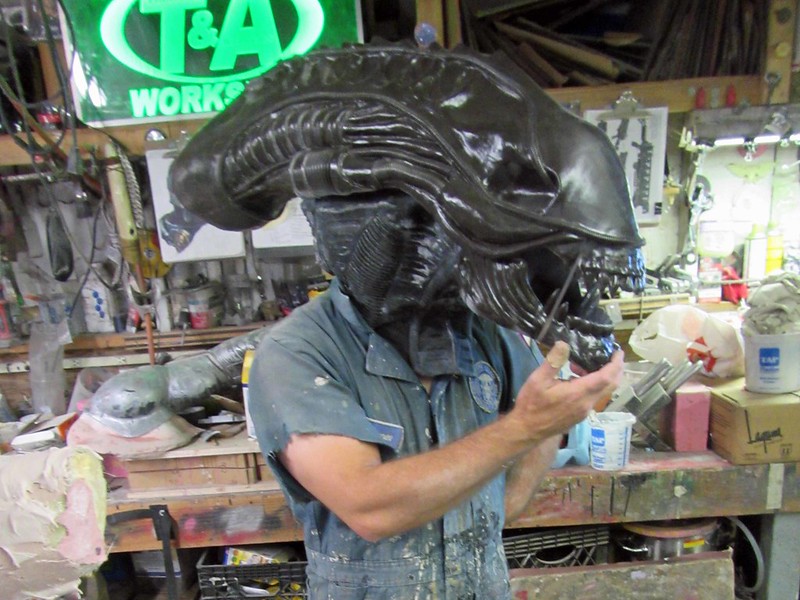
Perhaps one day I'll be able to use these molds to make myself a costume, but that's for future me to figure out.
Since we had a pretty good jump on the creature, it was time to get started on the Powerloader. We started by determining the proportions of the costume that would fit onto Jazmine's wheelchair. Then started making vacforming bucks for the arm parts:


Here's one forearm and gripper taped together to verify that the parts will work:
Sierra here is seaming together a hand part:
Meanwhile, Danielle is assembling forearms:
Rachel assembled the roll cage:


While Mark did most of the filling and sanding to smooth out the body box:

Jenny also did a lot of the filling and sanding:
Before long, things were really taking shape. Here's Christina tuning up the elbow for the Powerloader arm:

Then it was time for paint:

At this point we were in crunch time, so I didn’t get nearly as many progress photos as I’d have liked. So here’s the Powerloader painted and weathered:
Speaking of crunch time, I no longer had time to sculpt, mold, cast, and finish the xenomorph the way I’d planned, so we had to come up with a different scheme. Instead of making a pose-able rubber alien, I decided to make a one-off sculpt that would fit onto the top of the power loader. Since she’s a lot skinnier than the guy we made the other duct tape double from, I pulled an old foam cast of the Lady Shawnon out of storage, cut it up, and repositioned it:

That wee beastie was then wrapped in a layer of fiberglass for strength, skinned over with a layer of bondo for texture, and fitted with various bits of hose and cord in order to make it look like a xenomorph. Here's one of the rare photos taken during that process:

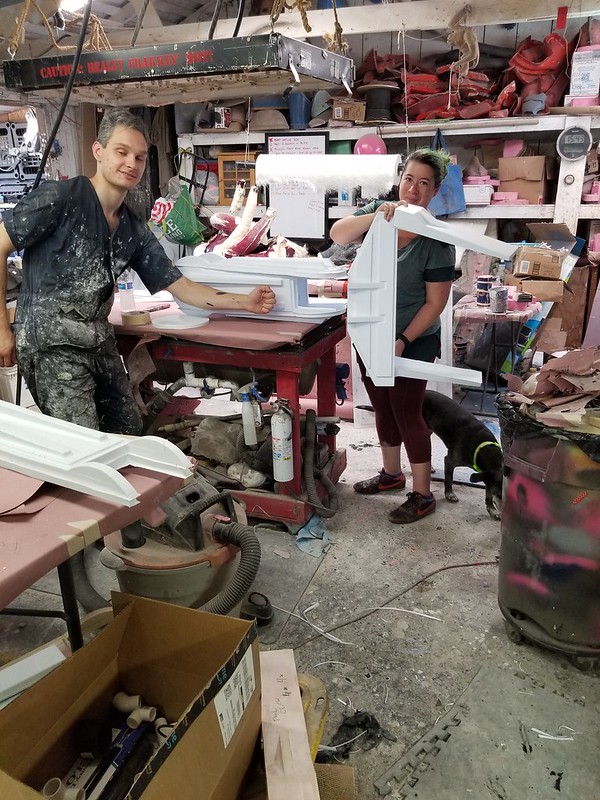
The whole thing came together in the last fifty or so hours of the project (during which I slept for a total of forty-five minutes) right up until we had to load it up and head to Portland to deliver it. I wish I’d had more time to spend adding details, but in the end it got the point across. Here’s a winning shot of the crew that was on hand the morning of the load-out and the finished parts of the costume:

Once we were in Portland, the last finishing touch on the creature’s head was the installation of the inner mouth/tongue assembly:
 You can see a video of the movement here: LINK
The tongue-mouth was modelled by my friend Jesse at Puzzlebox Props. You can check out his Patreon here for more of his work: LINK.
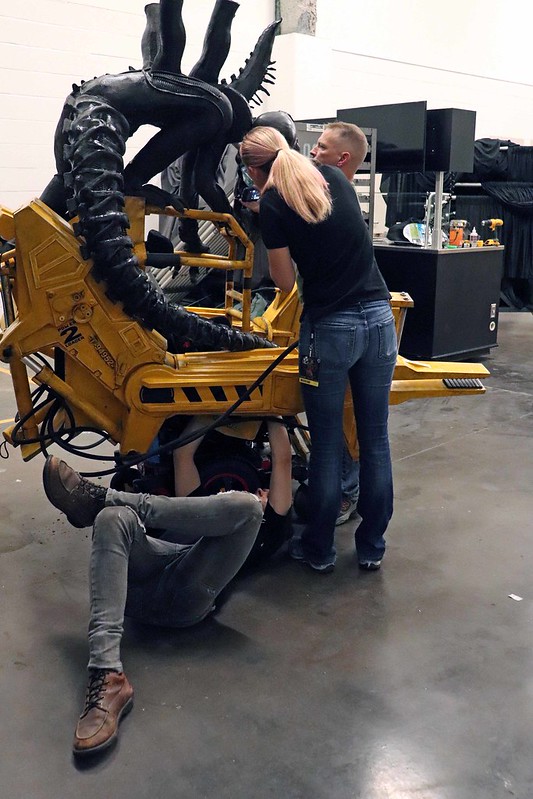
Once we’d moved everything over to the convention center, we finally got a chance to fit the parts onto Jazmine’s wheelchair backstage. Here’s the creature being mounted on top for the first time:
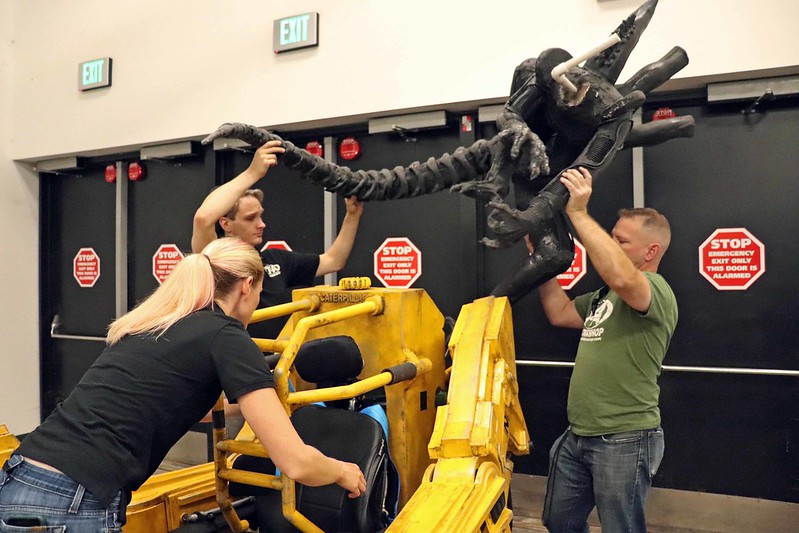
The next step was to set it up on stage and drape it in preparation for the unveiling in front of the audience before the cosplay contest at Rose City Comic Con:

The unveiling was done on stage in front of a few hundred people, but most importantly, Jazmine got to see it for the first time:

Then we got her out into the lobby area and strapped her into the costume:
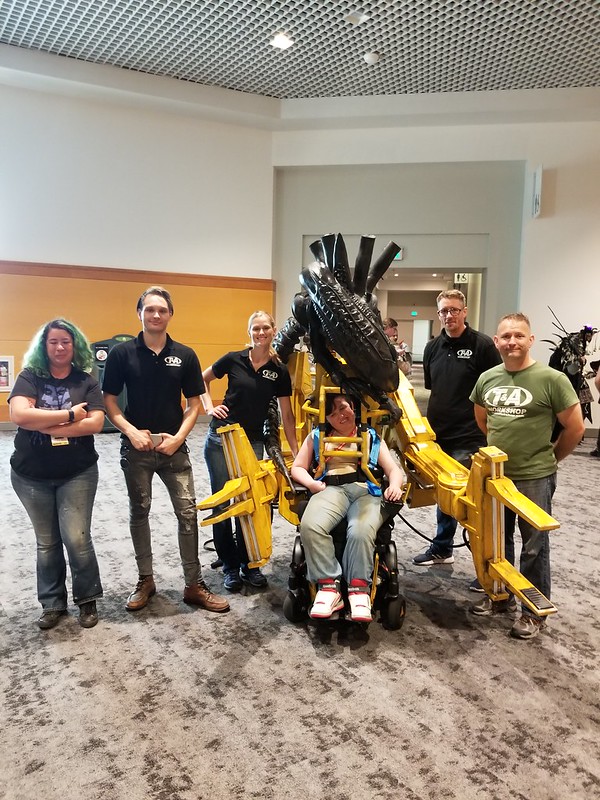
She seemed pretty happy with it:

Then she was off like a shot, doing laps and showing off her new rig:

The next morning we found her out on the convention floor having a ball:

She also spent a lot of time hanging out at the Magic Wheelchair booth:

And apparently met some interesting folks along the way:

So that was a lot of fun.
For more information about Magic Wheelchair organization and how you can get involved, check out their website at www.magicwheelchair.org