If you're not interested in reading over those parts, here's the short version: my crew and I turned a bunch of sheet styrene and urethane casting resin into some plastic armor and weapon replicas. We've been basing them off of this image:
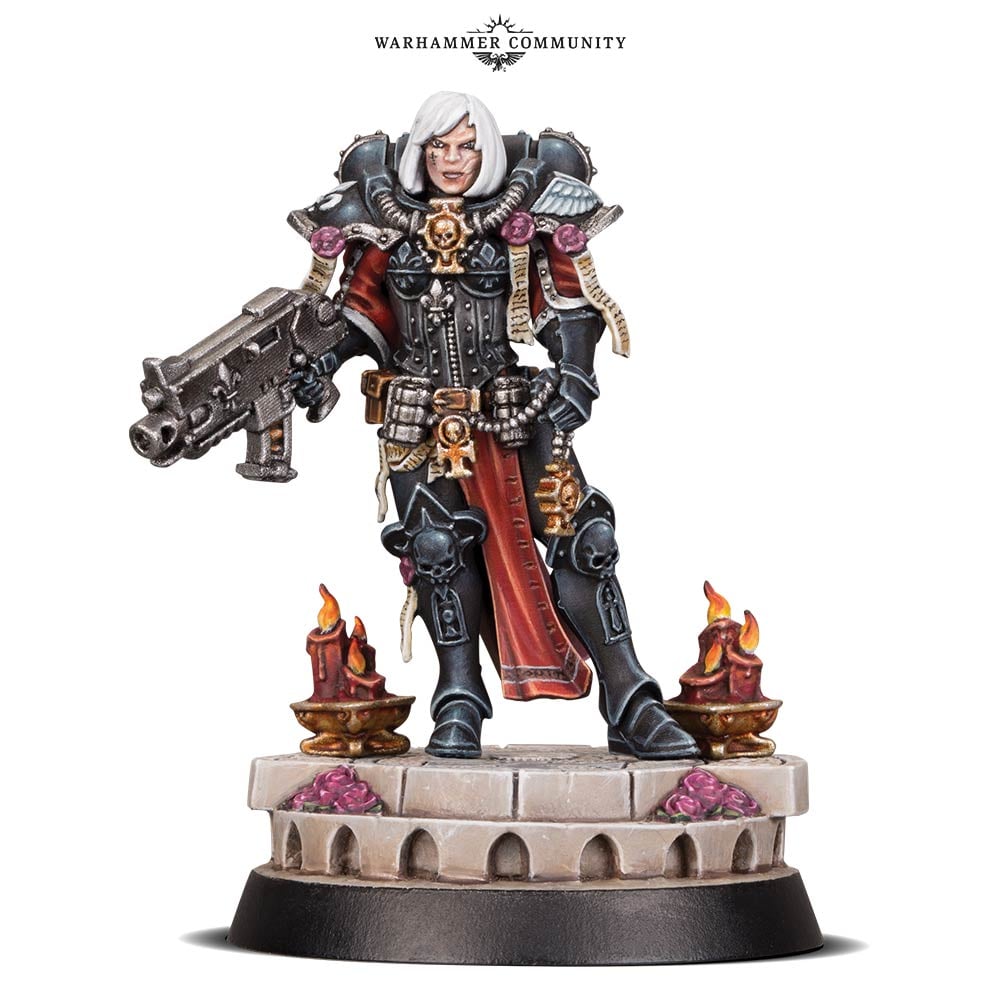
We ended up doing okay:
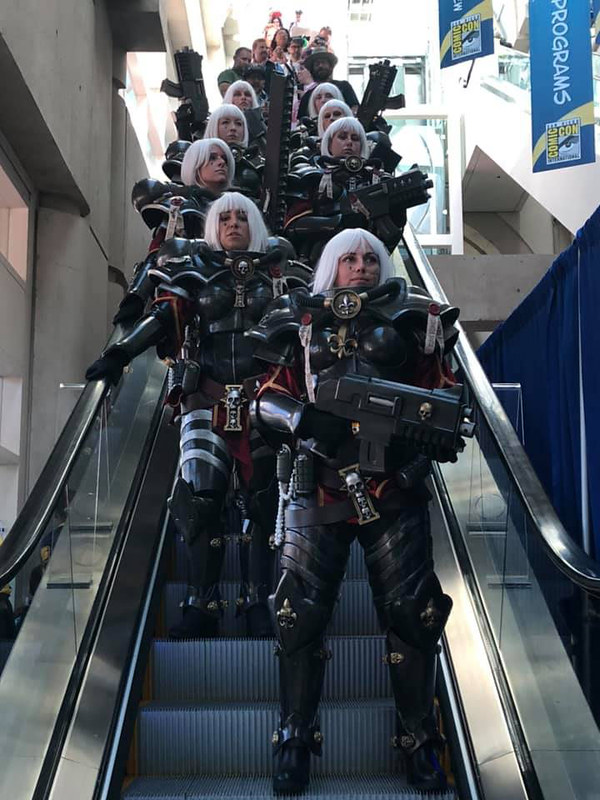
To see how the fabric and leather bits of that costume were maked, read on...
Since I was making multiple copies of this costume, I needed to keep costs low and results reproducible. To that end, I picked up all of the base garments off of Amazon.com. I started with the least expensive faux leather catsuit I could find. This one: LINK. Then I found a faux leather corset (LINK) and some reasonably inexpensive chunky heel ankle boots (LINK) and a wide variety of white, silver, and light blonde wigs. If you're trying to match this look, I've built a shopping list here: http://a.co/gD0pOuS
The end result, as modeled by my friend Mallory, looks like so:

That was the easy part.
For the sleeves and skirts, I had Rachel plug herself into the sewing machine with a bunch of velvet, some black jersey knit fabric, and a bit of gimp cord. In no time at all, she'd made up some sleeves:

The skirt panel was not far behind:

My dog Tiki was unimpressed.
Still, the "habit" portion of the nuns with guns was basically done. So now I needed a quick and inexpensive version of a whole bunch of belts and such.
Leather Goods
According to my brief and completely amateur research, belts are expensive. Especially if you need to get 20 or so good ones in a hurry. At least that's the case for normal people.
Not for me.
When I need an irresponsibly large quantity of leather, I run down to Barta Hide, the local tannery in Petaluma. Most of their business is the tanning and preparation of raw sheep and cow hides, so the place smells like roadkill pretty much all of the time. But for me and makers like me, the reason to go there is the back of the warehouse where you can pick through their off-cuts and odd-lots and buy leather scraps by the pound.
It looks like so:
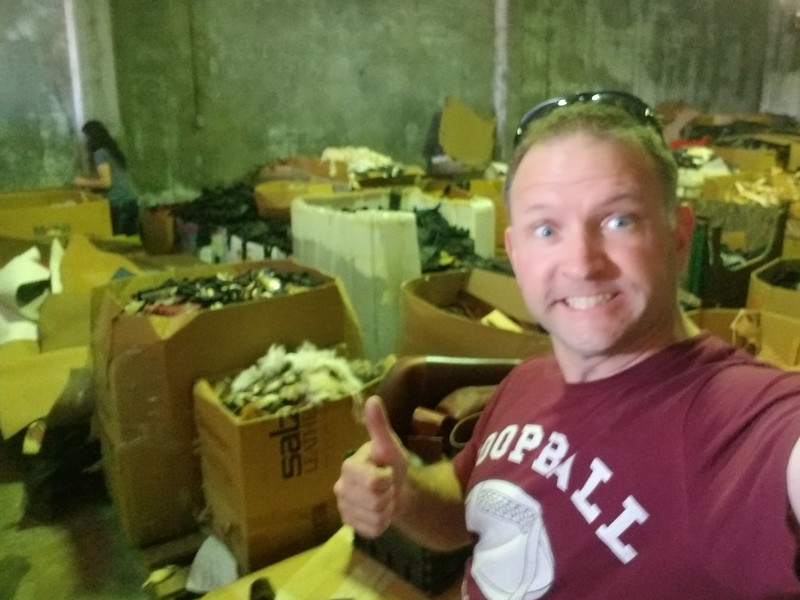
But this image only captures about one tenth of the massive space full of every kind of leather you'd ever need.
Once we'd found enough scraps of strap leather in about the right color, we lucked out and found a damaged hide of deerskin leather that was about the same color so we could make some pouches.
Cutting the belts was pretty straightforward. You may have noticed them in this pic:

Belts are easy, but we also needed big leather pouches. Making leather pouches requires all kinds of skill and patience. I don't have time for that though.
Making Pouches the Cheating Way
Instead of fighting a bunch of dead animal parts until I had the thing that I needed, I started by sneaking a block of wood onto the vacforming table every time we pulled a handful of armor parts. Two pieces of styrene formed on that block and joined together became this simple vacformed box:
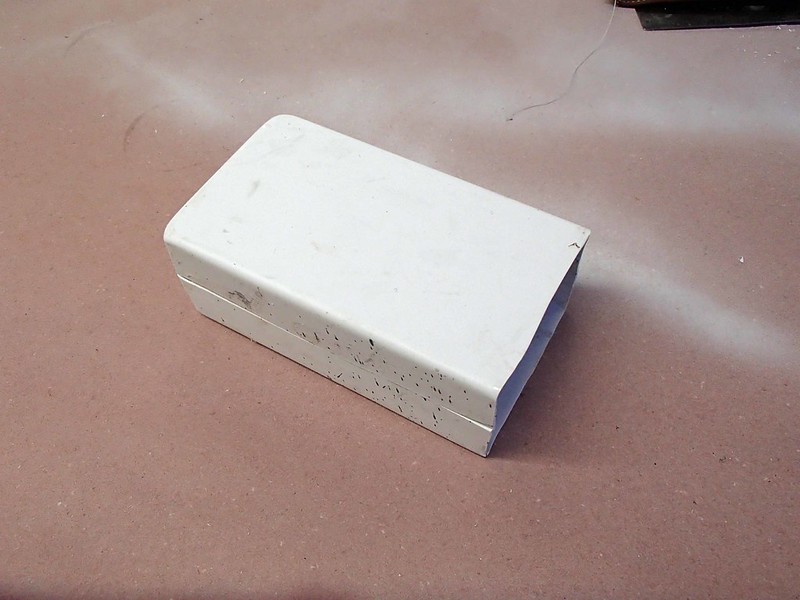
It's a very boxy plastic box:

That simple little box didn't quite look like a custom leather pouch yet, so I cut out this weird shape in buckskin leather:

That piece of weirdness was stitched on the industrial sewing machine with some contrast stitching. I also added patches of Velcro and a belt loop in the process:
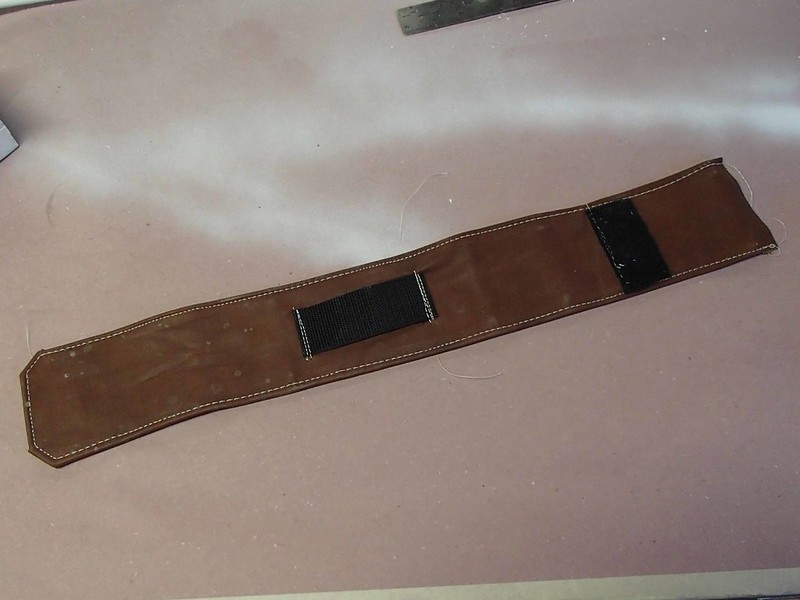
Then I glued on some patches of leather to cover the sides of the plastic box. Then long piece was glued right onto front, bottom, and back of the plastic box:

Simple enough:

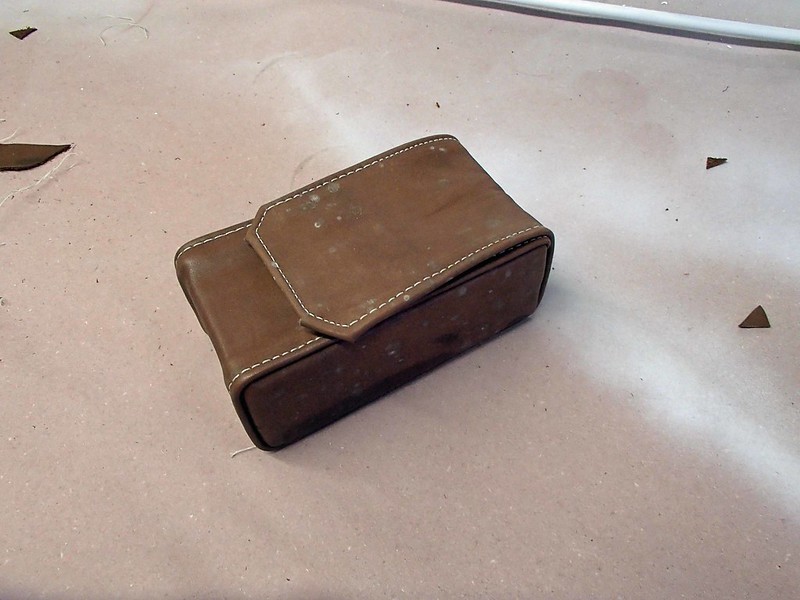
With the addition of a resin cast badge, the started to look like done things:

The plan was to put one on the left hip of each of the sisters along with a full compliment of grenades and miscellaneous rosaries and reliquaries like so:

So that's coming right along.
Stay tuned for part 4: Stepping up Production

No comments:
Post a Comment