

Wow.
It's what you'd expect Skeletor to look like if Peter Jackson and Weta Workshop decided to make Masters of the Universe instead of Lord of the Rings. I love the look and I haven't been able to talk myself out of building it lifesize.
So I went ahead and purchased the statue and started noodling over how I would go about building a wearable version of it. Knowing that I may not actually get around to completing the full build, I decided to start with something that would still look cool as a standalone piece; the Havoc staff. I started by scanning the top of the staff using my Revopoint mini 3D scanner. I'm still early in the learning stages of making this device work, but my early attempts show a lot of promise. Here's the scan of the staff head:
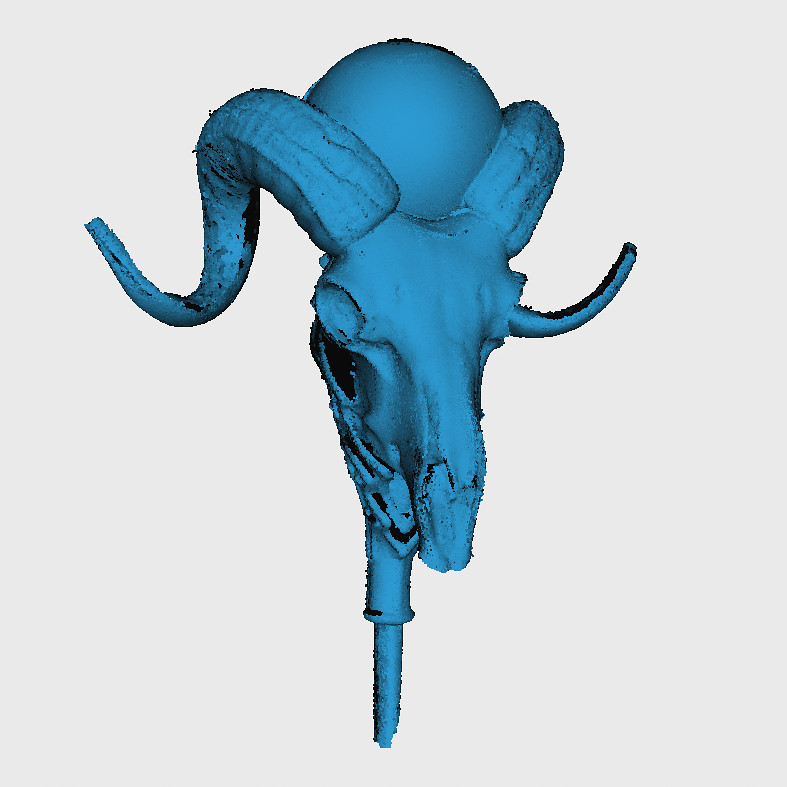
After filtering out the noise and smoothing the model a bit, I split it into functional separate parts, then I scaled it up to lifesize. At that point, it looked like so:

I also used the boolean function to hollow it out to fit a rod down the inside that would fit snugly inside the aluminum tube I planned to use as a handle and cut out space for a six-inch glowing spherical night light that I found here: LINK.
Each of the individual pieces was printed on one of my Zortrax M200 3D printers. After a bit of sanding, the main body looked like so:

The horns and the little plate that sits behind the sphere were separately printed. Here's an early test assembly with the glowing sphere in place:

So far so good:
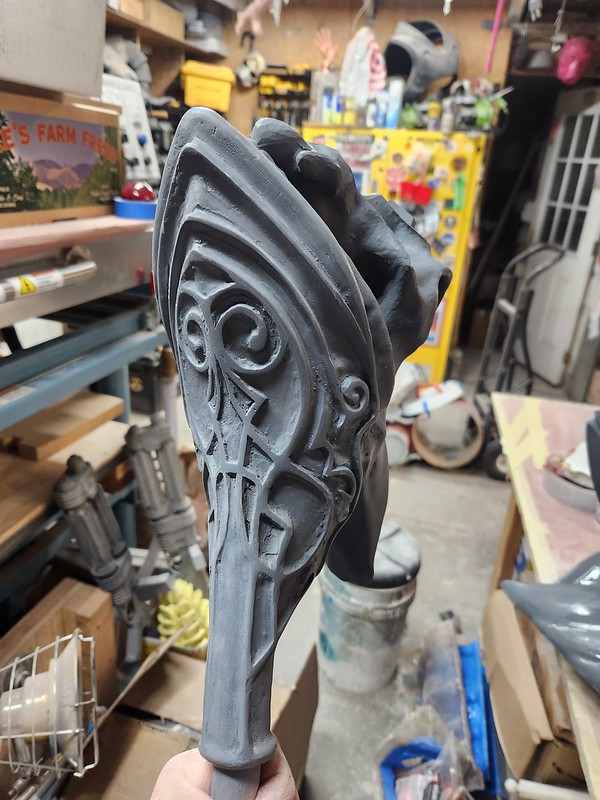
Of course, a lot of the finer details didn't really survive the transition through the scan-smooth-enlarge-print process. Mostly I lost this scrollwork on the backside:
I basically have no 3D modelling skill, so I began going through the process of adding these details by hand:

The raised portions are built up with "Magic Sculpt" a 2-part epoxy putty I pick up at my local TAP Plastics:

Once the details were roughly applied by hand, I waited for the Magic Sculpt to harden, then I could go back over them with a Dremel and a knife and some sandpaper and refine the edges. This made the details much sharper:

Of course, a quick coat of primer revealed that there was more work to do:
I used the same process for the bottom tip of the staff:
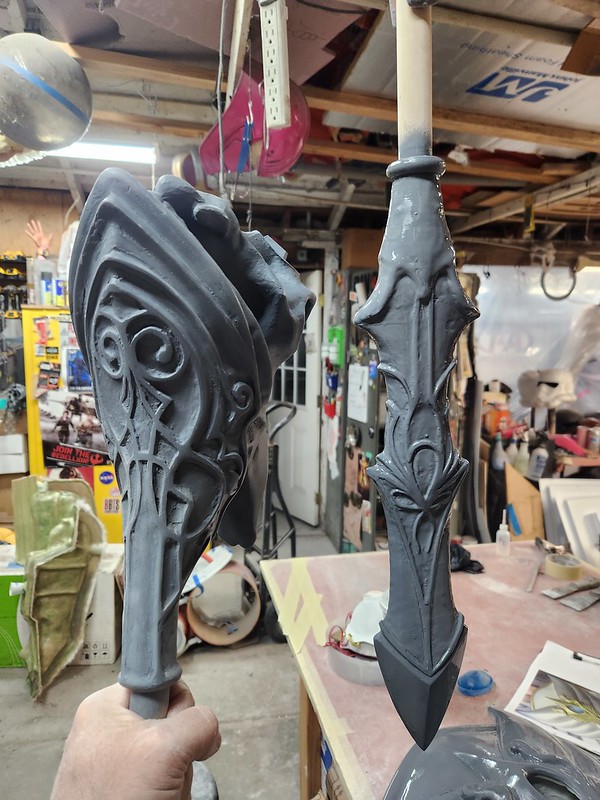
After a few more rounds of filling and sanding, I attached the horns:

Then the staff was ready for paint. I started with a couple of coats of Rustoleum "Dark Steel" spraypaint:

Then, as with all things, it needed a heavy blackwash to darken it up and really bring it to life:

Boop:

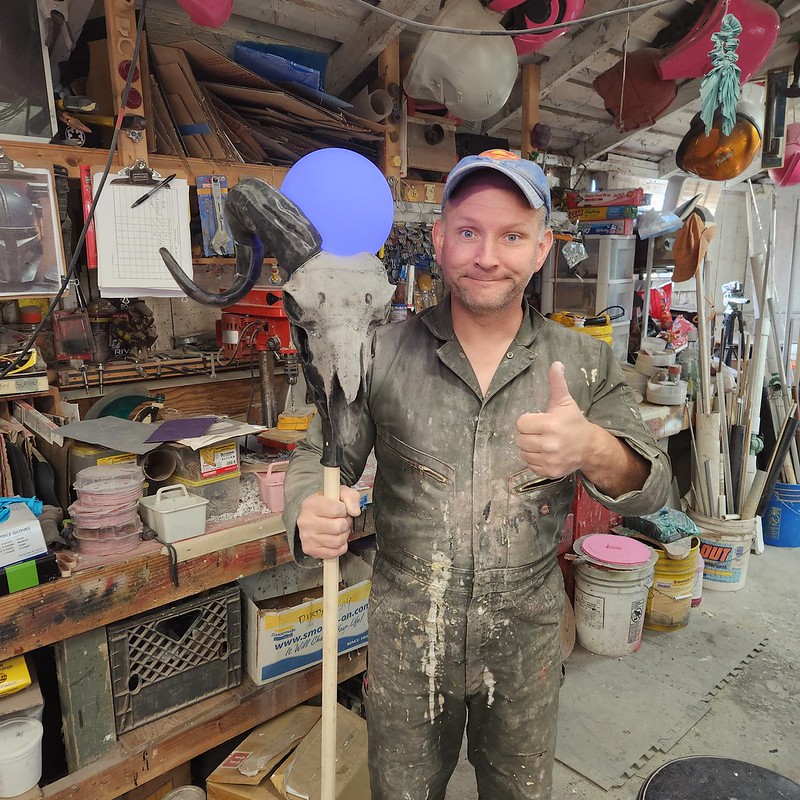
It's tough to get the whole thing to fit into a single photograph, but here's my best attempt:
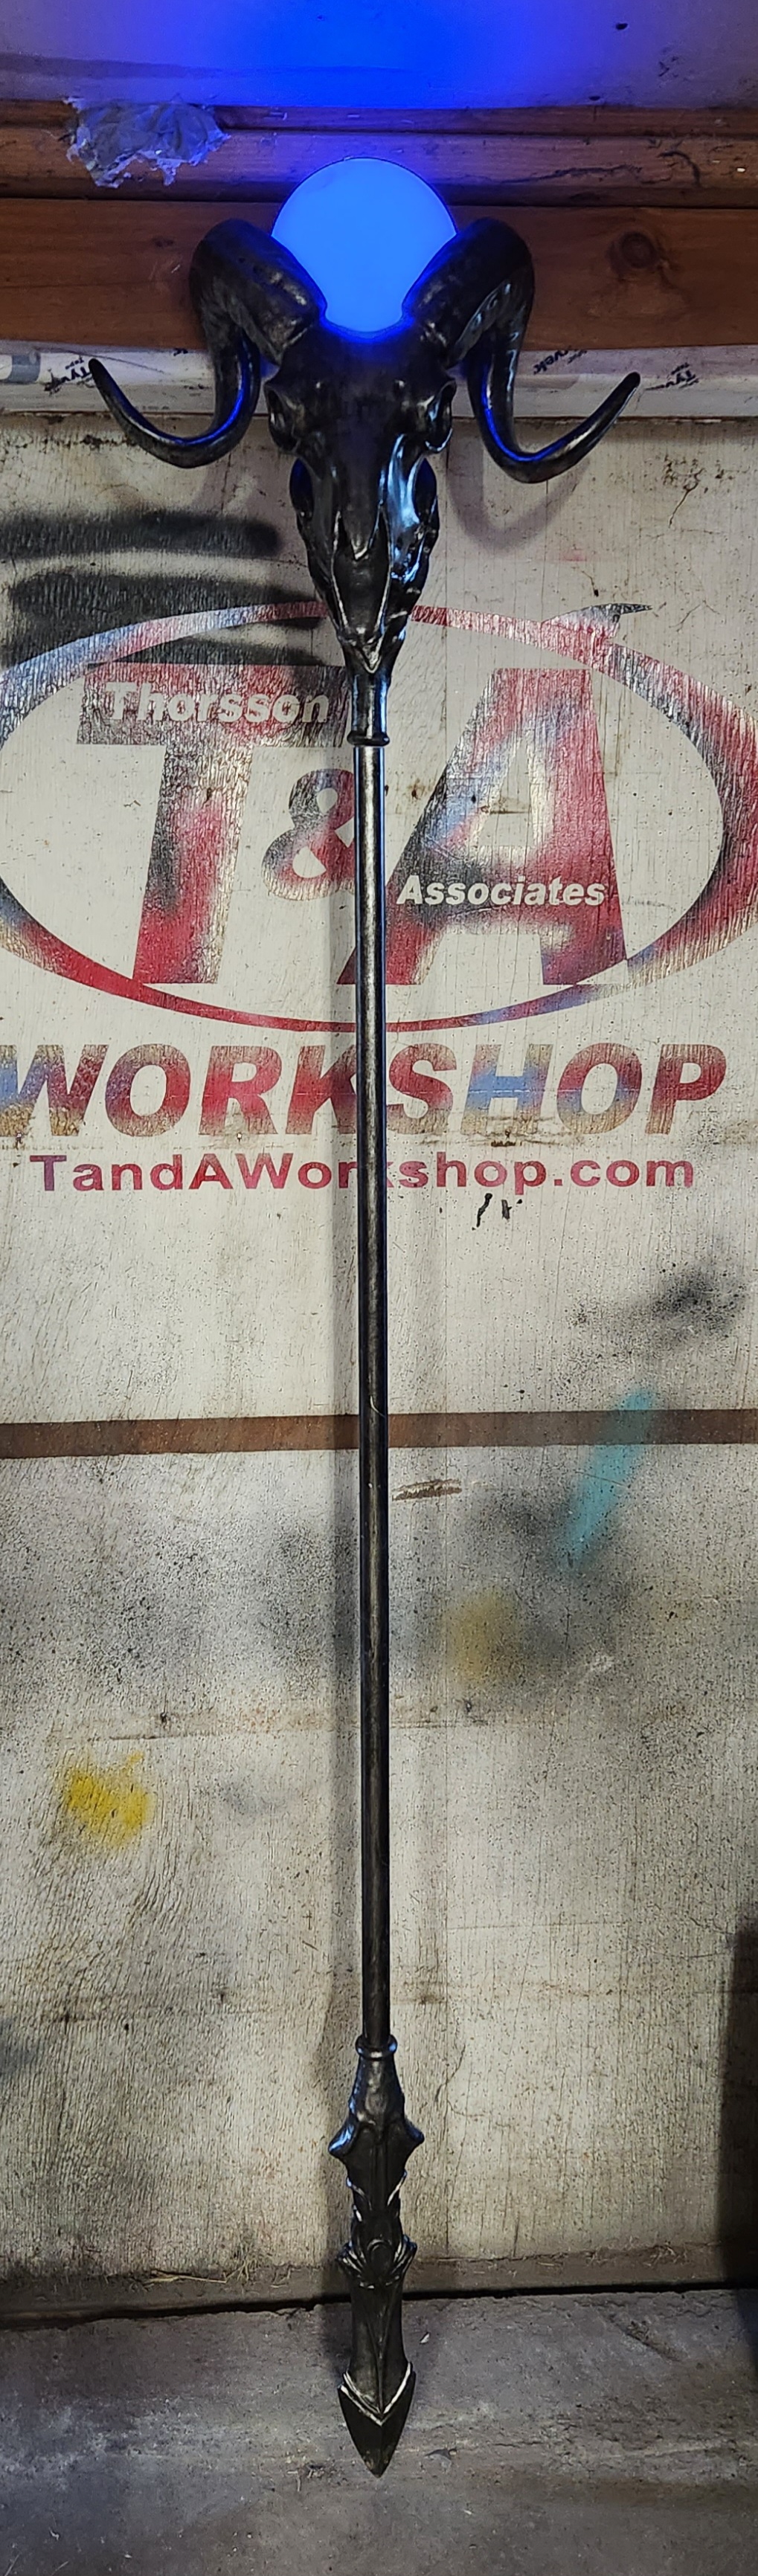
And a better angle in slightly dimmer lighting:

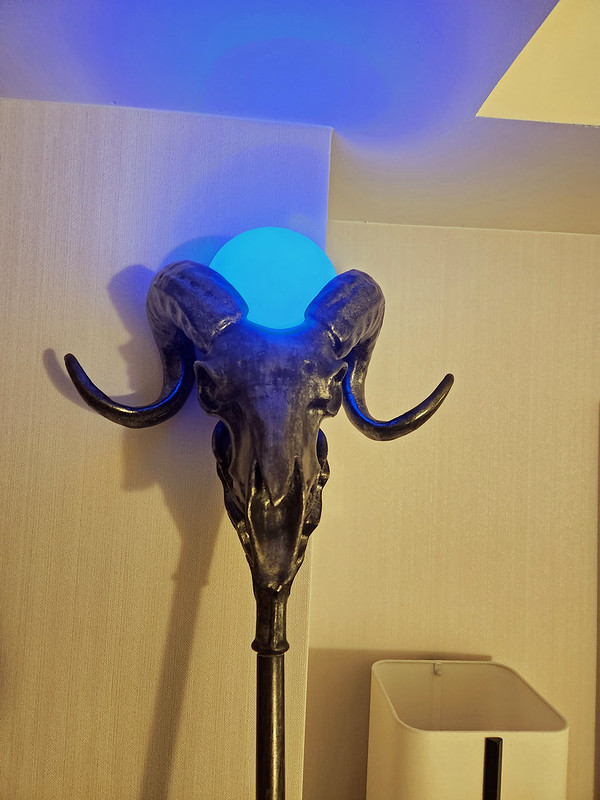
But seriously, here's the head of the staff in dim light to showcase the glowing orb:
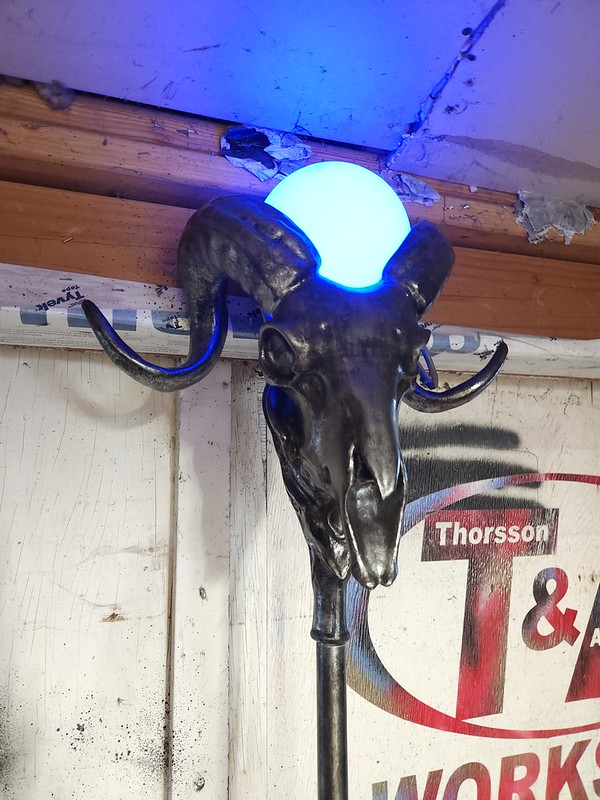
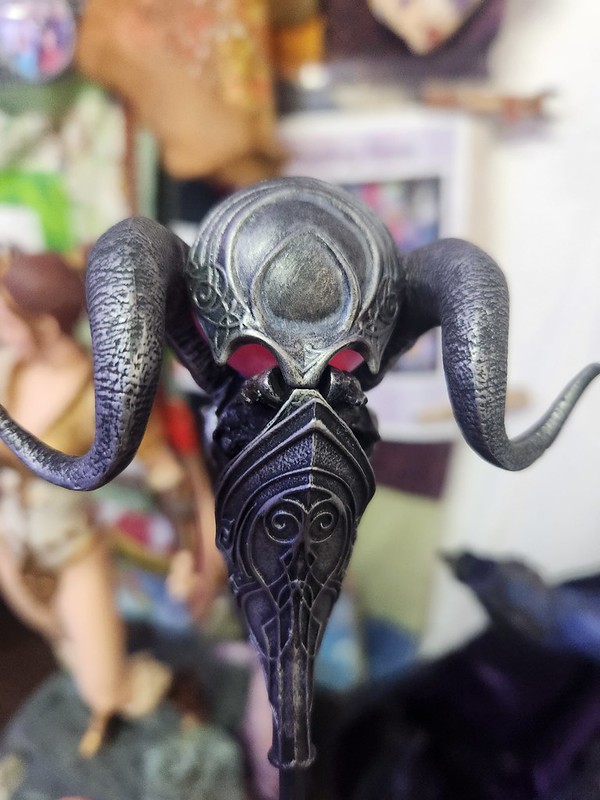
And again in slightly brighter lighting to showcase the metallic finish:

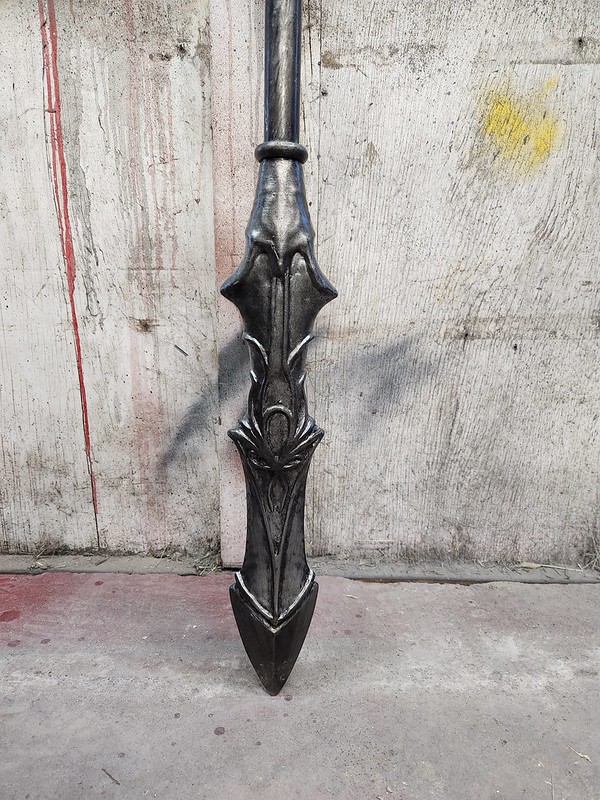
On the other end, here's the spear tip at the bottom of the staff:
While there are a few things I'd like to change (a different, more interesting lighted globe and a break in the middle of the pole to make it easier to pack and store, among other things), I'm pretty happy with it.
Here's the finished staff leaning against a wall in the hotel room at San Diego Comic Con:
Did I not mention Comic Con? Oops.
Turns out I was so excited about the building of the Havoc Staff that I went ahead and built the entire costume to go with it:
Turns out I was so excited about the building of the Havoc Staff that I went ahead and built the entire costume to go with it:

We'll go into great detail on that build in the next article.
Until next time...
Until next time...