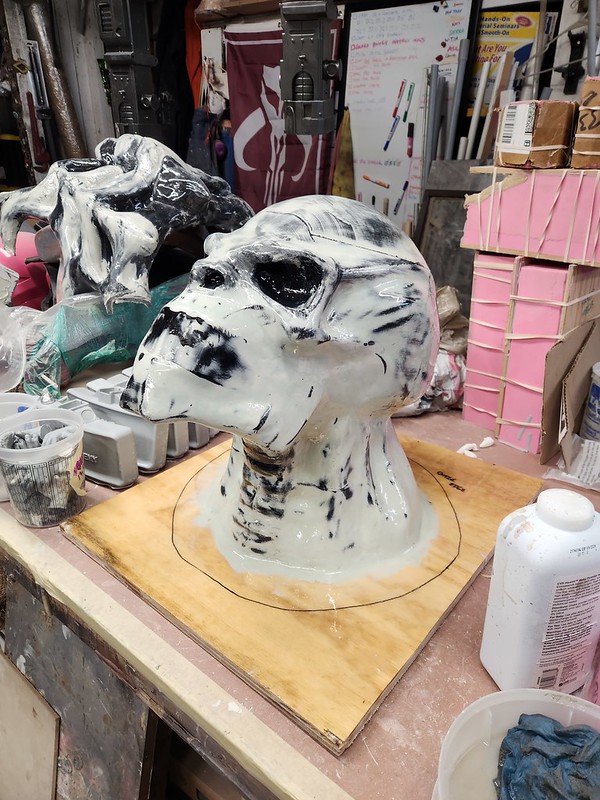
The first problem was the big, empty, soulless eye sockets. So I found some hollow acrylic Christmas ornaments (you can order them here: LINK), painted them red on the inside, and glued them in place:
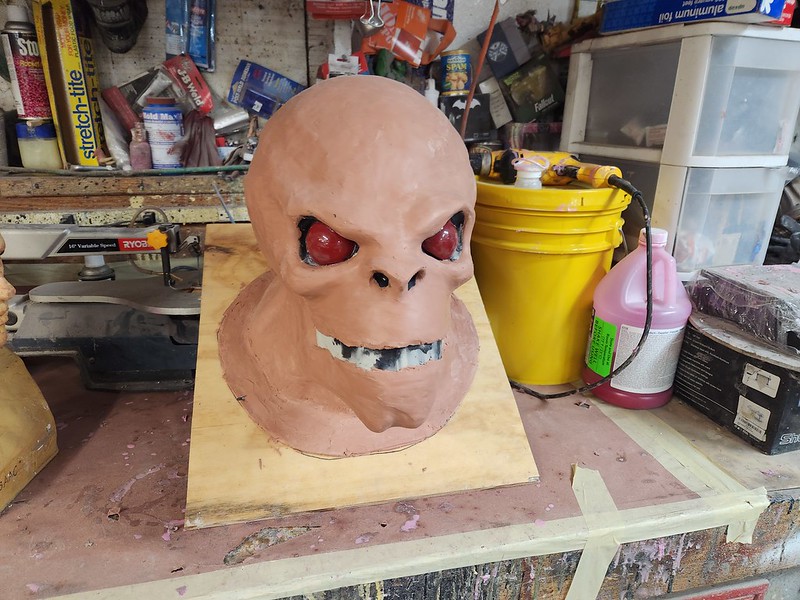
Later, when we mold the final sculpt, the eyes, nostrils, and mouth area will provide contact points that will hold the core of the mold in place. This is a key plot point that should be remembered for later.
With the eyes in place, all that I had left to do was flesh out all of the details and texture the skin to look like an actual critter, and make sure there was adequate thickness before molding and casting in rubber.
The trick is, while I've been familiar with genestealers in one way or another ever since I was about thirteen years old,* I didn't have the clearest picture of some of the minor details in my head. I needed to have some references on hand to guide my hand while I was sculpting my little beastie here.
So I scoured an internet to find some images and made a "mood board" to work off of. Genestealers have seen some subtle changes over the years, so I ended up with pics of the miniatures, artwork from the various codexes and rulebooks over the years, and screen captures from some video games. I'll incorporate aspects of all of these into the sculpture as I work:

So with the mood board and the beginning of the sculpture set up on the bench, all I needed was to grab my tools and get to work:

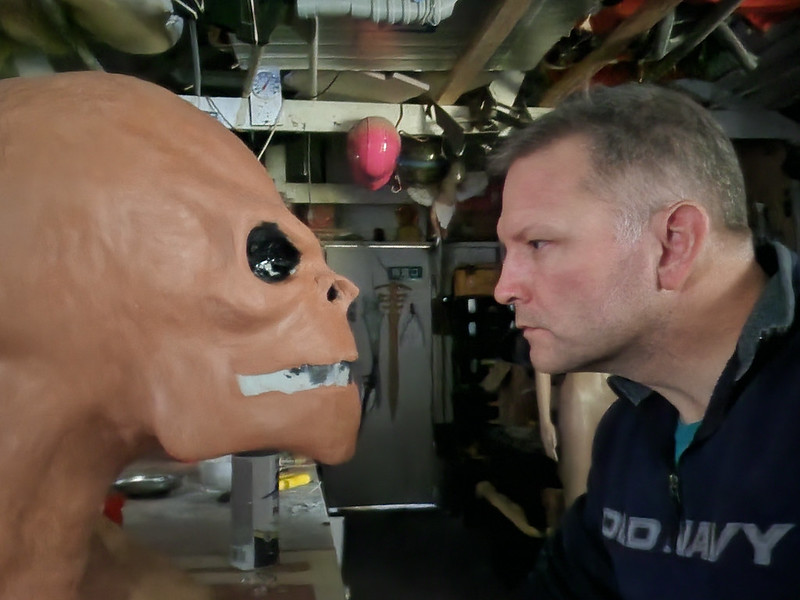
Speaking of tools, here's me:

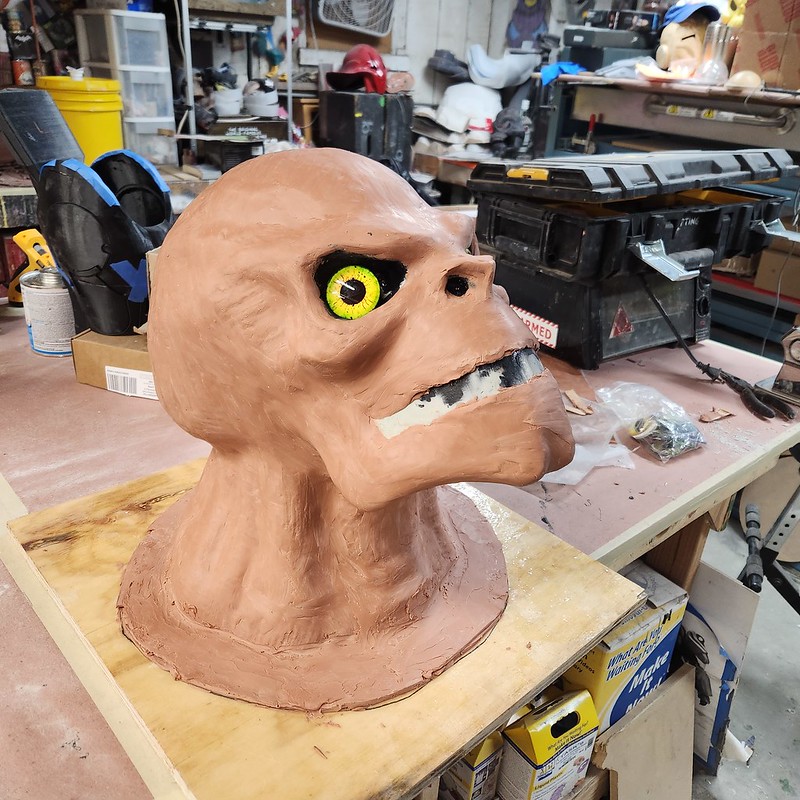
I didn't make a hell of a lot of progress in the one afternoon I set aside for this last week, but with just a bit of smoothing and the simple addition of eyelids, this guy started developing a personality:

He's already looking a little sinister, or judgmental, or maybe a bit stoned:

But anyway, that's the current state of the head sculpture:

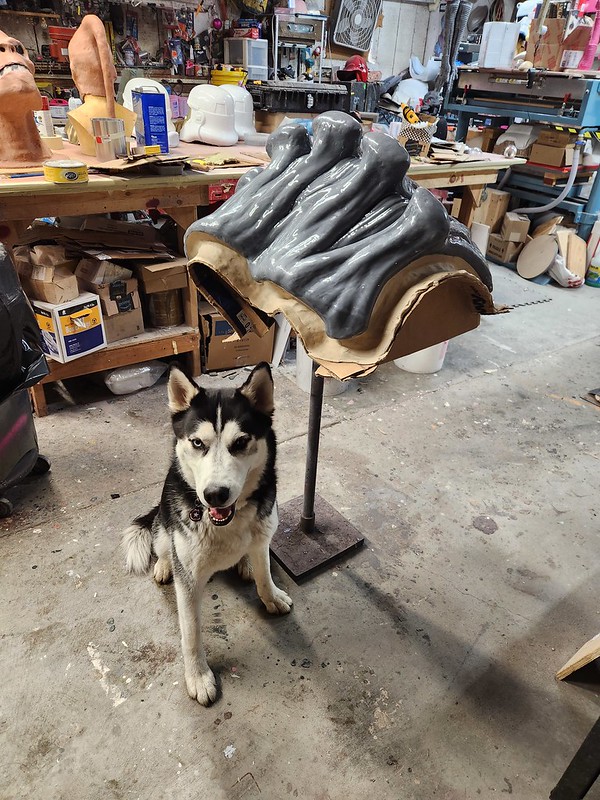
Meanwhile, I've been molding the carapace. This started with hot gluing cardboard around the margins and building up clay walls on the sides: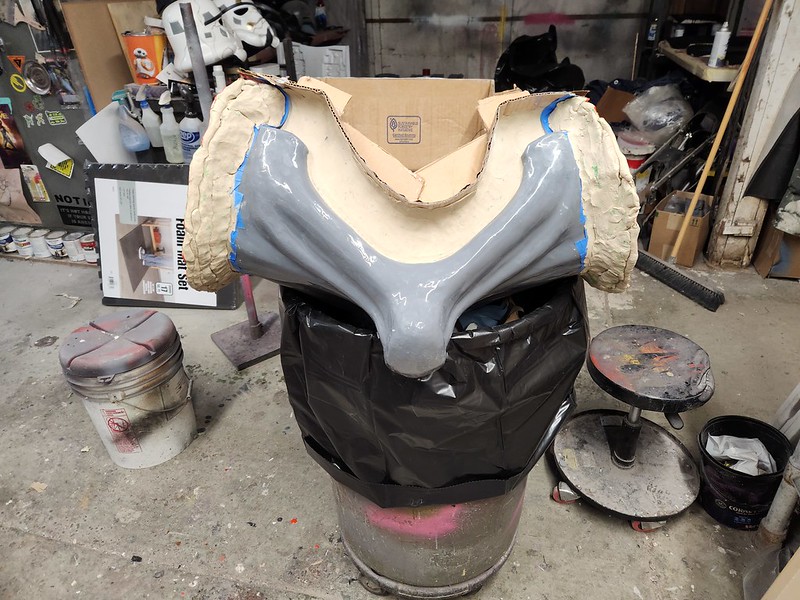
Then a generous coat of PVA mold release** before applying gelcoat:

After laying up the fiberglass for the sides, I got started on the ends. Here's the forward end marked out once I'd determined placement for the parting line:
Then the clay parting wall built up and covered with PVA mold release:
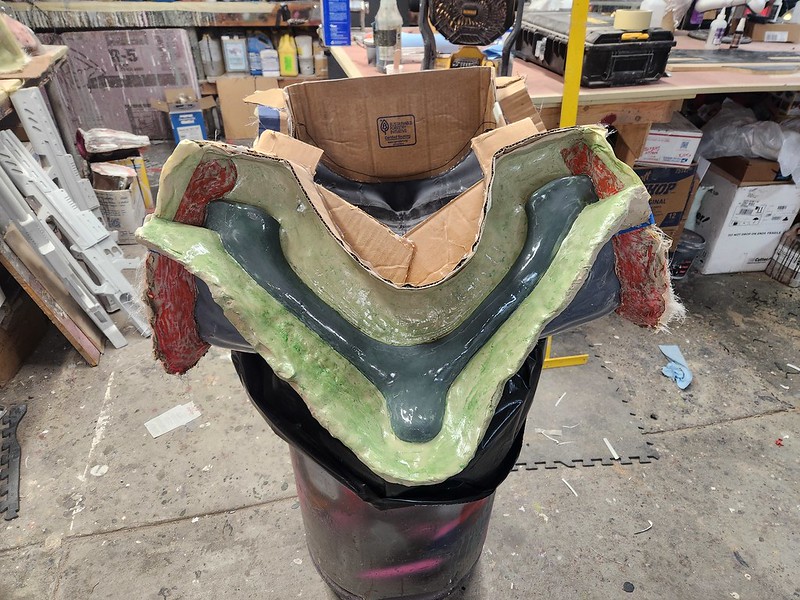
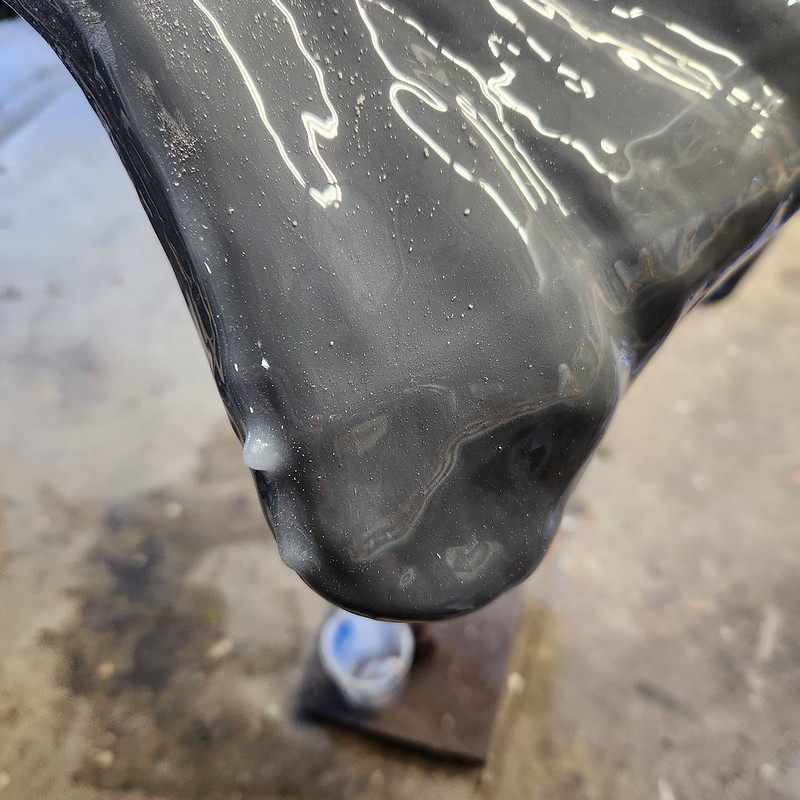
Then gelcoat:

Here I am laying up the fiberglass on the front end:

So with the mood board and the beginning of the sculpture set up on the bench, all I needed was to grab my tools and get to work:
Speaking of tools, here's me:
I didn't make a hell of a lot of progress in the one afternoon I set aside for this last week, but with just a bit of smoothing and the simple addition of eyelids, this guy started developing a personality:
He's already looking a little sinister, or judgmental, or maybe a bit stoned:
But anyway, that's the current state of the head sculpture:
Meanwhile, I've been molding the carapace. This started with hot gluing cardboard around the margins and building up clay walls on the sides:
Then a generous coat of PVA mold release** before applying gelcoat:
After laying up the fiberglass for the sides, I got started on the ends. Here's the forward end marked out once I'd determined placement for the parting line:
Then the clay parting wall built up and covered with PVA mold release:
Then gelcoat:
Here I am laying up the fiberglass on the front end:
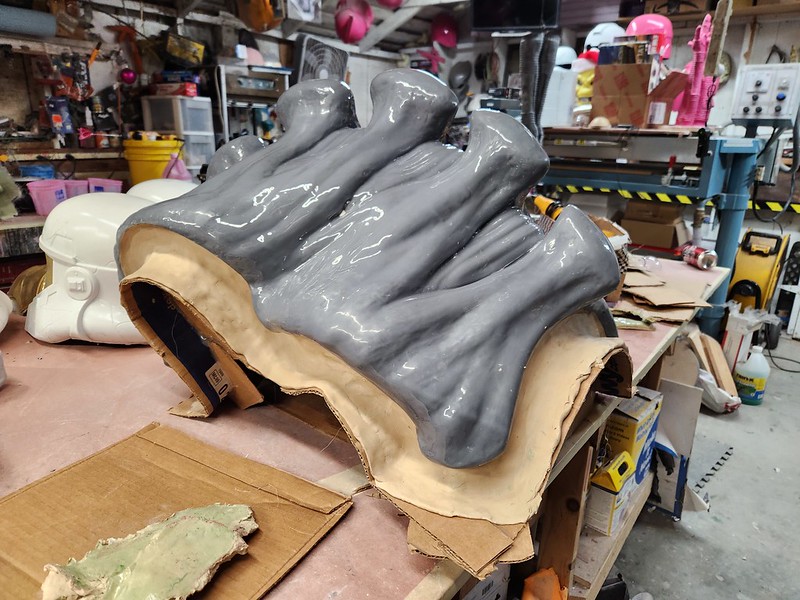
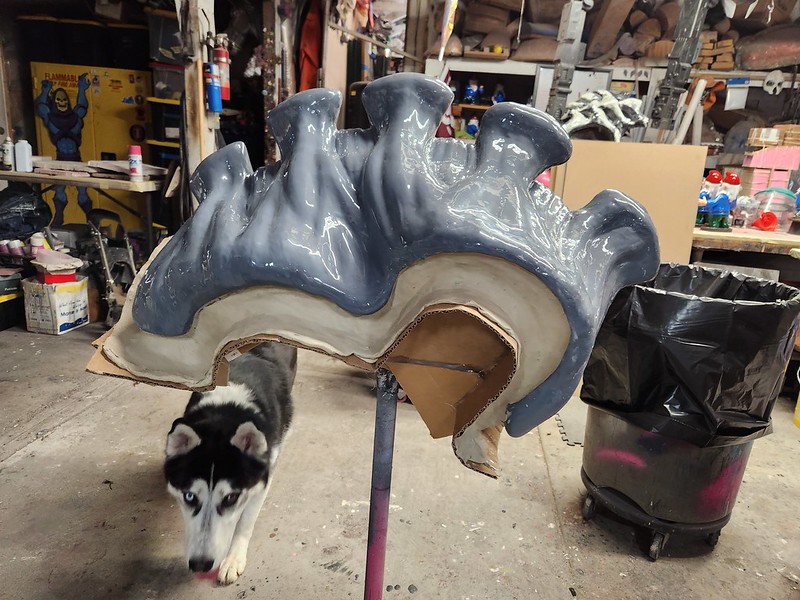
I spent most of this time working upside down while my assistant Rachel laid up the glass on the much more complex contours of the back end section. That part looked like this before gelcoat and fiberglass were applied:

Once the end pieces had cured solid, we could now place the whole thing upright and rest the weight on the mold sections instead of the shell.
I decided to start with the left side first and built up a clay parting wall lengthwise down the middle:

Then split the left side into four segments to eliminate any chance of the mold locking down onto the master:

So last night I gelcoated the first two segments of the left side:

Once I finish laying up fiberglass on these two sections, I'll remove the parting walls between them, apply more PVA mold release, then gelcoat and glass the remaining two segments.
Then I can repeat this process for the four parts of the other side of the mold.
It sounds like a major pain in the ass, but that's only because it's a major pain in the ass. If this were a paying project and I had the budget for it, I'd be making a silicone rubber mold jacket with a two-piece fiberglass mothermold and the part would come out seamless and have no flashing to clean off. But since this is a low-budget hobby project I'm spending less money and a bit more time to make it this way.
Once the end pieces had cured solid, we could now place the whole thing upright and rest the weight on the mold sections instead of the shell.
I decided to start with the left side first and built up a clay parting wall lengthwise down the middle:
Then split the left side into four segments to eliminate any chance of the mold locking down onto the master:
So last night I gelcoated the first two segments of the left side:
Once I finish laying up fiberglass on these two sections, I'll remove the parting walls between them, apply more PVA mold release, then gelcoat and glass the remaining two segments.
Then I can repeat this process for the four parts of the other side of the mold.
It sounds like a major pain in the ass, but that's only because it's a major pain in the ass. If this were a paying project and I had the budget for it, I'd be making a silicone rubber mold jacket with a two-piece fiberglass mothermold and the part would come out seamless and have no flashing to clean off. But since this is a low-budget hobby project I'm spending less money and a bit more time to make it this way.
*Trust me, that's a very long time.
**PVA stands for "PolyVinyl Alcohol." You didn't actually need to know this, but now you do. You're welcome. I've now used up a couple of little synapses that will sit and rot in a corner of your brain for the rest of you life instead of doing something useful for you.
**PVA stands for "PolyVinyl Alcohol." You didn't actually need to know this, but now you do. You're welcome. I've now used up a couple of little synapses that will sit and rot in a corner of your brain for the rest of you life instead of doing something useful for you.