About Me

My photo
I make toys for kids who don't want to grow up. I'm on the lookout for new projects. If you're interested in commissioning me to build something ridiculous, shoot me an email.
Showing posts with label Carvewright. Show all posts

Saturday, January 25, 2025

Gots me a New Raven CNC Machine from Carvewright

A long long time ago I was thrilled to purchase my first ever CNC machine.  It was a Carvewright CNC machine which we named "Lopez the Robot Whittler."

Over the years we've picked up a few more of these machines and made a few upgrades along the way.  We've gotten a lot of use out of them and they've been instrumental in building countless props, costumes, and scenic elements.

Recently I got Carvewright's new model, the Raven CNC.  It boasts a slightly larger cutting area and a few technical improvements.  

We went ahead and put together a quick video when we unpacked it and put it through its paces.  Check it out:

Interested in getting your own?  Go to carvewright.com and check it out. Enter the discount code "tandaworkshop" at checkout for $100 off any Raven CNC router package. 

We now return to our regularly scheduled ridiculousness.

Monday, September 10, 2012

Building the Blood Eagle Pathfinder from TRIBES: Ascend

In addition to the Spinfusor prop, Hi-Rez Studios also commissioned me to make the complete costume for a "Pathfinder," one of the light infantry classes from the Blood Eagle faction in their first-person shooter TRIBES: Ascend.

You saw the finished outfit at the end of my last post:
Blood Eagle Dressed at PAX

For details on how it was made, read on...

Saturday, September 24, 2011

Trouble with the Lopez the Robot Whittler

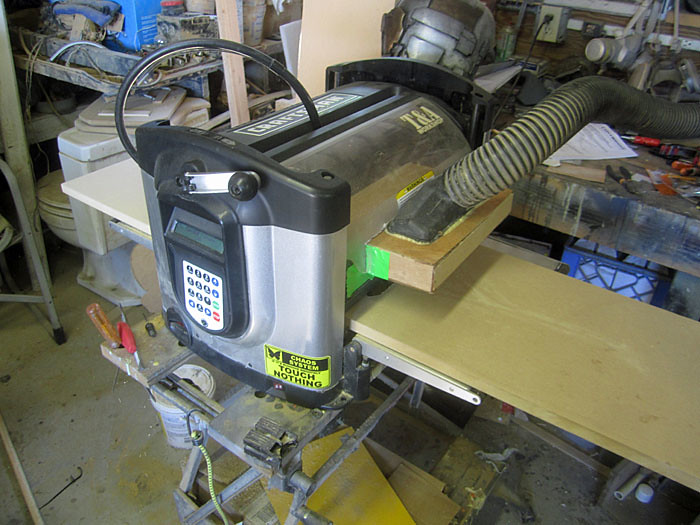
I've been having all sorts of troubles with "Lopez," my Craftsman Carvewright carving machine.  Several times along the way I've had him up and running only to shut down seemingly without cause.  My troubleshooting efforts seem to come to nothing each time but sooner or later I'll get him to finish a project.  It seems there are too many variables for me to predict exactly how this machine will operate.

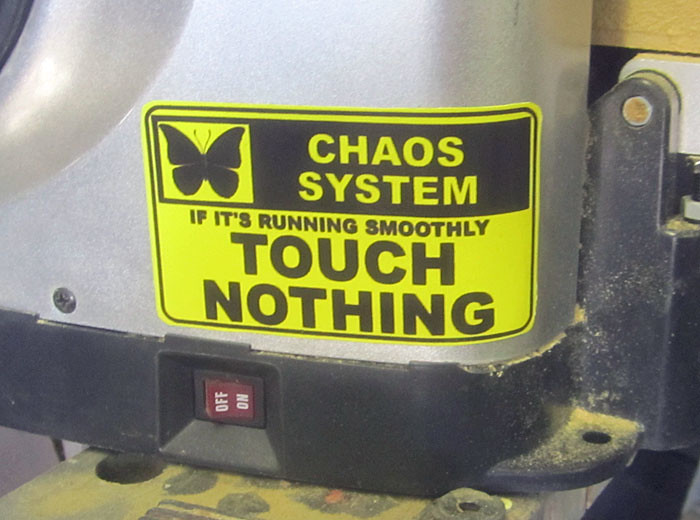
In the hopes of preventing anything else new from going wrong, I've added a new warning label:
Carvewright Warning Label

Here's a close-up shot:
Carvewright Warning Label closeup

Hopefully this helps...

.

Sunday, April 11, 2010

HALO M6G Pistol Build: Part Two

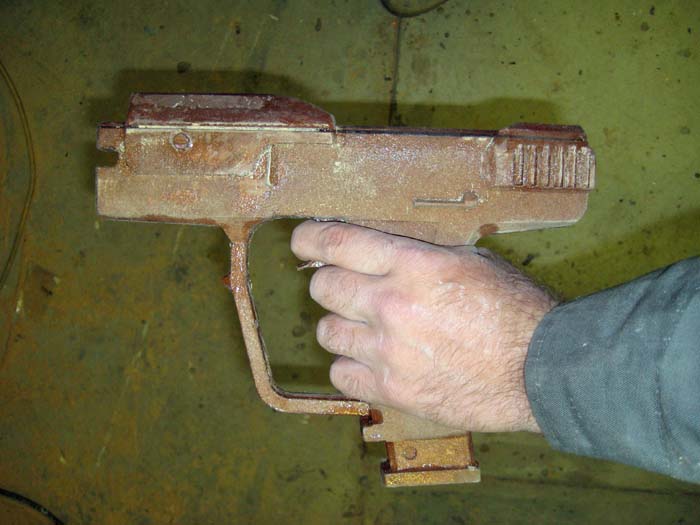
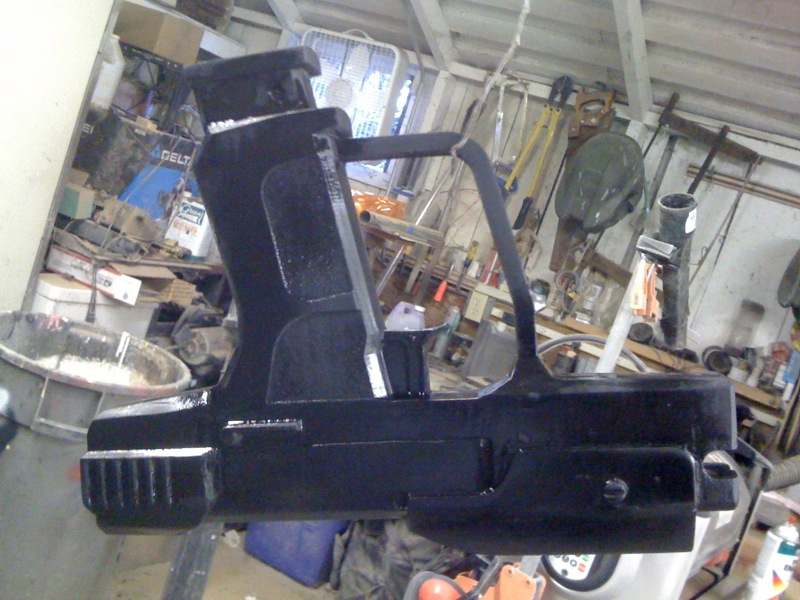
When last I wrote about this project, I’d just had my robot shop helper carve out four pieces to build the magnum pistol from HALO 3. Here are a couple shots of all of the pieces glued together and sealed up:


Once the epoxy had cured, I sanded and filed the surface, did a bit of filling along the seams, then put a coat of primer on it:


I spent some time trying to talk myself out of it, but finally decided to add more detailing on this piece. Over a couple of hours, I’d added the magazine release, lettering on the slide, all of the holes on both sides, and the details on the bottom of the magazine. Here's an overall shot:

I decided that if I stamped the lettering into the side it would probably end up being filled in with the first coat of paint. With that in mind, I went ahead and engraved the lettering by hand. It's not perfect, but it's there.

When the casts come out of the mold, if I don't like the lettering it'll be pretty simple to just fill it in or sand it off. Here's another shot:

The in-game model has some Korean lettering on the top of the slide and the bottom of the magazine. I swapped it out for some Japanese Kanji of my own:

Here's the bottom of the mag:

The most complex details I had to come up with were the details at the rear of the slide:

I know it's not perfect, but then again I doubt anybody will be looking at it as closely as I've been for the past few days.

At this point I still have to turn the laser sight and score the little seams on the top of the slide. Then, once I've got it painted glossy in the appropriate places, I'll be molding it up and making a run of castings. There won't be any moving parts so they'll just be big pistol-shaped blocks of resin, but they'll look pretty cool on the shelf or clipped onto my thigh armor.

Stay tuned...

Wednesday, March 31, 2010

HALO M6G Pistol Build, Part One

How do you like them apples?


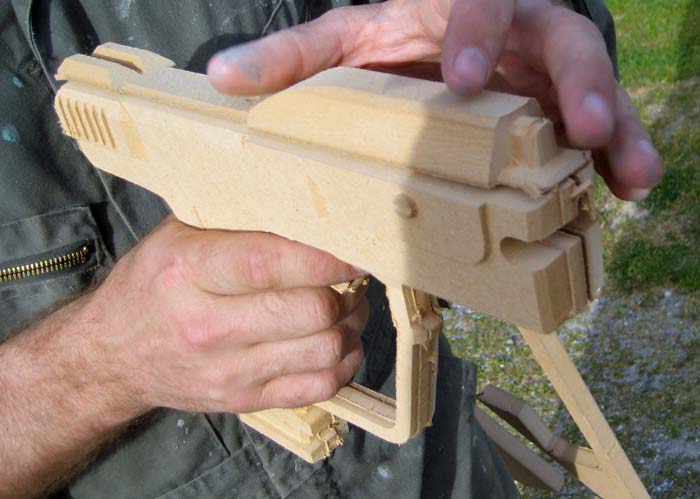
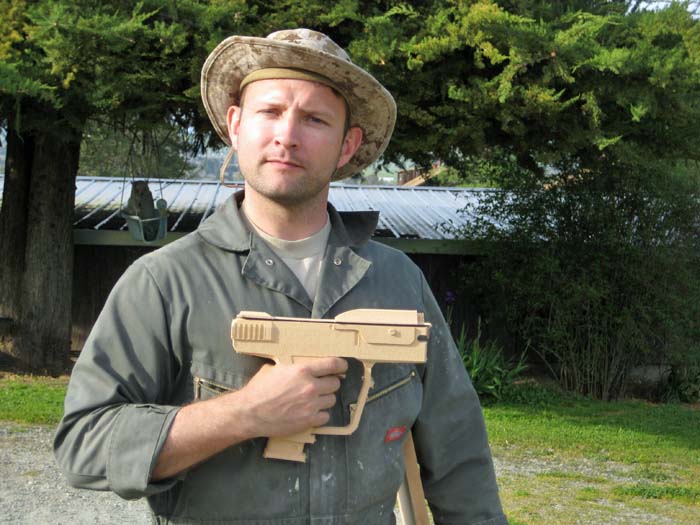
This was the end result of 7 hours and 26 minutes of run time on the new machine (which still needs a name). I cut it out of MDF and the finished surface was surprisingly smooth. Now all I need to do is stick the pieces together, sand, paint, stamp some lettering into it, and make a mold. Here's a shot of me holding it with the pieces just stacked together:


The digital model was one I found in the Google 3D warehouse. I don't remember who made it though. Here's a closer shot of the pieces all stacked together:


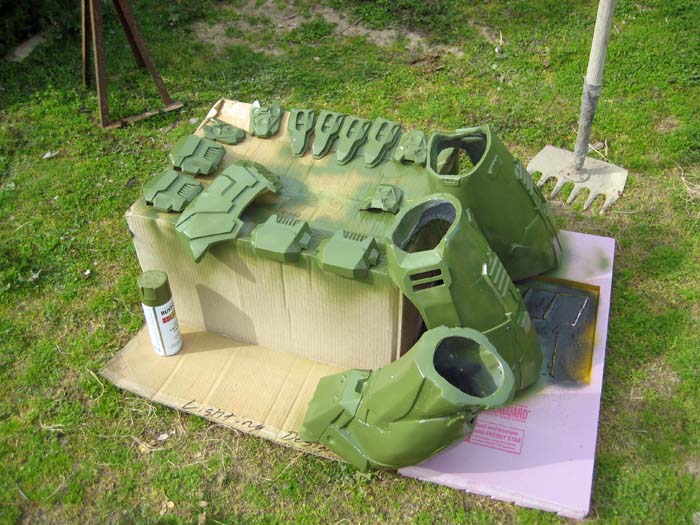
While I realize that seven and a half hours seems like a long time, I have no idea how long it would've taken to make one of these by hand. On top of that, while this thing was doing the bulk of the work making my pistol, I was able to put my attention elsewhere. Among other things, I put primer and a base coat on a lot of my pieces:


Before anyone asks, the primer was a two-part automotive primer shot with an HVLP gun and the green that I use for a basecoat is Rustoleum Army Green.

Stay tuned...

Saturday, March 27, 2010

I Love My Robot Workshop Helper

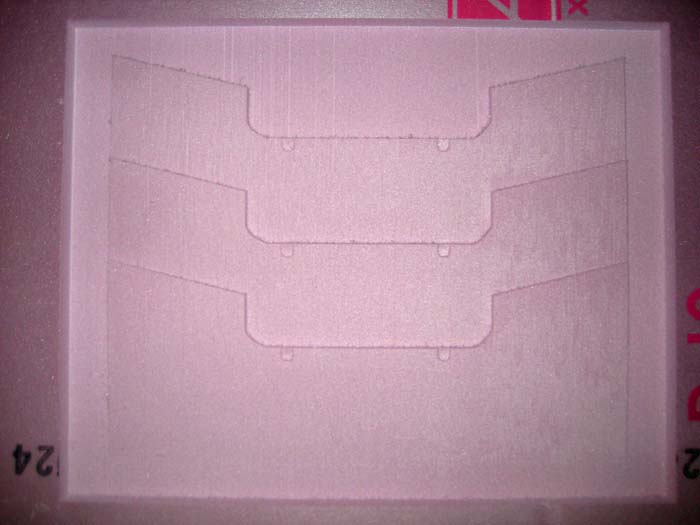
Here was the full process for the inner thigh parts. First, I spent about an hour finalizing the design in the carvewright software. Then I uploaded the file to the machine, lined up a chunk of 2" thick insulation foam, and fired it up. Unfortunately, the piece I was making was wide enough to block most of the vacuum dust collection port. Add to this the fact that the foam was inclined to build up a lot of static cling and hang onto every surface inside the machine. This meant that every half hour or so I had to go in and blow out all of the foam fluff with compressed air. Even so, it took four tries before I managed to get through the full carving without having foam bits gum up the drive belt for the vertical axis. Note to self: don't make pieces so wide that they cover the dust collection ports.

Here's the final (successful) carving of the inner thigh prototype coming out of the machine:

And here it is dusted off and ready for final smoothing and prep:

It turned out to be a good thing that I had three incomplete versions of this piece to experiment with. I tried every kind of paint I had in the shop looking for something that wouldn't eat the foam. In the end, it took two solid coats of normal, water-based, latex house paint to seal off the foam to prevent the textured spraypaints from destroying the prototype. Note to self: next time use a more chemically-stable material than foam to make prototypes.
Here is the master all painted up prior to moldmaking:

Making the mold was as simple as it gets (especially for me). Simply mix part A with part B and pour into the void carved around the prototype:
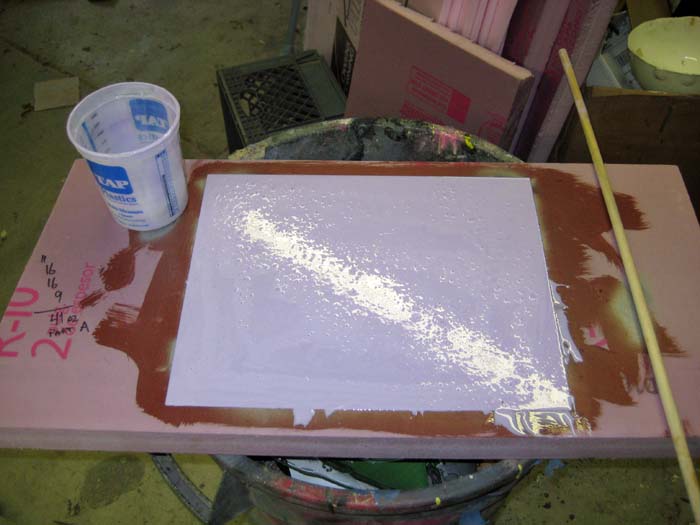
Once the silicone cured, it was just a simple matter of peeling it out of the master. It came out perfectly clean, so if I want to I can pour more molds to speed up production. Awesome!

Making the pulls is pretty simple too. I'm using a 2-part urethane foam rubber (often referred to as "cold foam" because you don't have to bake it to cure it) with black pigment added in. The rubber gets poured into the mold, then a flat board with a piece of spandex tacked onto it is laid on top and weighted down to keep the foam from bubbling out of the mold. As the foam rises, it soaks into the spandex and the two become one reinforced piece. The foam I'm using has a 5-minute de-mold time. Once it's cured all that remains to do is peel it out of the mold, trim off the excess, and attach it to the rigid thigh armor.

Here's the first successful pull from the mold:
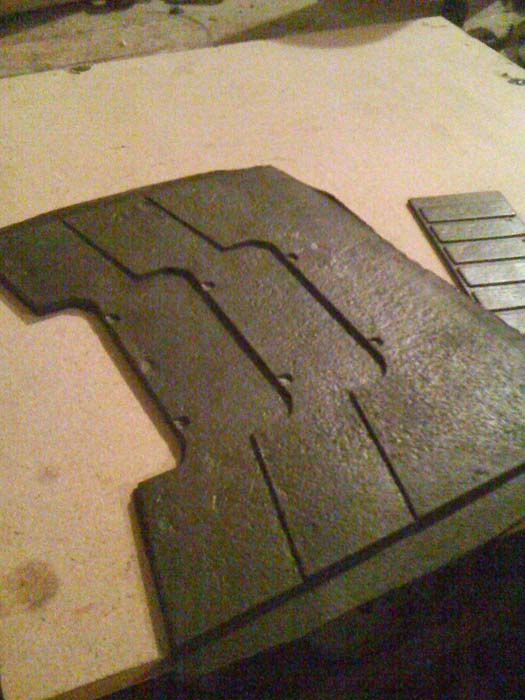

Here's me holding it inside one of the thigh castings:
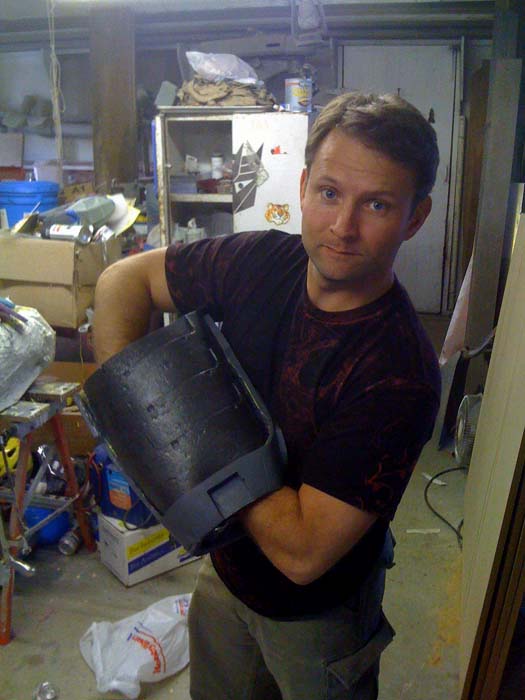

And finally, here's the money shot showing one of the foam rubber inner thigh parts taped into one of the rigid outer thigh castings:
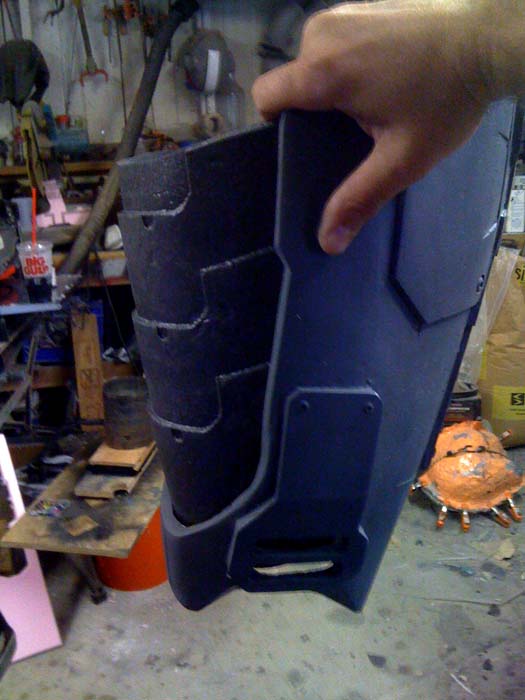

In related news, I've started tinkering with weapon builds using this thing too. Because I'm overly ambitious, I've started slicing up a sniper rifle model made by a character who calls himself Vrogy with some improvements by 405th.com member Bevbor. For my first attempt at cutting it, I made the muzzle brake out of 1/2" black acrylic. Here's the before pic showing my shiny black piece of acrylic:

Here's the after shot when the machine had done its business:

And here's the assembled muzzle brake:
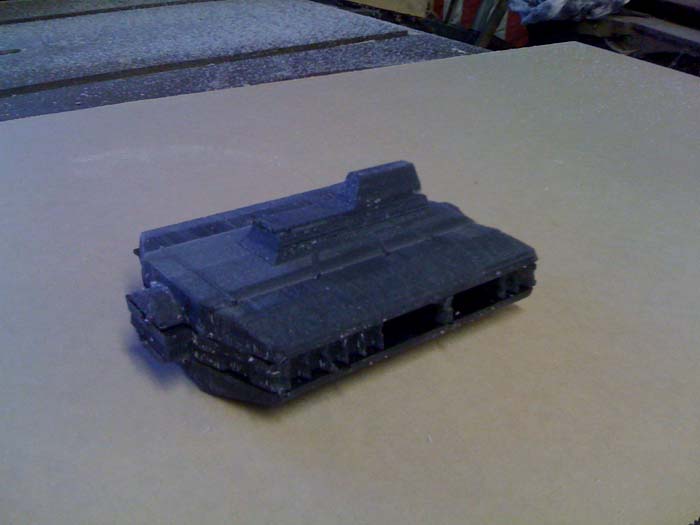
Unfortunately, the acrylic sheet was a hair under 0.5" thick. As a result, the finished muzzle brake was not quite as tall as it was supposed to be. On top of that, I've got the same problem with static cling that makes the much harder bits of acrylic tend to get stuck in the tender working bits of the machine. It took two tries to get the finished, too-small piece cut out. When you factor in the cost of the material and the difficulties of cleaning up the finished piece, making masters out of acrylic is a really bad idea.

Realizing this, I made another copy of the muzzle brake out of a piece of 1/2" foam just for gits and shiggles:

While these experiments have been fun and educational, I'm thinking that my next round of prototypes are going to be cut out of plain, ordinary, medium-density fiberboard. Also, having realized that I should learn to walk before I run my first marathon, I'm going to start by making a pistol instead of a 6'2" long rifle.

In the meantime, I need to come up with a suitable name for the machine. It seems like calling my robot shop assistant "it" is disrespectful. Any suggestions?

Tuesday, March 23, 2010

At Last: a Robot to Do My Bidding

Well if not my bidding, at least it can do my whittlin' for me. A little while ago I picked up a Craftsman Carvewright, a computer-controlled carving machine that can carve patterns into wood, foam, and a variety of plastics:


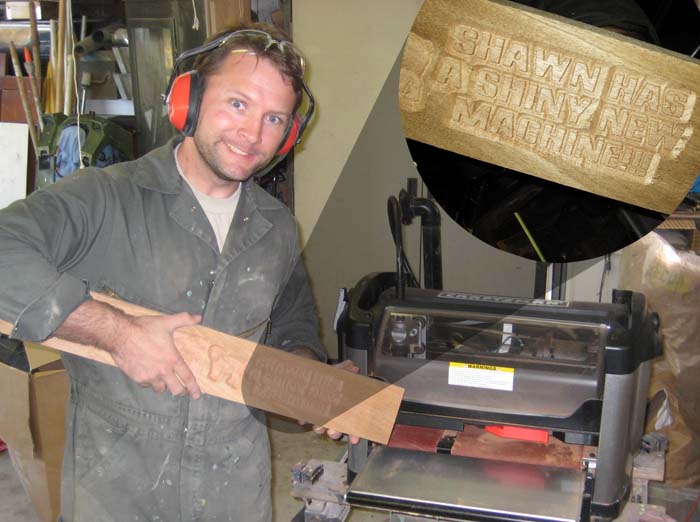
After reading and re-reading the owner's manual, I finally went ahead and built a test project. I grabbed a small scrap of mahogany and set up the machine to carve a handful of pictures and some text onto it. Here I am looking happy about it:
Shiny New 1
I made it a point to include as many small details as I could. It managed to cut them all, but since the ball-nosed carving bit had a 1/16" tip, I was making it work a lot harder than it was designed to. While there were some problems with some of the smaller details on some of the pictures, the text came out great:
Shiny New
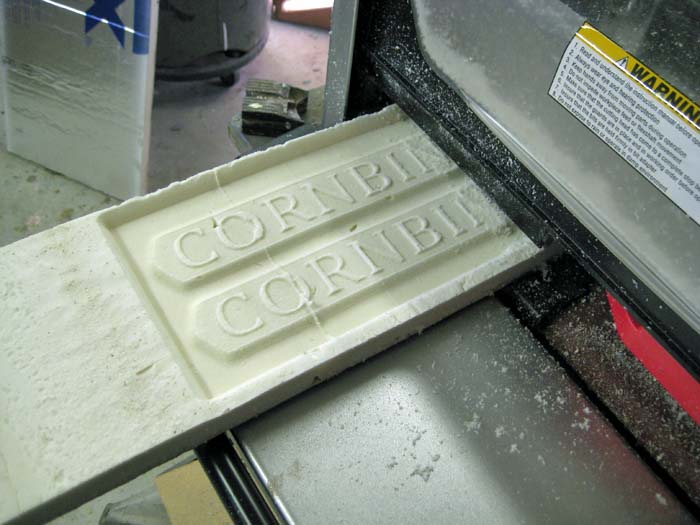
Having found the limitations of the device, I started making pieces and parts. Here's a rough draft of the replacement insignia I'm making for my father's RatRod built from an International Pickup truck:
Testing the Machine
For those of you who don't know, "Cornbinder" used to be a somewhat common nickname for International trucks. I didn't know either.

I'm also using it to make a few parts for the HALO project. Here's the prototype for the inner thigh part:
Inner Thigh Prototype

Now I'll be painting this piece and making a silicon mold to pull copies in urethane foam rubber. Painted black, they'll look like so:


There's also a function that lets me import 3d models, slice them into pieces that can be carved from flat stock, and make parts that can be stacked and glued together to make a 3d object. I'm building up to be able to make one of these:


Done right, this thing will be about six feet long. Fun!

In the meantime, I'm still trying to think up a name for my new robot shop assistant.

Stay tuned...