
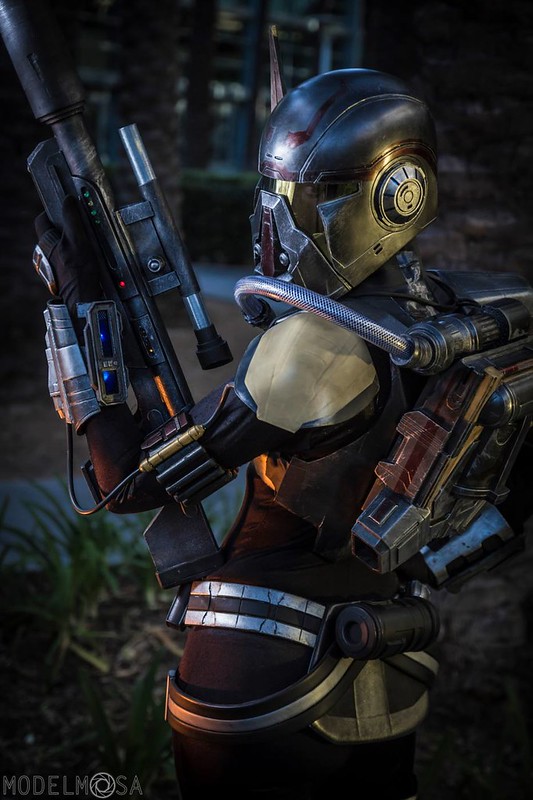
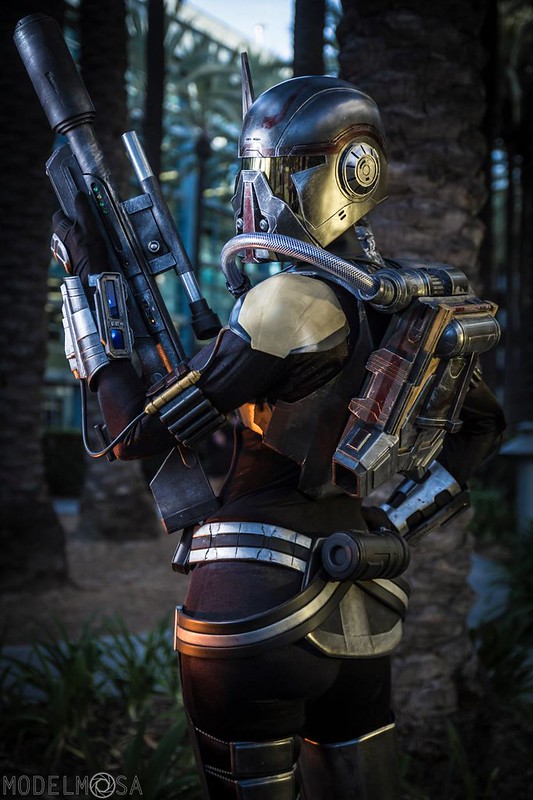
That's the Lady Shawnon wearing her Shae Vizla costume at Star Wars Celebration Anaheim.
Shae Vizla is a mercenary character that shows up in the trailers for the MMORPG Star Wars: the Old Republic. You can see her being a supreme badass in this video:
So here's Shawnon being a supreme badass:
To see how the costume was made (and a bunch more pictures of my smokin'-hot girlfriend showing it off) read on...
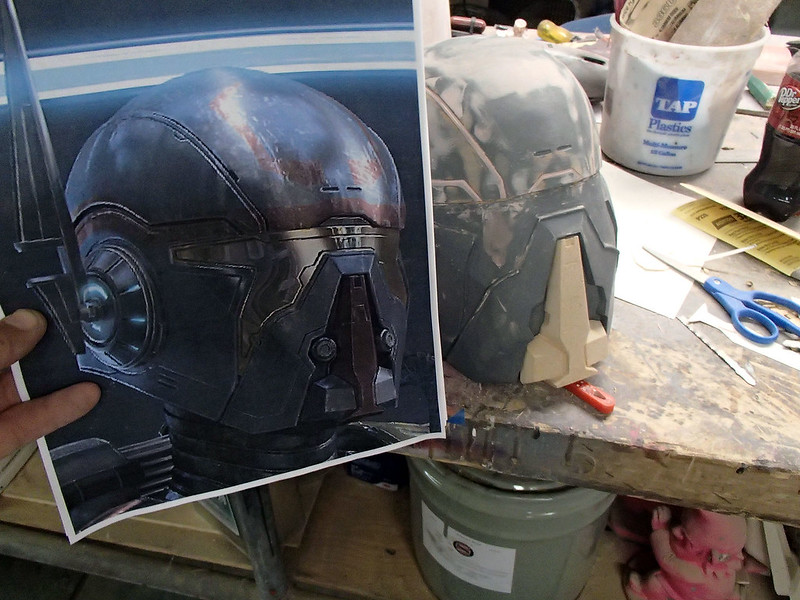
It all started in 2013 when I attended a meetup for members of the Replica Prop Forum in San Rafael, CA. While perusing the tables full of awesome that everyone had brought along, I spotted this large format printed image on one of the tables:
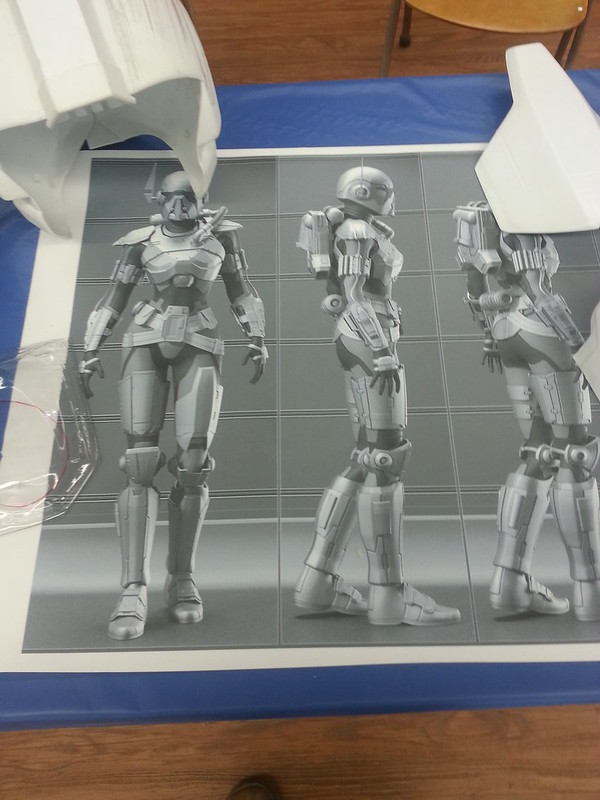
The guy who had set up the display was Darren Wright of DW Design Studios. If you don't know who he is, check out his site: LINK. He's got quite a portfolio of amazing Star Wars prop and costume builds behind him.
It turns out he'd been working on this particular costume for a while with no real deadline in mind. I asked if he'd be comfortable with splitting the remaining work and making two costumes instead of one. We worked out the details and in no time at all I'd started cranking out some parts for the helmet:
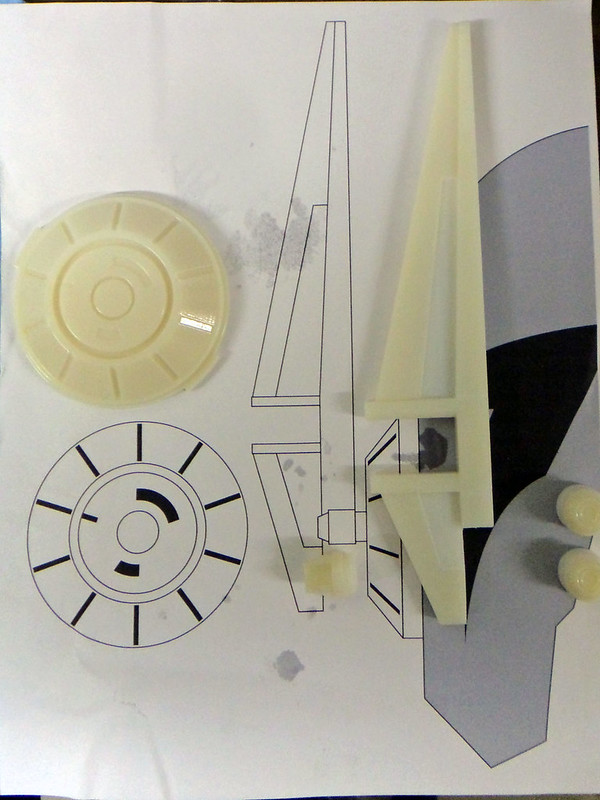
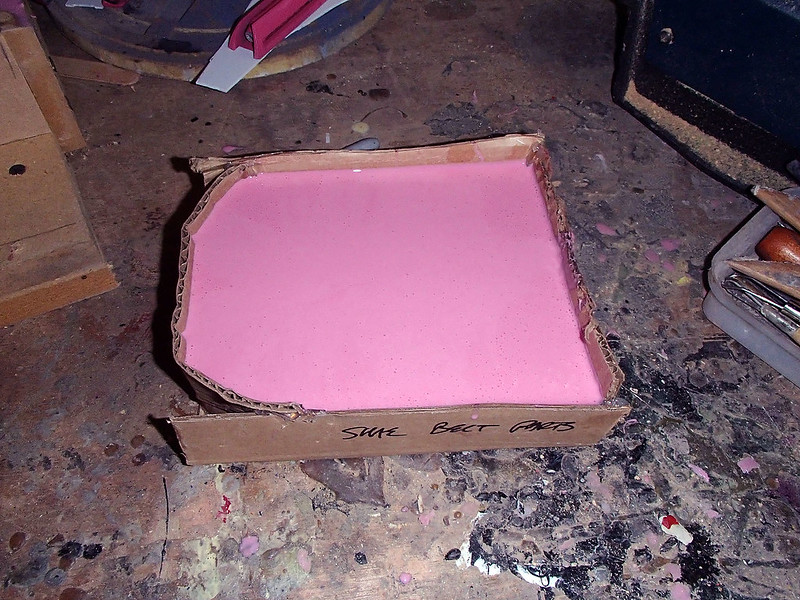
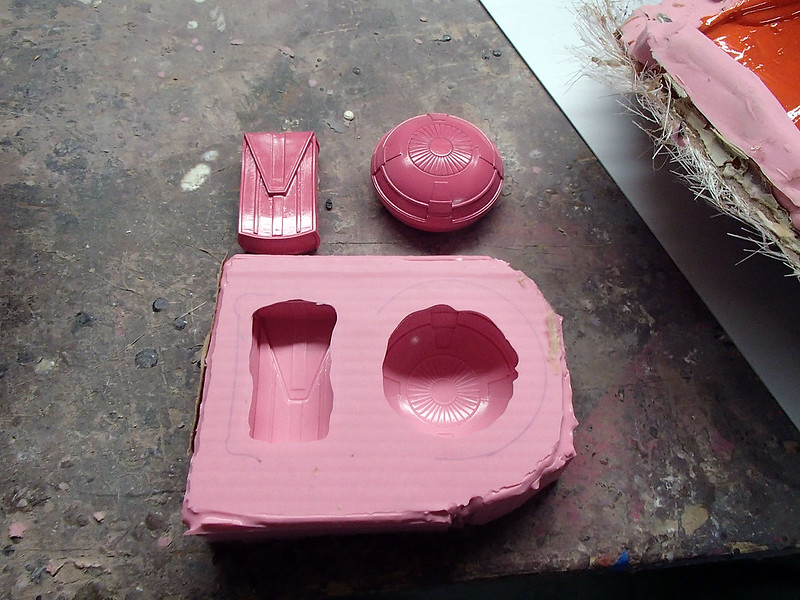
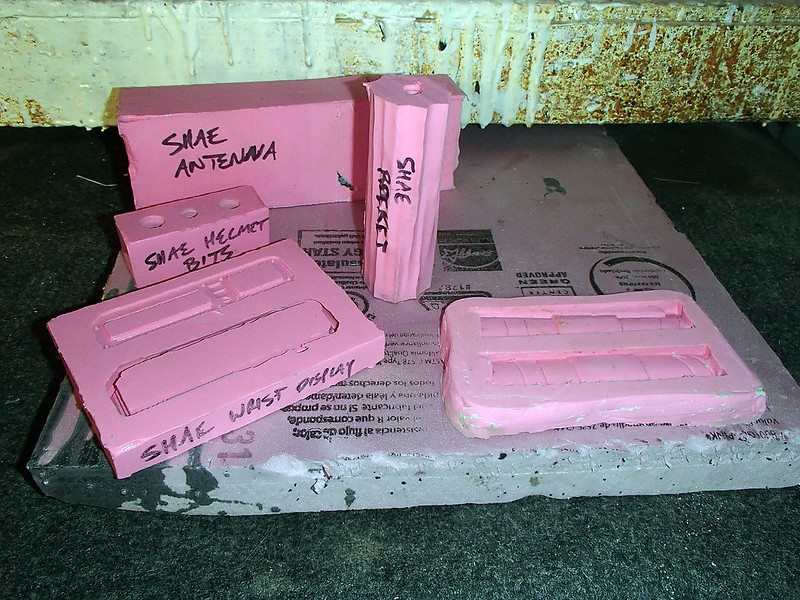
I also made a few details for the belt buckle display:

Those were quick and simple, but it was still some time before I was ready to start on a couple of the bigger pieces. For example...
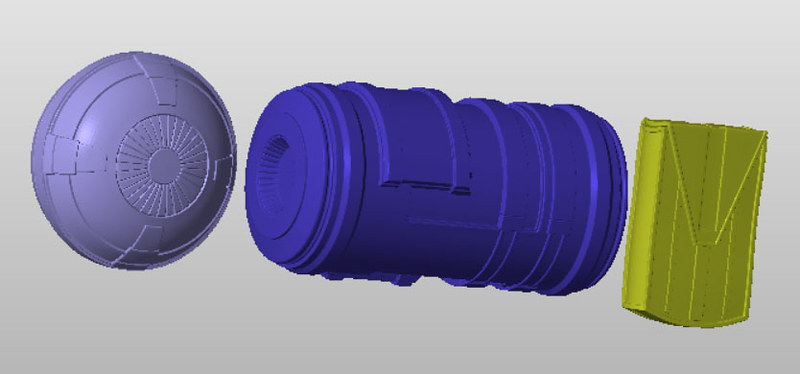
The Jetpack:
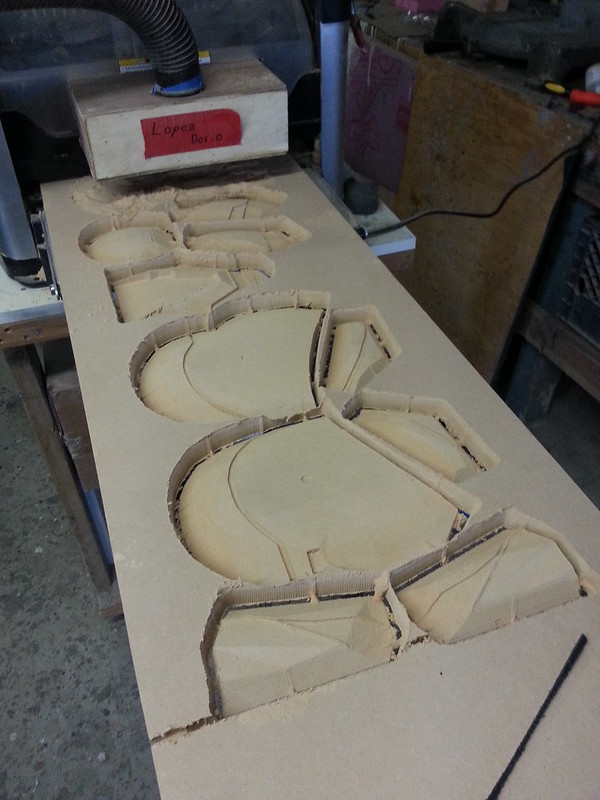
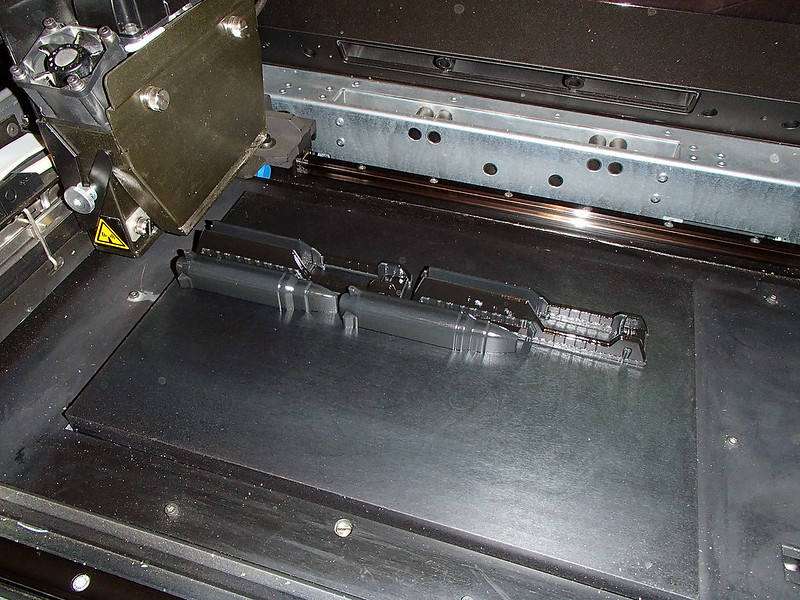
The jetpack started as a high-polygon 3D model which was drawn up by my friend Michael at Fierfek's Premium Pepakura Models. I had Lopez the Robot Whittler (my Carvewright CNC Machine) cut out for me. Here's the full set of parts coming out of the machine:
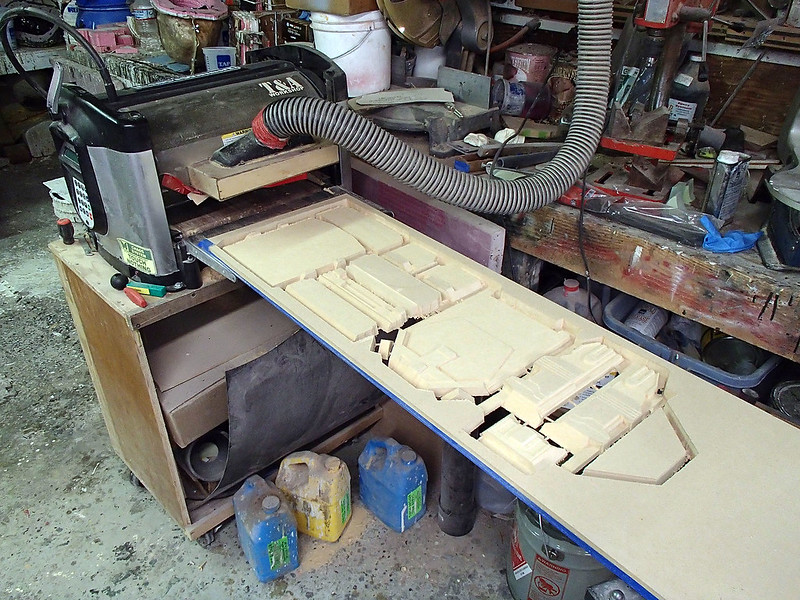
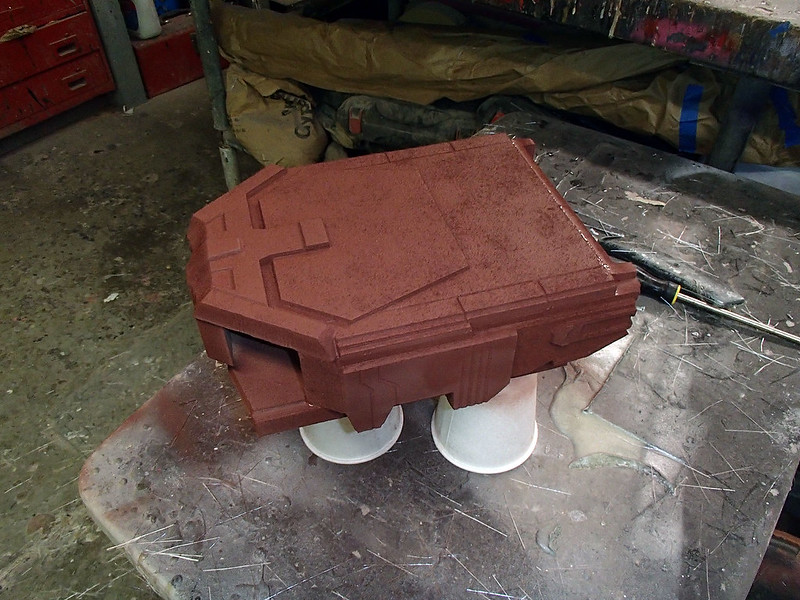
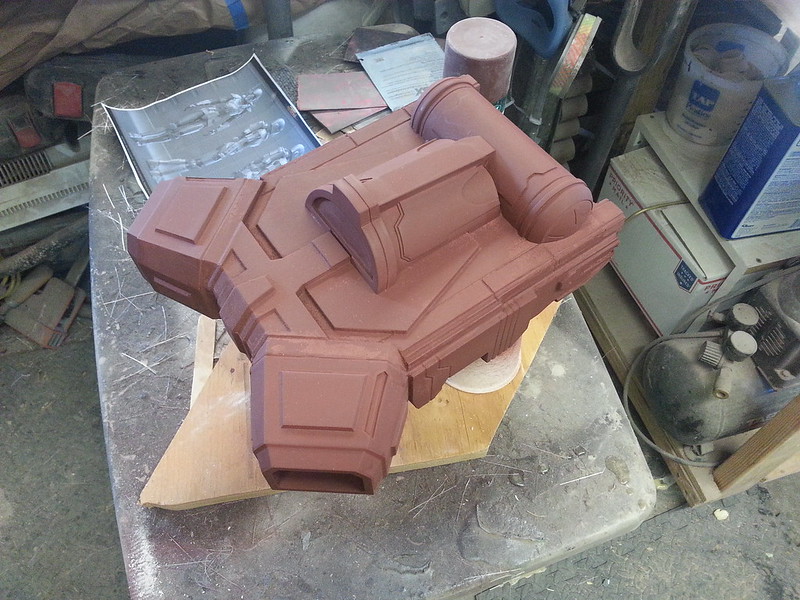
After snapping off the waste material, here's the main body assembled and primed:
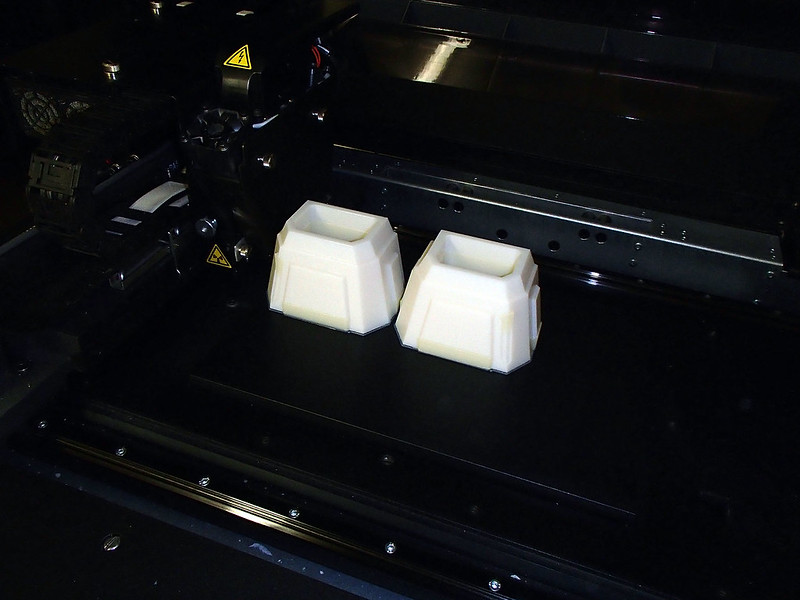
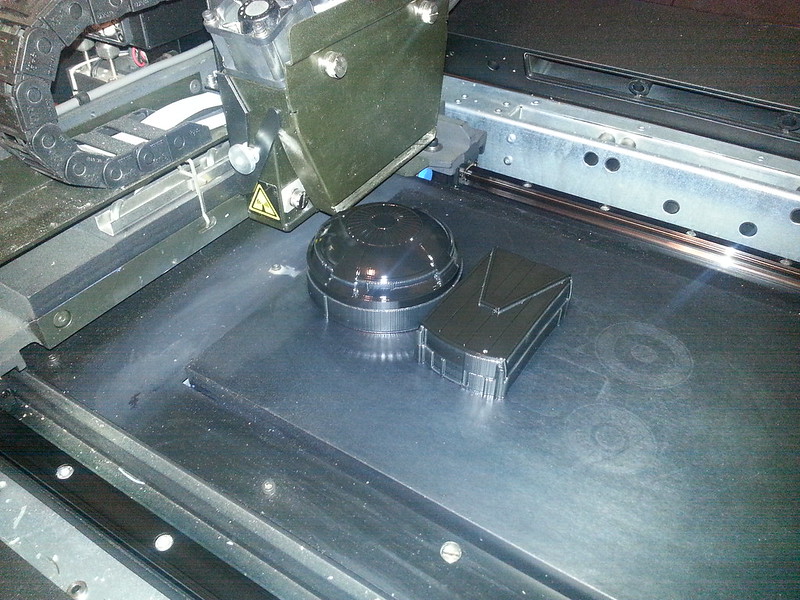
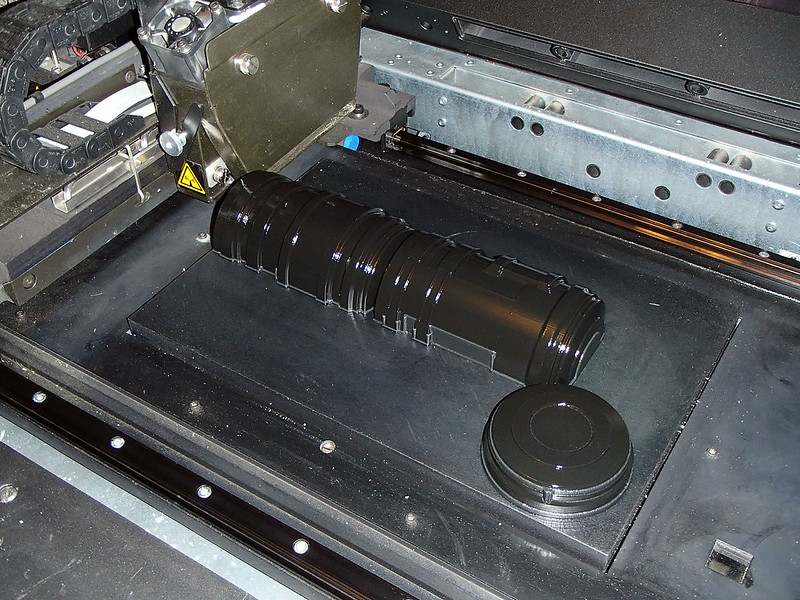
Some pieces were still better suited to 3D printing. Here's the exhaust nozzles all printed up:
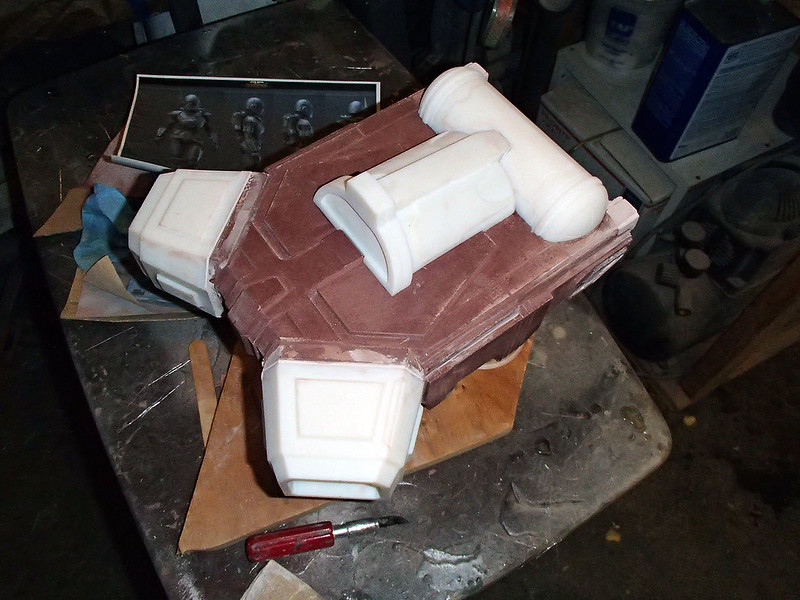
Here you can see them installed along with the bigger detail parts for the back:
After a bit of sanding and filling, the whole thing was looking pretty good:
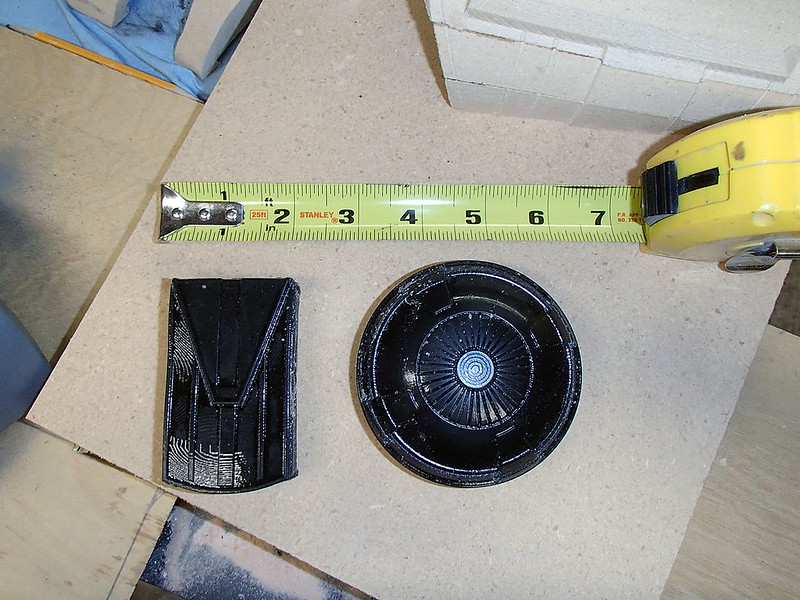
There were also these last two printed pieces (shown here in white) which would be molded and cast separately:
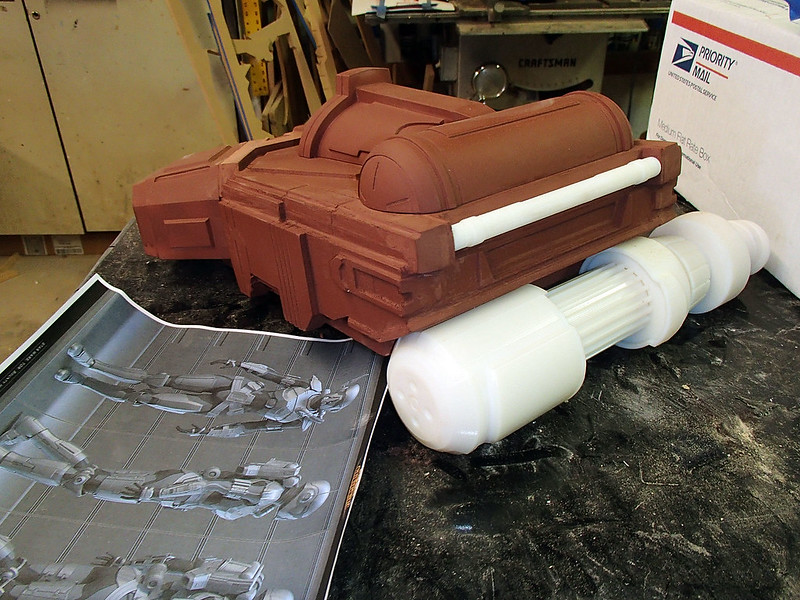
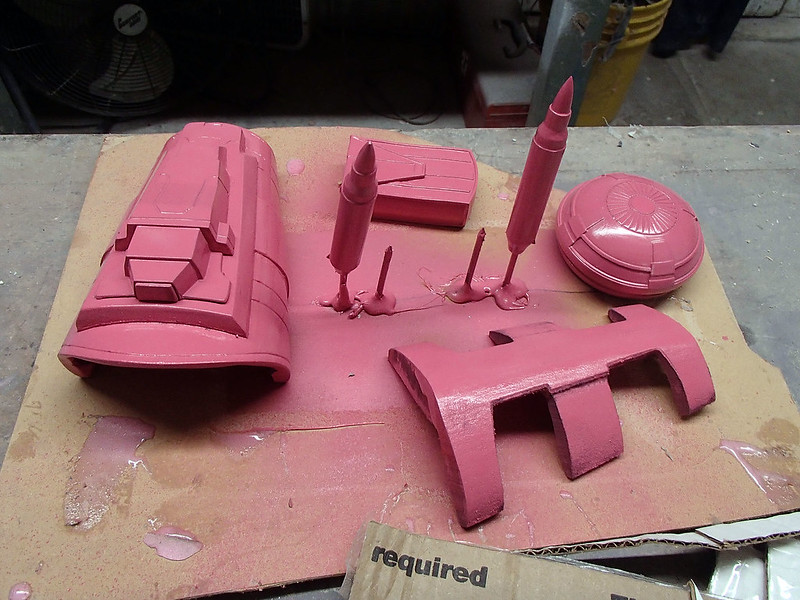
So that was all the machines could do for me on the jetpack:

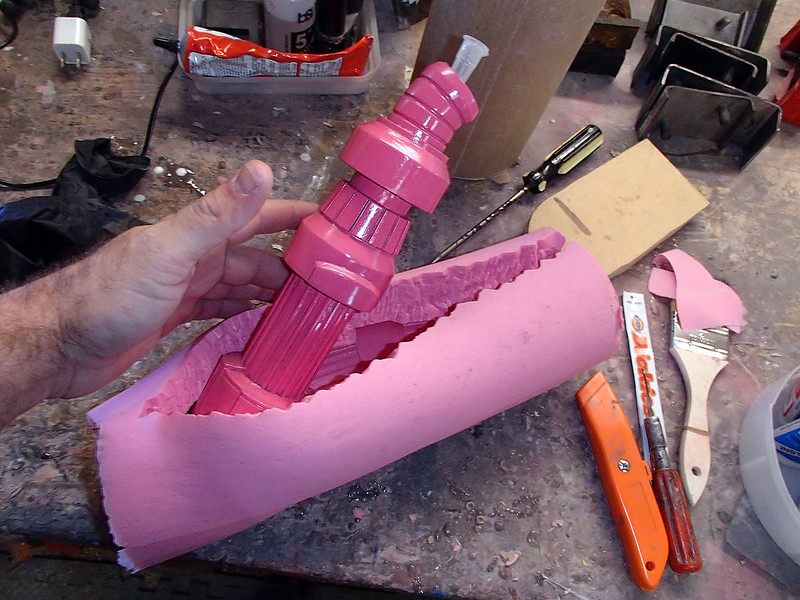
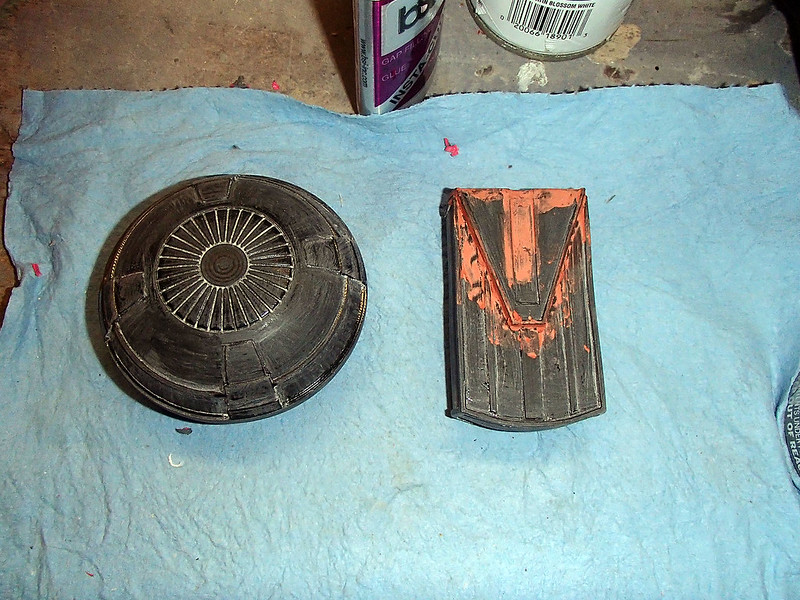
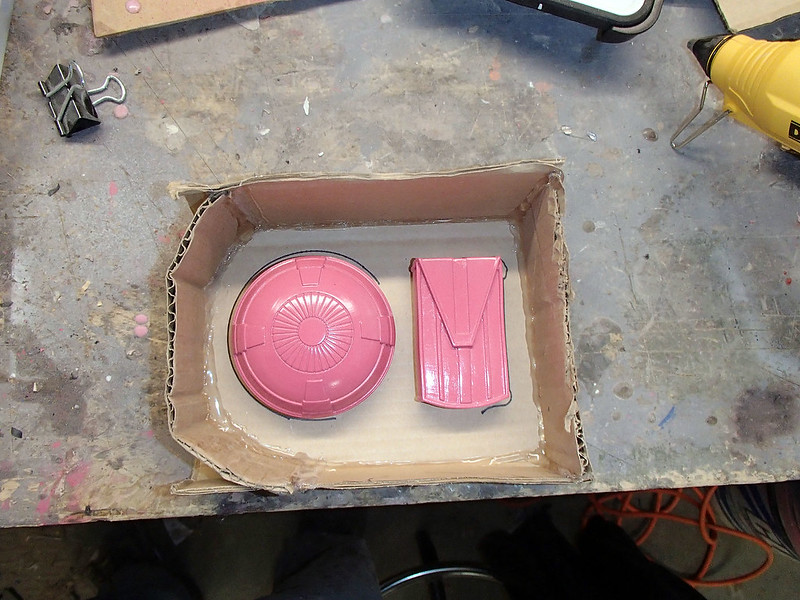
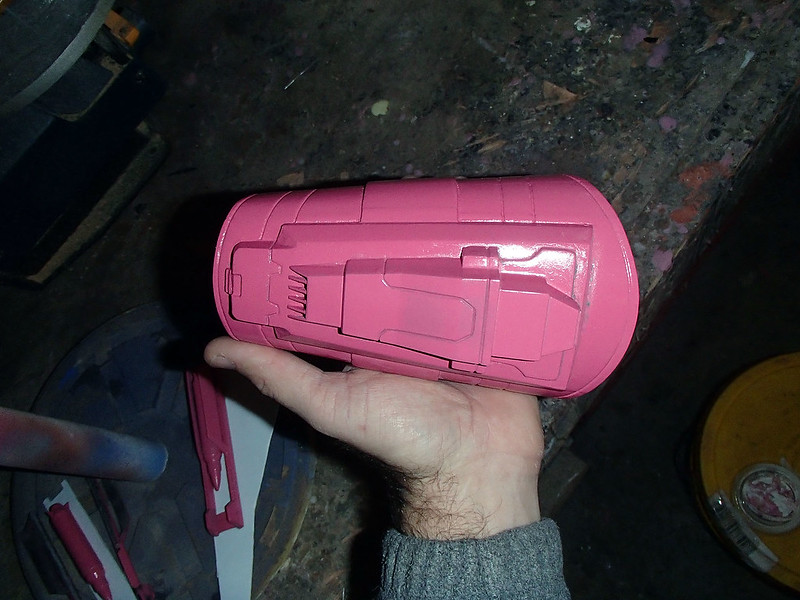
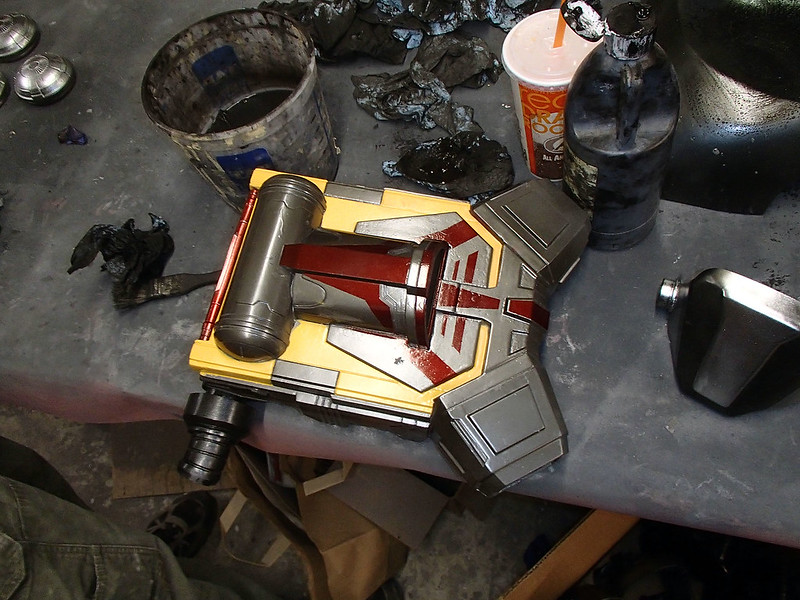
After I'd smoothed everything out, I made it shiny and light red:
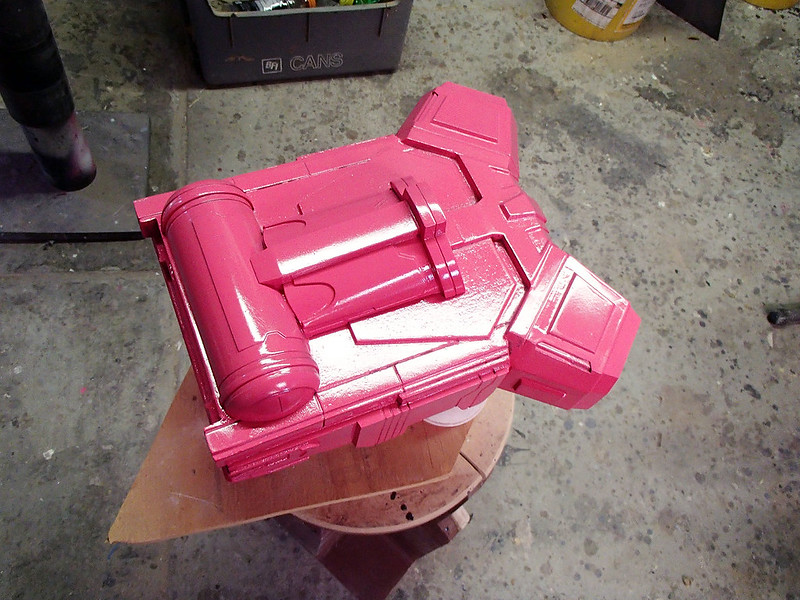
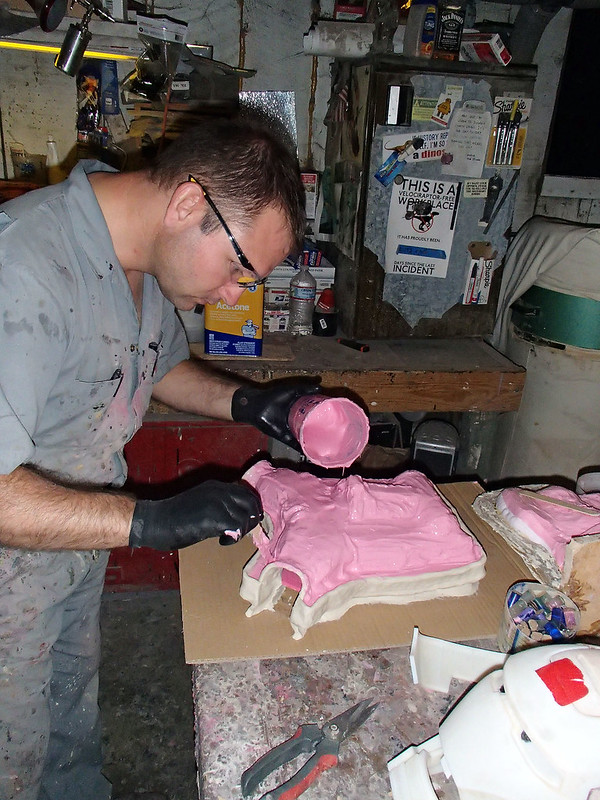
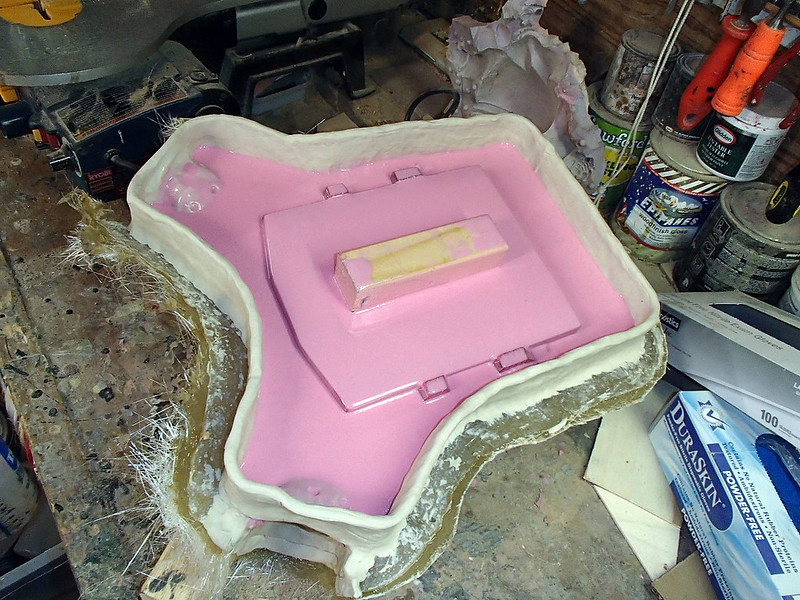
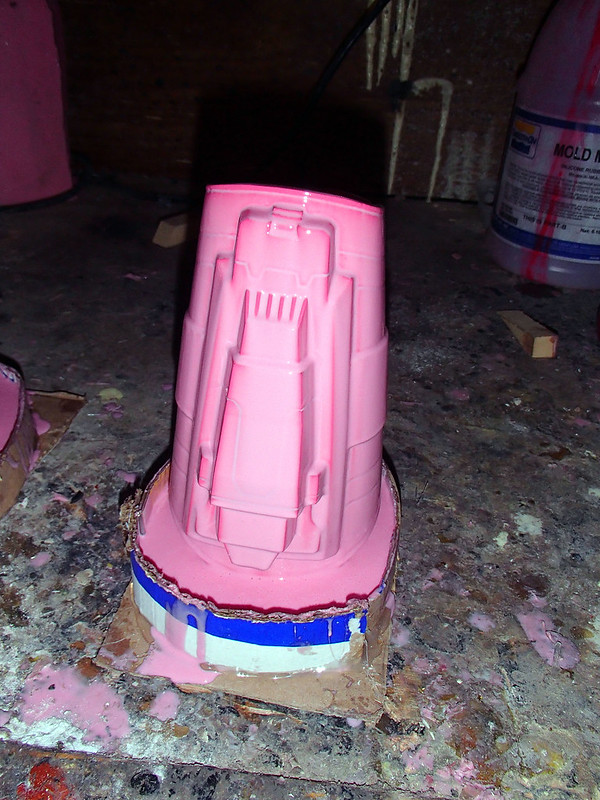
Then started the silicone rubber jacket mold:
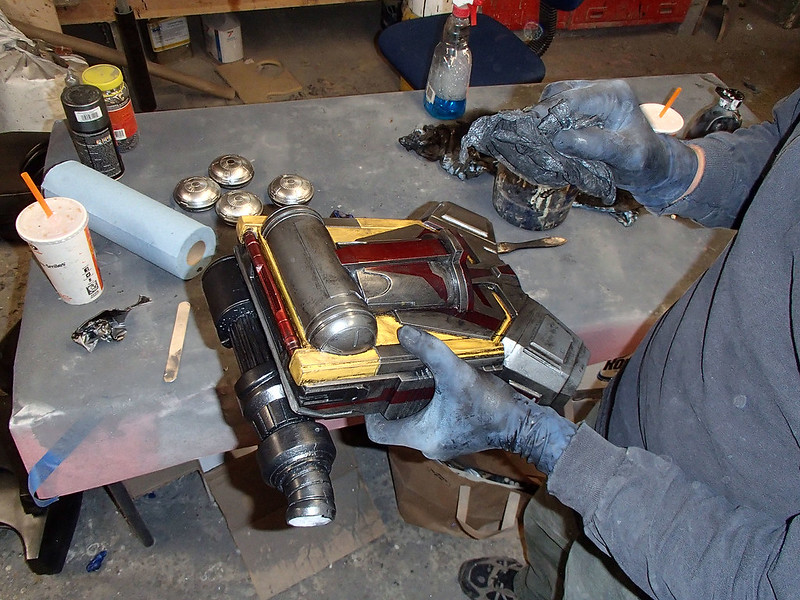
The mold ended up being four separate pieces. There was a front, a back, and a couple of plugs to help shape the inside of the exhaust ports. Here you can see me thickening up the back:
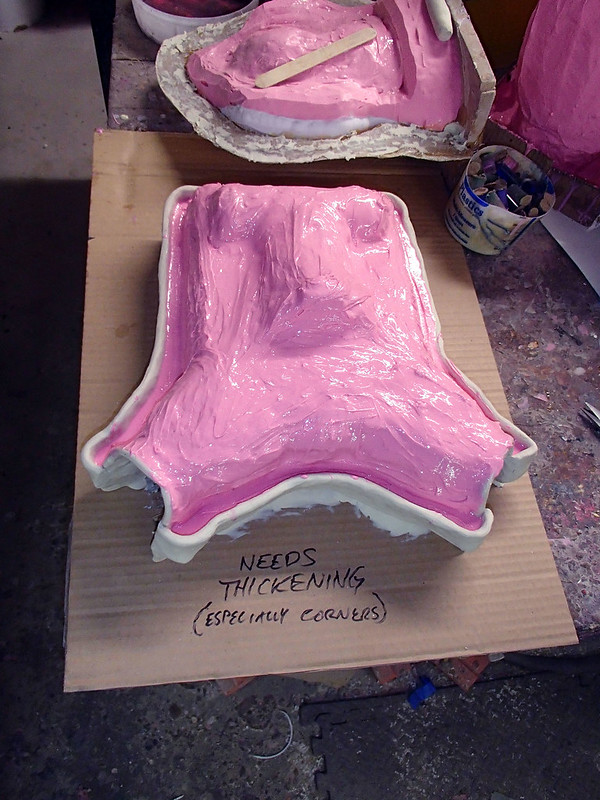
Here it is with a bit more silicone built up:
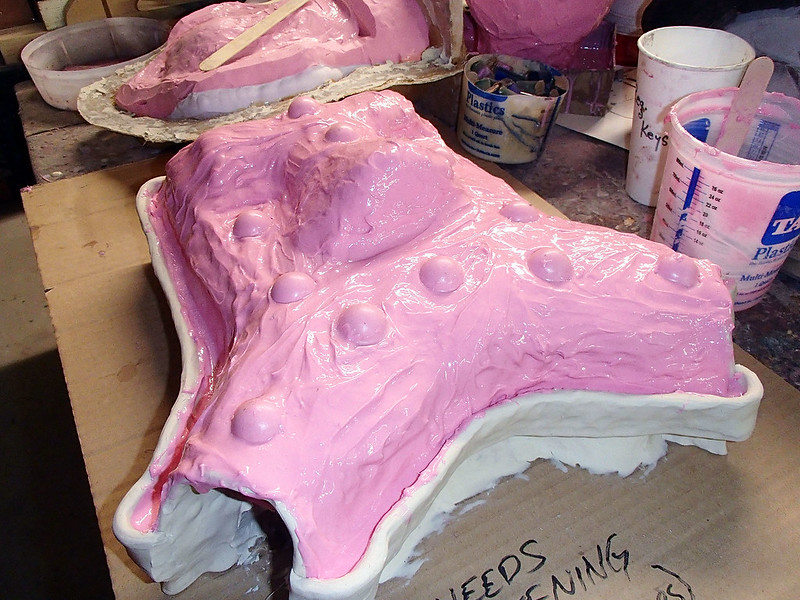
Somewhere along the way I added these little silicone hemispheres to help the rubber jacket register into the fiberglass mothermold:
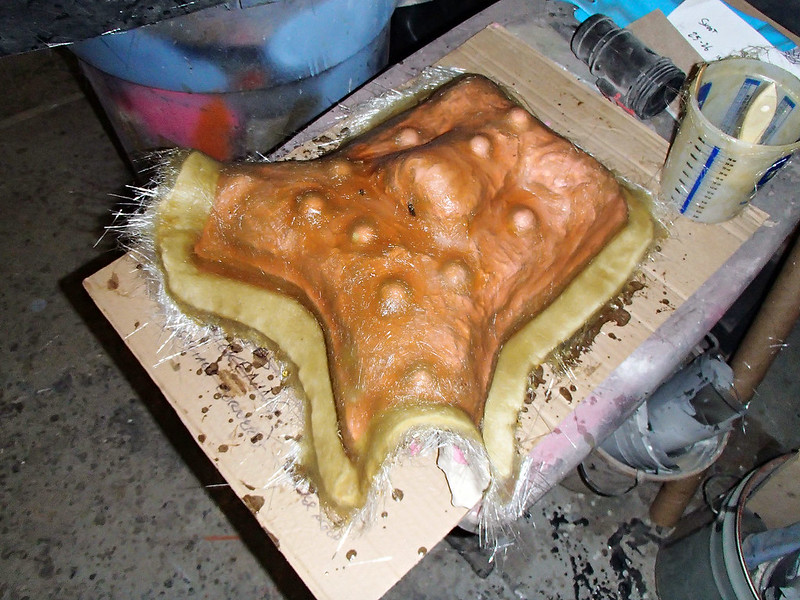
Once the thickened silicone had cured, the next step was to lay up the fiberglass mothermold:
When that was cured and trimmed, I flipped the whole thing over and prepped the other side for molding:

The block of wood in the middle was added to make a hole in the silicone to act as a sort of pour spout so I could get resin into the mold.
After spraying on a mold release, here's the first batch of silicone poured on:
Just like the other side, more silicone was laid on to thicken the mold:

Then I added registration keys and laid up a fiberglass mothermold:

The rubber inserts for the insides of the exhaust vents were poured over the next couple of days:
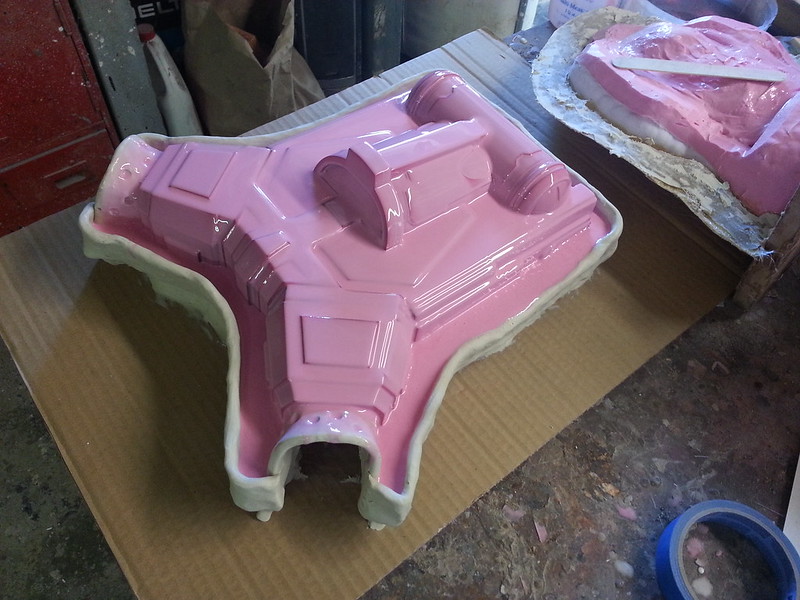
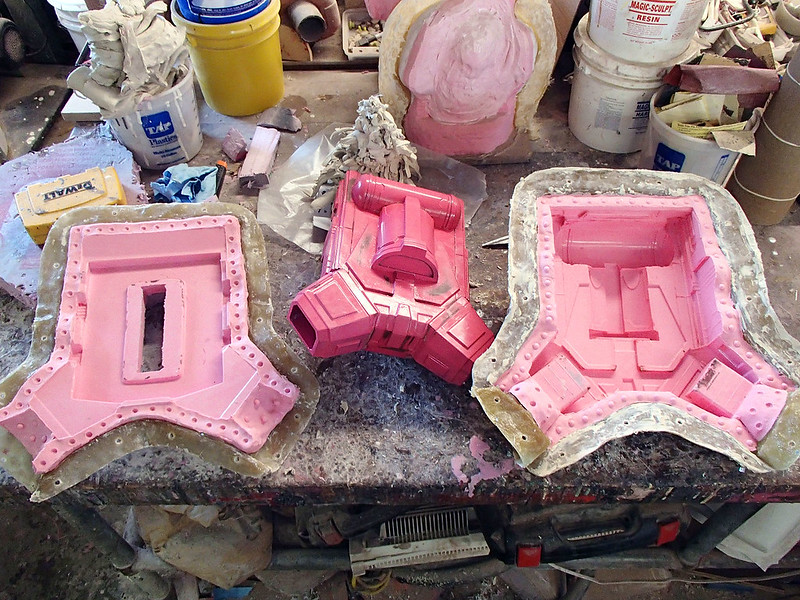
And then the mold was done:

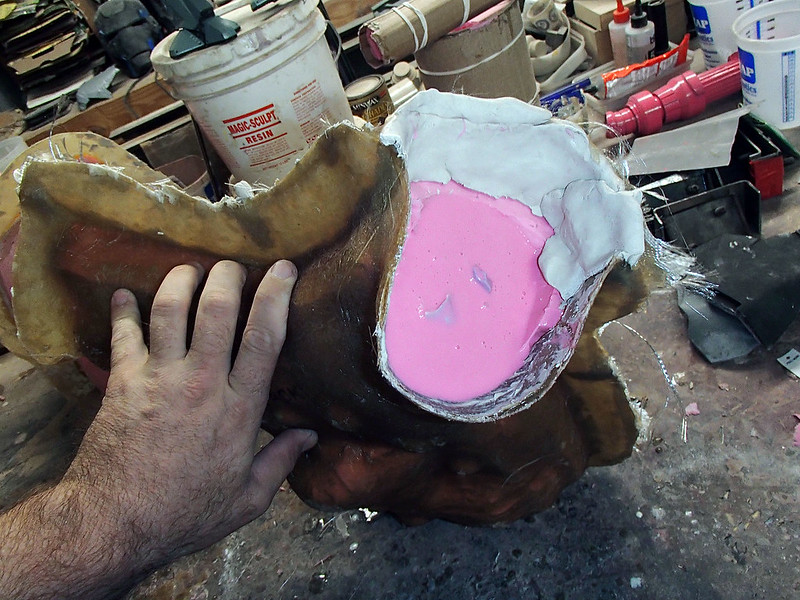
Here's the prototype after I'd pulled it out:
And here's the first rotocast copy of the jetpack:
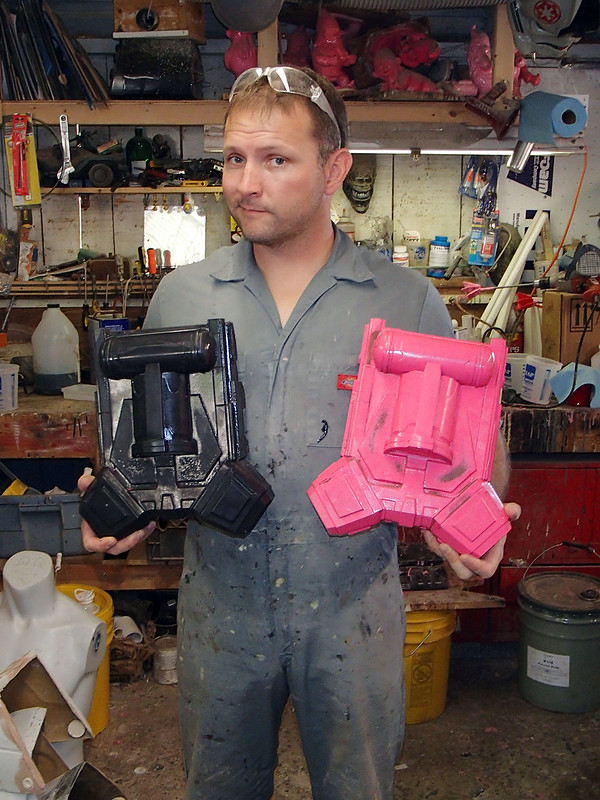
Piece of cake.
The Helmet:
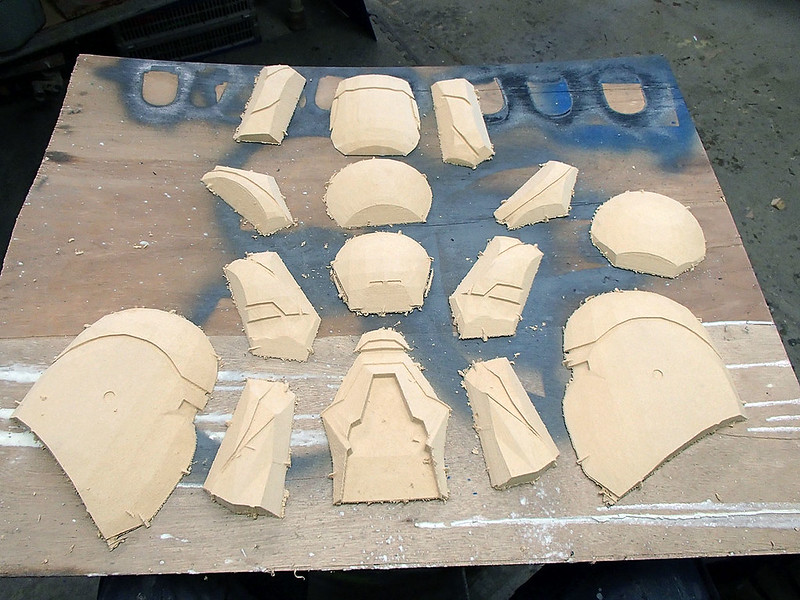
Originally, Darren had someone else on board to make the helmet. But as time marched inexorably toward the beginning of the convention, it started to look like that guy wasn't going to find time to get it done. So we finally decided it'd be best if I just jumped on it. Which of course means I put Lopez Dos Point Oh to work on it. Here's the full set of parts he cranked out:
Once again, after snapping off all of the waste, here's everything laid out on the bench:
And the complete model assembled:
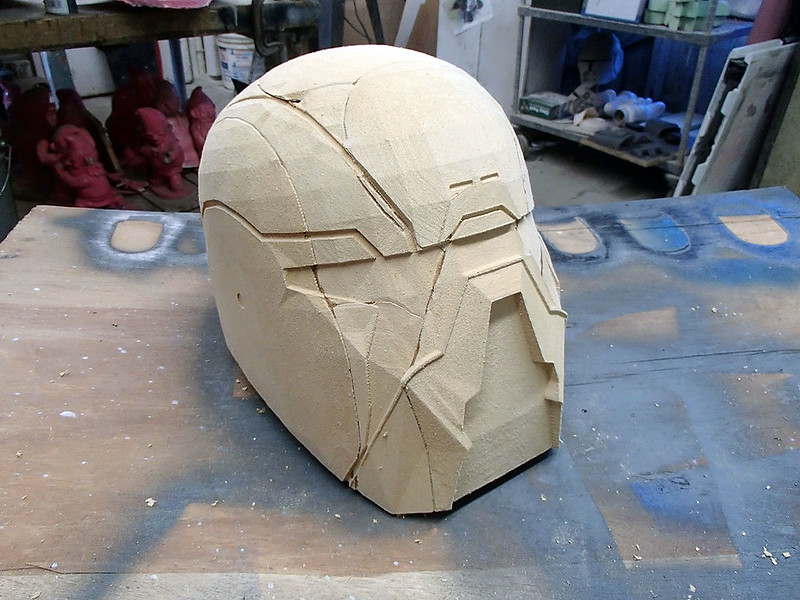
After rough sanding, I saturated the finer details with cyanoacrylate adhesive to make them a bit sturdier. Otherwise, any more sanding would've obliterated them:

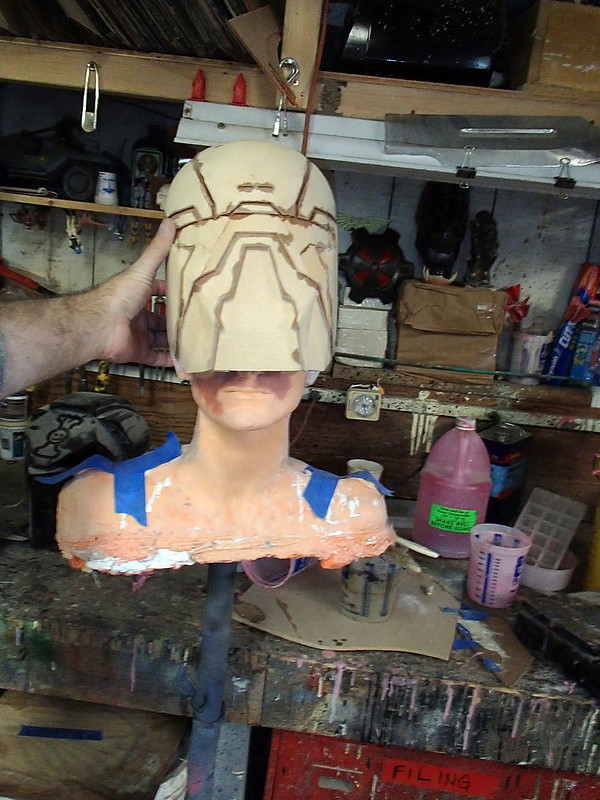
Size-wise, it looked about right. Here it is next to a lifecast of Shawnon's head:

I couldn't get it to fit, but that's just because the MDF Prototype is 3/4" thick in places. That, and the lifecast ears can't be pressed back out of the way. Still, close enough:
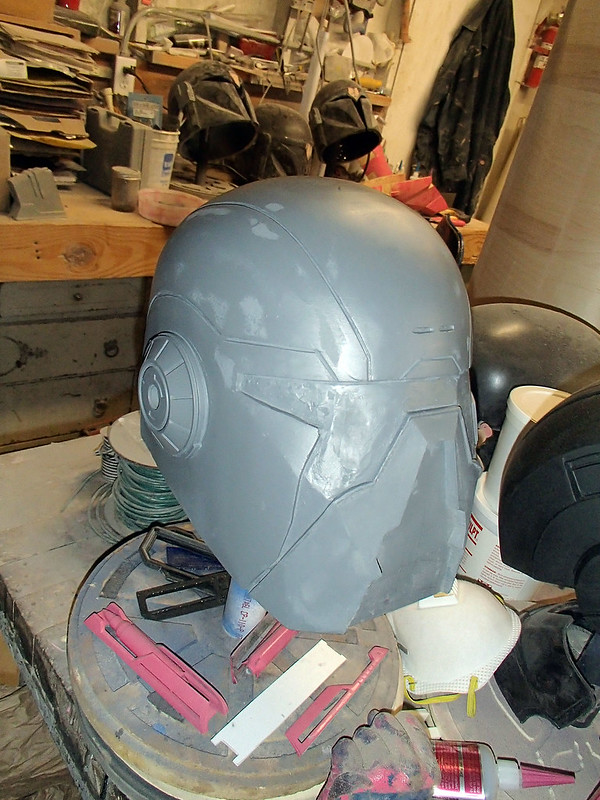
With the rough sanding done, it was time once again to soak a lot of primer into the surface:
Once that dried, I went to work filling in the seams:
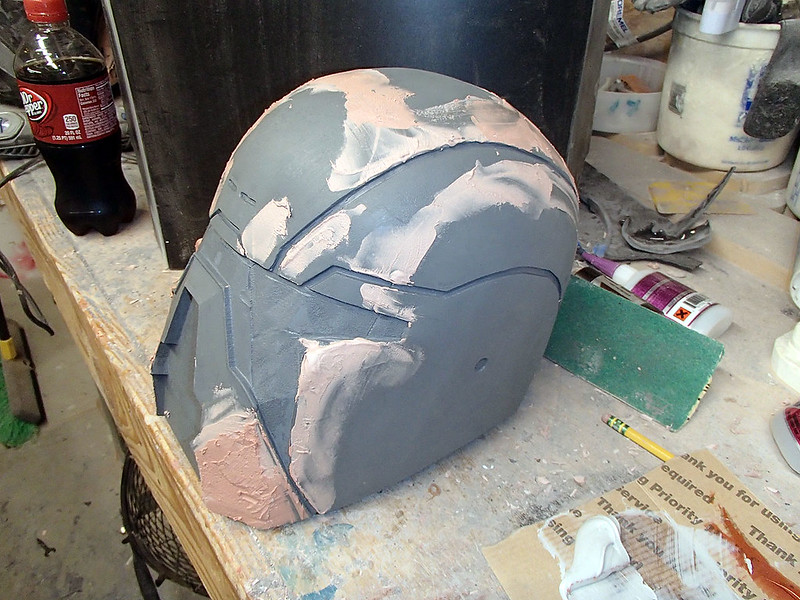
And adding more primer:
It came together pretty quick:
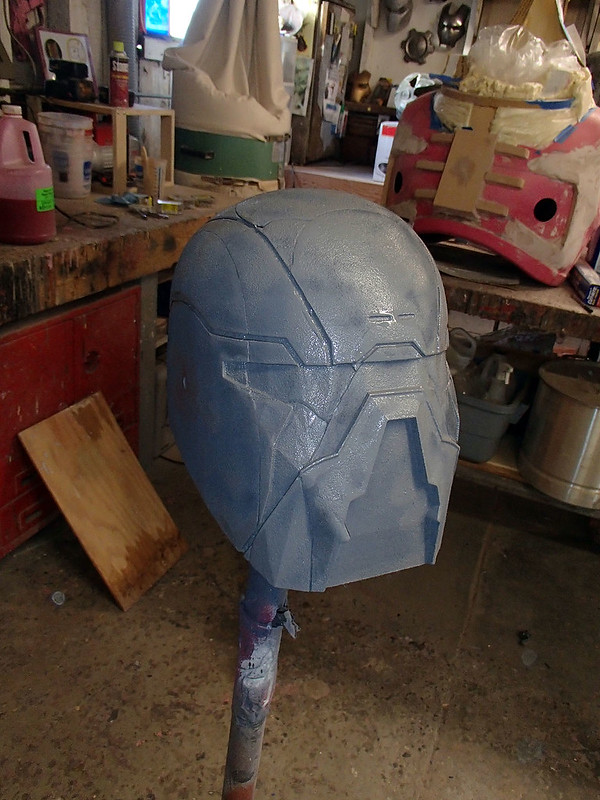
When most of the smoothing was done, I added the 3D printed ear caps and scored in some additional seam lines:
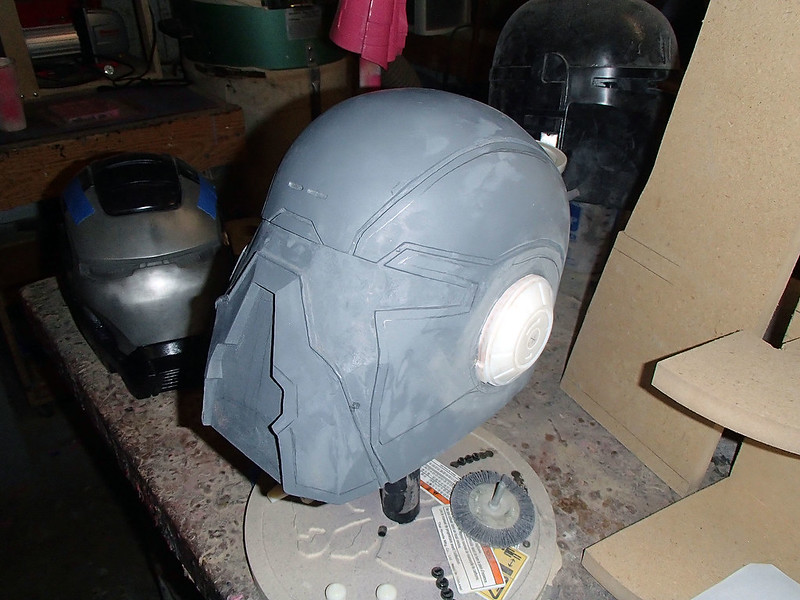
Somewhere along the way, I decided I really didn't like the way the seams were shaping up, so I filled them back in:
After sanding the whole thing smooth again I would just have to carve in new seams:
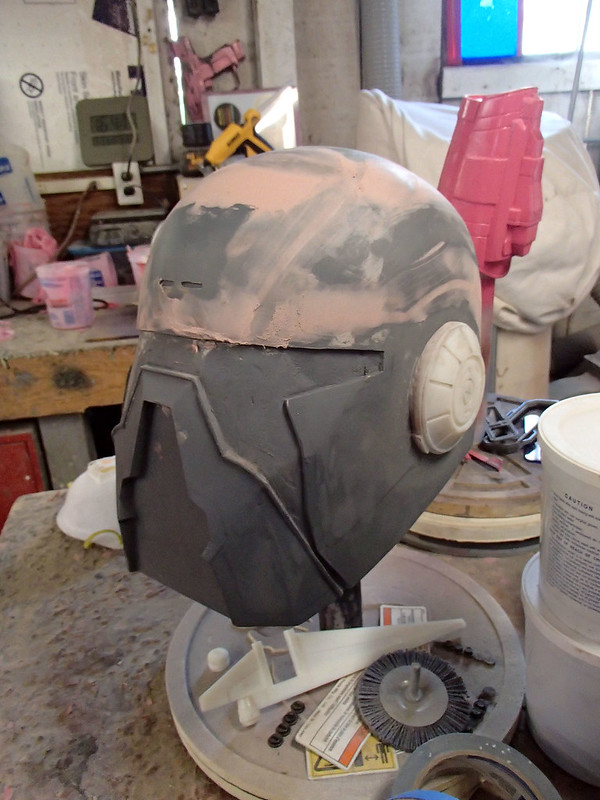
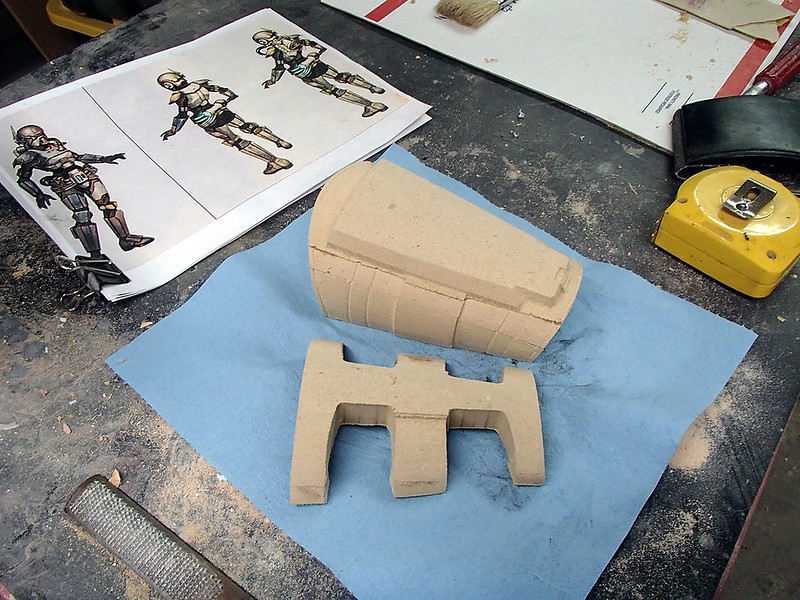
The last part of the helmet to make was the detail section of the mouth. I started with a rough cut shape in MDF:
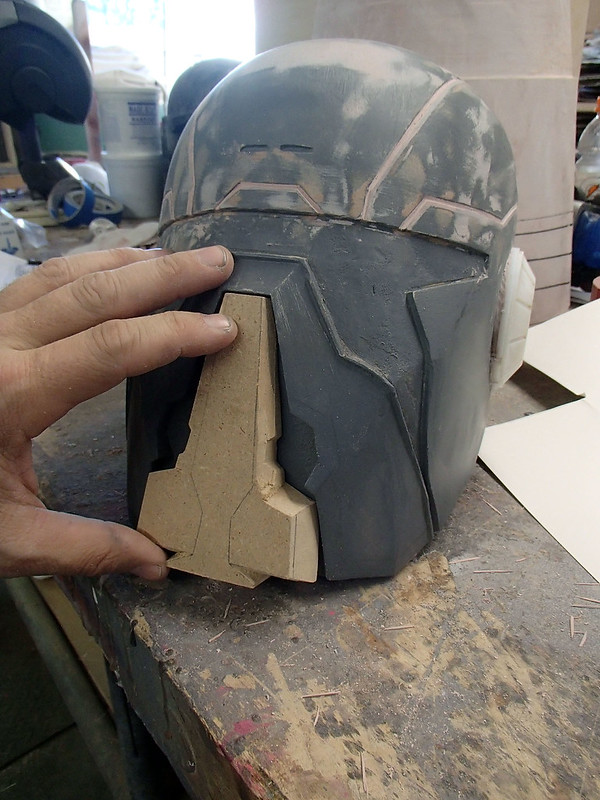
Then I whittled it down with a sheetrock knife and a couple of files:

Comparing the final shape to the reference images I had, I think I did okay:
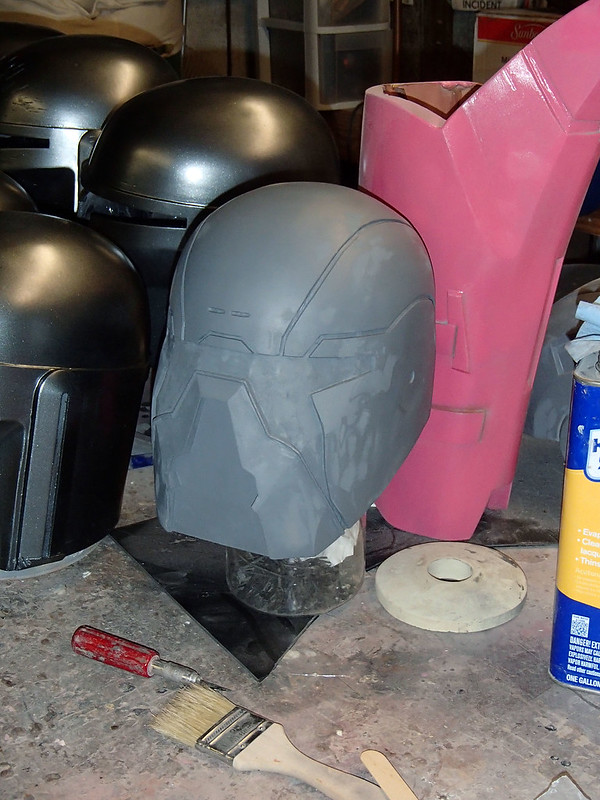
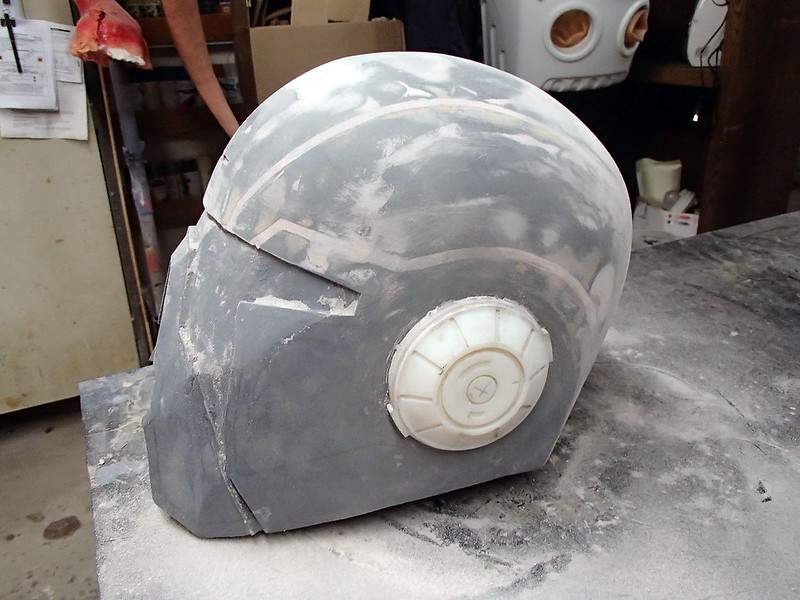
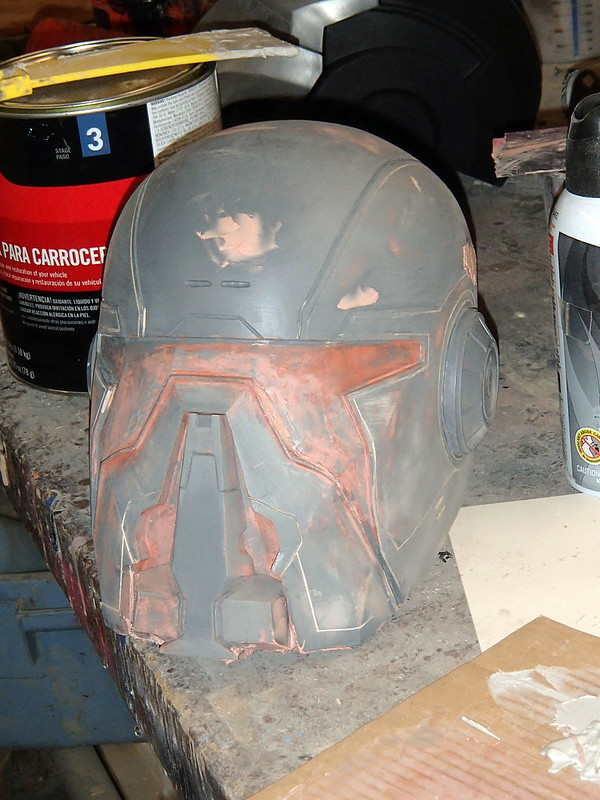
At this point I shifted focus back to the seams on the rest of the helmet:
Here's all of the seams carved in as well as the detail inserts for the mouth/nose area installed:
Here's my friend Janna (who's head is about the same size as Shawnon's) trying it on for size:
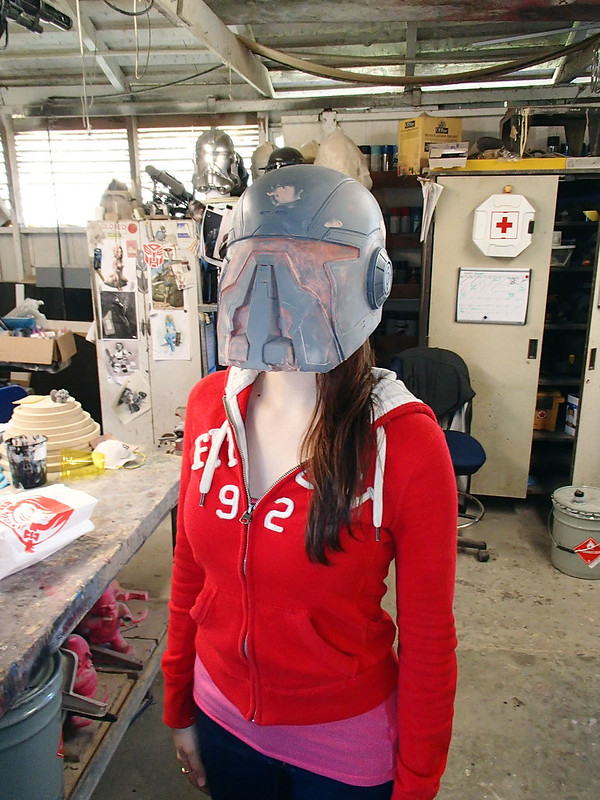
Looks about right.
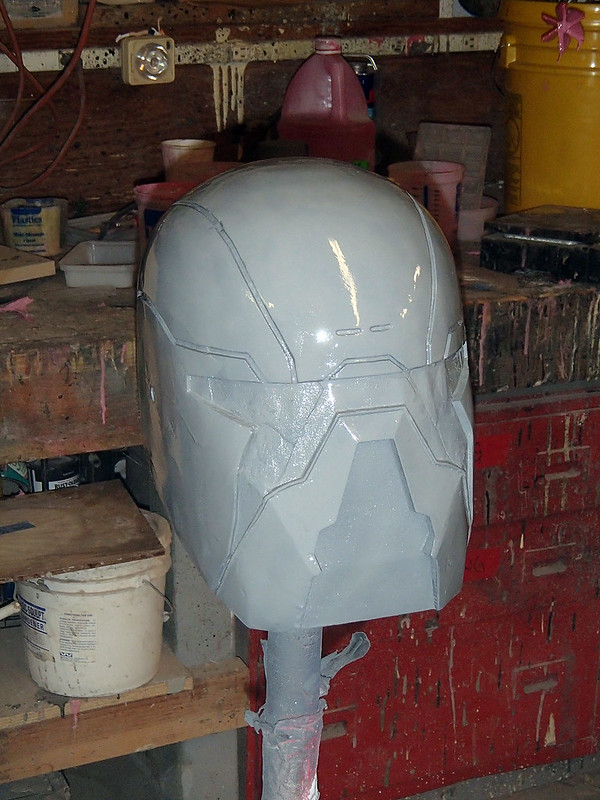
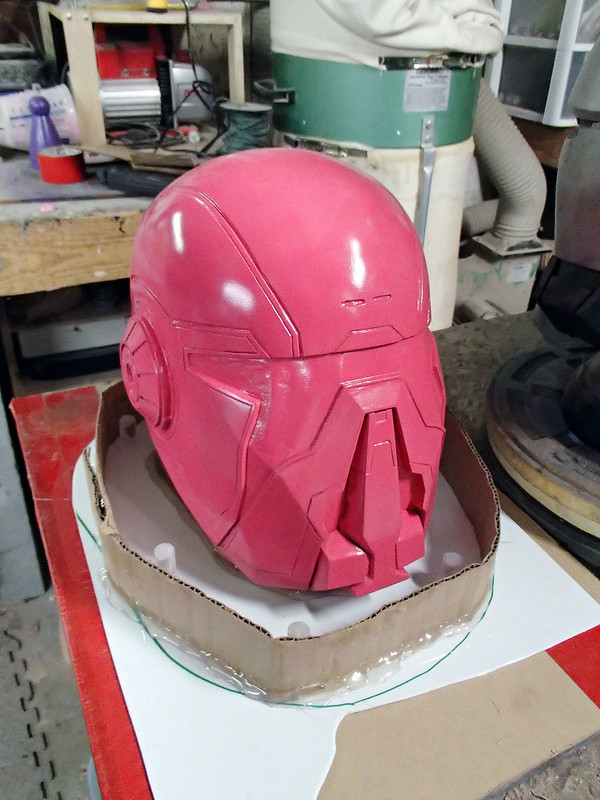
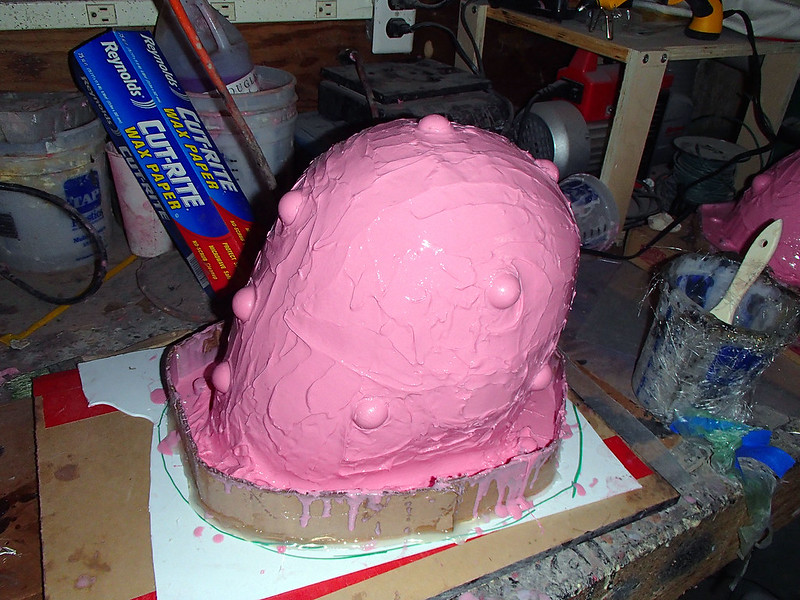
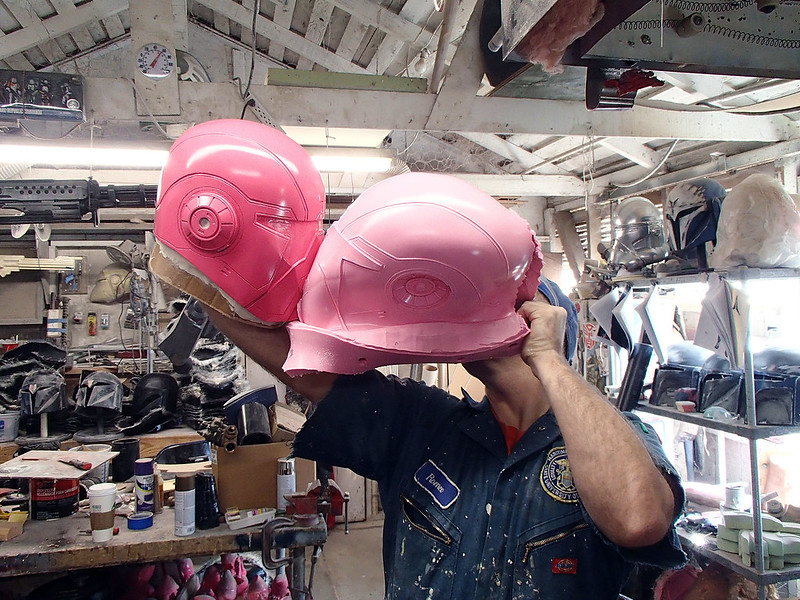
Happy that I'd gotten the shape right, I started making the whole thing shiny:
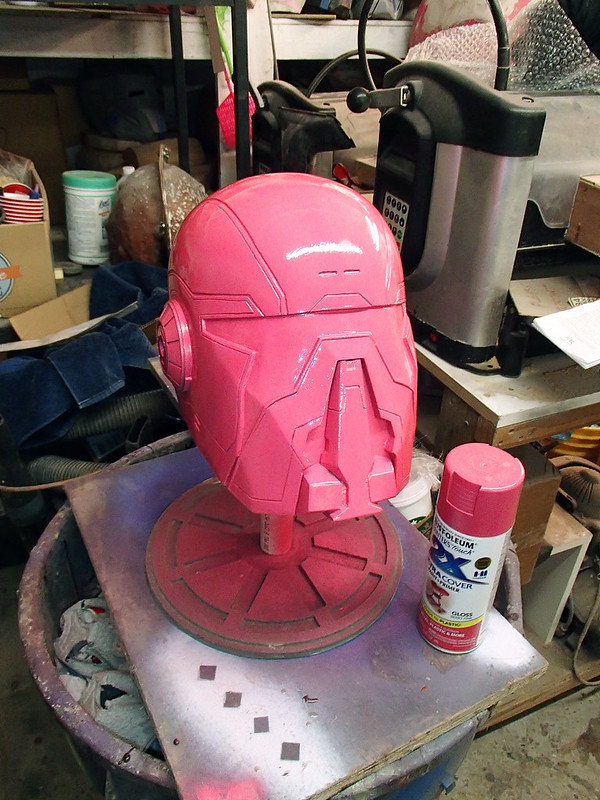
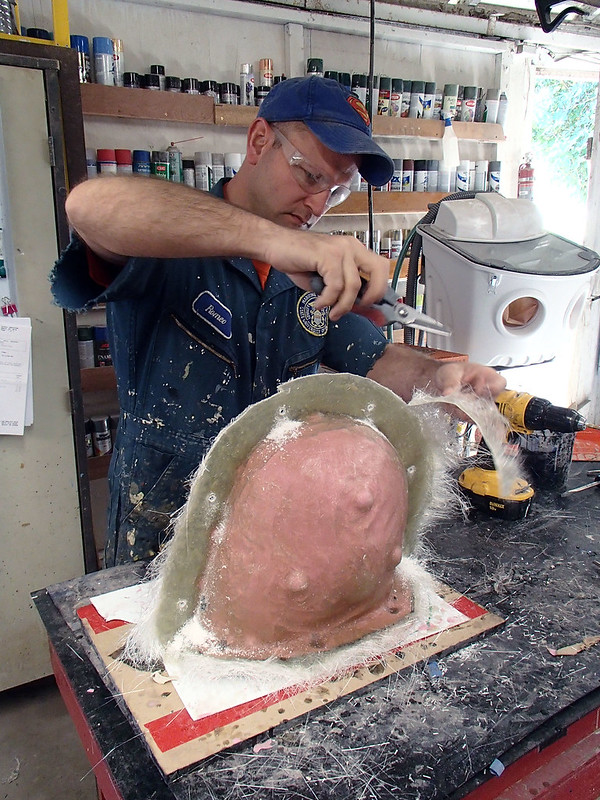
Then it was mounted to a board and I set up a cardboard wall to catch any drips:
Then the print coat was poured on:
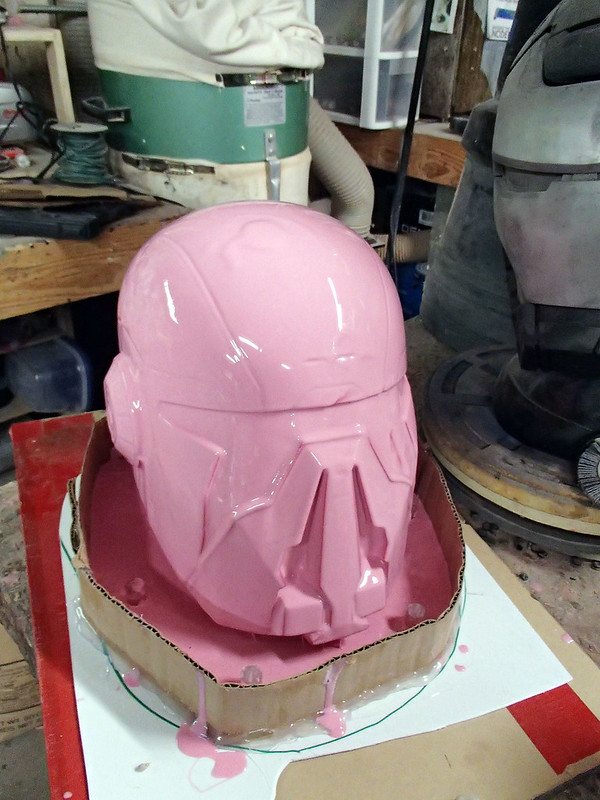
And the mold was thickened:
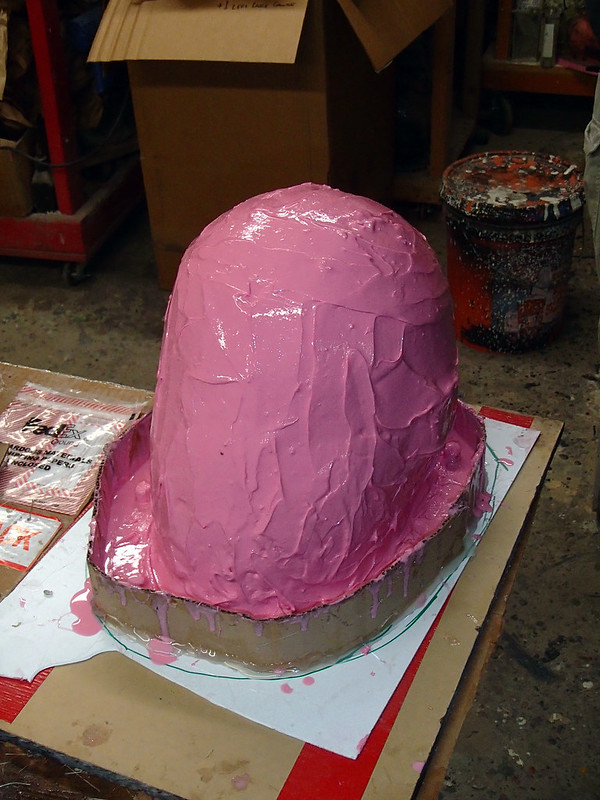
And thickened some more:
With the silicone built up, the next step was to build the fiberglass mothermold. It began with making a clay parting wall:
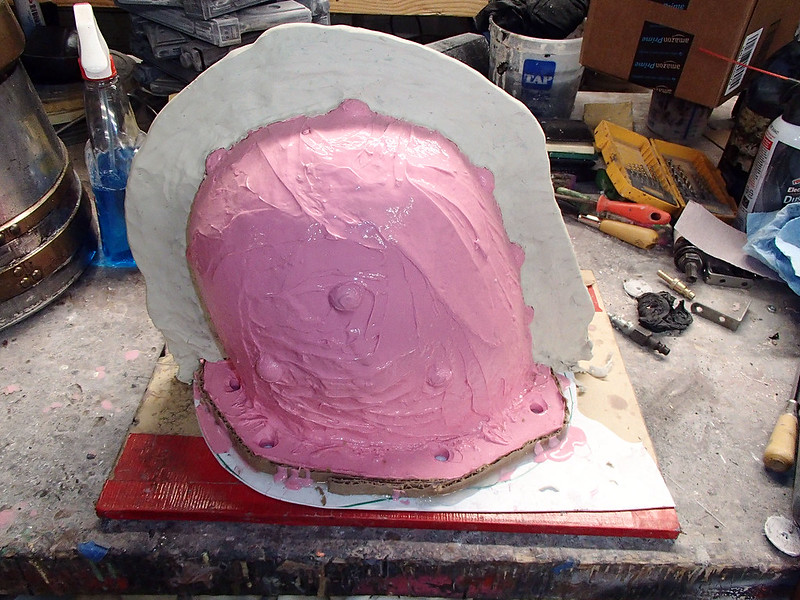
After laying up the glass on the first side, I peeled off the clay wall, applied a release agent, and laid up the second half:
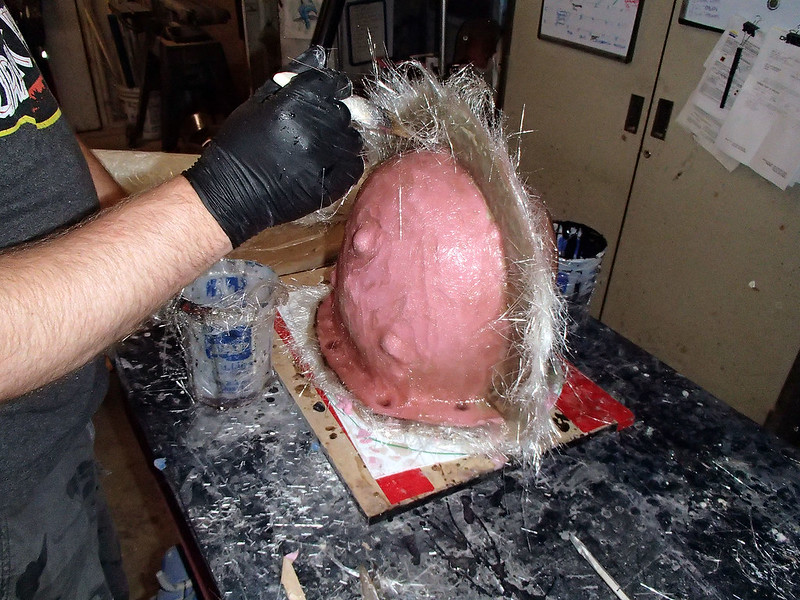
When the fiberglass had cured, I drilled a series of bolt holes:

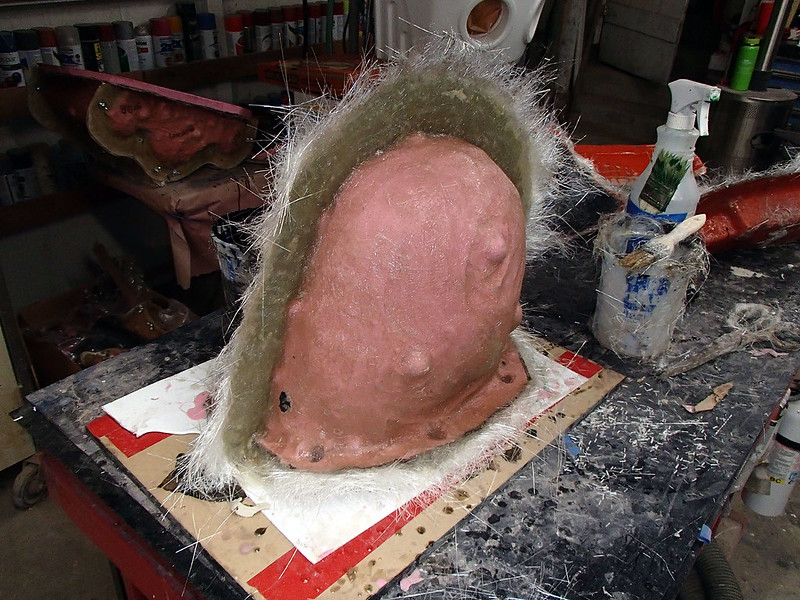
Then I trimmed off the hairy parts on the edges:
Then it was time to remove the mothermold:
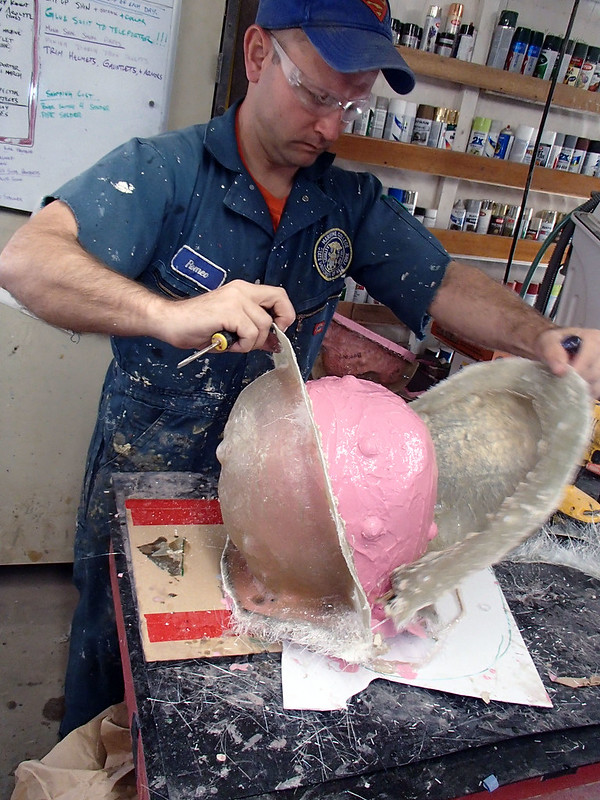
Here's the mothermold after I'd ground down the edges:
With the mothermold removed, I went ahead and made a serpentine cut up the back side of the helmet:
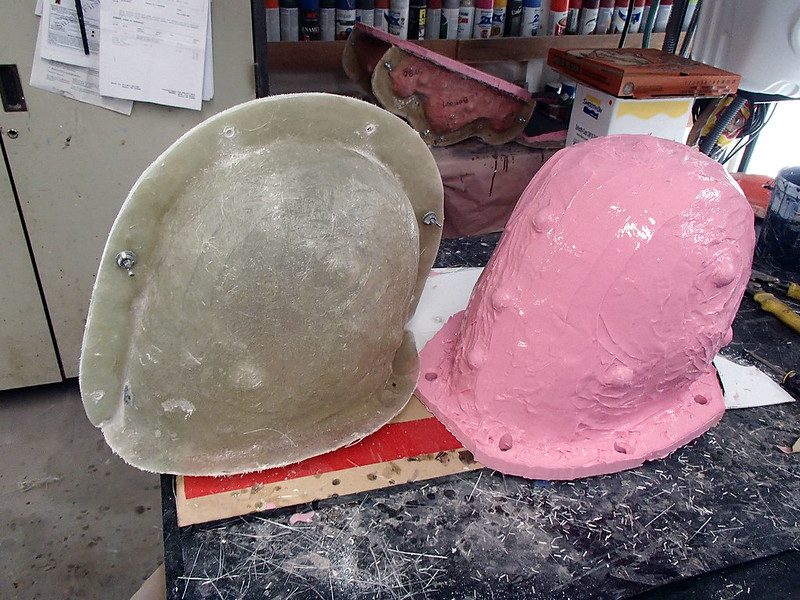
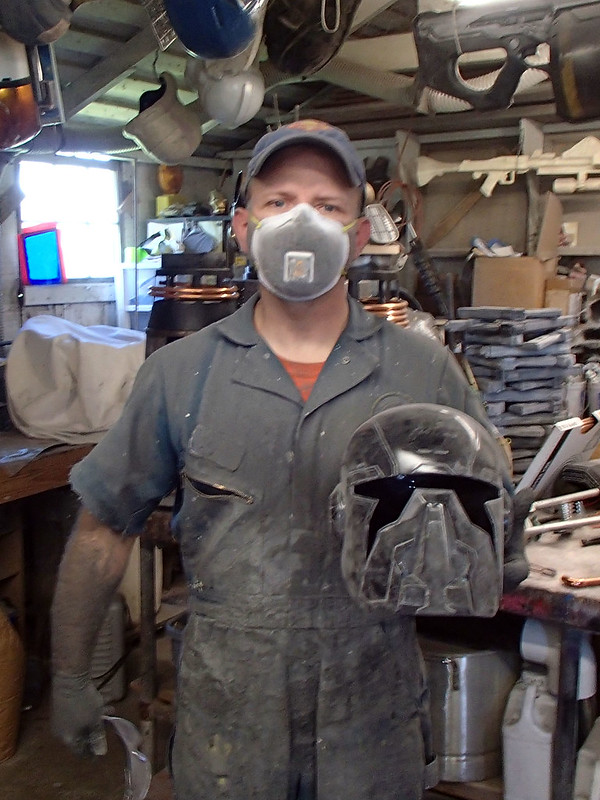
Then I pulled the prototype out of the mold:
After reassembling the mold, I rotocast the first copy in Onyx resin. Here you can see it on the right:
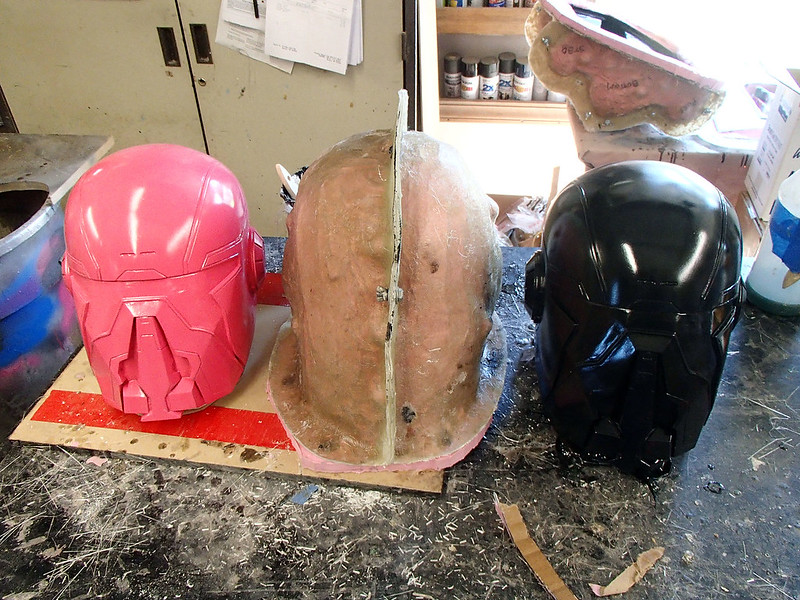
Good enough.
Tanks and Belt Bits:
I forgot to mention, I made a mold for the tank thing that fits on top of the jetpack. Here's the prototype being pulled from the mold:
Cool.
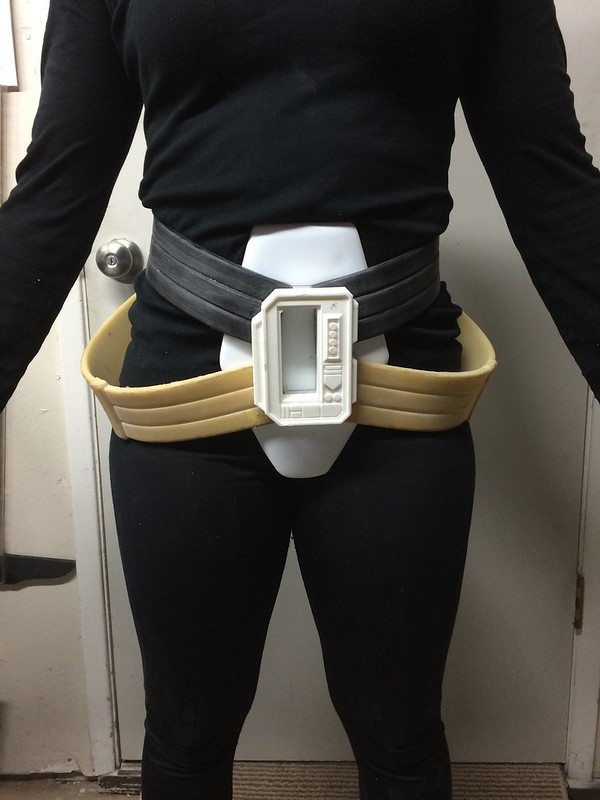
For the belt parts, I started with a pretty detailed 3D model drafted up by my friends at DO3D.com:
Then I had Jarvis print them out:
Those guys do good work:
After a tiny bit of cleanup, they were almost ready to mold:
The mold was a simple block mold, so all I had to do was build a watertight box:
Then fill it with silicone:
Here's the prototypes removed:
The belt canister took a bit more work, but by then I was in a rush and the only picture I took was this snapshot of the pieces on the 3D printer:
Gauntlets:
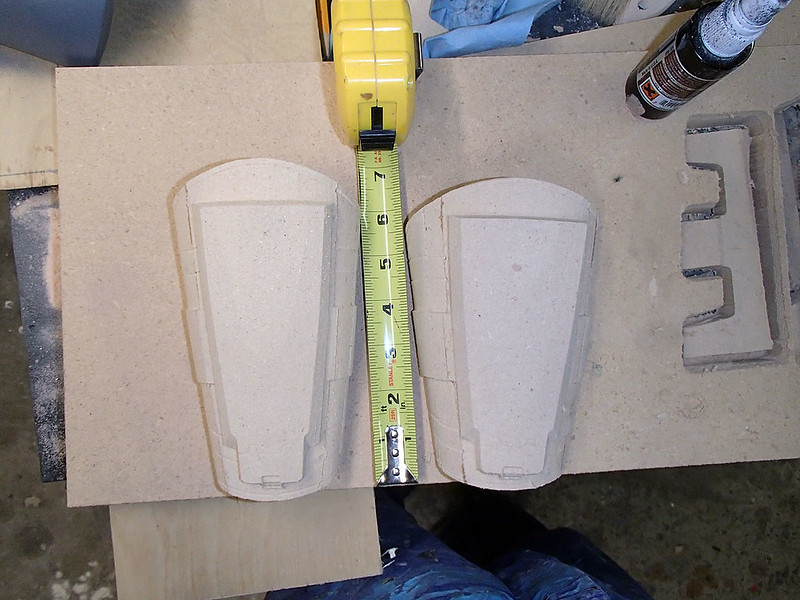
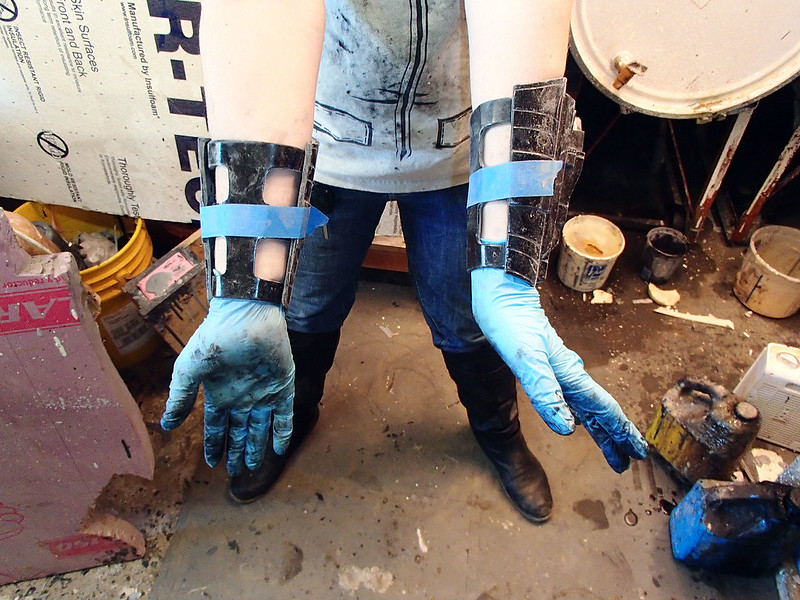
The gauntlets were another composite construction that started with the main parts being carved out by Lopez:
It took a couple of tries before I was convinced that I'd gotten the sizing right:
The upper detail part was 3D printed:
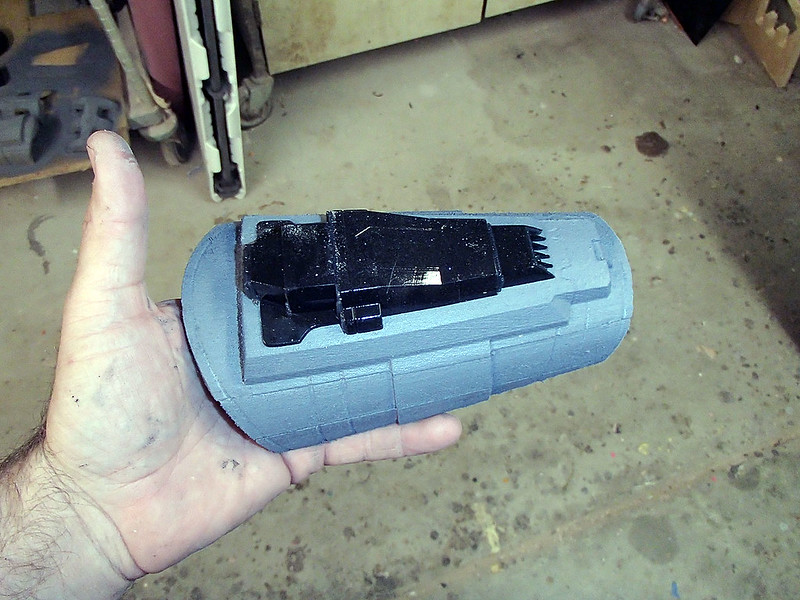
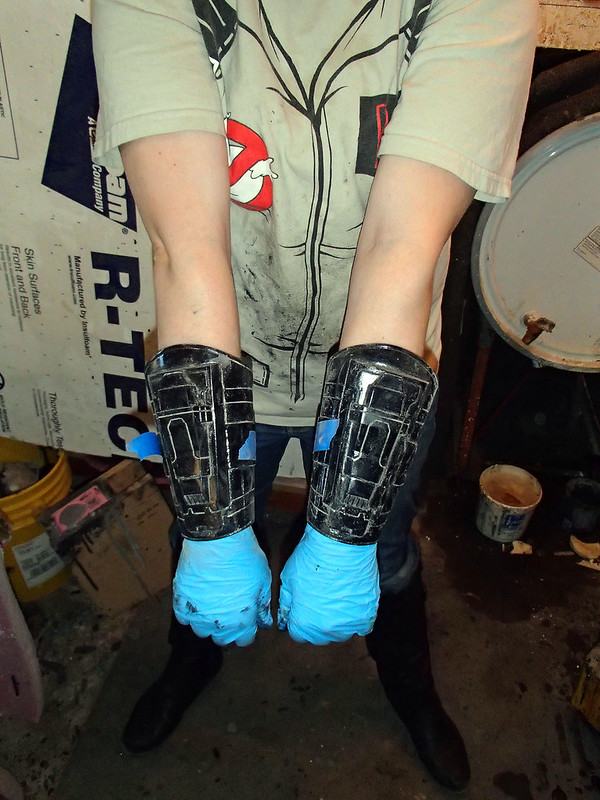
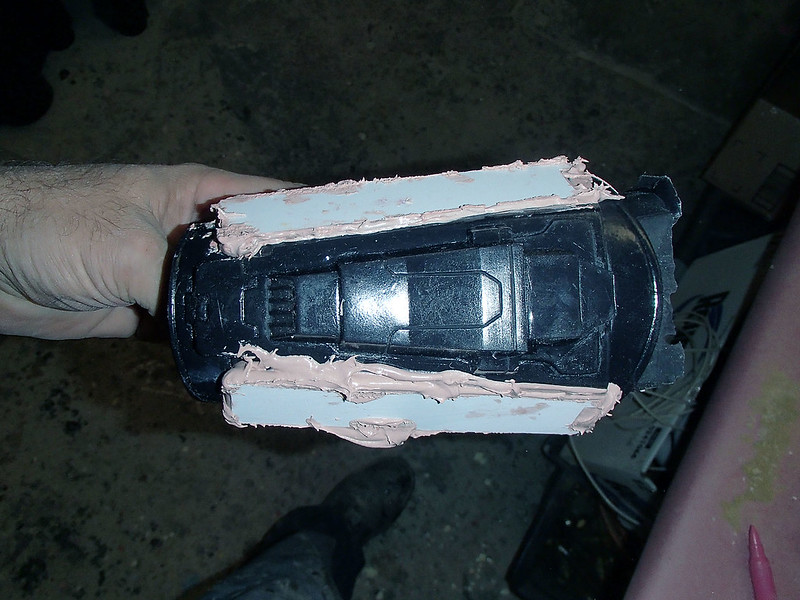
When I was certain they were going to fit, I spent a bit more time smoothing out the carved parts:
Then I finished up the cleanup work on the gauntlet prototype:
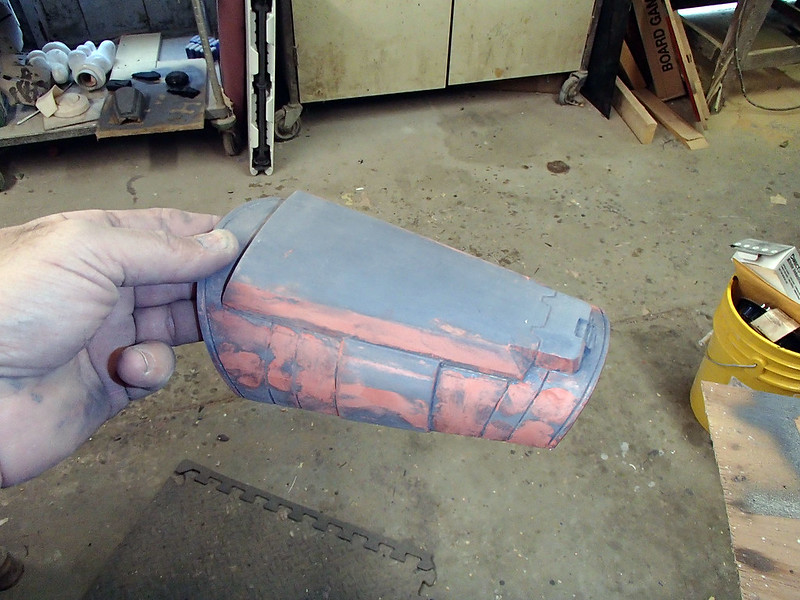
Once everything was smooth, I gave it all a coat of my standard lightish red glossy prototype color:
The upper part of the gauntlet came out pretty good.
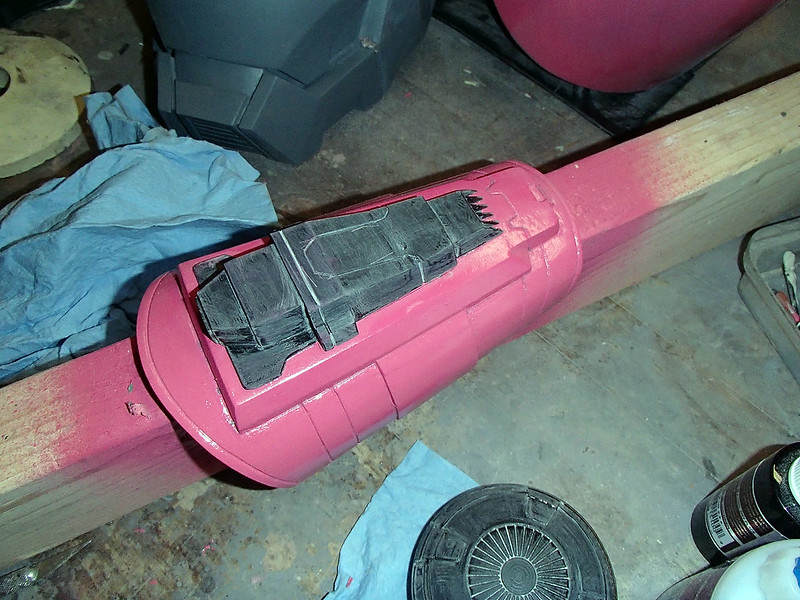
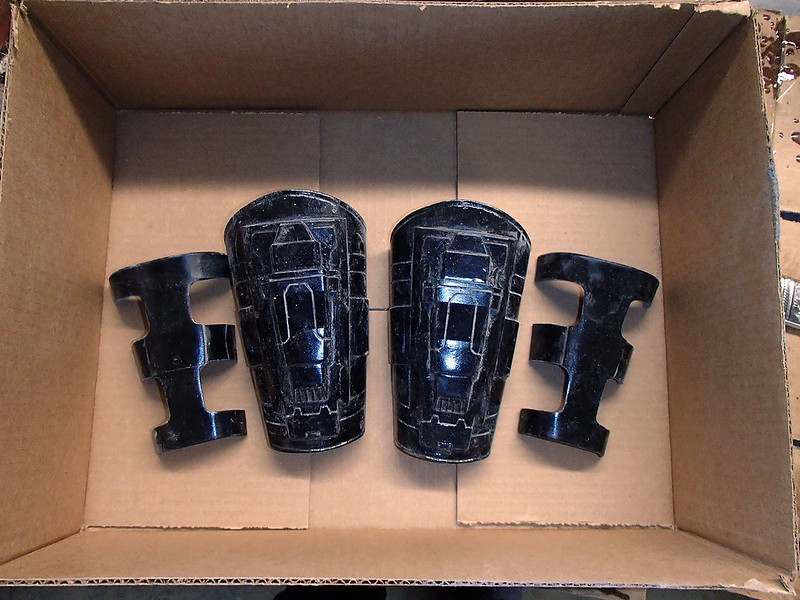
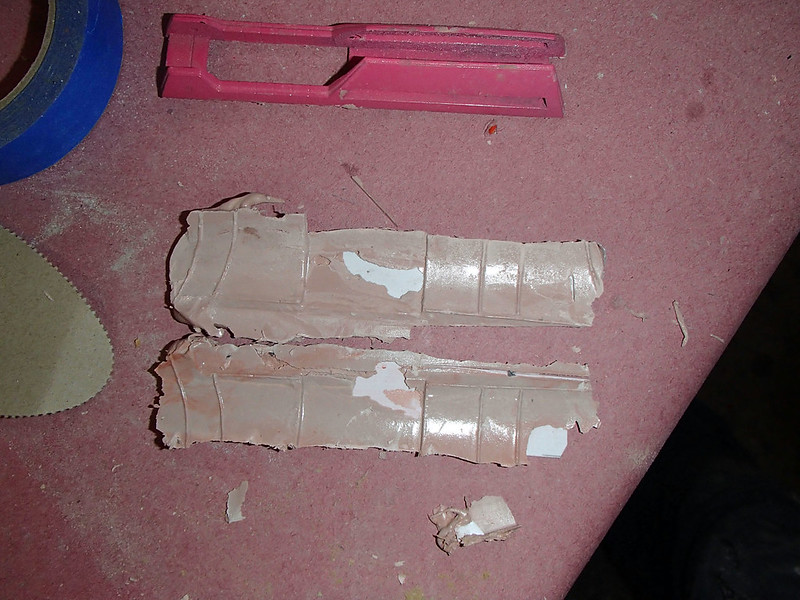
Satisfied that the prototype was nice and smooth, the gauntlet parts were glued together into one piece and molded in much the same way as the helmet:
Once the rotocast parts were popped out of the molds, they just needed a bit of cleanup and trimming around the edges before I split them apart again. Here's the first pair:
Here's my friend Jen trying them on:
Not bad at all:
Since I was trying to minimize the amount of time I'd have to spend in the prototyping and molding stage, I decided to use the same base gauntlet for both sides. The only problem was the tiny little rocket launchers on the outer side of each one. There was one on the right side of the right gauntlet and on the left side of the left gauntlet. Clearly this would need a solution.
I started by printing out a pair of launcher rails and tiny rockets:
The scale was just about right:
Then they got a bit of sanding to eliminate the build lines:

Then I took another casting of the gauntlet and sprayed it with a bit of mold release. Once that had set up, I took a couple of rectangular pieces of sheet styrene, gooped them up with a bunch of bondo, and stuck them in place:
Once the bondo had cured, I popped the parts off of the gauntlet and they looked like so:
After a bit of sanding and trimming around the edge to neaten them up, these guys were ready to mold, making a pair of bases that would register perfectly onto either side of the gauntlet. Neat.
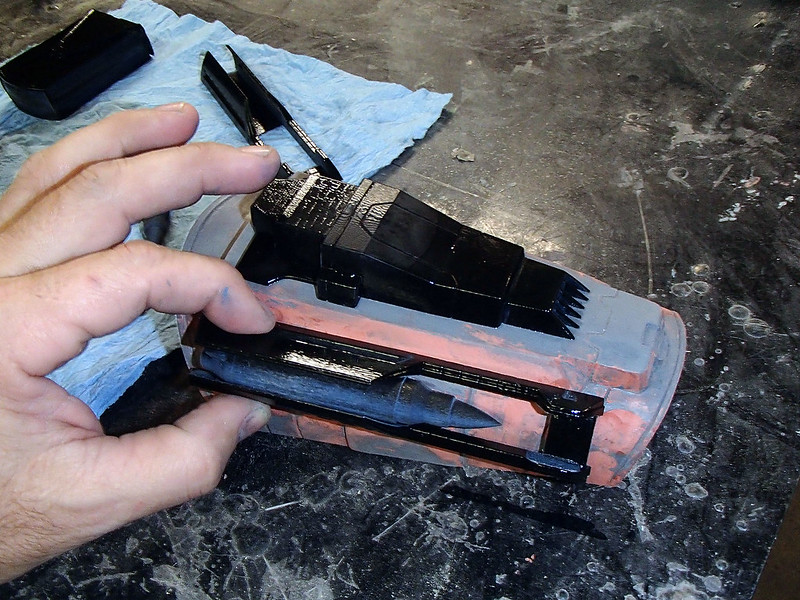
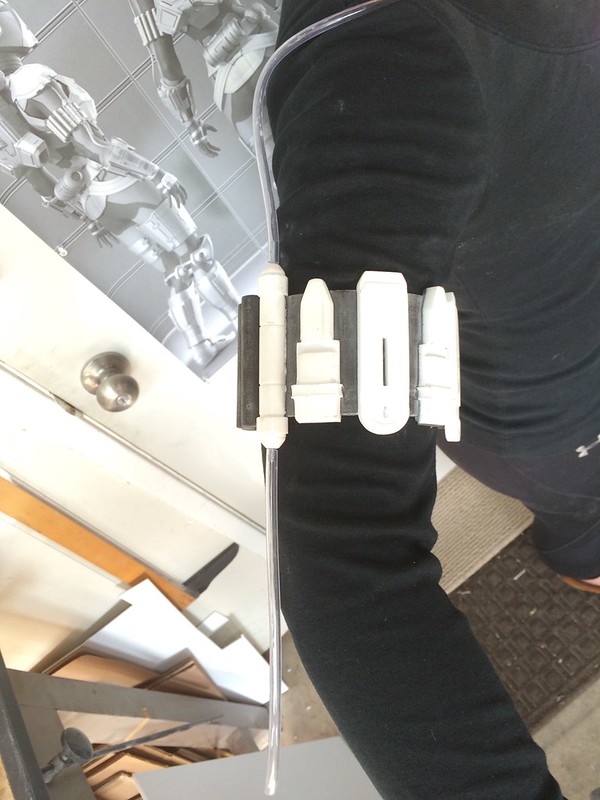
The last thing for the gaunlte build was the little status display that fitted to the inside of the left forearm. Once again, this was a couple of 3D printed parts:
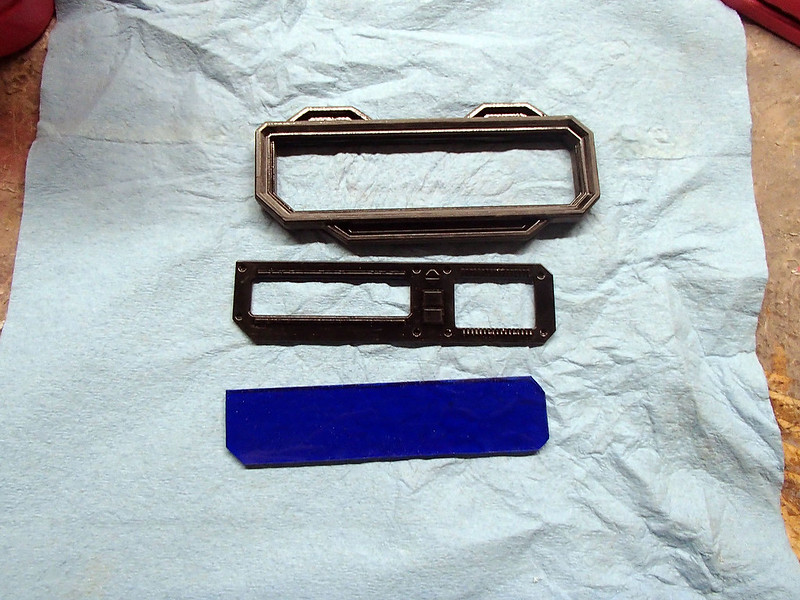
The blue bit at the bottom is just a scrap of clear blue acrylic that I cut out to fit into the window.
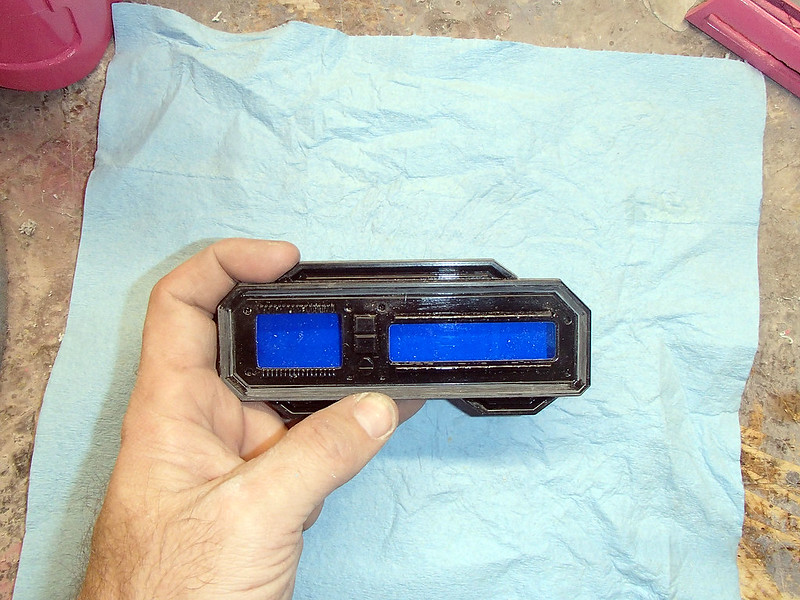
Here's the whole thing fitted together:
Here's the last few molds I made for the project:
The Vacuformed Armor:
While I was making my parts, Darren was diligently plugging away making all of his parts. Somewhere along the way, he shipped me a big box of awesome:
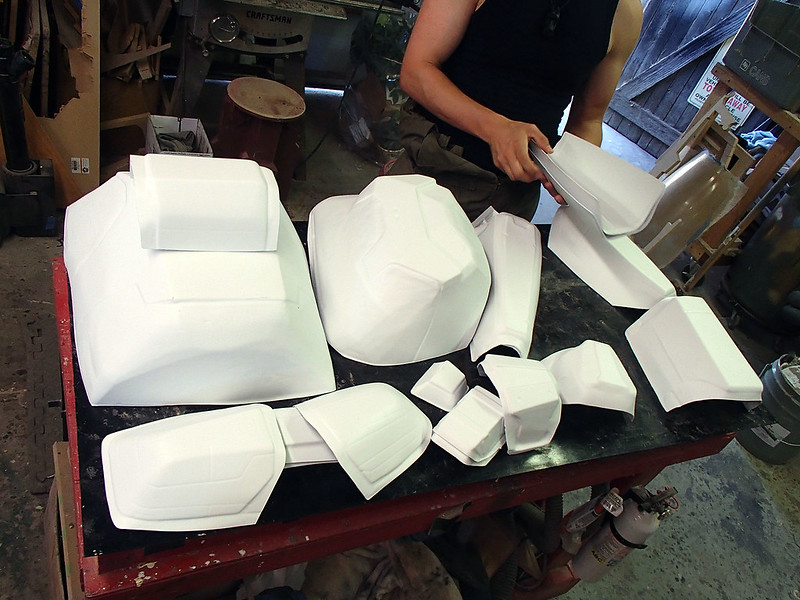
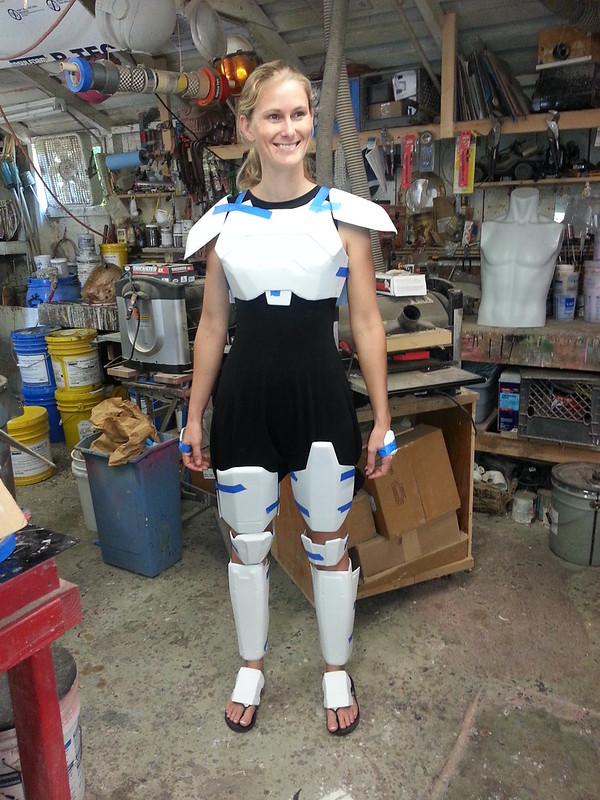
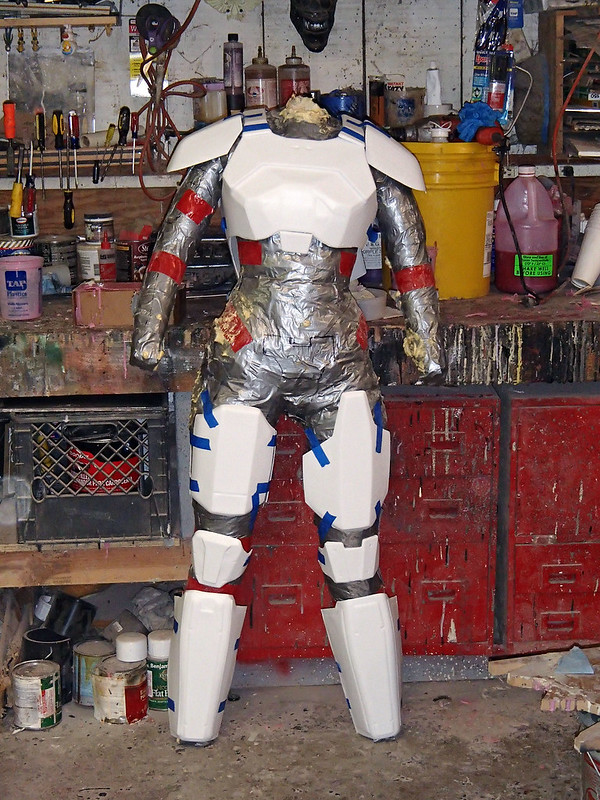
After a bit of time with the shears taking off the excess plastic around the edges, I had Shawnon try everything on with the assistance of a bit of masking tape:
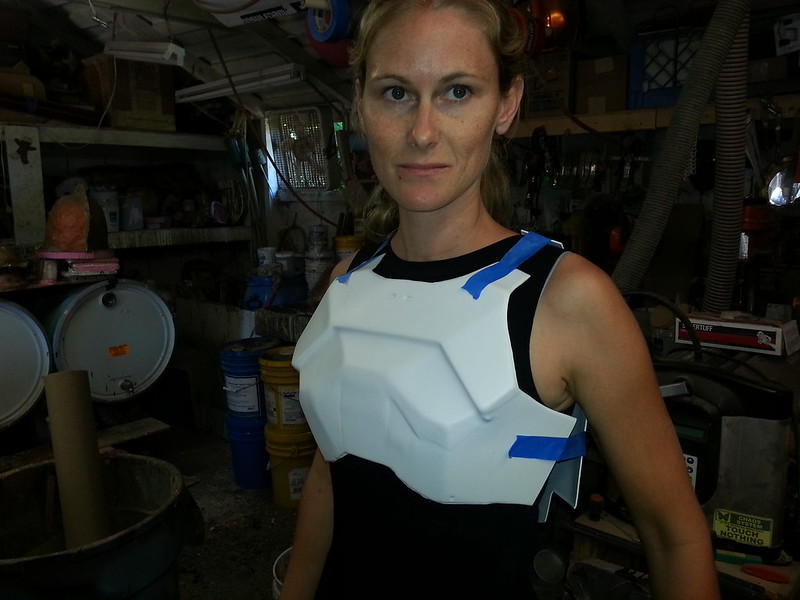
She hates this photos:
Since she was away at school for most of the build, I had to make a duct tape body double of her for most of the test fittings:
Darren also made these composite rubber and resin pieces for the upper arms:
And finally, the rubber belts:
Trimming and Painting:
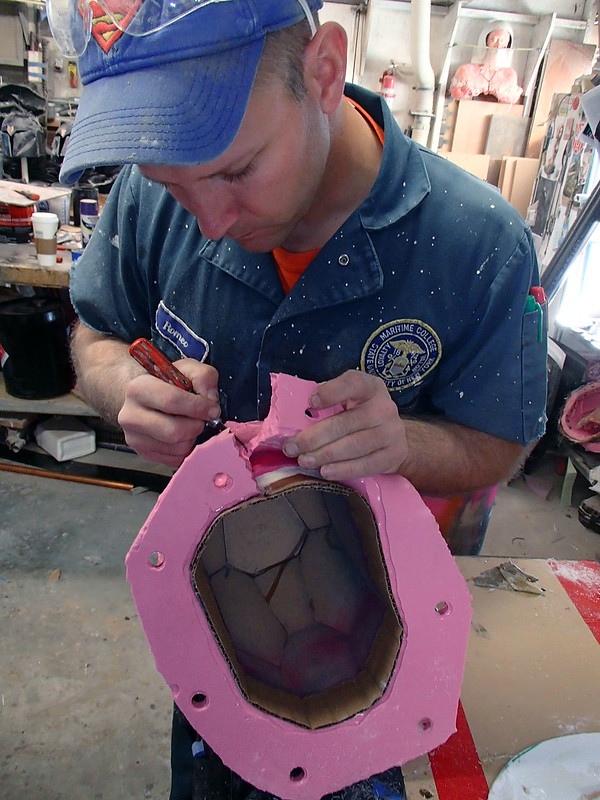
With all of the prototyping, molding, and vacforming done, it was time to start making the parts into a whole. I started by cutting out the face hole on the helmet and trimming off all of the flashing around the neck:
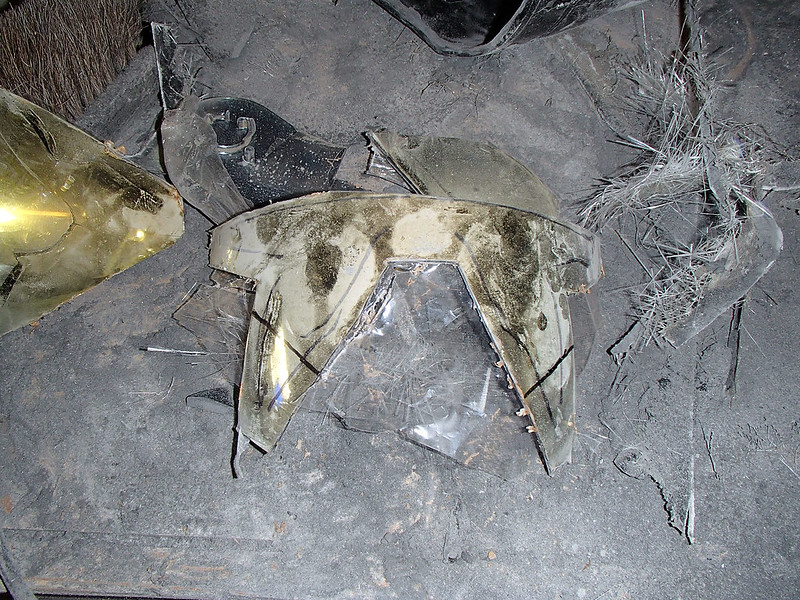
For the visor, I fitted in a gold tinted motorcycle helmet faceshield:
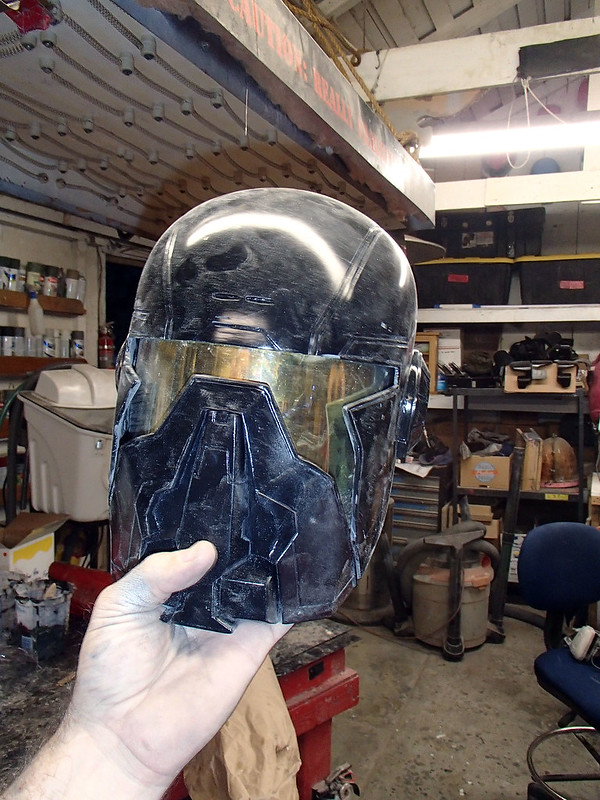
Visibility was great:
But since it wasn't a great fit, I had to trim off a lot of excess:
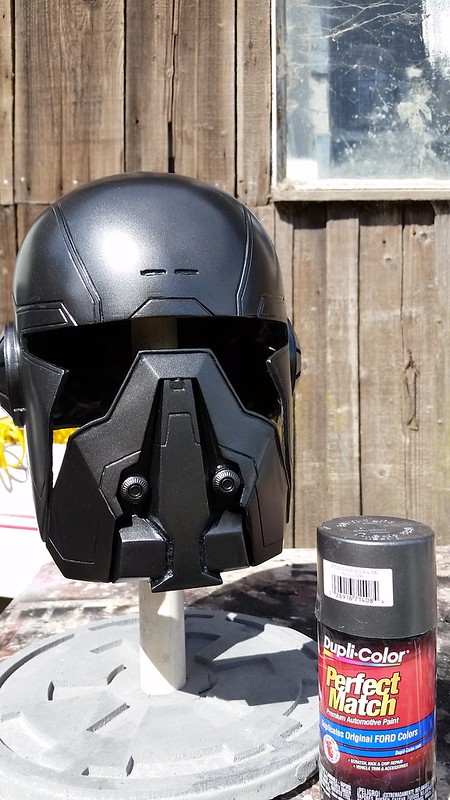
With that done, all of the parts were given a coat of primer:
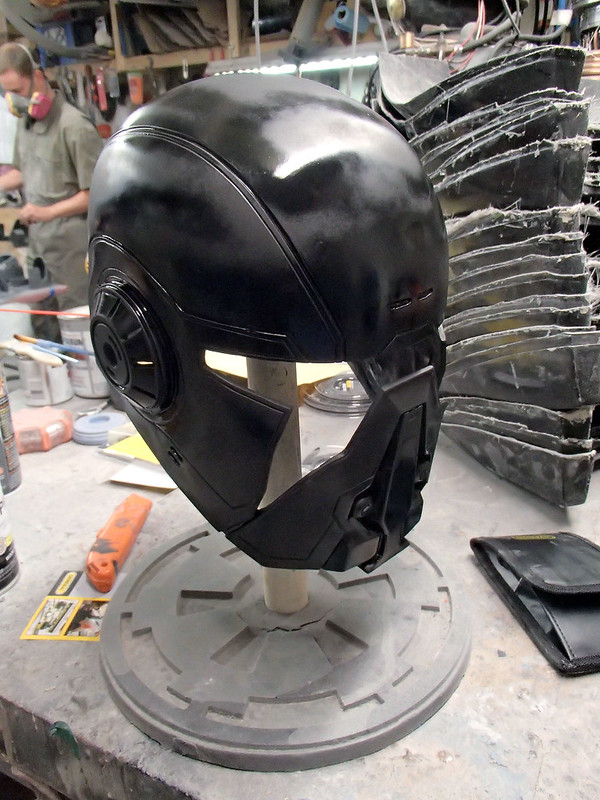
For the base color, I settled on Dupli-Color Dark Shadow Grey Metallic:
For the red details, I tried a couple of different options:
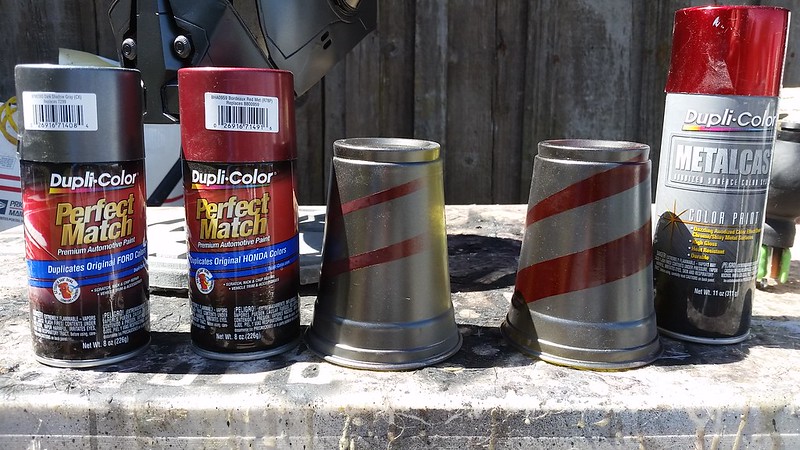
The one I ended up choosing was the Duplicolor Metalcast red anodizing spray on the right:
Somewhere around this stage, my friend Sarah stopped by to tinker in the shop and I set her to work masking off the Shae parts so the red bits could be sprayed on:
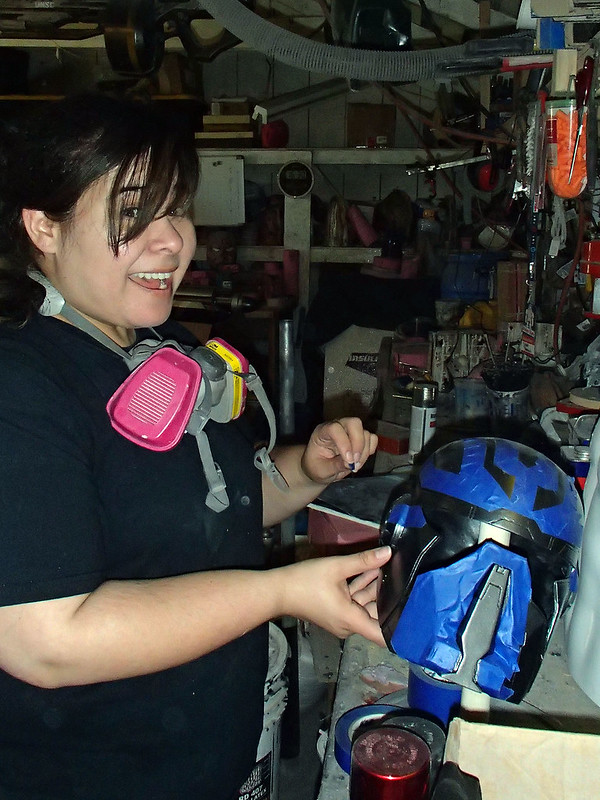
She did a great job:
Here's how the backpack came out;
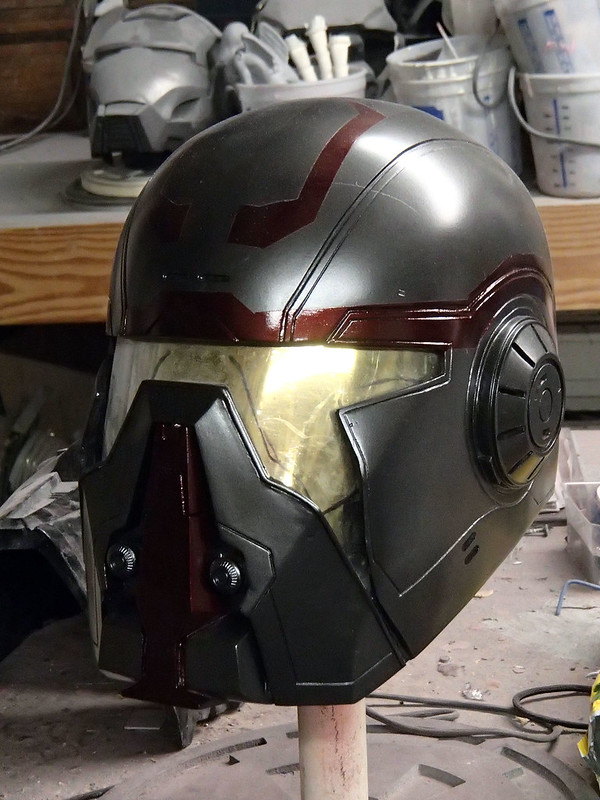
The next step in the paintjob was to add a blackwash to help the details pop a bit better:
After a bit of drybrushing, the parts really came to life:
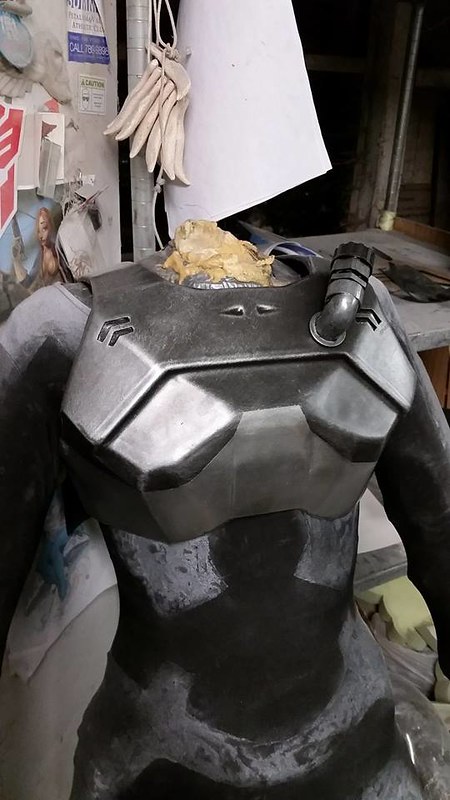
Here's the chest with the detailing done:
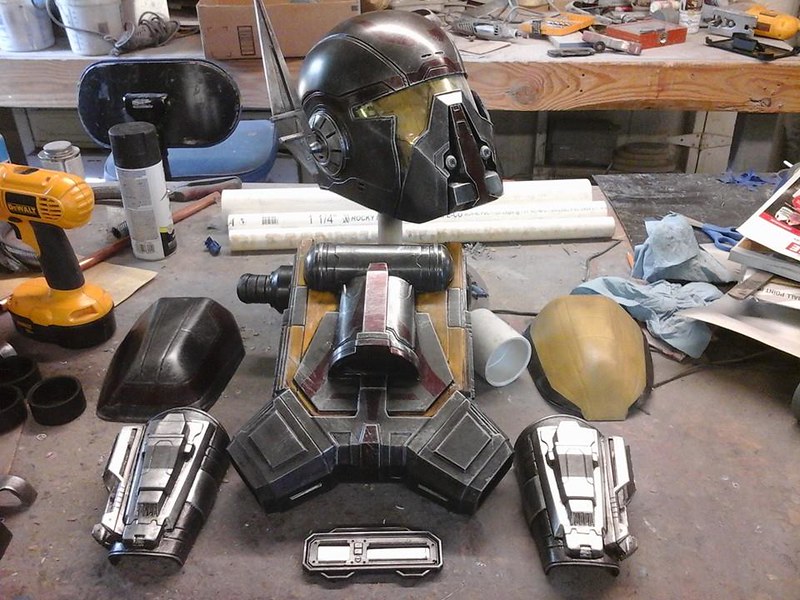
Minutes after the paint had dried, it was time to pack everything up and get it all down to Anaheim for Star Wars Celebration. Here's a snapshot of my hotel room once I'd unpacked:
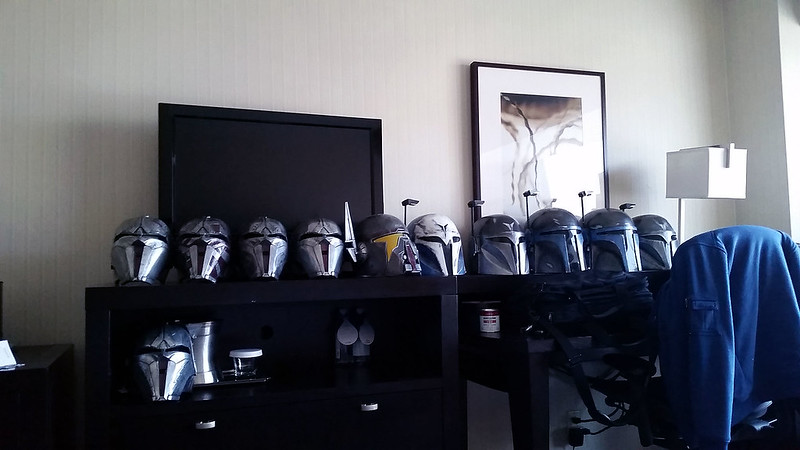
That's the Shae helmet right there in the middle.
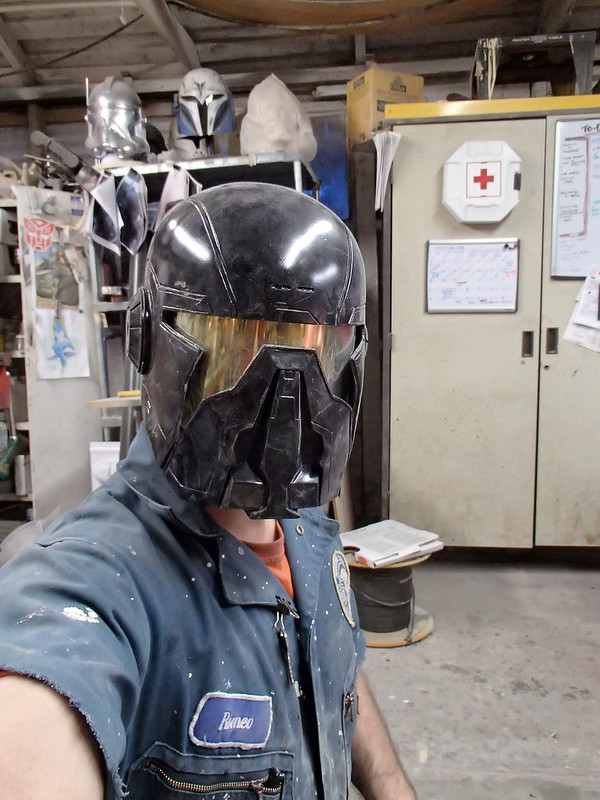
The next day, the Lady Shawnon flew into town and we got her all kitted out:
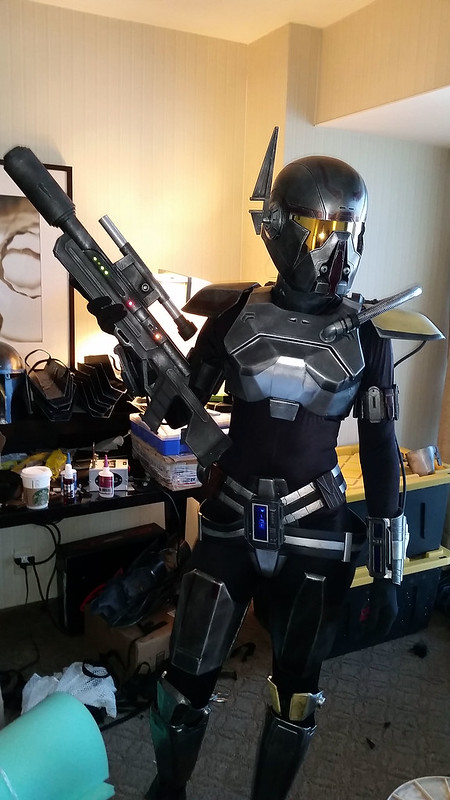
Then it was time to head out to the convention:
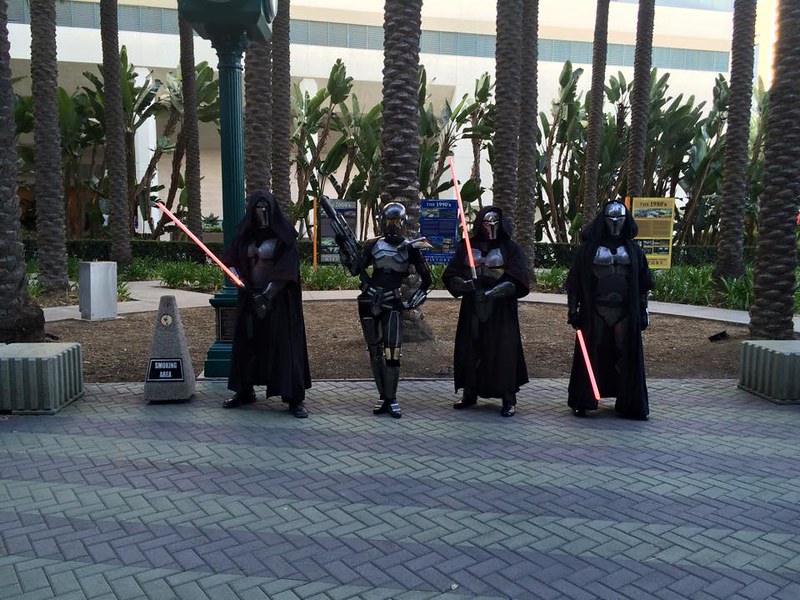
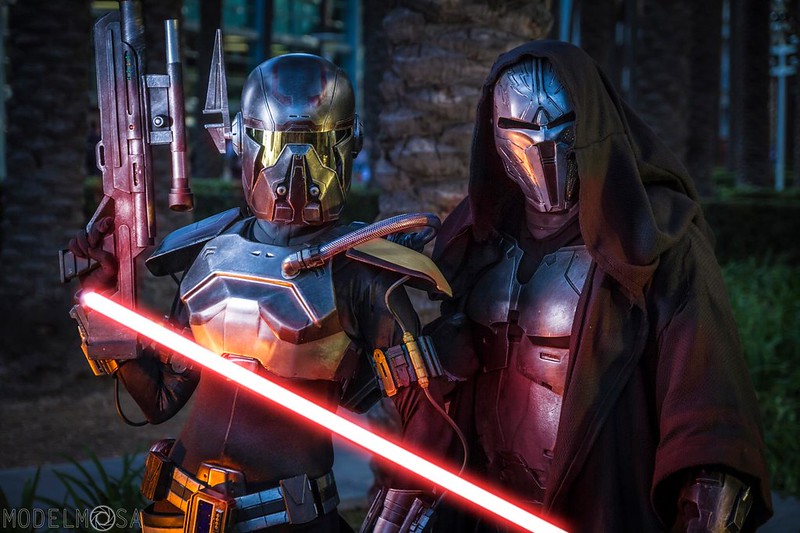
The first time out, she was escorted by three Sith Acolytes:
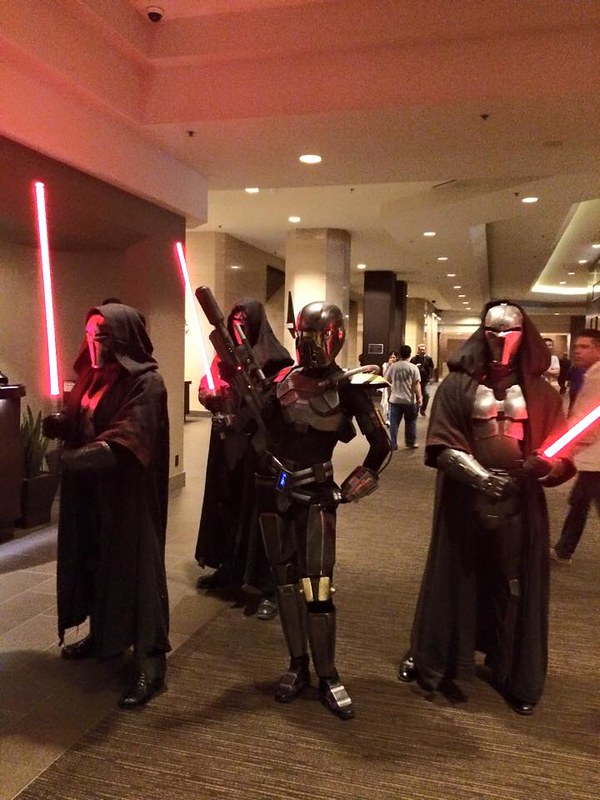
I made those costumes as well. Here I'm the one standing to Shae's left:
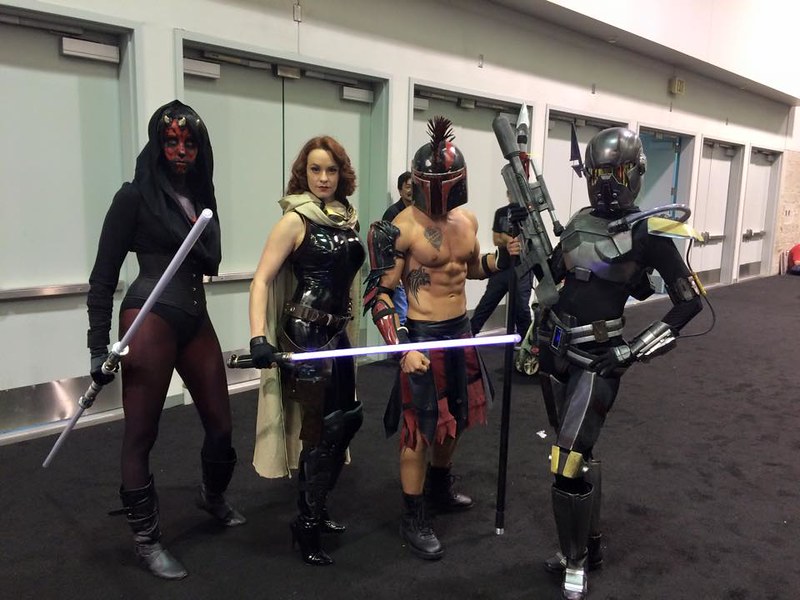
We got out for quite a bit and ran into all sorts of other costumed characters:
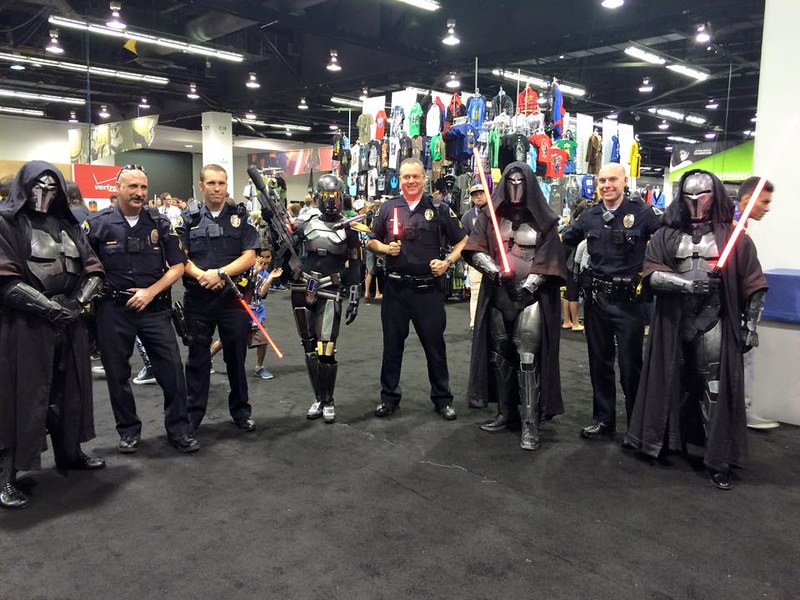
And had a bit of fun with the local police:
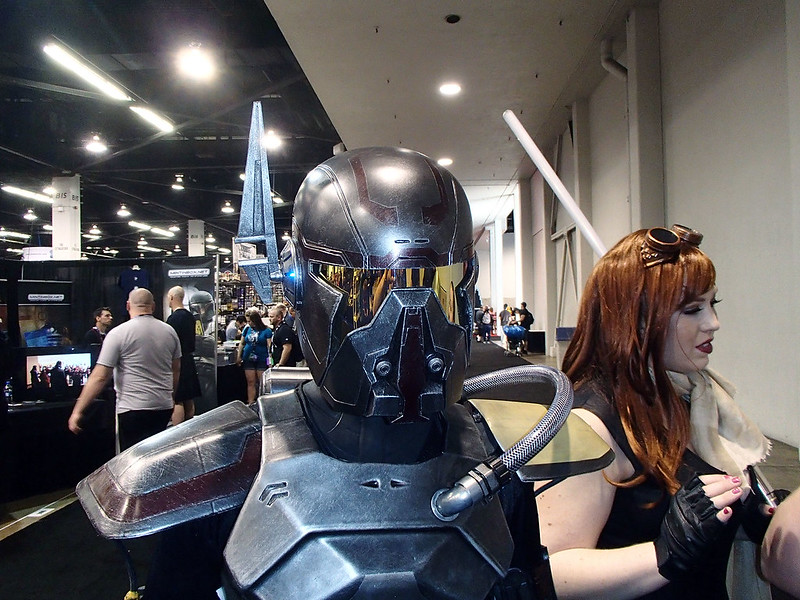
On the last day of the convention, Shawnon decided to break out the Shae suit again. Here she is with her cousin Kristen while we were waiting for the elevator in the hotel:

Once again, we had a lot of fun hanging out at the convention:
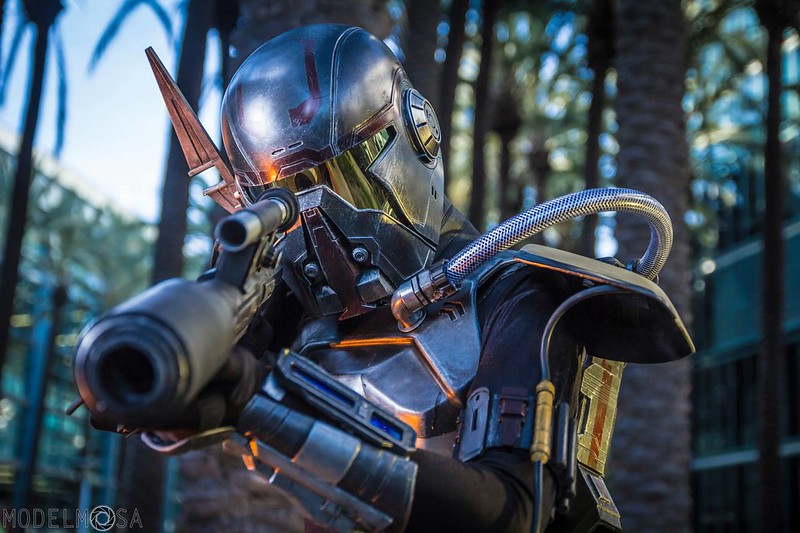
On the way back to the hotel, we were stopped by a photographer who had a whole studio lighting setup off to one side of the convention entrance. You can see his portfolio at modelmosa.com.
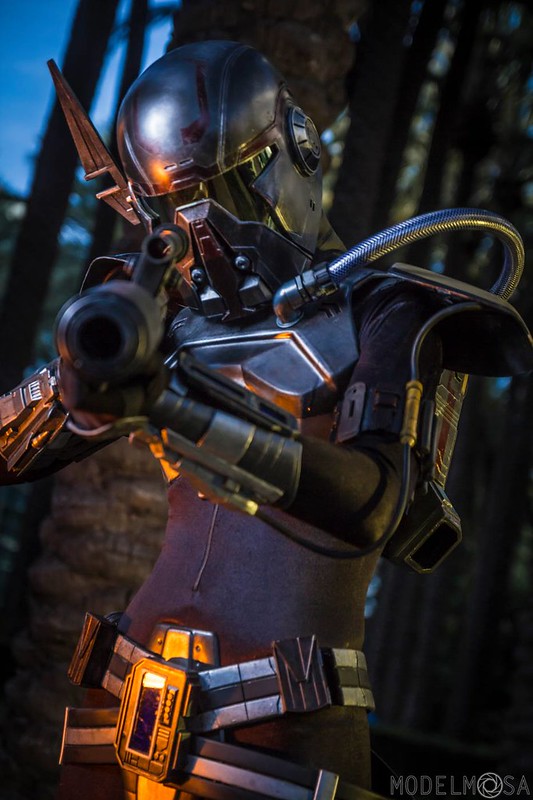
He managed to get some really great shots of Shawnon in the Shae costume and my friend Jesse in one of the Sith Acolytes. Here's a few of my favorites:
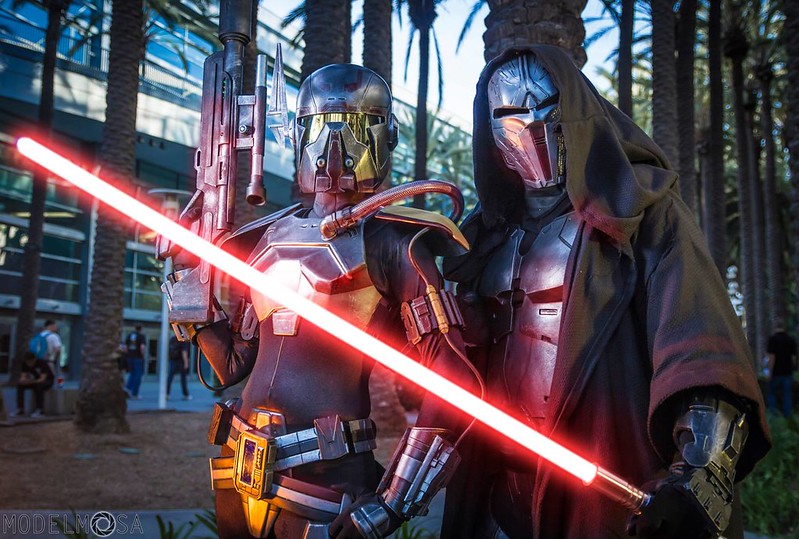
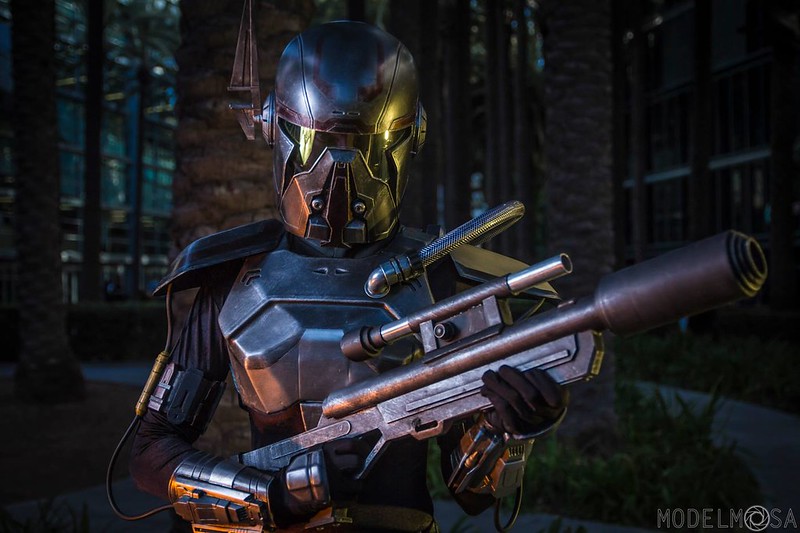
This is one of the more iconic poses:
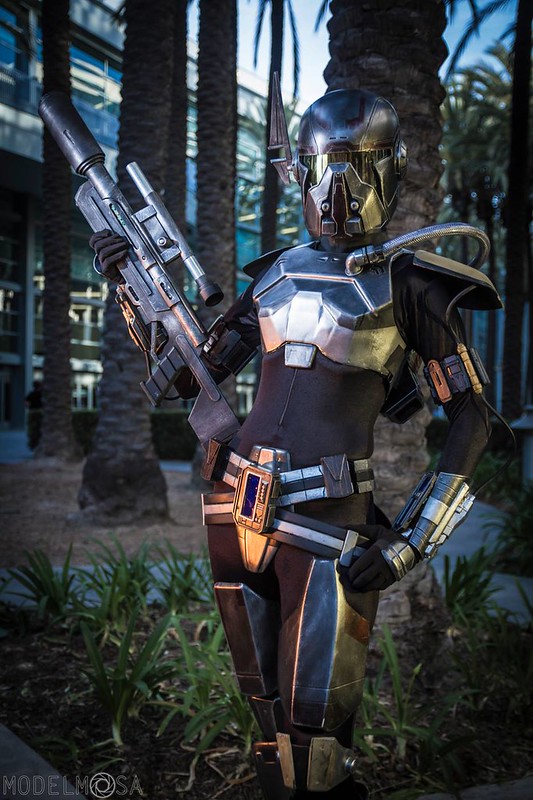
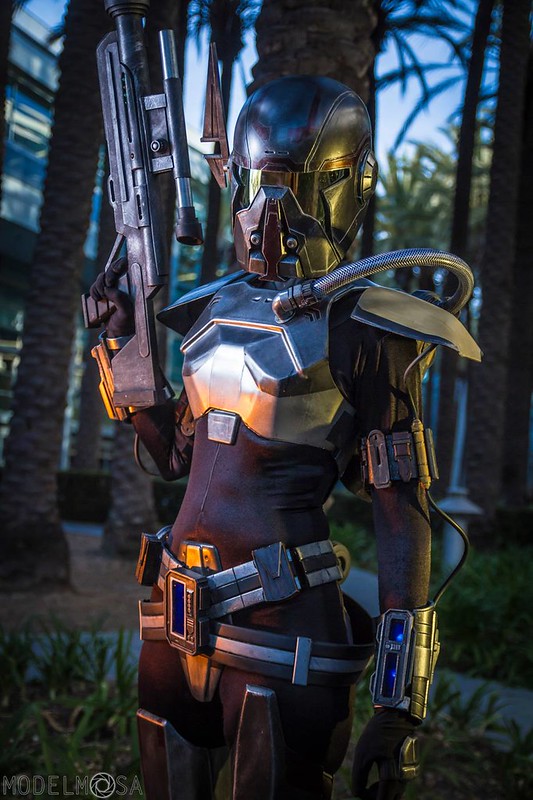
This one does a great job of showing off some of the details on the front:
Then there's the backside:
That's a nice backside!
At the end of the weekend, it was time to wedge the whole suit into a storage bin:
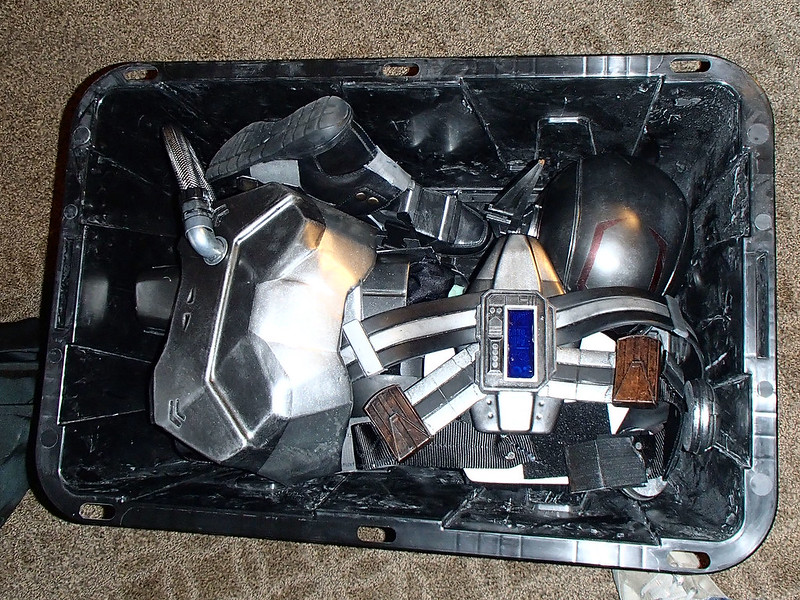
And there it will stay. Until next time...
Sooner or later I'll get around to upgrading the undersuit that goes with this costume and get a whole new photoshoot lined up. So stay tuned...
Been waiting for the write-up on this one. Great work, as always.
ReplyDeleteYour site is awesome! I love your appreciation for details and thank you for sharing your build experience on your site :)
ReplyDeleteHave you discussed your rotocasting process in a previous post?
Just amazing...
ReplyDeletejust great of you to share so much.
I'm a woodworker and really appreciate all of the effort that you've put in..
Brilliant.
Great blog post!!!
ReplyDeleteThanks so much for sharing this!
ReplyDeleteI'm working on a mold of a Jango helmet I made for my son, and you have taken all of the guesswork out of the process. I've gotten to where I just leave your blog open in a firefox tab. XD
I love all of the things you do and make, and I am in awe of your skills. I am just starting to make my own unique Mandalorian armor, and wondered if you had an STL file for the launcher rails, and mini rockets? My Mando will be an assassin type, and I wanted a "stealthier" rocket for my gauntlets. I have looked through thingiverse, but haven't had any luck.
ReplyDeleteAbsolutely amazing. I have already contacted you about a purchase and would love to discuss the details. Wonderful blog post!
ReplyDeleteAbsolutely amazing. I have already contacted you about a purchase and would love to discuss the details. Great job!
ReplyDelete