
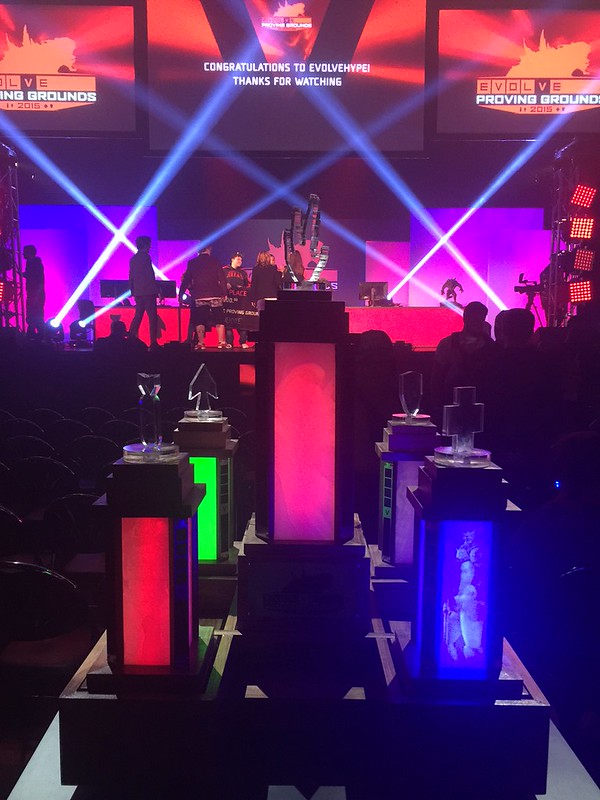
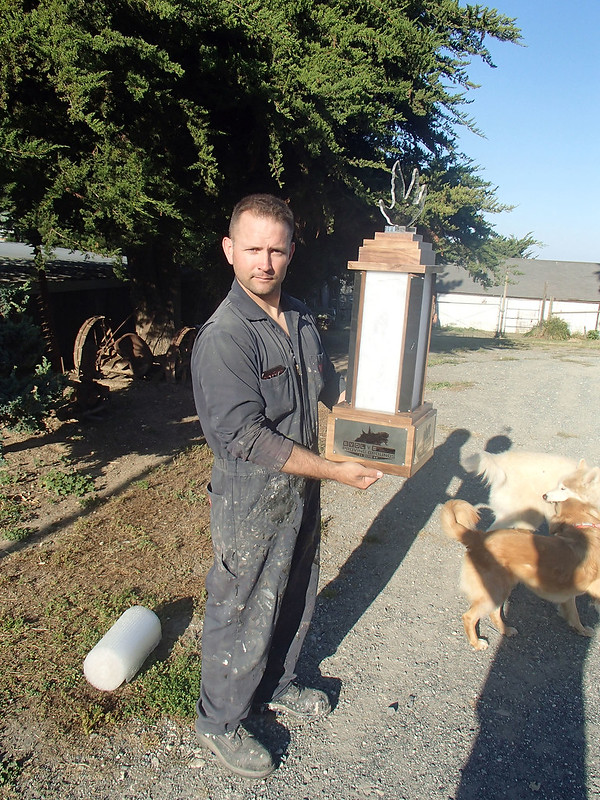
The total timeline from green light to completion? Two weeks! Here's the end result:
To see how it all came together, read on...
Design:
The first thing to do was to settle on a design of some kind. As luck would have it, the folks at 2K were willing to leave that up to me. Unfortunately, with such a rushed timeline, there wouldn't be time to allow for any real back and forth discussion or approval process. No pressure.
Each team in the tournament would consist of five players. There were four players who would each play one of the classes of hunters (the Assault, Medic, Support, and Trapper classes) while the fifth player would assume the role of the giant monster. To represent this, I wanted to build the trophy as five separate pieces so each player would have their own trophy to take home, but make them so they could be combined together to make a much larger team trophy. Each class also has it's own distinct color scheme, so I'd have to find a way to work that in as well.
Since I didn't have a lot of time to build in finesse, I opted instead for mass. A few minutes with Google Sketchup and I had a rough idea of what the final piece would look like:
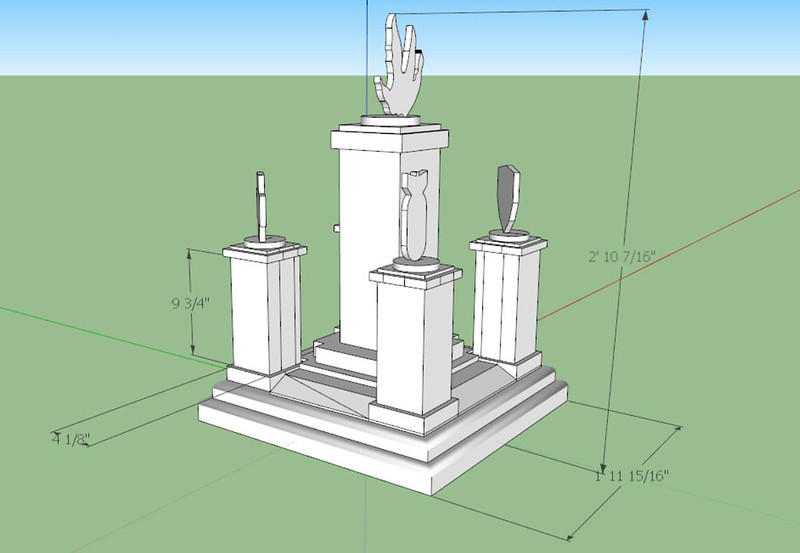
I told the folks at 2K that this was a pretty rough sketch and that the final product may end up being a bit bigger in the end.
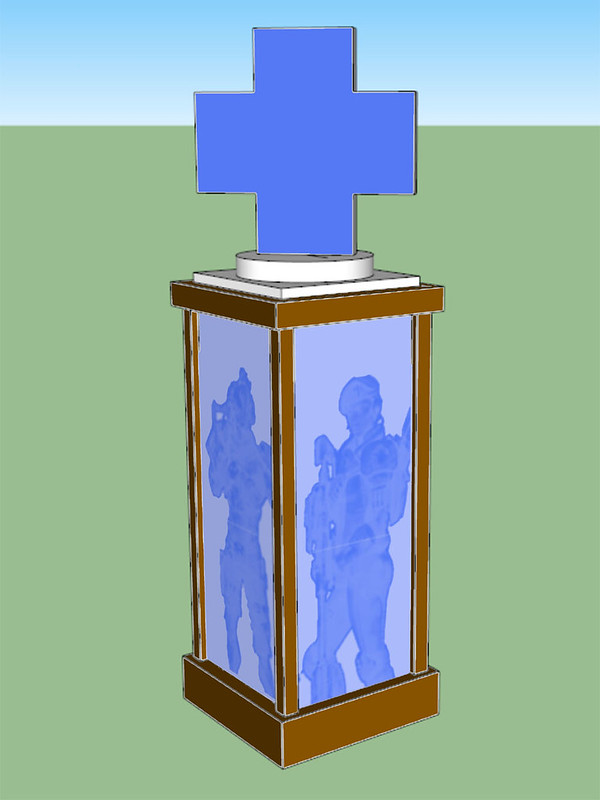
Each of the five columns would be a separate piece to represent the five playable classes. The plan was to top them off with the class icons in laser-cut acrylic. In addition, the sides of the columns would be carved pieces of translucent acrylic to create lithophane panels with renderings of the different characters in each class which would be visible when backlit. Here's another rough sketch:
The plan was to build it all out of some nice hardwood and add a few details in photo-etched metal to mark it as the Proving Grounds trophy. 2K seemed satisfied that I was headed in the right direction, so I was off to the races.
The photo etching was going to be the long pole in the tent. Since it requires a bit of equipment and a whole lot of hazardous chemicals I didn't really want to work with, I sent out the artwork to be etched by my new friends at Insight Designs. You can find out more about them at etchnow.com. We had some back and forth discussions about the best ways to fit everything, and they added the project to their queue. Still, until I actually had the metal bits in hand, I wasn't going to be able to do any of the woodwork for fear of wasting precious lumber and time building something that wouldn't work with the final version of the etched parts.
So while we were working that out, I got started on the other parts. First up...
Laser-Cut Icons:
I wanted the toppers to look like some significant chunks of glass. My acrylic suppliers warned me that I was probably wouldn't have much luck getting nice-looking cuts through anything thicker than a quarter inch. What they weren't counting on was the fact that I was going to sneak into a friend's shop and feed it all to his 250-Watt laser cutter. Here's the first set of parts being cut out in 1/2" clear acrylic:
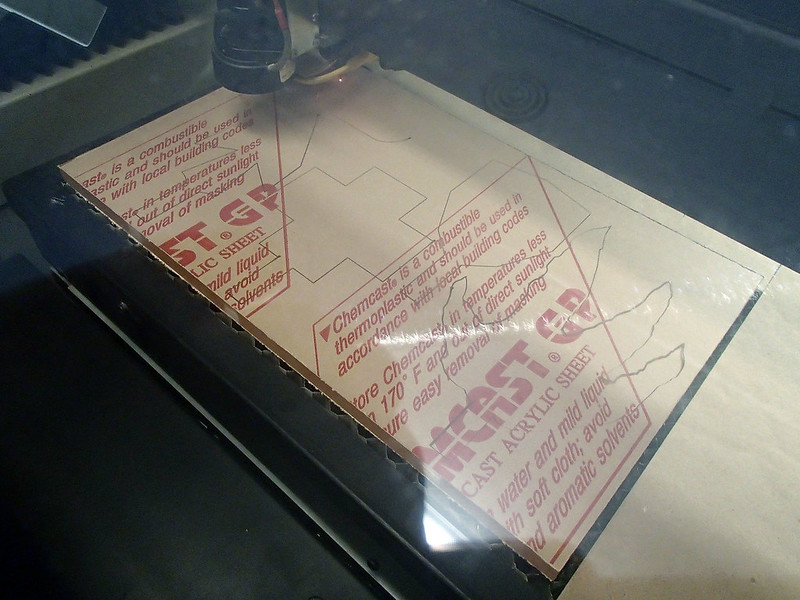
Here's the Assault class icon before I'd removed the protective backing paper:
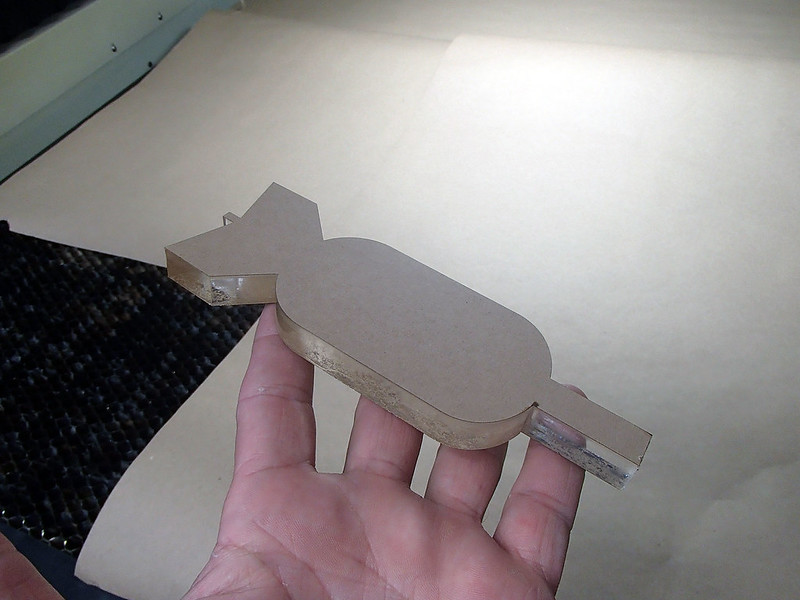
Those are pretty nice edges if you ask me.
Once we had a good set of parts in 1/2" acrylic, I decided it would be a good idea to try making the Monster class icon in something thicker. Here it is being cut out of 23/32" acrylic:
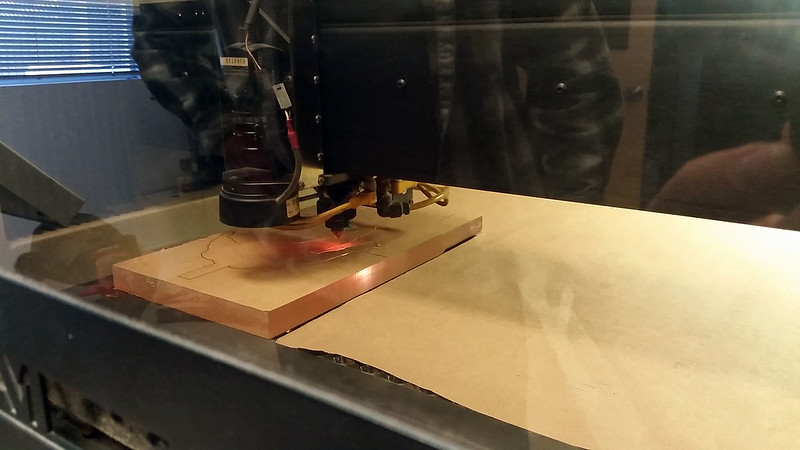
Lasers are cool:
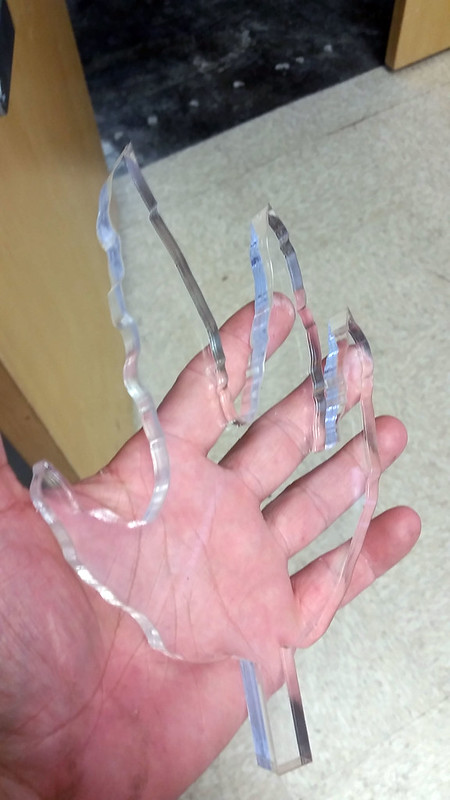
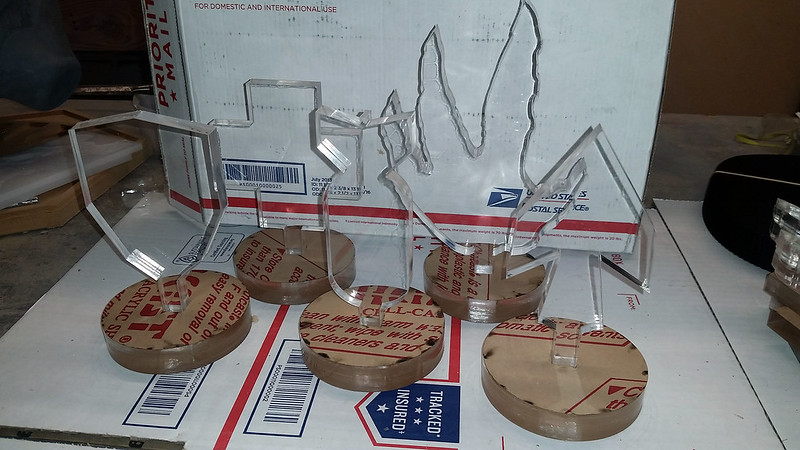
Once all of those guys were cut out, I also cut out a series of circular bases to mount them on:
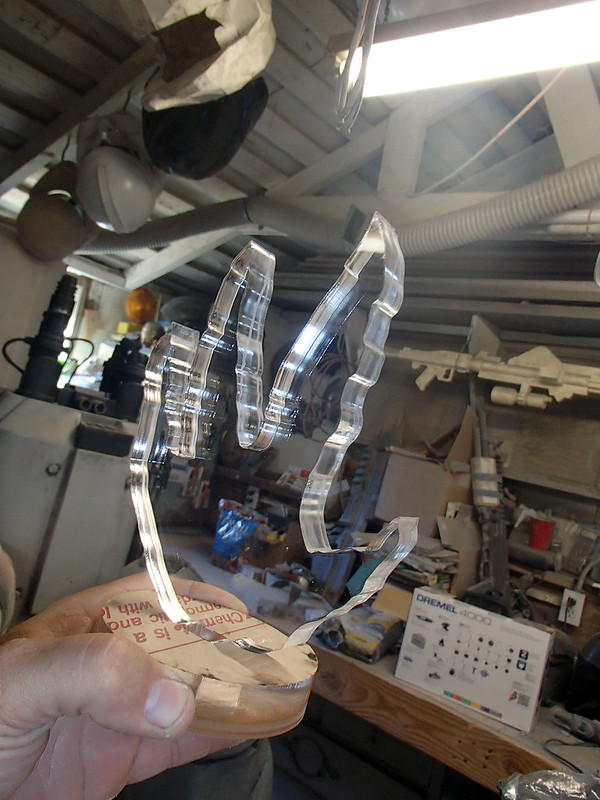
So here's the complete set of laser-cut parts:
Lithophanes:
While all of that was being done, I had the Lopez Dos Point Oh (my Carvewright CNC machine) working on the lithophane panels.
A "lithophane" is an etched or molded artwork in thin translucent material that can only be seen clearly when back lit. This type of artwork was popularized in 18th and 19th century European ceramics and you can still find examples today, but it's not something folks do a lot of.
In this case, the translucent material would be 1/4" acrylic sheet intended to be used in lighting applications. The images of the various playable characters were converted to grayscale so Lopez could cut them into the acrylic. Wherever he cut deeper into the material, more light would pass through, making the image visible once the lighting was installed. Lighting would be provided by internal LED arrays in the primary color of each of the individual classes.
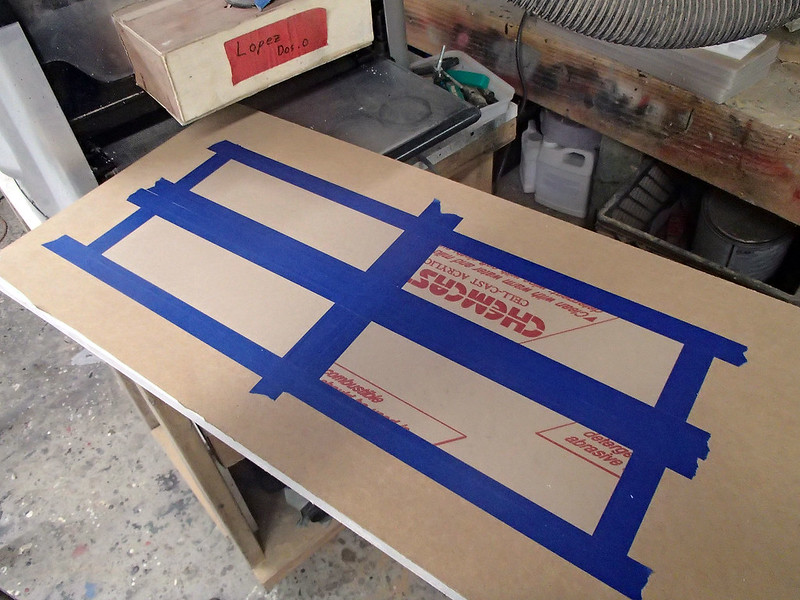
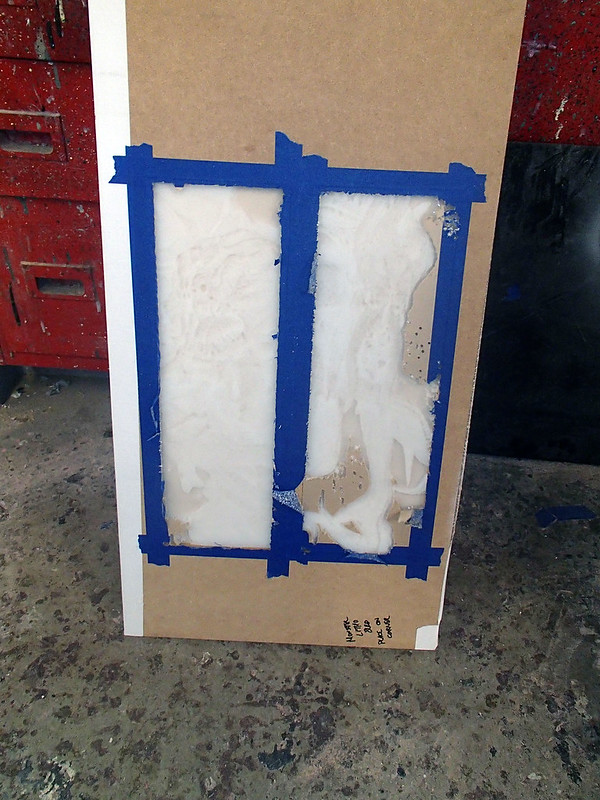
Since the acrylic sheet was thinner than Lopez' minimum thickness requirements, the first thing I had to do was create a jig to hold the pieces for carving. After a few minutes laying out the design, I had Lopez whittle me this:
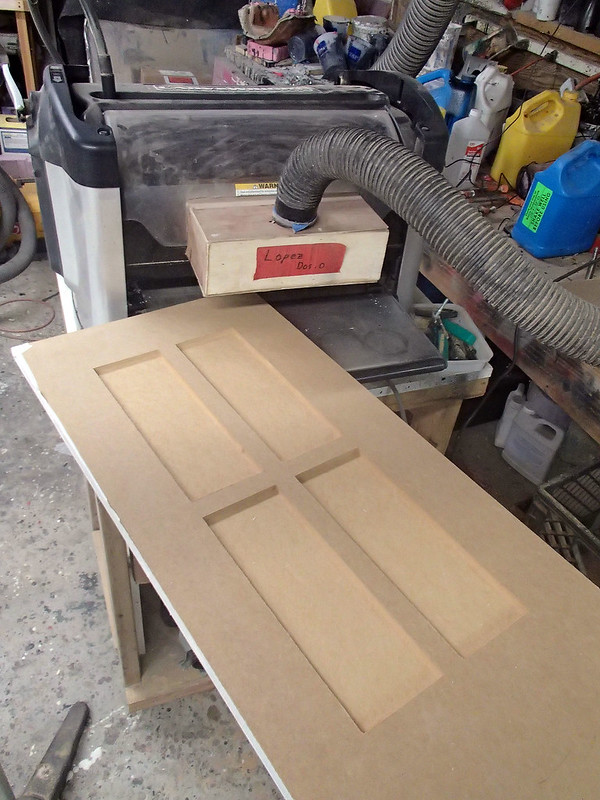
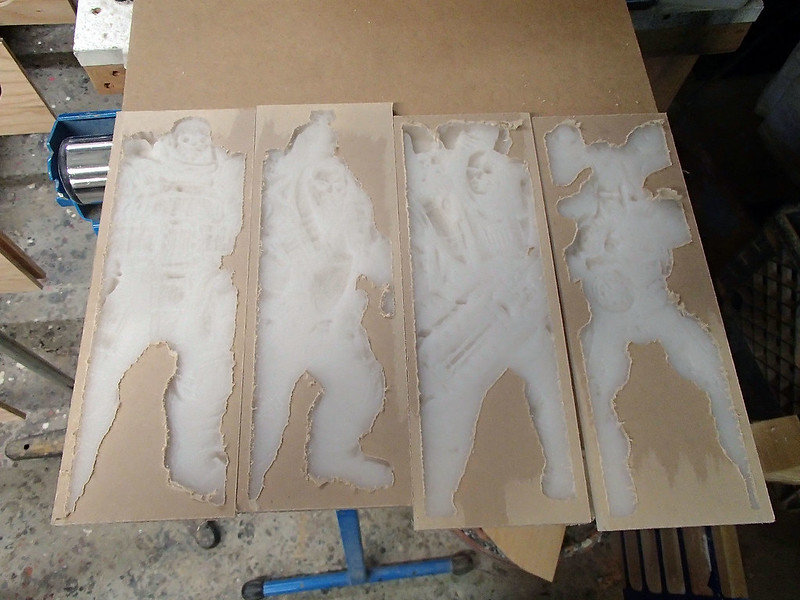
Each recessed area was the just-right size for one of the acrylic panels. Doing four at a time meant that I could knock out the lithophane carvings for one complete column at a time. I started by taping the acrylic into the jig:
Then Lopez carved out the images:
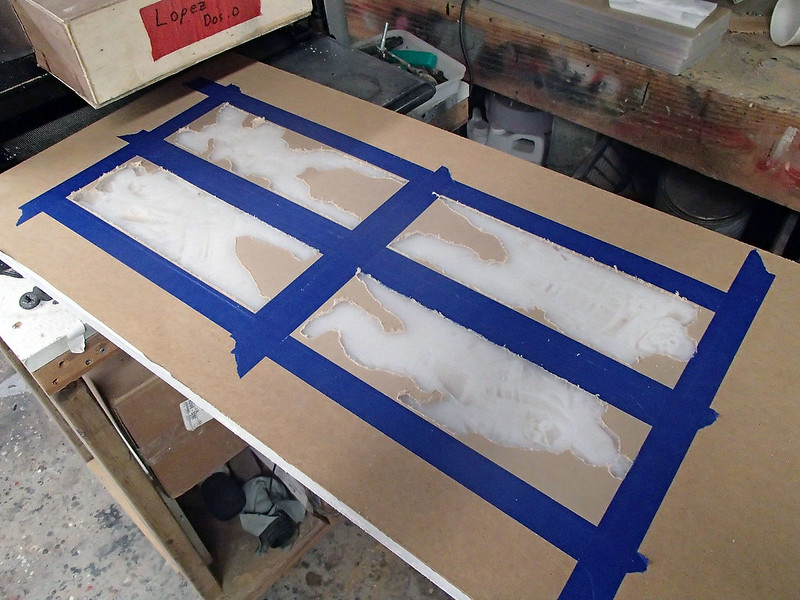
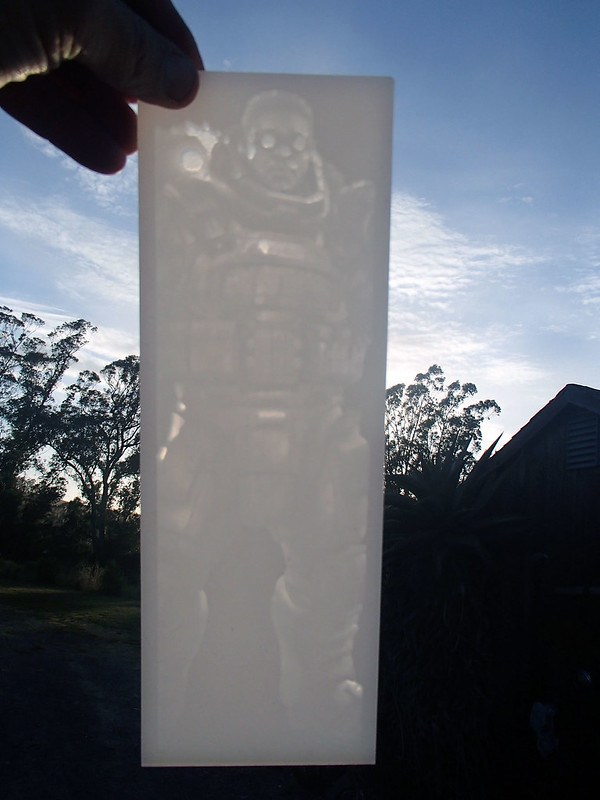
Each set took about two hours. Here's the Assault-class hunters:
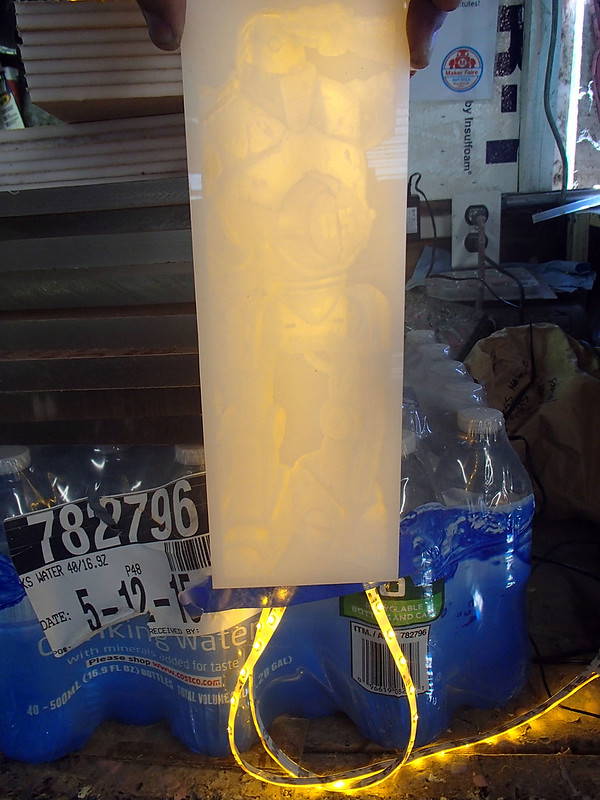
Here's one of them with the protective backing paper removed when I held it up to the fading sun:
And another one with a flashlight behind it:
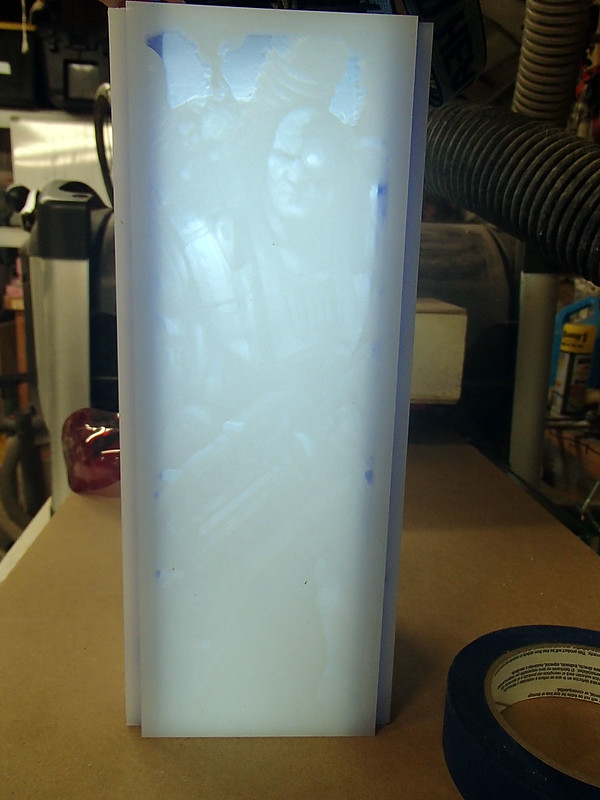
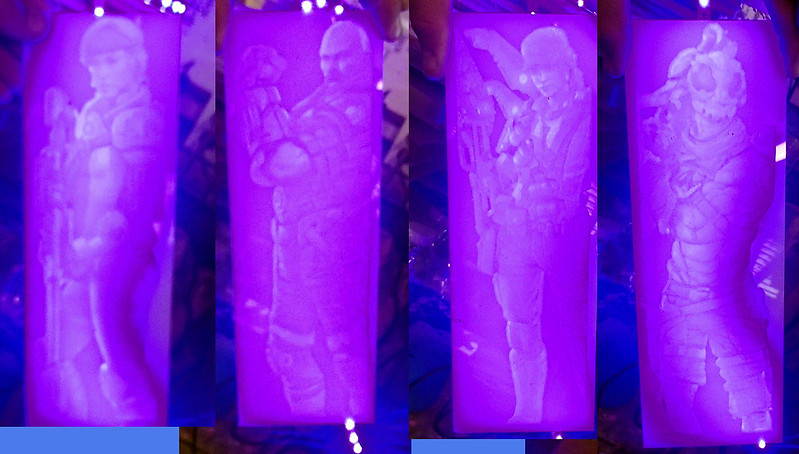
Satisfied that I was on the right track, I had Lopez carve out the Medic class hunters. Here they are with blue LED backlighting:
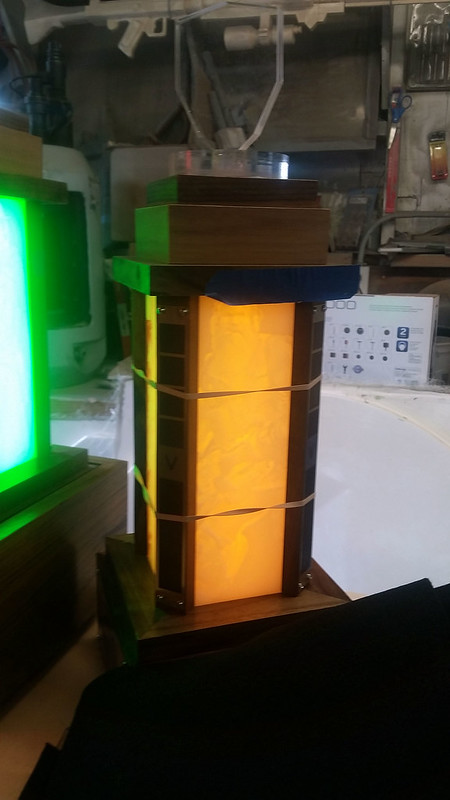
Here's "Bucket" the robotic Support class hunter with yellow LED backlighting:
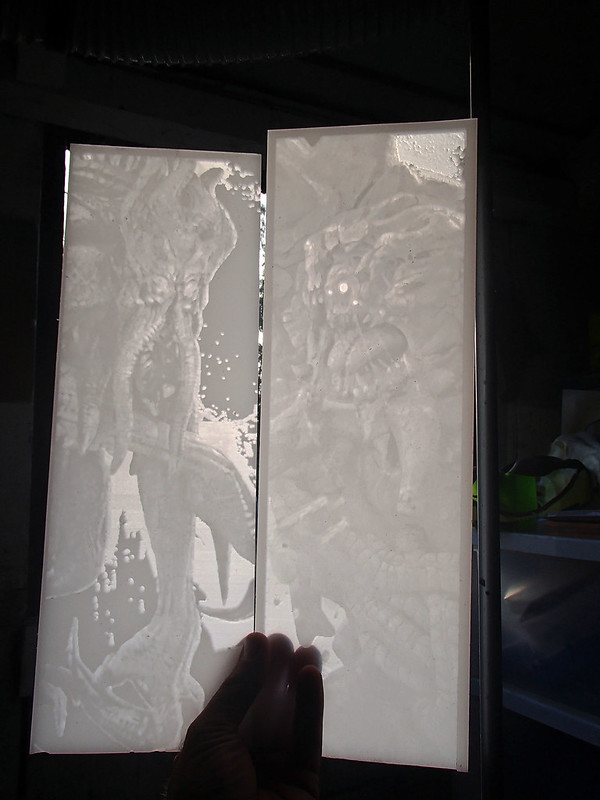
Since the Monster class column was going to be larger, I had to make a new jig for the bigger lithophanes:
Here's the Kraken and Behemoth monster panels:
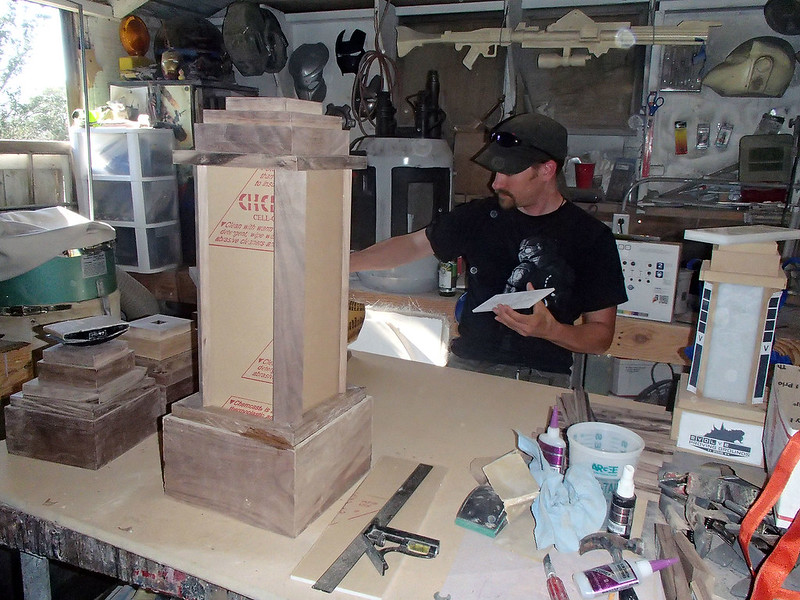
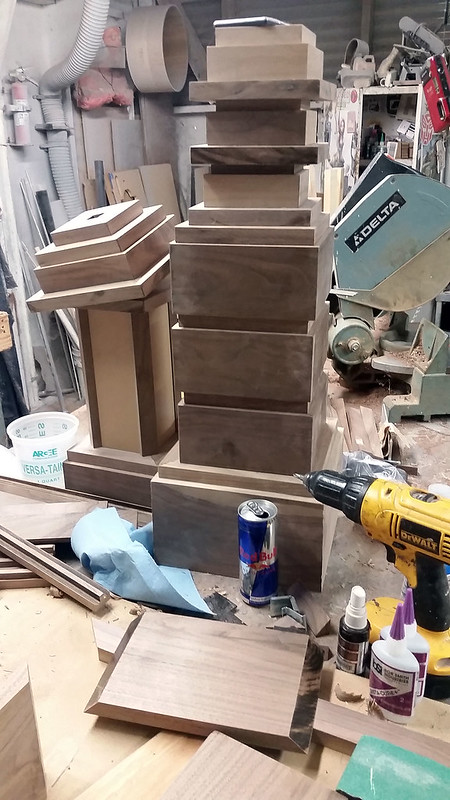
Rough-Draft Column:
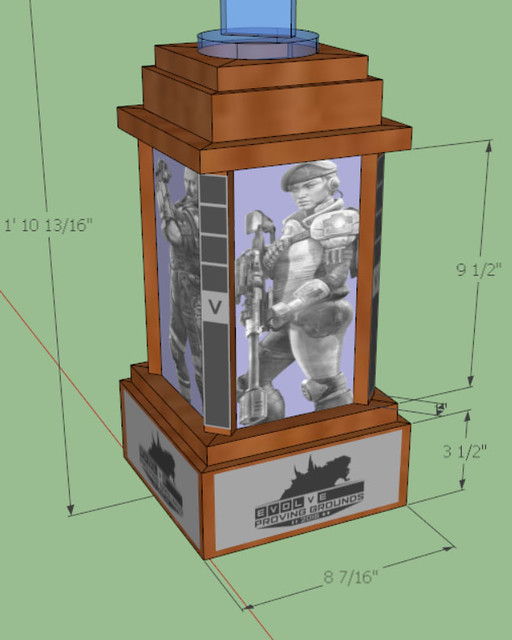
At this point, The folks at Insight Designs and I had settled on the final dimensions of the photo-etched metal panels. That meant I could start to home in on the exact look of the final trophy parts. Turning back to Sketchup, here's the new and improved rendering:
Insight sent me a PDF version of the parts they were etching so I could print them out and build them into a mockup of the final parts. Grabbing some scraps of Medium Density Fiberboard (MDF) that I had laying around, I knocked together a quick and dirty version of the trophy parts:
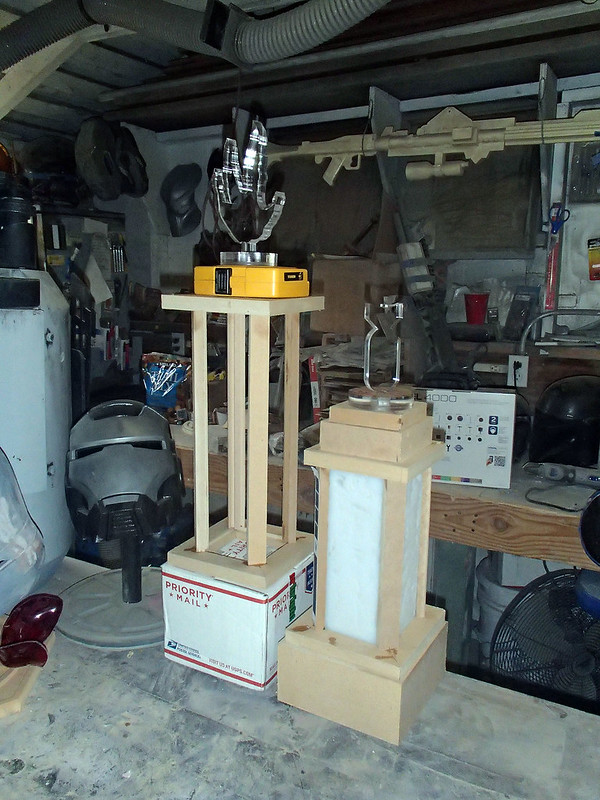
This thing was going to be big;
Here's a Hunter-class column mockup by itself:
Even the individual parts are not small:
I hadn't quite worked out the lighting though:
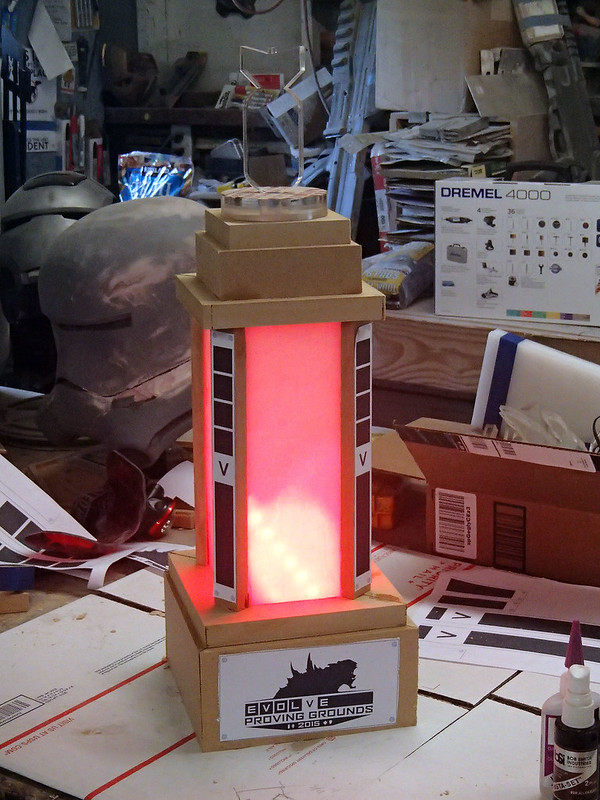
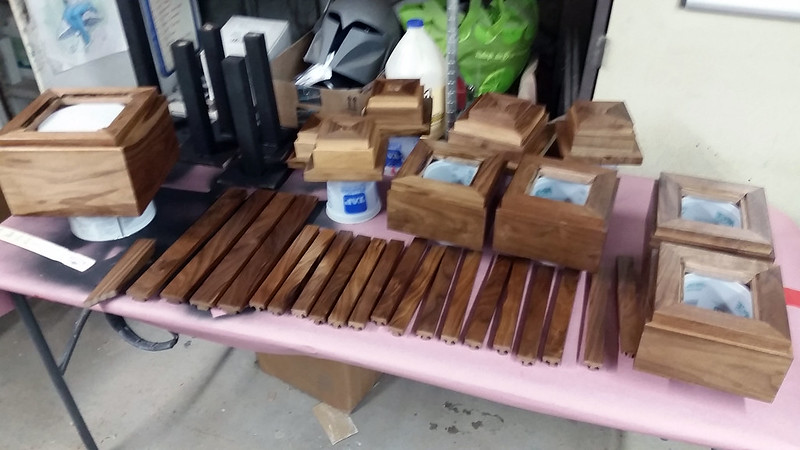
Photo-etched Panels:
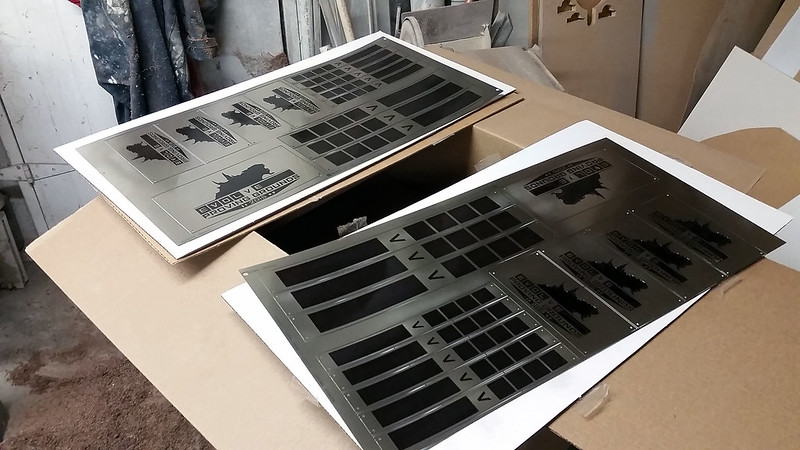
At this point I got the call that the photo etching was done and made the run out to Rio Vista, California to pick up the pieces. They came out pretty good:
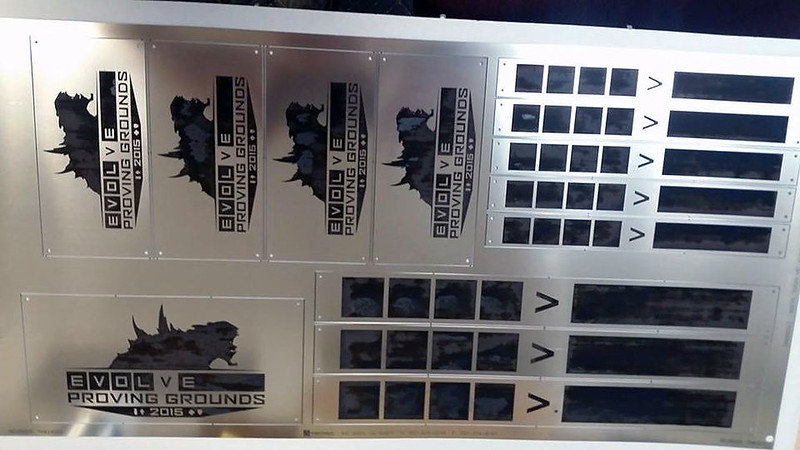
The parts were etched in nickel-silver with a black oxide treatment to help the artwork pop a bit more. While it looks blotchy in the above picture, once I applied a clearcoat, everything evened out:
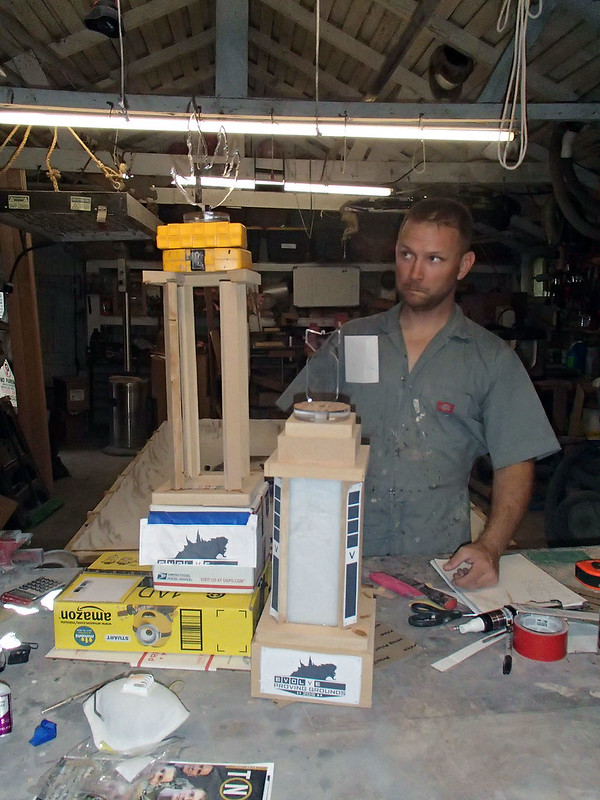
This was late in the afternoon on June 10th. Everything needed to be done and ready for pickup by June 12th. So now that I had all of the pieces in hand and it was time to kick the project into high gear and move on to...
The Final Draft:
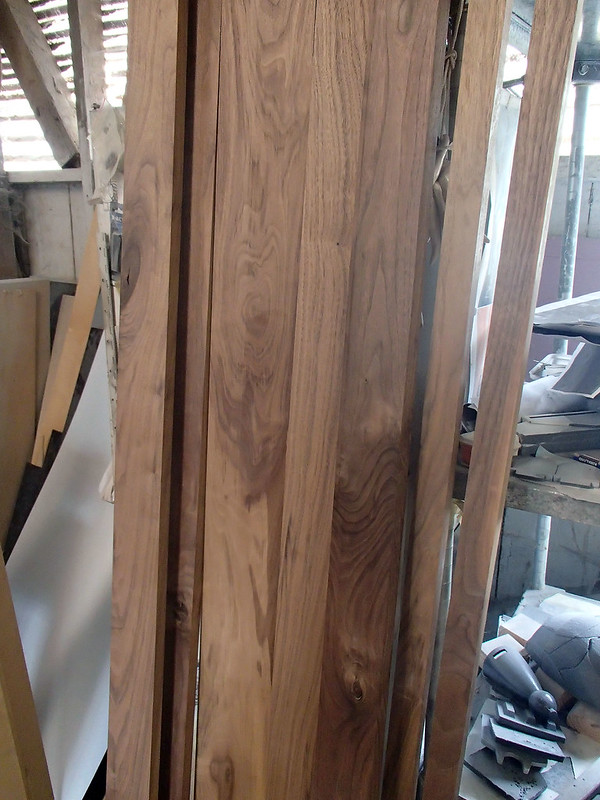
Initially I was thinking I'd make the wood parts out of mahogany, but when I started looking at the local lumber selection I found some absolutely gorgeous, beautifully figured walnut stock:
With a shiny new blade on the miter saw, I cranked out all of the little pieces I'd need:
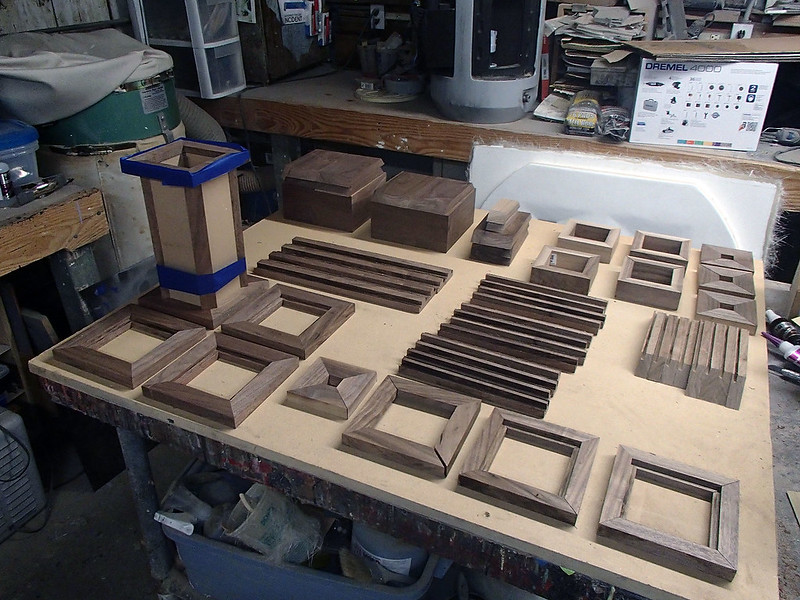
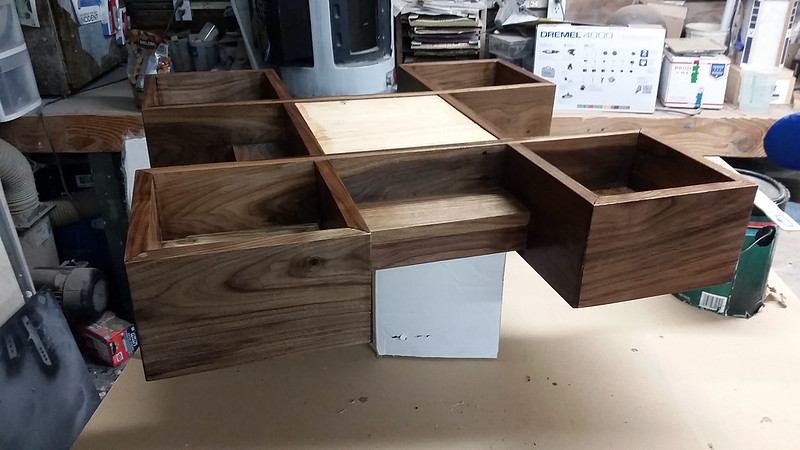
Then I started creating sub-assemblies:
There were four sets of everything to make the Hunter columns and then another set of larger parts for the central Monster column:
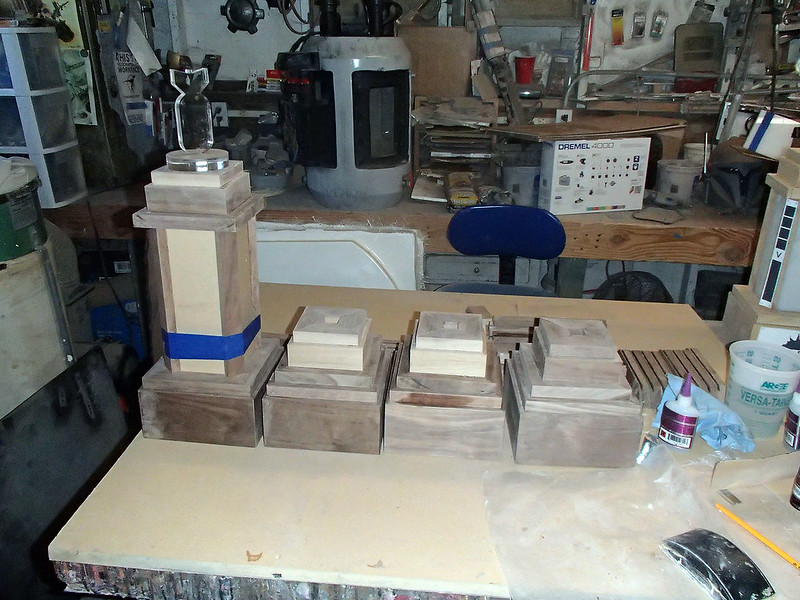
While I was head-aching over exactly how to re-size everything for the Monster class column, my friend Trevor busied himself with sanding everything smooth:
By late afternoon, all of the sub-assemblies were ready for finishing:
Then I got started on the base that they would all fit into. Again, I started with a gorgeous selection of walnut:

These pieces were cut, slotted, and mitered to fit together as best I could manage:

I don't have any photos of the assembled base prior to applying the final finish, so let's just jump ahead to...
Finishing:
The tray itself finally came together at about 3:45 am the night before the whole thing was due to be picked up. So the very last thing I did that night before losing consciousness was apply a coat of high gloss, fast drying Minwax polyurethane to all of the parts. Here's the base:
The gloss coat really brought out all of the beauty of the walnut:
Then I went and passed out. Four hours later I dragged my beaten and bedraggled carcass back to the shop and added another coat of polyurethane over everything. Then it was time for...
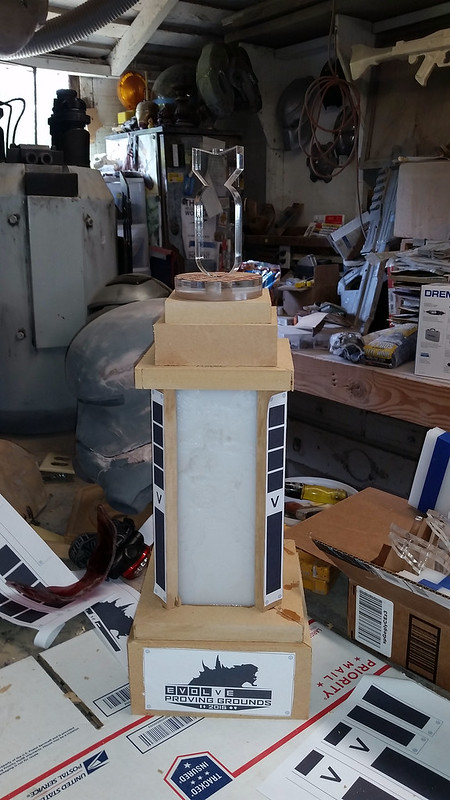
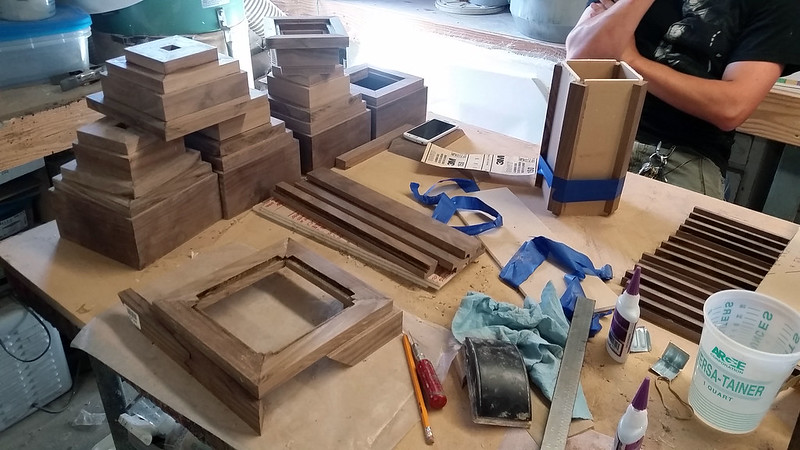
Final Assembly:
At this point it was about 9:00 am. 2K was sending someone to pick up the completed trophy that very same afternoon. Bleary-eyed and bordering on delirious, I set about the task of fitting the pieces together. The first order of business was mounting the lithophanes in place and gluing them into the bases and toppers:
Then I mounted the etched panels in place with an adhesive as well as small stainless steel screws. Here's a progress shot showing the pieces strapped together and waiting for the glue to dry:
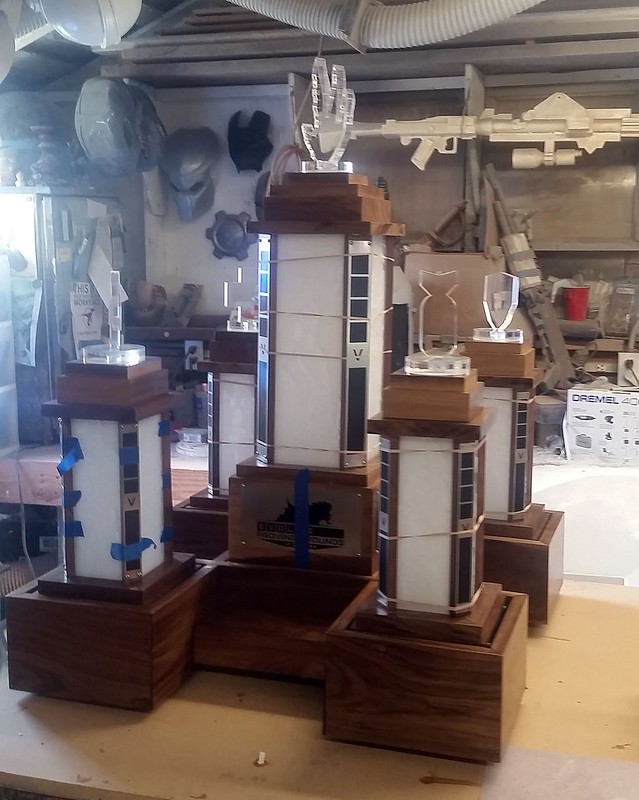
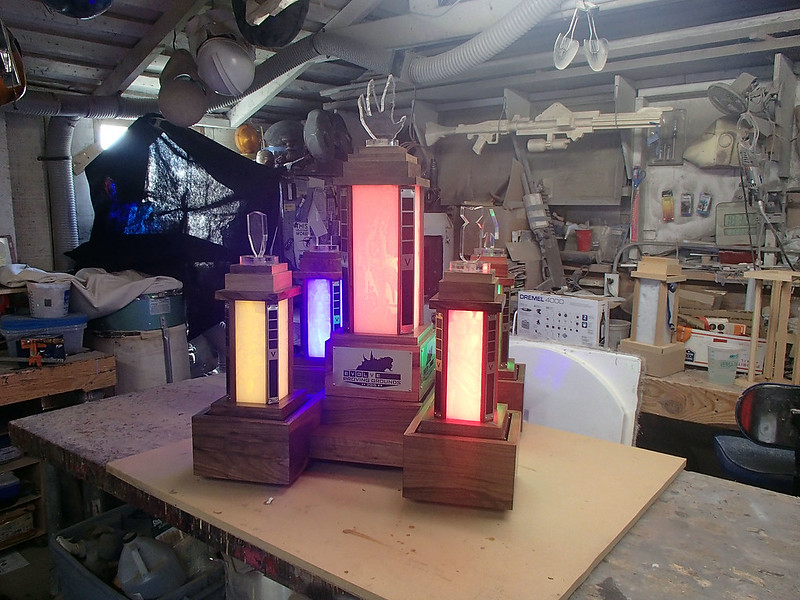
Again, this thing was not small:
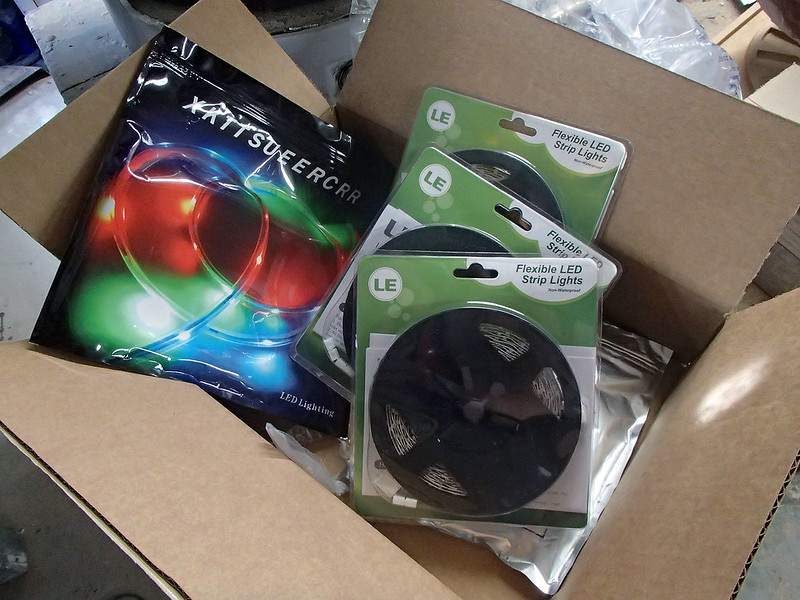
Lighting:
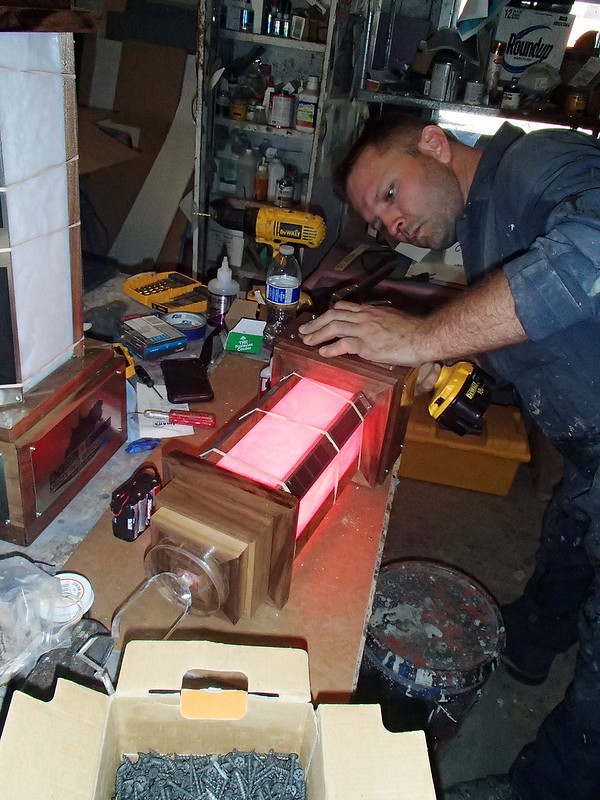
While the glue was setting up, I assembled the LED arrays. I started with pre-made LED light strips like THESE:
The strips were wrapped around a piece of wood that was then mounted inside the lithophane section of each column:
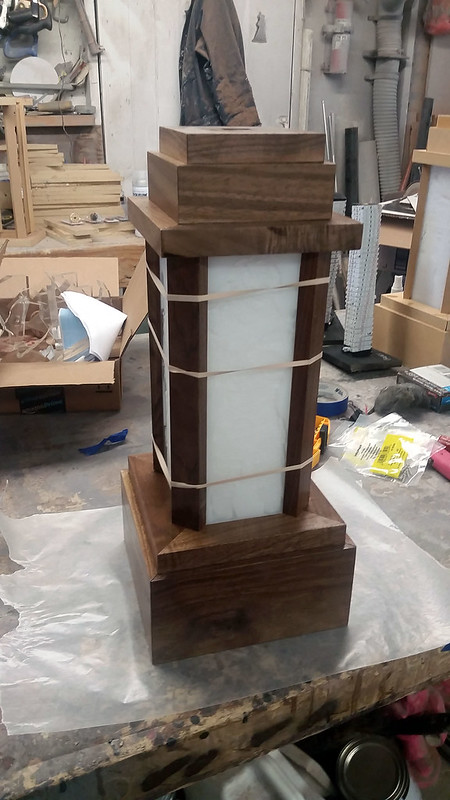
Here's the Trapper class column all lit up:
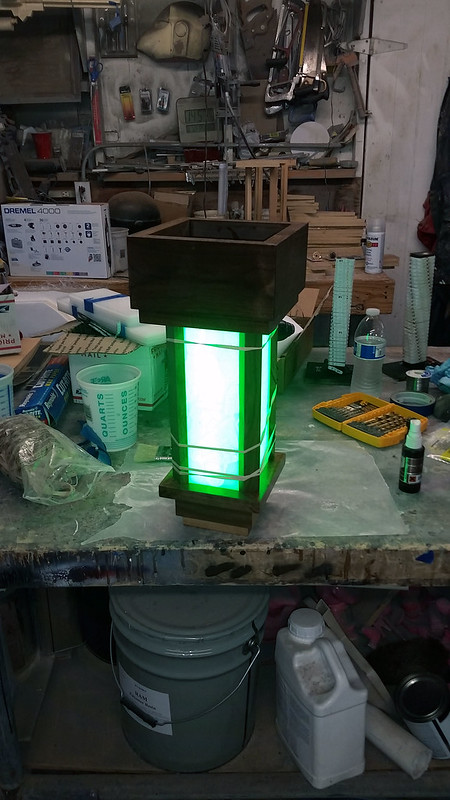
At this point, it became nearly impossible to get any good photos of these things. Either the lights were bright enough to wash out the details, or everything was dim enough to lose the look of the wood. Here's my first attempt:
Here's a reasonably good pic of the Support class, column:
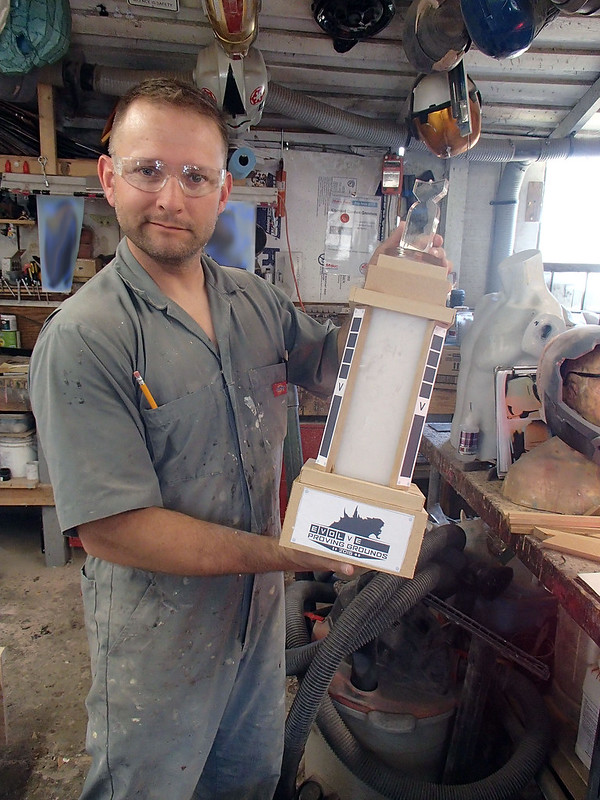
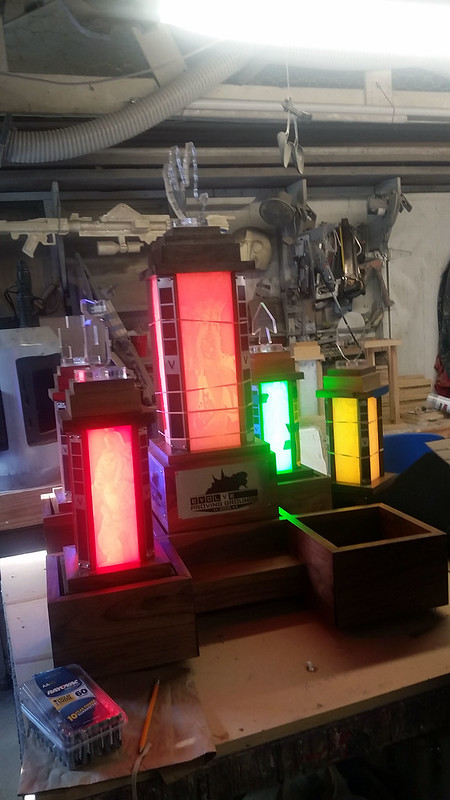
Fully finished, the assembled trophy is mounted to a motorized turntable that would slowly rotate it, making a complete revolution every ninety seconds. Even just sitting on my workbench, it was a pretty respectable piece of work:
The only thing left was to see if I'd managed to come up with something that would look adequate to the event it was built to commemorate:
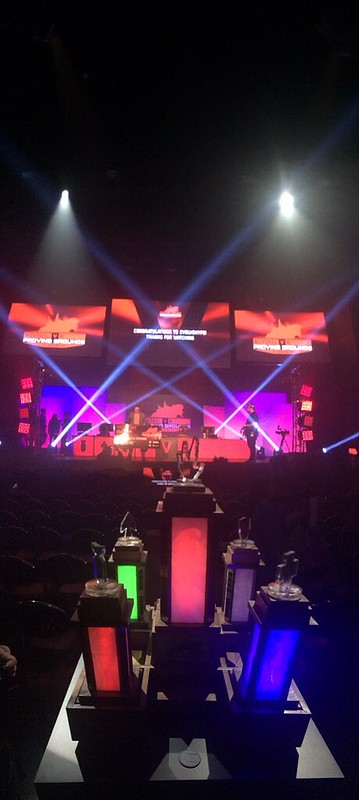
I think it worked:
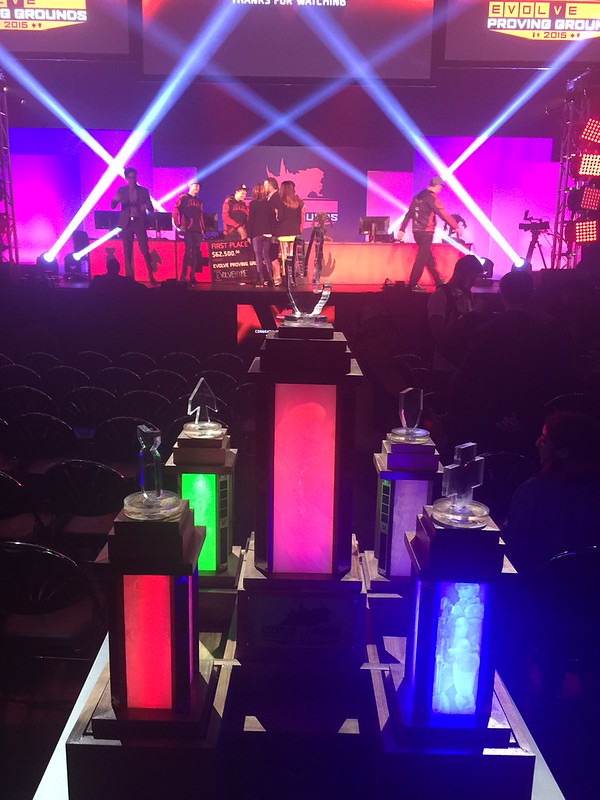
Mission accomplished.
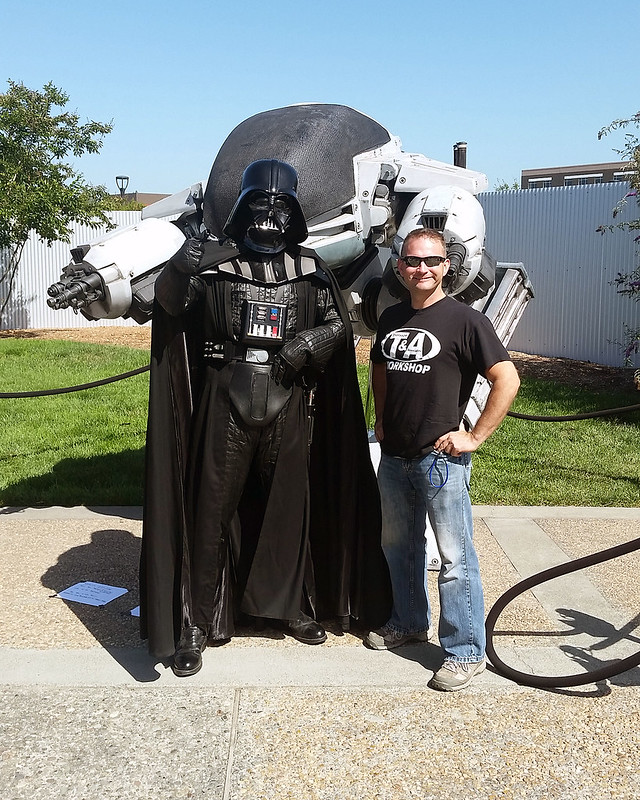
The next day I took my ED-209 for a walk, hung out with Darth Vader for a bit, and tried to relax as best I could:
But that's a story for another day...
No comments:
Post a Comment