
Some time ago I traded another maker one of my HALO 3 Mark6 Spartan helmets and got a copy of his hand-sculpted EVA helmet. It was well made and the casting was nice and strong, but it was also a little on the small side. I finished it up in the colors of Agent Maine from the popular webseries RED vs BLUE and wrote a quick article about making the visor which you can read by clicking HERE.
Since finishing it, I've had it hanging in the rafters of my workshop. I have a lot of helmets hanging in the rafters. Most of them just need some tiny finishing touch. Some of them are just waiting for me to start trimming and paint work. Others, like this one, are mostly just being forgotten.
While it was being forgotten it also suffered a fall when I was moving some lumber around and knocked it off its hook. I was able to reassemble it, but in the process I was reminded that I'd rather have another version of this particular helmet that was just a bit bigger and had sharper edges.
If you'd like to see the steps involved in making the upgrade helmet from start to finish, read on...
If you'd like to see the steps involved in making the upgrade helmet from start to finish, read on...
A quick glance at the Halo Costuming Wiki found me downloading a hi-res Pepakura model. After a few late nights on the boat, it was made:


I was a bit worried that it might be too big, but once I compared it to one of my other HALO helmets, I felt as though I was on the right track again:
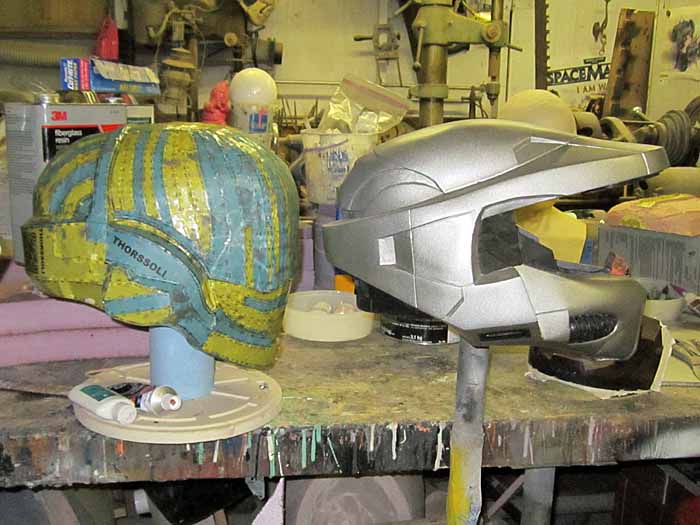
In the picture above you can see that I soaked the paper model with some polyester resin to stiffen the cardstock. Once that resin had cured, I layered the inside with three or four coats of urethane resin with microballoons blended in for viscosity.
Then it was on to Bondo:
This particular paper model was already pretty smooth, so there wasn't a lot of fairing to be done:

Still, every time I "finished" smoothing it out I'd notice some new flaw that needed attention:
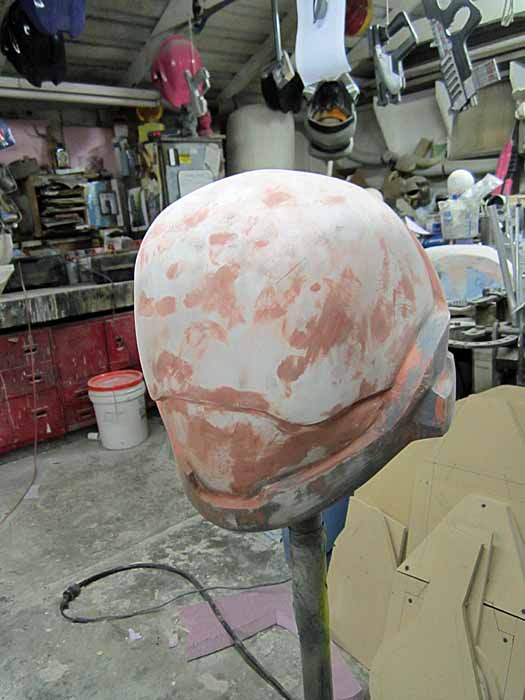
After three rounds of bondo, sand, repeat, I finally sprayed on some primer to see how bad it was. Then I used spot putty to touch up some of the smaller flaws. Another round of sanding and it looked like so:
This build probably would've gone much faster if I'd spent less time fooling around:

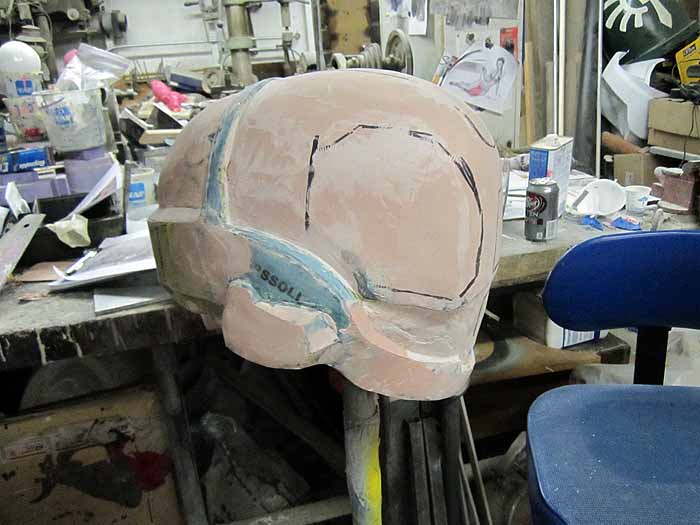
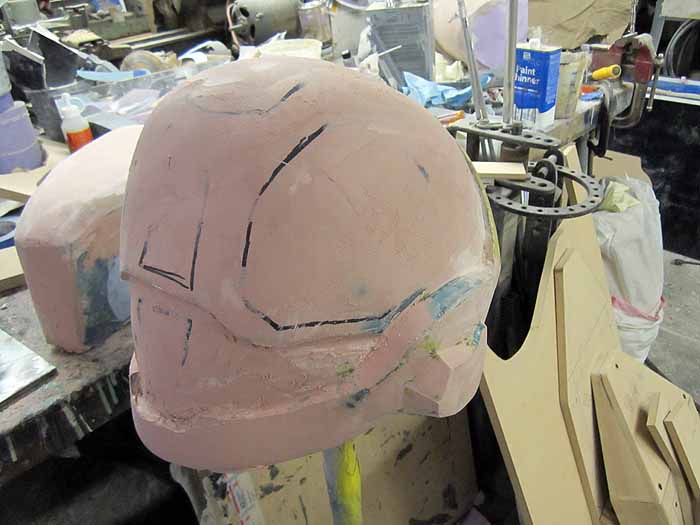
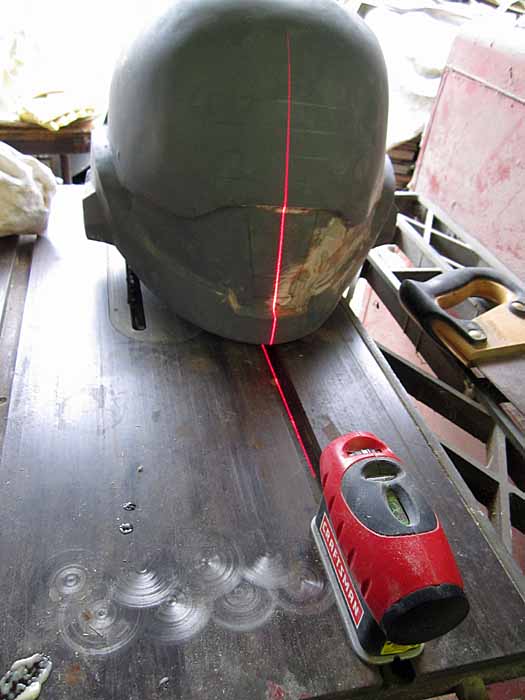
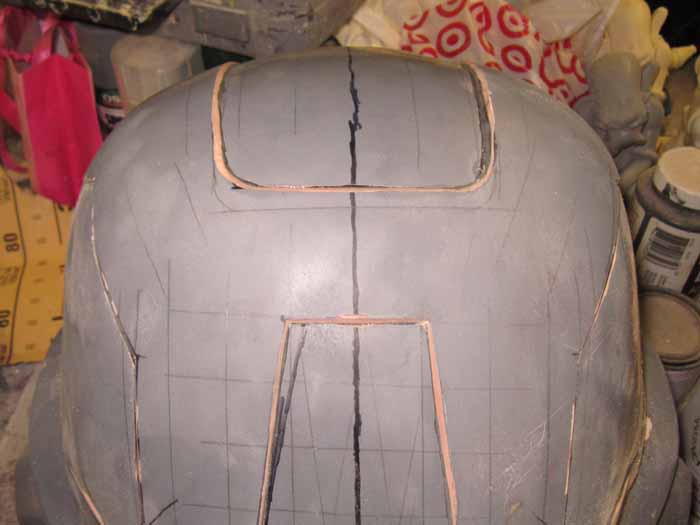
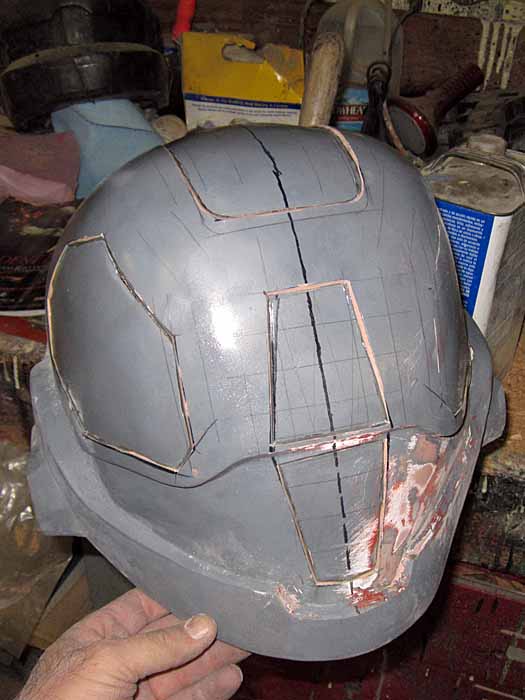
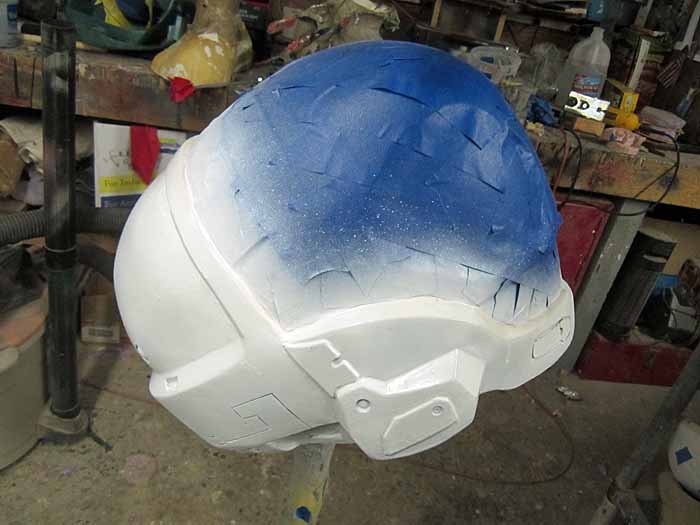
Once the pep model was mostly faired and smoothed out, the next step was to find a centerline and lay out a grid so I could decide where to put all of the recessed windows. I started by using a laser level for the centerline:
With the lines drawn out, I marked out the recessed portions and cut them out with a cut-off wheel on the Dremel:
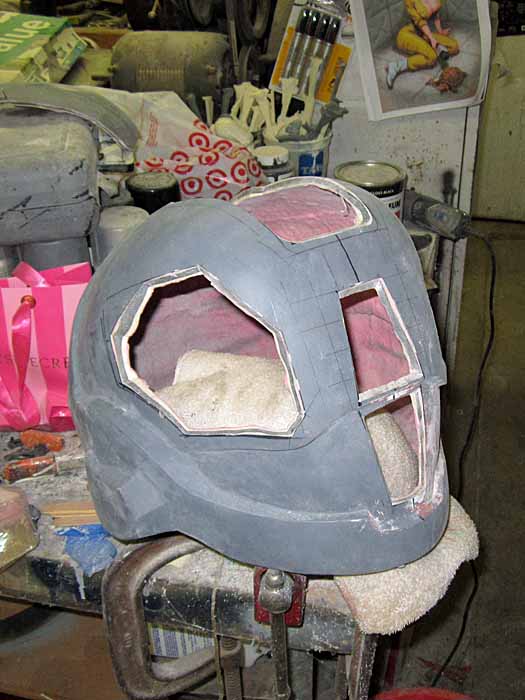
Since the cuts were all made at an angle, all I had to do was sand the edges smooth and glue the cutouts back in the same places in order to get the proper recess:
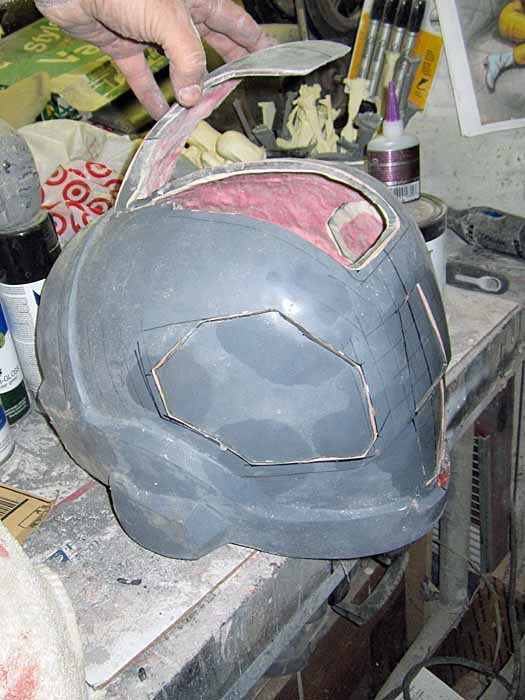
Here's a close-up of the end result:
I think it looked about right:
Once the visor area was smoothed out, the next step was a few coats of gloss to make it all shiny before adding the final, tiny details:
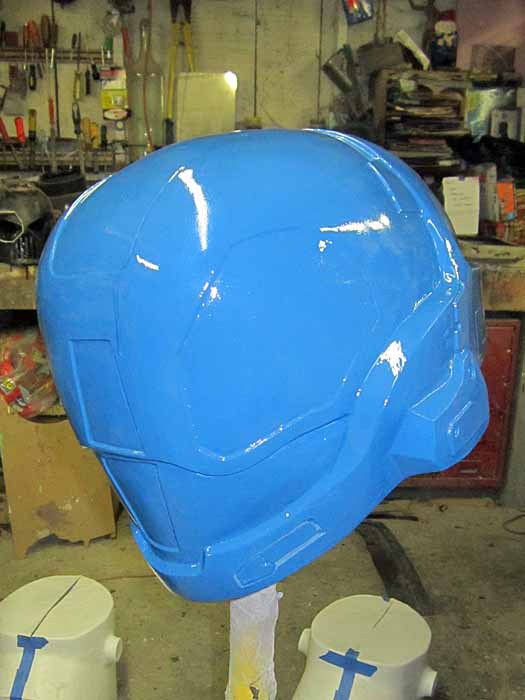
If you're wondering why I didn't paint it in my usual lightish red prototype color, rest assured that I actually did, I just neglected to take pictures before I started making the mold.
With the detailing done, it was time for moldmaking:
With the detailing done, it was time for moldmaking:
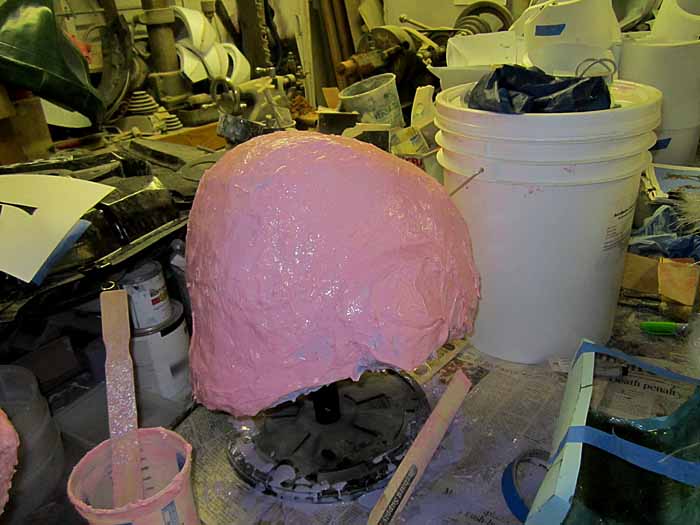
The mold was made in much the same way as my other helmet molds such as the Republic Commando helmets and the Space Marine Chaplain helmet. Here's the whole mold built up:
The first casting (center) with the prototype (left) and one of my Mark VI helmet castings (right):

As luck would have it, it fits:
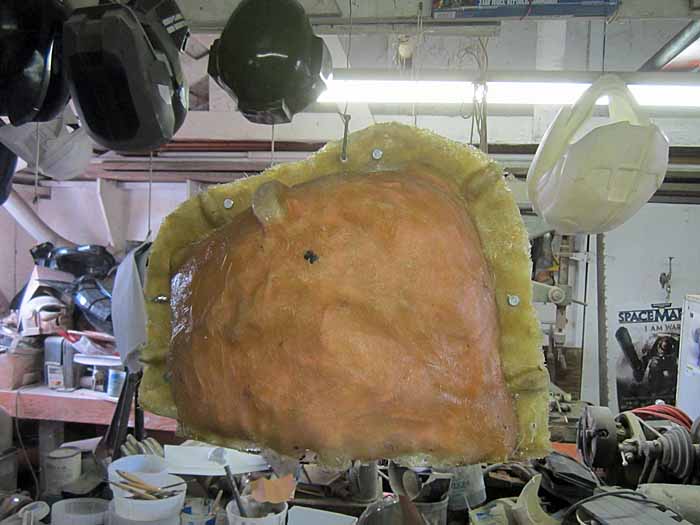
The main challenge with a helmet like this is making the visor. This is a job for vacuum forming. The first step was to make a forming buck. This basically meant casting the visor portion of the helmet, using blocks of foam to take up space so it had a shell that was over 1/2" thick.
Once I removed the casting from the mold, the next step was to grind down all of the edges with a flapwheel grinder. Here's how it came out:
To make the visors transparent, I'm forming them in PETG, the same sort of plastic used to make soda bottles. My forming table is almost 24" by 48". Since this form would only use up half of the tabletop, I went ahead and pulled some copies of my MkVI faceshield to use up the extra plastic. Here's the formed sheets as they came off of the table:
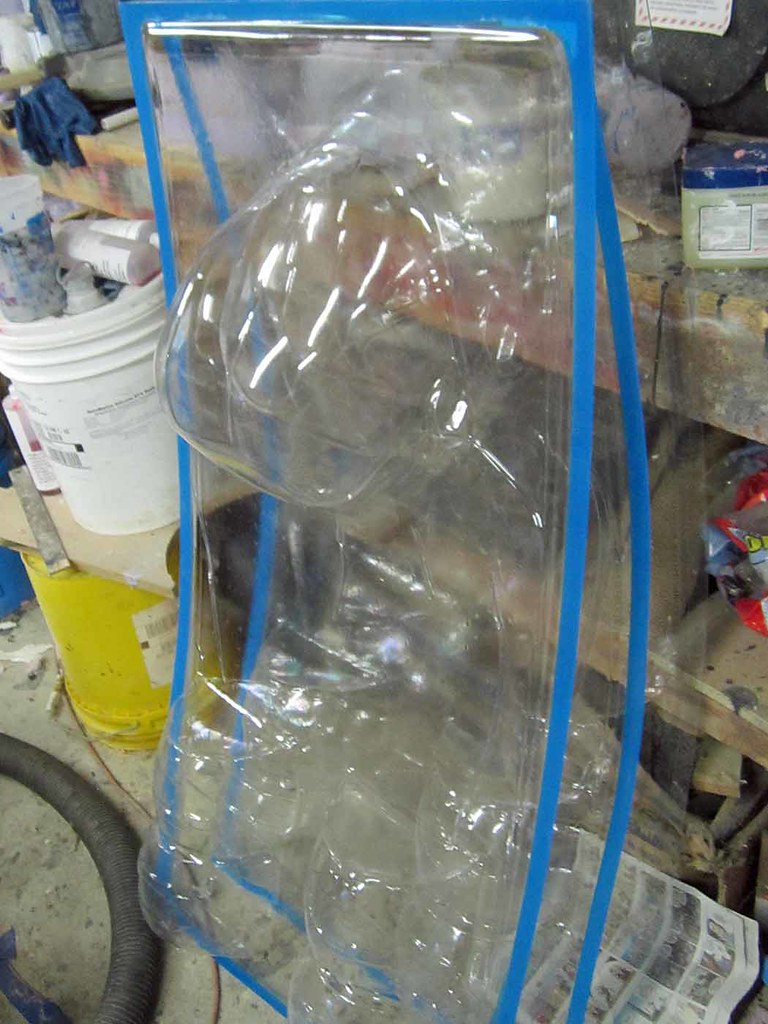
After some rough trimming, it was starting to look like it would work:
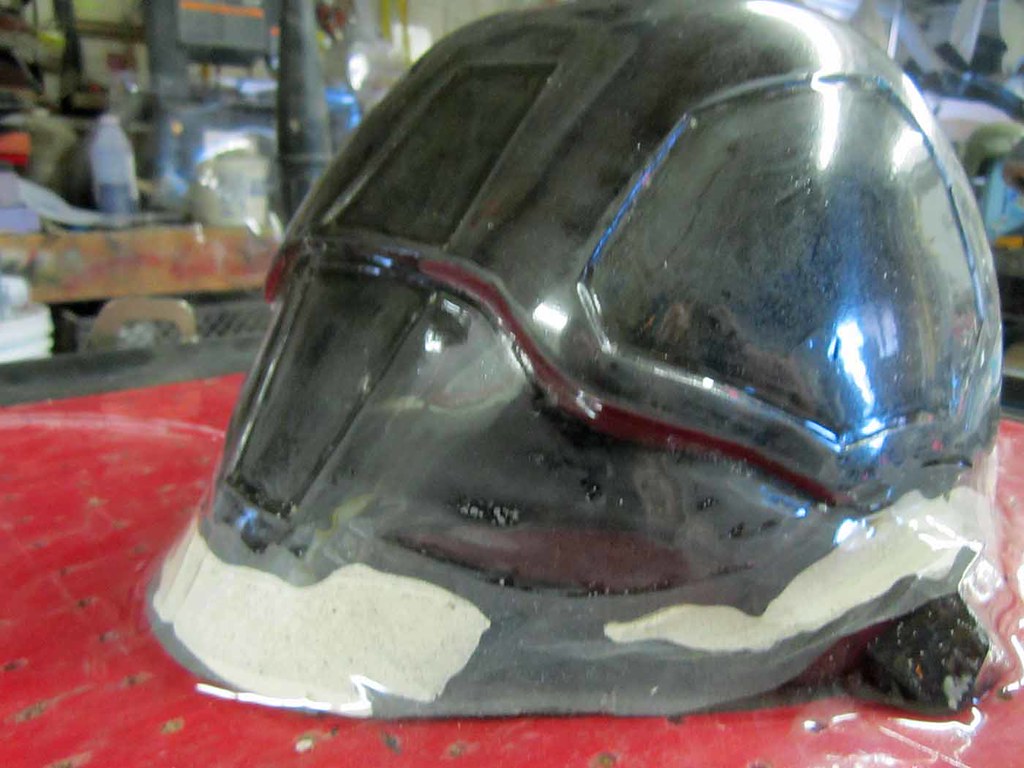
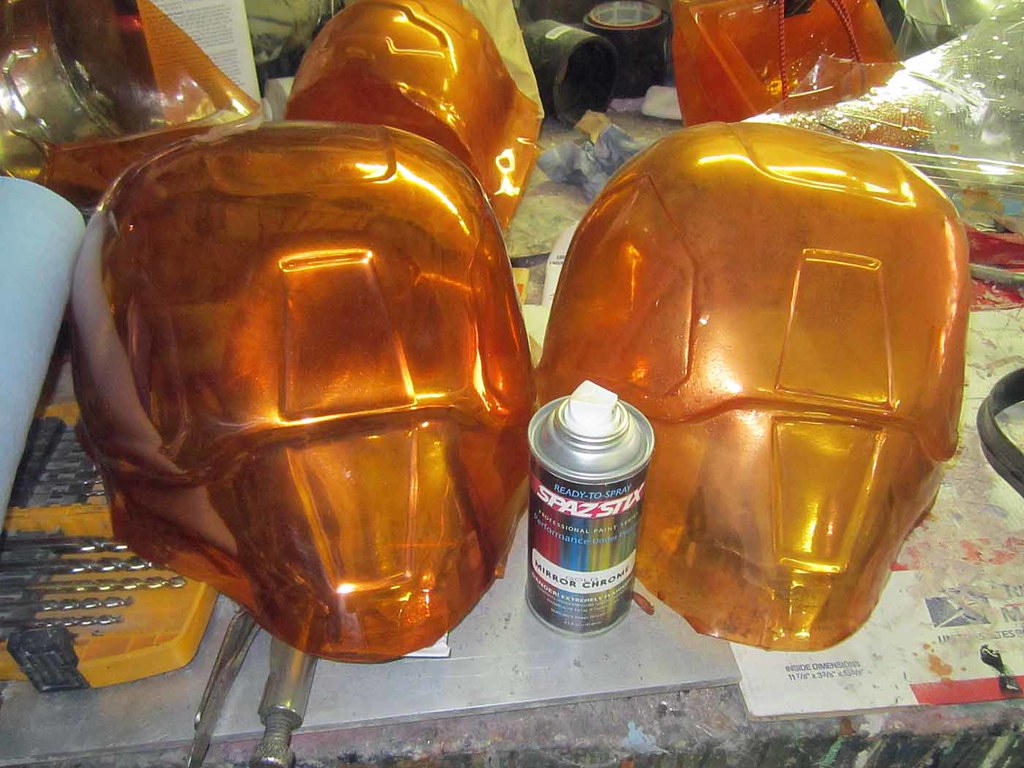
As a test, I went ahead and sprayed the inside of the visor with a very light coat of Mirrorchrome paint from Spazstix:

Concept proven:
With the visors formed, it was time to make them the right color. In this case, I used orange fabric dye. Specifically, "iDye Poly," a dye designed to color synthetic fabrics. RIT dyes used to work for this sort of application, but they've since changed their formula and now I have no use for them.
In order to dye the plastic, you have to make a hot dye bath. The problem is that too much heat will cause the painstakingly formed sheet to deform. To mitigate this, I suspend the formed parts from a string and hang it so that the parts are only just submerged in the dye bath.
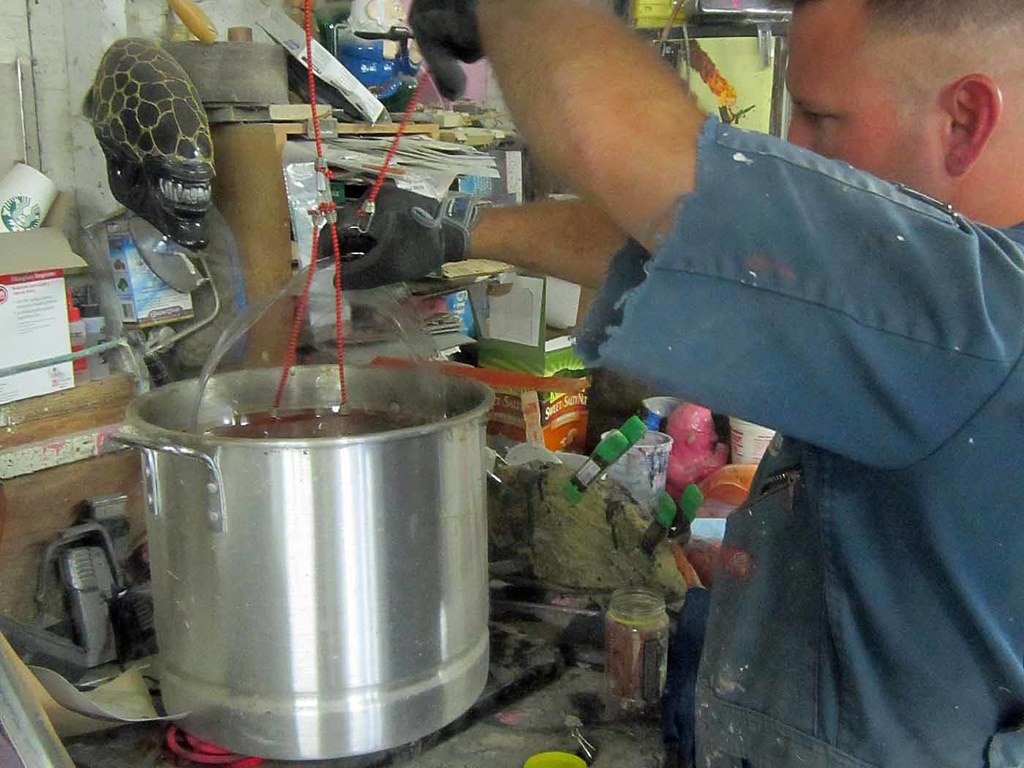
As I pull each piece out of the dye bath, I stretch it back over the forming buck so it doesn't warp as it cools:

In order to dye the plastic, you have to make a hot dye bath. The problem is that too much heat will cause the painstakingly formed sheet to deform. To mitigate this, I suspend the formed parts from a string and hang it so that the parts are only just submerged in the dye bath.
As I pull each piece out of the dye bath, I stretch it back over the forming buck so it doesn't warp as it cools:
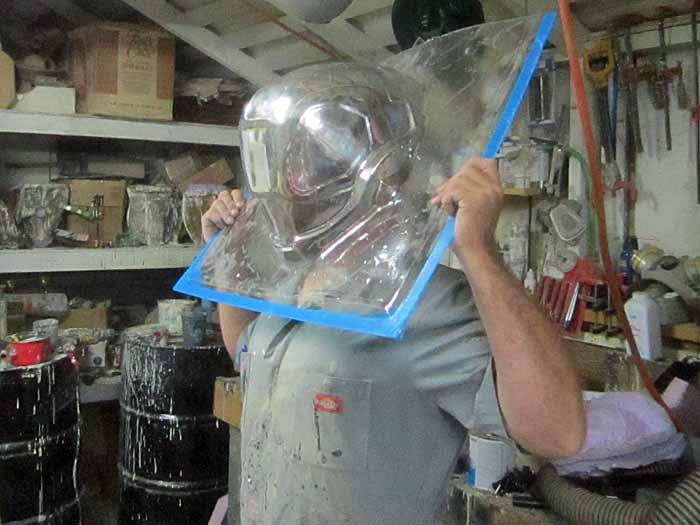
Once the part has cooled, it gets rinsed clean, wiped down inside with alcohol, and then sprayed with the same mirrorchrome paint. Here's a couple of tinted and chromed pulls:
The one on the right has not been wiped clean on the outside and has slightly less chrome sprayed inside.
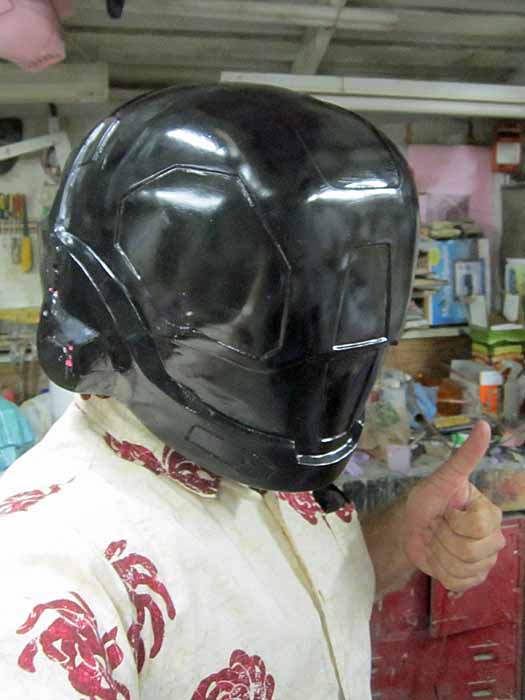
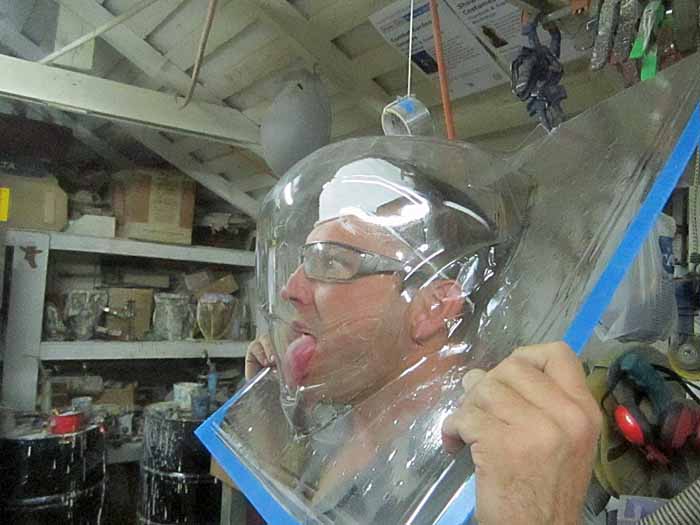
Once everything had dried and stabilized a bit, I went ahead and did a test fitting:
After all that work, it turns out I hated the vacformed visor. So I went back to the same method I originally used with the other helmet. Here you can see another casting in white primer with the windows cut out:

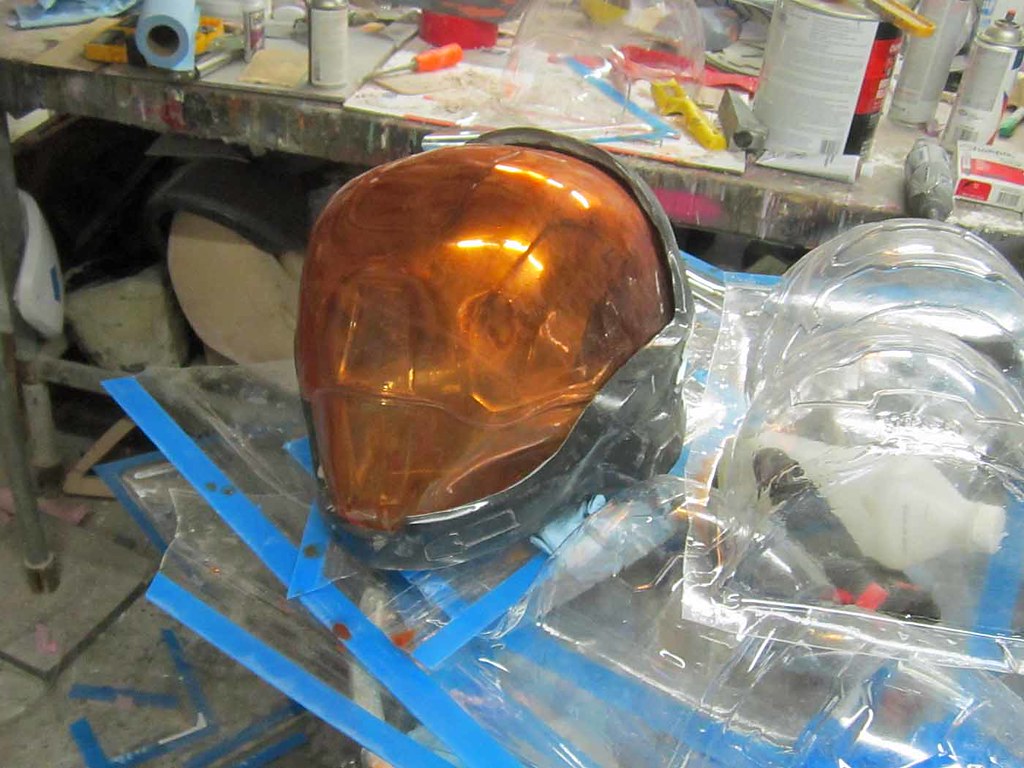
Here's a couple of the orange tinted acrylic pieces fitted:

In order to bend the acrylic pieces to conform to the curve of the helmet I set them in a toaster oven and cooked them until they were soft enough to bend into place. It's worth noting that when you heat up acrylic it lets out all sorts of nasty, stinky ick. It smells bad, it's bad for you, and it probably kills kittens. Wear a respirator.
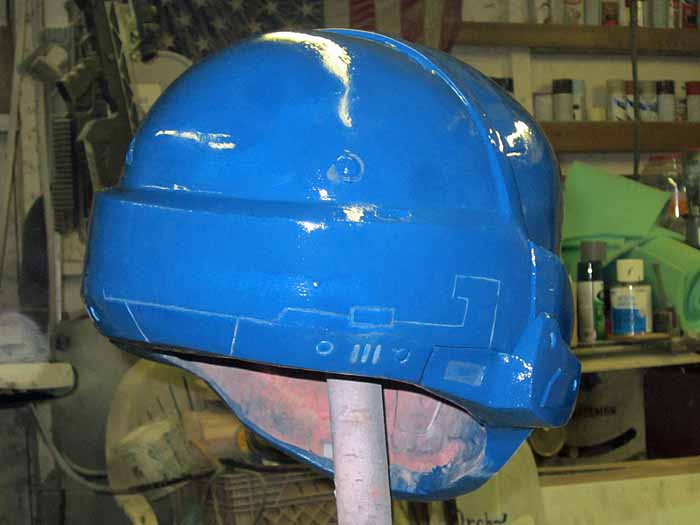
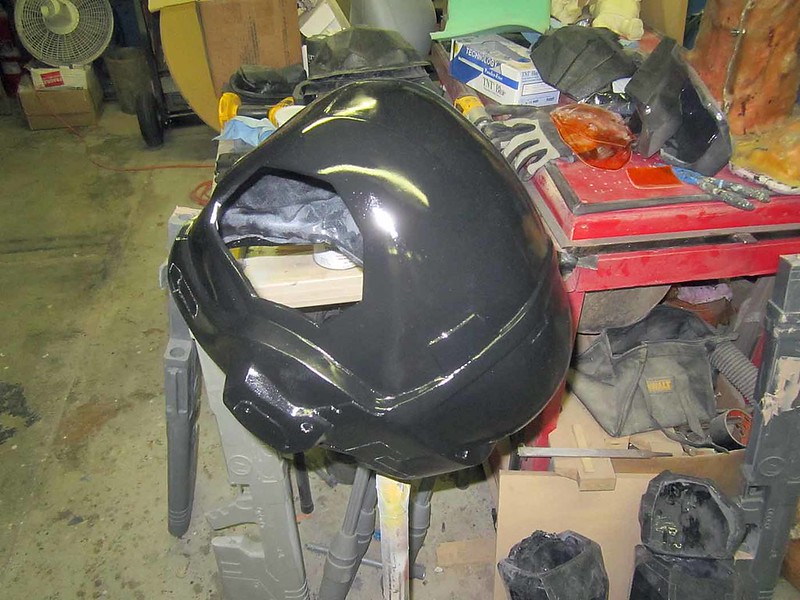
Once I had formed all of the acrylic pieces, the whole helmet got a glossy black basecoat:
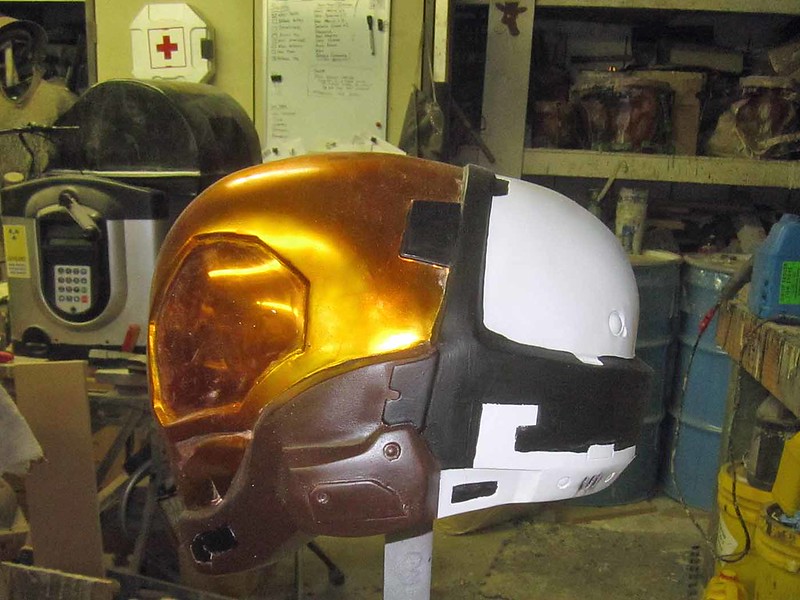
The gloss black was then coated over with Mirrorchrome paint, then a coat of Tamiya clear orange acrylic paint to give it the proper orange tint. Once that had dried, I masked off the visor parts and painted the rest of the helmet in it's base white color:
After picking out all of the details it looked like so:
It still needs some weathering, but I'm holding off until I've completed the armor so it will all have the same look when it's done.
Next I'll make the Brute Shot (Agent Maine's signature weapon) and the rest of Agent Maine's accessories.
In the meantime, I'm looking for a sound box that will work for making growling noises. Stay tuned...
I would like to have this in my possession
ReplyDeleteAwesome tutorial. Thanks a lot for taking the time to show your steps.
ReplyDeletehow much for a York suit?
ReplyDeleteHow much rubber do you use on an average helmet?
ReplyDeleteI don't really keep track. I usually pour 20-25 ounces per batch and I'll use 2-4 batches to layer up a mold, but sometimes I'm using part of the batch for other things at the same time. So figure somewhere in the neighborhood of five pounds and you'll have some left over for another project.
DeleteI really want this. Where am I able to buy it?
ReplyDeleteCould I buy This.
ReplyDeleteI too, wish to give you money.
ReplyDeletereally interested to know if you will sell one aswell. keep us updated!
ReplyDeleteYou could make some cash off these. I've been looking for Maine armor and weapons for months. I may actually beg you for this
ReplyDeleteYeah, I'd kill a guy for one of these
ReplyDeleteso jealous *Q* i want one
ReplyDeleteIf you read this, please get in contact. Do you make custom work? Hope much for the meta's helmet?
ReplyDeleteI do custom work. If there's something you'd like me to make for you, please email me at sthorsson99@yahoo.com and tell me all about it.
DeleteIs there any progress?
ReplyDelete