
Here's what the end result is supposed to look like:

Here's what mine looked like when Lopez was about 90 minutes into the first piece:
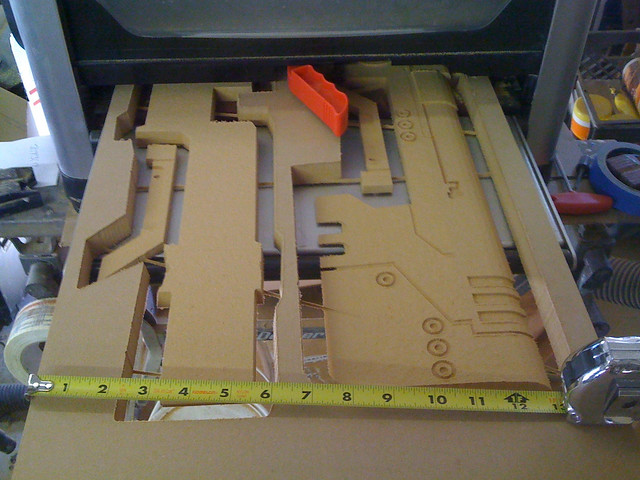
Per the game references I've found, the whole rifle will be a little over six feet and two inches long. To make it a tiny bit more manageable, I've scaled it down a tiny bit. My version will be around five foot, six inches long. The main body will still be thick enough that I was forced to slice it into four separate layers and then carve them out two at a time. Here's the parts that make the left half of the rifle once Lopez was done whittling them:

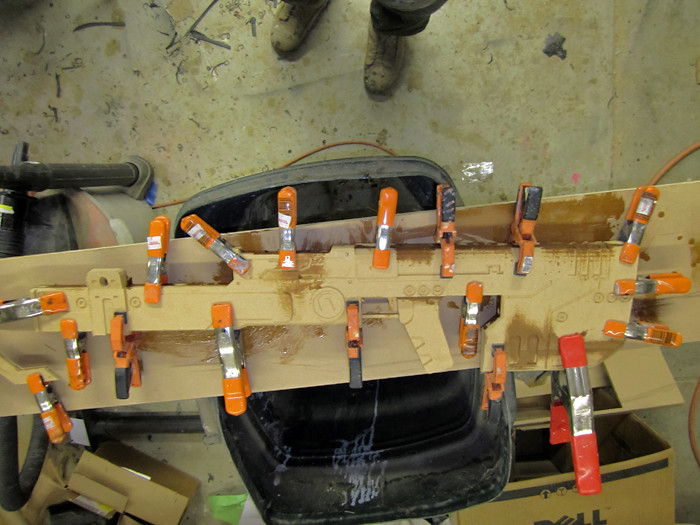
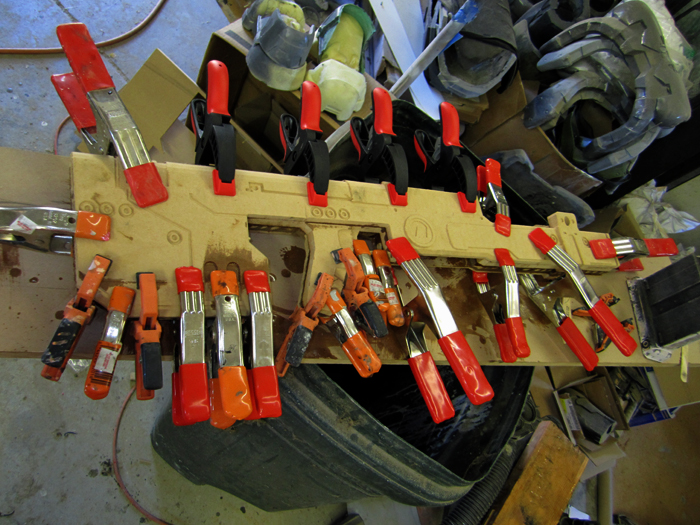
After I'd separated them from the waste portion of the board, it was a simple matter of buttering one of them up with epoxy and then clamping the two halves of the half (two quarters really) together:
Bear in mind that this is just the main body. With the barrel and muzzle brake assembled and attached it will be over twice as long. This will be a big f*cking gun:
Prior to making the left half of the main body, I had Lopez make the magazine and I made a mold from a .50cal machine gun round. Here's one of the shell castings sitting on the rough prototype of the mag:
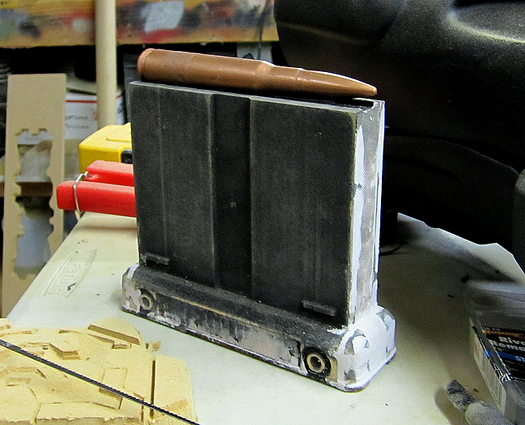
It turns out that the mag fits perfectly:

While the glue was curing on the left half, Lopez cranked out the right half:
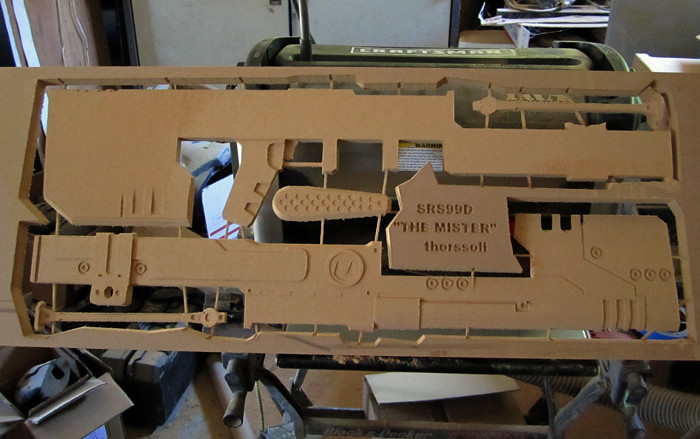
While I was reading through the references for this piece, I stumbled across a number of nicknames for this rifle. My favorite was "the mister." Not "mister" meaning "man" or "husband," but rather "something that makes mist." Clever.
Here's a shot of the right half being glued and clamped to the left half:
Here's a couple of the small parts clamped and glued. Here you can see the forward handle and the bipod leg:
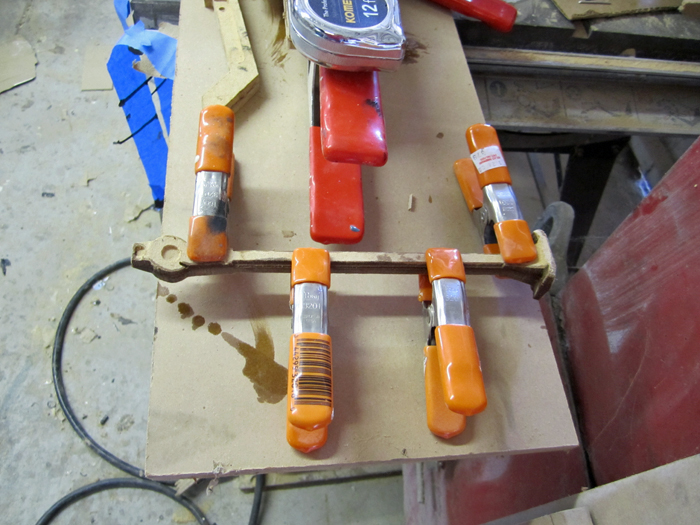
Since the left and right bipod legs are interchangeable, I'm planning on making just the one, molding it, and then cranking out copies to attach to either side.
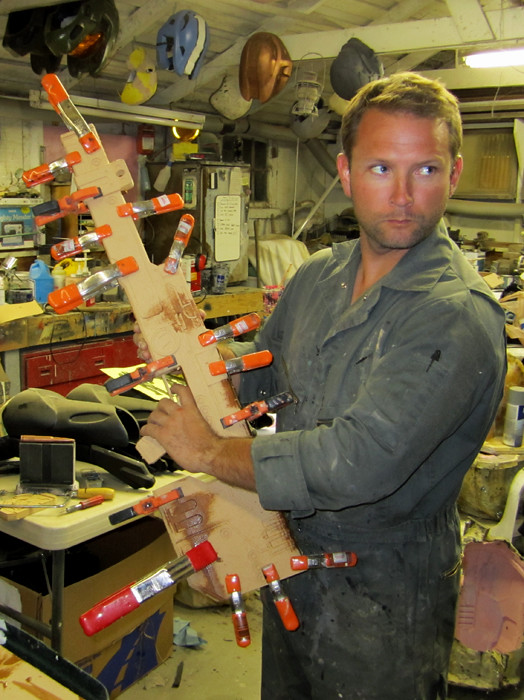
The frustrating part of a project like this is waiting for glues and paints to dry or cure. All the while I have to find ways to distract myself from my cool new toy so I don't touch it and mess something up. Once I'd clamped all of the main body parts together, I spent some time tinkering with my MA5C Assault Rifle casting. Here's a shot of it laid on top of the sniper rifle body for size comparison:
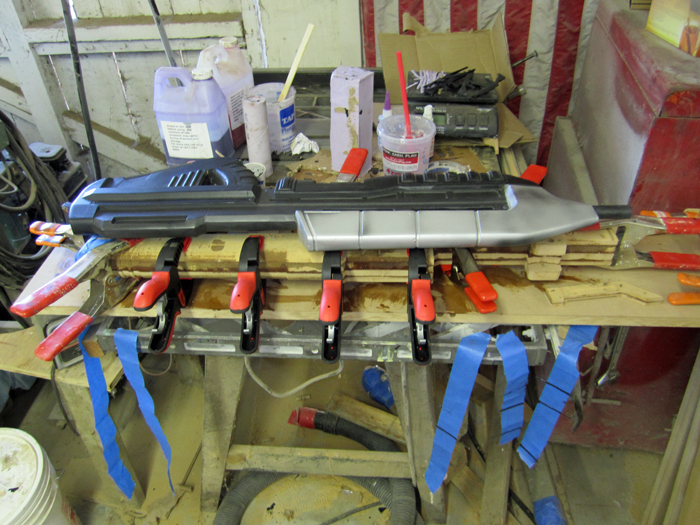
After that it was time to take off for the weekend and let everything set up. When I'd returned on Sunday night, it was time to remove all of the clamps, tape a length of PVC pipe in the place of the barrel, and struck a few poses.
When the whole thing is finished it's not going to be small:

And the posing will be fun:

Even though it's wasteful and premature, I couldn't help but spray on a coat of black primer to get a bit of a preview of what the Mister will look like once I get him in formalwear:
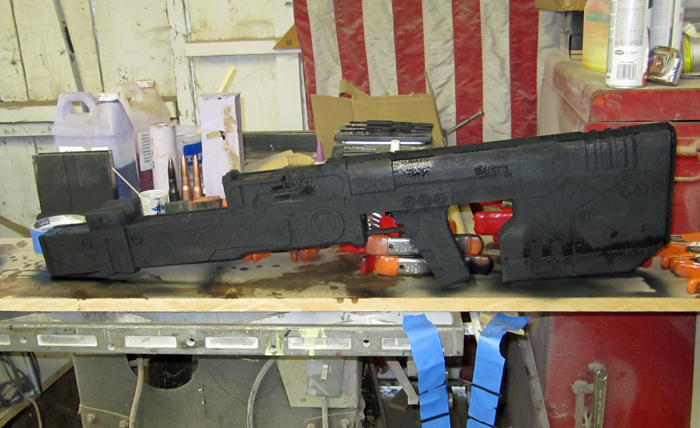
Not too shabby.
Now I need to have Lopez make the muzzle brake and scope housing. While he's doing that I'll machine the barrel and the recoil suppressor. Then it'll be time to do some sanding, filling, detailing, painting, molding, casting, sanding, painting, and all that'll be left to do is explaining it to the arresting officers.
Whats the weight?
ReplyDeleteI haven't weighed it, but the MDF prototype isn't especially heavy.
ReplyDeleteOnce I've made a mold, I'm planning on making a hollow core to put inside the castings to keep the weight down. Still, it's going to be a big, heavy piece of gear.
I congratulate you from Venezuela
ReplyDeleteyour work is excellent ...
I wish you the best of luck thanks for your images.... mazel tov