
Years ago I began building a miniature Sherman tank. I found plans to make a child-sized (1/5th scale) version of the Sherman at the Gizmologist's Lair. On the website, you can also buy plans to build one for yourself. I don't know why, but this project struck me as something I absolutely needed. That was in early 2003.
Once I managed to get my ex-girlfriend (aka, the Psycho Hose-Beast) out of the house I suddenly had more spare time and money than I'd have ever imagined. That was June of 2004. I set to work immediately resizing the Gizmologist's plans to build a Sherman tank big enough for me to run it by myself.
Initial design constraints were fairly simple: it had to be able to fit one person of my size, it had to have a footprint of no more than 4 by 8 feet (to fit in a pickup truck), and it had to be able to shoot things. Shoot things at things, that is.
Initial design constraints were fairly simple: it had to be able to fit one person of my size, it had to have a footprint of no more than 4 by 8 feet (to fit in a pickup truck), and it had to be able to shoot things. Shoot things at things, that is.
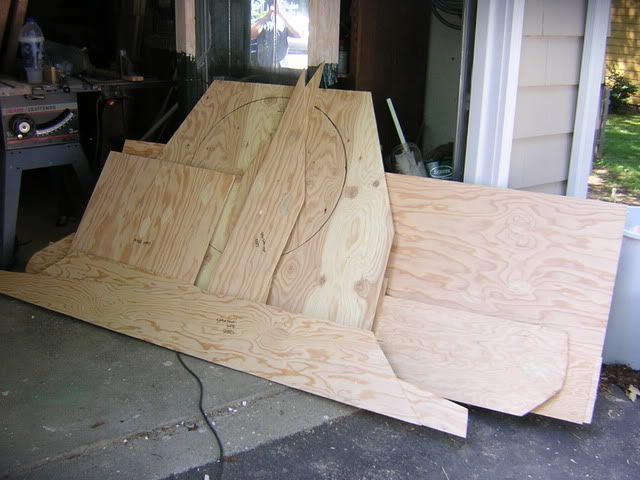
A quick trip to the Home Depot and construction began. Within one weekend, I had the hull generally assembled:
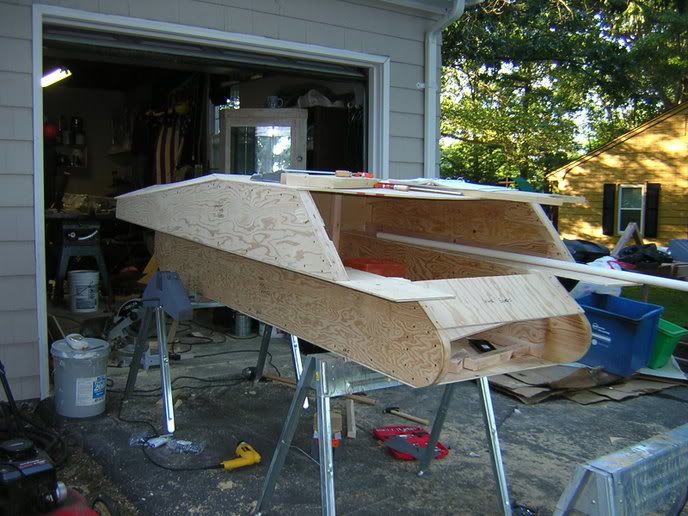
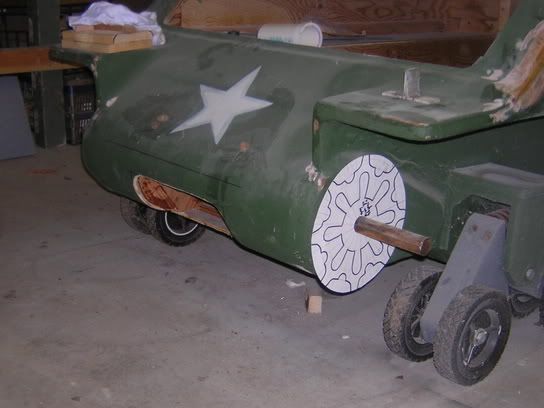
Over the next few months I managed to layer the hull completely in fiberglass, build most of the suspension components, and test fit the whole thing:
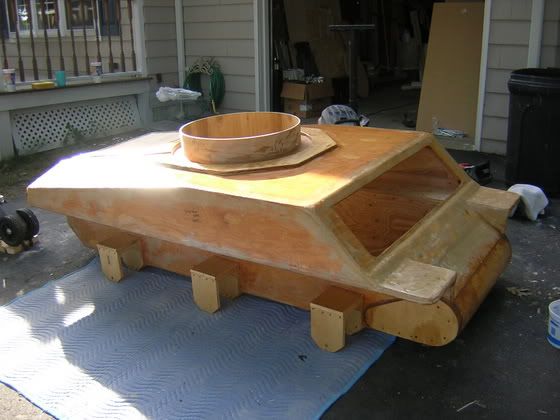
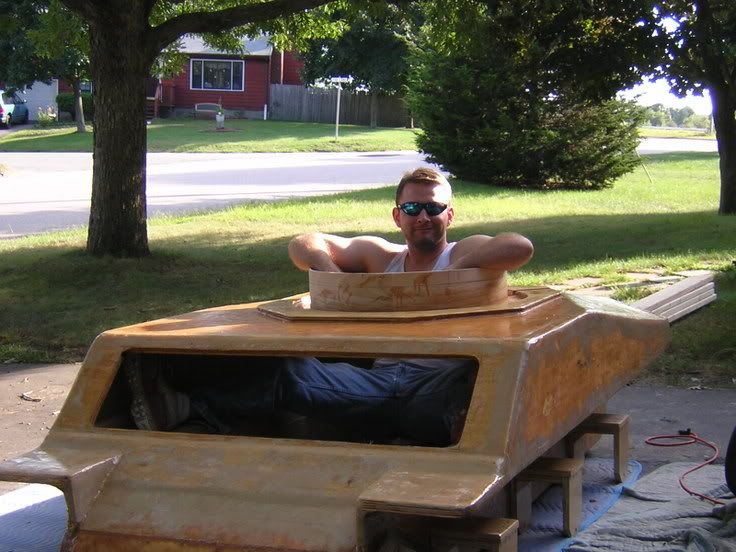
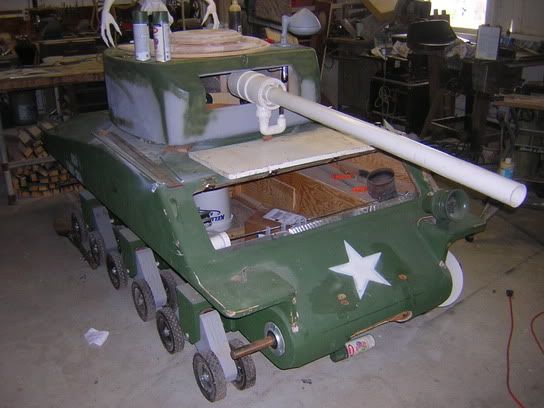
I managed to get a quick coat of paint on it, but then it was time to get out of the Navy, sell my house in Rhode Island, and move to beautiful Petaluma, California. After two months spent building a woodshop and rearranging all sorts of random junk, I was able to get back to the tank:
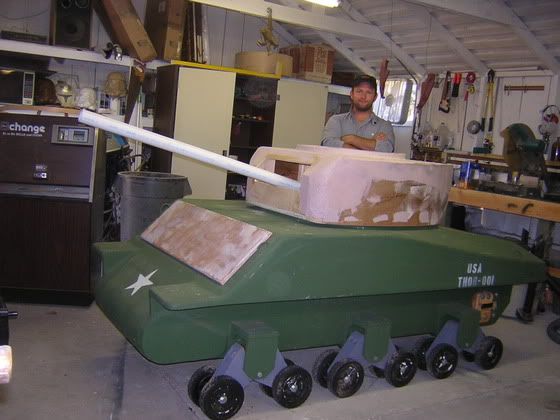
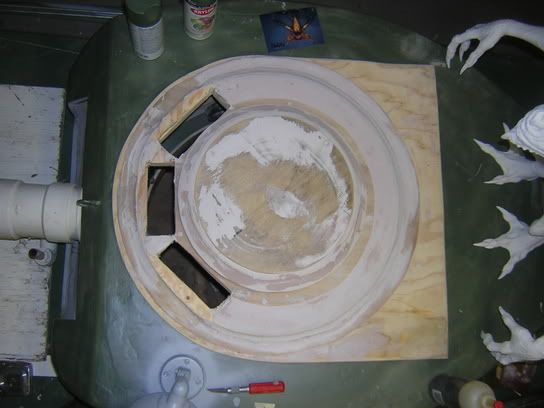
Pictured above is my third attempt at building a turret. The other two I tried to rough together by eye and I was never happy with them. This one was actually designed in CAD:
The white pipe sticking out of the turret in the photo above was actually the barrel for the version two prototype gun.
Prototype version one was too big to be practical in a tank of this size:
Prototype version one was too big to be practical in a tank of this size:

In case you were wondering, both guns work. The first one was fired using paintballs shotgun style. It would fire 25 at a time. The second one was fired using a t-shirt that made a really nasty welt.
After re-starting the project in California I haven't made too much progress that's noticeable from the outside. I've mounted the drive shafts in the front end and built a bracket to mount a differential:
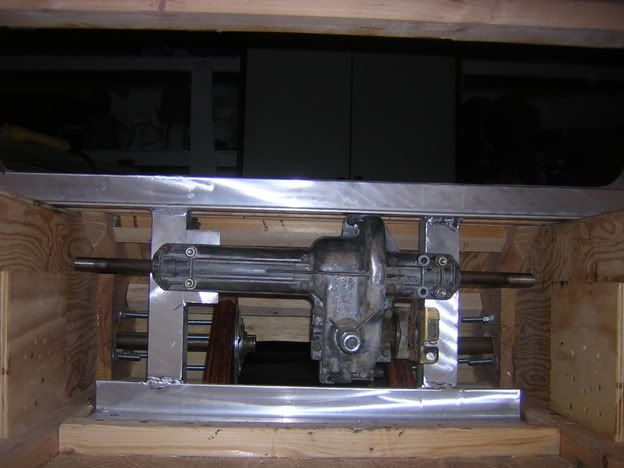
I've since scrapped the differential in favor of an improved transmission idea that will actually allow pirouette turns. More on that after I've built it.
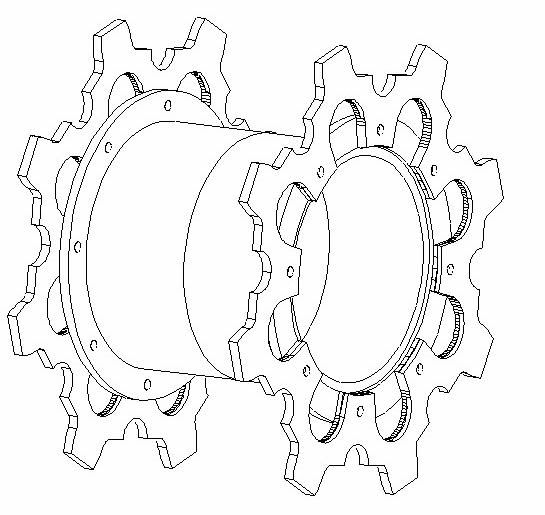
Now I'm shopping for other components. I'm also designing various components that will need to be custom fabricated. The first is my drive sprocket assembly:
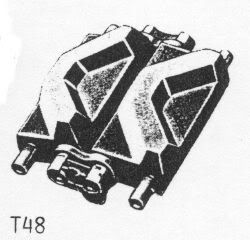
I was planning on building a set of tracks that would be essentially a simplification of the Sherman's T-48 style tracks:
Somewhere along the way I test fit a mockup of my drive sprocket:
This seems pretty straightforward, but it turns out that I'm going to have to redesign the suspension arms to make more clearance for the track connectors between the road wheels and the hull.
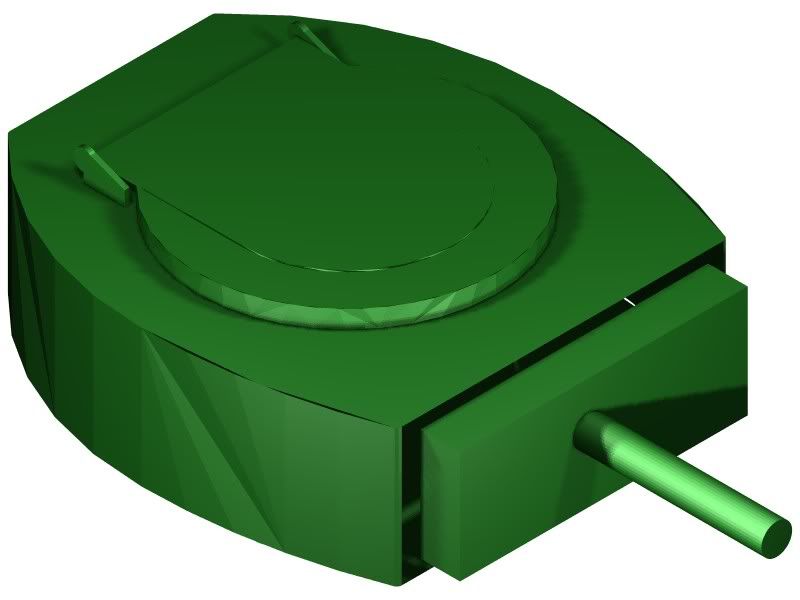
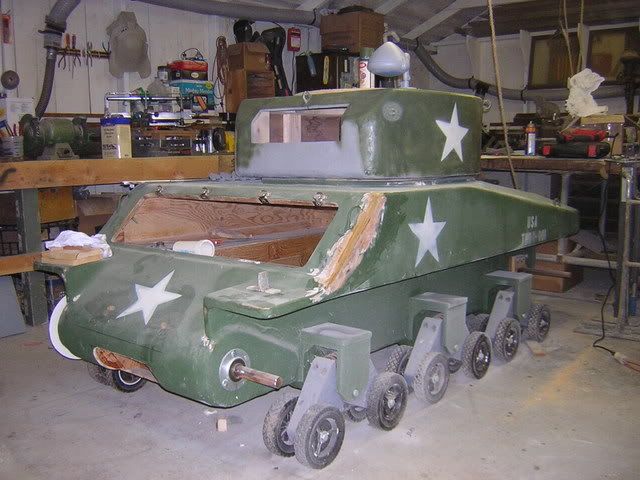
Most of the exterior work on this project since moving West has happened on the turret. Mostly this was revising the hatch coaming to make it flush with the turret top. Then I cut a new hatch and added a spotlight:
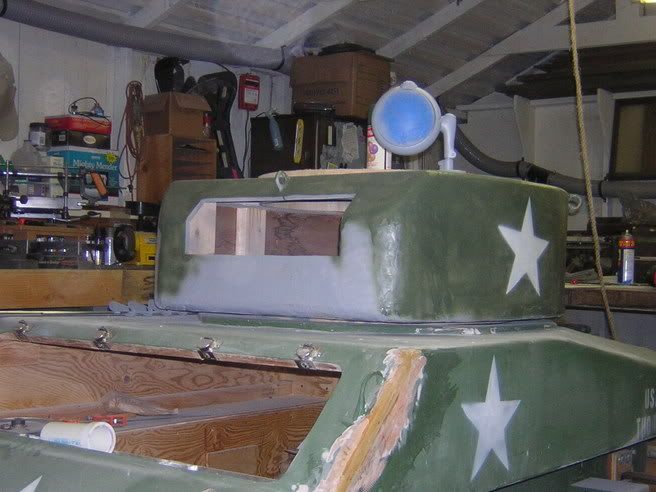
So this is about how it looks now:
Here's the hatch for the turret:
The entire thing will hinge open so the driver can get in and out. While inside though, the driver can open a smaller hatch built into the main hatch so that he can poke his head out.
Here's another test fit of the second prototype cannon:
Once I'd given up on making the tracks with the same functionality as the real-life Sherman tracks, I decided the best method was to duplicate the tracks made by Dave Manson, builder of an amazing 2/5th scale sherman in Perth, Australia.
To begin, I cut out oodles of blocks of ipe (a hardwood commonly used for decking because of it's resistance to rot) and turned the ends down on the lathe:

I made a lot of them. Here's all of the blocks for one track with a few to spare:

Then I epoxied stainless steel sleeves onto the turned ends to give the drive sprocket something to wear against:

Then I built a jig and fastened the track plates to a length of conveyor belting with screws and more epoxy. On the inside surface I used rectangles of 1/4" plywood to give the screws something more to hold onto and to clamp the conveyor belting in place:
Once I'd gotten that one track built, I rolled the tank into storage while I went off to Afghanistan and there it has sat ever since. But now that my friend Matt has started building his Panzer, I really need to dust this thing off and get cranking on it again.
I've already stacked up an engine and all of the gears and pulleys I need to build the transmission. I've drawn out the drive sprocket in CAD and I'll be getting the software that allows me to upload the drawings to Lopez the carving robot and have him cut them out of Delrin (which I already have on hand too). So really, this thing should come together pretty quick after Halloween.
So that's about where I'm at with the tank project, in case you were interested.
More to come...
I am seriously in AWE of some of the projects you are doing. The Predator outfit, the Tank! Casting your own parts, a CNC machine? Holy Crap.
ReplyDeleteCall it an odd request, but from navigating through past posts, I don't really seem much about the tools you use to make all this stuff. Did you purchase all your tools? Scratch build stuff? I've been wanting to do various castings and vacuum forming for a while now, I'm curious to see what you use for all this.
It's really a mixed bag of all sorts of things that I use. My workshop is a converted chicken barn that's probably around 100 years old. My tools are found, bought, home-made, and, on rare occasion, borrowed.
ReplyDeleteSooner or later I'll decide to clean things up and post a written picture tour of my little workshop. In the meantime, you can see all of the clutter in the background of most of my projects.
Thanks :) I look forward to the tour when you get around to it :) I can imagine you've got quite a backlog of other stuff to work on tho. I'll be checking in though.
ReplyDeleteNice project !
ReplyDeleteOutstanding job, you are a true visionary as an engineer! Thanks for sharing your work!
ReplyDelete