
While I have already explained much of the details involved in getting the parts both large and small out of the the game and into the real world, I suppose the one part that does the best job of summing it all up is the helmet. I probably should've written this article first, but oh well.
Usually when I'm working on a big armor project, I like to start by building the helmet first. There's a number of reasons for this. First of all, if I end up losing interest in the project and dumping it on the backburner for eternity, at least the helmet looks good sitting on the shelf. Second, while most people don't have space to stand the complete, lifesize T-60 in their home, it's easy to find a place to display the helmet. This means that it makes a handy thank you gift for folks who've helped out on the project. Finally, on the days when I don't feel like working on the big, dusty project with all the smelly, toxic materials, the helmet can sit there on the bench and stare at me. It's a good thing for me to have this sort of thing sitting on the bench, watching, judging. Taunting me with its unfinished nature, eventually it spurns me into action to build the rest of the body that will make it whole so at last it may be laid to rest in a place of honor among the big stack of done things in my portfolio.
So yeah. Helmet first.
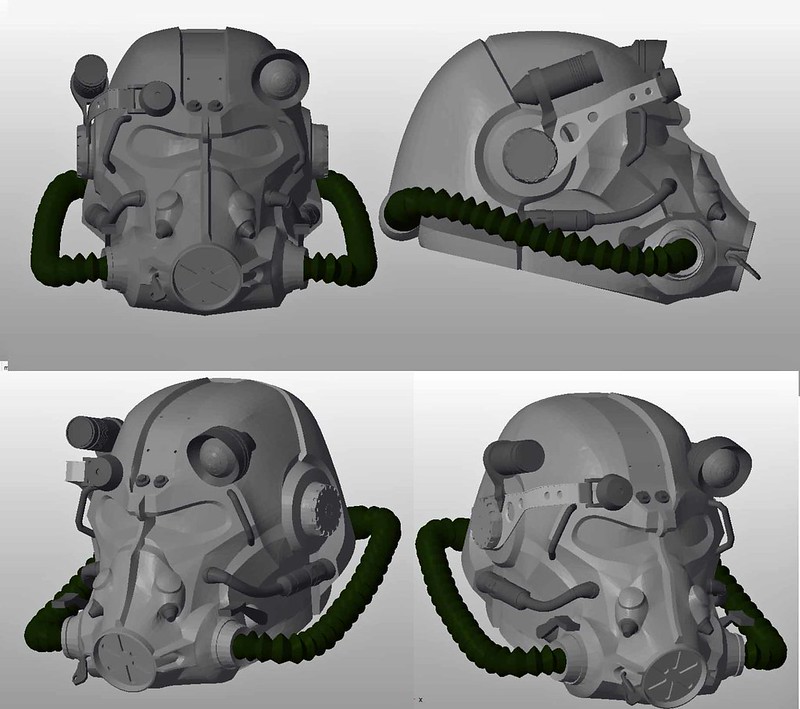
Here's the digital model I started with:
The trick at this stage is to decide which pieces and parts can be made by which machines. While technically my 3D printers are capable of doing it all, the helmet is big enough that they'll take forever and the main body of it is smooth enough that there's really no need for that level of resolution. After a bit of tinkering in the digital realm, I had removed most of the little greeblie bits that would be better suited to 3D printing or just buying at the hardware store:
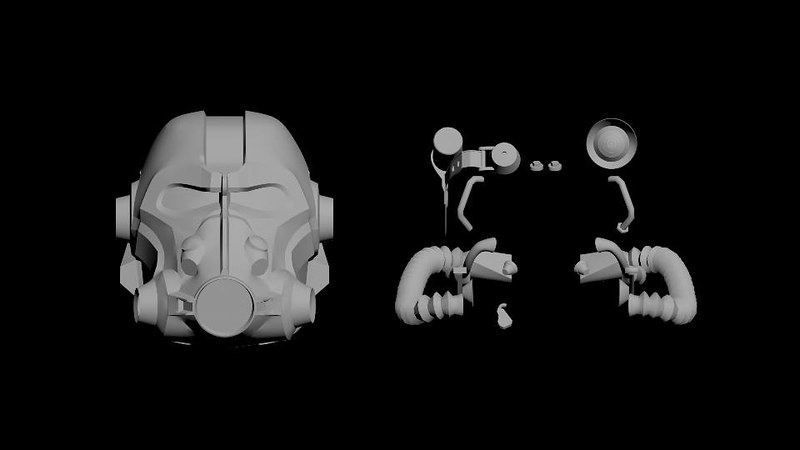
I later sliced off the ear caps and the "sink drain" details at the front end since they had some very tiny details that were much better suited for printing.
Once that was done, I sliced up the main body in the Carvewright design software and fed it to Maria (my third Carvewright in the shop):
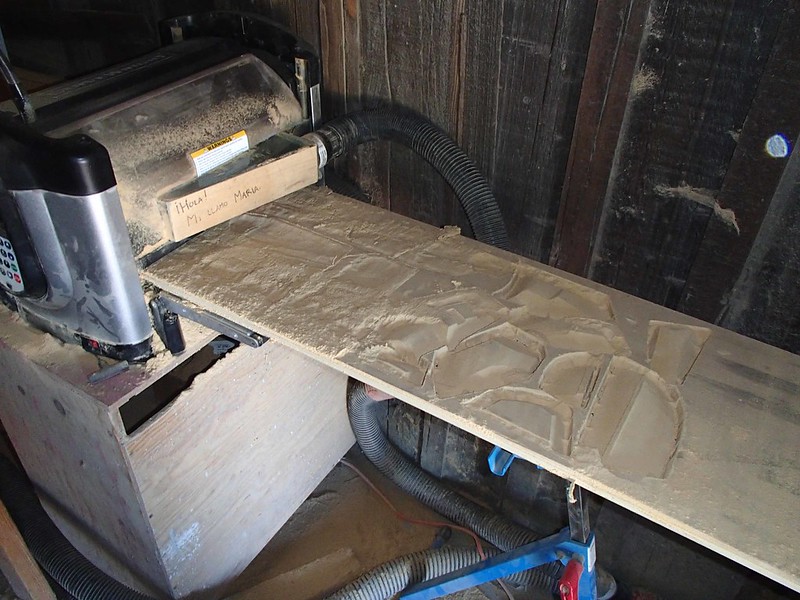
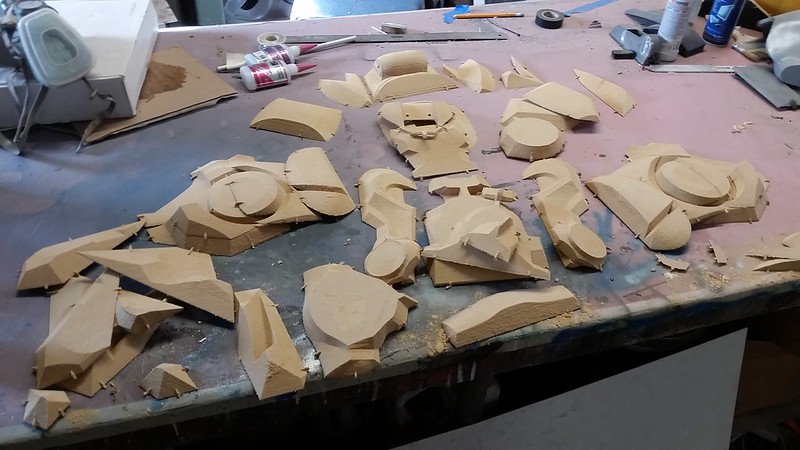
All told, she whittled it out in three separate sessions of about six or eight hours each. The raw carved parts looked like so:
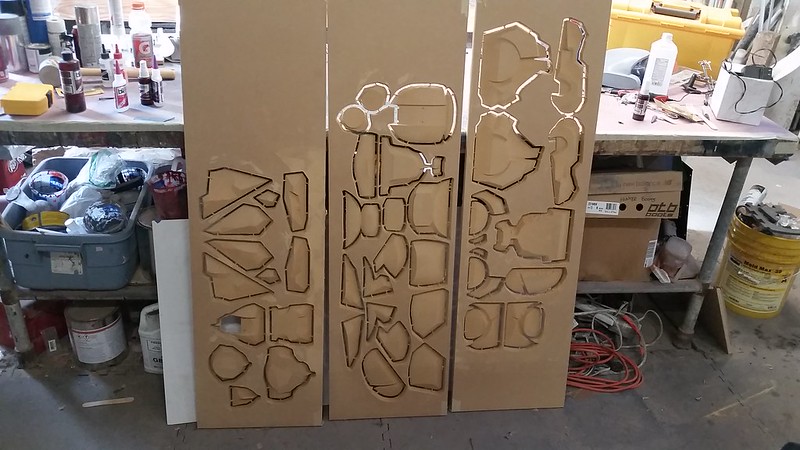
Once the bits and pieces were snapped out of the waste material, it was time to jigsaw puzzle them back together:
With a bit of glue, the main body had taken shape:

I was pretty happy with the size too:
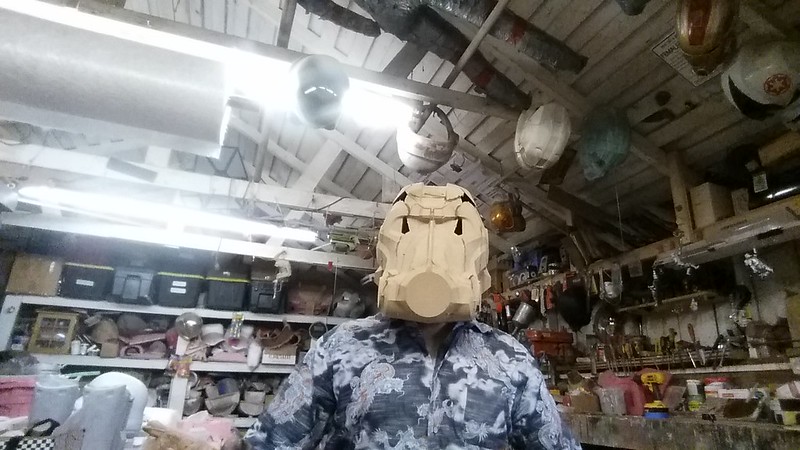
At this point I was still leaving a couple of slices out of the helmet so I could see out of it while I was goofing around trying it on in the shop. I'd get around to plugging those holes later.
The trick at this stage is to decide which pieces and parts can be made by which machines. While technically my 3D printers are capable of doing it all, the helmet is big enough that they'll take forever and the main body of it is smooth enough that there's really no need for that level of resolution. After a bit of tinkering in the digital realm, I had removed most of the little greeblie bits that would be better suited to 3D printing or just buying at the hardware store:
I later sliced off the ear caps and the "sink drain" details at the front end since they had some very tiny details that were much better suited for printing.
Once that was done, I sliced up the main body in the Carvewright design software and fed it to Maria (my third Carvewright in the shop):
All told, she whittled it out in three separate sessions of about six or eight hours each. The raw carved parts looked like so:
Once the bits and pieces were snapped out of the waste material, it was time to jigsaw puzzle them back together:
With a bit of glue, the main body had taken shape:
I was pretty happy with the size too:
At this point I was still leaving a couple of slices out of the helmet so I could see out of it while I was goofing around trying it on in the shop. I'd get around to plugging those holes later.
While all of that was going on, the Zortrax printers were growing the little bits for me. Here's much of the detail add-ons fresh off the printer:
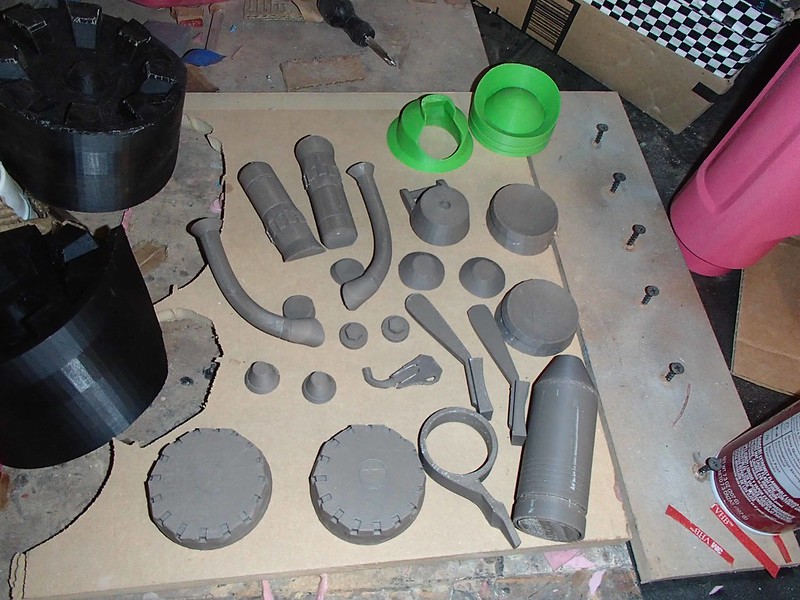
While many of them would be molded and cast separately, there were a few that made more sense to blend into the rest of the helmet body so they'd be cast directly in place. For example, the nostril and snout details:
These either included undercuts that the 3-axis Carvewright couldn't get to or very thin edges that would've fallen apart if carved in the thoroughly frangible MDF.
With the first little bits glued onto the main body, the next step was filling the seams and smoothing everything out. This initial fairing process was a great job for Bondo body filler:
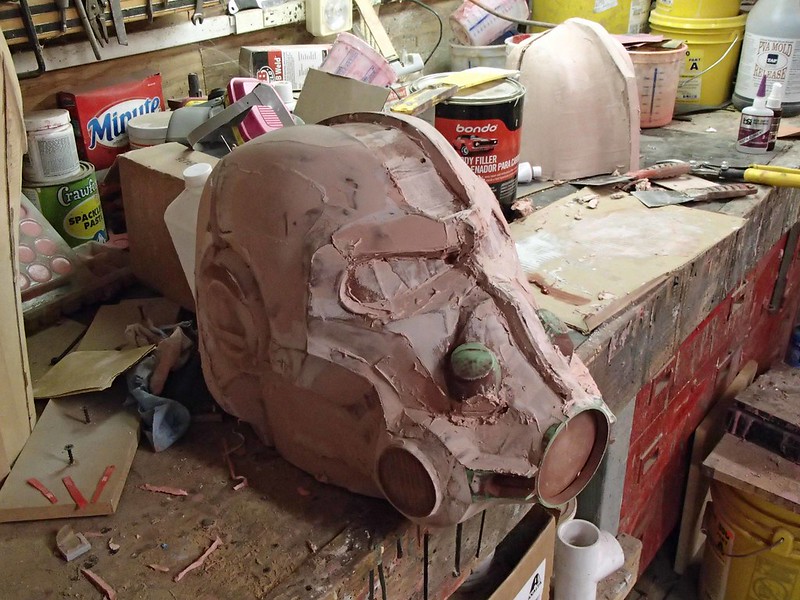
At this rough stage, the helmet body went through a couple of rounds of filling and hand sanding on its way to getting the shape right:
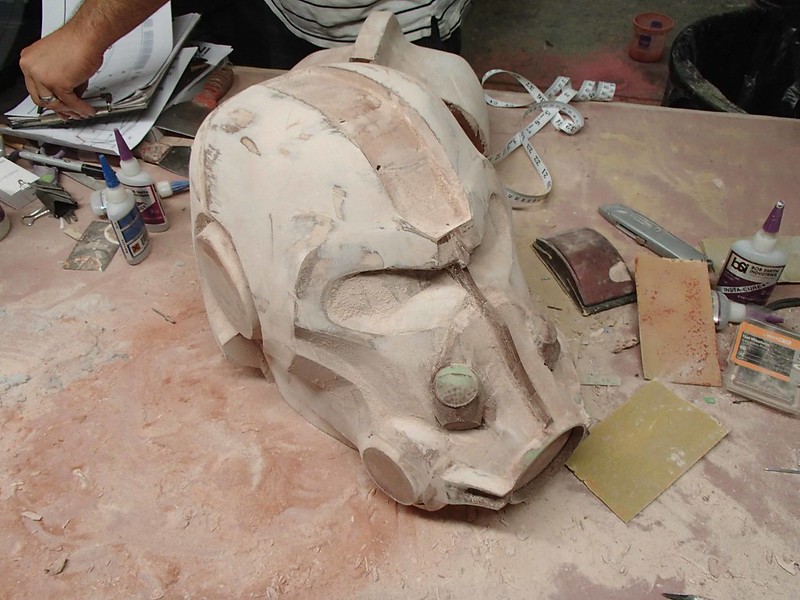
Once the rough shaping was done, the next step was fine tuning and feathering in the edges with spot putty:
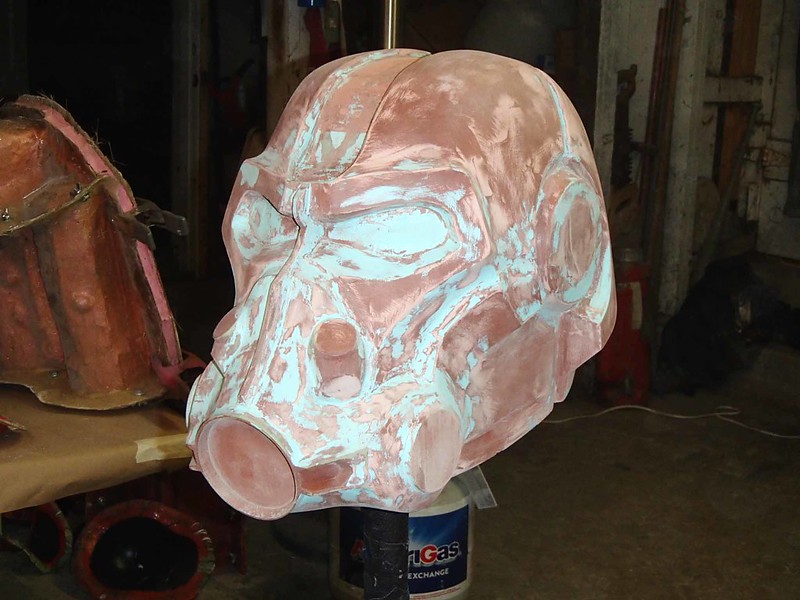
After a couple of coats of primer, the remaining smaller surface flaws were touched up with more spot putty:
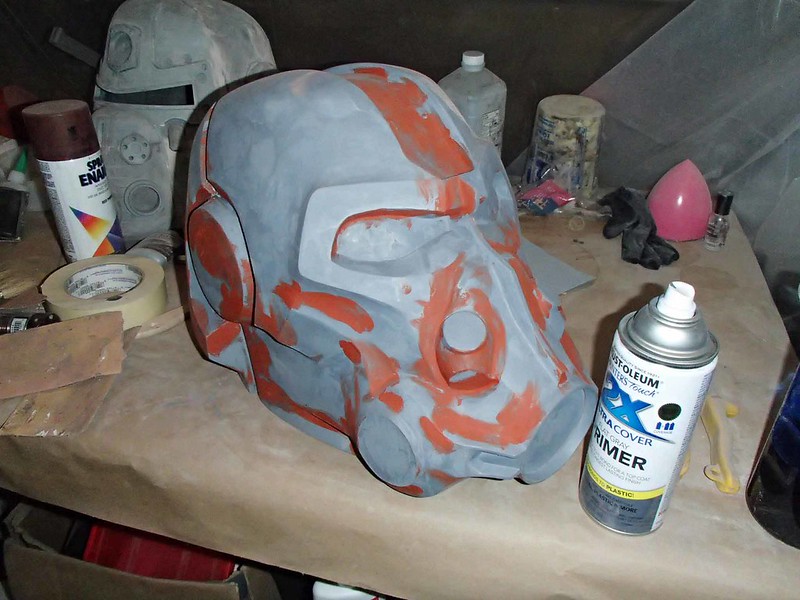
At this point, a few more details were added. In this case, the hose attachment points and the sink drain detail cut from a piece of flat stock:
When it was almost as smooth as it was going to get, the left ear cap was added too:
Only the left one though. The right one would need to be separate for reasons that would make sense later.
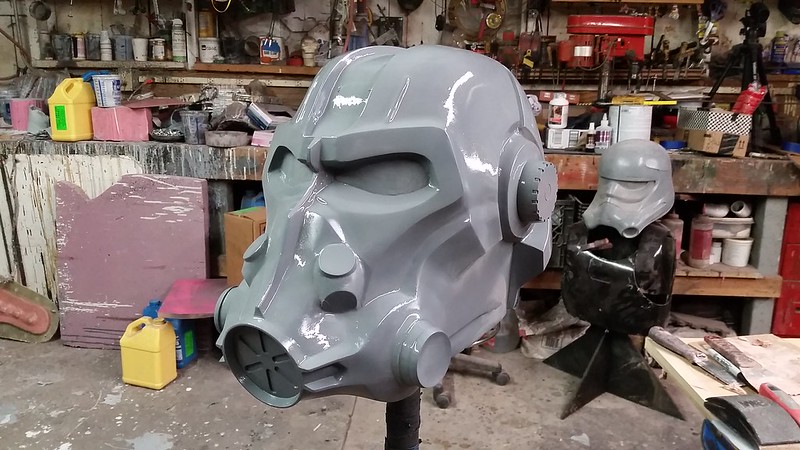
Finally, rivets were added where needed before the whole thing was given a glossy coat of paint:
While most of my helmet molds lately have been matrix molds, this part of this build was done a few years ago before I was entirely confident with that method. Instead, this was a brush-up silicone mold jacket and a fiberglass mothermold built on top of the jacket.
It started with mounting the helmet to a cardboard riser hot glued into the neck hole:
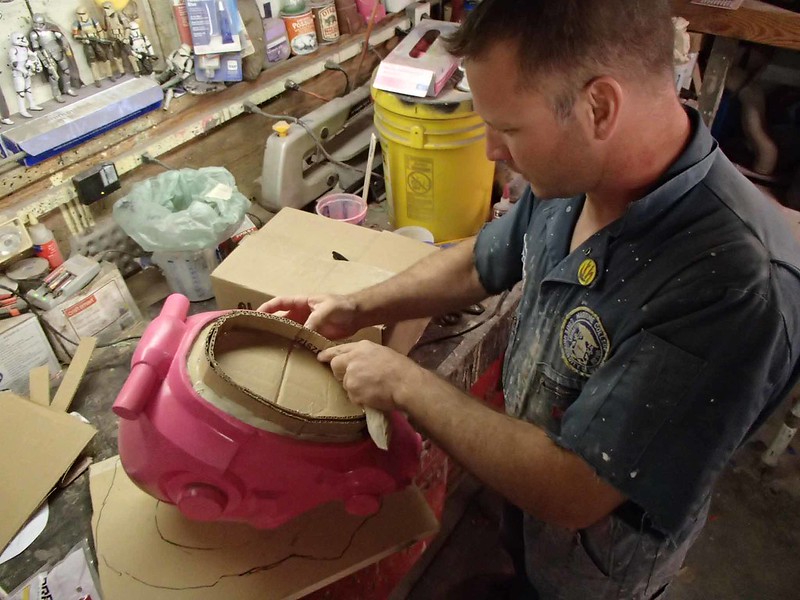
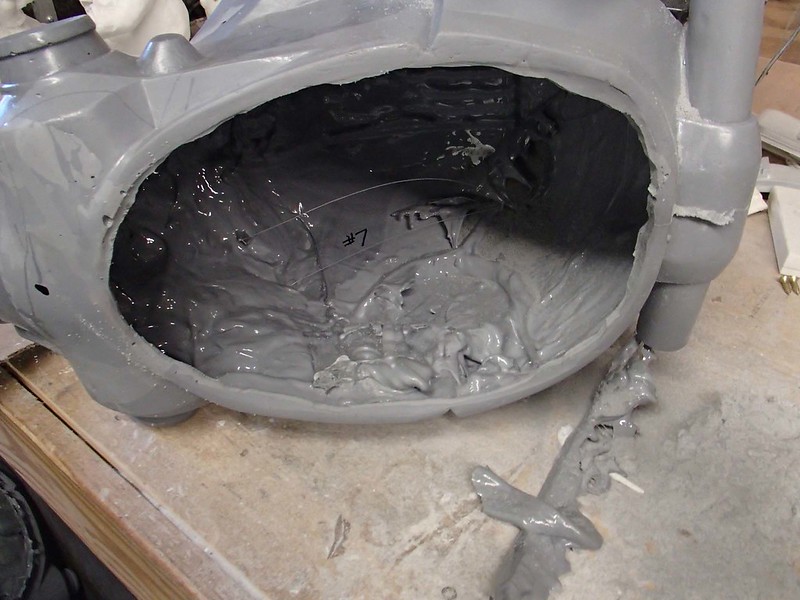
Then I packed the undercut area in the bottom of the neck ring with thixotropic silicone before mounting the whole assembly on a scrap of MDF and adding a cardboard drip wall:
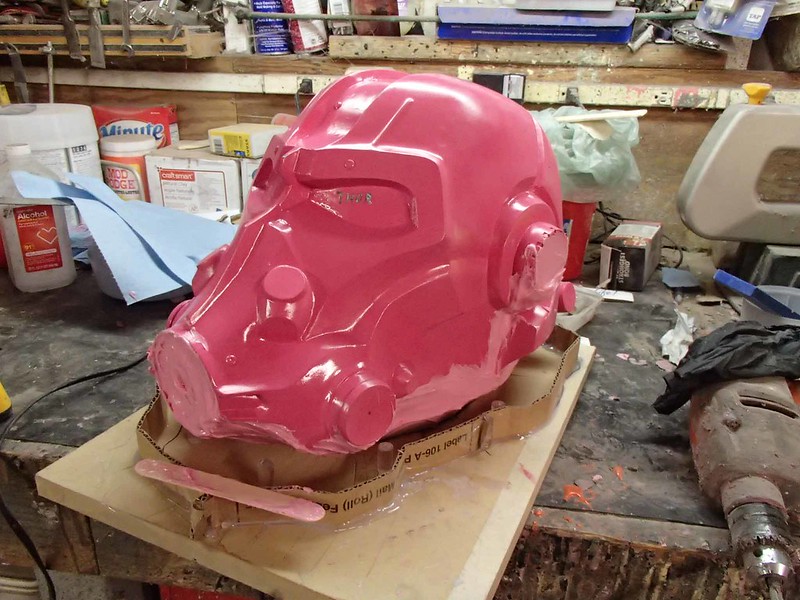
Then I poured on a thin "print coat" to capture all of the details:
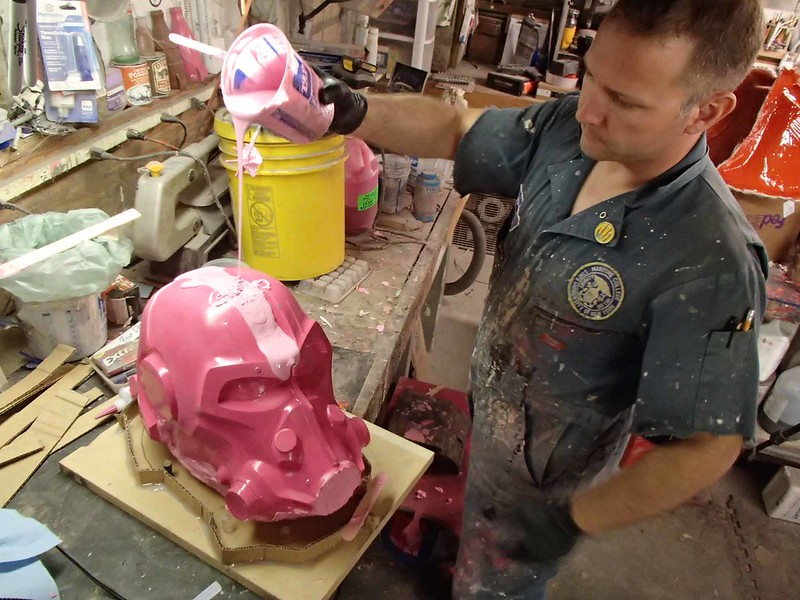
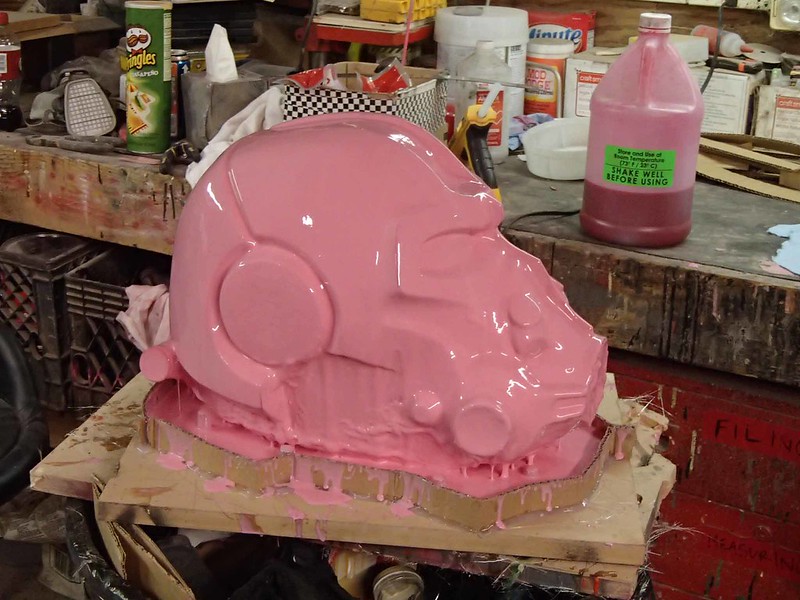
After this had set up I started adding more thickened layers. Here's somewhere in the middle of the second or third coat:
Because I was trying to capture this build on video, I neglected to get photos of the rest of the mold process for the helmet body. Suffice it to say that it went pretty much the same way as most of my other older helmet molds. If you really need the details, you can read all about the process in the moldmaking section of my book:
While many of them would be molded and cast separately, there were a few that made more sense to blend into the rest of the helmet body so they'd be cast directly in place. For example, the nostril and snout details:
These either included undercuts that the 3-axis Carvewright couldn't get to or very thin edges that would've fallen apart if carved in the thoroughly frangible MDF.
With the first little bits glued onto the main body, the next step was filling the seams and smoothing everything out. This initial fairing process was a great job for Bondo body filler:
At this rough stage, the helmet body went through a couple of rounds of filling and hand sanding on its way to getting the shape right:
Once the rough shaping was done, the next step was fine tuning and feathering in the edges with spot putty:
After a couple of coats of primer, the remaining smaller surface flaws were touched up with more spot putty:
At this point, a few more details were added. In this case, the hose attachment points and the sink drain detail cut from a piece of flat stock:
When it was almost as smooth as it was going to get, the left ear cap was added too:
Only the left one though. The right one would need to be separate for reasons that would make sense later.
Finally, rivets were added where needed before the whole thing was given a glossy coat of paint:
While most of my helmet molds lately have been matrix molds, this part of this build was done a few years ago before I was entirely confident with that method. Instead, this was a brush-up silicone mold jacket and a fiberglass mothermold built on top of the jacket.
It started with mounting the helmet to a cardboard riser hot glued into the neck hole:
Then I packed the undercut area in the bottom of the neck ring with thixotropic silicone before mounting the whole assembly on a scrap of MDF and adding a cardboard drip wall:
Then I poured on a thin "print coat" to capture all of the details:
After this had set up I started adding more thickened layers. Here's somewhere in the middle of the second or third coat:
Because I was trying to capture this build on video, I neglected to get photos of the rest of the mold process for the helmet body. Suffice it to say that it went pretty much the same way as most of my other older helmet molds. If you really need the details, you can read all about the process in the moldmaking section of my book:

You can get a copy here: LINK In addition to explaining brush up molds, I cover all manner of things from Pepakura building to foamsmithing to vacforming as well as painting, weathering, rigging, and so on. I'm very proud of it. End of shameless plug.
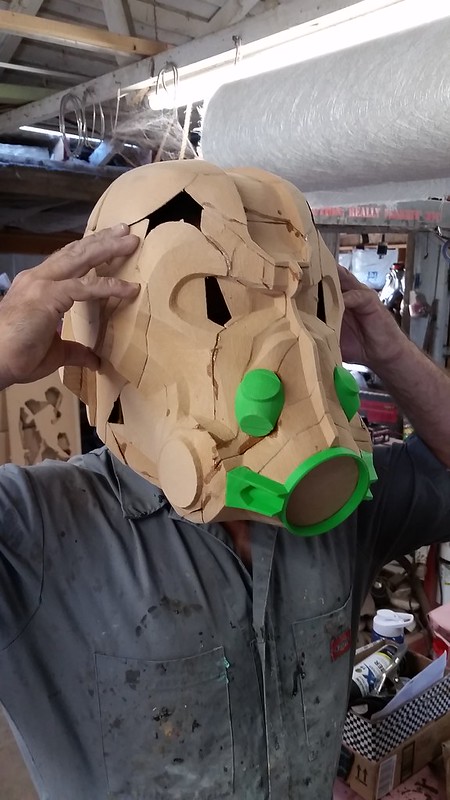
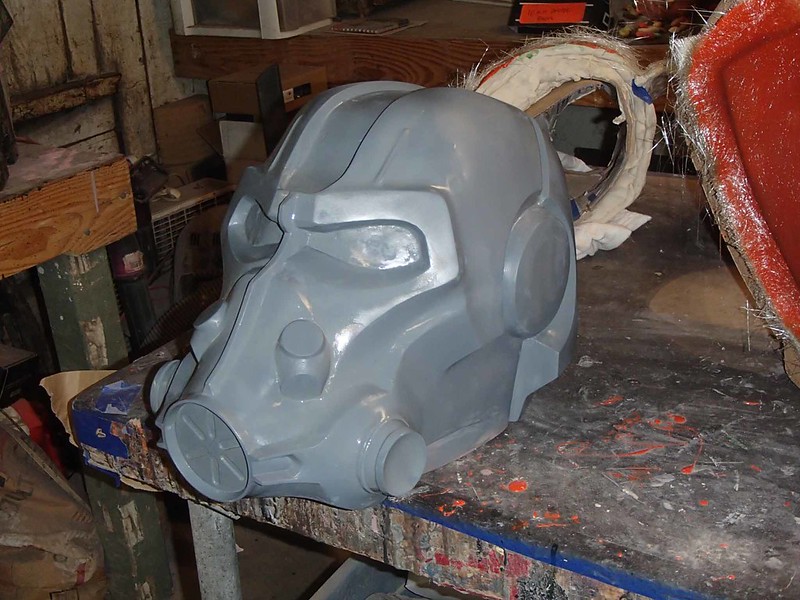
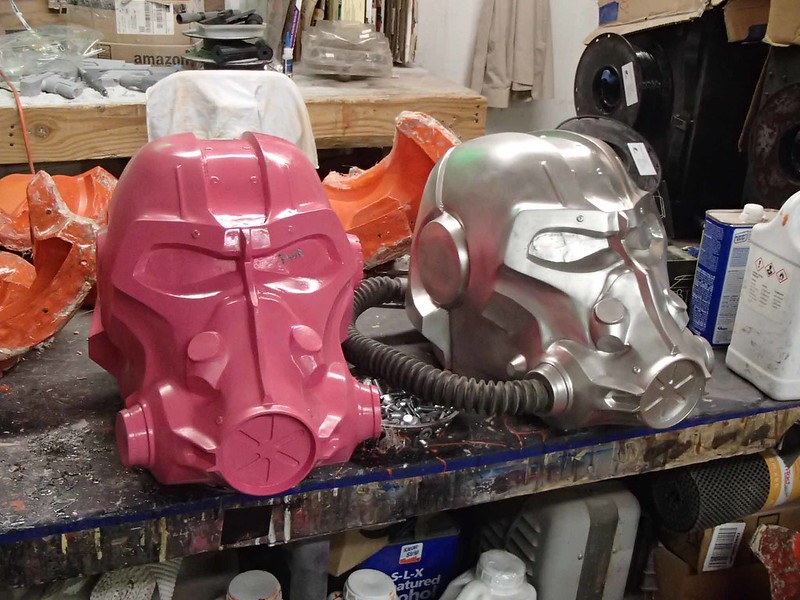
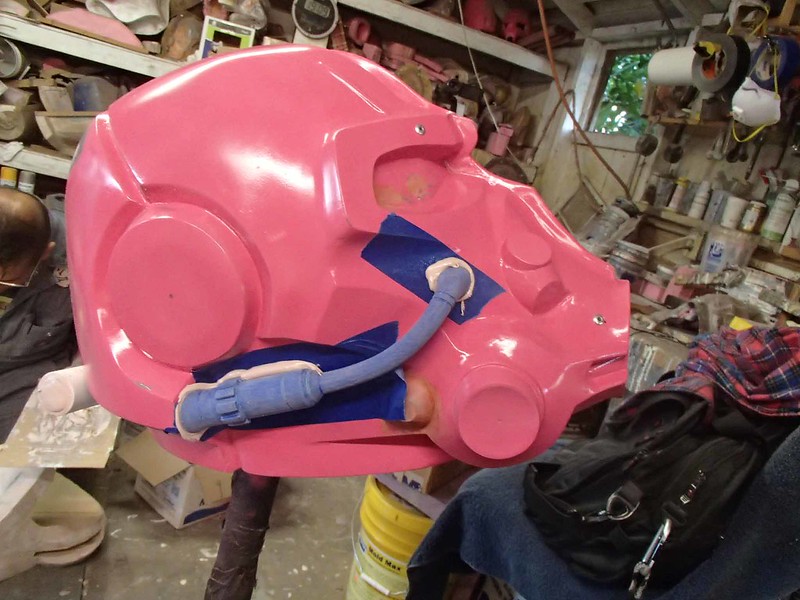
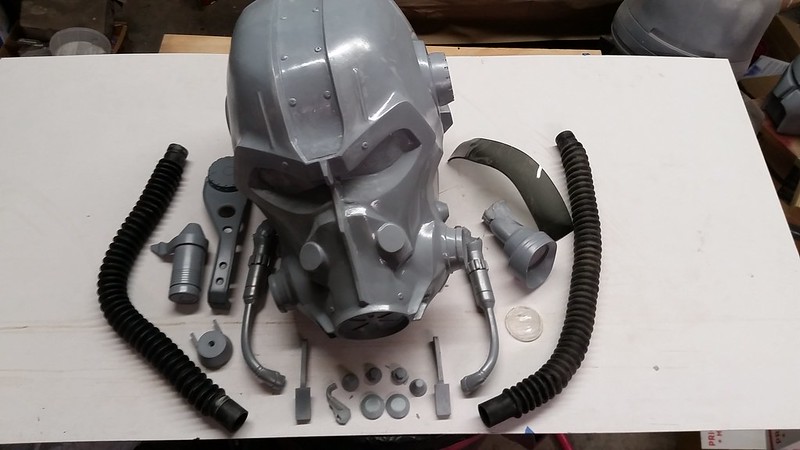
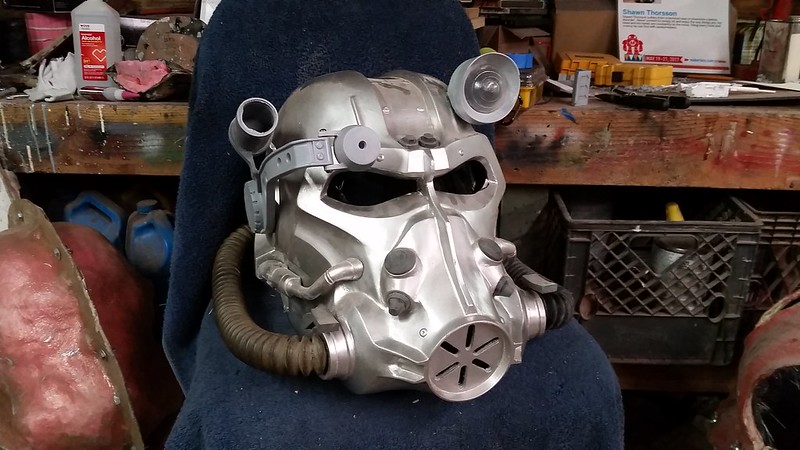
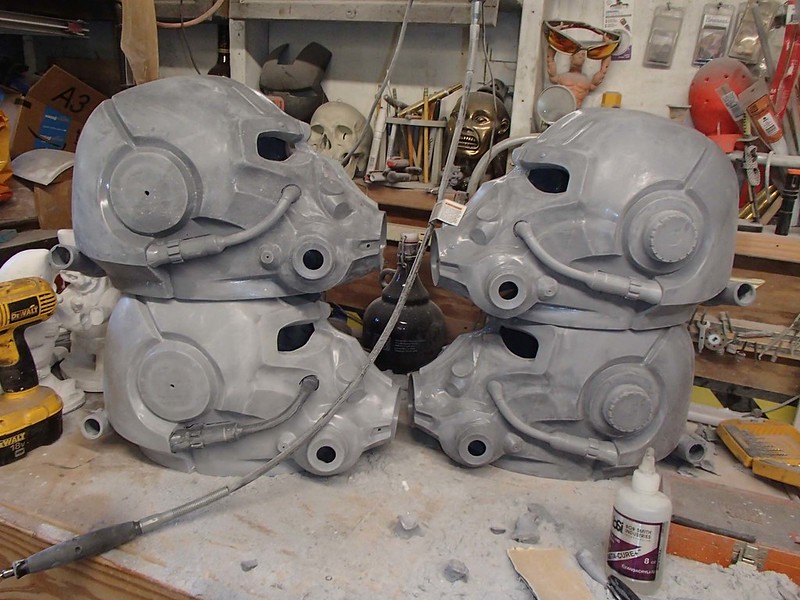
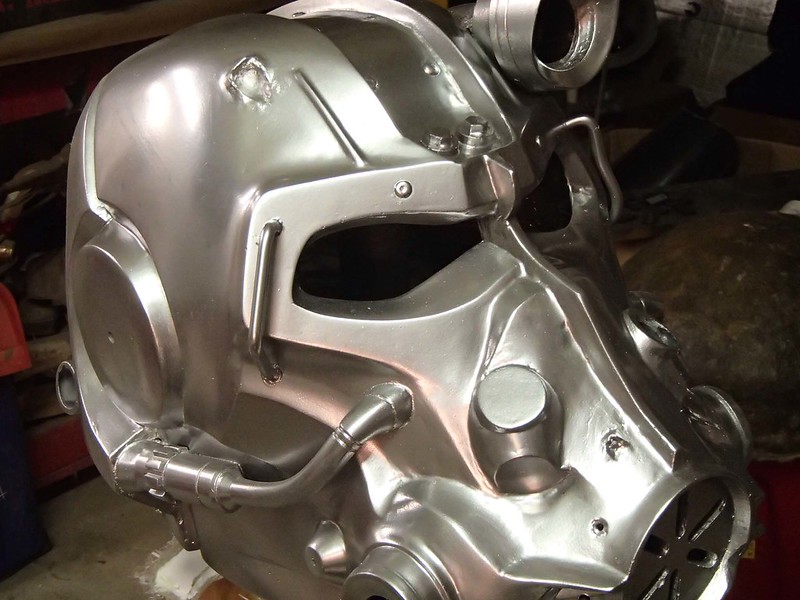
In any case, once the mold was done, it was only a matter of time before I had rotocast my first helmet body. Here it is next to the prototype:
In any case, once the mold was done, it was only a matter of time before I had rotocast my first helmet body. Here it is next to the prototype:
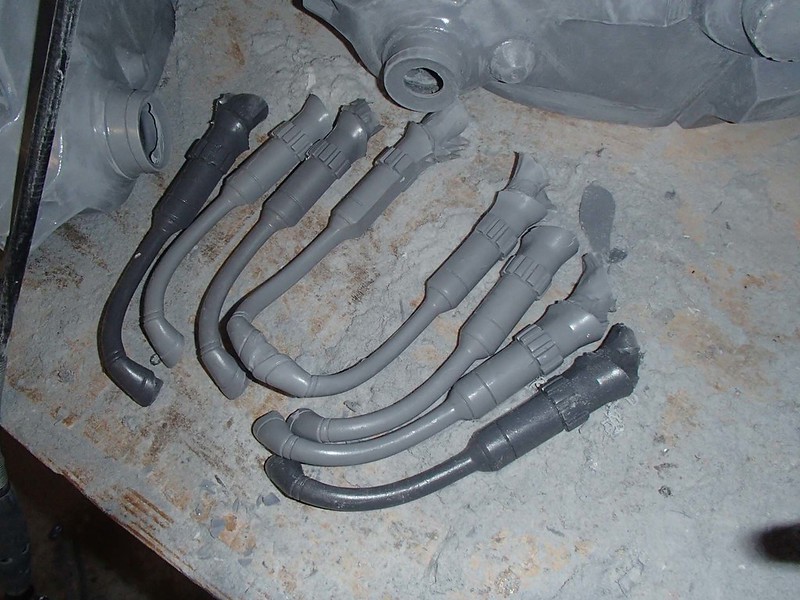
The rubber hoses are actually some new old stock Cold War era Russian gas mask hoses that I picked up on eBay from a seller in the Ukraine. They just happen to be about the exact right length and the fact that they've been sitting on some warehouse shelf collecting dust since the fall of the Soviet Union means they look just right for the wasteland aesthetic I was after.
Now it was time to figure out how the little greeblie bits would attach. Video game models don't have to necessarily concern themselves with how the parts of things fit together. There are not really any physical barriers that prevent digital meshes from passing through each other and they are often left to just hover in place with nothing actually holding them in place.
When it comes time to make parts with mating surfaces that will fit snugly together, what I'll often do is cover the contact area with masking tape, then a coat of Vaseline. Then I blob a healthy dollop of Bondo onto the adjoining part and smoosh it into place like so:
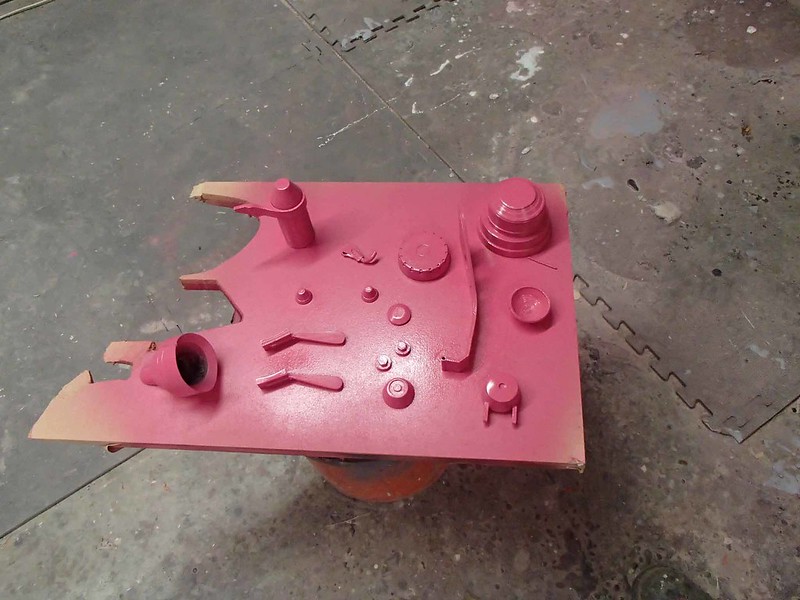
Once the bondo is cured, the part can be popped off and I know that the backside has the just right contour to fit where it goes onto the main body. At that point, it's just a matter of a bit of trimming and cleanup before the pieces can be sanded smooth, primed, painted, and molded. Again, I did a terrible job of photographing the works in progress, but here's a handful of the helmet details and one of the chest canisters we started referring to as the "oil filters" for lack of a better term:
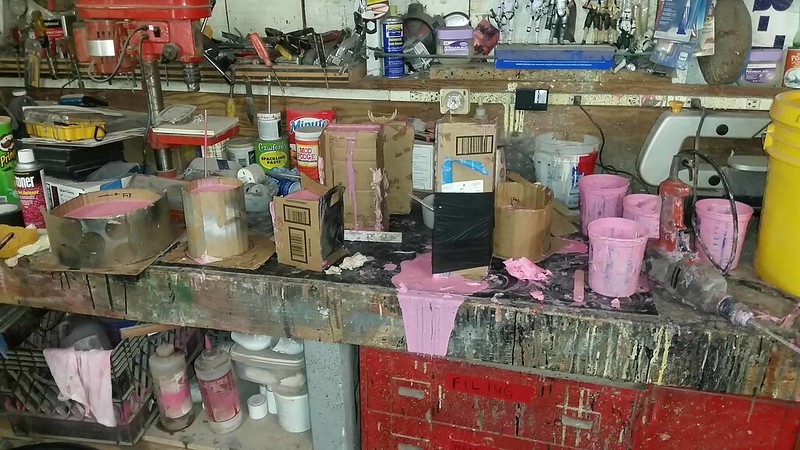
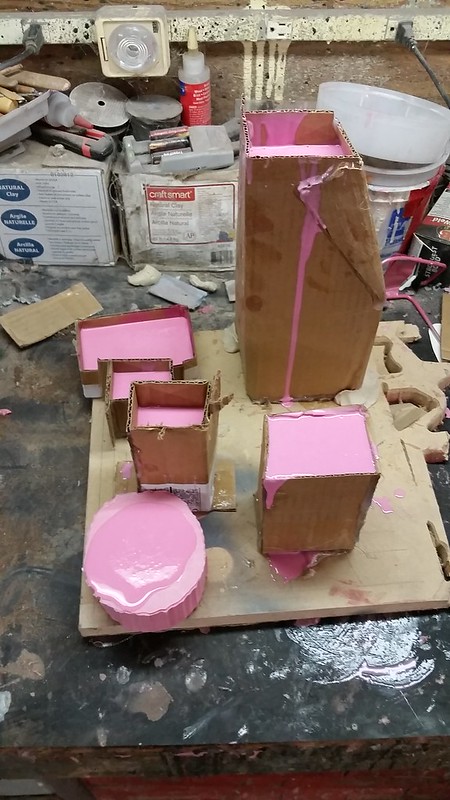
Most of those parts were made in simple block molds. I had a helper make the mold boxes and pour the rubber and probably should've been supervising them a bit more closely because one of the boxes sprung a leak and about fifty dollars worth of rubber drooled all over the bench and onto the floor:
One of the trickier add-on bits was the right ear. Mostly because it had this contraption sticking out of it:
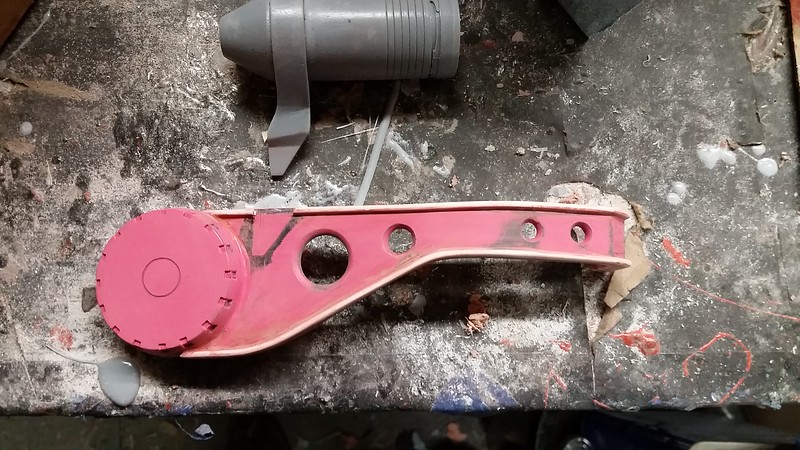
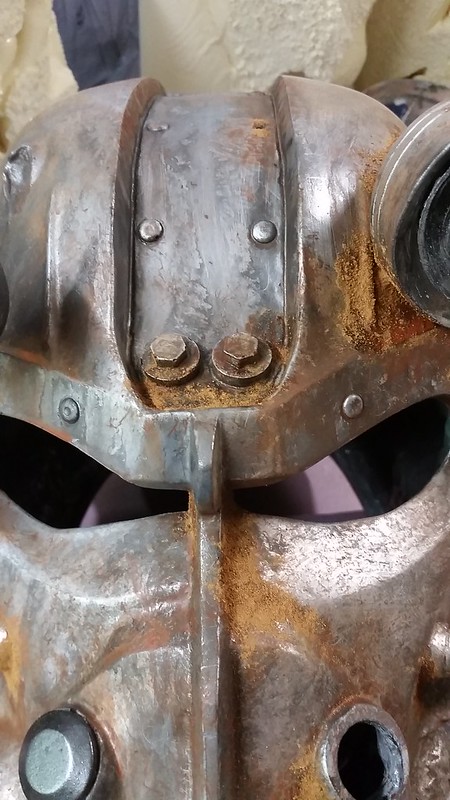
The digital model was lacking some of the definition I needed, so it ended up being mostly modeled by hand from scraps of plastic that I had on hand in the shop. The final detail was a pair of rivets in the front end:

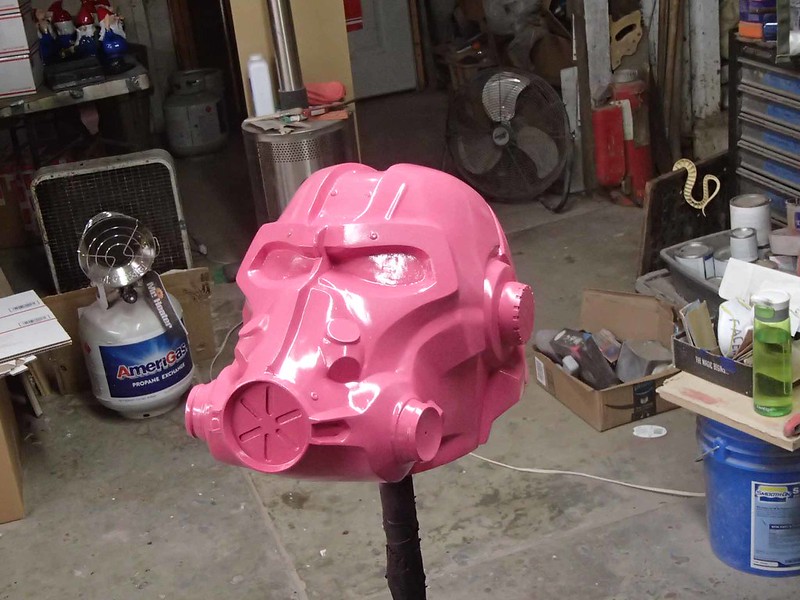
Once it was sanded smooth and painted all pink and shiny, it was mounted on it's back end, set up with vents and sprues, and boxed for molding. Here it is once the rubber was poured:
Once the rubber had cured, the mold was cut to release the prototype and I was ready to start casting more:

With that mold made, I had a full set of the cast add-ons:
The headlight lens was cast in clear resin:
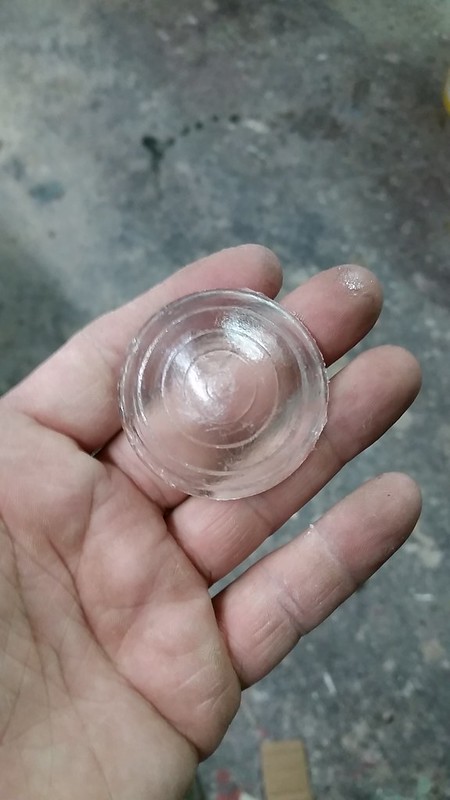
It was sized to fit neatly into a notched ring set in the headlight housing:

The eye lenses were just a single piece of dark tinted acrylic sheet that was heated up in a toaster oven and then laid in place against the eye holes until it had cooled:
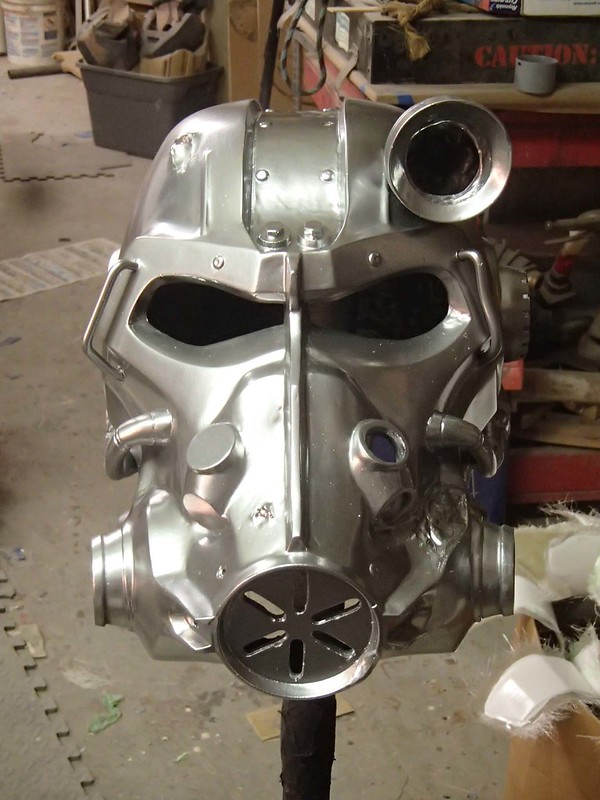
So that's the first helmet all trimmed and ready to paint:
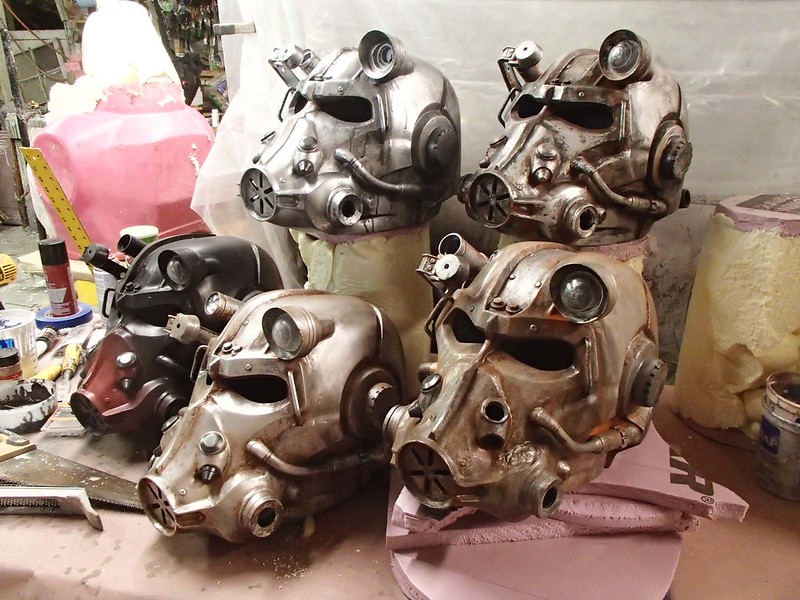
Of course, I never make just one of anything. After a fun-filled day of casting and demolding, I had a few extra helmets lined up:

Then I started started the trimming and prep work portion of this build. Most of the casts were pretty good, but someone did an absolutely awful job on this one cast:
Normally a cast like this would be crushed and used for filler in bigger cast parts, but it had some interesting surface flaws that would be useful later.
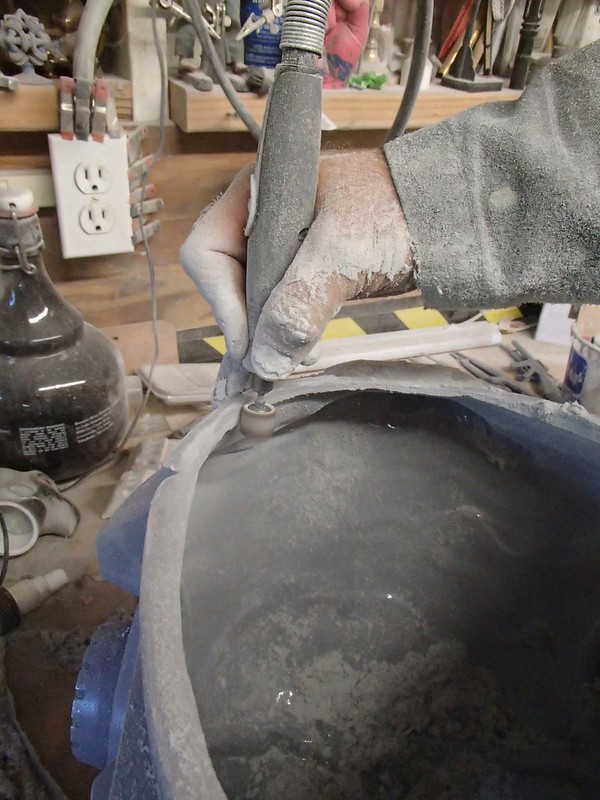
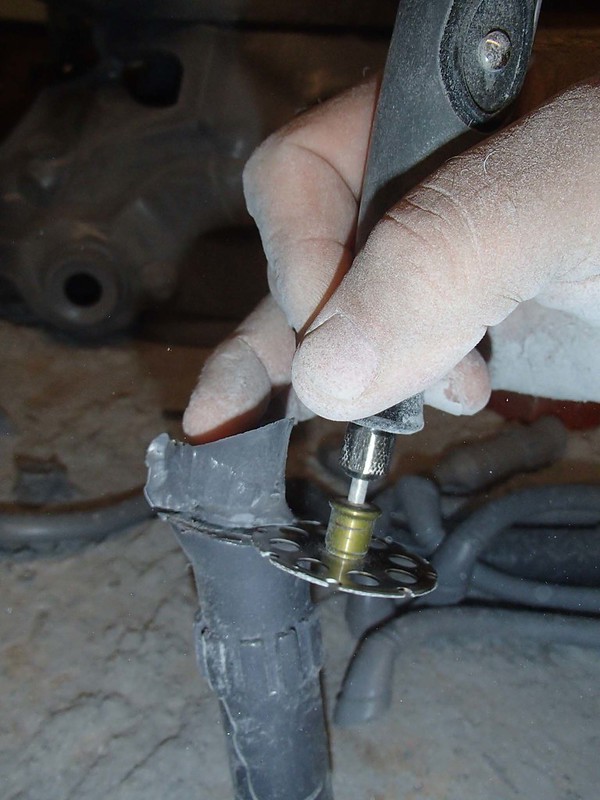
In any case, I started by rough trimming the neck hole and eye holes with a tile cutting bit on the Dremel:

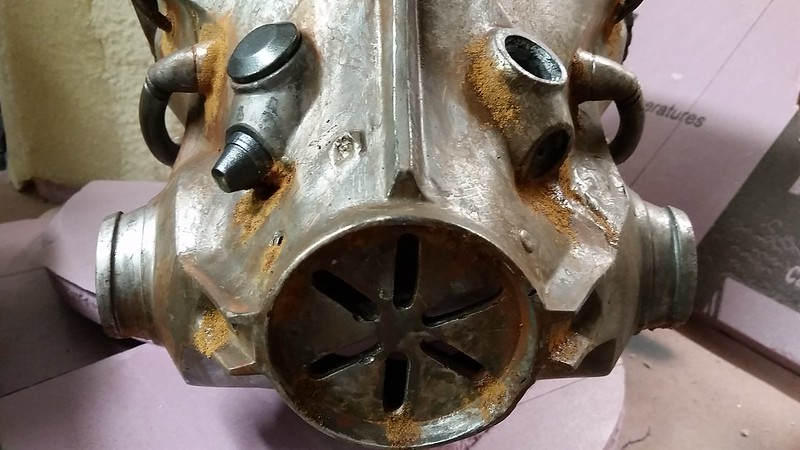
The same bit was used to cut out the sink drain holes on the snoot:

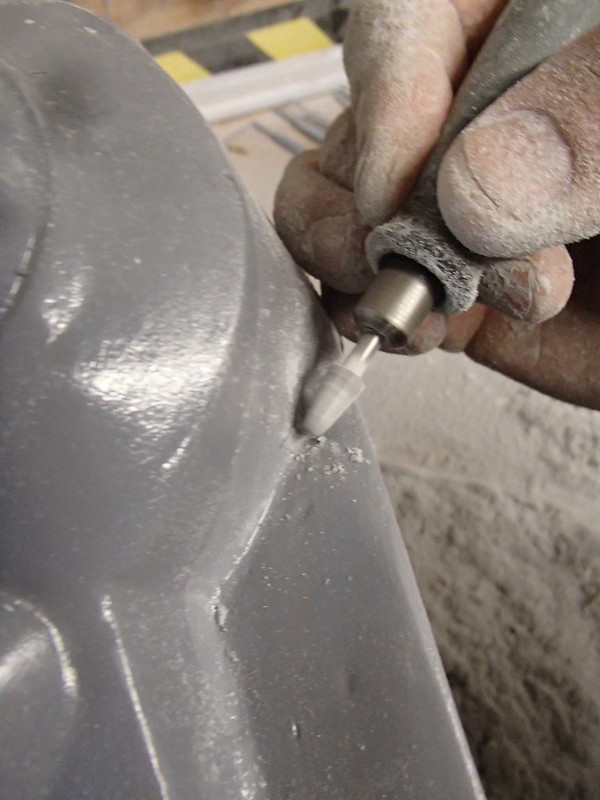
Then I fine-tuned the edges with a sanding drum on the Dremel:

There were a few tiny bubbles in the mold that ended up leaving these little warts on the casting:
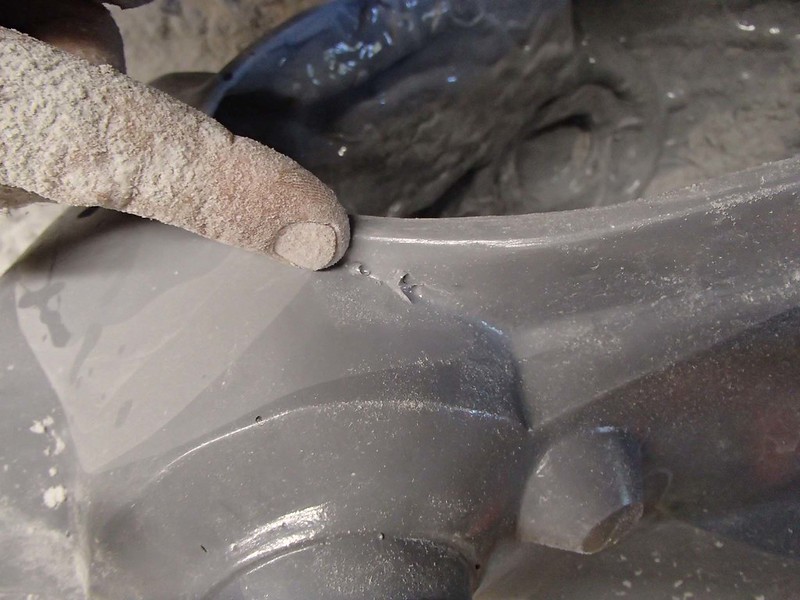
A high-speed cutting bit made quick work of those:

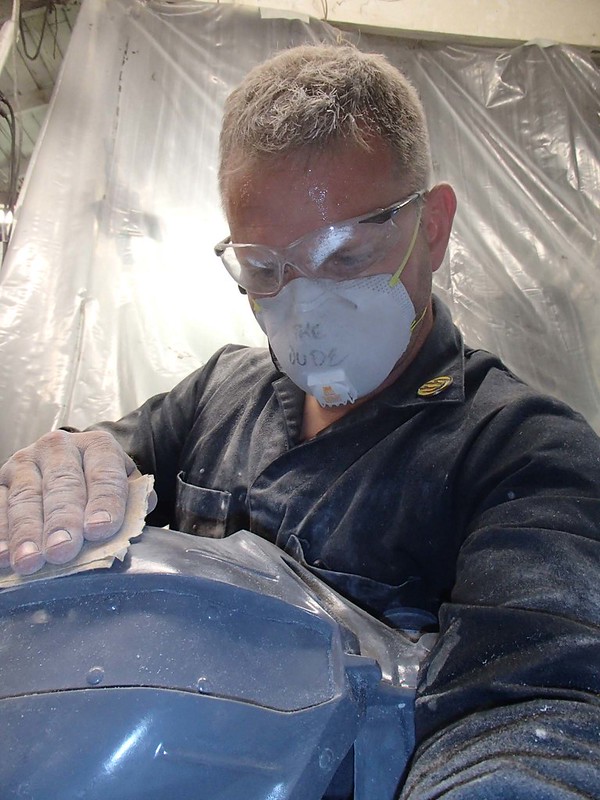
At this point, I was mostly done with the heavy grinding portion of the prep work. The next step was to smooth out the remaining rough bits by hand sanding:


This included getting rid of the slight seam line where the mold was cut to remove the helmet:

Finally, I drilled the bolt hole for the right ear:
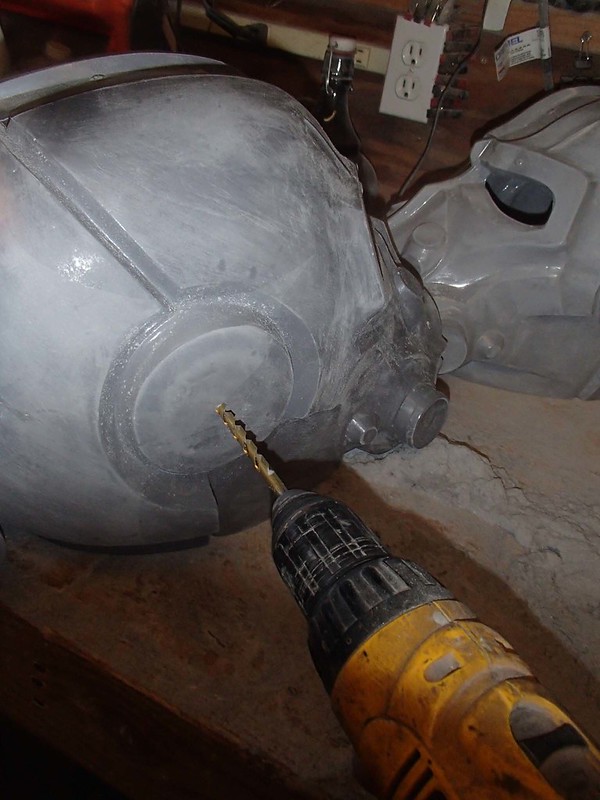
To attach the right ear with the built-in sight arm, I would need a bolt hole there too. This started as a 3/4" hole drilled inside the center of the ear cap with a Forstner bit. Then a T-nut was glued in place in the bottom of the hole. Once the glue had set, the hole was filled around the T-nut with casting resin. This makes a nice, secure threaded steel insert permanently embedded in the resin ear cup:
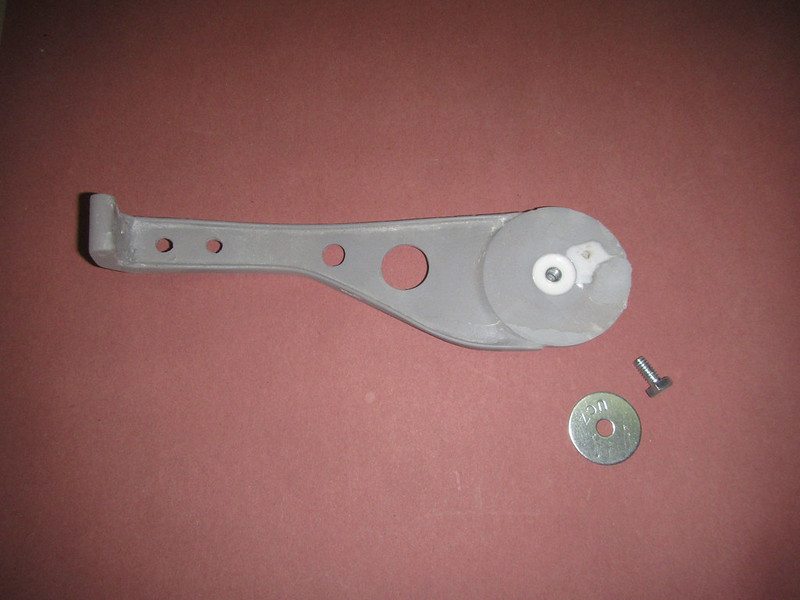
To attach the right ear assembly, it's just a matter of running a bolt from the inside of the helmet into the threaded insert in the ear cup:


So that was most of the prep work the helmets needed:

The next step was to cut off the mold sprues from the nostril tubes:
This was done with a cutoff wheel:
Once the ends were sanded down, they were all glued in place:
Next I bent some 1/4" aluminium rod to make the guard rails on either side of the eye holes:


This is what I get when I'm using a really big mold to teach a noob how to rotocast helmets.

A flawed section of the snout was repaired with a blob of bondo sculpted to make the metal look bent instead of just missing:

And with that, I had five helmets all ready to paint:

This did wonders for the "damaged" helmet:
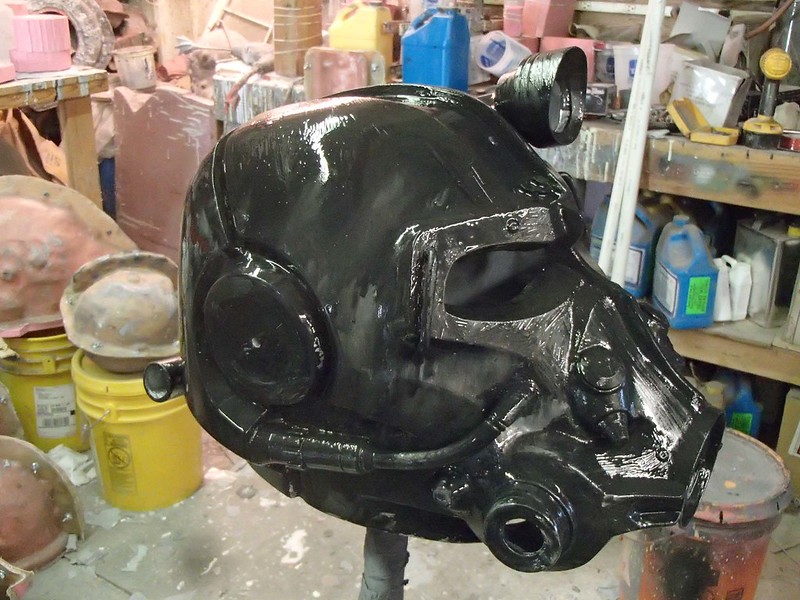
Once the silver had time to set up, it was given a generous blackwash. This started wit smearing black acrylic paint over the whole helmet:
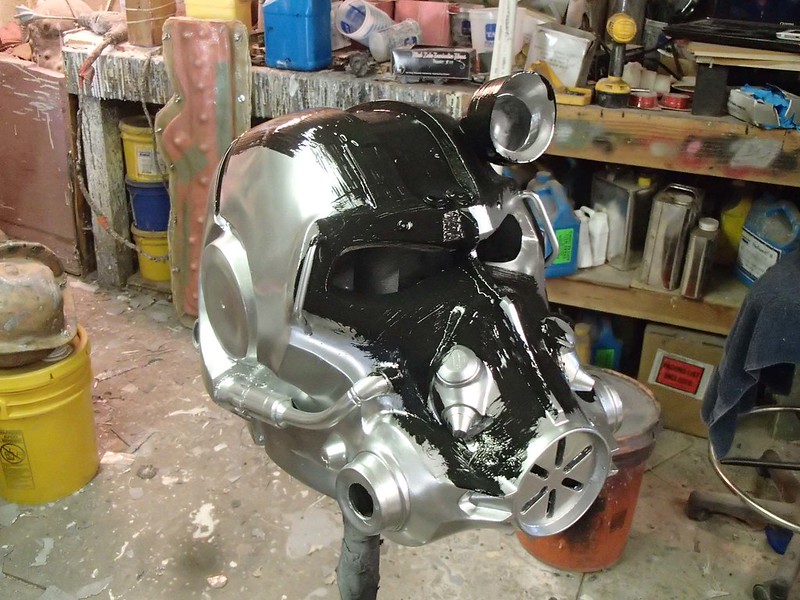
Along the way, the black acrylic was thinned with water and isopropyl alcohol to help it flow into all of the recesses:
After using a rag to daub off most of the black, the metal finish began to look suitably aged as shown here on the right:

The one exception to the rusty dirty theme was this guy:
He was painted in the Atom Cats' signature hotrod style. Complete with this logo stenciled on the back:


The cinnamon trick was a tip I picked up from my friend Freddy Schramm, master of all kinds of corrosive fiction:

The final effect is gorgeously believable and as an added benefit, it makes the shop smell like a bakery for a moment, instead of the toxic chemical nightmare it really is:
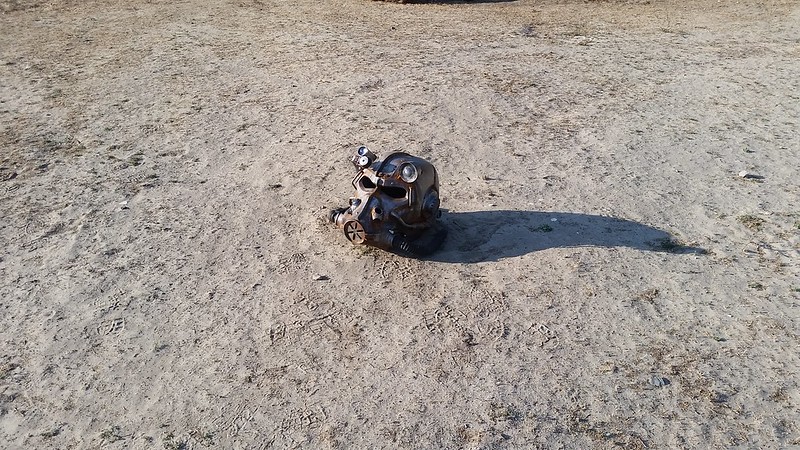
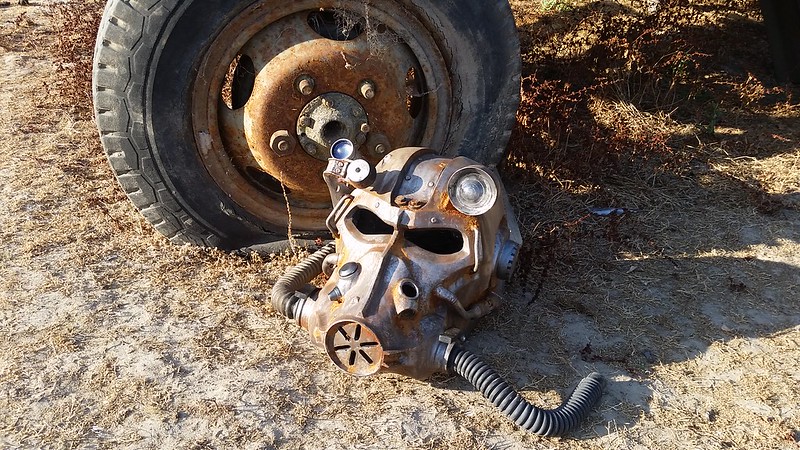
At that point, all that remains is finding a suitable location to display it:
To attach the right ear assembly, it's just a matter of running a bolt from the inside of the helmet into the threaded insert in the ear cup:
The last bit of drilling was to cut out the ends of the rear tubes where the gas mask hoses would be inserted:
So that was most of the prep work the helmets needed:
The next step was to cut off the mold sprues from the nostril tubes:
This was done with a cutoff wheel:
Once the ends were sanded down, they were all glued in place:
Next I bent some 1/4" aluminium rod to make the guard rails on either side of the eye holes:
The red in the above pic is just some spot putty used to smooth out the seams.
I mentioned that there was one helmet cast that would've normally been tossed out. The main reason for this was a huge air blister that was near the surface:
This is what I get when I'm using a really big mold to teach a noob how to rotocast helmets.
While it usually would've ended up in the trash, the Fallout universe is a welcome place for rusty, dusty, damaged things. With that in mind, I decided to embrace the flaws. I even used a drill, some bondo, and a bit of spot putty to add a bullet splash in the other side:
A flawed section of the snout was repaired with a blob of bondo sculpted to make the metal look bent instead of just missing:
And with that, I had five helmets all ready to paint:
After a couple of coats of black primer, they were mostly given a plain silver basecoat:
This did wonders for the "damaged" helmet:
Once the silver had time to set up, it was given a generous blackwash. This started wit smearing black acrylic paint over the whole helmet:
Along the way, the black acrylic was thinned with water and isopropyl alcohol to help it flow into all of the recesses:
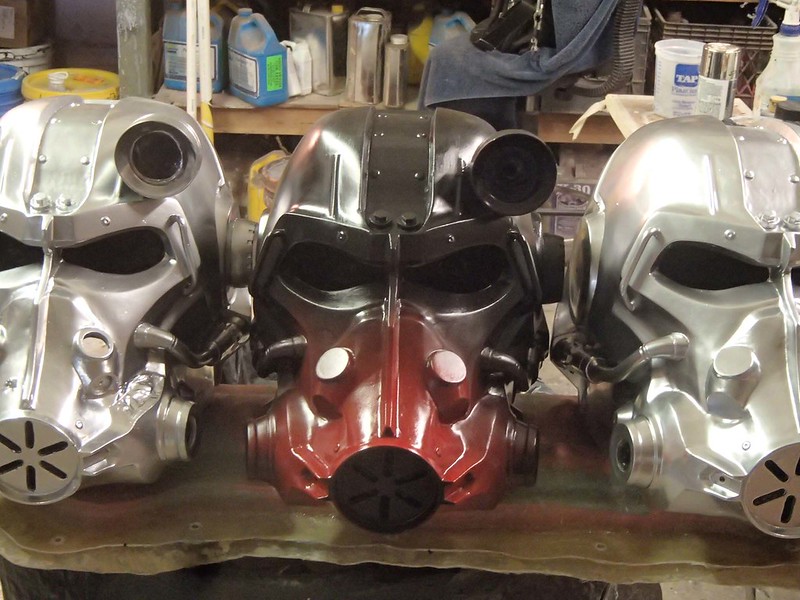
After using a rag to daub off most of the black, the metal finish began to look suitably aged as shown here on the right:
The one exception to the rusty dirty theme was this guy:
He was painted in the Atom Cats' signature hotrod style. Complete with this logo stenciled on the back:
Of course, even that helmet got at least a bit of blackwash to knock down the shine.
For the rest of them, rust was the order of the day:
For the rest of them, rust was the order of the day:
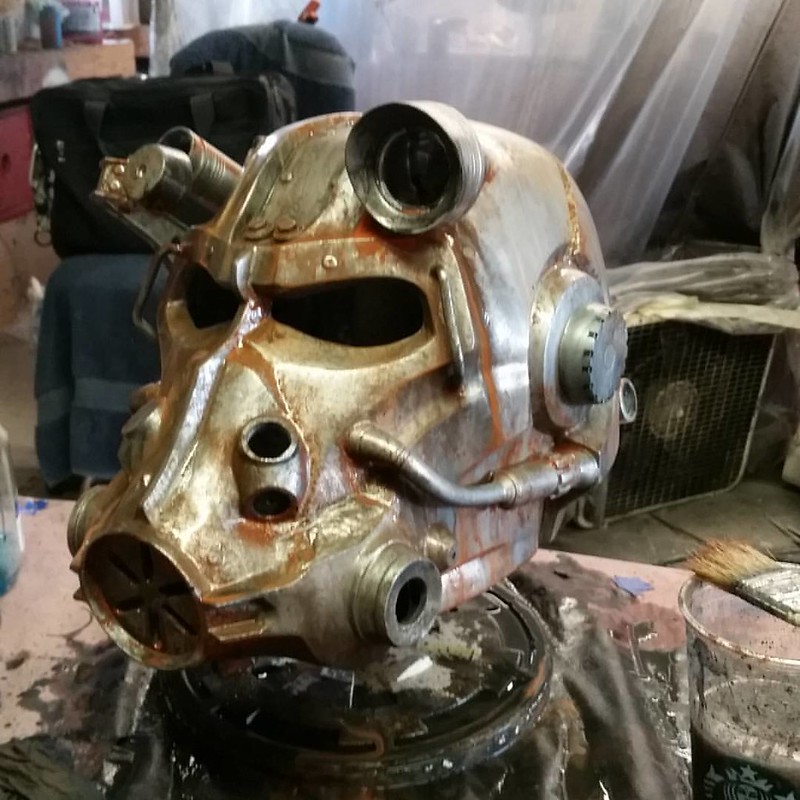
All of the bare metal helmets would need at least a bit of rust, but the one with all of the casting flaws got the most of it:
The effect was achieved the same way as the blackwash, selectively using colors such as burnt umber and raw sienna and letting the watered-down paint drool it's way all over to leave streaks of rust along the way:
For areas where excessive scaly rust buildup was needed, drops of CA glue were smeared into place and then caked with cinnamon before spraying with an accelerator to lock everything together:
The cinnamon trick was a tip I picked up from my friend Freddy Schramm, master of all kinds of corrosive fiction:
The final effect is gorgeously believable and as an added benefit, it makes the shop smell like a bakery for a moment, instead of the toxic chemical nightmare it really is:
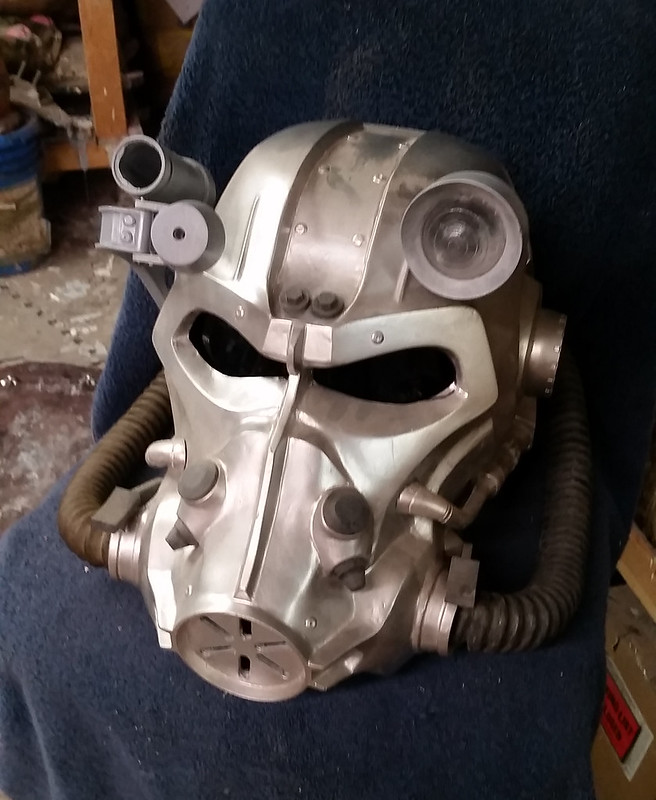
Once the paint is set up, the headlight and sight arm lenses are glued in place. Then I install the gas mask hoses and it's all done:
At that point, all that remains is finding a suitable location to display it:
Stay tuned for more updates. Next up for this project will be the boots. In other words, I'll detail how I turned a 5'7" tall me into a 7'3" tall armored behemoth.
Stay tuned...
Stay tuned...
Is that "Minute Rice" in the background where you first apply Bondo to the prototype? What do you use that for in the shop?
ReplyDeleteIf I have part to cast and can't remember how much material it takes to fill the mold, I fill the mold with rice, then empty it into a measuring cup. It's not exact, but it gives me a pretty good idea of how much it'll take to fill the mold without making a mess.
DeleteAh, good idea. I'll remember that, thanks!
DeleteWhat is the size u had the helmet print out at? Like cm or in in length and high?
ReplyDeleteI'm sorry, but I don't remember that specific number. I remember we scaled the whole set of parts to be 7'3" tall. Everything else fell in there, but this project was a few hard drives ago and I didn't keep more detailed notes than that.
DeleteCan you give a quick description on how you did the rivets?
ReplyDeleteI drilled a tiny hole, then installed a pop rivet.
DeleteAre these suits for sale, How much would this cost to buy
ReplyDelete