
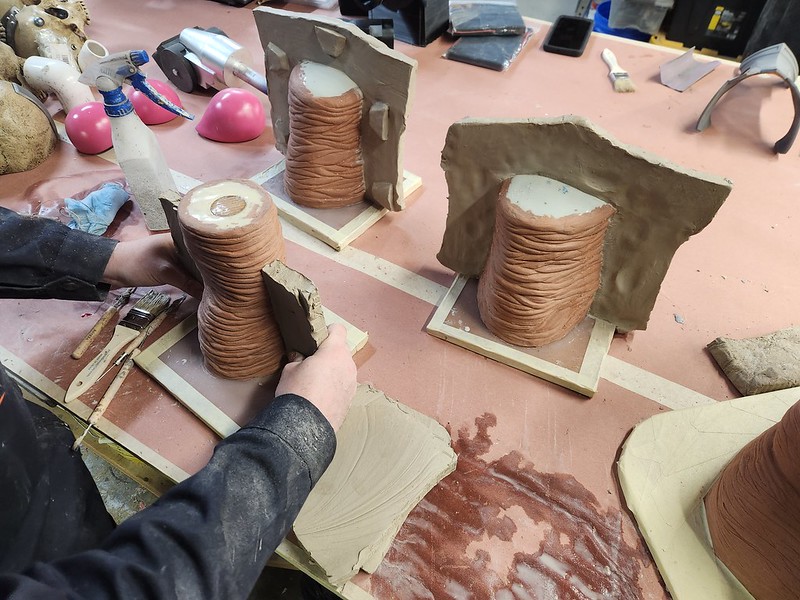
When we last updated this project, we had finished texturing the sculptures for the knees, elbow, and tail:
Since then, we made molds for all of them and started casting rubber parts:
The core would be the 3D printed piece that we used as a sculpting armature. To make the two-part outer mold, we'd start by building a parting wall using WED clay:
We used WED clay because it's water based and would be easy to clean off of the oil-based clay sculpture. Here's Jeff helping me set those up:

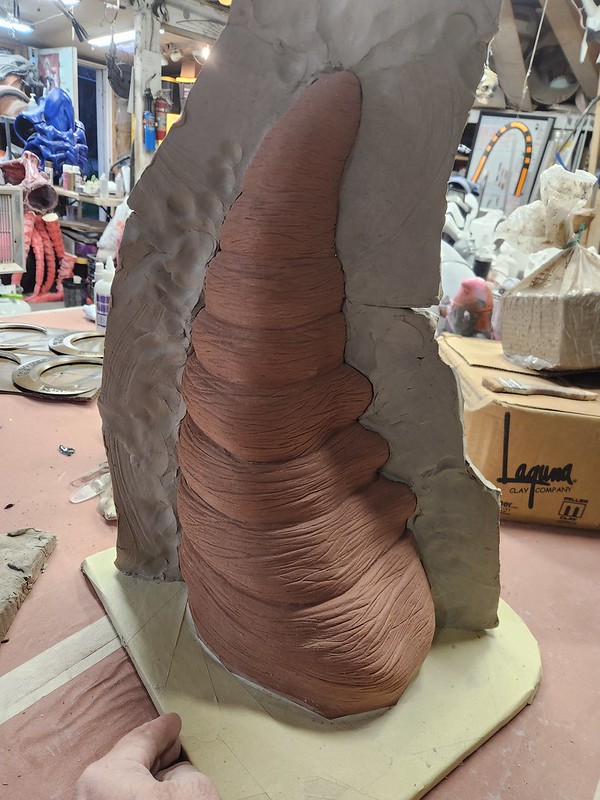
This is a dimly-lit pic of the tail with the parting wall started:
Because I'm a terrible photographer, it fails to illustrate the registration dimples I pushed into the surface or the watertight edges along the surface of the sculpt. Really I should've taken the photo when the wall was all polished and smooth, not when it was half done like that. I don't know what I was thinking. I apologize for this shortcoming.
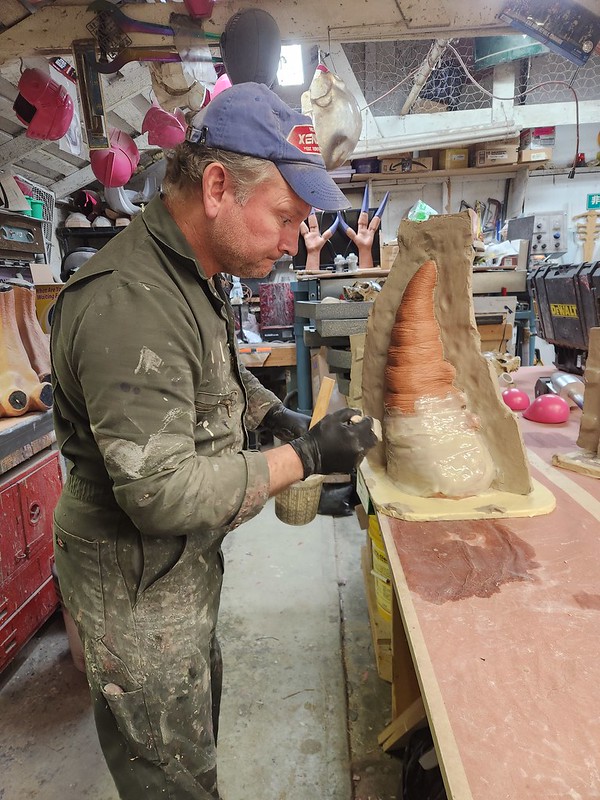
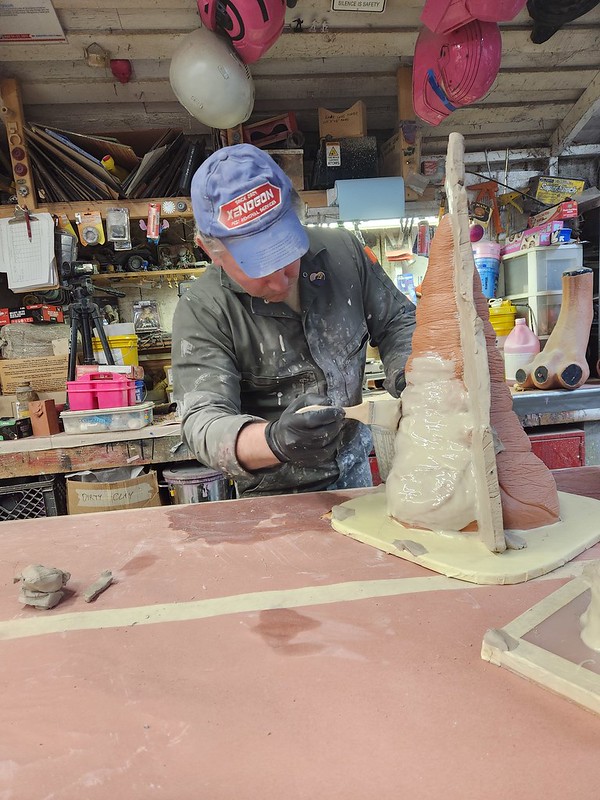
You can almost make it all out in this pic where I'm starting to apply an epoxy-based gelcoat to the surface:
The gelcoat captures all of the fine details on the surface:
Gorgeous:
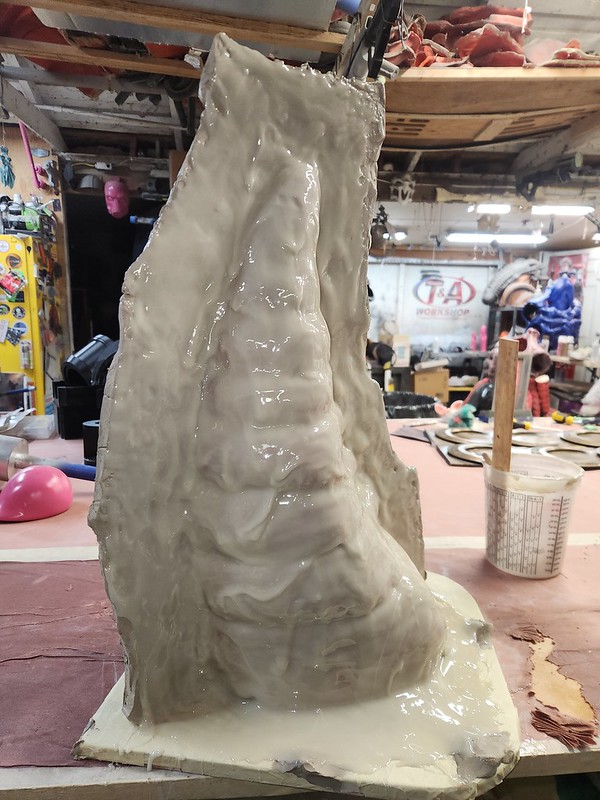
Here's all four molds with the gelcoat applied being set aside to cure overnight before reinforcement:

Once the gelcoat had set up, I used some Plasti-Paste Epoxy (a trowelable plastic compound) to fillet the hard corners and smooth over the peaks and valleys of the gelcoat. Then I laid up a healthy thickness of fiberglass:

Here's side one of all four molds laid up:

The next day I removed the WED clay parting walls, washed off the residue they left behind, then sprayed a thick coat of release agent onto the first half of the molds and the clay sculpt before gelcoating and fiberglassing the second half. Then they set overnight to cure again.
The gelcoat captures all of the fine details on the surface:
Gorgeous:
Here's all four molds with the gelcoat applied being set aside to cure overnight before reinforcement:
Once the gelcoat had set up, I used some Plasti-Paste Epoxy (a trowelable plastic compound) to fillet the hard corners and smooth over the peaks and valleys of the gelcoat. Then I laid up a healthy thickness of fiberglass:
Here's side one of all four molds laid up:
The next day I removed the WED clay parting walls, washed off the residue they left behind, then sprayed a thick coat of release agent onto the first half of the molds and the clay sculpt before gelcoating and fiberglassing the second half. Then they set overnight to cure again.
The next next day the molds looked like so:
All I needed to do was to pry the two halves apart with a pair of flat head screwdrivers:
To make it a little easier, the clay inside was softened by placing the molds in front of a heater in the shop. Even so, it took some doing to get the molds open. Here I am forcing the tail mold apart:
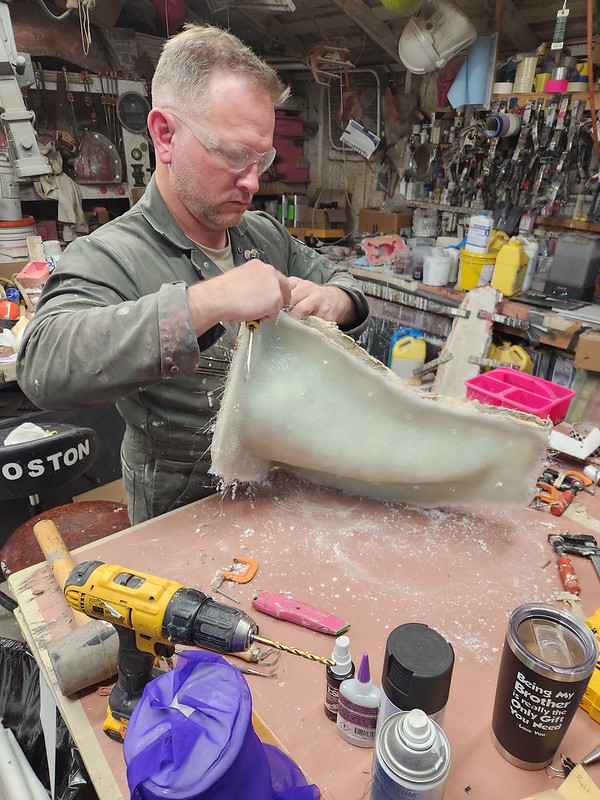
Ta-da:
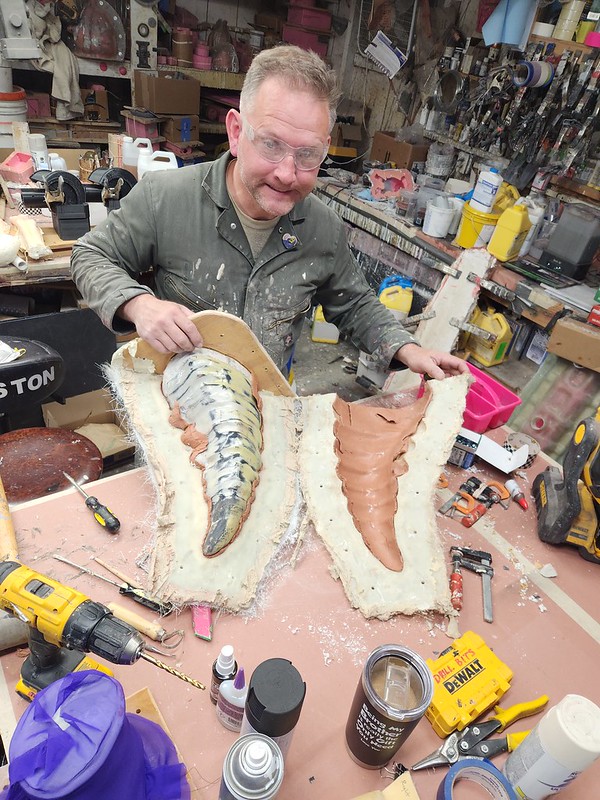
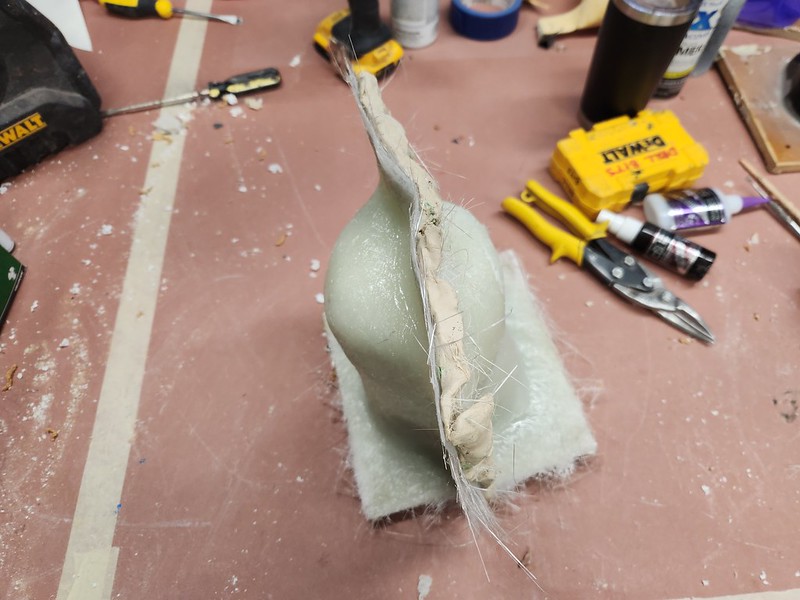
The original 3D printed sculpting armature inside was pretty smooth and the sculpted texture inside of the outer mold was pretty rough, so the clay mostly slipped right off of the armature and stuck to the inside of the molds:
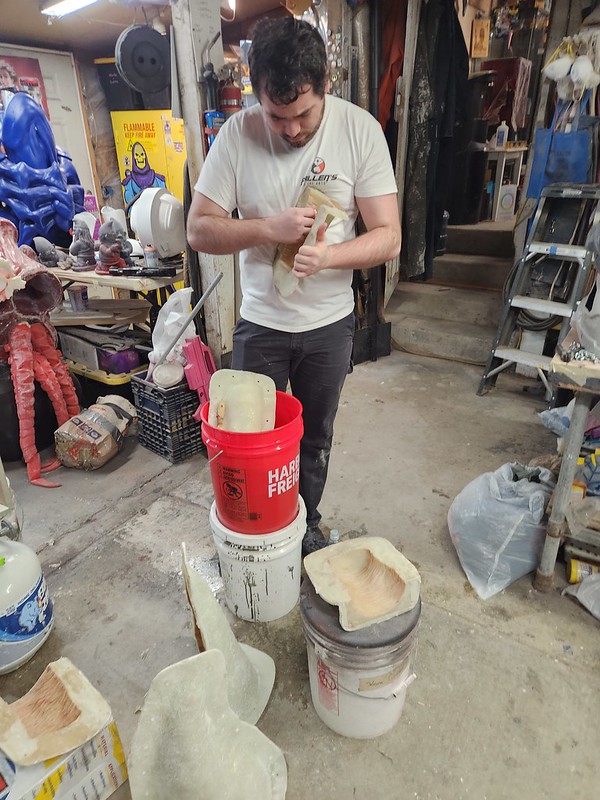
So this here is the tail core all nice and clean after a quick wipe down with a rag:
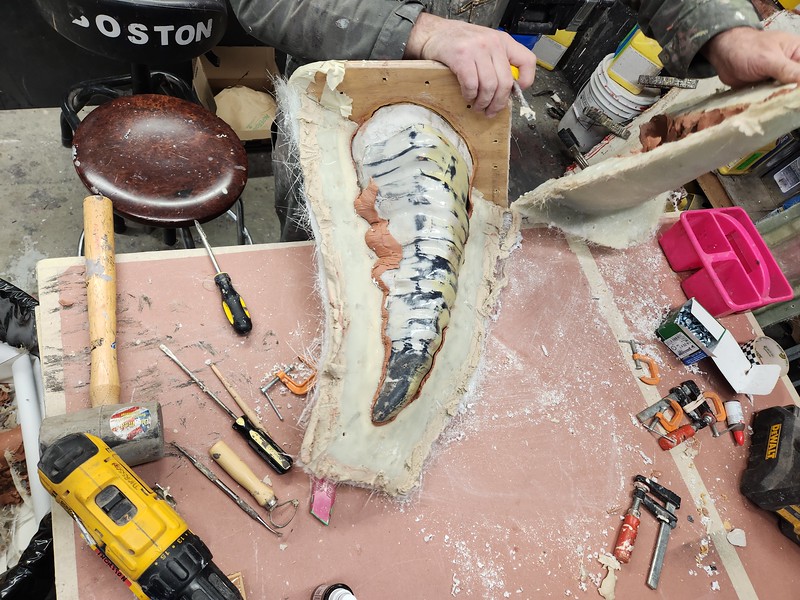
After cleaning up the edges of the fiberglass molds, the clay that was stuck to the inside of the fiberglass parts needed to be peeled and picked and scrubbed out. This particularly tedious pain-in-the-butt chore was perfect for Jeff:
Jeff loves this sort of thing:
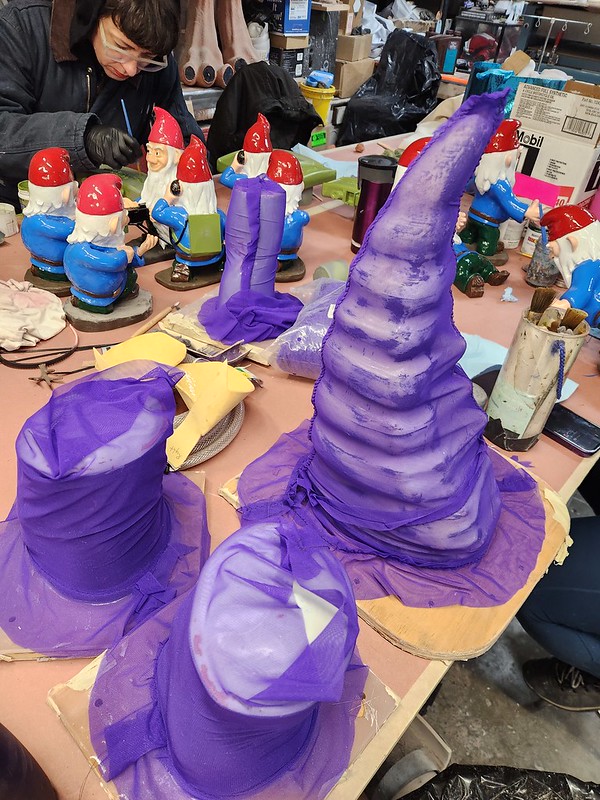
While Jeff was going through the tedium of scrubbing the oil-based clay out of the molds, Rachel sewed up a set of plurple powermesh fabric sleeves to fit over each of the mold cores:
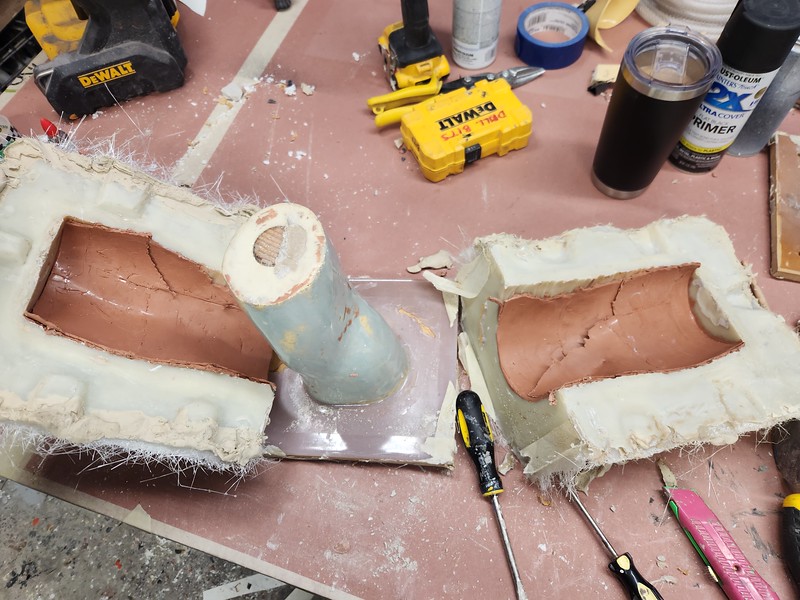
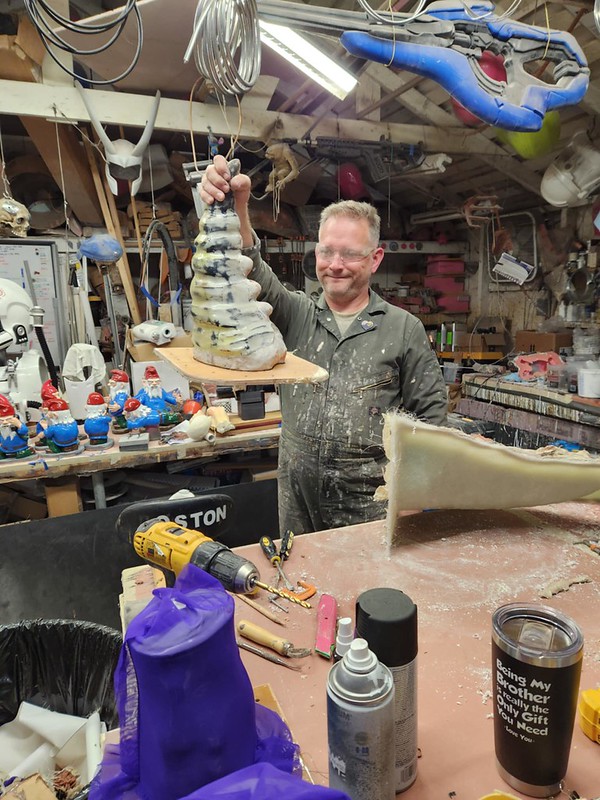
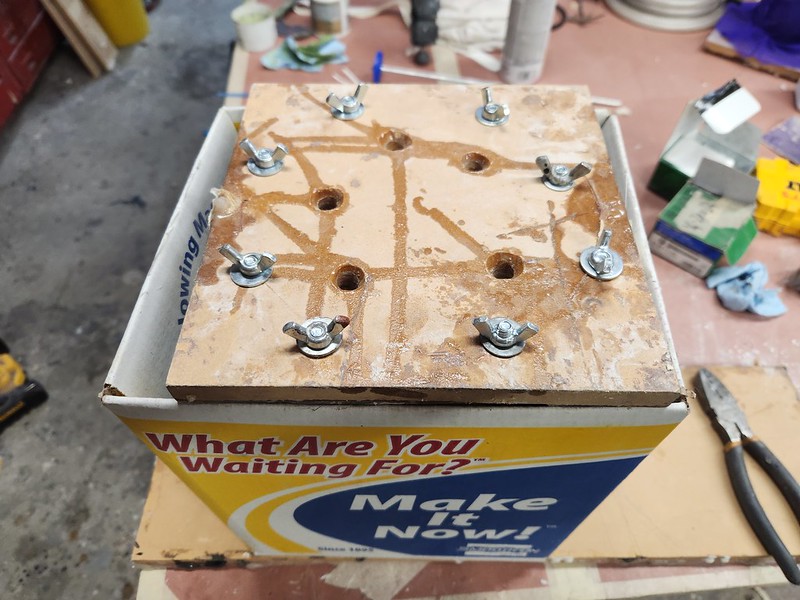
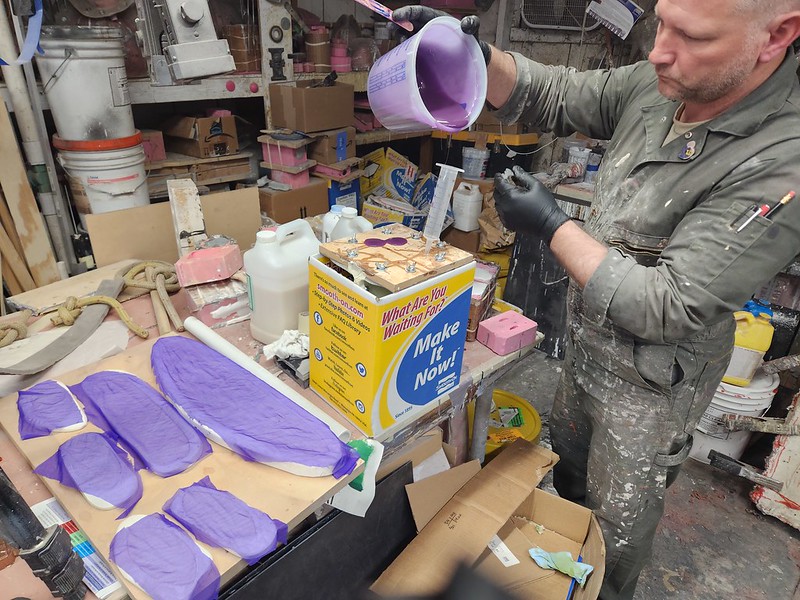
Meanwhile, I drilled a series of holes around the base of the armature (which would now become the core of the mold) to allow rubber into the space between the outer mold and the inner core. Then I bolted the whole thing back together and it was ready to pour:
Just like the flat fleshy parts we made before in update 20, these fleshy parts will be cast in Dragon Skin silicone with a mix of red, blue, and a teensy bit of white pigment from Smooth-On's Silc Pig lineup. Then it all gets mixed together before vacuum degassing. The degassing chamber is always fun to watch:

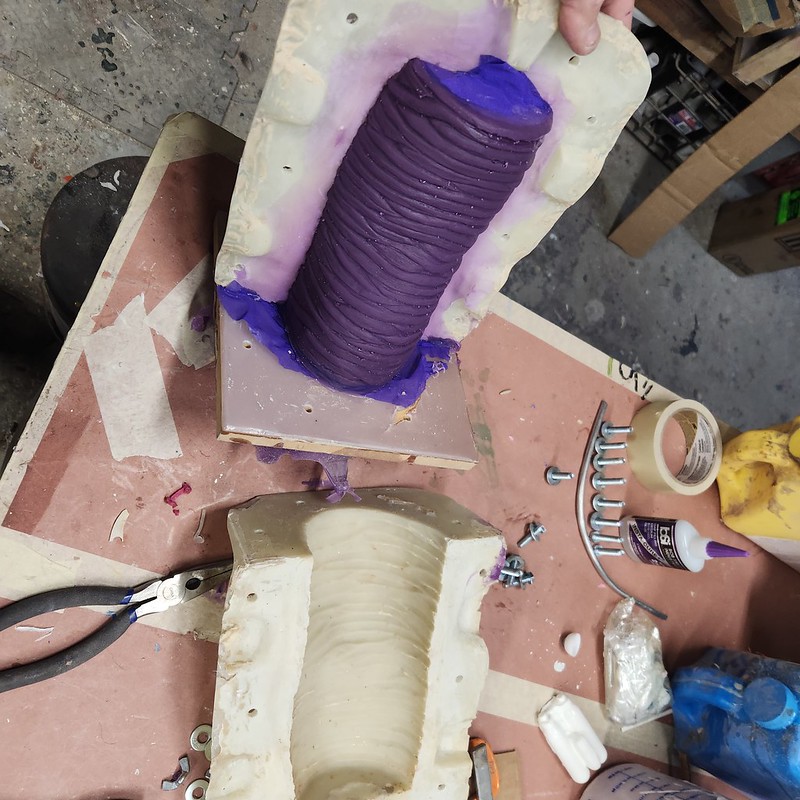
Once all of the bubbles had been evacuated from the liquid rubber, I pour it into the mold:
But it turns out to be way too viscous to easily drool its way into the holes I drilled, so I ended up having to use a syringe to force it into the mold:

The whole hole was filled to overflowing so there would be excess silicone to flow into the mold if a stray bubble worked its way out:

The next morning, it was time to open up the mold:
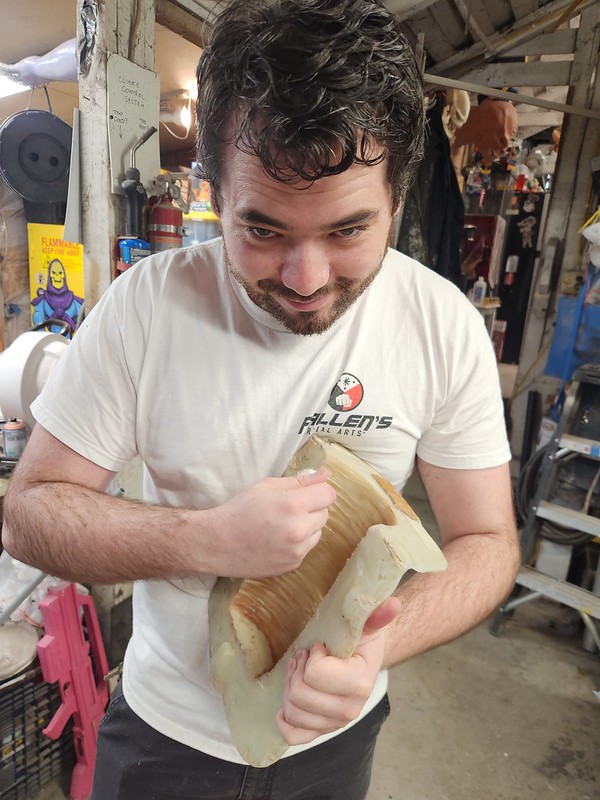
And then peel the cast silicone sleeve off of the inner core of the mold:
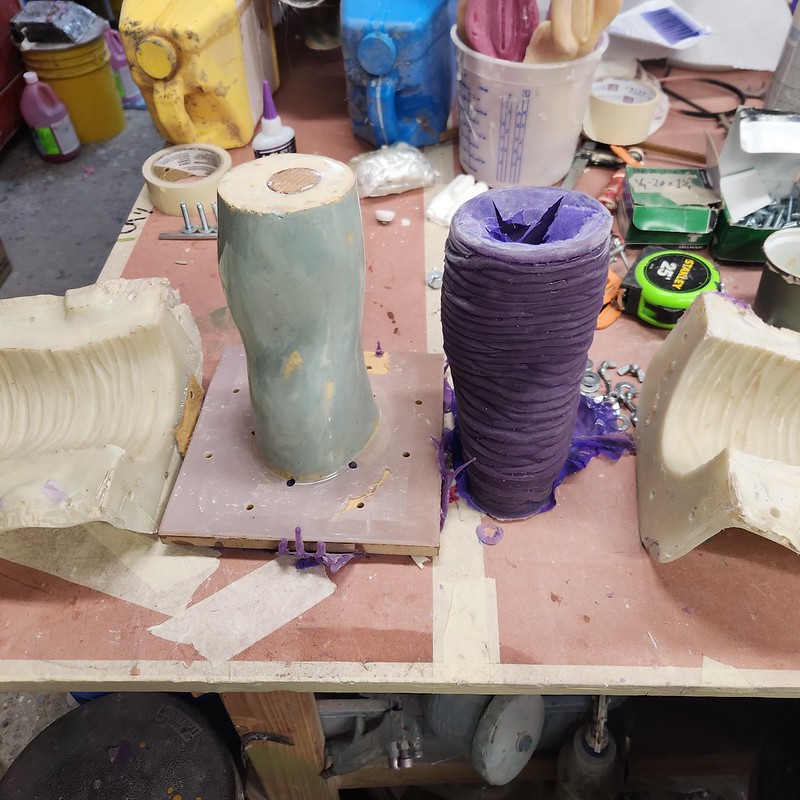
The resulting sleeve was not too shabby:

It was, however, a little loose on Rachel:

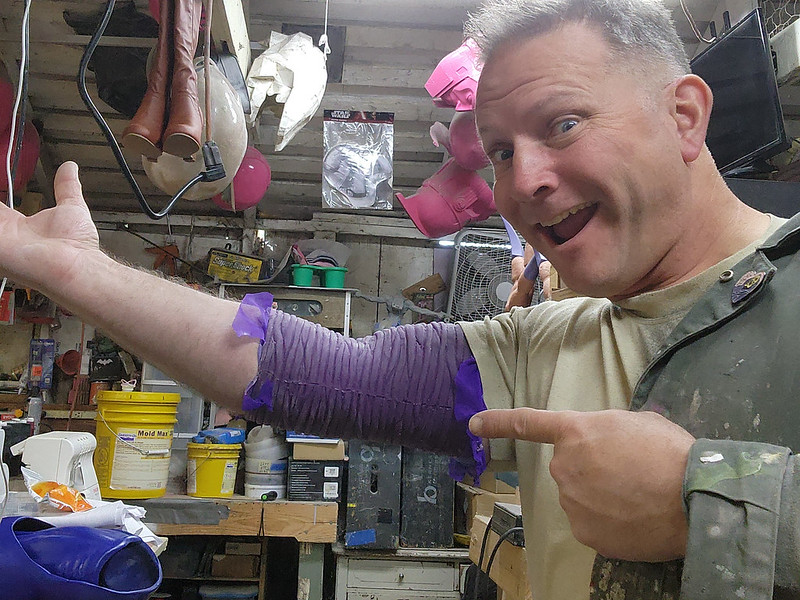
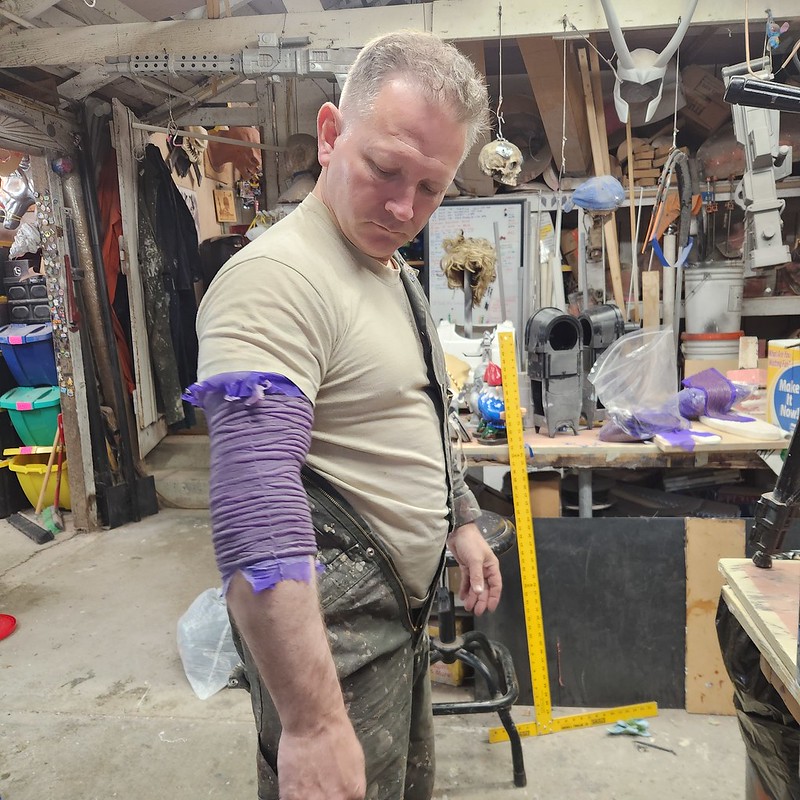
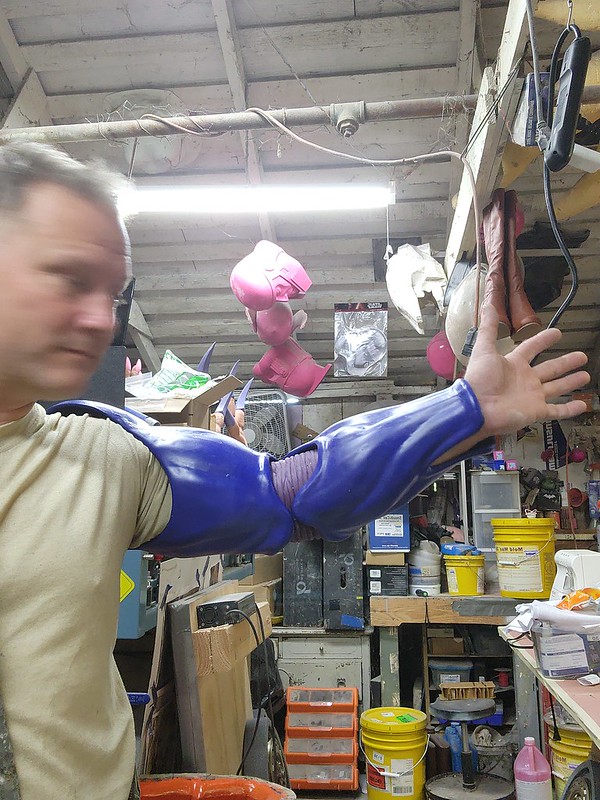
It did fit me pretty well:
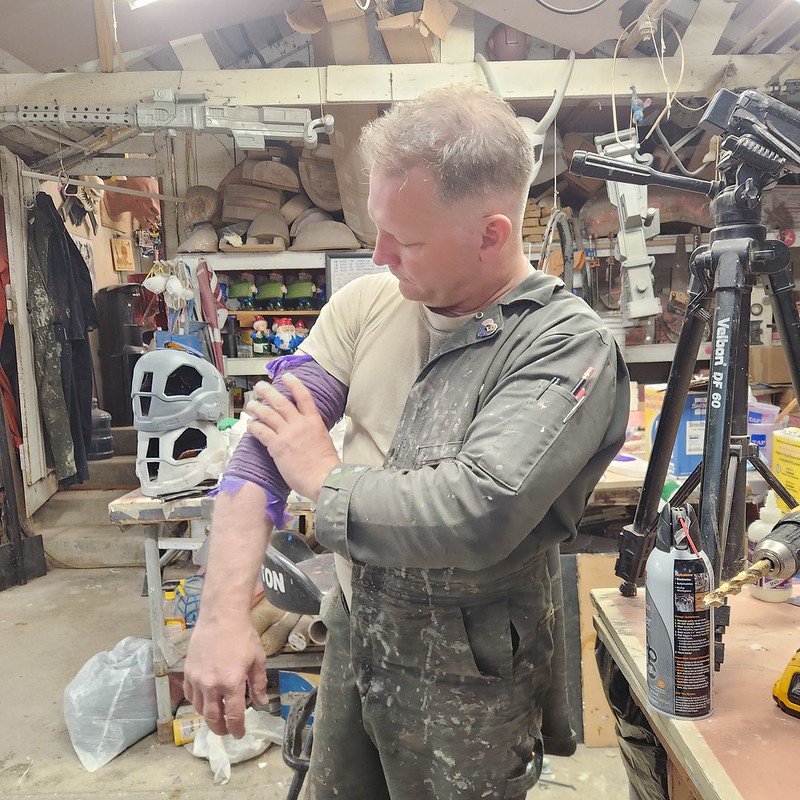
It'll be even better once I trim off the excess powermesh fabric from the ends:
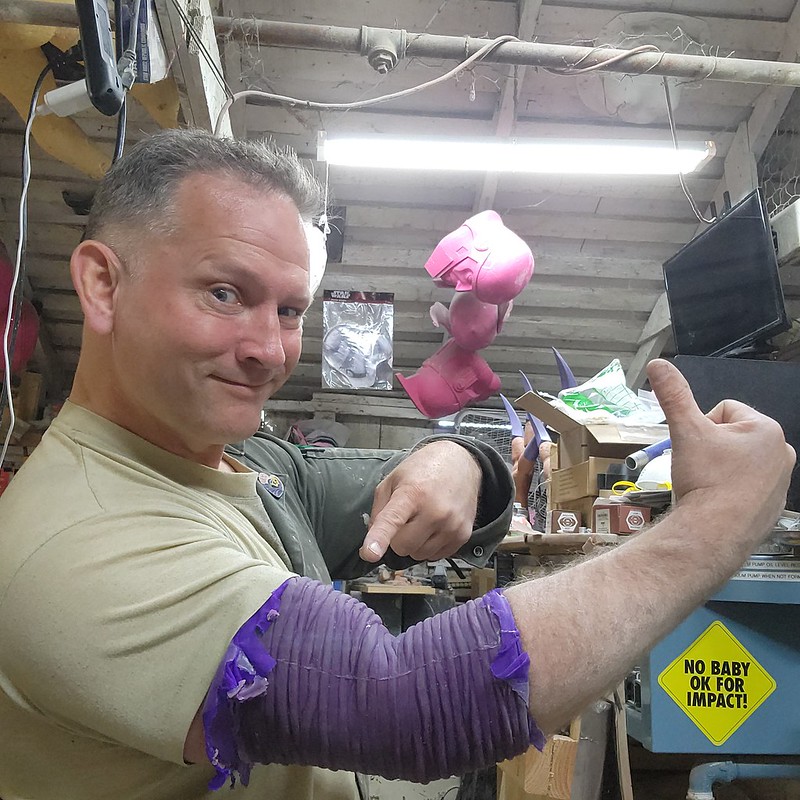
But this? This will work:
Since I was excited, I couldn't resist the temptation to slip on the arm exoskeleton shells and check the fit in the dirty shop mirror:
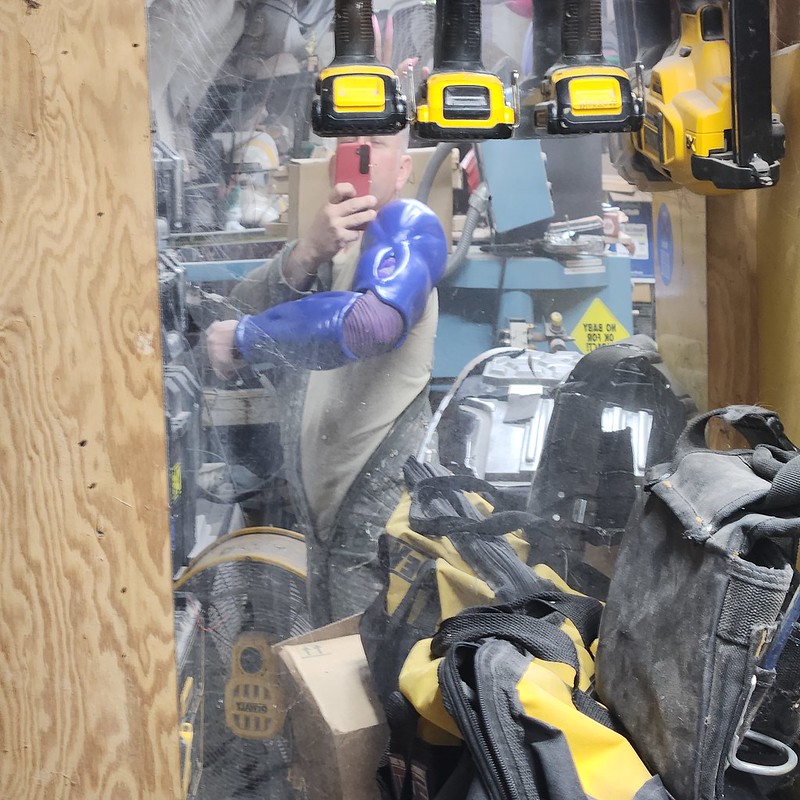
Turns out I forgot to tuck in the little flat bits in the holes in the sides of the arm:
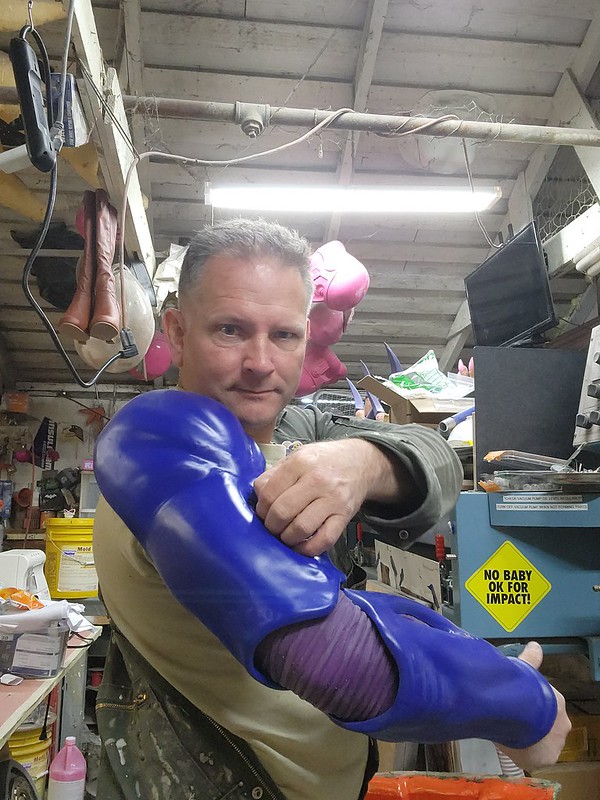
Still, it looked pretty good:

All I needed to do was to pry the two halves apart with a pair of flat head screwdrivers:
To make it a little easier, the clay inside was softened by placing the molds in front of a heater in the shop. Even so, it took some doing to get the molds open. Here I am forcing the tail mold apart:
Ta-da:
The original 3D printed sculpting armature inside was pretty smooth and the sculpted texture inside of the outer mold was pretty rough, so the clay mostly slipped right off of the armature and stuck to the inside of the molds:
So this here is the tail core all nice and clean after a quick wipe down with a rag:
After cleaning up the edges of the fiberglass molds, the clay that was stuck to the inside of the fiberglass parts needed to be peeled and picked and scrubbed out. This particularly tedious pain-in-the-butt chore was perfect for Jeff:
Jeff loves this sort of thing:
While Jeff was going through the tedium of scrubbing the oil-based clay out of the molds, Rachel sewed up a set of plurple powermesh fabric sleeves to fit over each of the mold cores:
Meanwhile, I drilled a series of holes around the base of the armature (which would now become the core of the mold) to allow rubber into the space between the outer mold and the inner core. Then I bolted the whole thing back together and it was ready to pour:
Just like the flat fleshy parts we made before in update 20, these fleshy parts will be cast in Dragon Skin silicone with a mix of red, blue, and a teensy bit of white pigment from Smooth-On's Silc Pig lineup. Then it all gets mixed together before vacuum degassing. The degassing chamber is always fun to watch:
Once all of the bubbles had been evacuated from the liquid rubber, I pour it into the mold:
But it turns out to be way too viscous to easily drool its way into the holes I drilled, so I ended up having to use a syringe to force it into the mold:
The whole hole was filled to overflowing so there would be excess silicone to flow into the mold if a stray bubble worked its way out:
The next morning, it was time to open up the mold:
And then peel the cast silicone sleeve off of the inner core of the mold:
The resulting sleeve was not too shabby:
It was, however, a little loose on Rachel:
It did fit me pretty well:
It'll be even better once I trim off the excess powermesh fabric from the ends:
But this? This will work:
Since I was excited, I couldn't resist the temptation to slip on the arm exoskeleton shells and check the fit in the dirty shop mirror:
Turns out I forgot to tuck in the little flat bits in the holes in the sides of the arm:
Still, it looked pretty good:
So that's a thing!
As I write this, the second elbow is curing in the mold. The tail and knee molds need a bit more cleaning before they're ready to pour.
Next on my way up the ladder of increasingly complicated shapes to mold and cast in silicone will be the shoulders. Then the feet, the hands, and the waist/hip section. Then finally the head.
Stay tuned!
No comments:
Post a Comment