While I've been posting a lot of progress updates on the ongoing Genestealer build, I don't want people to think that's the only thing we're working on the shop.
With that in mind, here's just a handful of the UnFinished Objects (or UFOs) currently rolling around on the to-do list that we can talk about publicly.
First off, the Genestealer isn't the only 40K project we're tinkering with. While I've been churning away in the workshop, Jeff has been hard at work on the digital models for our Techpriest based on the versions you see in the background of the Space Marine 2 video game. Here's the current state of the model:

We've also been making a few scenic elements, starting with these nifty servo skull wall sconces:

Then there's these two banners, part of a series of them we're putting together:

Of course, it's not all 40K stuff. A while back I got a wild hair and decided to build myself a First Order AT-AT Driver costume. And of course, I never build one of anything:

Over the next few days I'll finish the last couple of details, then I'll be posting finished pics and a step-by-step from that build.
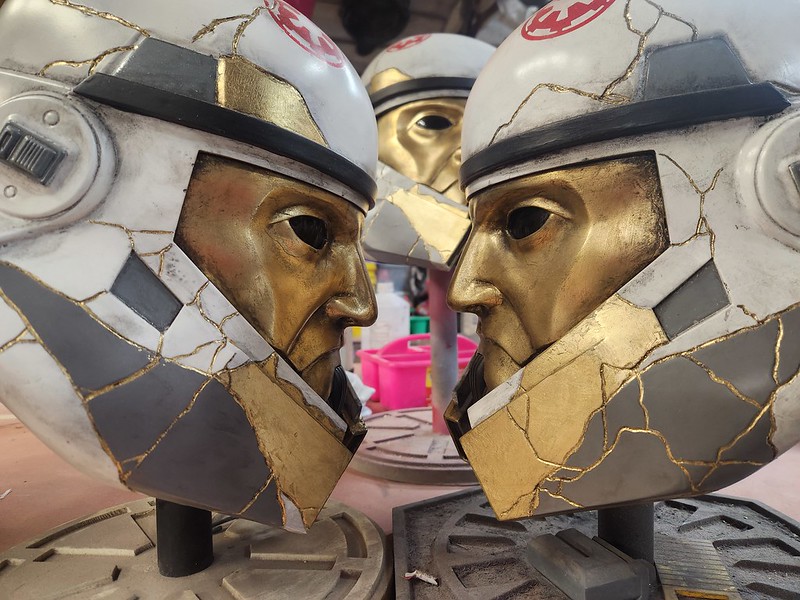
Since we had the First Order armor molds on the bench, I went ahead and made a set of armor with red gelcoat so we can build a Captain Cardinal costume:

Since we had the First Order armor molds on the bench, I went ahead and made a set of armor with red gelcoat so we can build a Captain Cardinal costume:
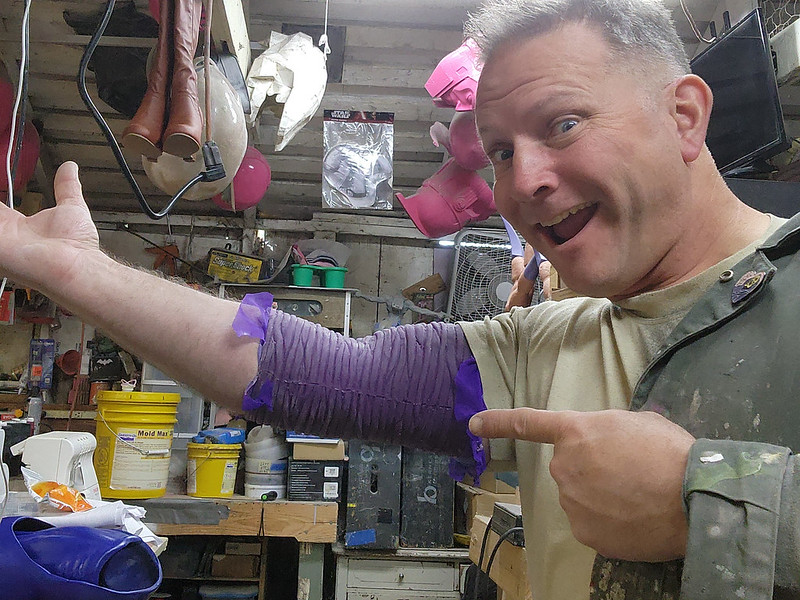
With the news that there may be a Starship Troopers reboot in the works, I've gotten pretty excited to finish the last few things from the classic 1997 film. First, there's Lt. Rasczak's prosthetic arm:

Then there's a stack of grenades:

Andrew the Intern has been learning to make molds:

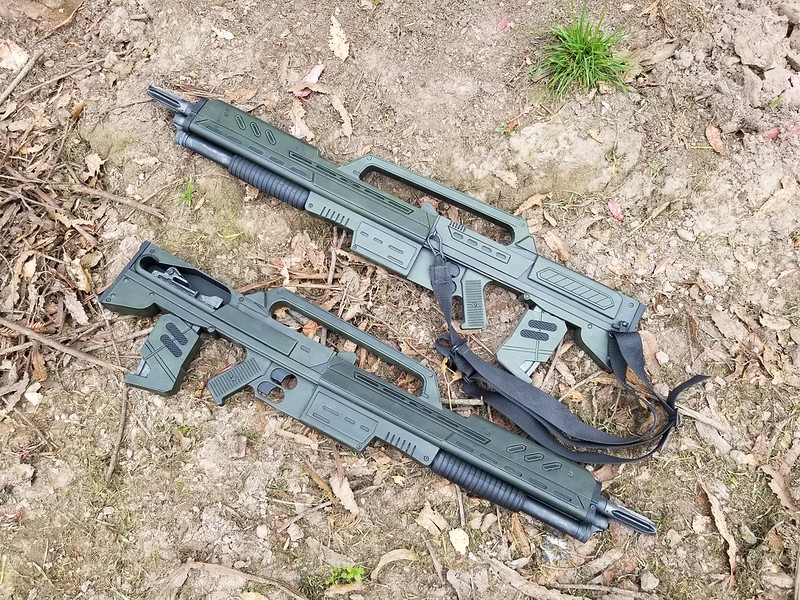
So it seemed like a good time to start him on making molds for the pieces of the M-55 Tactical Nuke Launcher:

Current goal is to have it done in time to deploy with my squad at WonderCon next week. Which means I had to churn out a few more of these guys:

After Wondercon we've got a few other events to look forward to. But that's a whole 'nother ball of worms.
Stay tuned...
Then there's a stack of grenades:
Andrew the Intern has been learning to make molds:
So it seemed like a good time to start him on making molds for the pieces of the M-55 Tactical Nuke Launcher:
Current goal is to have it done in time to deploy with my squad at WonderCon next week. Which means I had to churn out a few more of these guys:
After Wondercon we've got a few other events to look forward to. But that's a whole 'nother ball of worms.
Stay tuned...