
When I last posted anything significant about this goofy little build, I had it sitting on the bench looking like so:
Meanwhile, Jeff had the digital model looking like so:
In order to make the legs look a little leaner, we'd need to get a scan of our actual body shapes, including the stilts we'd be wearing in order to fit the parts better.
The stilts started with a lifecast of our feet standing on our tippy toes. Those lifecasts were then wrapped in a 1/4" thick layer of clay like so:

The clay was smoothed out and coated with a PVA mold release, then given a coat of black gelcoat:

Once the gelcoat had set up, I used copious amounts of bondo glass build a pad onto the bottom of the feet with a length of 1" steel square tubing bonded into place:

The whole assembly was then layered over with four layers of 3/4 ounce fiberglass mat:

Once the glass had cured, I cut each leg into two parts and pried them off of the lifecasts:

For the initial trial run, I laid in a layer of 1/4" foam and strapped them onto my legs:

We'll refine the strapping arrangement sooner than later, but for now, duct tape does the job:

Stalking around on the smooth concrete floor with nothing for traction except for the hard, sharp edge on the tip of the steel tubing proved to be a bit precarious. So I headed outside to walk around on the gravel driveway:

That worked just fine until I got to the edge, stepped on the softer ground, and stabbed my left foot all the way into the earth, nearly losing my balance and doing all kinds of damage that would've been tough to explain in the emergency room.
So we'll get back to the stilts later.

The first attempt at scanning ran into some problems with the dark area of the stilts, so we misted on a coat of flat white paint to make them easier for the scanner to pick up:

Then we cleared out some space in the office and got to scanning:

this time we got all of the nooks and crannies:

After the scanning was done, Jeff got to work smoothing out the seams on the arm parts:
Later that evening, he sent me the scan data. It's glorious:

So here's what the current digital model looks like:

Now Jeff can begin refining the waist/hip/tail section so we can print out another sculpting armature and get started on making the rubber bit happen:

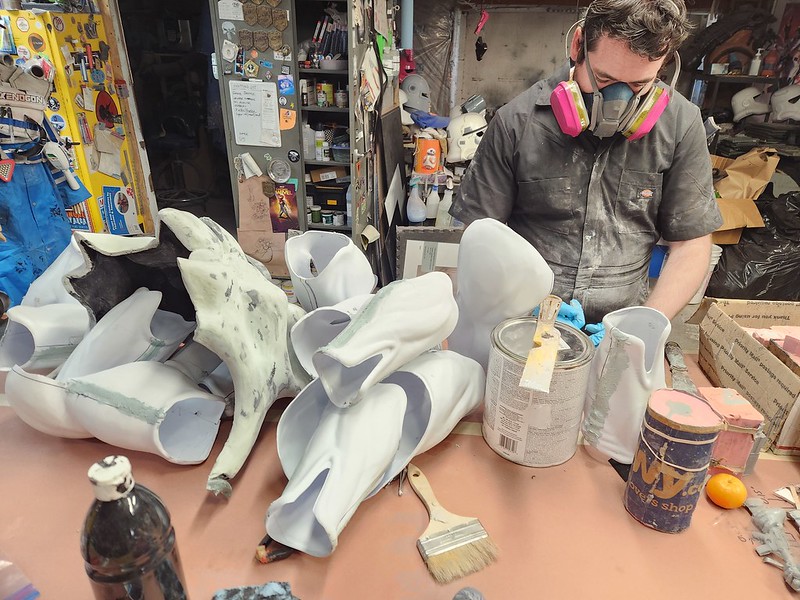
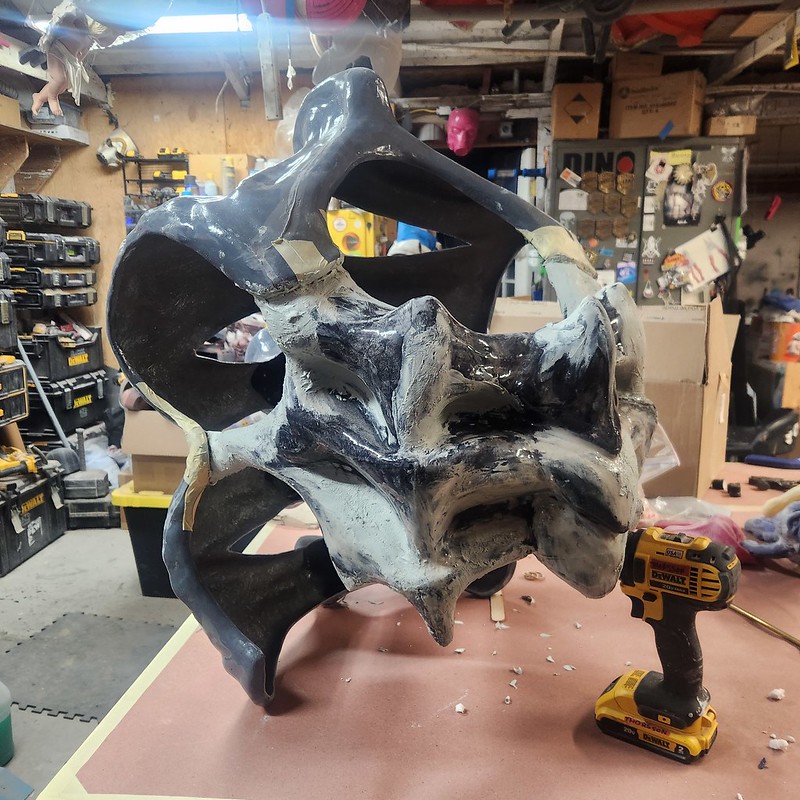
Meanwhile, the head sculpt is collecting dust on the bench and slowly being surrounded by little distractions:

The stilts started with a lifecast of our feet standing on our tippy toes. Those lifecasts were then wrapped in a 1/4" thick layer of clay like so:
The clay was smoothed out and coated with a PVA mold release, then given a coat of black gelcoat:
Once the gelcoat had set up, I used copious amounts of bondo glass build a pad onto the bottom of the feet with a length of 1" steel square tubing bonded into place:
The whole assembly was then layered over with four layers of 3/4 ounce fiberglass mat:
Once the glass had cured, I cut each leg into two parts and pried them off of the lifecasts:
For the initial trial run, I laid in a layer of 1/4" foam and strapped them onto my legs:
We'll refine the strapping arrangement sooner than later, but for now, duct tape does the job:
Stalking around on the smooth concrete floor with nothing for traction except for the hard, sharp edge on the tip of the steel tubing proved to be a bit precarious. So I headed outside to walk around on the gravel driveway:
That worked just fine until I got to the edge, stepped on the softer ground, and stabbed my left foot all the way into the earth, nearly losing my balance and doing all kinds of damage that would've been tough to explain in the emergency room.
So we'll get back to the stilts later.
The other big stride was on the chest prototype. I decided I'd like to have a bit more structure to mount the head and upper arms onto, so I didn't want to make the whole chest a separate part. Instead, the lowest "rib" and the underarm part of the shell will be removable to get the thing on and off without dislocating the wearer's shoulders. So I split it thusly:

The upper portion will be molded without this lower piece, so I went ahead and taped everything in place where it would end up once it's finally assembled:

The overlapping areas of the back section were wrapped inside and out with masking tape which was coated in a release agent. Then I smeared over the gap with some bondo glass:

I did the same thing at the joint between the upper and lower arm holes:

The upper portion will be molded without this lower piece, so I went ahead and taped everything in place where it would end up once it's finally assembled:
The overlapping areas of the back section were wrapped inside and out with masking tape which was coated in a release agent. Then I smeared over the gap with some bondo glass:
I did the same thing at the joint between the upper and lower arm holes:
This process was repeated for all four of these seams: 
Now, with the tape removed, the seams overlap in such a way that friction and tension are enough to keep the pieces from falling apart:
With that done, the back was popped off of the chest piece so we can smooth it out prior to molding:

This entire evolution was done with this poor, tragic, neglected dog underfoot:

Back to the stilts, earlier this week Jeff stopped by so we could get a 3D scan of one of us with the stilts on. Since I'm a bit thicker than he is, if the parts are big enough to fit me, they'll probably fit him just fine. So I was elected to be scanned. So I had to get into something form-fitting and get back into the stilts.
Now, with the tape removed, the seams overlap in such a way that friction and tension are enough to keep the pieces from falling apart:
With that done, the back was popped off of the chest piece so we can smooth it out prior to molding:
This entire evolution was done with this poor, tragic, neglected dog underfoot:
Back to the stilts, earlier this week Jeff stopped by so we could get a 3D scan of one of us with the stilts on. Since I'm a bit thicker than he is, if the parts are big enough to fit me, they'll probably fit him just fine. So I was elected to be scanned. So I had to get into something form-fitting and get back into the stilts.
This time I was smart enough to put a tennis ball on the tip of each foot for traction and grab a pair of forearm stilts to help me keep myself upright until I get more comfortable with these new feet:
The first attempt at scanning ran into some problems with the dark area of the stilts, so we misted on a coat of flat white paint to make them easier for the scanner to pick up:
Then we cleared out some space in the office and got to scanning:
this time we got all of the nooks and crannies:
After the scanning was done, Jeff got to work smoothing out the seams on the arm parts:
Later that evening, he sent me the scan data. It's glorious:
So here's what the current digital model looks like:
Now Jeff can begin refining the waist/hip/tail section so we can print out another sculpting armature and get started on making the rubber bit happen:
Meanwhile, the head sculpt is collecting dust on the bench and slowly being surrounded by little distractions:
Next week I'll be focused on another project, but once that's done I'll be shifting focus back to this guy. That head needs finishing and soon.
Stay tuned...
Stay tuned...
> The other big stride
ReplyDeleteA stilts pun... love it.
I'm hoping the tail has enough weight to it so that it sways when moving.