
So I needed something a bit different. If only to prove to myself that I can still do shiny and clean-looking stuff.
Enter this lady:
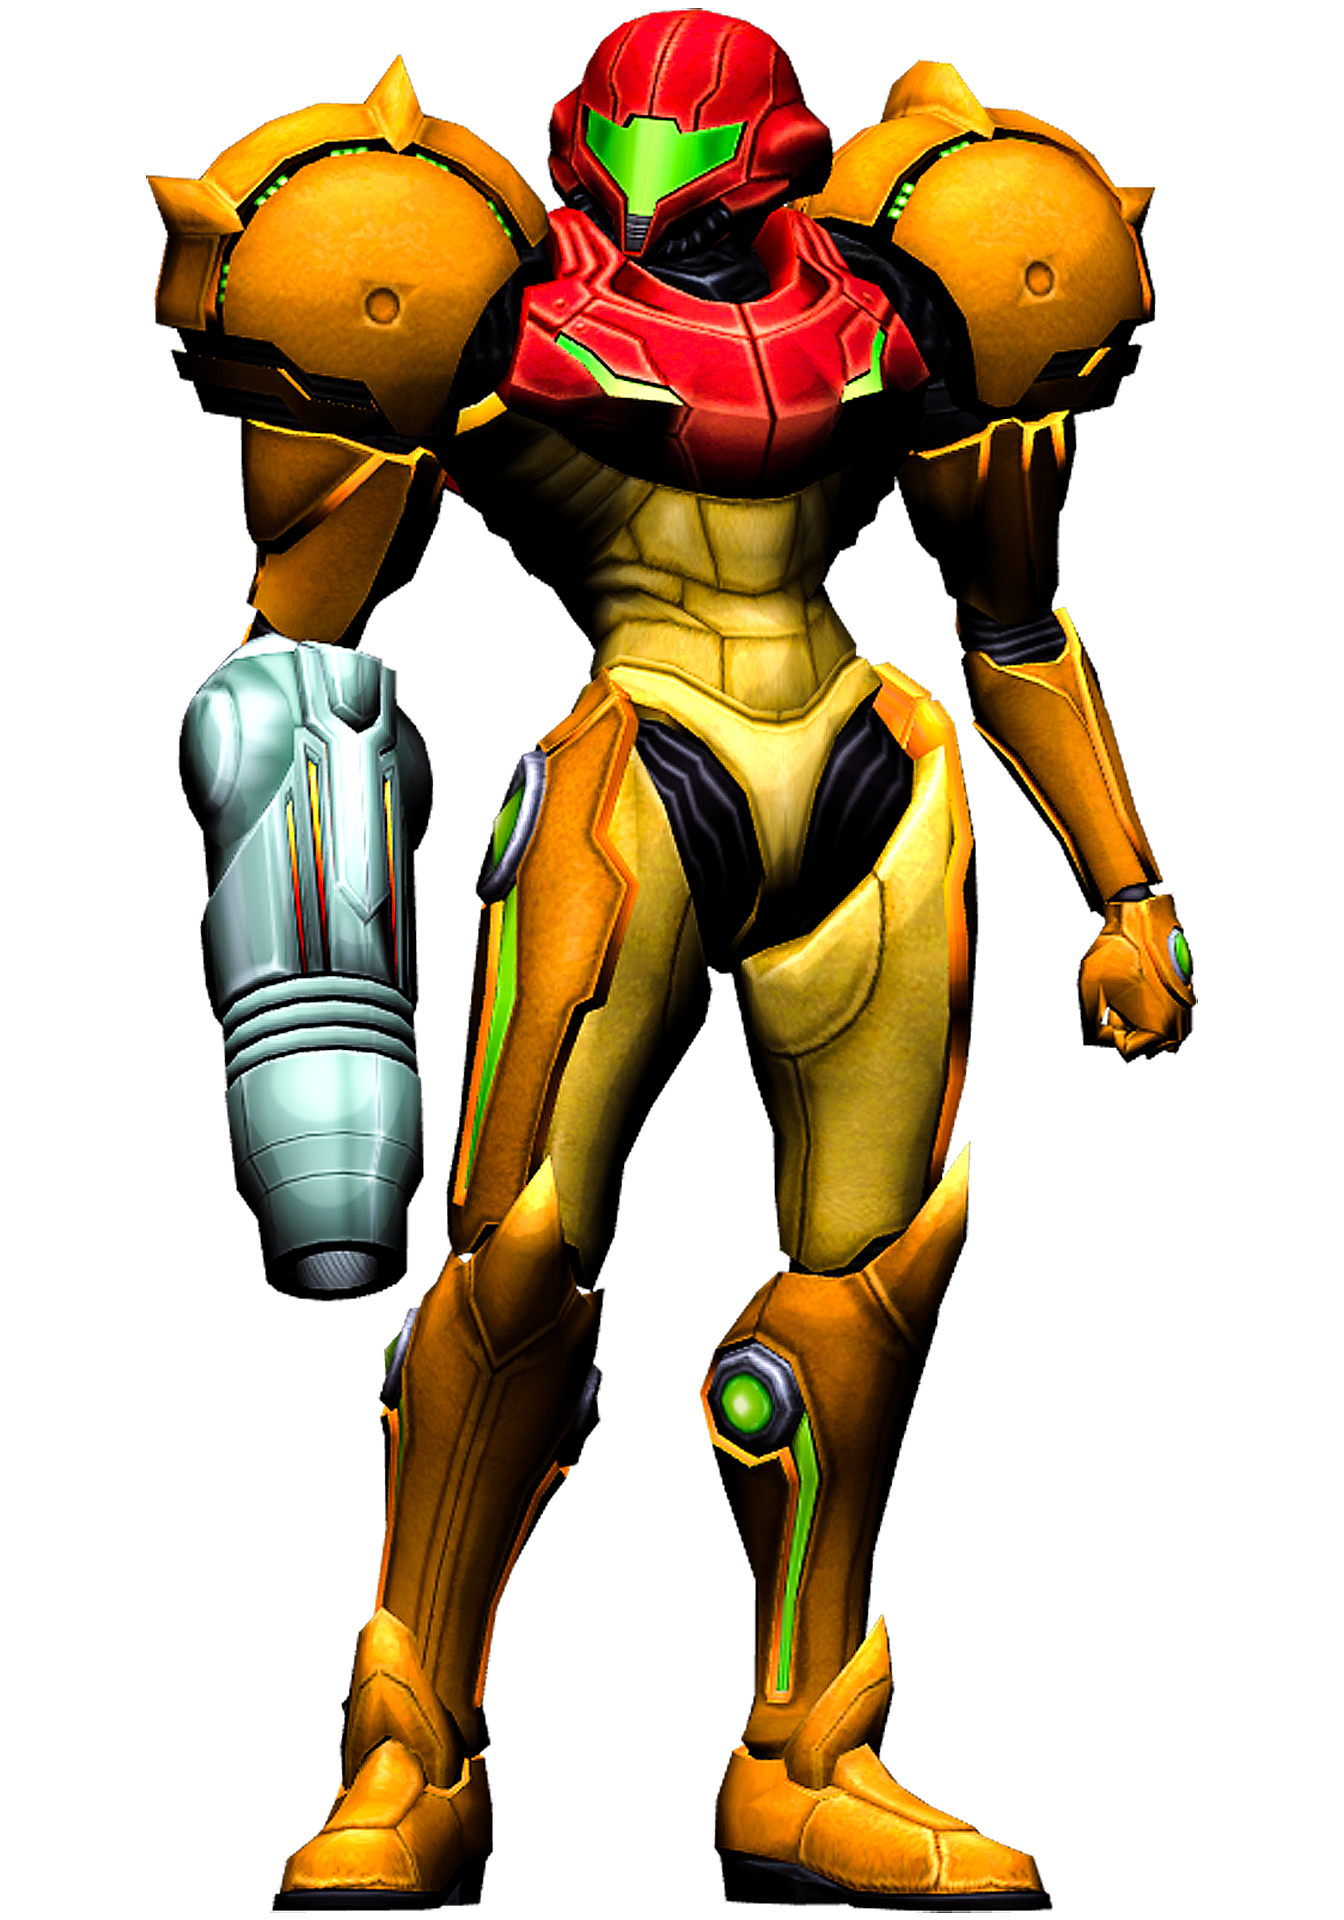
This is Samus Aran from Nintendo's Metroid games. Not only is she completely decked in bright colors from head to toe, she's almost never shown with even the slightest scratch on her armor.
That'll do.
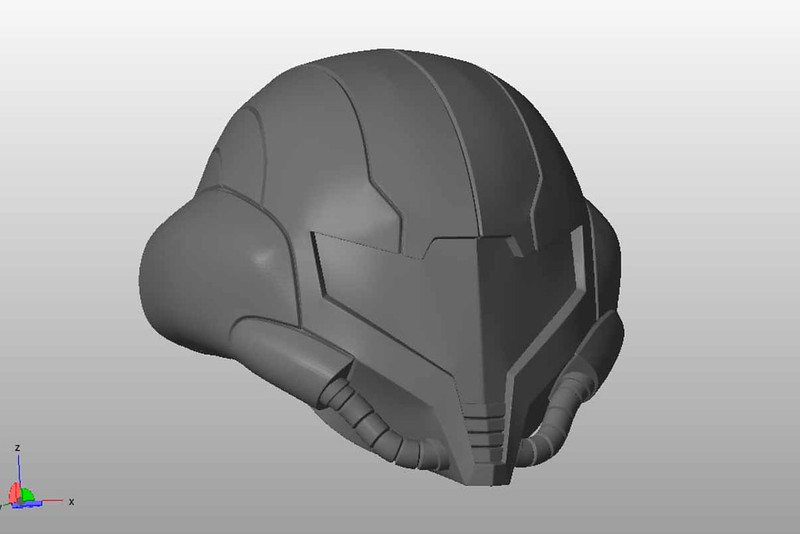
Since I was taking this project on a whim, I figured just making the helmet would be enough to satisfy this weird new desire to make something shiny. I started by contacting my friends at Do3D.com to get a hold of their printable Samus helmet.
They really do great work:
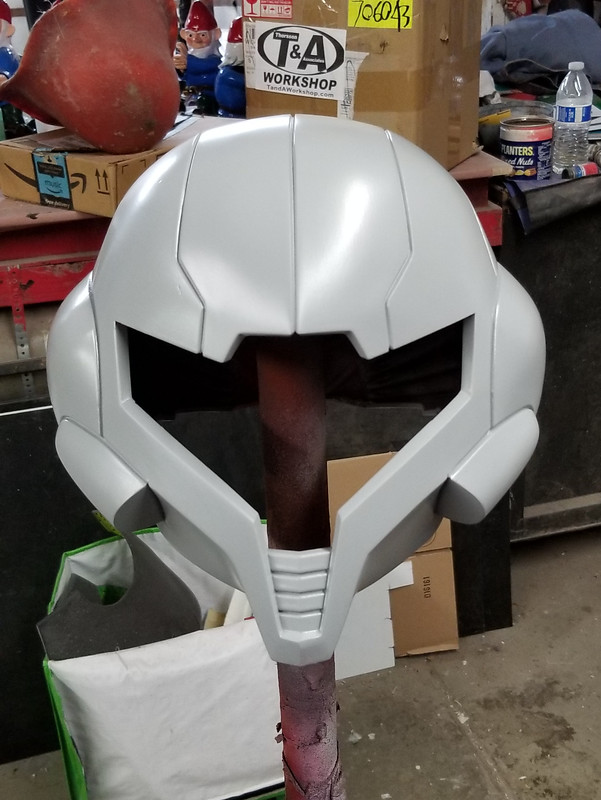
So I split up the model into smaller pieces that I could print with leftover bits of filament on the ends of all of my nearly empty spools. After a couple of days, it looked about like so:
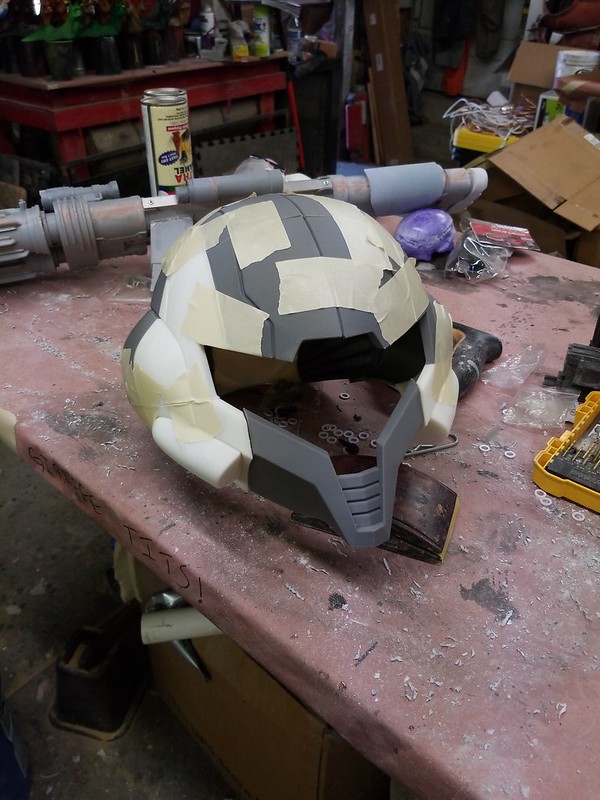
With the parts lightly sanded and glued together, all that was left was a bit of filler work on some of the areas where I messed up the alignment a bit:
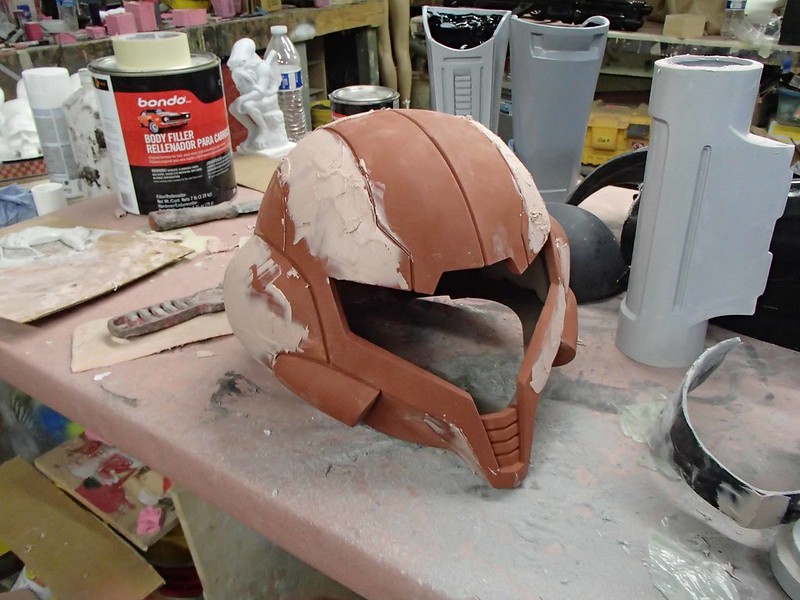
The final coat of primer let me know I had everything smooth and proper:
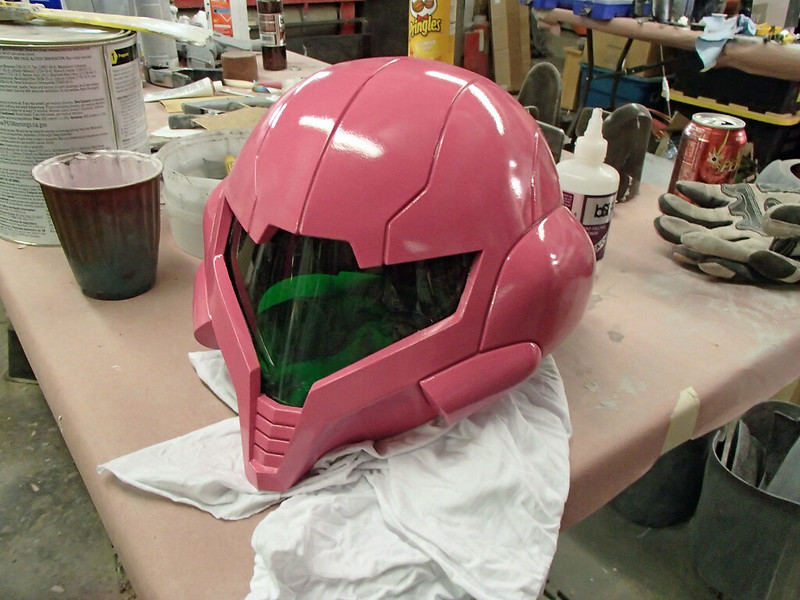
Then everything got a nice glossy coat of my standard lightish-red prototype color. Here's Doctor Girlfriend trying it on for size:

Perfection!
The last step was to heat form a piece of acrylic for the faceshield:
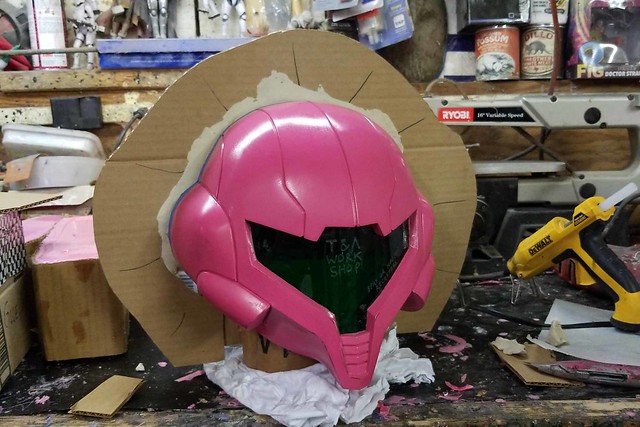
Of course, at this point, the color didn't matter. It was more important to get the shape right. With that in mind, we just used a scrap of whatever was laying around.
That done, the whole thing was molded. The mold itself was a two-piece rubber jacket mold with a two-piece fiberglass mothermold.
Heres the beginning of the parting wall being built up:
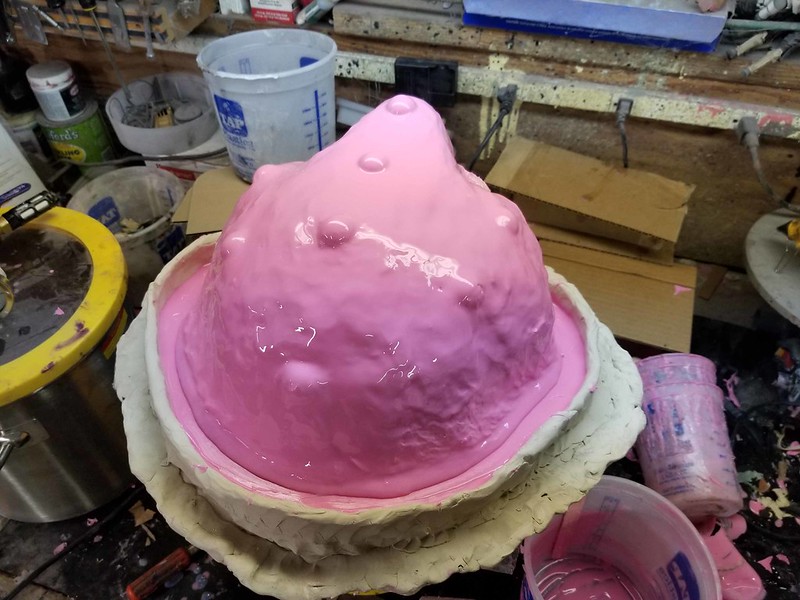
Once the clay wall was dimpled with registration keys, a drip lip was built up around the edge and the silicone print coat was poured on:
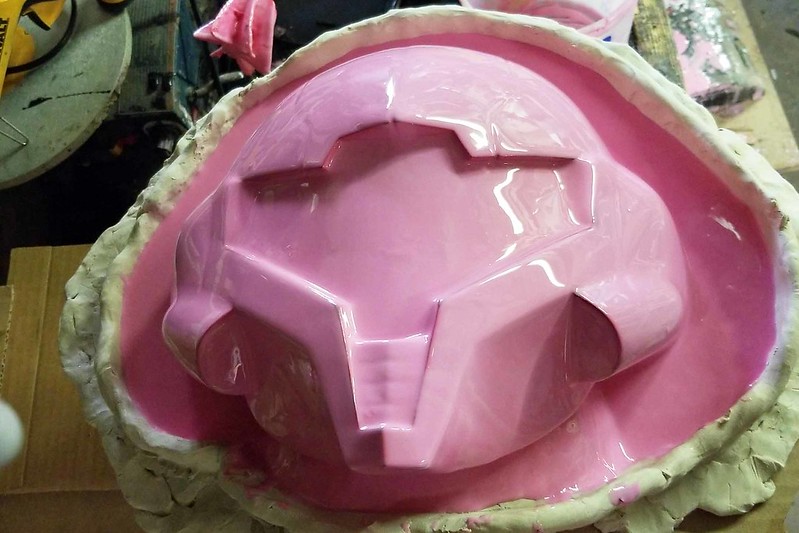
After building up a few layers of thickened silicone, I had about half an inch of rubber over the front half of the helmet. This was covered with registration keys and another thin layer of silicone to smooth it out:
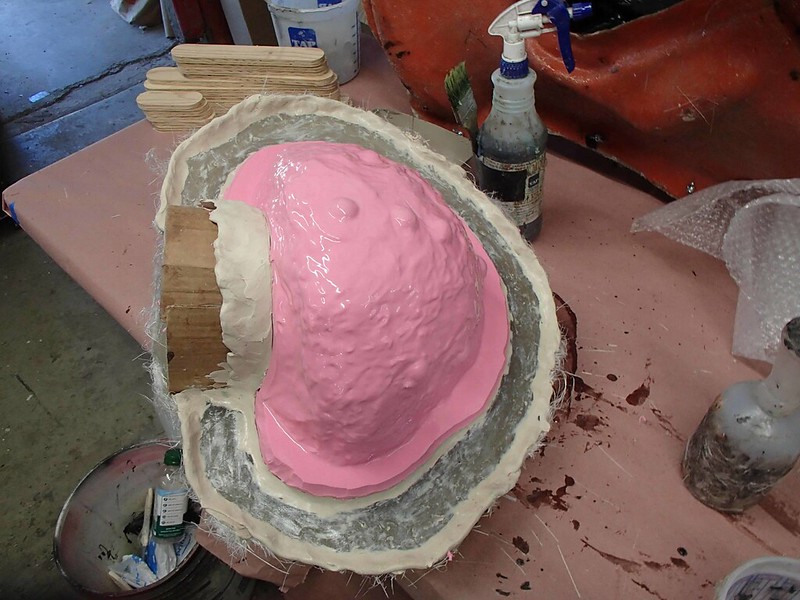
That cured and I laid up the first half of the fiberglass mothermold. Then I flipped it over, removed the clay wall, and molded the second half. Here it is somewhere in the middle of the process right before the second half of the mothermold was made:
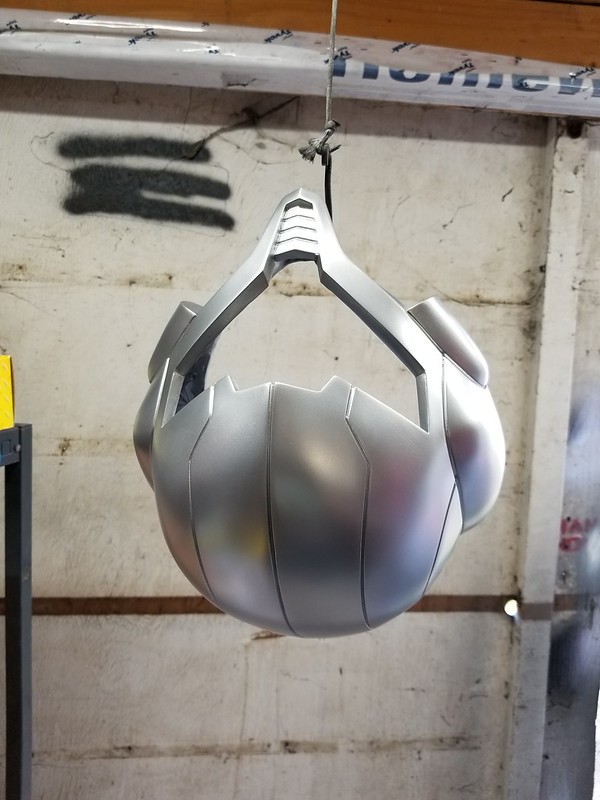
This is the complete mold ready for rotocasting:
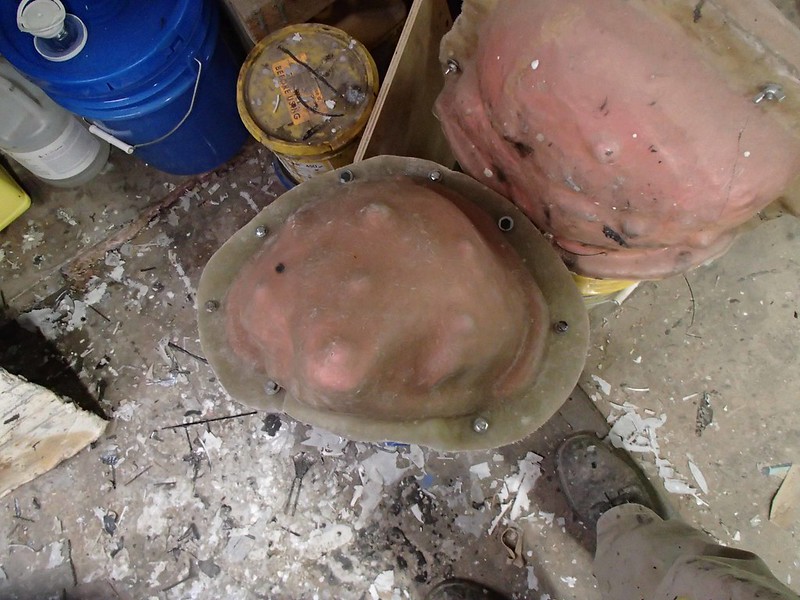
It's also conveniently sized to fit nicely on top of a 5-gallon bucket:
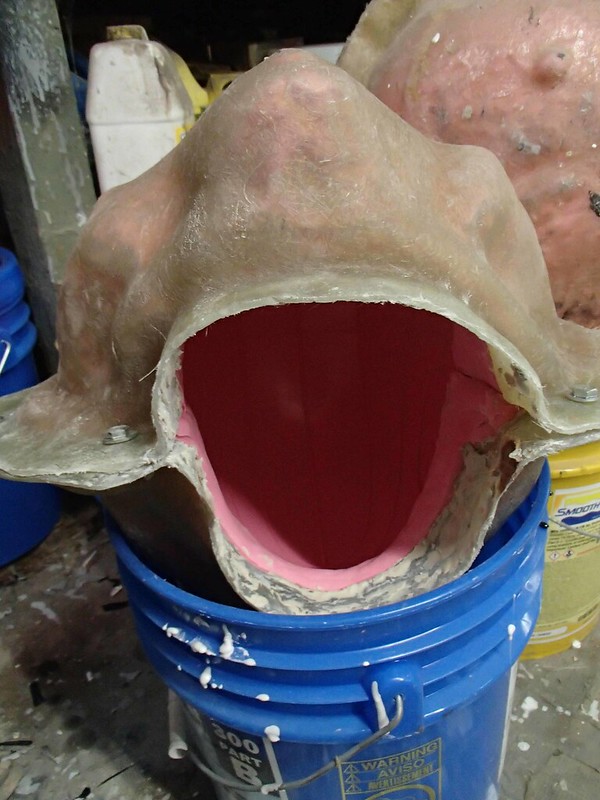
The main body of the helmet was rotocast in four layers of urethane casting resin. The third layer had a small amount of microballoon filler mixed in to give it more body. This makes the shell a bit thicker without adding any significant weight. The final, innermost layer was made with Smooth-Cast Onyx to make the finished product less likely to warp if it gets too warm. With a bit of trimming around the neck and face holes, the first two kits looked pretty good:
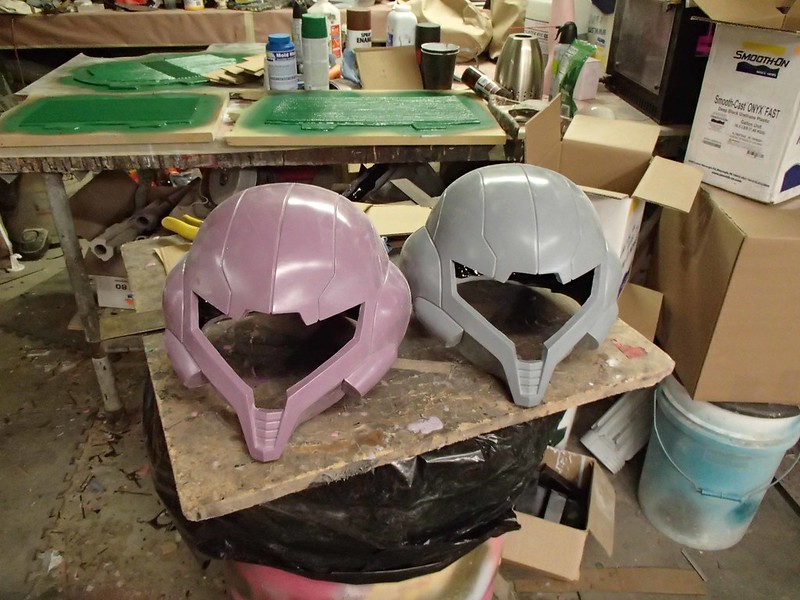
Because I'm impatient, I decided it was a good idea to do a quick and dirty rattlecan paint job on one of the first two kits. Here it is with a fluorescent green tinted acrylic faceshield:
Not too shabby:
Then I decided it'd be better to do more:

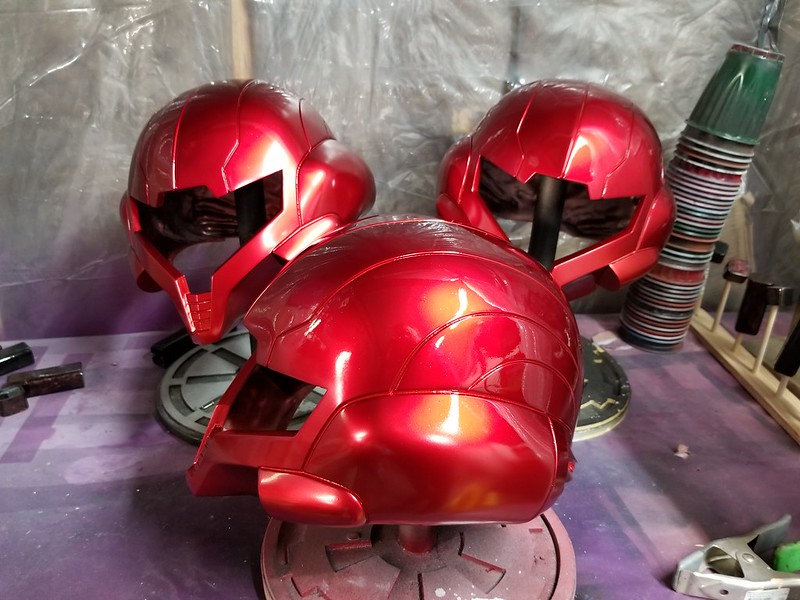
I set up four helmets for paint. This way I'd have some to mess around with in case there were any issues with the finish. Each one started with black primer, then a plain silver basecoat:
The silver was Ford's "classic silver" if memory serves.
Once the silver basecoats had dried, they each got four coats of "Wild Cherry Red" candycoat from House of Kolor:
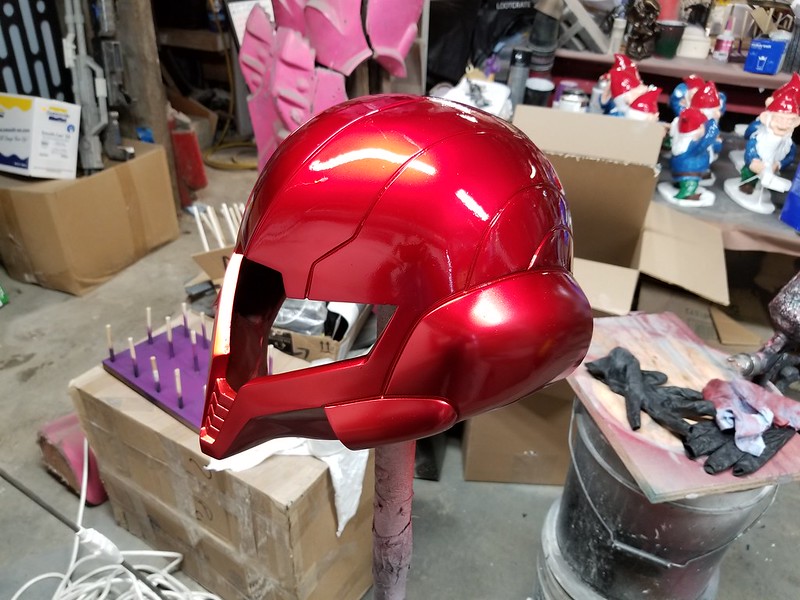
Shiny!
Candy coats can be kind of a nightmare to work with. They're usually applied over a metallic to create a finish system that exhibits a deep, colored sparkle that can't really be matched with typical automotive paints. Then they get a clearcoat to maximize shine and protect them from the elements. This is what makes them part of a “three stage” or “tricoat” system. You can also add other effects to the candy "intercoat," the second stage of the finish system to give them even more shimmery or pearlescent qualities. For now, I was just experimenting with getting the candy color laid down in a uniform thickness to make the color and depth as consistent as possible.
I'd like to say that I nailed it on the first try, but in truth it took me a couple of rounds before I was completely satisfied with the finish. These things have a way of highlighting even the slightest flaw in the prep work, so if there's even a tiny scratch or faint sanding swirl, it positively glows in the dark once you lay down a candy coat on top of it.
Case in point, this cast of the helmet looks pretty good:

Then when you look closer, you can see a couple of specks of something that were embedded in the candycoat:

But after of wet-sanding and repainting a few times, I finally had a few candycoated helmets that didn't make me want to scream. This one wasn't one of them:

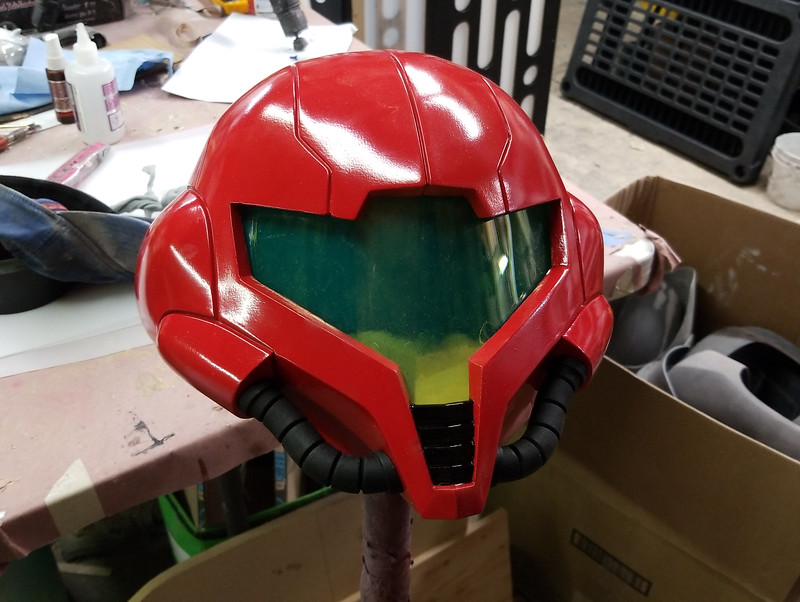
Once the clearcoat was sprayed on, the candy really came to life:

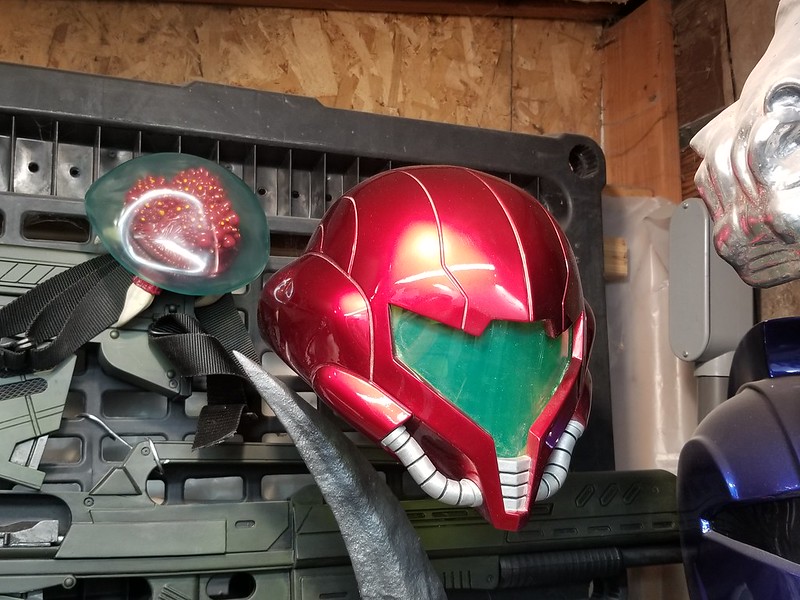
The cheek hoses were picked out in black with the raised elements hand painted with a metallic aluminum enamel:

The visor was formed out of 1/8" thick transparent fluorescent green acrylic, then glued in place. Then I installed some LEDs around the edge to light up the wearer's face inside:

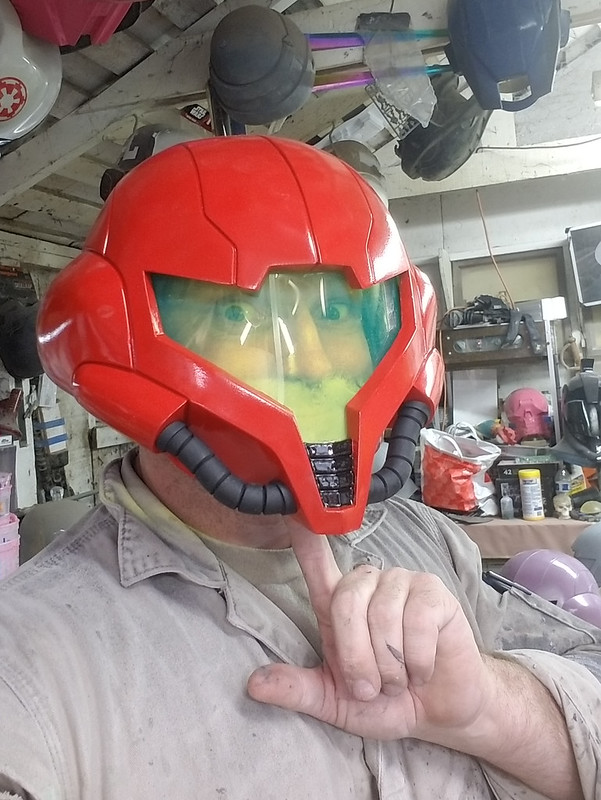
It looked a bit silly on me:

Of course, it's not supposed to look great on me. Here's the Lady Shawnon test fitting it:

Much better-looking than me:

So there it is:

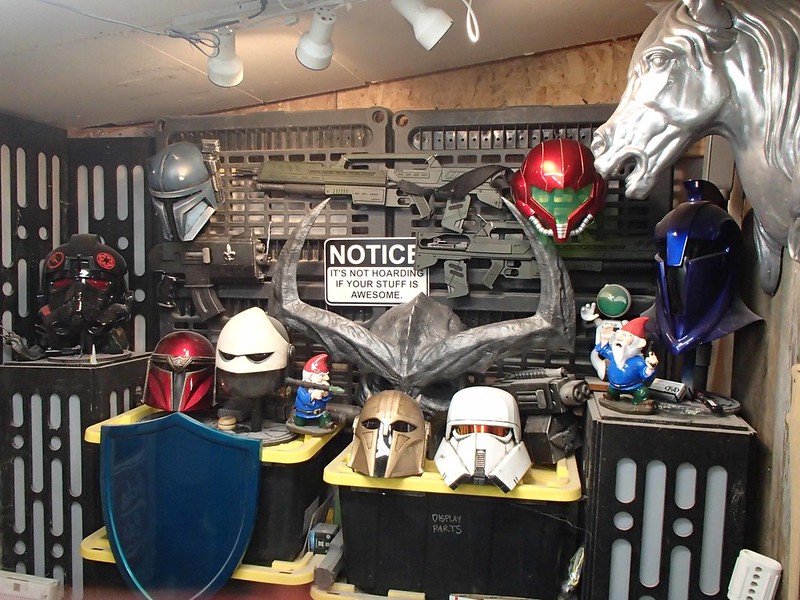
Finally here it is on display:
So shiny. So red. It has a place of honor on the recently-finished projects wall:
Now it's only a matter of time until I cave in and start building the rest of the armor.
Stay tuned...
that paint job is gorgeous. thank you for sharing!
ReplyDeleteHow do you decide on the size for a helmet?
ReplyDeleteI need to rebuild the suit I made for my wife now... but first GUNDAM!!!
ReplyDelete