
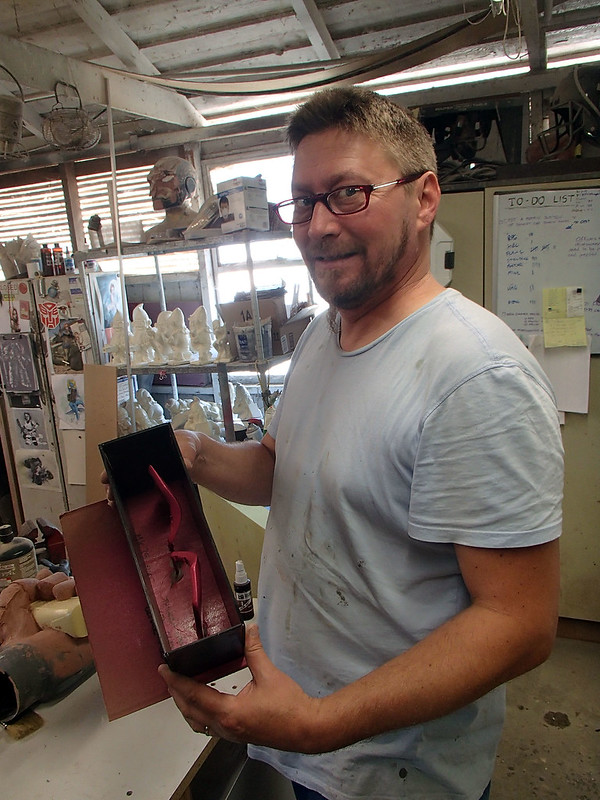
I had a few things that ended up getting in the way of the build. Some of them were better than others. One of them was this:
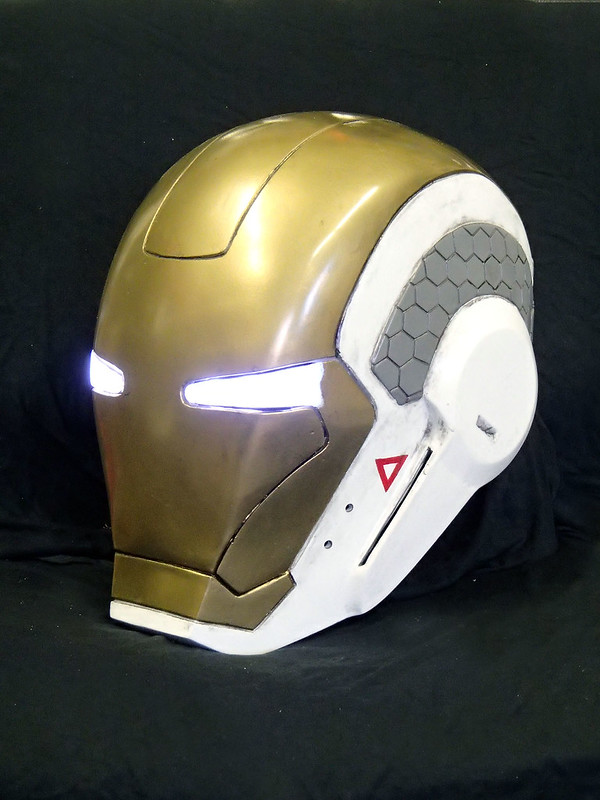
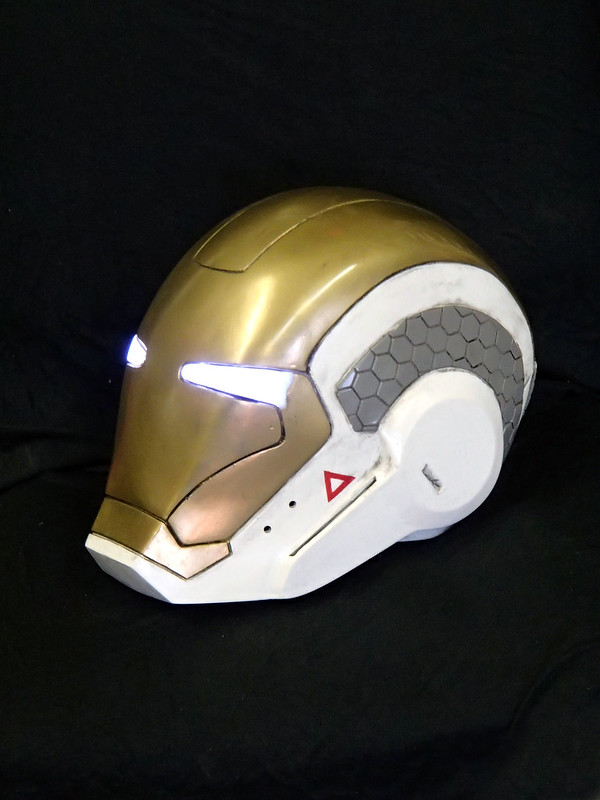
This is the Mk39 "Gemini" version of the Ironman helmet.
For details on how it was made and more photos of the finished piece, read on...
Now I wanted the MkIII suit ever since I saw the first trailer for the first movie. The look of the helmet was instantly iconic and I had to have it. When the sequel came out, I was worried that I'd end up finding something else I had to have. Happily, I got through it without a to-make list. I could be content to have my Mark III mixed in with the rest of my prop and costume collection.
Then they came out with the third Ironman movie. In that one, Mr. Stark had come up with 45 different suits if you count the different versions of War Machine.
Suddenly I had a new to-make list.
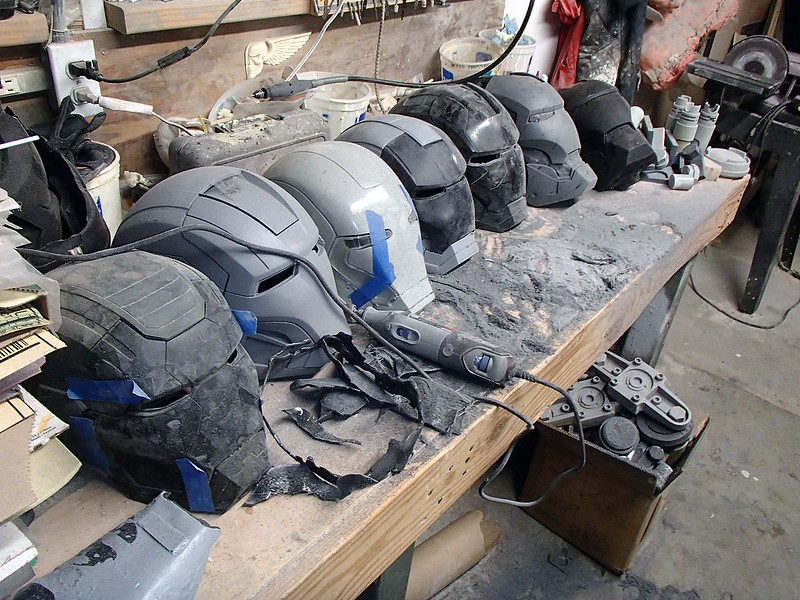
Because I apparently hate myself I decided it was time to get back on the forums and see if anyone had made the weirder ones and was willing to make trades. I don't know where I'm going to put them, but I've gotta get 'em all.
While I have managed to find other makers working on a variety of the other helmets, I haven't seen anyone offering this one in trade:

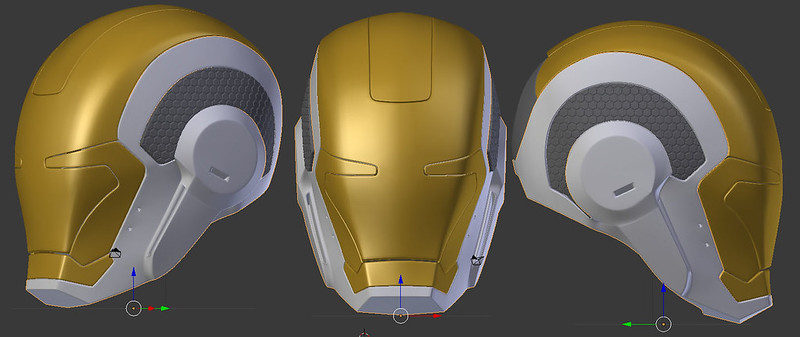
Since I didn't have a lot of free time on my hands, I elected to make this another mostly digital build. Since my 3D modelling skills aren't quite up to the task of reproducing this helmet, I scoured the internets searching for someone who'd already made a reasonably accurate model.
The best one I found was at do3d.com. It looked like so:
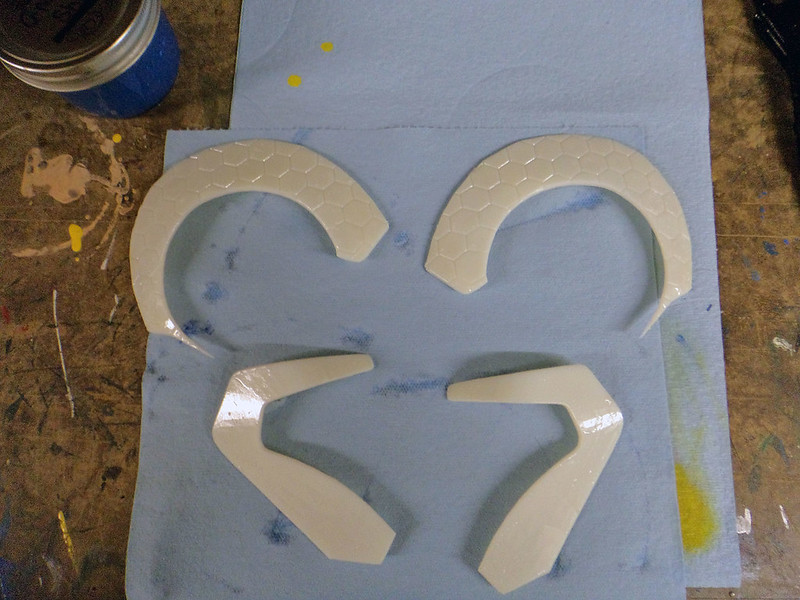
What's even better, after I'd contacted them about tweaking the model to make it ready for rapid prototyping, they were able to break it into several different pieces. For example, the eye inserts are separate pieces:

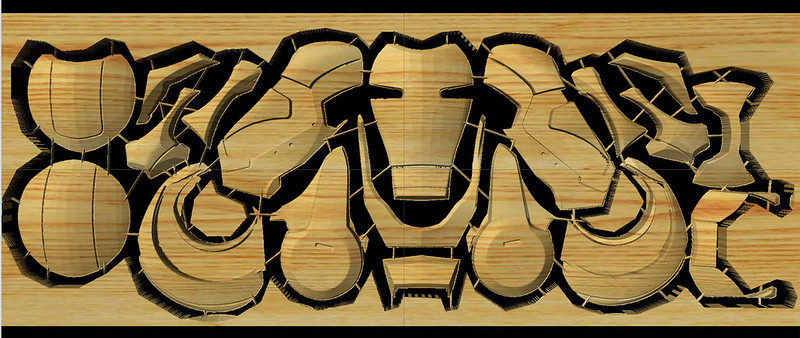
In order to avoid the astronomical costs of the resin involved in having Jarvis (my Objet30 rapid prototyping machine) just grow me the parts, I decided to slice up the model for the main portion of the helmet and feed it to Lopez the Robot Whittler, my Carvewright CNC Machine. Here's the slices of the helmet laid out in the design software:
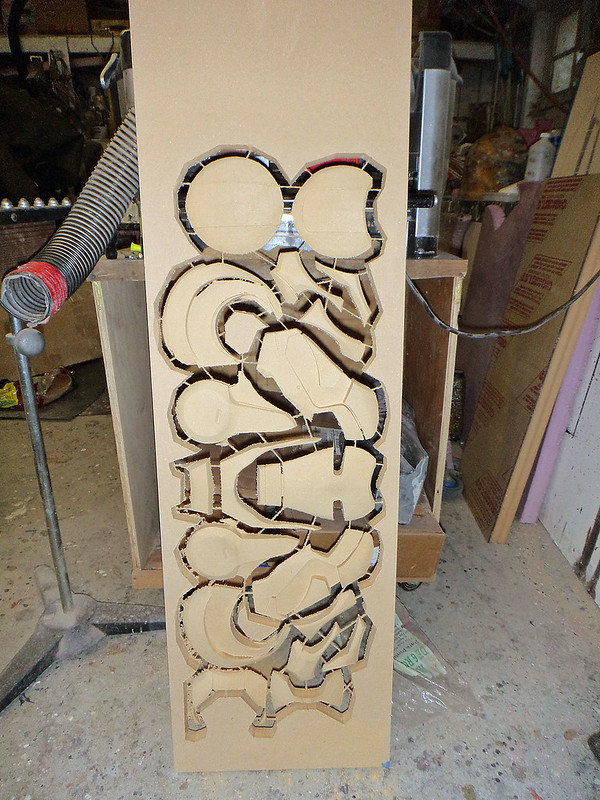
Lopez took about ten hours or so to carve the slices out of a piece of 3/4" MDF:
Once I'd snapped the pieces off of the board, it was quick work to assemble them into a helmet:

I'd made a pretty decent fit:
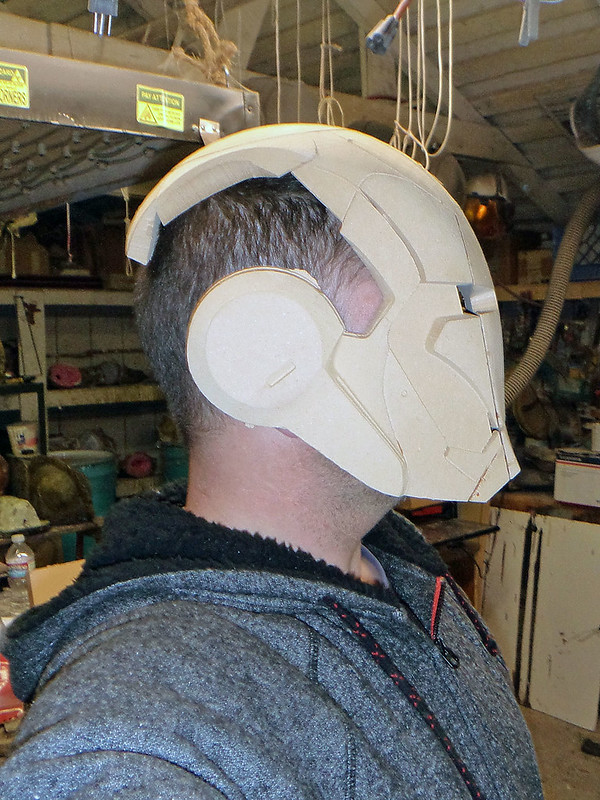
While Lopez is great at some of the big parts, for the smaller, more detailed pieces, I had to take advantage of the higher resolution that Jarvis could manage:
Here's the whole thing with the 3D printed parts fitted into place:
Once I was done putting the pieces together, the next step was to fill in all of the seams with Bondo auto body filler:
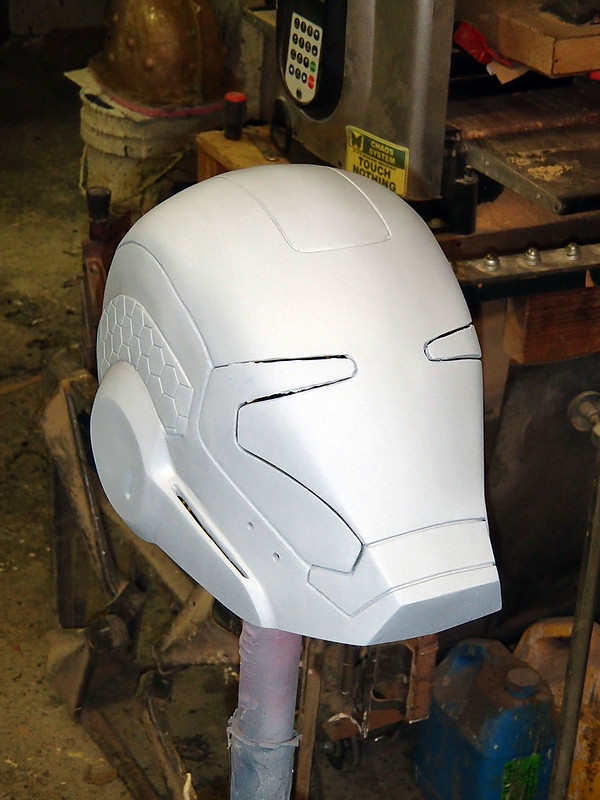
After a bit of work, I sprayed on a coat of primer to see how I was doing:

With all of my other projects in progress, this helmet spent a lot of time on the back burner. Still, every time I had a few minutes to spare, I'd sand a bit more, fill a bit more, and spray on another coat of primer:
Along the way it really started to take shape:

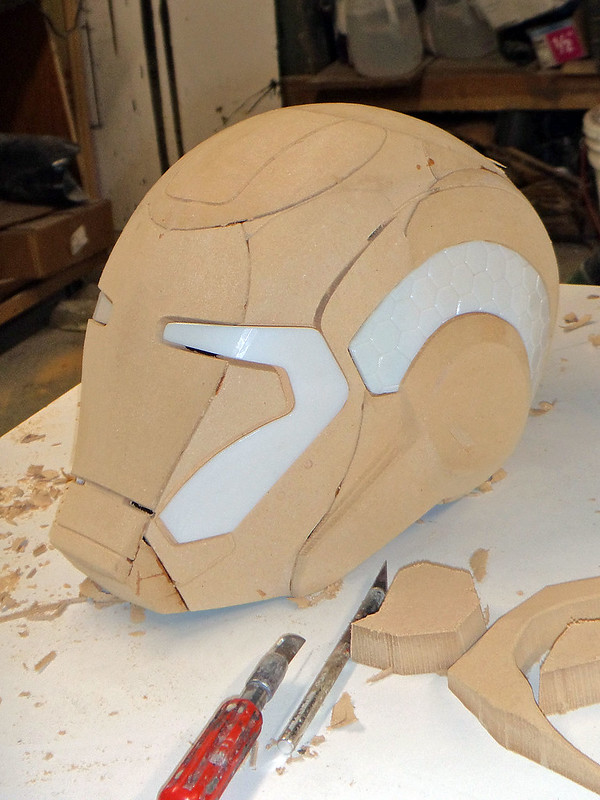
Since I wanted to cast the eye portions separately, I had to make sure they'd fit properly. Fine-tuning the gaps was a job for more Bondo:
Almost there:

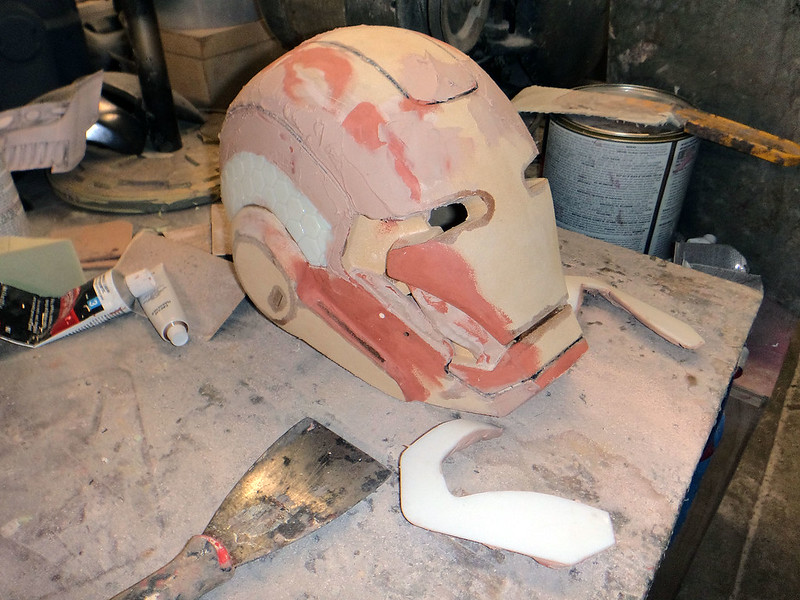
Last round of filler:
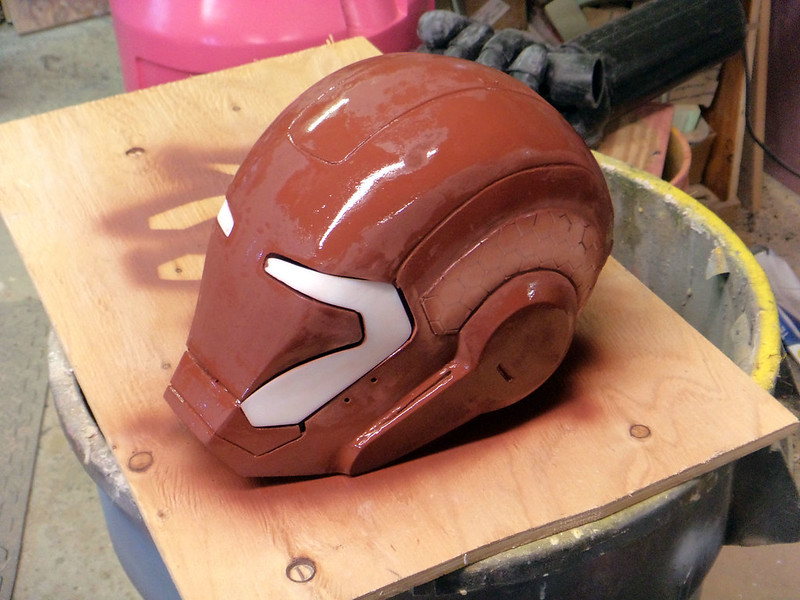
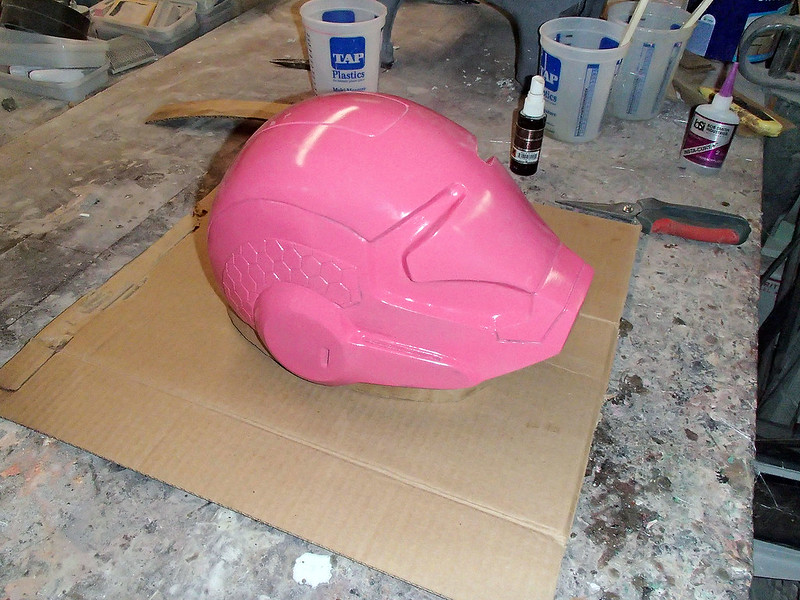
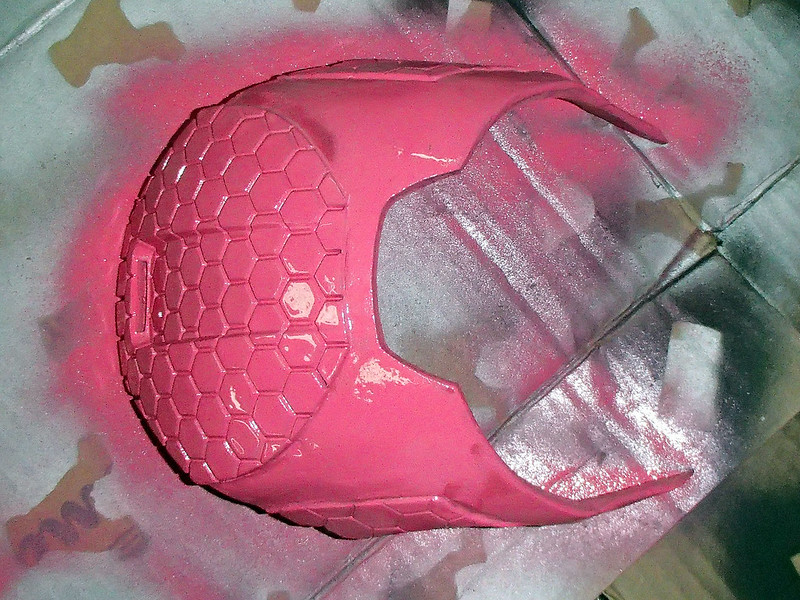
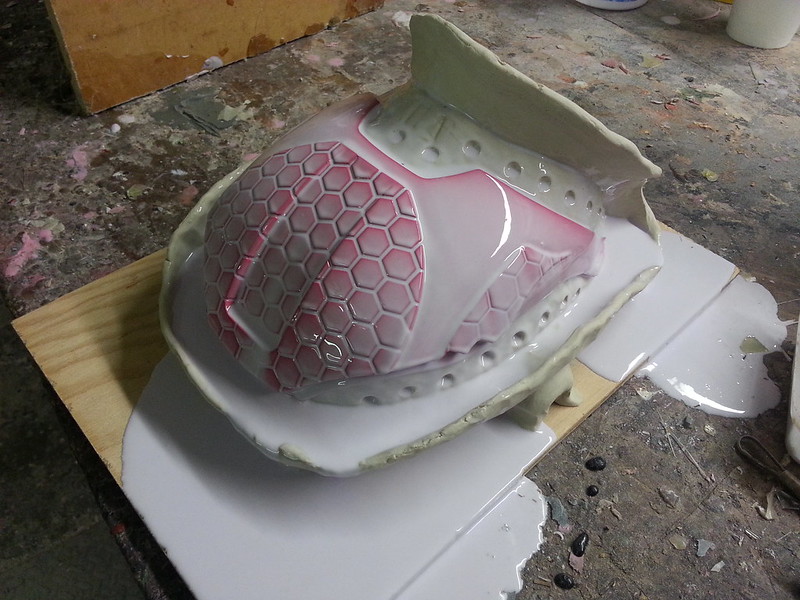
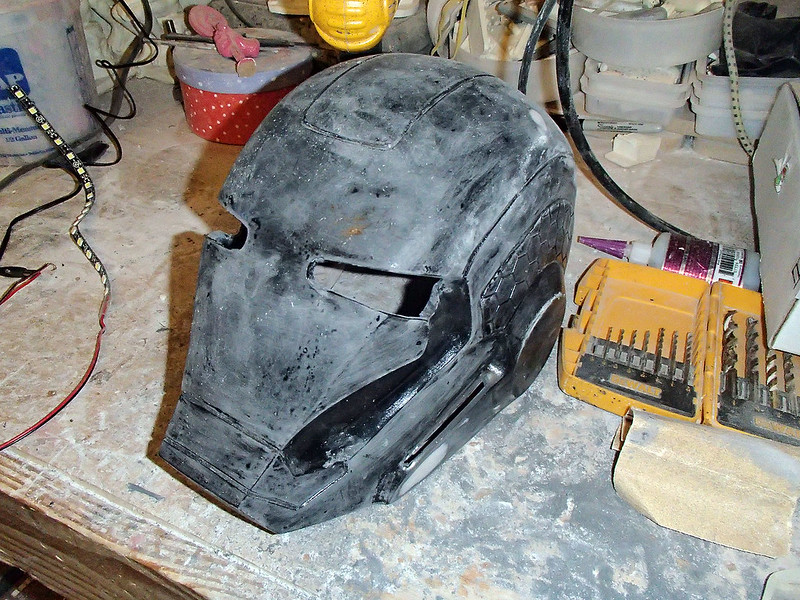
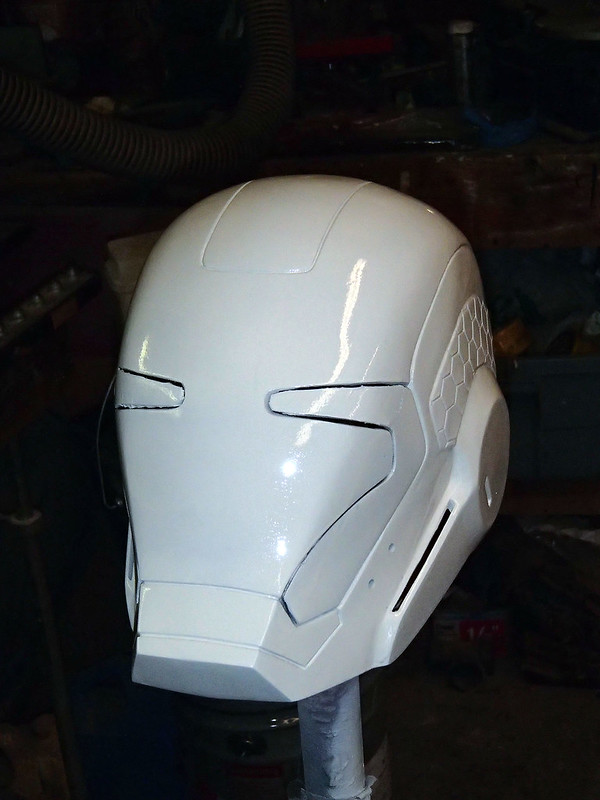
Once I was satisfied that I'd done all of the sanding and shaping I wanted, it was time for a nice, glossy coat of my standard prototype color:
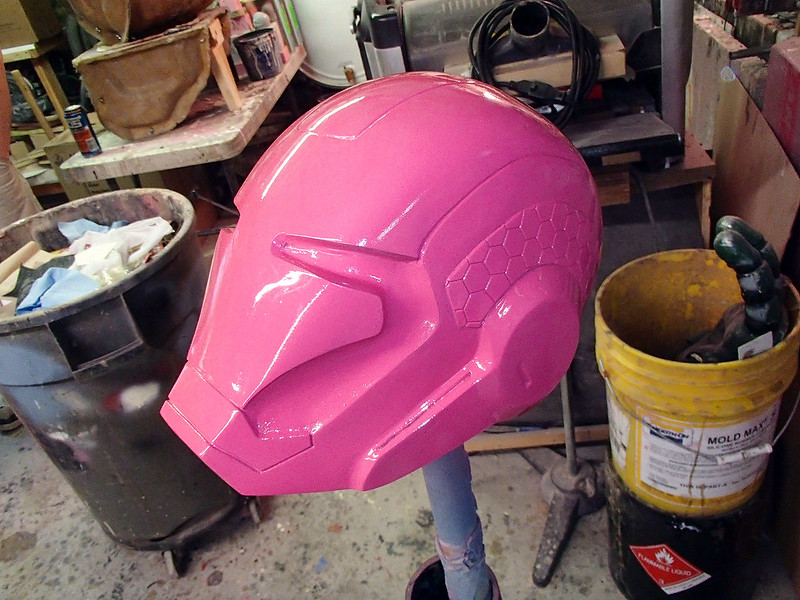
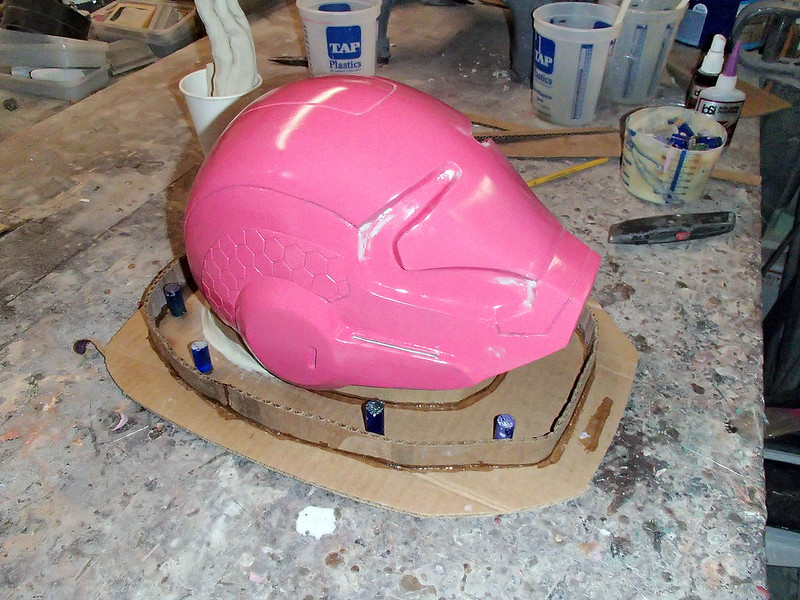
Once the paint had dried, I set it up for molding. This started by mounting it to a piece of cardboard with a bit of a standoff:
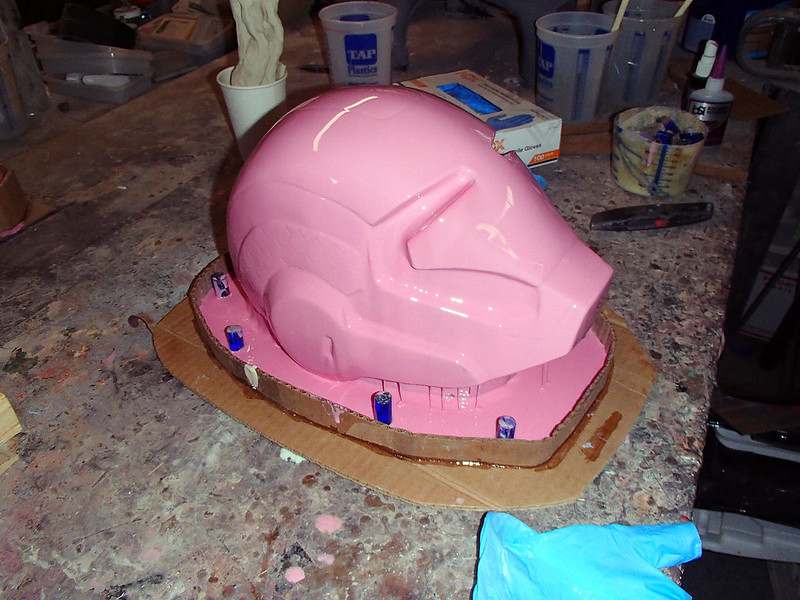
Then I built a drip tray to keep the silicone from dripping all over the bench and onto the floor:
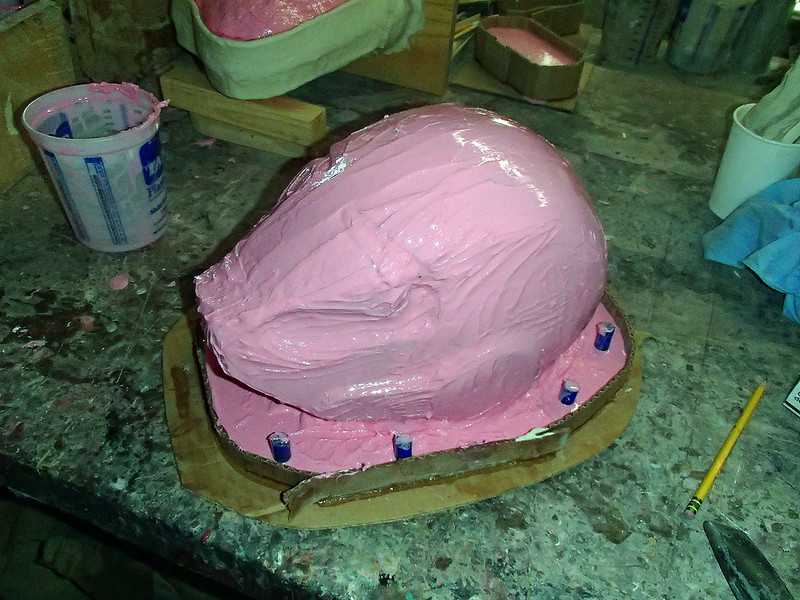
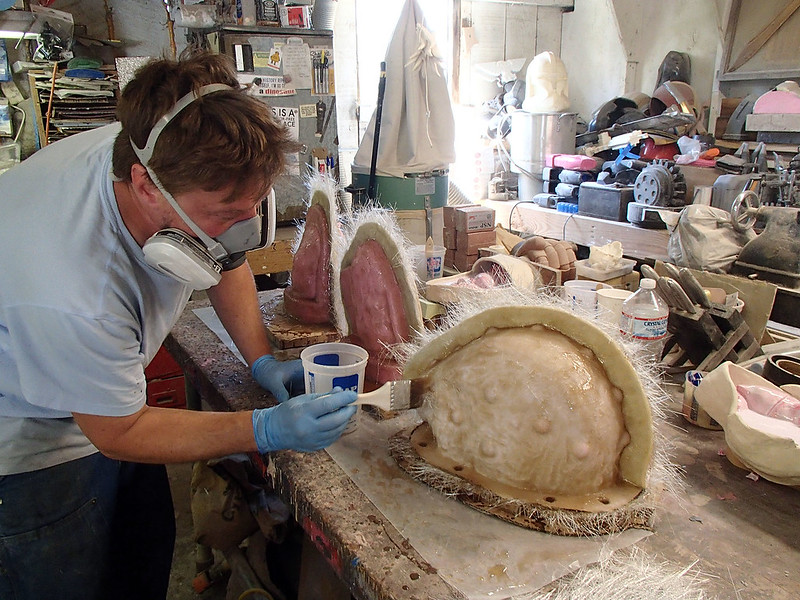
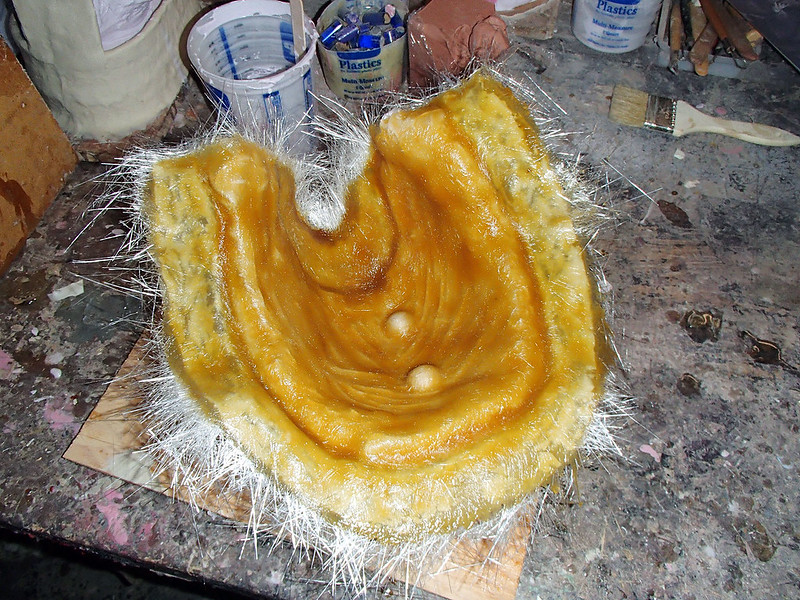
Once the drip tray was glued up and watertight, I poured on the silicone print coat:
Once it had cured I built up a few layers of silicone with a
thixotropic additive to make it more viscous while I troweled it on:
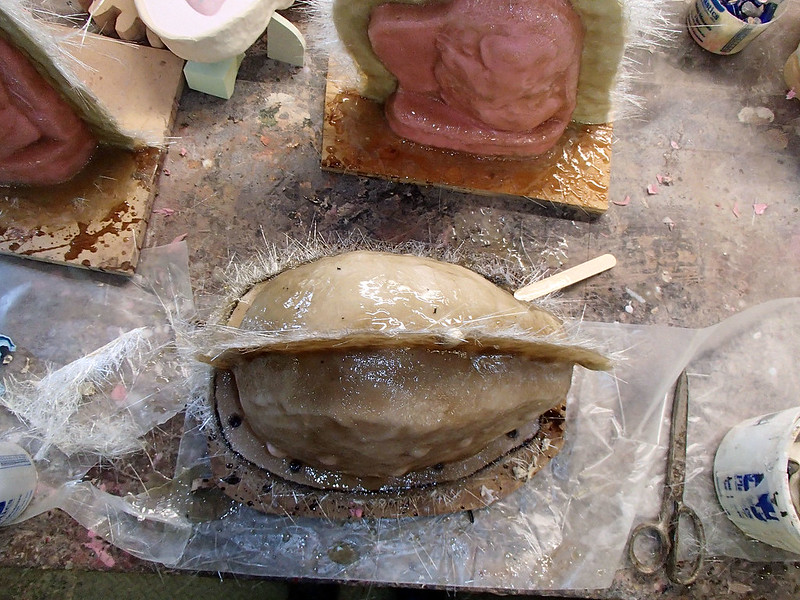
The last step in laying up the silicone jacket mold was to add some silicone blobs (molded earlier) as registration keys and pour on one more thin coat to smooth out all of the little bumps and ridges:

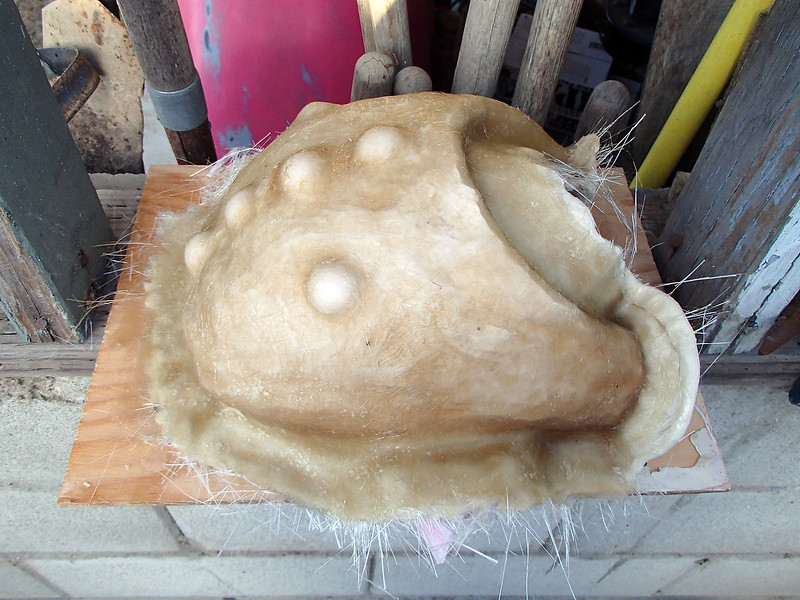
Once the rubber had cured, it was time to build up a clay parting wall and lay up the first half of the fiberglass mothermold:
When the glass had set up, the clay was removed and the second half of the fiberglass mothermold was built up:
After it had cured, the mothermold was pulled apart and the edges were trimmed:
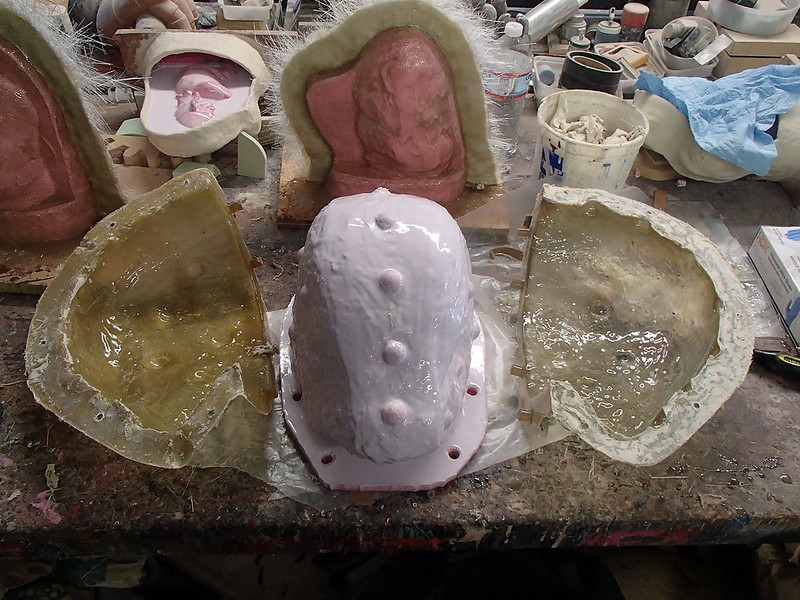
Then I used a sharp pen-knife to make a serpentine relief cut up the back side of the helmet so I could remove the rubber jacket mold:
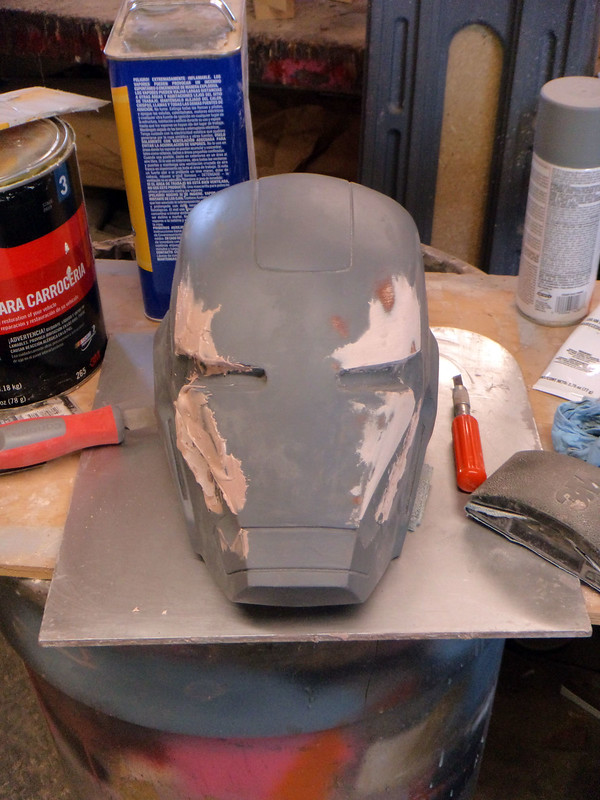
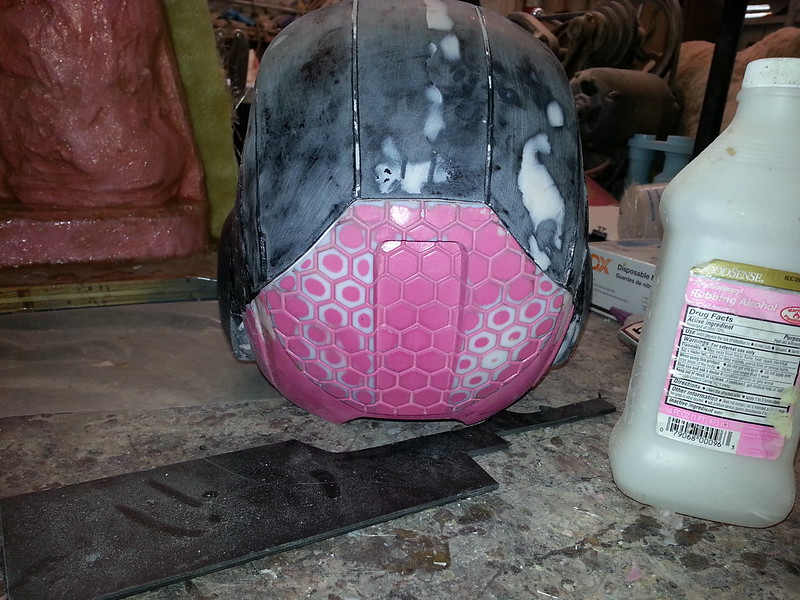
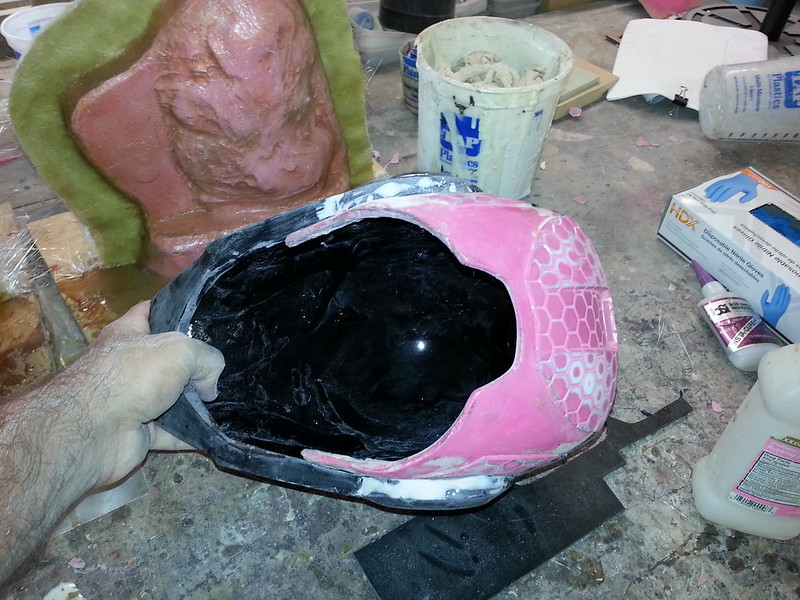
Here you can see (from left to right) the prototype, the reassembled mold, and the first rotocast copy of the helmet:
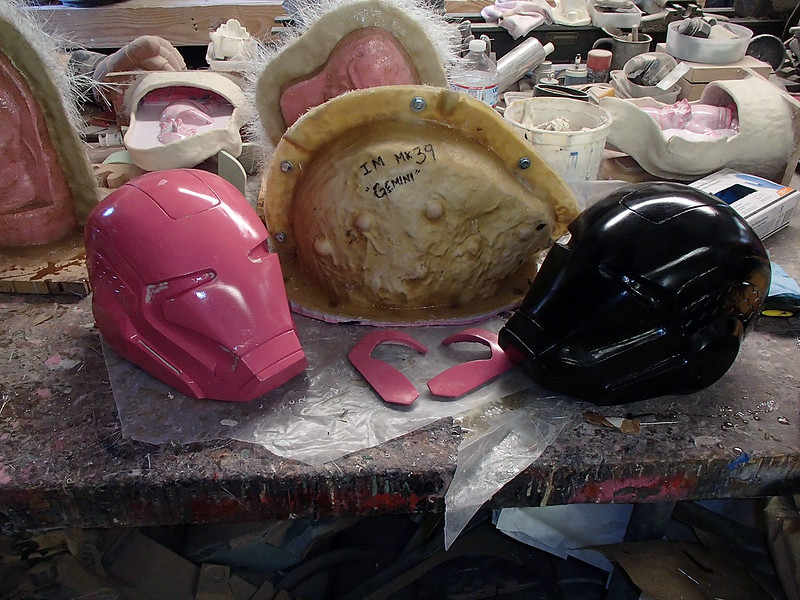
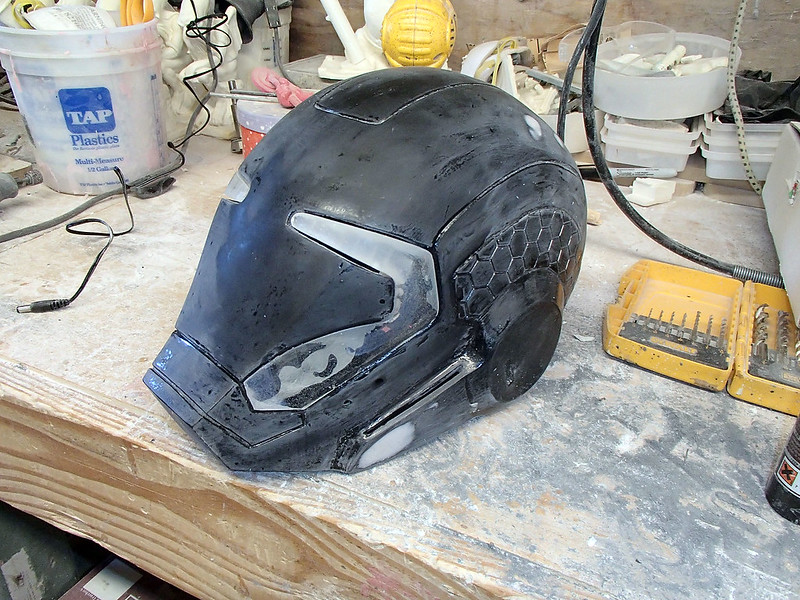
With a bit of trimming, it fit great:
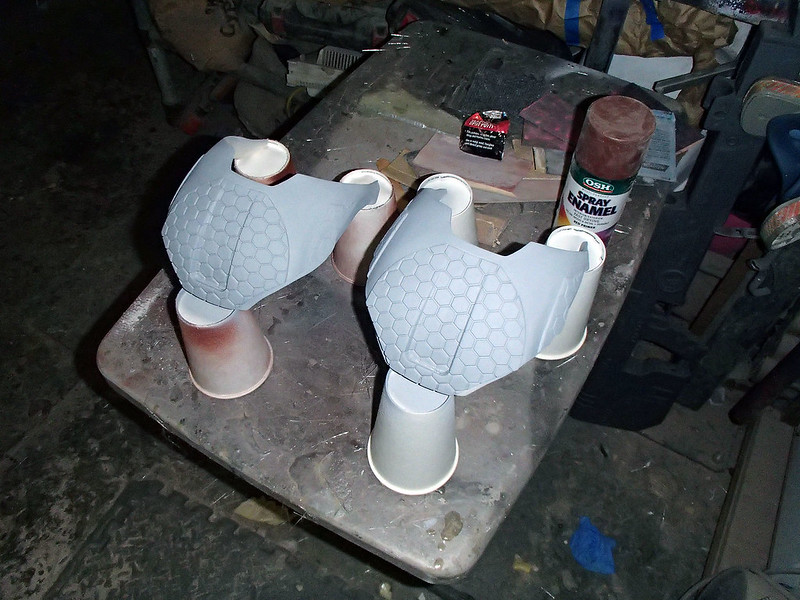
The next thing I did was clean up the 3D printed eye pieces:
Once they were all polished up, I attached them to a piece of cardboard and added sprues and vents. "Sprues" will become the funnel shapes in the silicone mold while "vents" are the little tubes that will allow air to escape and prevent me from trapping any bubbles:
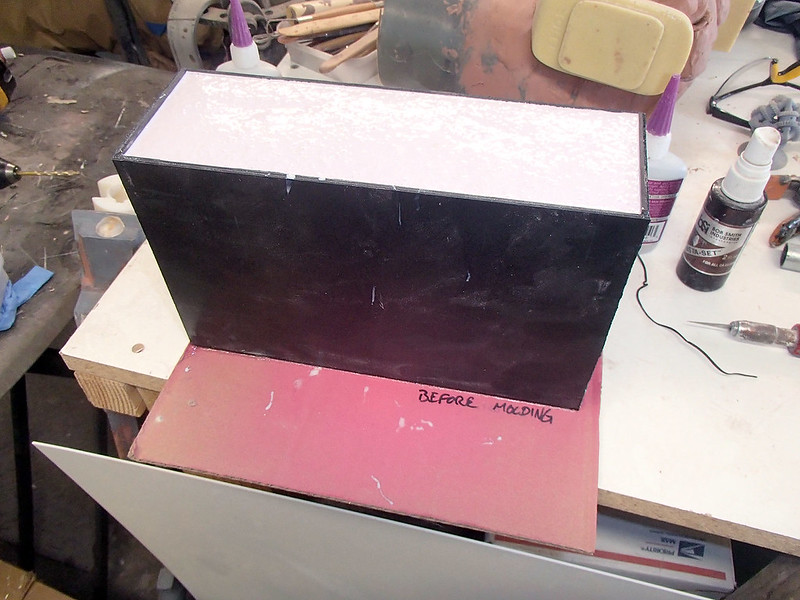
Then the whole thing was boxed up and made watertight:
The the box was filled with silicone:
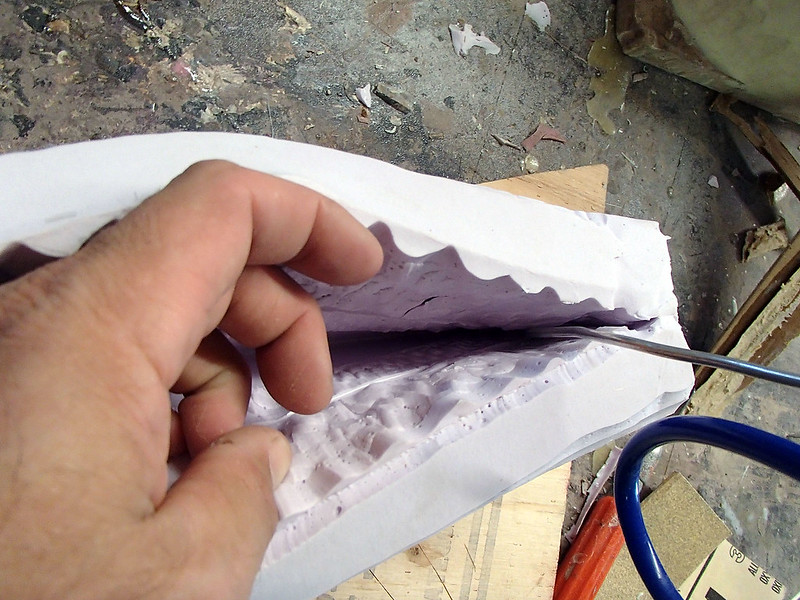
To get the prototypes out of the cured rubber, I made a simple jeweler's cut:
With the prototypes removed, I injected clear casting resin into the mold. Once it cured, I trimmed off the vents and sprues and cleaned off any excess plastic everywhere else, I went ahead and taped them in place on the helmet casting:
It's a bit tough to see how they fit in that pic, so here's a shot of the first castings fitted into the prototype:

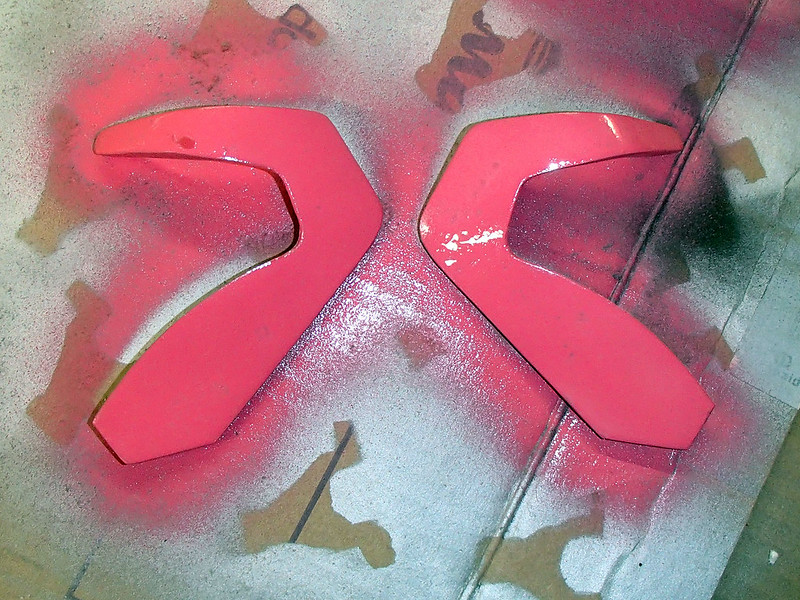
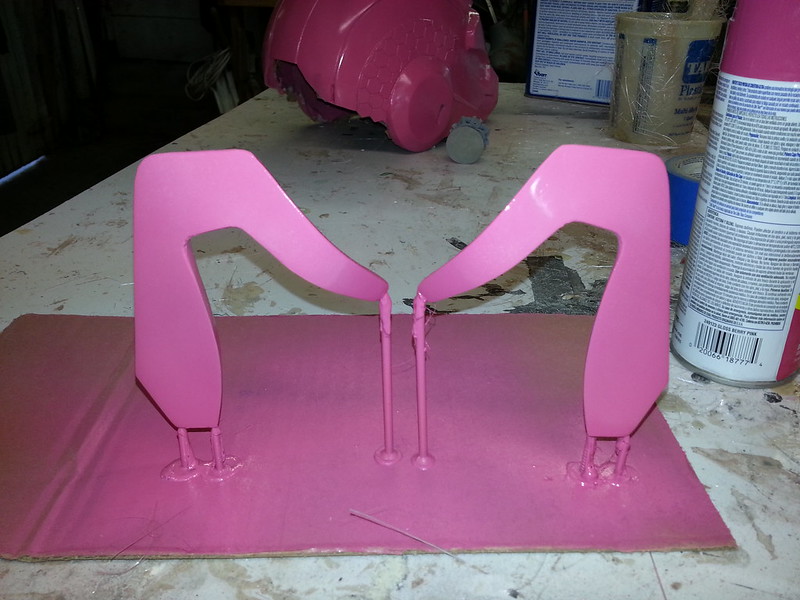
The last prototype part was the "backdoor" panel:
If I'd made the entire helmet as one piece, the neck hole would never be able to fit a person's head through it. To get around this, I made the bottom of the backside of the helmet as a separate piece that will slot into place after the wearer puts the helmet on:
By building up flanges around the edge, the whole thing would be able to snap into place and hopefully stay put without fasteners of any kind:
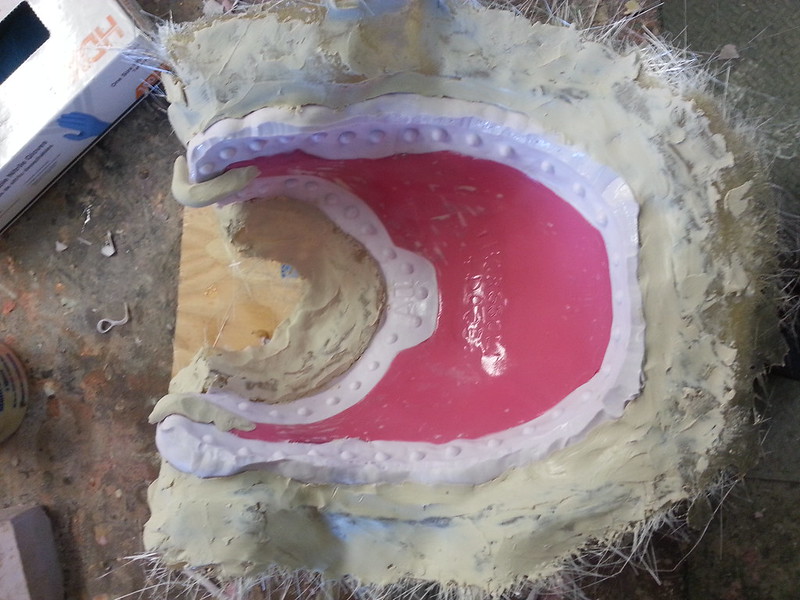
Because I didn't want to spend all day rotocasting this little backdoor panel and I wanted a consistent thickness across the width of the whole part, I built a two-part mold. This began with building up a clay wall all the way around the edges and pouring on a silicone print coat:
Just like the main body of the helmet, this mold was thickened up with more silicone:

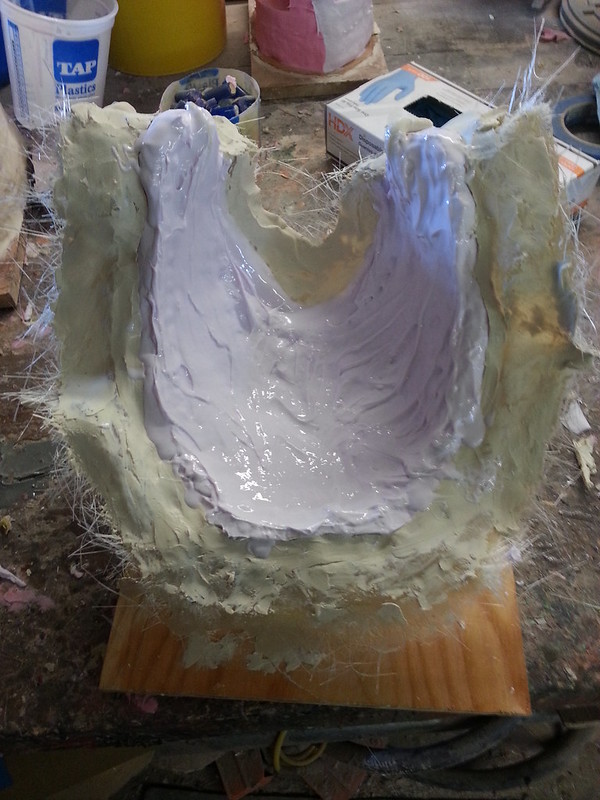
Then a fiberglass mothermold was laid up over it:
With the fiberglass cured, I flipped the whole thing over, removed the clay, and sprayed on a coat of release agent:
The release agent was to keep the silicone from bonding to the first half of the mold. Here's the thickened rubber jacket mold:
The inside was also laid up with a mothermold:
Then the edges were trimmed, the prototype was removed, and bolts were added to the flanges:
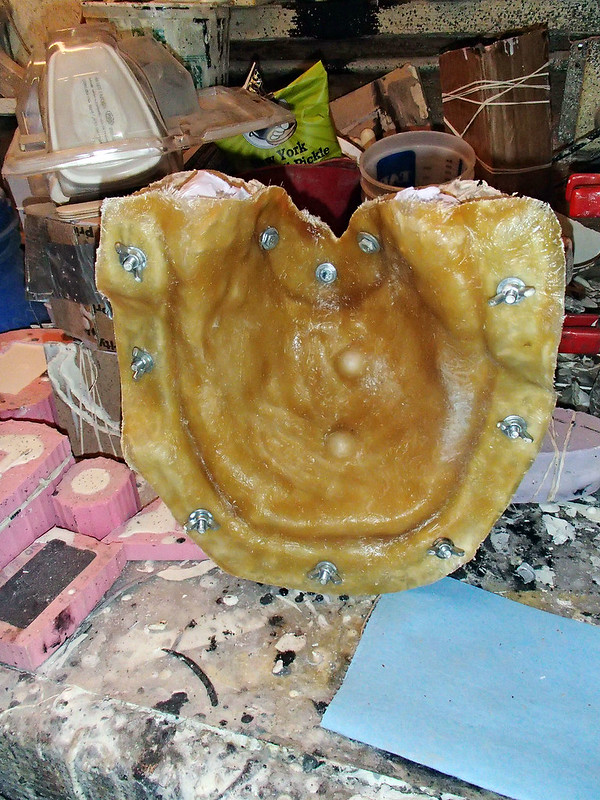
After removing the prototype, urethane resin was injected into the mold:
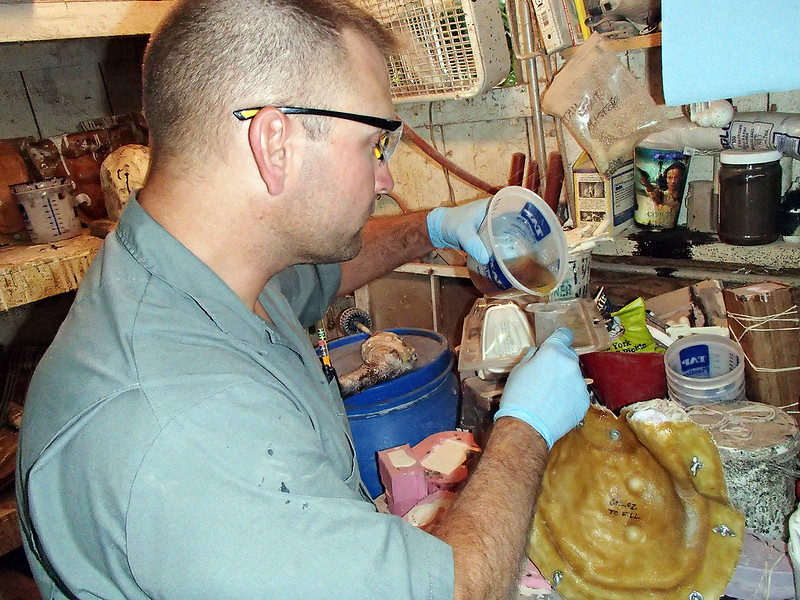
Here's the first cast once it was pulled out of the mold:
Trimmed and test fit:
Excellent!
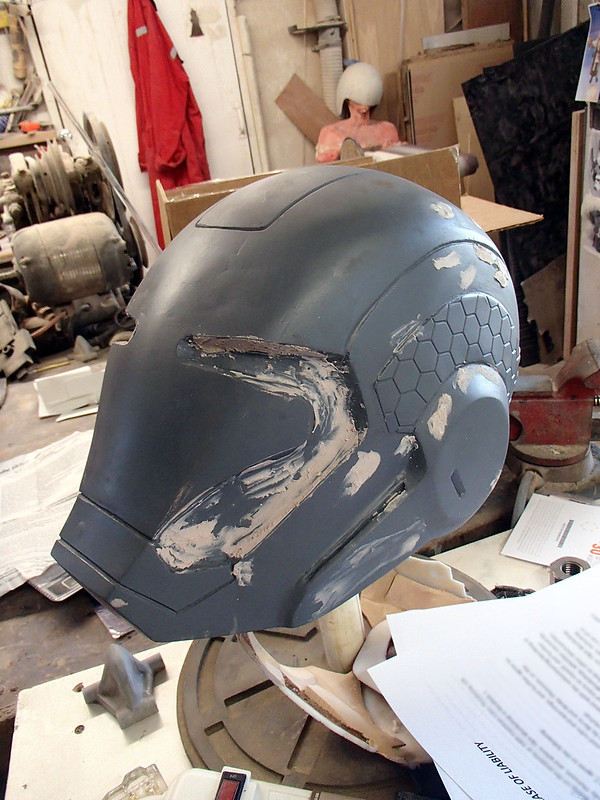
Once I had a full set of cast parts out of the molds, the next thing to do was to get all of the edges trimmed down and cut out the appropriate holes for the eyes as well as drill a pair of holes in either cheek. I also went ahead and cut out the slotted vent in either side of the face just to improve air flow for the wearer:
Once all of the trimming and cutting was done, I glued the clear cast eye inserts in place:
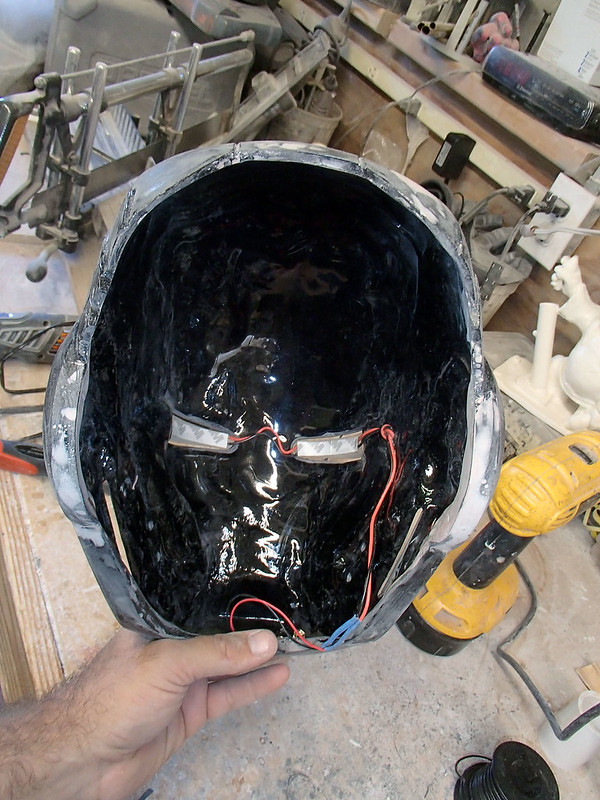
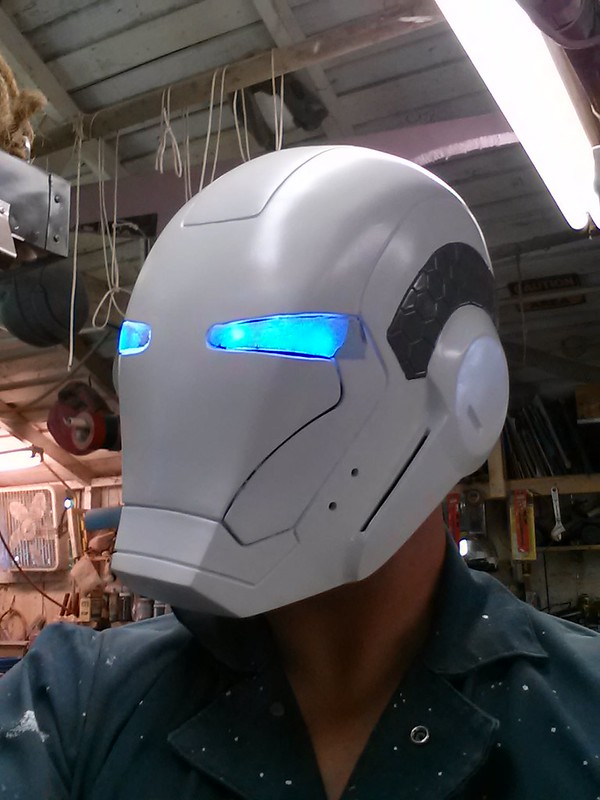
Then I installed an LED strip into either eye:
The LED strips came from superbrightLEDs.com, but you can find a similar one here: CLICK. They're set up so you can cut off pre-wired segments of 3 LEDs that already have the appropriate resistors wired in. All you have to do is apply a 9V-12V power source. Here's what the whole thing looks like from the inside:
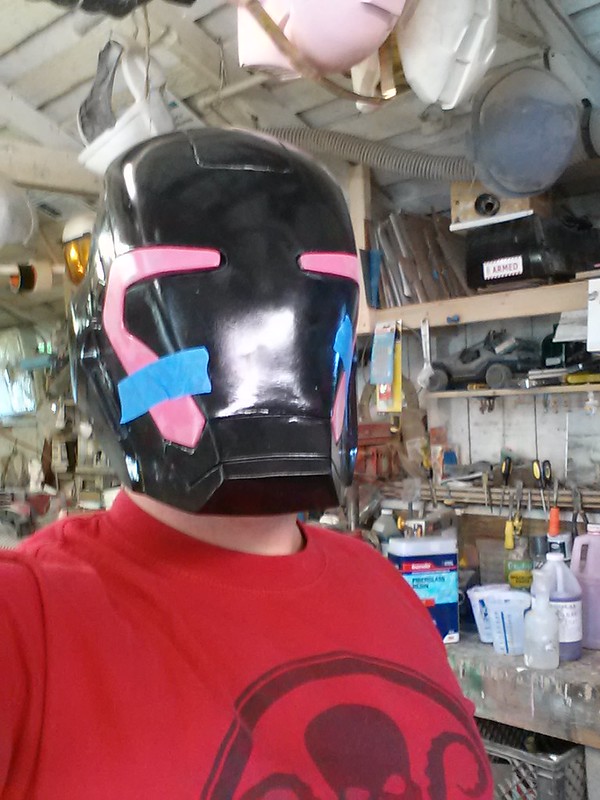
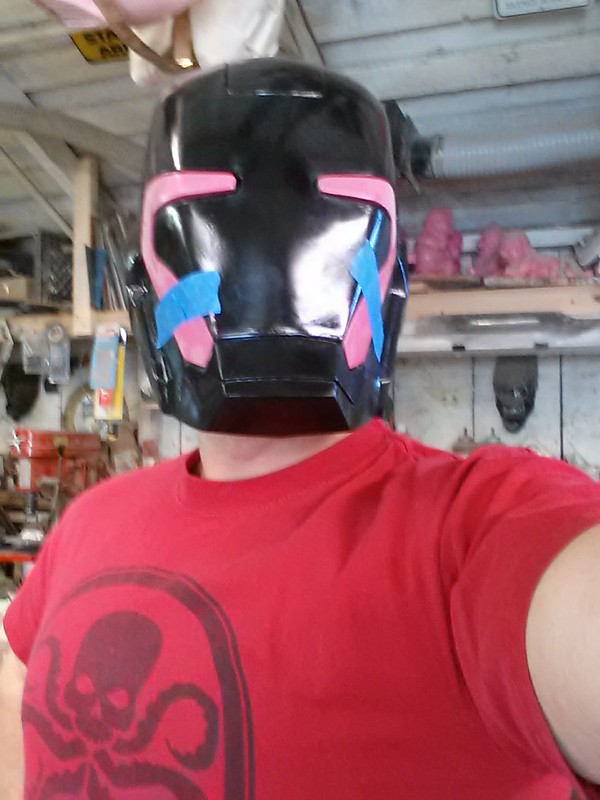
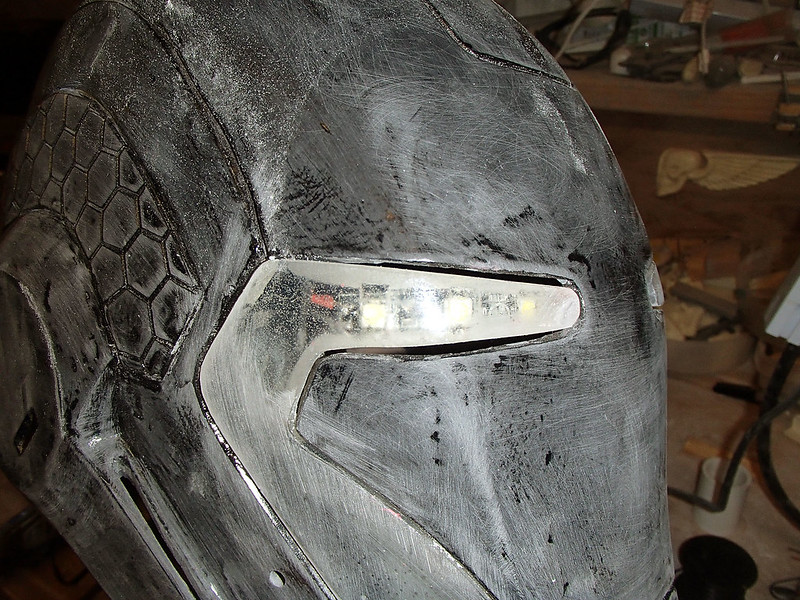
And the glimpse you can see from the outside:
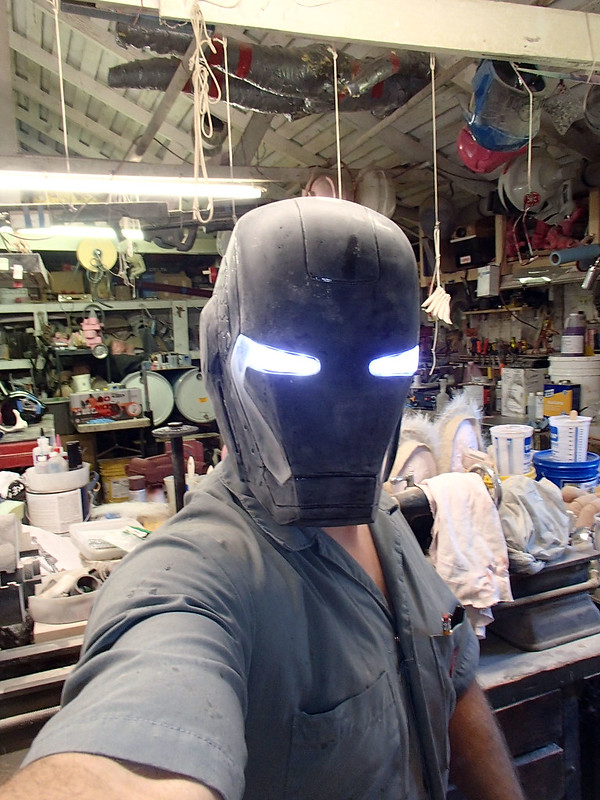
This is what it looks like when you put a huge dork inside:
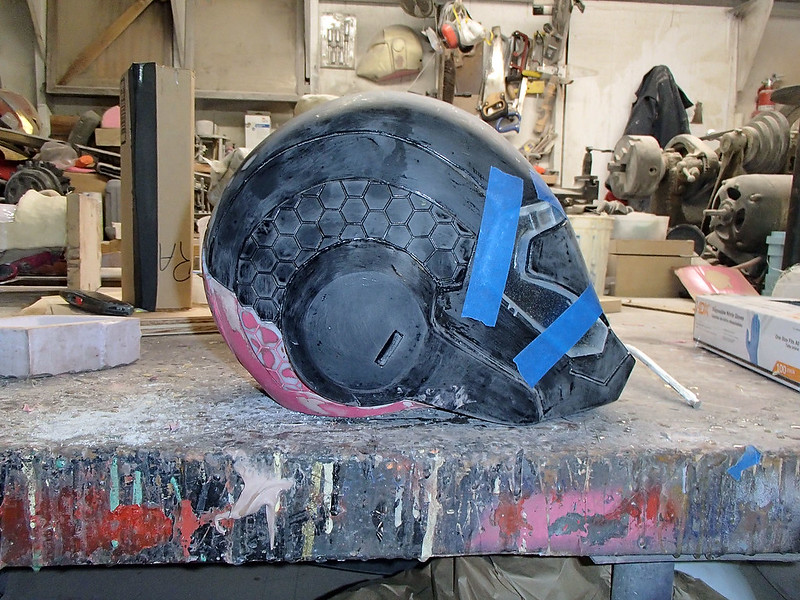
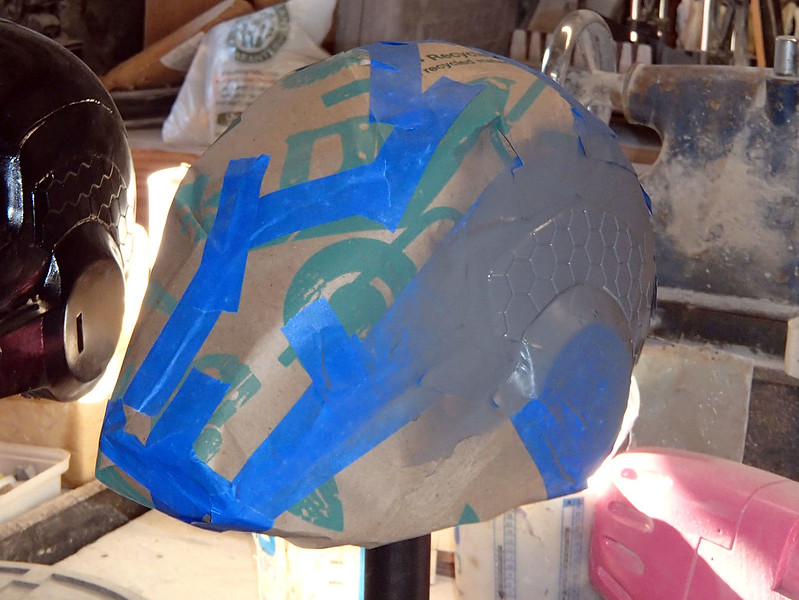
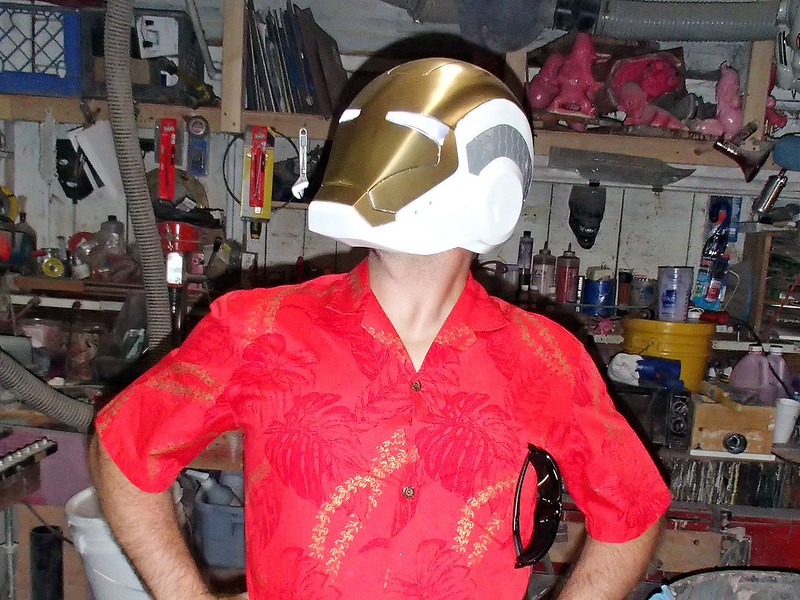
With the LEDs in place, it was time for paint. Here's the helmet in primer:
Backdoor panel primed:
For the base color, I used Rustoleum "Blossom White" which has a nice satin finish:
Once it had dried, I masked off everything except for the gray areas and sprayed on a couple of coats of satin "Granite" also from Rustoleum:
So far so good:
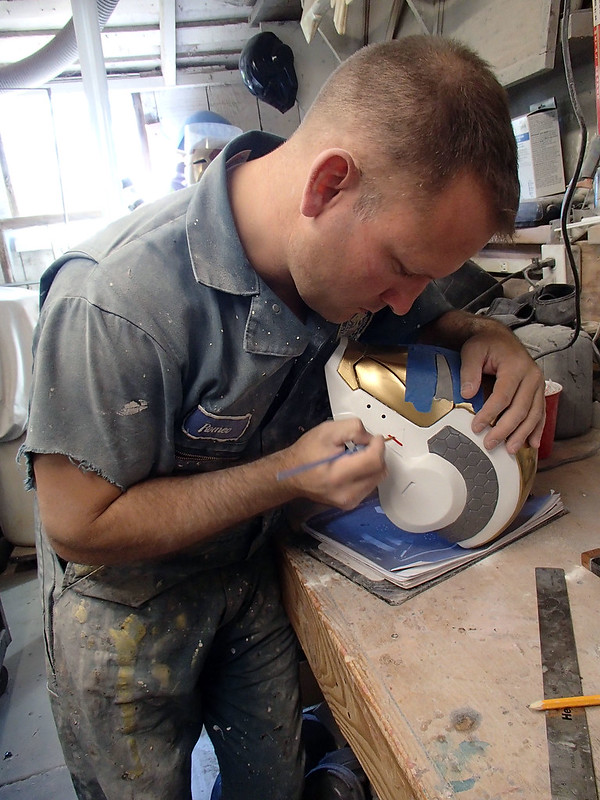
The blue tint is painter's tape which was the first step in masking off the whole thing and painting the gold parts:
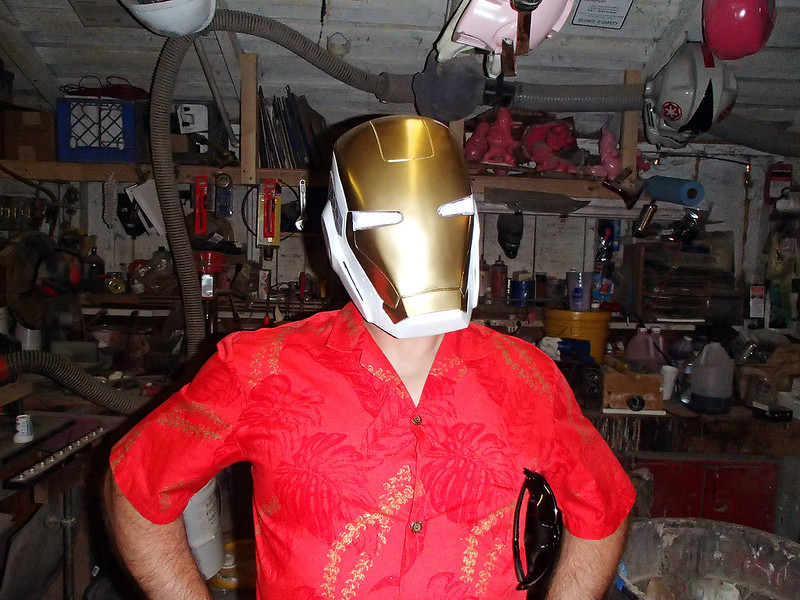
The last couple of details on the sides were laid out in pencil:
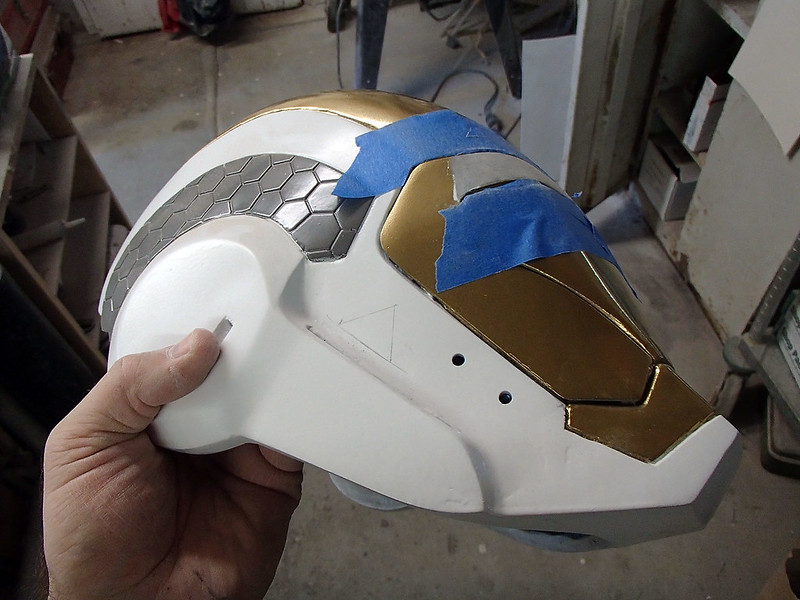
Then I picked them out by hand (because I'm a rockstar):
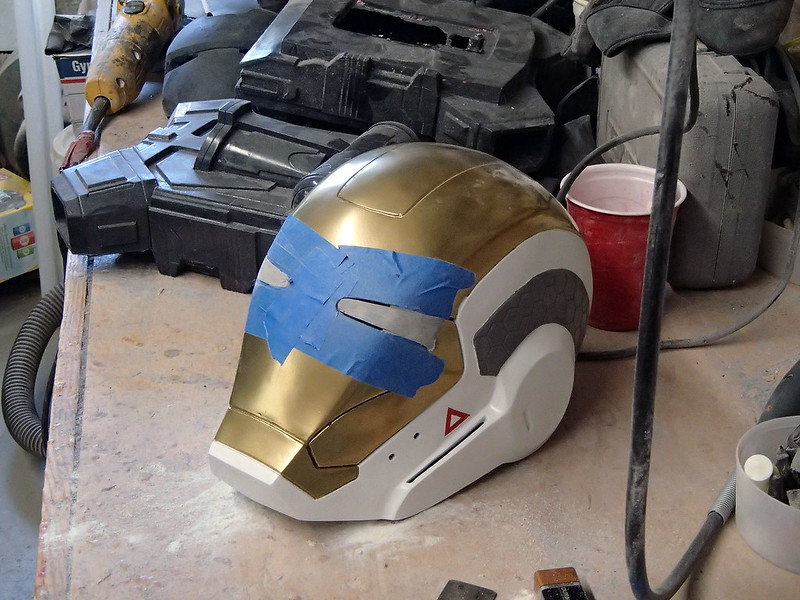

Shiny!
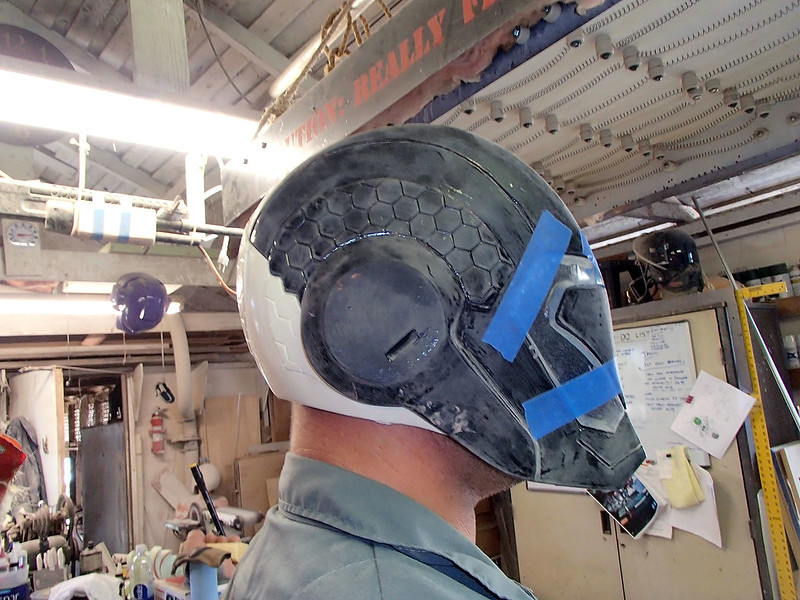
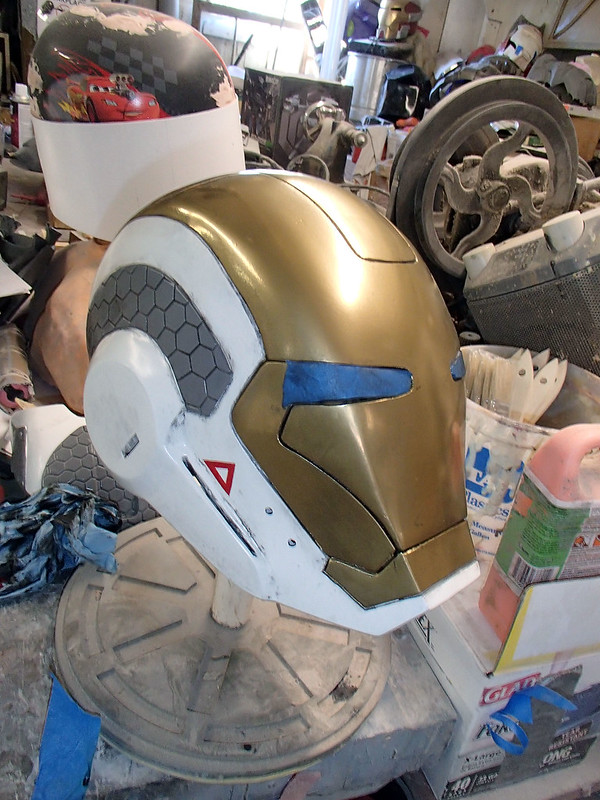
I wanted this helmet to look relatively new, but things tend to look fake if they're too clean. So I gave it a very light coat of blackwash to help the details stand out:
With the weathering done, I installed some elastic to keep the backdoor pulled snugly into place:
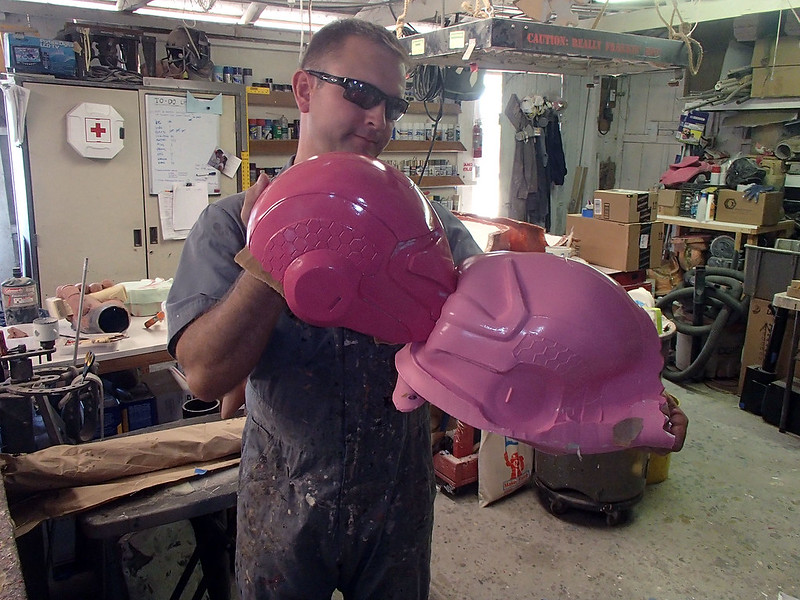
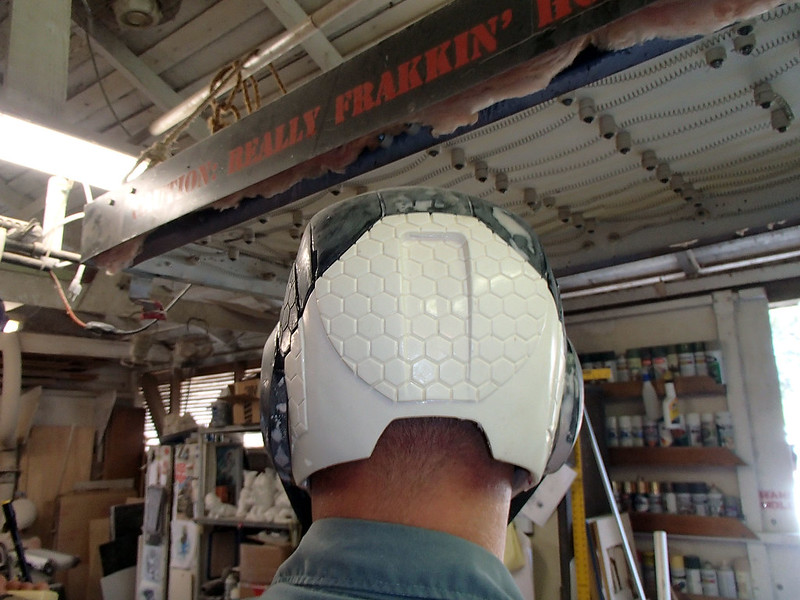
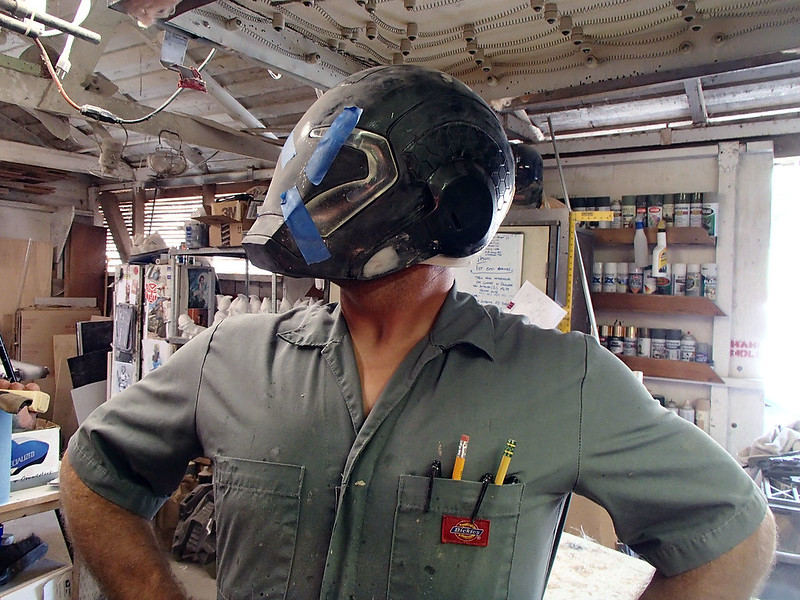
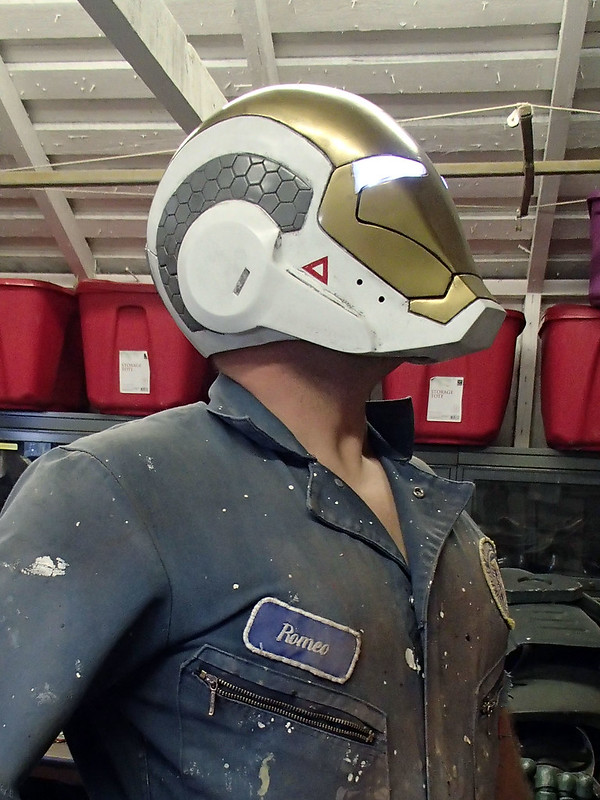
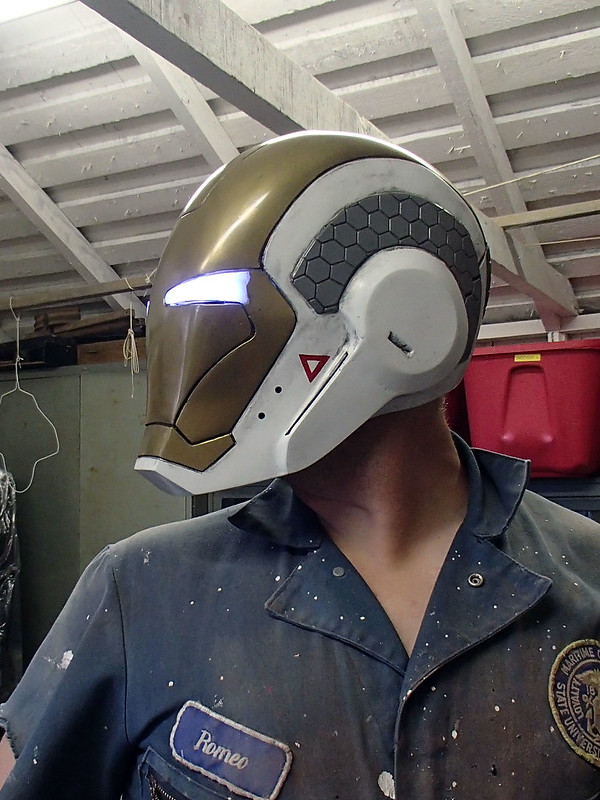
Here I am wearing the finished helmet:
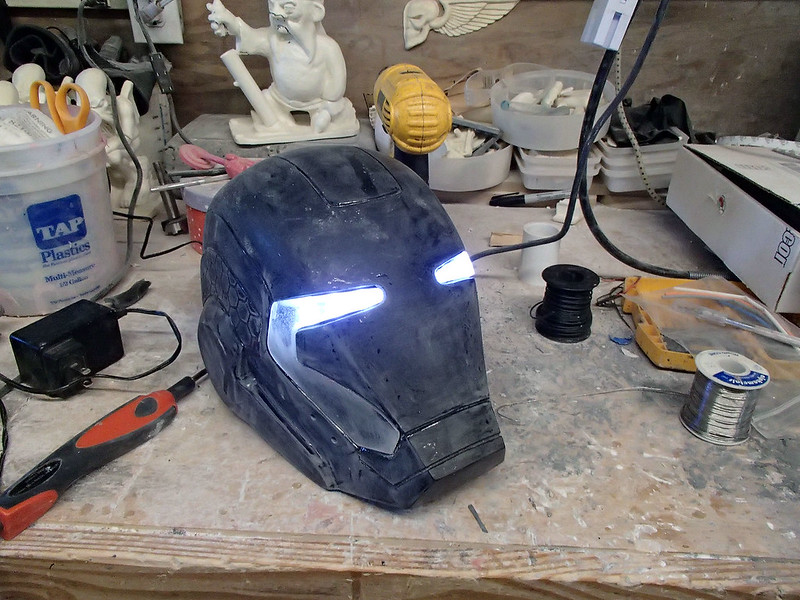
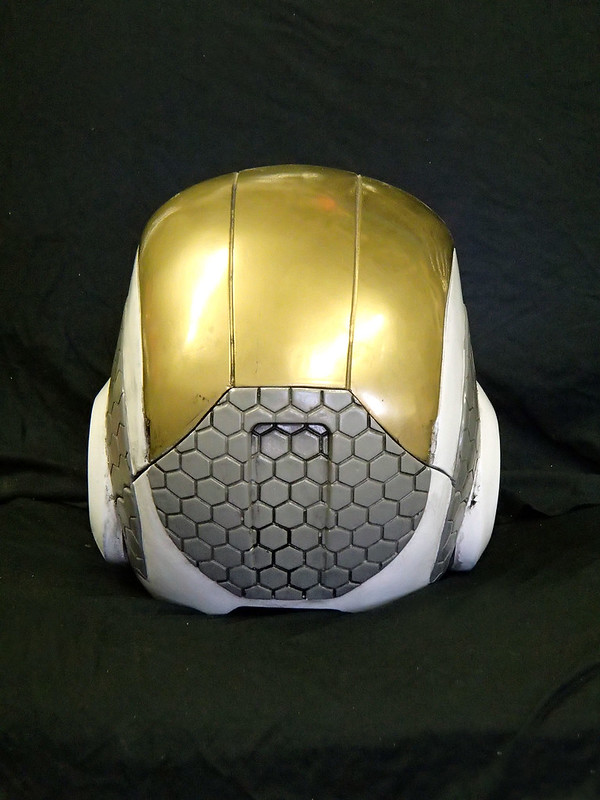
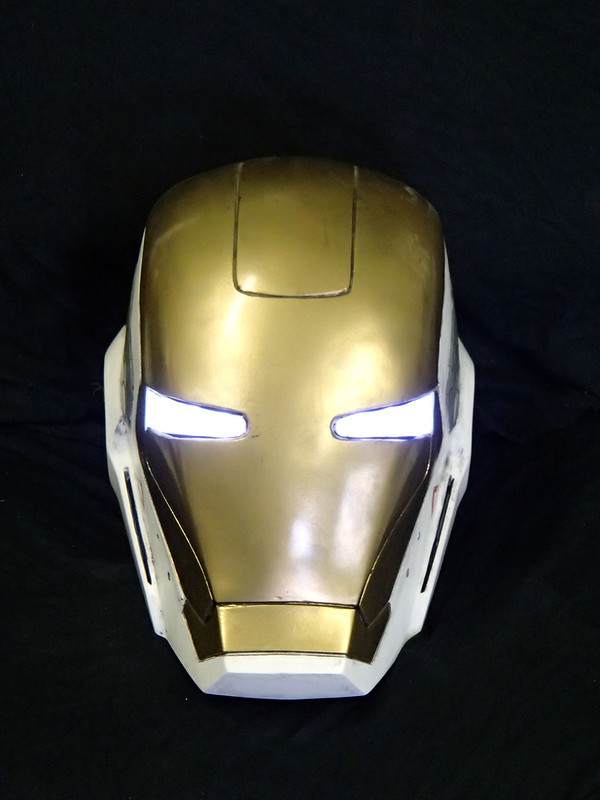
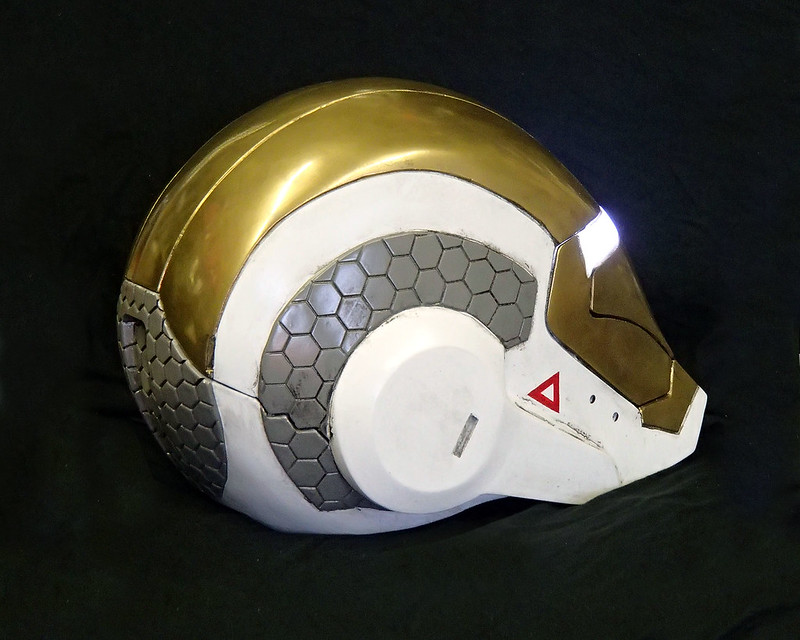
Finally, here's a few more pics of the finished helmet all by it's lonesome:
Of course it won't be sitting all by it's lonesome as soon as I get back to work on the rest of these guys:
Stay tuned...
This thing is probably my favorite Iron Man helmet. As of, like, now.
ReplyDeleteHail Hydra?
ReplyDeleteYou should definitely look into making the Mark 40 Shotgun Armor Helmet
ReplyDeleteI'm still hoping I can find someone out there who's work is comparable to my own who has already done it and is willing to trade some raw castings.
DeleteBesides, I'd need to make two of them, because the Mk40 "Shotgun" helmet would come out of the same mold as the Mk23 "Shades" helmet. I have a problem...
I WANT TO BUY
ReplyDeleteVery Impressive, is there a way you can see when wearing the helm?
ReplyDeleteThe gaps around the illuminated portion of the eyes allow the wearer to see out. Visibility's not great, but it keeps you from walking into walls.
DeleteHave you considered selling raw casts of this helmet?
ReplyDelete