
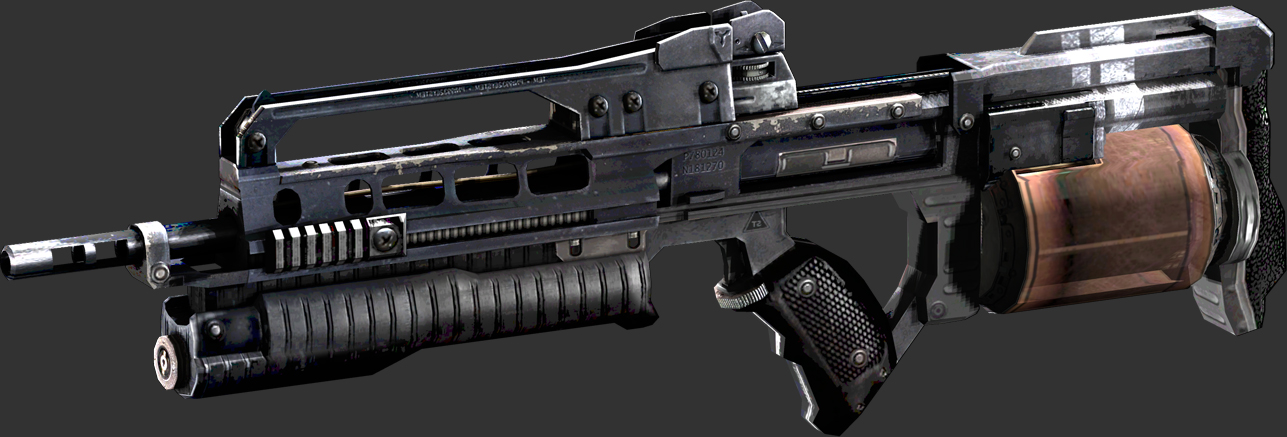
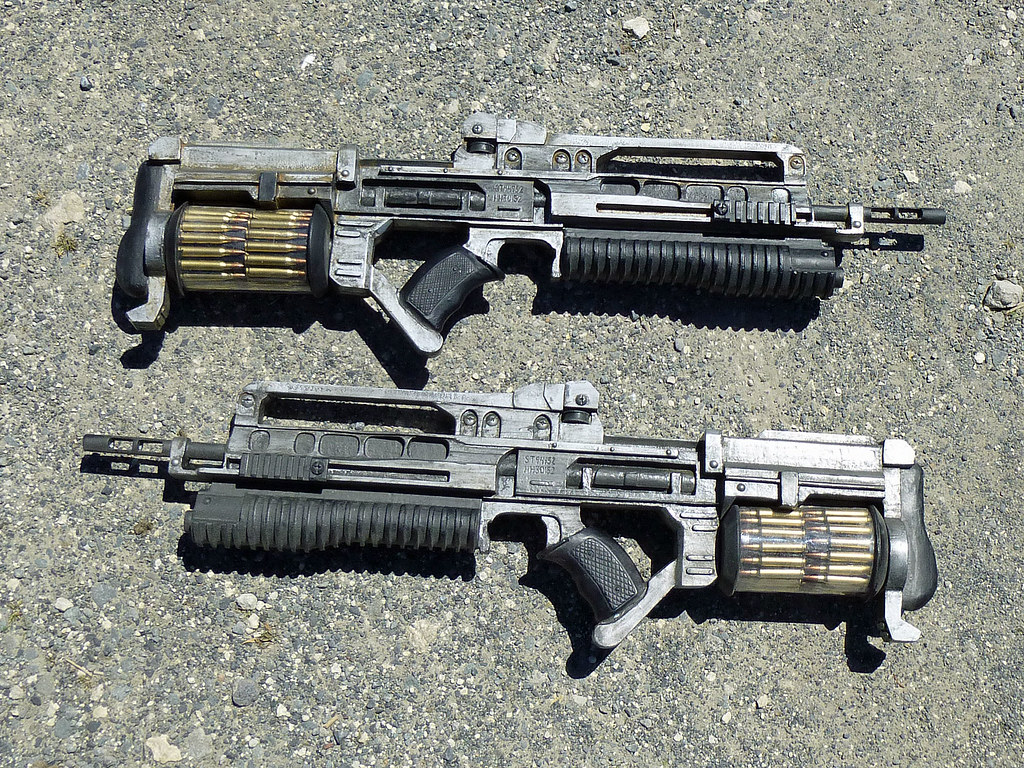
This is the STA-52 light assault rifle used by the Light Assault Infantry troops of the Helghan Empire. From one title to the next in the Killzone series there are some minor changes in the design, but nothing significant.
With the 3D modelling done, he asked me if I'd be willing to build it for him. No problem.
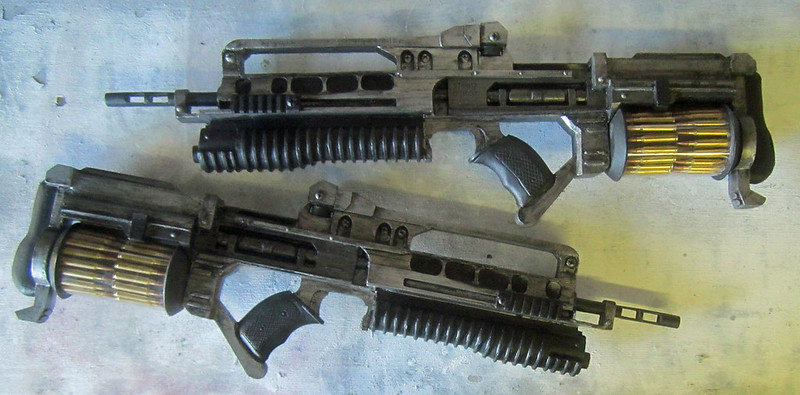
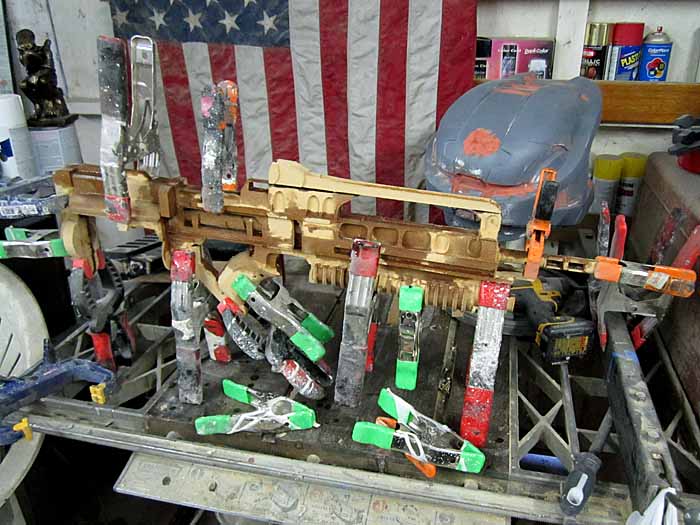
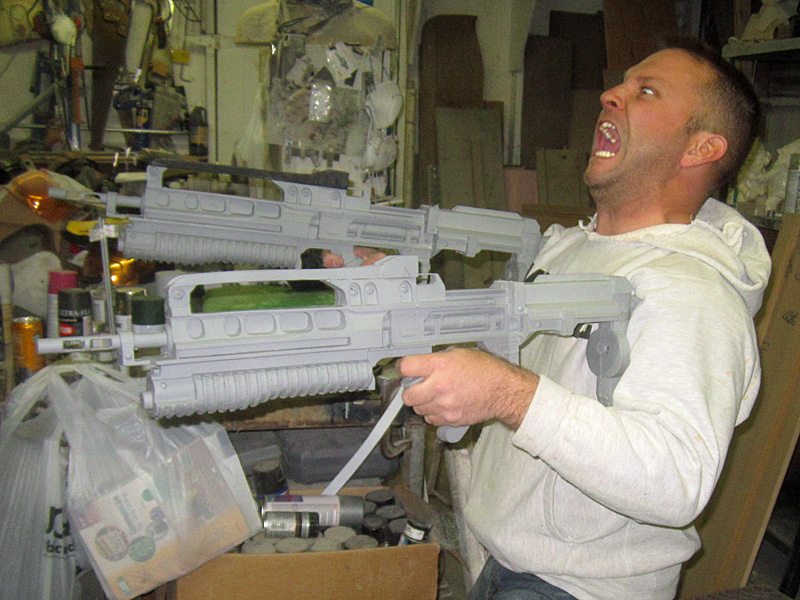
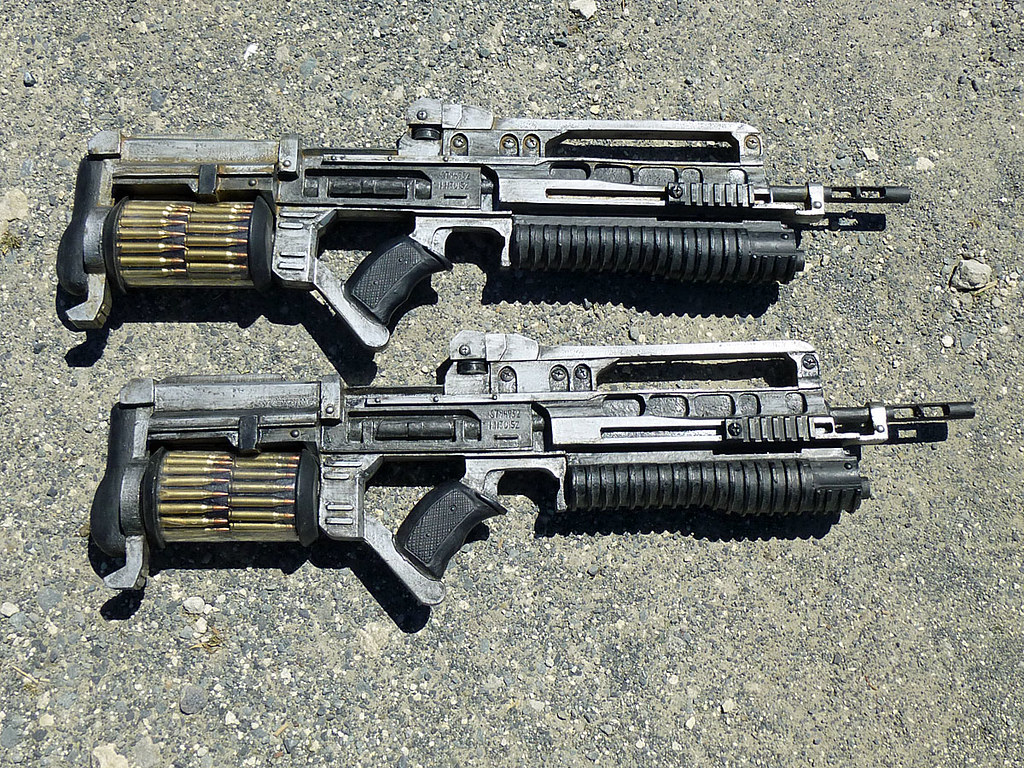
Here's a couple of copies of the finished piece:
To see how they were made, read on.
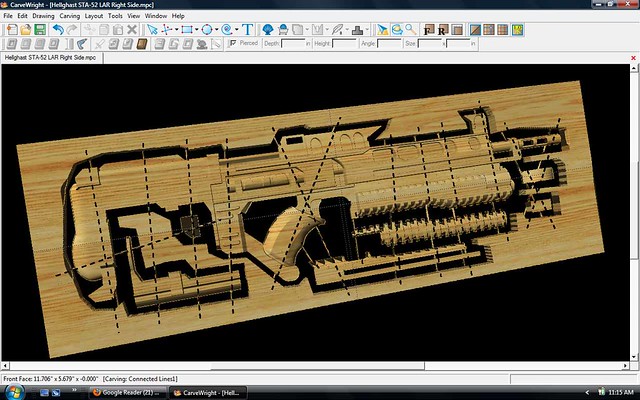
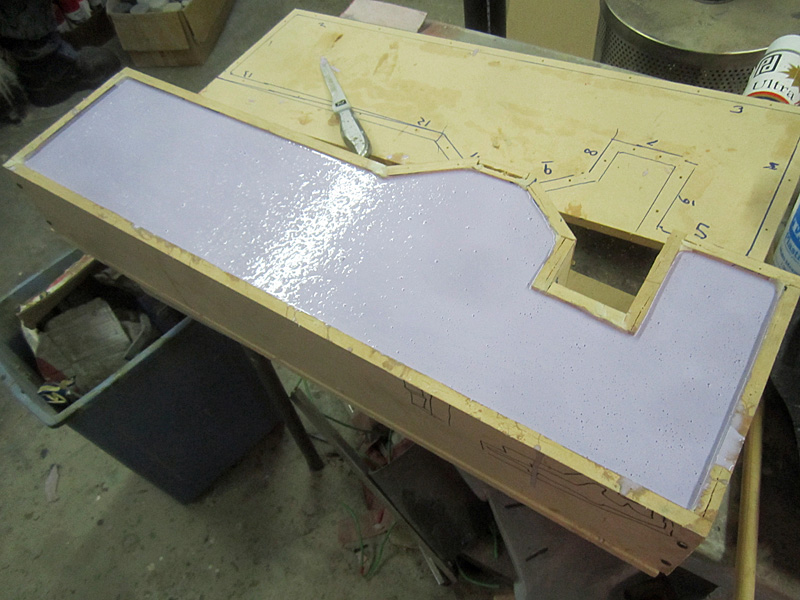
The original model was alread split in half and laid out for cutting, but because Lopez (my Craftsman Carvewright CNC machine) is only able to cut 3/4" deep, I had to slice each side in half on the vertical axis. Here's a screen shot showing the layout for one half in the Carvewright design program:
Satisfied that the layout was as efficient as possible, I fed it to Lopez and he spit this out:

Then there was some general screwing around:
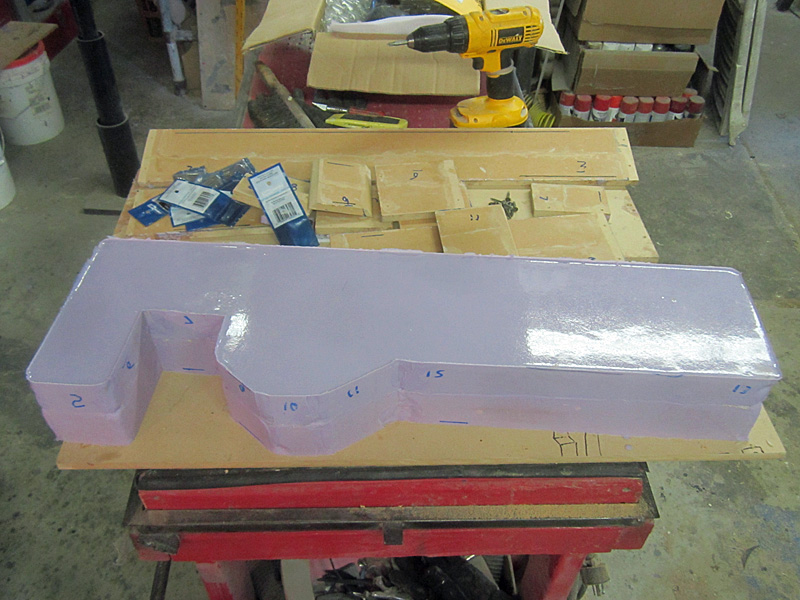
While I was goofing off, Lopez cut out the other half:

Then I glued the two halves together:
Some days there just aren't enough clamps.
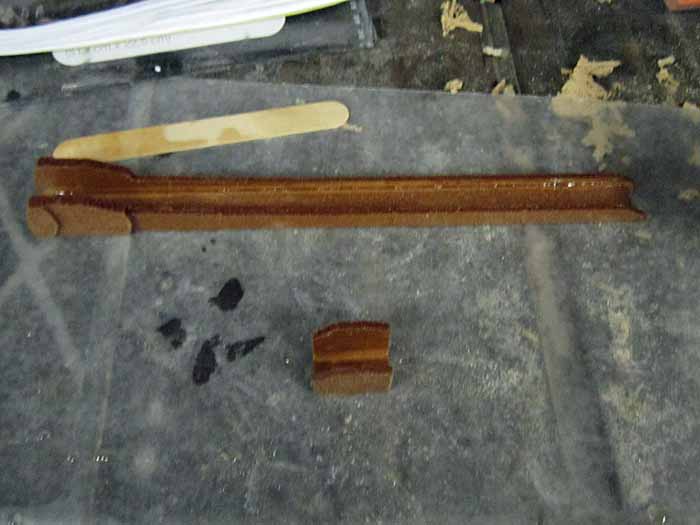
While waiting for the epoxy to set up on the main body, I coated the top rail/carrying handle with more epoxy:
Meanwhile, Lopez whittled out the pieces of the rear double drum magazine:
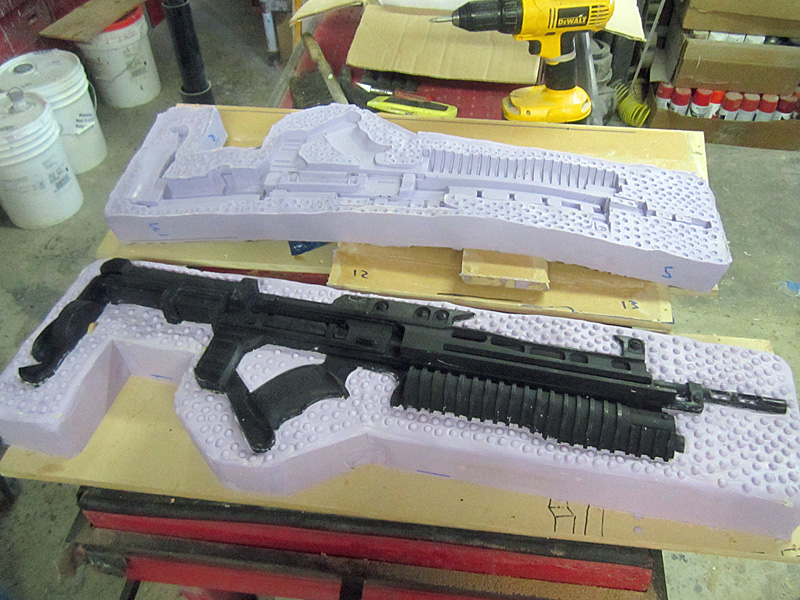
With the epoxy set up on the main body, the next step was to sand it smooth:
Since Lopez is a 3-axis CNC machine with a tapered cutting bit, he can't cut perfectly vertical faces. Instead, I have to go back and square up a few spots were there are problems. In this case, this meant rebuilding some of the narrow ridges with strips of styrene:

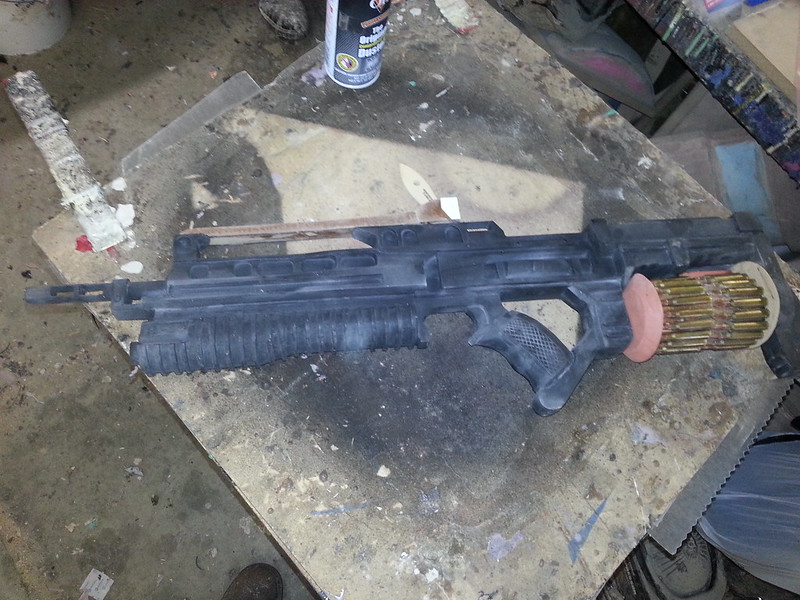
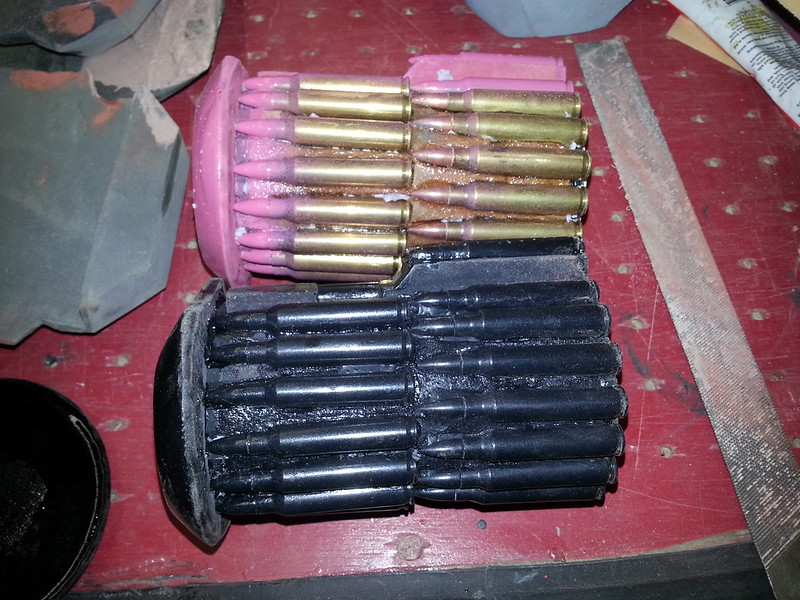
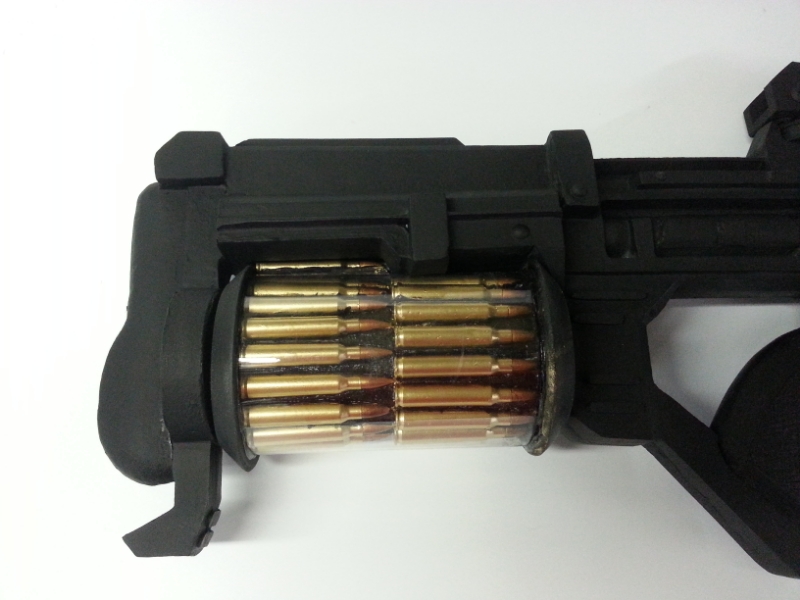
Somewhere in the myriad cycles of sanding and filling, I continued working on the drum magazine. In order to make it as believable as possible, I had a friend of mine (who does a lot more shooting than I'd ever have time for) send me a bag of inert NATO 5.56mm rifle rounds. As luck would have it, they fit perfectly:
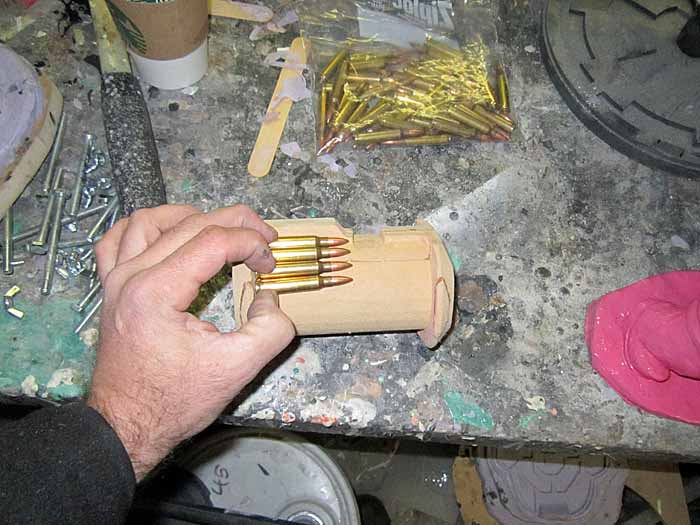
I carved grooves into the drum to fit each of the rounds and then glued them in place. Here's the first stack in position:
And the second:
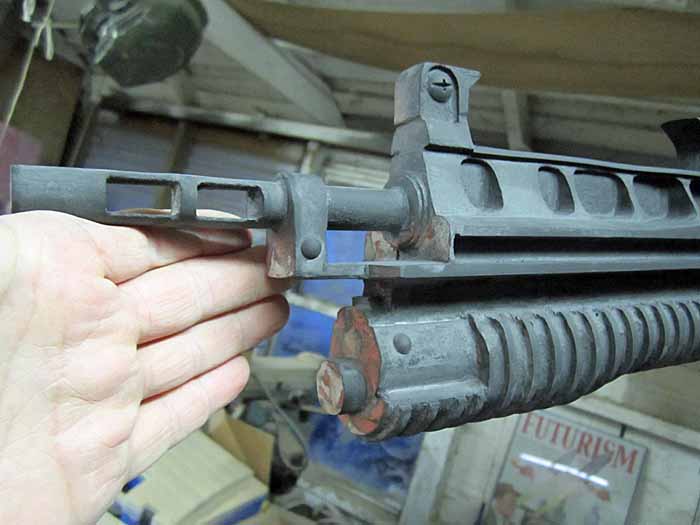
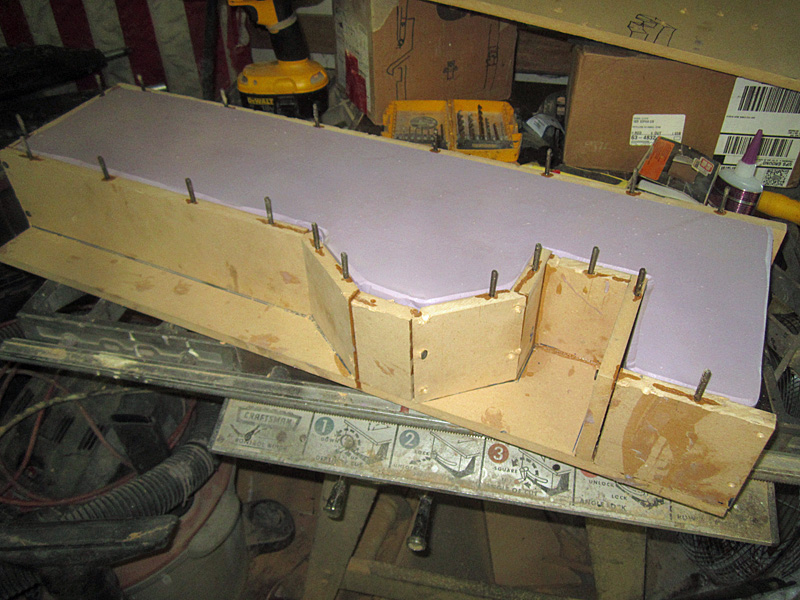
Back to work on the main portion of the rifle, I'd started adding various rivets and screws to increase the realism:
Nearing completion, I crosshatched the grip by hand using a triangle file:
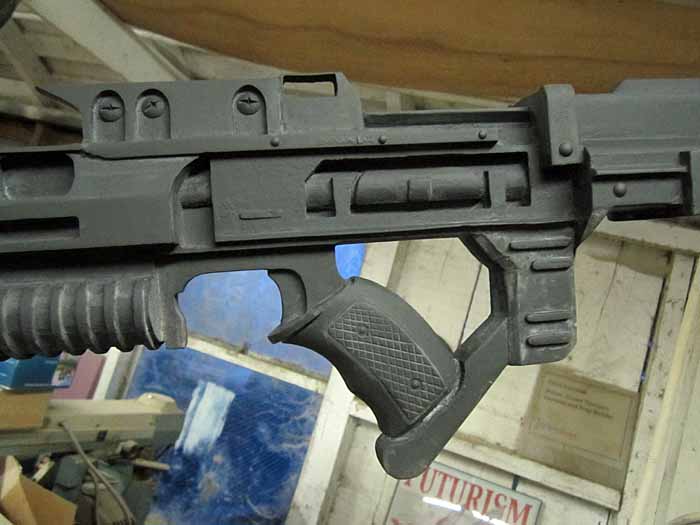
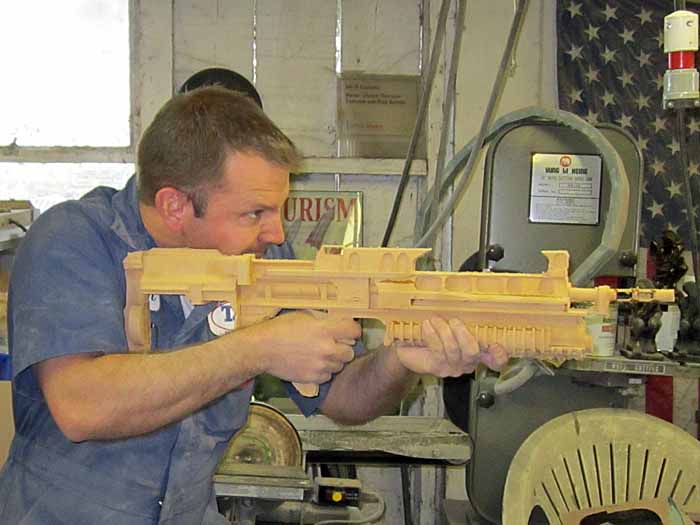
To get an idea of were I stood, I sprayed the main body with black primer:
Satisfied with the overall shape, I tied it to one of the rafters in the workshop so it would be out of the way for a little while.
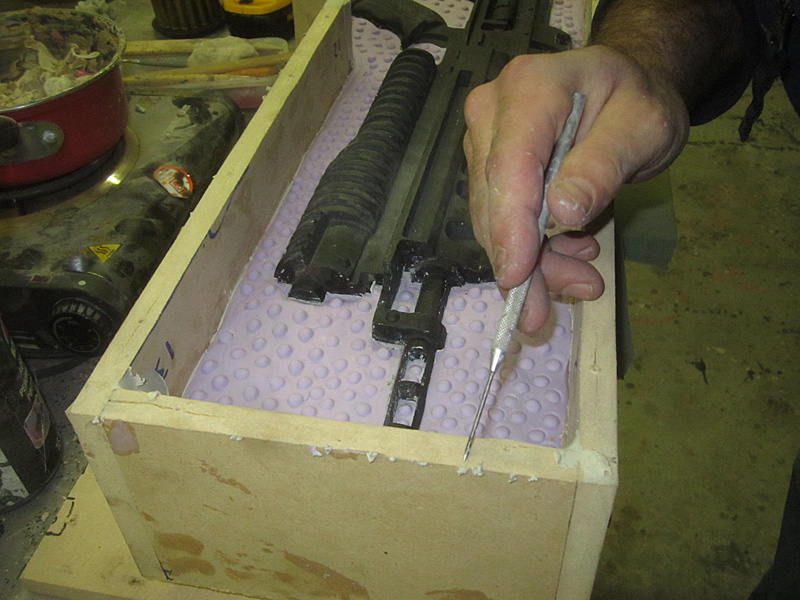
"A little while" turned out to be almost a year before I had a few moments worth of down time and I started making a mold.
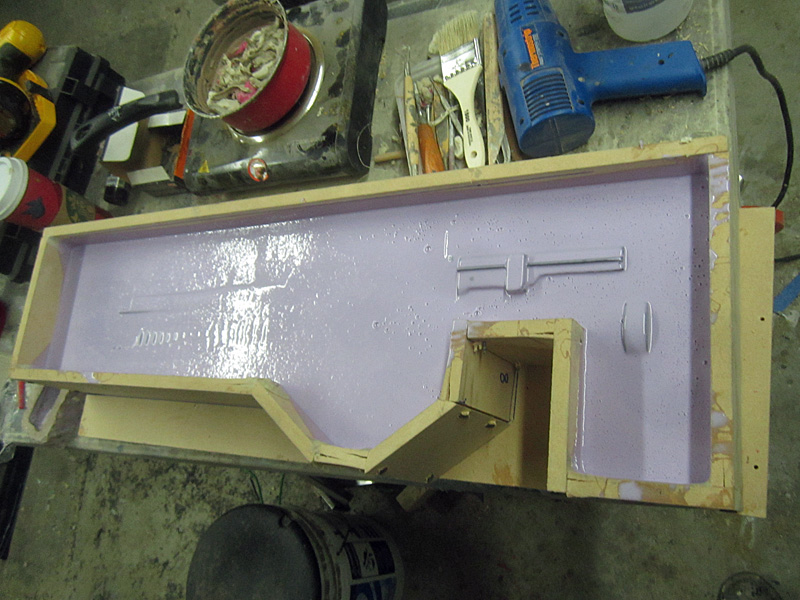
Step one was building a box:
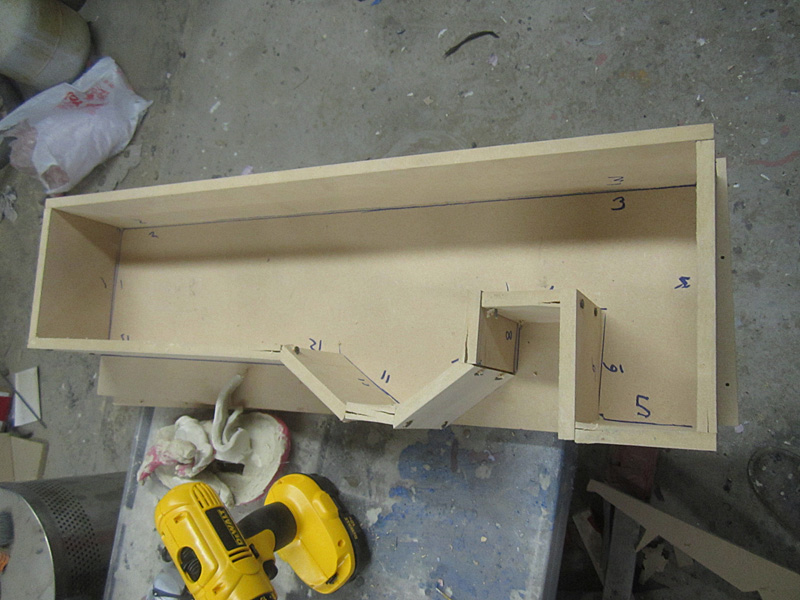
Box built, it was time to build up a bed of clay for the rifle to set into. This will determine the shape of the parting wall that separates the two halves of the mold. In order to make the two halves register together properly, I pressed a bunch of dimples into the clay surface with the round end of a sculpting tool:
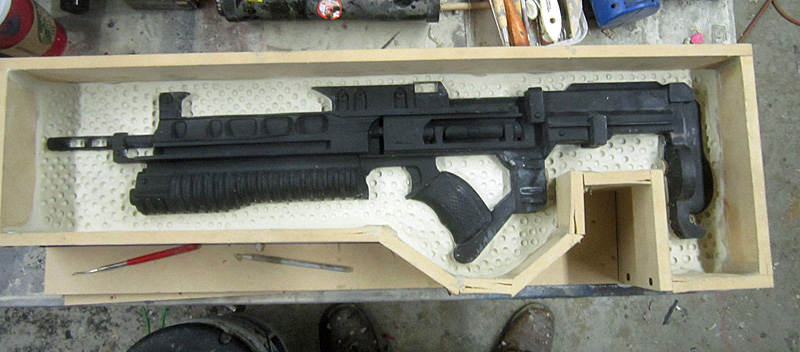
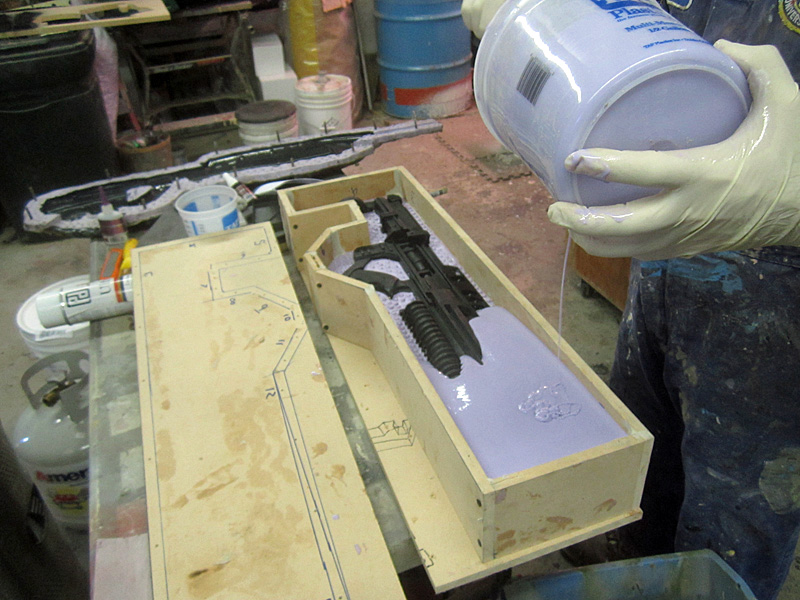
Then it was time to pour in some rubber:
Here's the first half of the mold poured and waiting to cure:
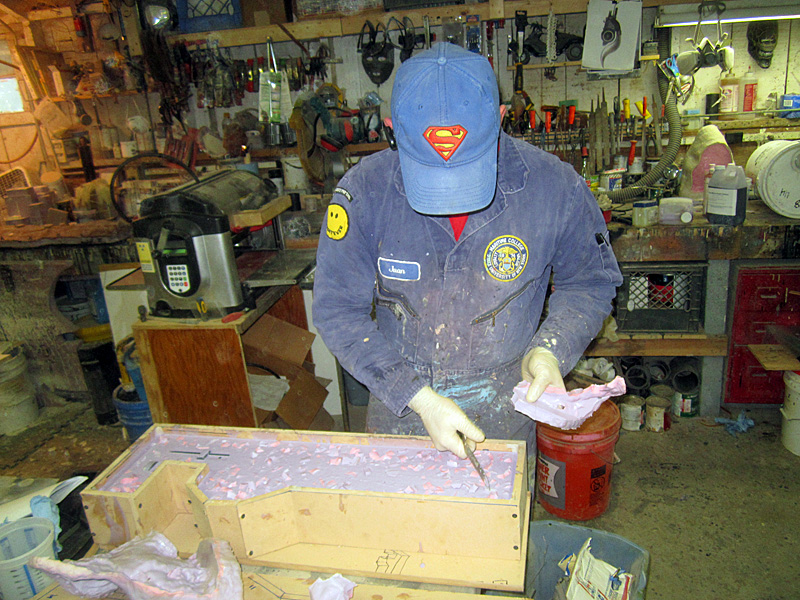
The next morning, I flipped the whole thing over, removed the bottom of the box, and picked out the clay:
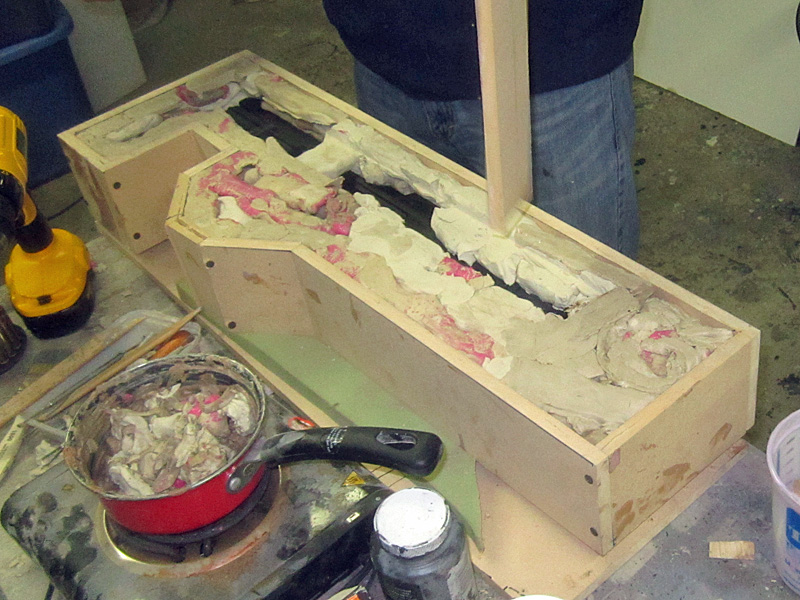
And picked out the clay:
And picked out the clay:
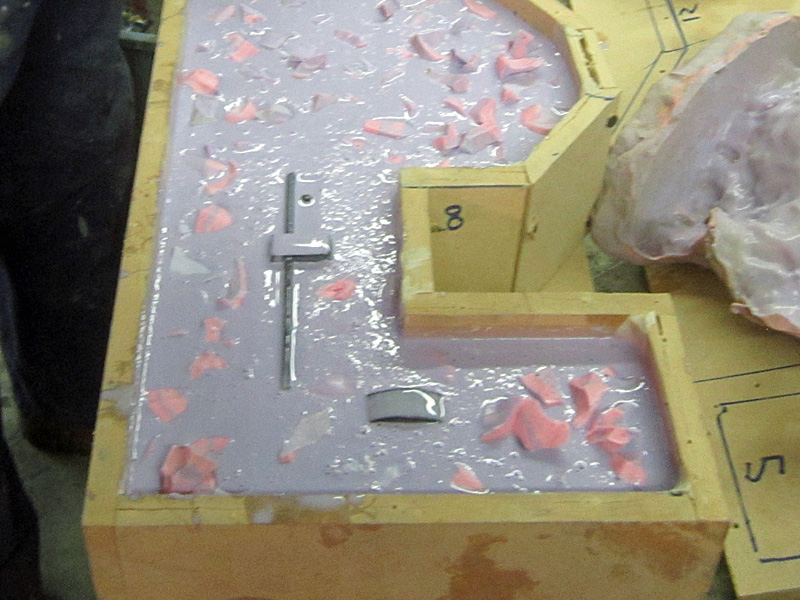
Once I'd removed all of the damned clay, I sprayed the silicone with a mold release to prevent it from bonding to the second half, then poured more rubber on top of it:
Since this would be a very large (read: "expensive") block of rubber, I filled some of the space away from the prototype with chunks of cured rubber cut from retired molds:
Here's a closer shot showing the chunks sinking in:
To make the surface smooth, more rubber was poured on top:
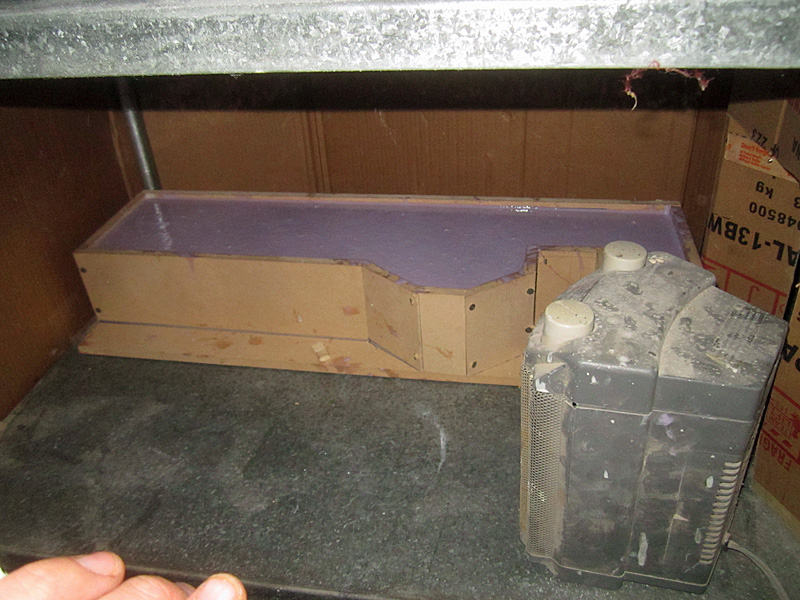
After the second half had cured, it was time to disassemble the box:
Then separate the mold halves:
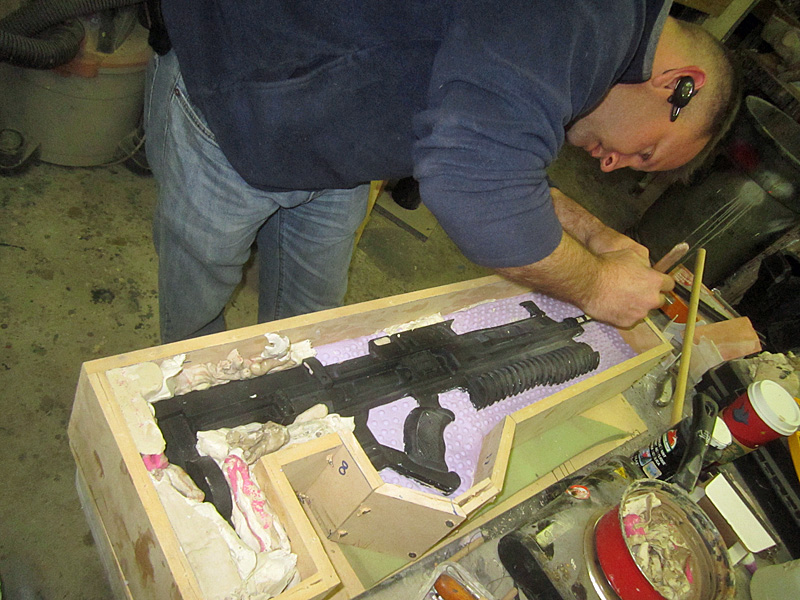
After removing the original, I cut sprues and vents into the rubber. Then the next step was to cut down the sides of the mold box so that the rubber sits about 1/4" above the wood, then I reassembled the whole thing and fitted hanger bolts to the top edge:
When the lid is bolted onto the box, tightening the nuts works to squeeze the two halves of the mold together and minimize flashing. Then it's time to pour resin into the butt end of the rifle.
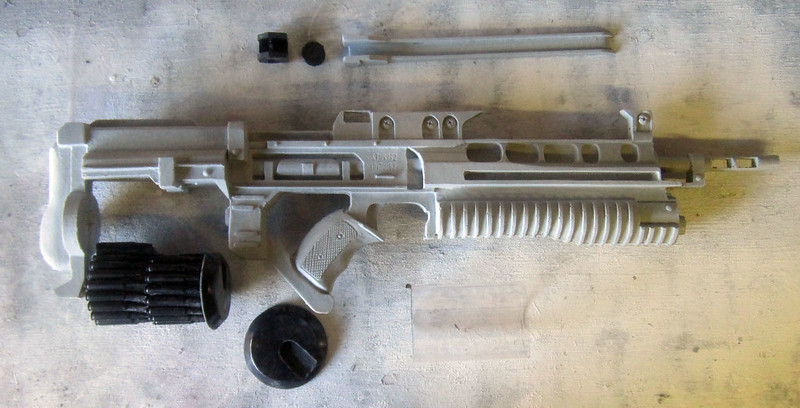
The small parts required simple block molds. Here's all of the pieces laid out:
I made multiple copies:

It's always hard to be serious at this stage:
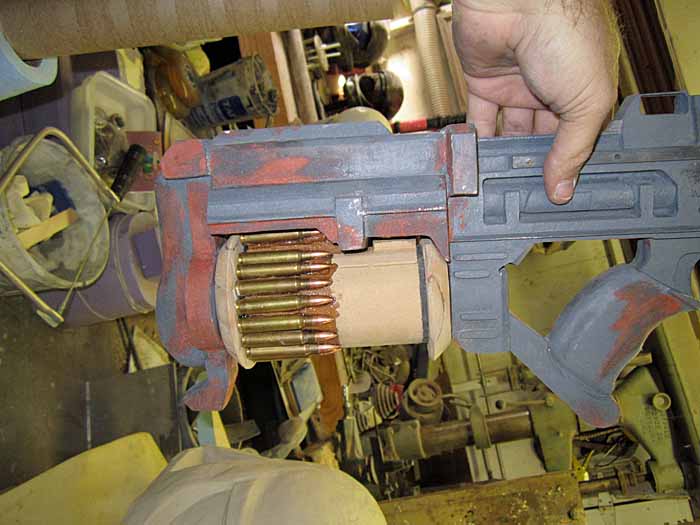
Here's the first cast of the magazine next to the prototype:
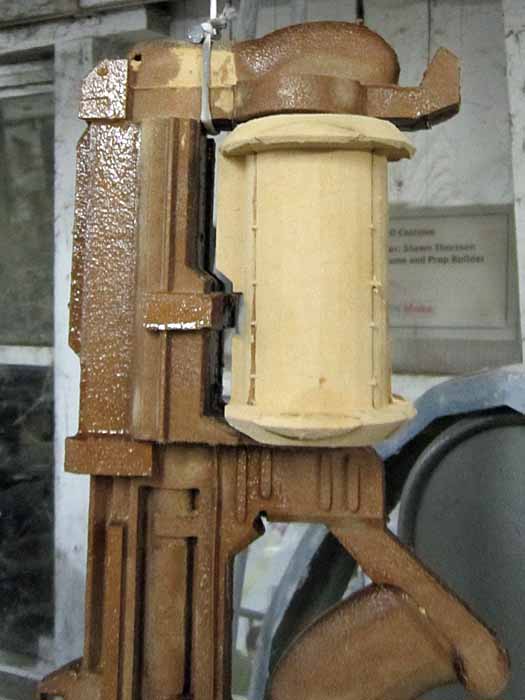
With a handful of decent castings cleaned up, the first thing I did was prime them and spray on a gold basecoat:
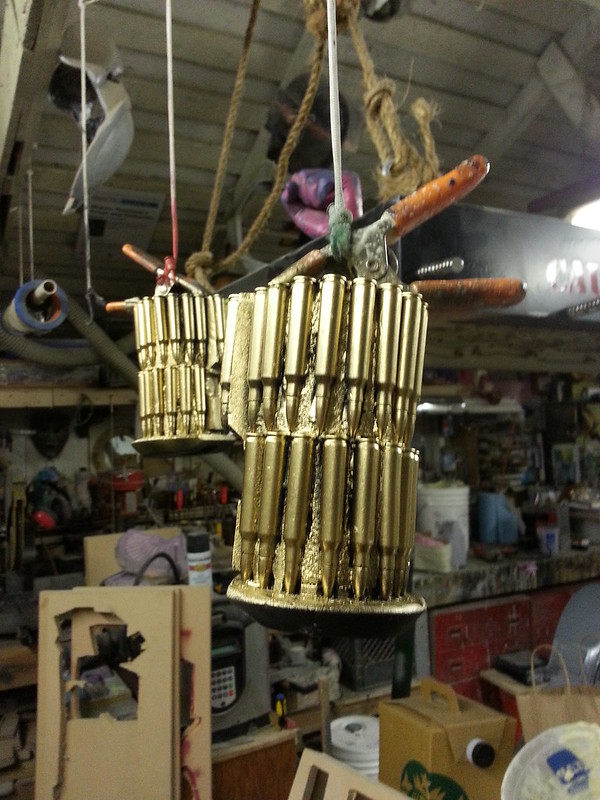
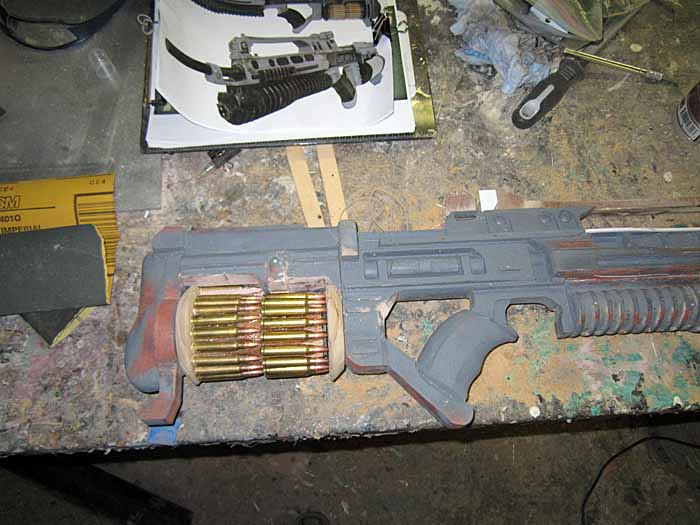
After a bit more paint and the addition of a section cut from a clear plastic map tube, they really started to look the part:
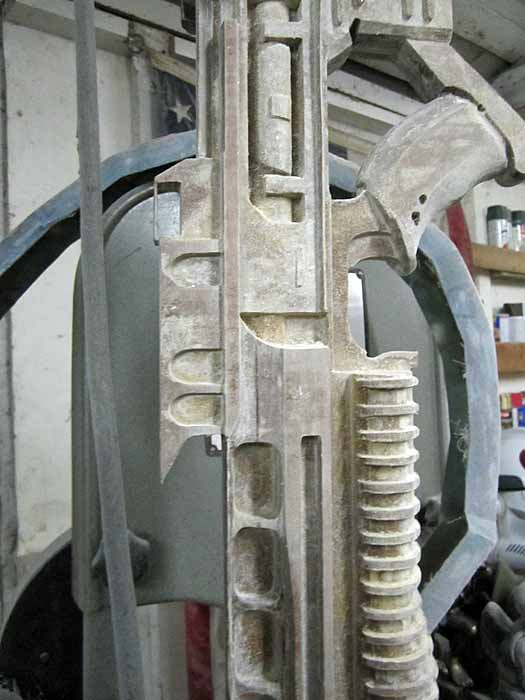
The rifle was given a basecoat of "magnesium" from the Model Masters line of metalizers:
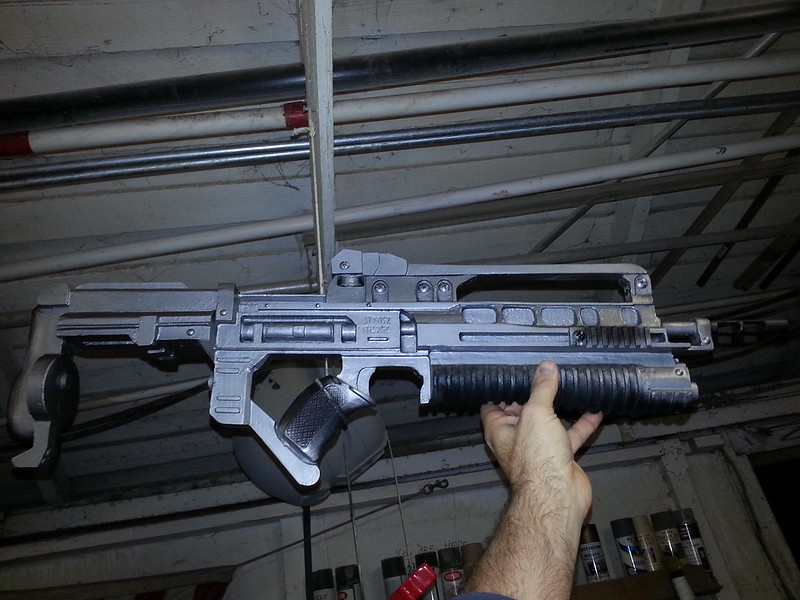
Then I picked out the black parts:

Some of the pieces of the action were picked out in "gunmetal" metalizer, then the whole thing was given a blackwash:
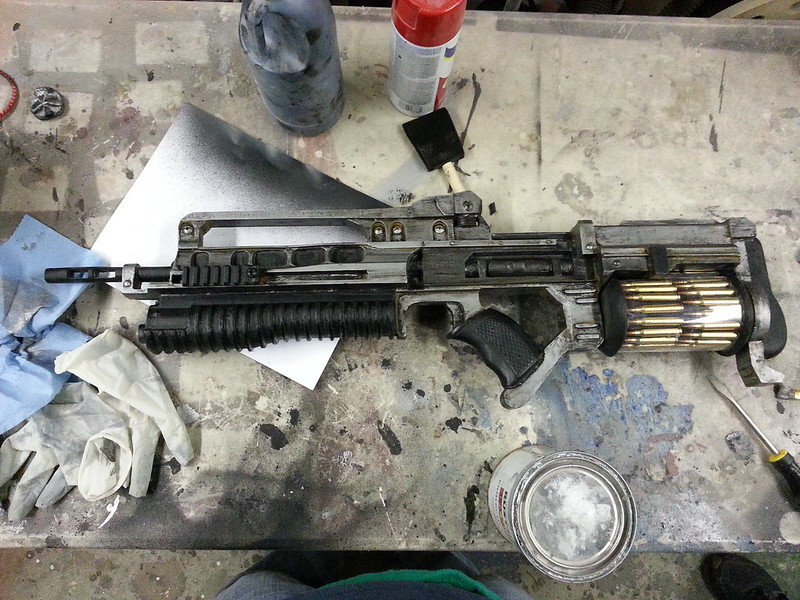
Again, progress slowed a bit due to some generalized screwing around:
To add a bit more age, I also added a rust-colored wash in some places:
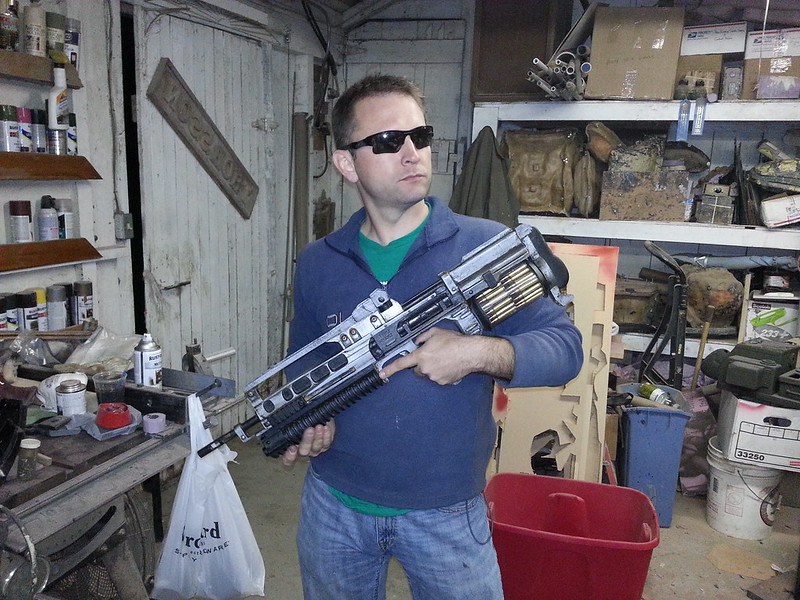
Once I was satisfied that they looked like they'd seen some long months battling the ISA on the fields of Vekta, I was finally ready to call them done:
Of course, now that I've got the rifles, I can't help but think I really need the rest of the outfit to go with them. First step, the helmet:
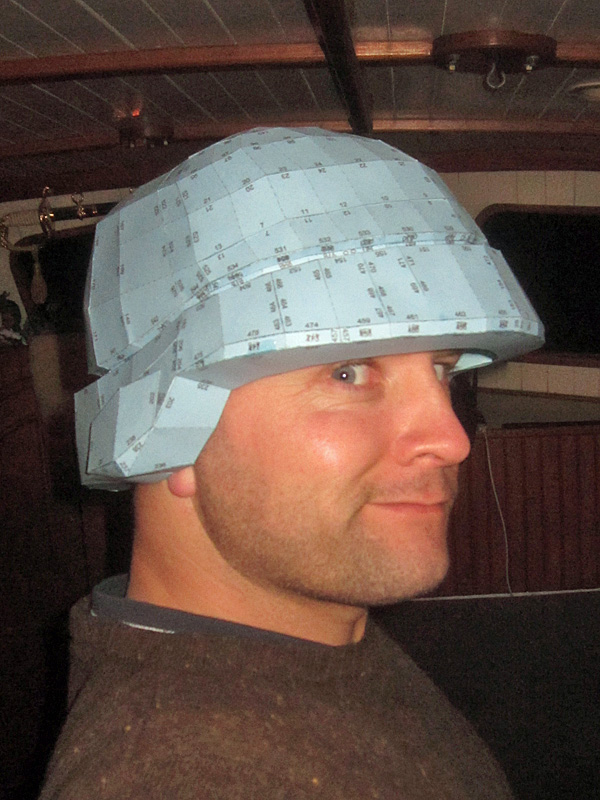
More on that some other time...
Absolutely great work on this.
ReplyDeleteAh man, that it cool :P smashing work!
ReplyDeleteNice job.
ReplyDeletefrom France
any chance you're selling any copies Y.Y i want one on my wall
ReplyDeleteI'm glad you had as much fun making this as I did reading it!
ReplyDeleteThat's pretty amazing. Next step ... SENTRY DRONE!!
ReplyDeleteI can haz? I haz moniez.
ReplyDeletePlease make VC32 Sniper Rifle next, my favourite gun from Killzone. Sta-52 is my 2nd favourite :)
ReplyDeleteThey look siiiiiiiiiick!!!
ReplyDeleteI wanna buy one ^__^
Fantastic work!!
ReplyDeleteSuper cool.
ReplyDeletei want one
ReplyDeleteOMFG!!! the ultimate gun finally came to life! great job man, great job
ReplyDeletenice work looks real!
ReplyDeletehow much I want to buy it!
i would buy this for 250 that's a good price right? the helmet 150 eh?
ReplyDeleteMaybe a good price for you.
DeleteBear in mind that even with the help of the CNC machine, the prototype took a great many hours to bring to life, then the mold took a lot of work, then there's the labor involved in casting, trimming, painting, and weathering.
And I've not even mentioned the costs of materials involved.
Ok so I love the Killzone games. Do you sell these replicas? If not I think you could start a small business doing so.
Delete-Dan
Amazing work. It's a hell of a gun.
ReplyDeleteIf i get up like $2k, would you make one for me? or is that too low? I actually have a replica with an orange tip that is oversized but this one is 100x better..
ReplyDeleteAmazing, I would buy one!
ReplyDeleteit's a masterpiece! in Russia, I do not know of masters who could do the same. and I really want to have the same home! Do you have the option of sending one in Russia!? for gratuity, of course.
ReplyDeleteThese are truly amongst the wonderful informative blogs.gut
ReplyDeleteHow much would it cost to buy one?
ReplyDeleteShoot me a DM would be very interested in purchasing one. I look forward to hearing back!
ReplyDelete