
The challenge: make a healthy human female look like this:

No problem.
My first concern was securely attaching a pair of prosthetic arms to her back. Unless they had a model that would let me drive screws into her shoulder blades, there was no way I could glue them on that would be guaranteed to hold up the severed head and the cup she's supposed to be carrying. At least not if she's planning on walking around all day on the show floor at a convention.
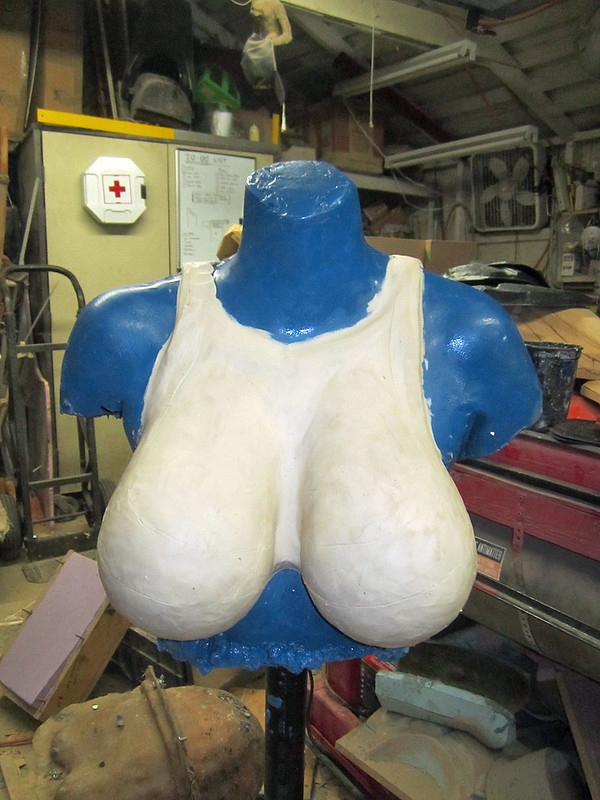
After some careful consideration, I decided that the best option was to make the chest prosthetic as well. That way I could make the breasts, collar, and extra arms into a harness that could be strapped on with no risk of having any slippage that might result in unanticipated nudity on the show floor. As an added benefit, the prosthetic breasts would counterweight the extra arms.
With most character builds, I focus a lot of time and energy on the parts that will get the most scrutiny. This is usually the head or some particularly iconic prop. In this case, it seemed pretty obvious where most of the attention would be drawn to. It wasn't going to be her eyes.
The rest of this article is safe for work and family-friendly, but be forewarned: there are pictures of an attractive, young, topless woman being coated in purple goo. If you're okay with that and you'd like to see the step-by-step process involved in making a girl with a 32B bra size into something more like a 32F, read on...
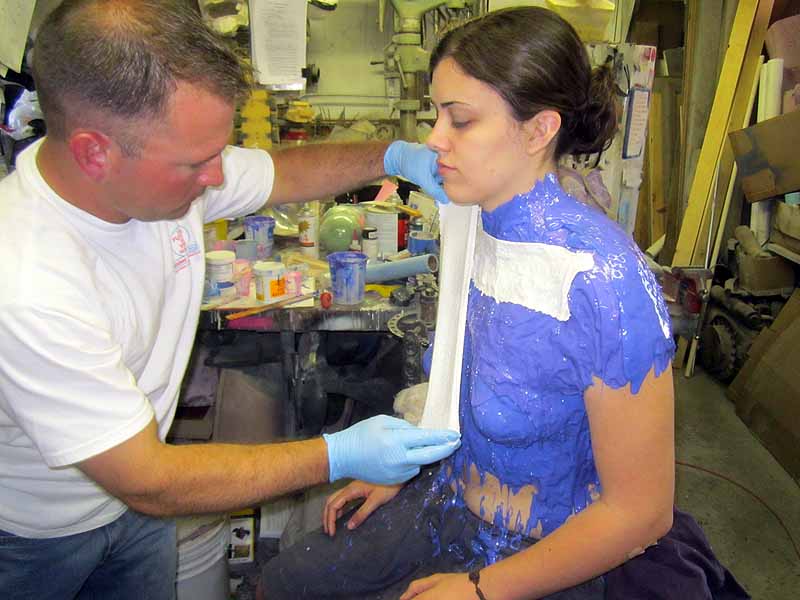
Before building a prosthetic, you need to start with the body it'll need to fit onto. Because no person will ever be able to sit still through the days-long sculpting process, you'll want to make a copy of the relevant parts of their body. This process is called "lifecasting." The end result is an exact duplicate of the anatomy in question. I'd considered just using a mannequin, but it's almost impossible to find one that's actually person-shaped with fairly straight posture.
Since I wouldn't actually get a chance to meet the model this costume was intended to fit until the start of the show, I had to use a stand-in. After weeding through countless applicants*, the closest match I found was Jackie. Jackie has apparently given up modelling in favor of her academic pursuits. Due to her excellent bone structure, careful poise, and perfect posture, she has a pretty respectable portfolio. But none of that mattered in this case. I just needed someone with her bra size and happened to catch her at the tail end of summer break.
Lifecasting is essentially no different than making molds of anything else. The only thing that makes it any kind of challenge is that the model has to sit still throughout the process and you have to use different materials to avoid putting the model's health at risk.
In this case, I made the mold using Smooth-On's Body Double Skin Safe Silicone. I could have just as easily used dental alginate and saved quite a bit of money. The only concern I had was the fact that alginate can only be used to make one casting. If something had gone wrong in the casting stage, it would mean having the model sit for another lifecasting session. In this case her time was more valuable than the materials.
Body Double is available in Standard and Fast-Set. In this case I'm using the Standard version in order to give myself a bit more time to work with the material and trowel it into place. The Fast-Set is really only ideal if you're doing something like copying someone's face and you really need to minimize the amount of time the model will be under the rubber.
Although it's supposed to be skin safe, it's still a good idea to mix a small batch and test it on the model's skin to see if there is any adverse reaction:
The first step in this process is to apply a skin cream that will act as a release agent. The silicone I'm using doesn't bond to skin, but its ability to pick up fine detail means it tends to lock pretty tightly to fine hairs. Without a release cream, it can be a bit of a pain to peel off.
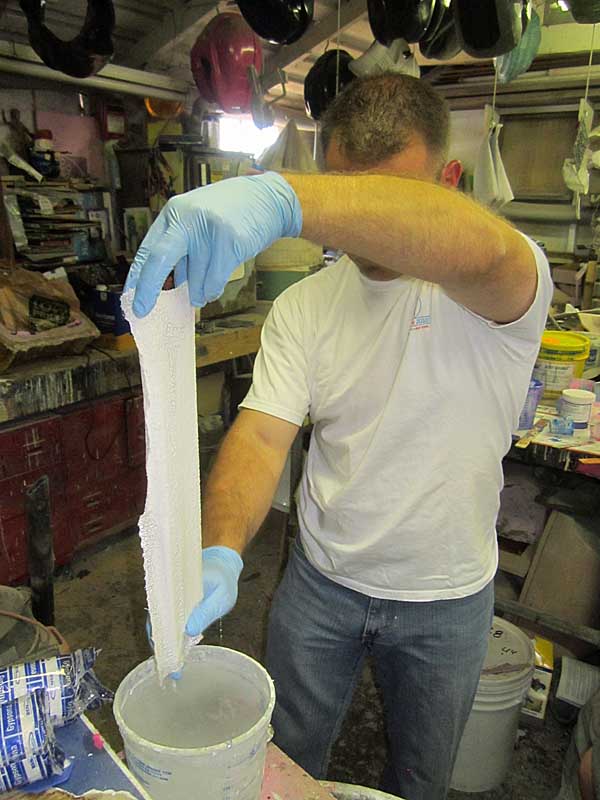
While Jackie applied the skin cream, I busied myself with preparing the other materials I'd need. First, I measured out batches of silicone:
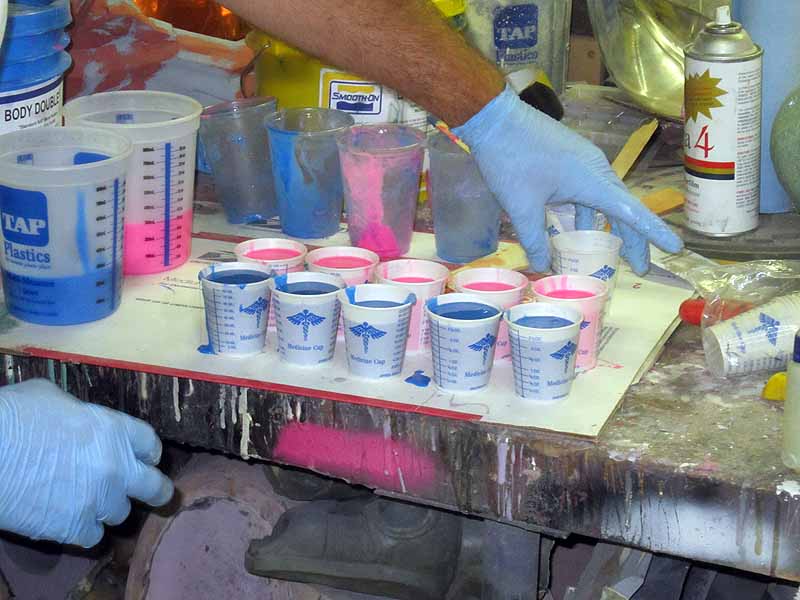
By having pre-measured batches ready to mix, I was able to mix only as much as I would be able to use before each batch started to turn solid and minimize the time spent mixing in between batches.
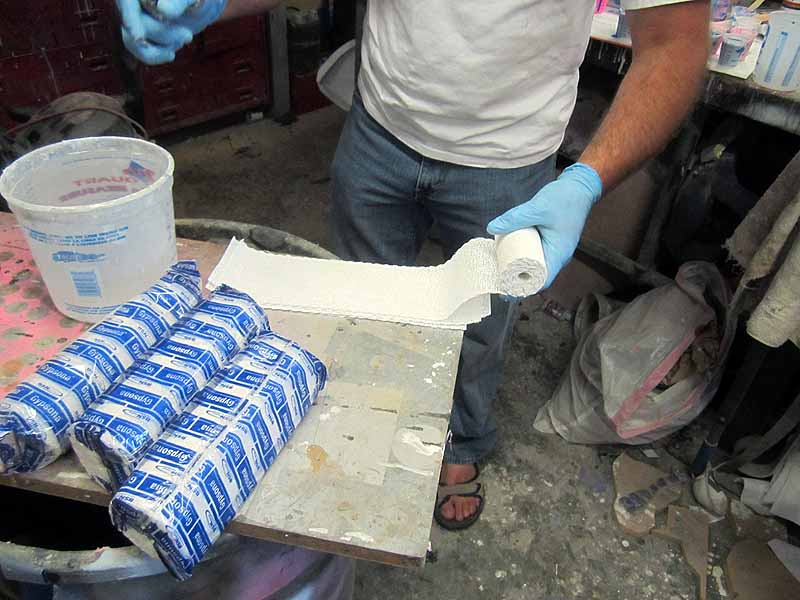
With the silicone measured out, I also set up a small bucket with warm, clean water and cut strips of plaster bandage:
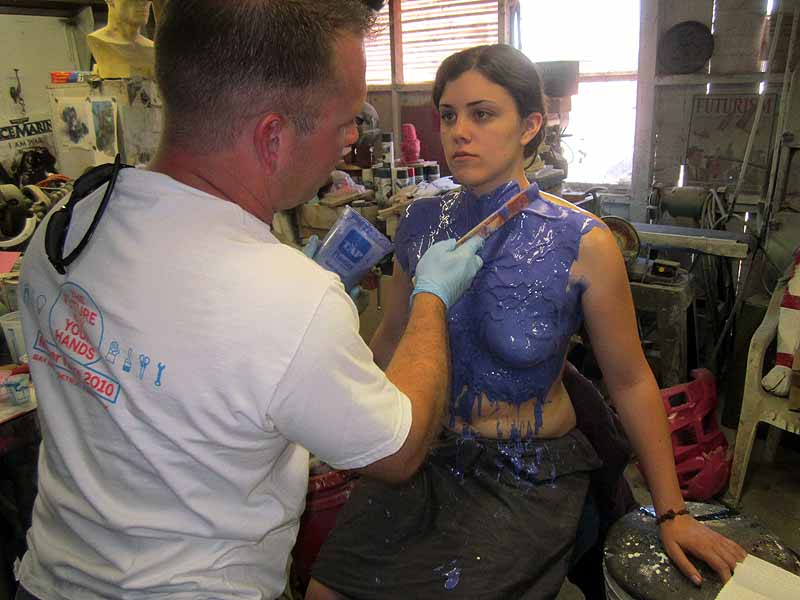
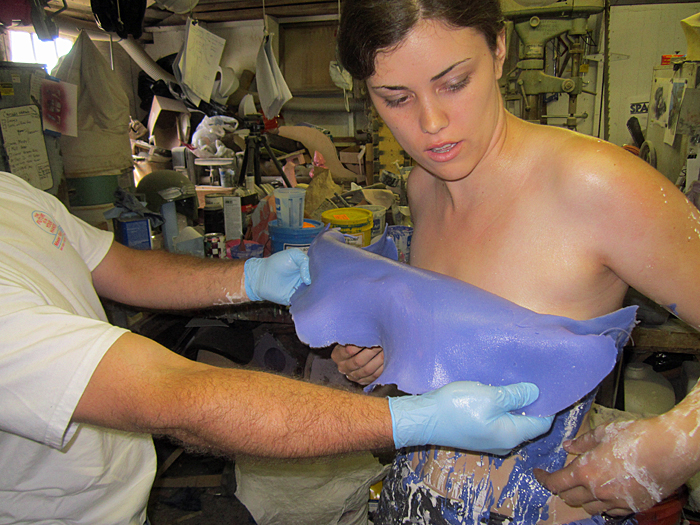
Once the skin cream is applied, it's time to apply the silicone. Starting from the bottom and working your way up makes it easier to fill any undercuts beneath the breasts and in the armpits. If you work from the top down, bubbles will form and drips will cover voids that will be very difficult to fill later:
Coating the front half of her torso required several small batches. No matter how fast you do this, it's going to be difficult for your model to hold the same position long enough to complete the entire process. You can make this easier by placing supports in helpful places such as the buckets I set up on either side of her chair:
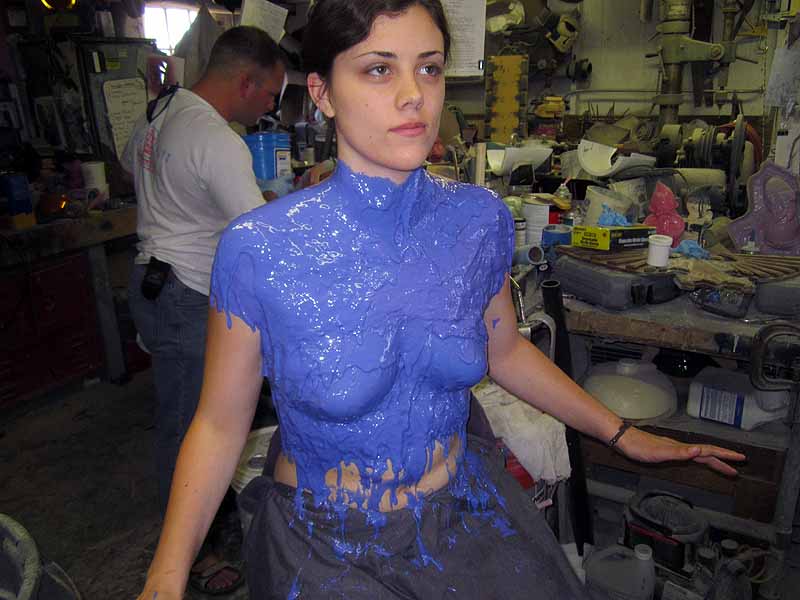
Here's the front half done:
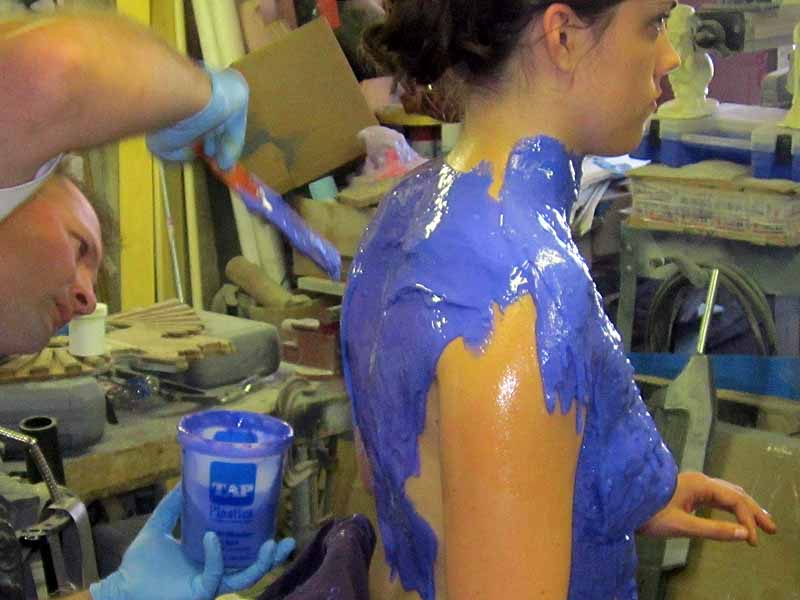
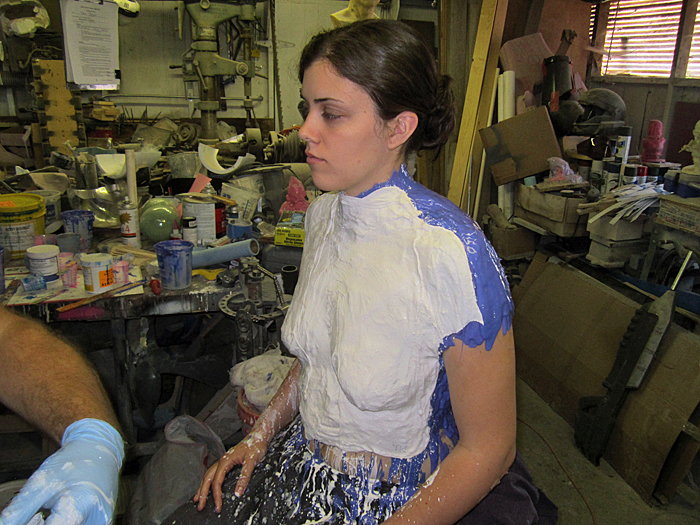
In order to keep from having to cut the rubber off after it had cured, I elected to lay it up in two sections, front and back. So after the front half had cured, I coated the edges with petroleum jelly to prevent the back half from bonding to it. Then it was time to coat the back:
Jackie did a great job of holding the same pose throughout the process. Even when I had to swivel the chair around in order to find better angles. I almost think she went the whole time without even blinking.
Once I'd finished spreading the silicone to cover her back, it was time to build up a mothermold to keep the very flexible rubber from becoming distorted during the casting process. Normally I would build the mothermold out of fiberglass, but because I didn't want to wrap Jackie in noxious chemicals and their poisonous fumes, it was better to make the mothermold out of plaster bandages. Just like the silicone layer, the mothermold is made in two separate halves with petroleum jelly used as a release agent between them.
Plaster bandages are fairly easy to work with. You just take the strip of plaster-treated cloth, dip it in water, and wipe off the excess as you pull it out:
Wiping it mixes the water into the plaster, essentially activating it and starting the curing process. The warmer the water you use, the faster the plaster will set. Wiping it once does the trick. More than that and you'll start scraping off the plaster.
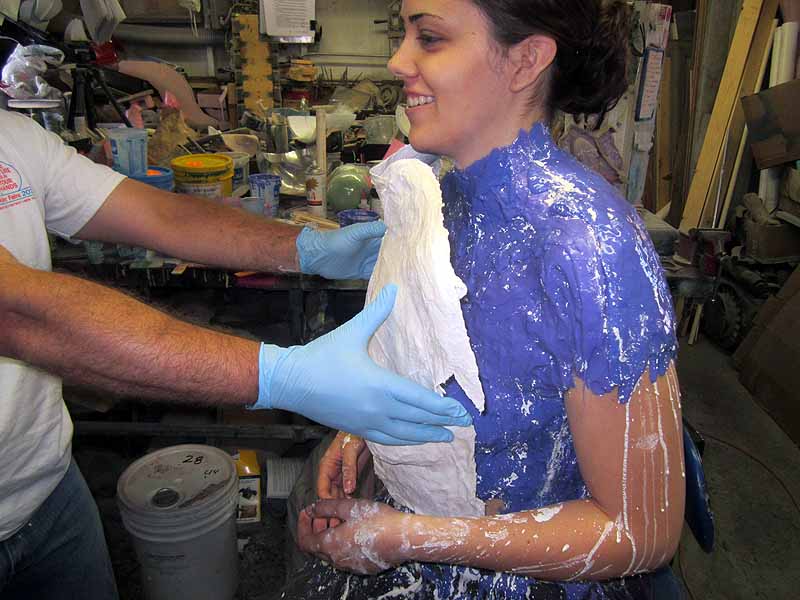
Using the wet bandages, it's time to start laying up the shell:
You need to make it stiff enough to support itself. Supported by the rigid shell, Jackie was now free to doze off:
Again, after laying up the front half, the edges were coated with petroleum jelly and the back half was layered in the same fashion.
Once the mothermold had set up, it was time to remove the whole thing. Here's the front of the mothermold coming off:
The model is now free to take deep breaths again.
Here's the back half of the silicone being peeled off:
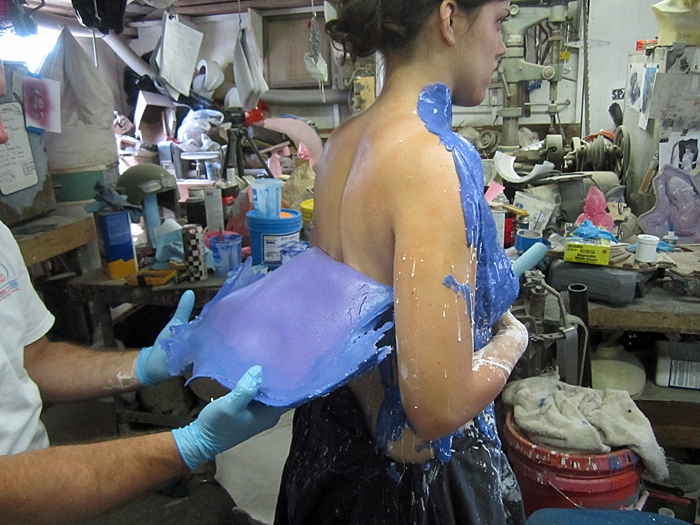
And the front:
Nested in it's plaster mothermold, here's the front half of the silicone jacket mold:
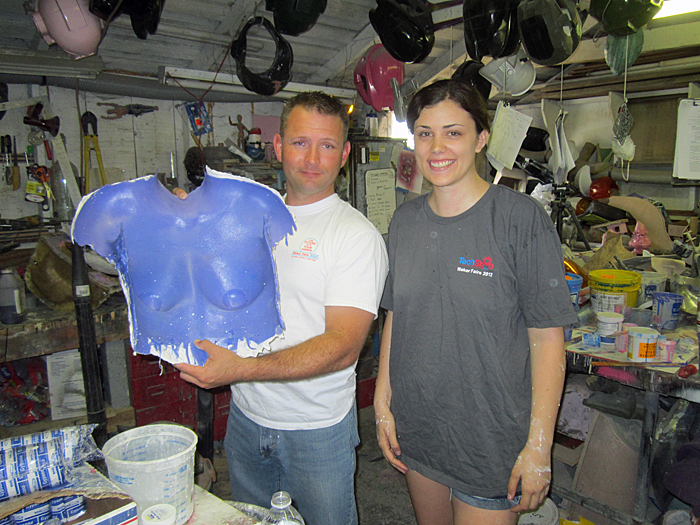
After putting the two halves of the mold back together, the next step was to rotocast a copy. The resin cast copy replicated every detail right down to the pores in her skin and the creases in the pasties she was wearing**:
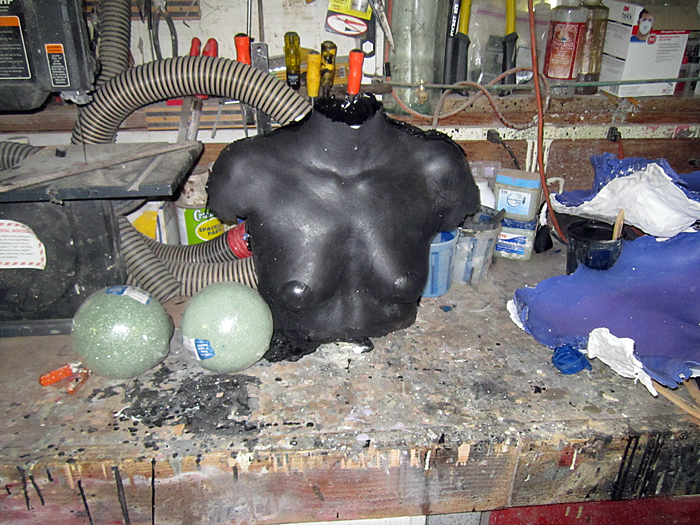
Since I did a pretty sloppy job of lining up the mold seams, I had to do some quick bondo work to clean up the edges:
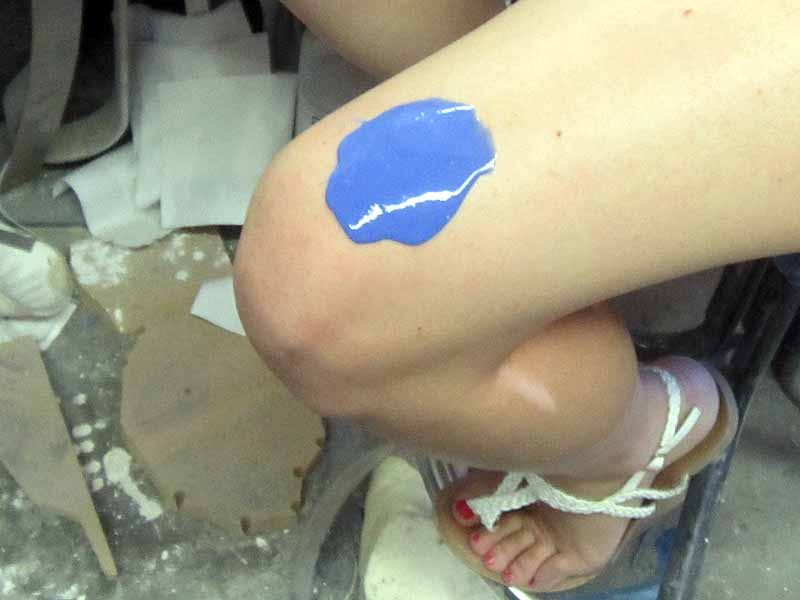
Once I'd sanded it smooth and painted it blue (to help establish the right mindset) I had the exact sculpting armature I needed.
Because I couldn't be sure of the fit, I had to design the prosthetic to be somewhat generic. That and the fact that it had to be reusable meant that I wasn't going to be able to bond it to the wearer's skin. This meant that I had to find realistic places to put seams between the model's skin and the fake parts. Since the purple necklace arrangement that covered the character's nipples ran along the extreme edges of the chest and up to the collar, that accounted for most of the seam. For the rest, I just had to sculpt in enough neathage to hide the seam in the crease under the breast.
Easy, right? Apparently not for me.
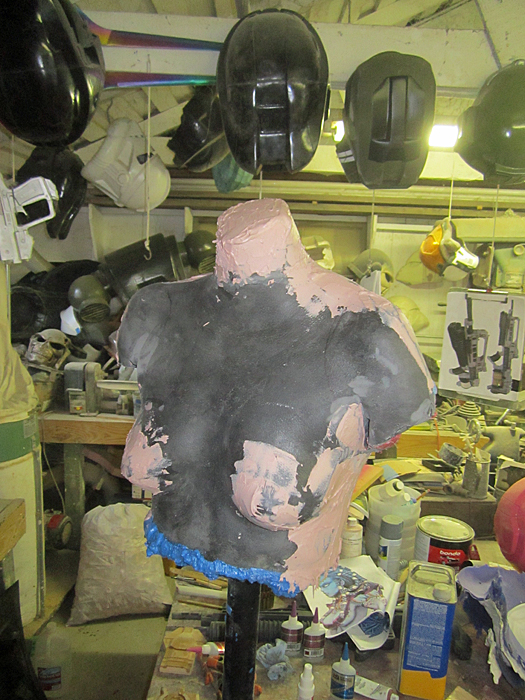
First I grafted a matched pair of styrofoam spheres over the lifecast breasts to block out the sculpt and ensure symmetry. Then I started layering clay onto the armature:
I'm not sure why, but somewhere around this point I became impossible to please. I'd spend a few hours working on the sculpt, decide I hated it, and then make drastic changes. For example, in the pic above I decided that the boobs were to long from top to bottom. Then, after some major surgery, I screwed up the symmetry:
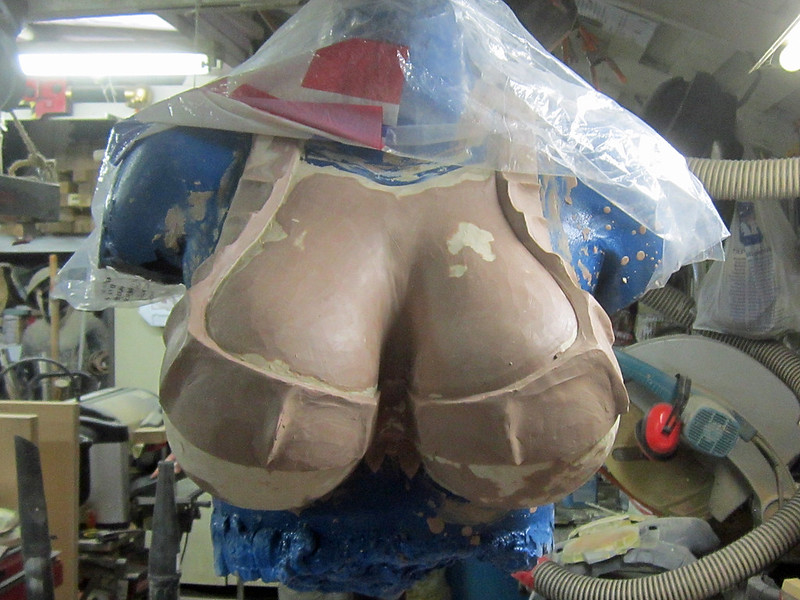
I'm glad I don't keep track of my hours when I'm working on projects like this. Still, it wouldn't be unreasonable to say I spent more than 75 hours sculpting, hacking, re-sculpting, smoothing, and re-sculpting this piece. Somewhere in the last quarter of those hours I actually heard myself say something awful. The purest form of blasphemy. A phrase I never thought would escape my lips no matter how senile I got:
"I'm really getting sick and tired of staring at this huge pair of tits all day!"Clearly there was something very wrong with me. Still, I'm quite proud of the end result.
What was the end result, you ask? Divine cleavage:
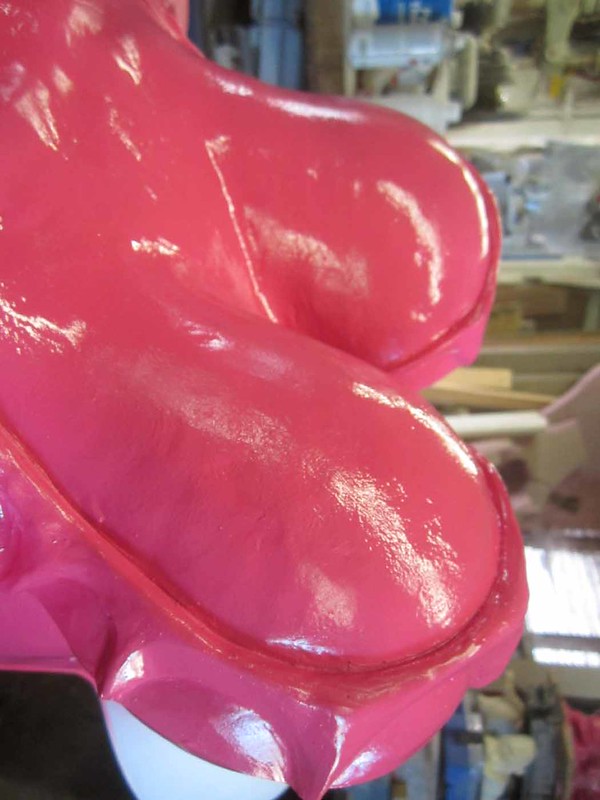
After all the strife and internal turmoil, the countless hours of late-night internet research, the endlessly painful self-critiques, I had, at long last, perfected the boobage:

Once I was satisfied with the sculpt (FINALLY!), the next step was to make it into something wearable. If money was no object, I would've cast the prosthetic in gel-filled silicone in order to give it a realistic jiggle. Sadly, the budget left no room for jiggling.
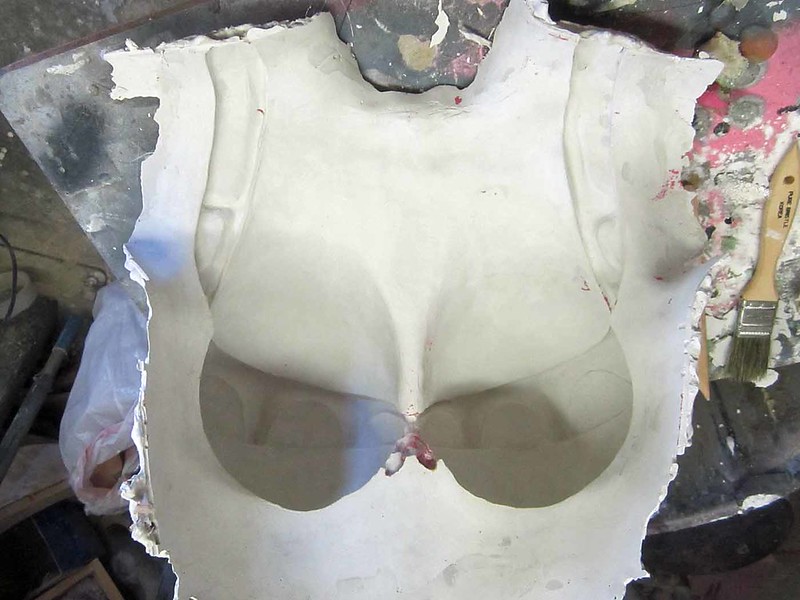
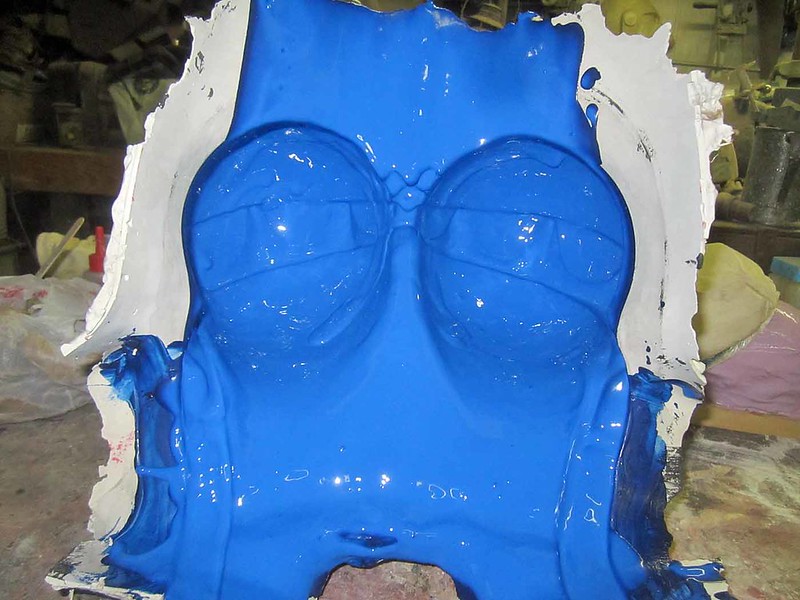
Instead, I decided to lay up a mold using Ultracal 30. This is a gypsum product (occasionally referred to as "stone") much like plaster of Paris. The mold is laid up in at least three layers: the "print coat" which picks up all of the surface details, a follow up coat to prevent the strength layer from damaging the print coat, and a strength layer that is reinforced with strips of burlap or other coarse fabric. Sooner or later I'll write up a detailed description of the building of a stone mold. For now, there are excellent tutorials available at monstermakers.com.
Once the stone had set up, I set it aside and allowed it to dry overnight. The next day I flipped the whole arrangement over, removed the lifecast, and cleaned all of the clay from the inside of the mold. I now had a negative space that was identical to the huge pair of boobs I'd pulled out of it:
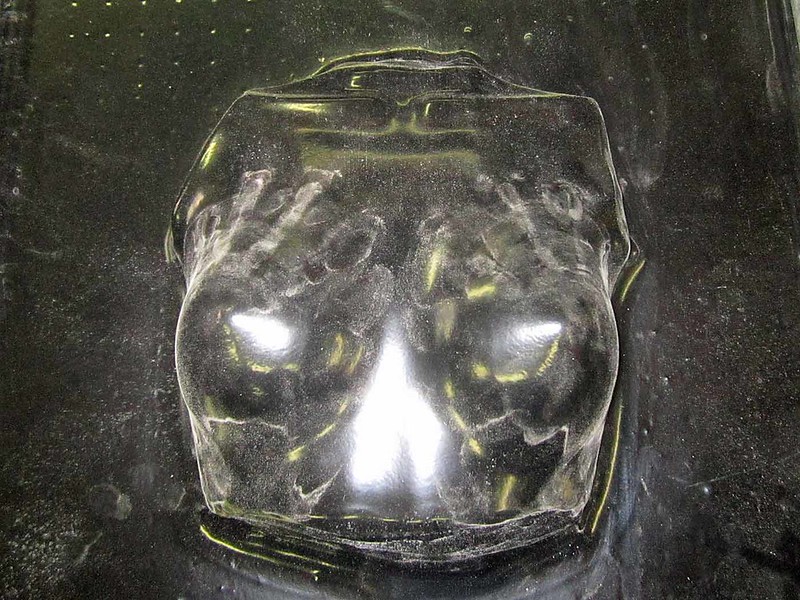
To create a strong skin on the surface of the prosthetic, I used liquid latex with a blue tint added in. Because of the porous nature of the stone mold, it wicks the moisture out of the latex as soon as it makes contact. So once the inside of the mold is coated, you have an instant skin on the outside of the pieces. All that remains is to allow the inner surface to air dry:
While I was waiting for the latex to dry overnight, I made up a forming buck and vacuum formed an inner plastic shell to go inside the prosthetic. This would be a rigid piece that would fit against the model's skin and give me something sturdier than the latex skin to attach all of the straps to:
In order to keep the prosthetic breasts from sagging and flopping all over the place, they needed to be filled. When the latex had dried, I mixed up a batch of flexible expanding foam and poured it into the stone mold:
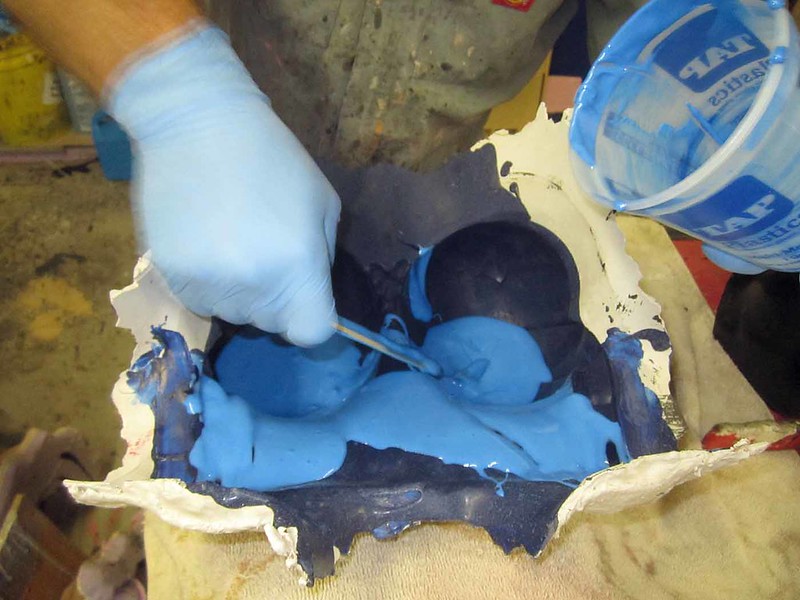
The pot life for the expanding foam is only a couple of minutes, so I had to work fast. As the foam started to expand, I rolled the mold around in order to make sure that the entire inner surface was covered in order to prevent any voids from forming:
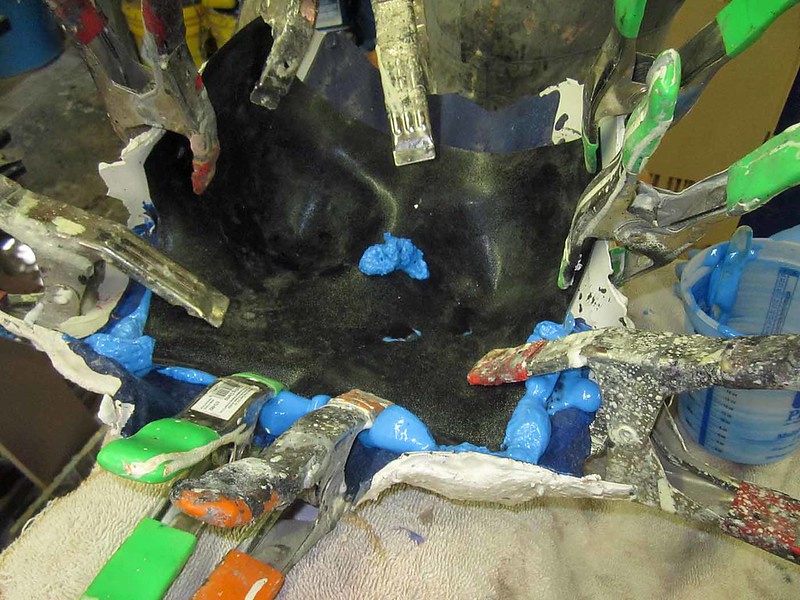
While the foam was still expanding, I pushed the inner form into place:
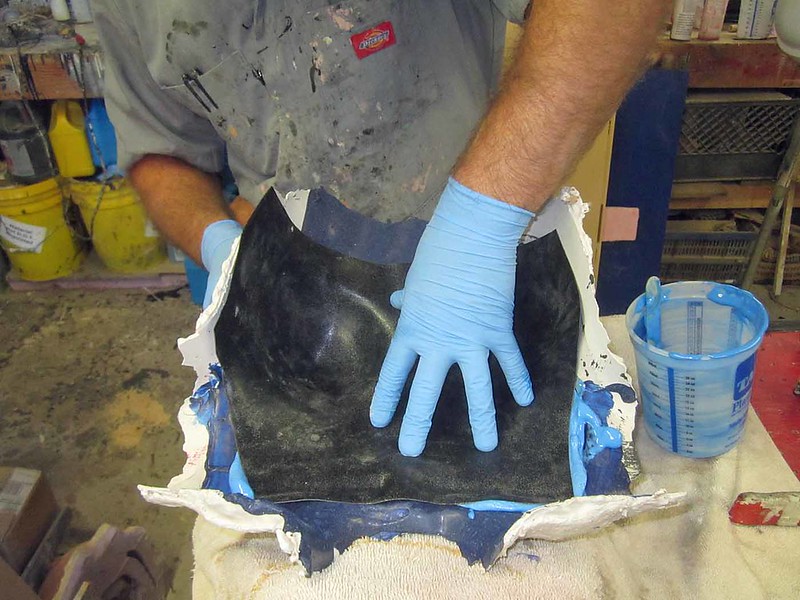
Then I held it in place with not a few clamps:
In order to prevent the expanding foam from distorting the inner form or (heaven forbid) breaking the stone mold, I drilled a hole in the inner form in order to release some of the pressure. That's why you see a blob of blue foam growing out of the sternum in the picture above.
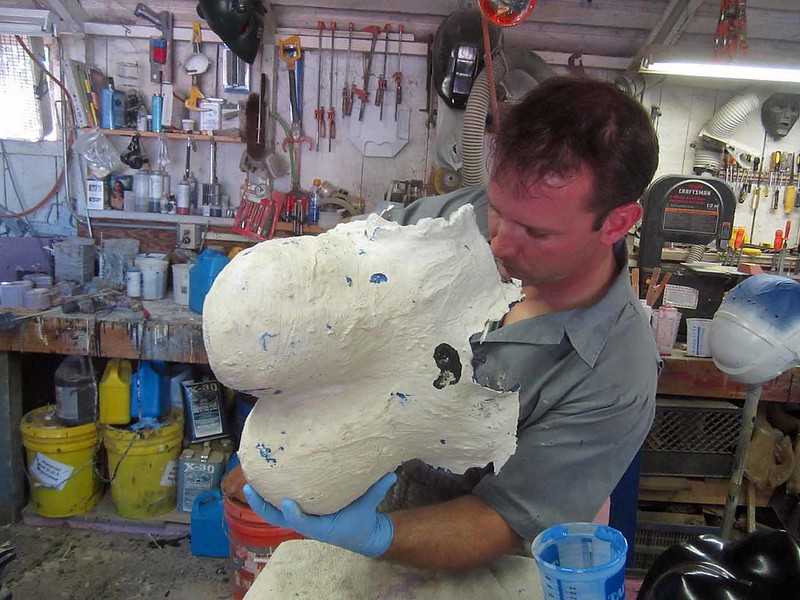
When the expanding foam had cured two hours later, it was time to peel the whole thing out of the stone mold. Since the bulk of each breast was bigger around than the portion where it attached to the ribcage, there was some concern over whether or not I'd be able to pull the very firm, full rubber piece through the narrow stone opening without breaking the mold:
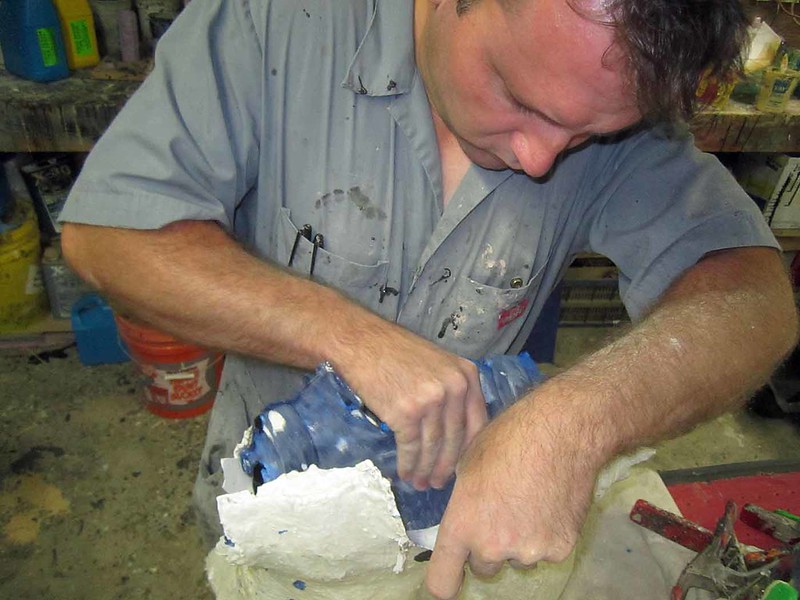
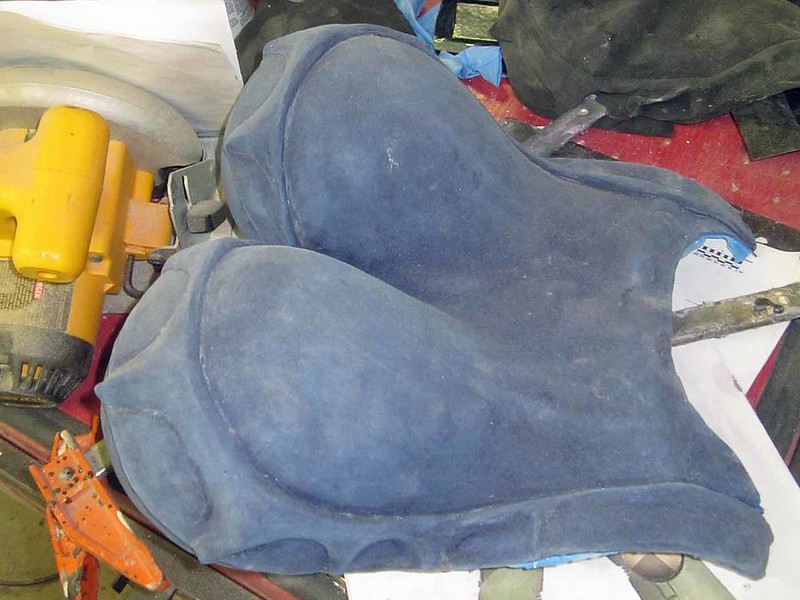
It took some careful massaging, but here's the pair of big blue boobs fresh out of the mold:
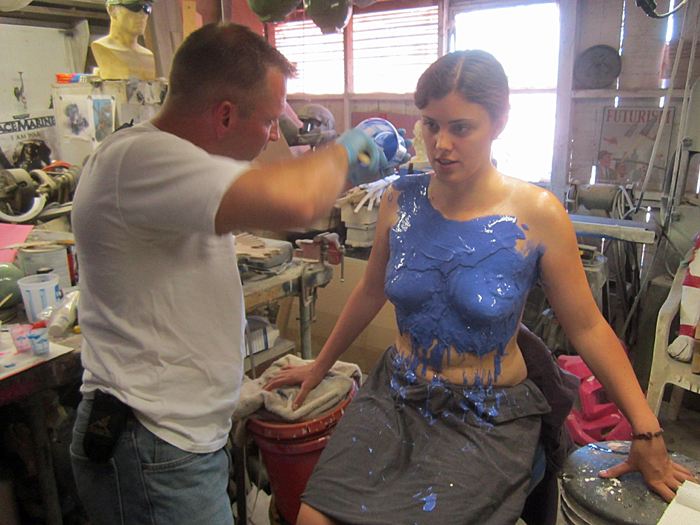
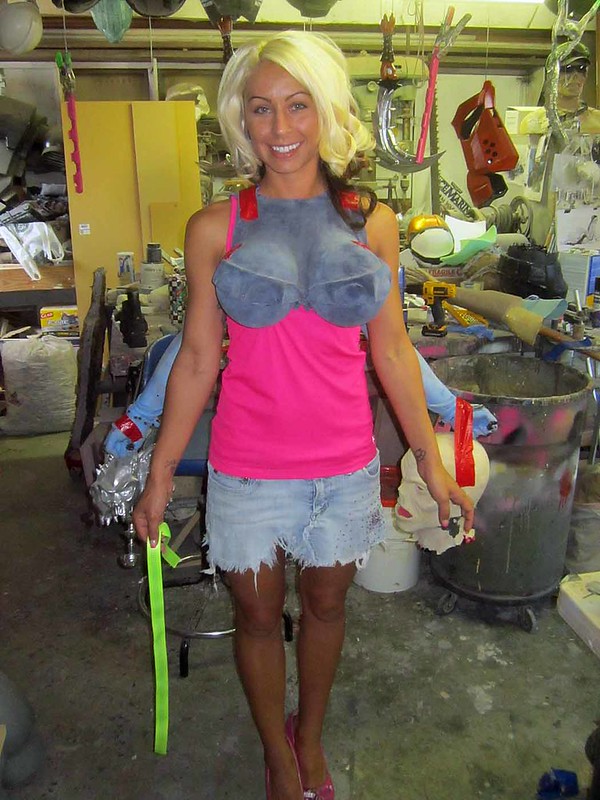
With the unpainted pair fresh out of the mold, the next step was to find a suitably sexy model to try them on:
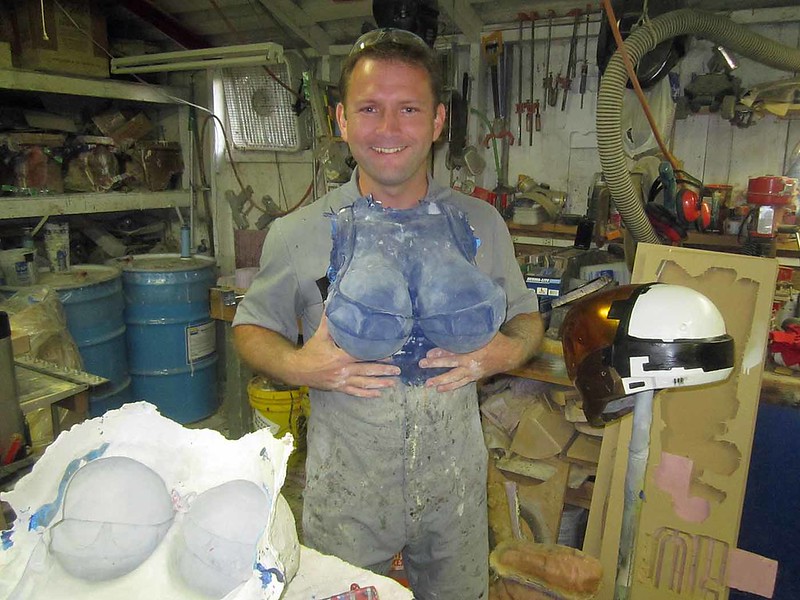
Just kidding. Sarah here was a much better fit:
Stay tuned, I still have to write up the details for building the skirt, ears, shoes, arms, cup, spare head, and swords.
Be sure to subscribe so you don't miss any updates. Sooner or later I'll post pics of Sarah being painted blue...
*Not the worst part of this job, I'll admit.
**Since I didn't need the sculpting base to have nipples, pasties were the order of the day.
The handprints on the vac formed piece made me laugh. I love your blog, and I can't wait to see more of this build process!
ReplyDeleteveryy nice , u guys have skill , <3
ReplyDelete