
Over the past three months I've been scrambling to finish a few items for Hi-Rez Studios to have at their promotional booth at PAX Prime in Seattle. Now that PAX has come and gone, I've finally got a chance to share some details of these builds. First up: the Spinfusor. This is the iconic weapon from their first-person shooter, TRIBES: Ascend.
Here's the finished piece:
More details after the jump.
Here's the finished piece:
More details after the jump.
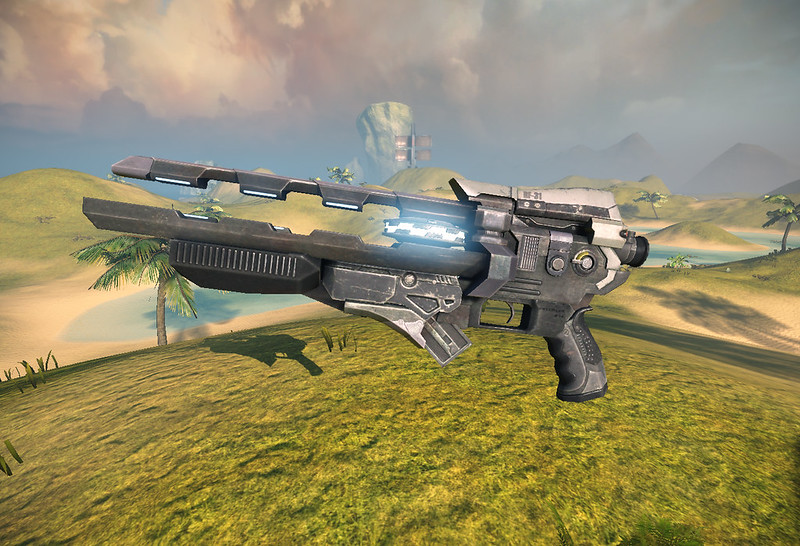
To start with, here's one of the reference images they sent me:
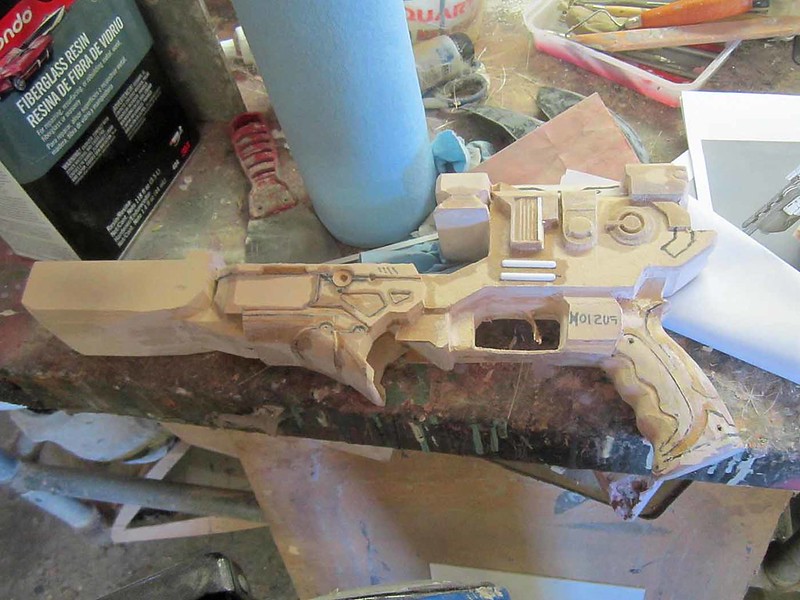
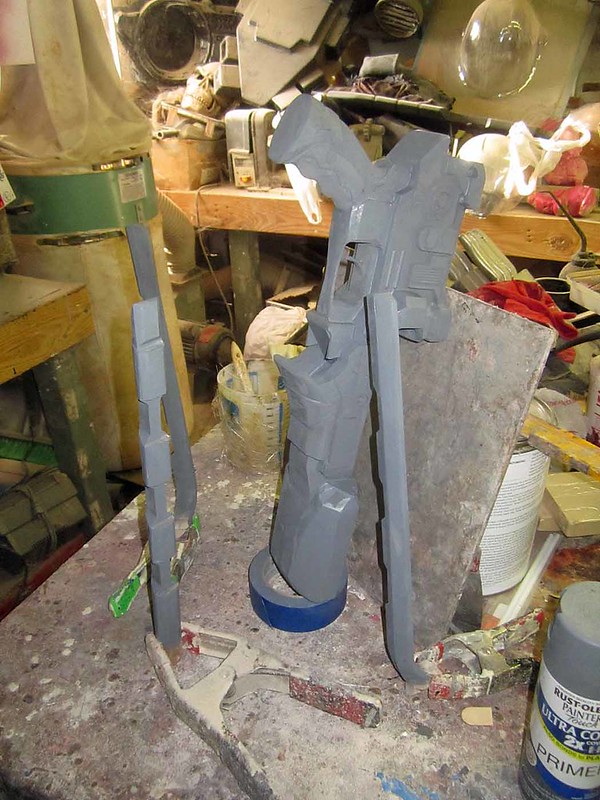
To ensure accuracy, I used the 3D files from the game and had Lopez the Robot Whittler cut out the various pieces. Deciding on a scale for the finished piece was a bit tricky because in the promotional artwork it looks like these things are over half as long as the characters carrying them. Making them that large meant making them impractically heavy and making a grip that would be twice the size of a person's hand. Instead I settled on a size that makes it comparable to a modern carbine without the buttstock.
Here's the first of the rough-cut pieces coming out of the machine:

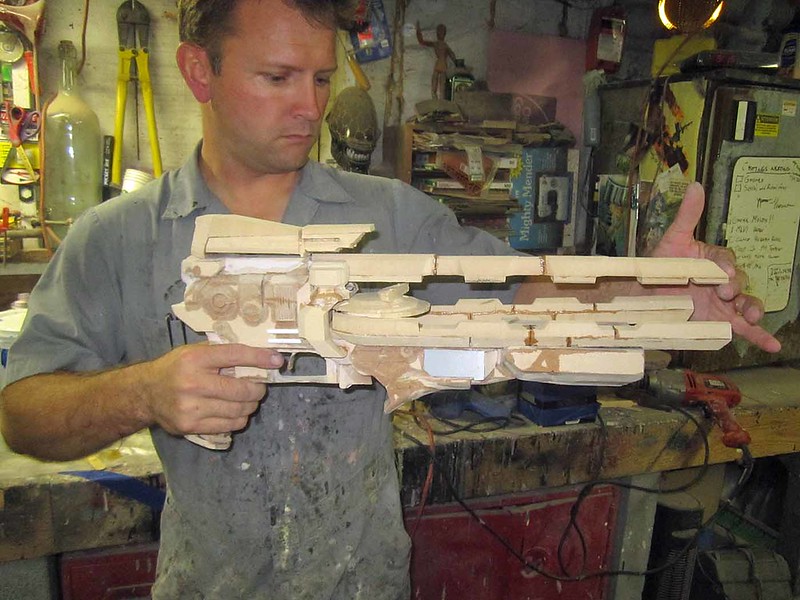
After a bit of cleanup and some fine detailing, the main body looked like so:
The pieces were cut from medium density fiberboard. It's good because it's inexpensive, but it's bad because the fine details tend to become very fragile. When I run into this problem, I use super-thin cyanoacrylate adhesive to soak into the wood and make a stronger composite that will hold up better to fine carving and cutting. That allows me to get sharper details. This is why there are darker spots on the wood where the small details are:

The in-game model was surprisingly detailed, but there were still a number of grooves and small recesses that I had to carve in by hand. Predominately those in the lower area where the small magazine detail goes and the various textures on the pistol grip itself.
Due to some oddities in the interior of the 3D model, it took quite a bit of patching and filling in order to eliminate all of the hollows in the middle layers of the main body. Also, since the CNC machine was starting to have a few mechanical problems, I had to make each of the rails in at least three separate parts. Still, the assembled piece was starting to shape up nicely:
After a significant amount of sanding, filling, and fairing, it was time to prime it and see where I stood:
After a tiny bit more smoothing and detail work, it was time to spray it with a coat of my standard prototype color and make a mold. Here it is in the early moldmaking stage:

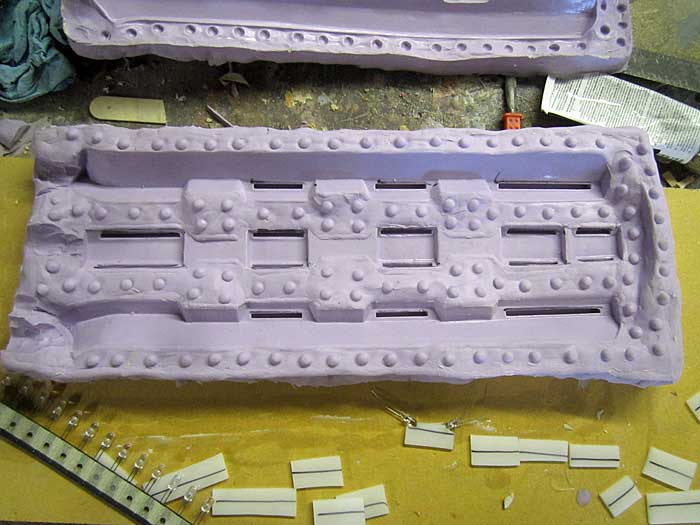
The mold for the main body was a 2-part silicone RTV jacket mold with a fiberglass mothermold much like I made for my Halo Assault Rifle. The mold for the rails was a 2-part box mold done pretty much the same as the Mass Effect Predator Heavy Pistol I did a while ago. I won't rehash all of the details here, so if you want the specific how-to bits, click on those links.
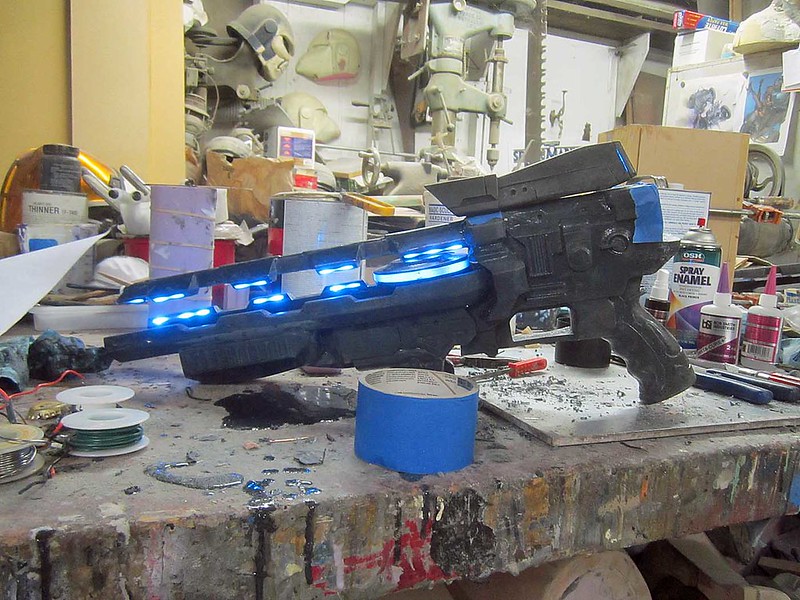
The part that made this particular project a challenge was the lighting. The rails have lighted portions all over the inside edges, but they're so narrow that it was going to be a major pain to try and install lights inside and snake wires inside them to get to a common power source. With this in mind, I decided it would be easier to build the whole lighting system and then pour the resin around it. The first step was to glue strips of 1/8" acrylic to the prototype rails. That left notches in the molds everywhere I needed to have a visible light in the finished piece:
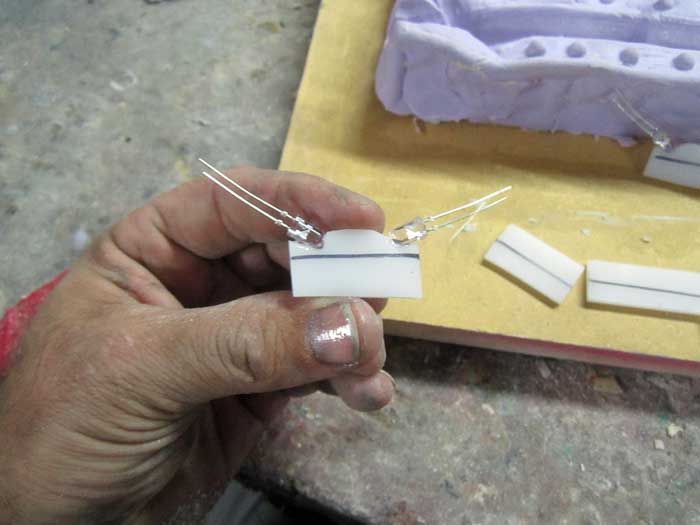
For each light, I cut a small piece of frosted acrylic and fitted it with ultra-bright blue LEDs:
These assemblies were then slotted into the notches in the mold:
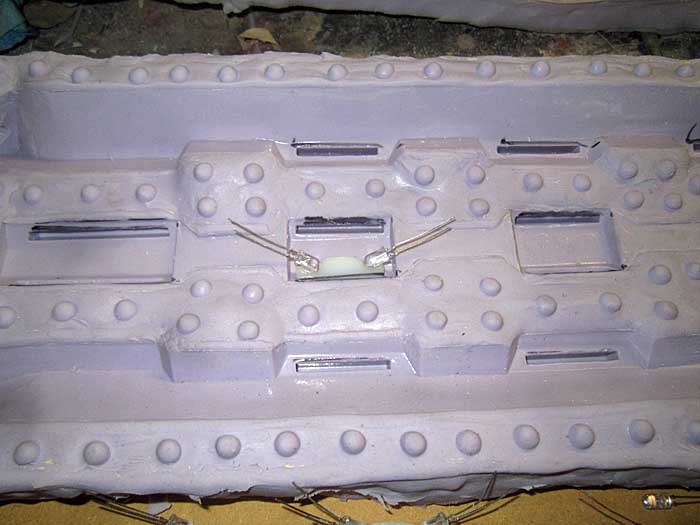
Since the top rail was a long, skinny, unsupported piece, I was worried about it being too breakable if it was just a solid piece of resin. To reinforce it, I used a piece of 3/16" brass rod which also doubled as one of the conductors for the lights. Here's a shot of me soldering together all of the leads on the second copy of the Spinfusor:
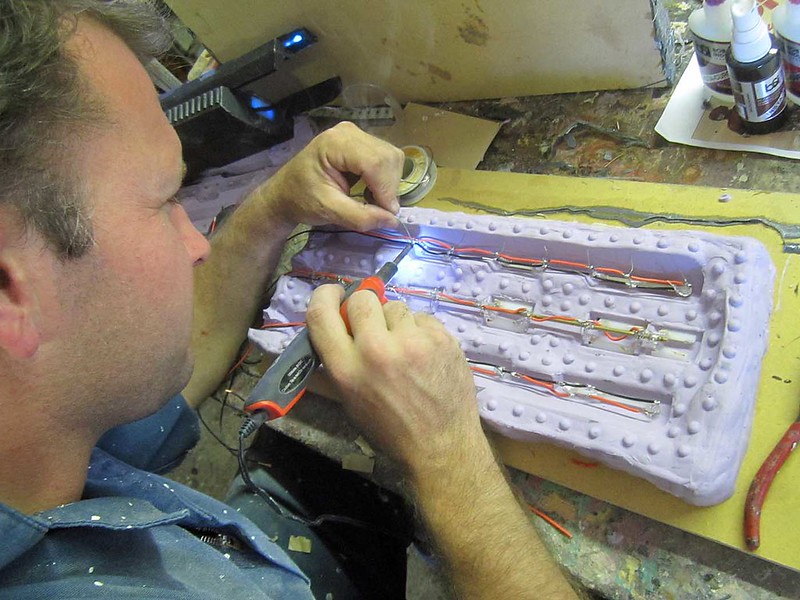
In this picture, you can clearly see the brass rod running down the middle of the center rail. All of the LEDs are wired up in parallel, so there's a significant current draw. This thing sucks the life out of batteries pretty quickly.
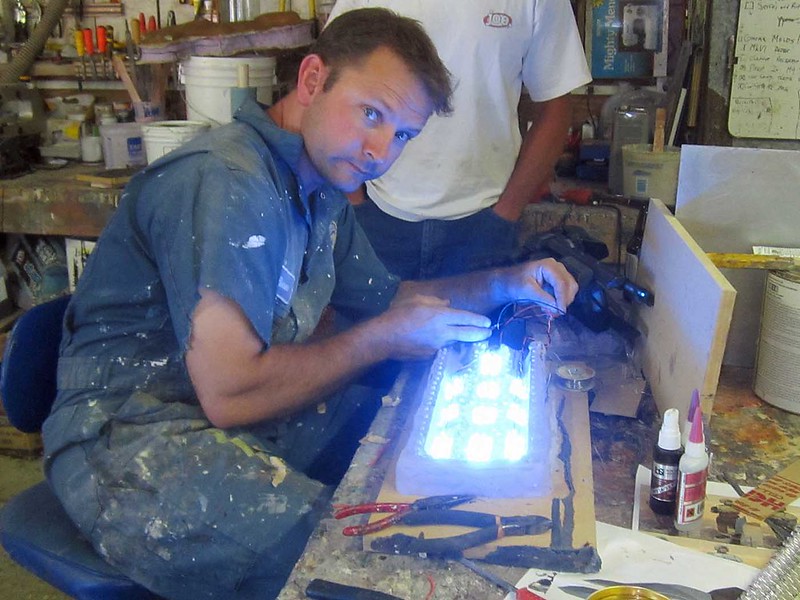
Before closing everything up, it was important to test the lights to make sure everything worked:
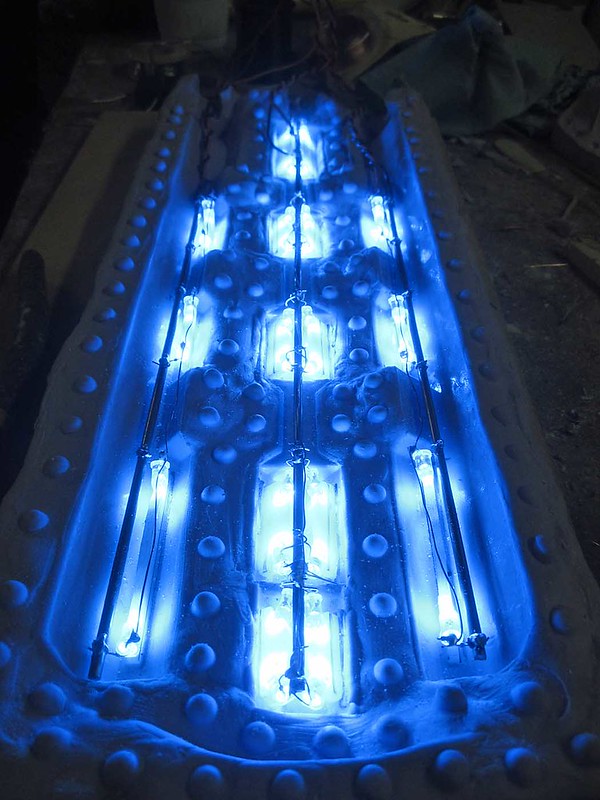
Shiny! Much better than version one:
Once the mold was clamped shut, I stood it up on end and filled it with resin. As soon as the resin had cured, it was a simple matter of grinding off the excess acrylic so that the lights would sit flush with the surface of the rails.
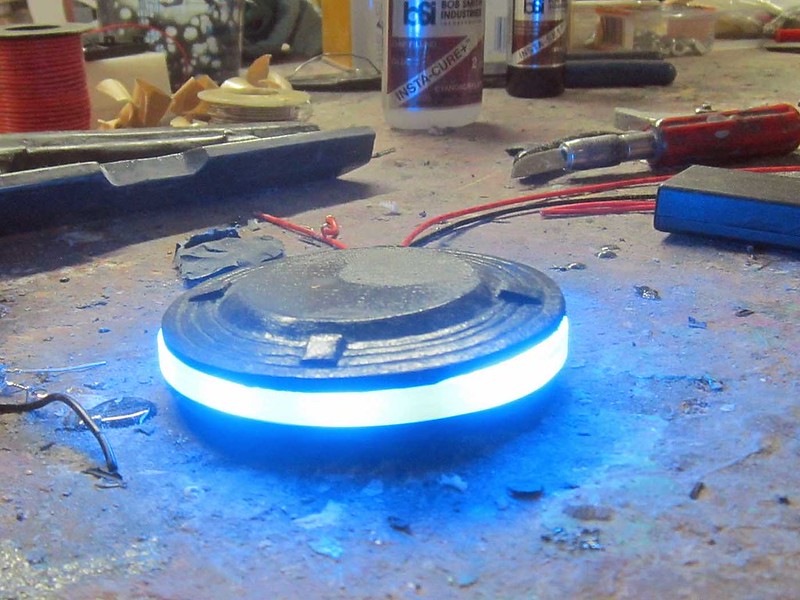
The lighting for the disc was also a parallel array of LEDs embedded in an acrylic disc glued between the top and bottom pieces of the disc. Here's the inside:
The lighting for the disc was also a parallel array of LEDs embedded in an acrylic disc glued between the top and bottom pieces of the disc. Here's the inside:

Here it is all stuck together:
Finally, here's the whole thing assembled and illuminated:
There's one more LED in the scope assembly to light up the ammo counter readout on the back end.
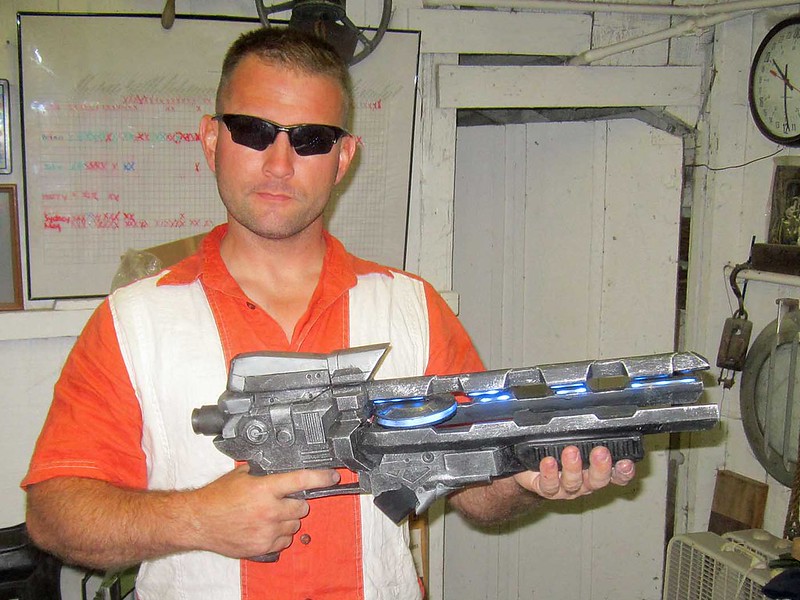
Here's a shot of me holding the finished piece for scale:
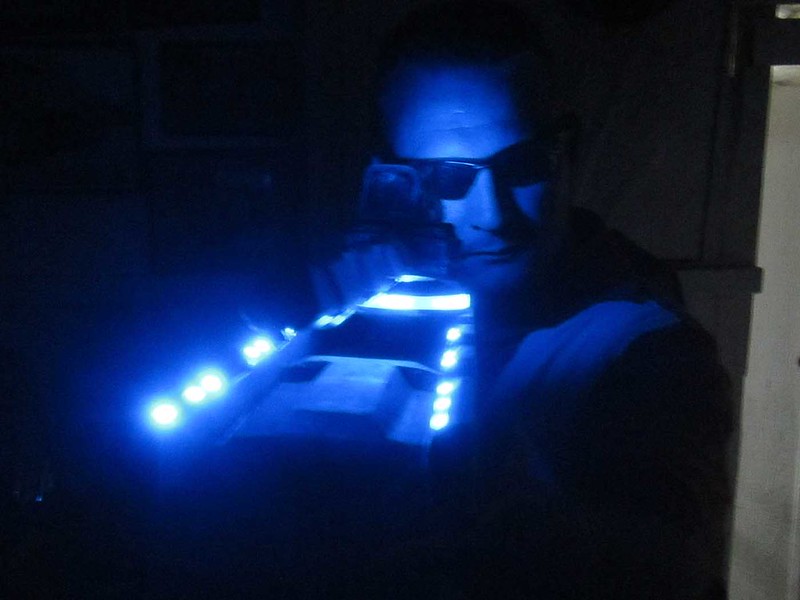
Here it is in low light:
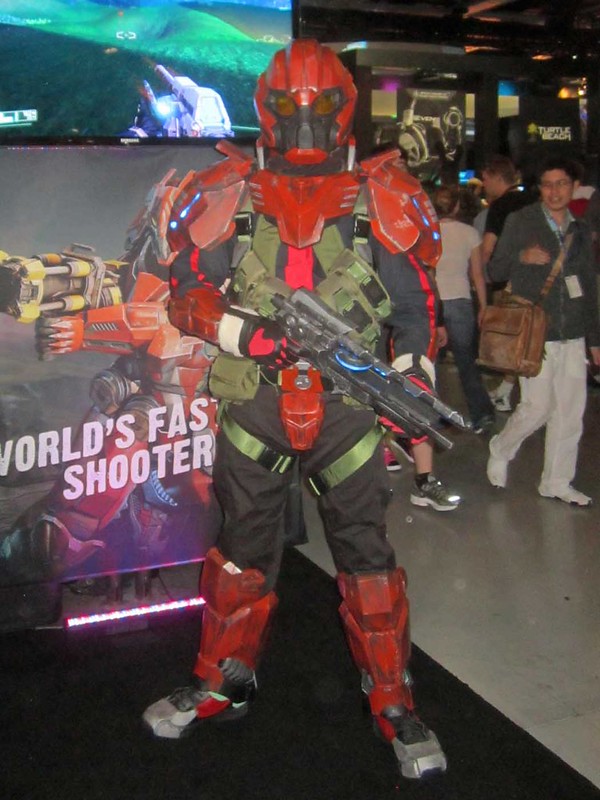
I was pretty happy with the end result. There's still a few things I'd like to tune up, but I was on a very cramped timeline to deliver the finished piece to PAX Prime. If you were there, you probably saw it looking like so:
I'm still sorting through pictures so I can describe the build for the costume, so be sure to subscribe so you don't miss any updates.
The best part about this project is that I'm allowed to make extra copies to sell. If you're interested in owning your own copy of this prop, I'll make a raw, untrimmed copy of the pieces with no lights for $180 plus shipping. If you'd prefer a fully-finished piece with working lights that will be ready for display right out of the box that will cost you $575 plus shipping. Feel free to contact me by clicking here.
.
Out of curiosity, why didn't you do a vacuform prop for the spinfuzor instead of doing a resin cast?
ReplyDeleteThere are a lot of very small details that wouldn't really show through unless the plastic was very thin (read: flimsy). I wanted to make a sturdy piece that would have some weight to it.
DeleteIf I make one of the light Diamond Sword armor variants, there will be some vacformed pieces.
But.. you dressed as a pathfinder with the soldier spinfusor..
ReplyDeleteIt really wasn't up to me.
DeleteSooner or later it'll bother me enough to just crank out a light spinfusor for my own collection.
Deletewow!
ReplyDeletei love your workplace and you!
I envy your motivation.
ReplyDeleteAwesome work with the spinfusor! Looks like a great game to play.
ReplyDeletePlay Tribes Ascend!
http://bit.ly/Q1a8Hj
it is still awesome :D
DeleteYou know, I saw pictures of this ages ago, and then when I started reading your blog I looked through your portfolio and saw this.
ReplyDeleteNeedless to say, I was quite pleased.
I say that any suit can use any weapon (except the Laser Rifle and Fusion Mortar). Tribes 2 forever!
ReplyDeleteLoadout freedom!
Good job on your suit and fuser. I go small and make fusers for megablock figures for my nephews. :)
still playing?
Delete