
So as of my last update, Jeff had done the digital modeling to get us to this point:
The arms do not have that problem. They don't have to hold up anything but a coat of paint. As long as they're the right shape and can survive being put on, worn around, and taken off, they've done their job. So there's no need to go through the very labor intensive process of making them in fiberglass. Instead we can get away with something significantly faster and less expensive. While I could just make silicone molds of each part of the arms and rotocast them in urethane resin, it would be a lot of work, cost quite a bit of money, the parts would have a tendency to be a bit breakable, and then I'd have four really big molds that I would need to store somewhere afterwards.*
Fortunately, their mostly smooth organic shape lends itself to an easier replication process: vacuum forming.
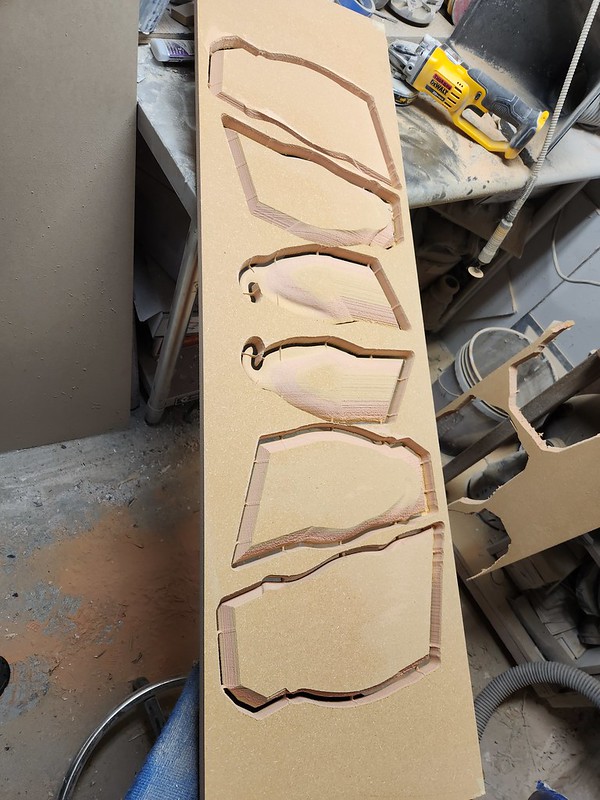
To make the vacforming bucks, I started by filling in the insides of Jeff's arm models to make them solid blocks instead of wearable sleeves. Then I imported them into the Project Designer software for my Carvewright CNC machines and sliced them up into pieces I could carve out on that 3-axis machine like so:

That's the inside half of the upper arm, mirrored to make the left and right versions.
To make the vacforming bucks, I started by filling in the insides of Jeff's arm models to make them solid blocks instead of wearable sleeves. Then I imported them into the Project Designer software for my Carvewright CNC machines and sliced them up into pieces I could carve out on that 3-axis machine like so:
That's the inside half of the upper arm, mirrored to make the left and right versions.
Once I was happy with all of the parts I'd need, I fired up Lopez the Robot Whittler and left him to run:

In the space of a few hours, the first set of parts was carved:
Somewhere along the way, one of the bearings on the Z-axis truck sheared off it's mounting screw and I got this weirdness:

Weirdness. Look at it:
Here's a set of properly carved pieces next to the weirness:

I'm a bit embarrassed by how long my troubleshooting process took before I got that little problem fixed. But since these pieces didn't have any fine details to preserve, I would still be able to use the weirdness and the time and material wouldn't go to waste.
In the space of a few hours, the first set of parts was carved:
Somewhere along the way, one of the bearings on the Z-axis truck sheared off it's mounting screw and I got this weirdness:
Weirdness. Look at it:
Here's a set of properly carved pieces next to the weirness:
I'm a bit embarrassed by how long my troubleshooting process took before I got that little problem fixed. But since these pieces didn't have any fine details to preserve, I would still be able to use the weirdness and the time and material wouldn't go to waste.
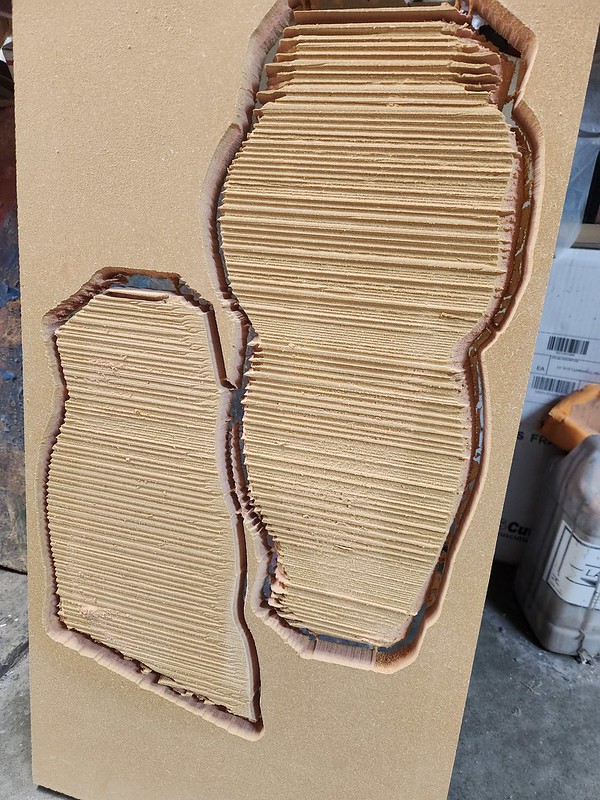
So I started by stacking the slices up and gluing them together:

For the slices with the weirdness, I did a bit of rough shaping with a coarse rasp, then filled any gaps with sawdust soaked in superglue, then worked the roughness back into shape with a flapwheel grinder, rasps, and coarse sandpaper:

The glue/sawdust composite would end up being sturdier than the rest of the MDF board, but since I'm only going to need four or so pulls from each of these bucks, it turns out there's no reason to reinforce the whole surface.
Here's all four upper arm parts (outsides, insides, left and right) after the initial assembly and reshaping was done:

With most of the shape tuned up, I did a bit of final smoothing with Bondo and coarse sandpaper:

Bondo isn't ideally suited to deal with the kind of heating and cooling cycles that vacforming will put it through, but since they'll only get very limited use, I wasn't worried about it.
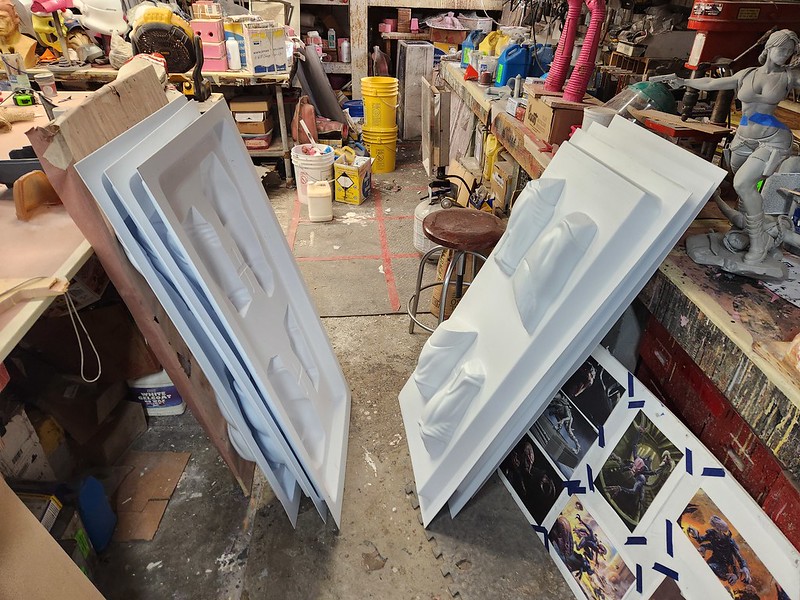
So after about half a day of filling and sanding, I had all of the arm parts smoothed out and ready for vacforming:

In order to make a pair of arms, I would have to do two pulls on the forming machine. Here's half of the forming bucks laid out on the platen as the plastic sheet (0.125" high impact polystyrene in this case) is being heated:

Here's the machine in action:

Schnazzy:

The forming bucks were removed from the sheet and set aside to cool off (to keep the bondo from getting too soft from the heat) and I set up the other four bucks to pull the other half of the first pair of arms:

It turns out I could've spent just a bit more time smoothing out the forming bucks to make the surface smoother, but give the irregular, organic nature of the shapes we're working with, I wasn't too particularly concerned about the little bits of wiggly-ness here and there. Here's a closeup of the shoulder area that shows the worst of what I'm referring to:

It's fine.
For the slices with the weirdness, I did a bit of rough shaping with a coarse rasp, then filled any gaps with sawdust soaked in superglue, then worked the roughness back into shape with a flapwheel grinder, rasps, and coarse sandpaper:
The glue/sawdust composite would end up being sturdier than the rest of the MDF board, but since I'm only going to need four or so pulls from each of these bucks, it turns out there's no reason to reinforce the whole surface.
Here's all four upper arm parts (outsides, insides, left and right) after the initial assembly and reshaping was done:
With most of the shape tuned up, I did a bit of final smoothing with Bondo and coarse sandpaper:
Bondo isn't ideally suited to deal with the kind of heating and cooling cycles that vacforming will put it through, but since they'll only get very limited use, I wasn't worried about it.
So after about half a day of filling and sanding, I had all of the arm parts smoothed out and ready for vacforming:
In order to make a pair of arms, I would have to do two pulls on the forming machine. Here's half of the forming bucks laid out on the platen as the plastic sheet (0.125" high impact polystyrene in this case) is being heated:
Here's the machine in action:
And moments later, here's the first set of vacformed arm parts:
Schnazzy:
The forming bucks were removed from the sheet and set aside to cool off (to keep the bondo from getting too soft from the heat) and I set up the other four bucks to pull the other half of the first pair of arms:
It turns out I could've spent just a bit more time smoothing out the forming bucks to make the surface smoother, but give the irregular, organic nature of the shapes we're working with, I wasn't too particularly concerned about the little bits of wiggly-ness here and there. Here's a closeup of the shoulder area that shows the worst of what I'm referring to:
It's fine.
So I forged ahead and pulled four pairs of arms worth of sheets:
So with all of the parts formed, the next step was to trim off the excess plastic and make a nice, neat stack:

Now I just need to do the last little bit of trimming and I can seam the edges together and make them wearable.
I've been putting off posting about this update in the blog, because It feels horribly dissatisfying to not have this step just a bit more done, but I also know that if I post pics of the parts trimmed and glued together I'm going to wish I also had pictures of them all rigged and wearable. And if I show them rigged and wearable I'm going to wish they were painted. And if...
The deal is: I resolved that I would post every week no matter what and it's already been twelve days since my last update, so it's time to stop failing at keeping y'all up to date on how this is going.
Stay tuned for more. This thing is about to start looking like something.
*I know I'll probably never make any more of these things, but with all of the work that goes into making molds, I hate the notion of discarding them after a project is wrapped because you never know if they'll turn out to be useful at some point. As a result, I have a lot of storage space that is claustrophobically jam-packed with molds from almost every project I've ever built. It's terrifying.
Does rubbing a stick over the corrugated MDF play a secret message?
ReplyDelete