
Part 1: Rapid Prototyping the Helmet
Part 2: the Hard Parts
The whole suit is supposed to look like it's made of metal (I know, a gold-titanium alloy). So for me nothing detracts from an otherwise well-done Ironman costume like gaps around the joints showing that there's just a spandex-clad nerd inside.
While I'm not about to go through the trouble of engineering a series of compression articulations for these areas, I still need to fill them in with something that I can convincingly paint to look the part.
This is why I needed to make the rubber bits:

To see how I made these parts, read on...
In the end, the flexible rubber bits of the suit were made out of slipcast latex. This is the same material used to make halloween masks and such. For a really quick primer on how to make your own mask, check out the same tutorial I originally learned it from at Monstermakers.com.
Modifying the maskmaking techniques slightly, I made flexible parts for the knees, elbows, and neck. Let's start with...
The Knees and Elbows:
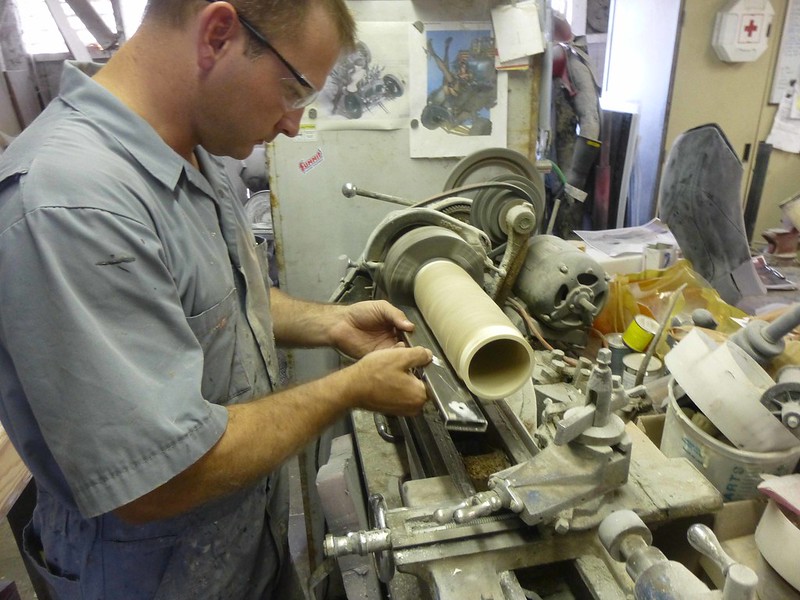
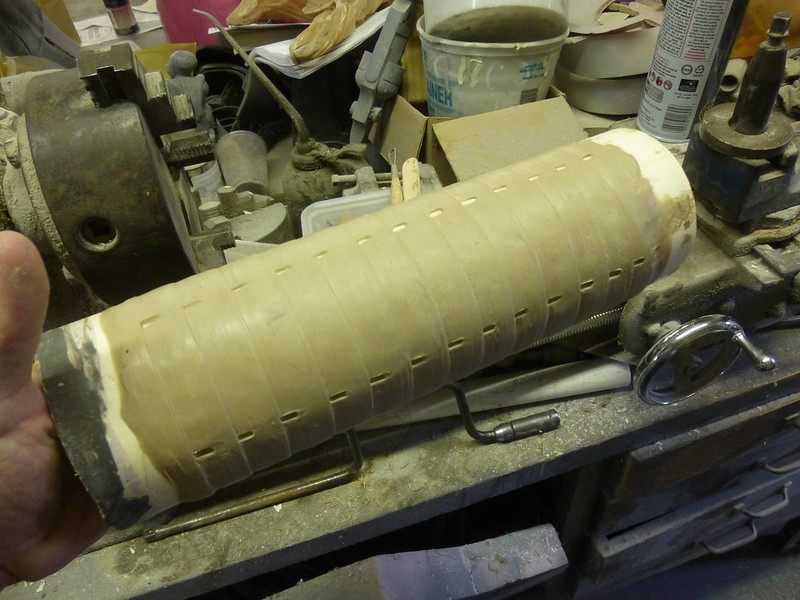
The sculpt for the knee and elbow parts was exceedingly simple. I started with a piece of plastic pipe that was almost big enough to fit the appropriate appendage inside. Then I chucked it into the lathe and loaded it up with oil-based clay.
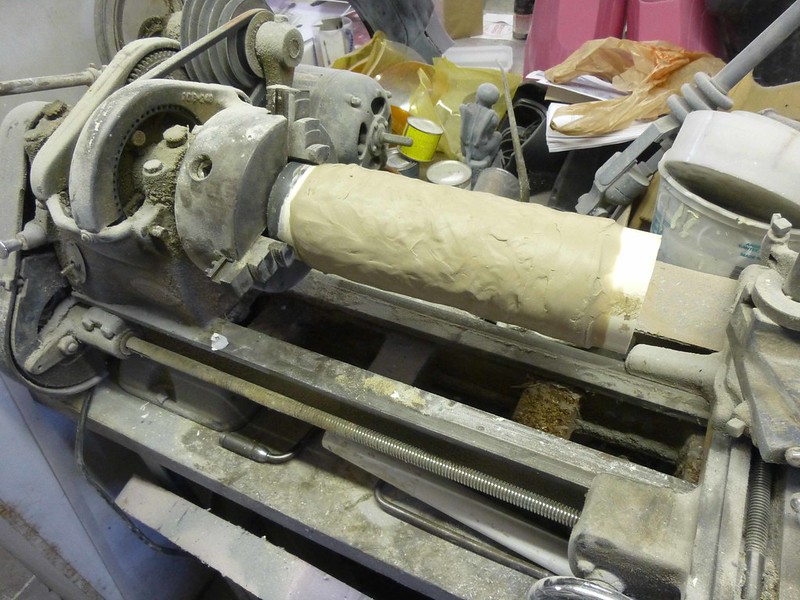
Once I had some thickness built up, I started turning it back down and making everything nice and round using a variety of improvised tools:
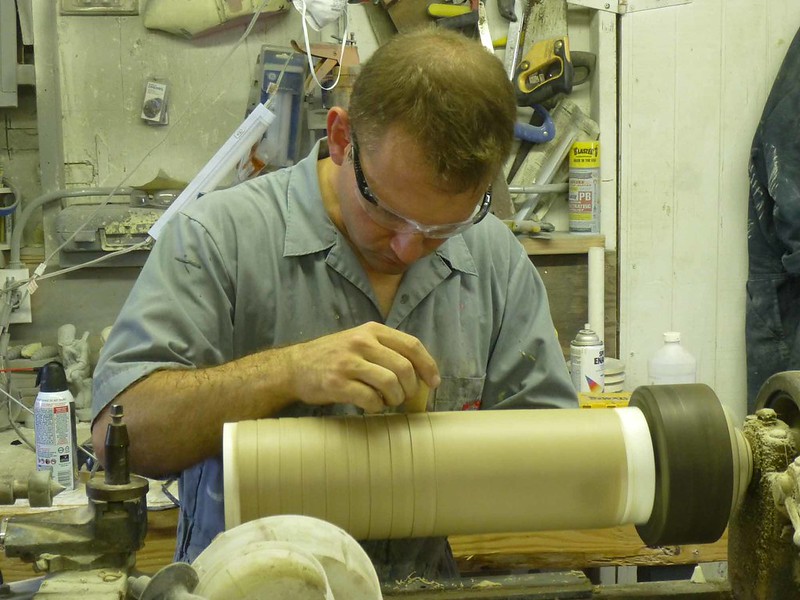
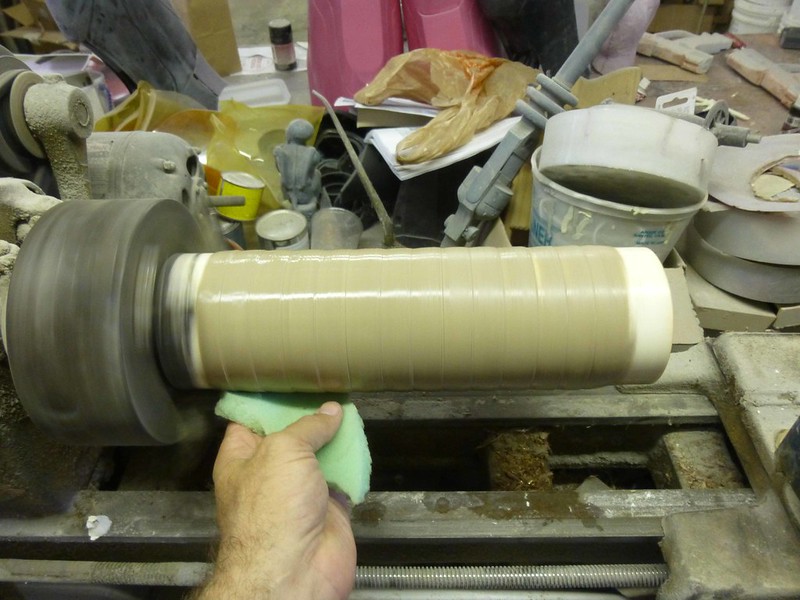
Once I'd turned all of the grooves, the next step was to sculpt in some of the smaller details. Here's the finished elbow sculpt:
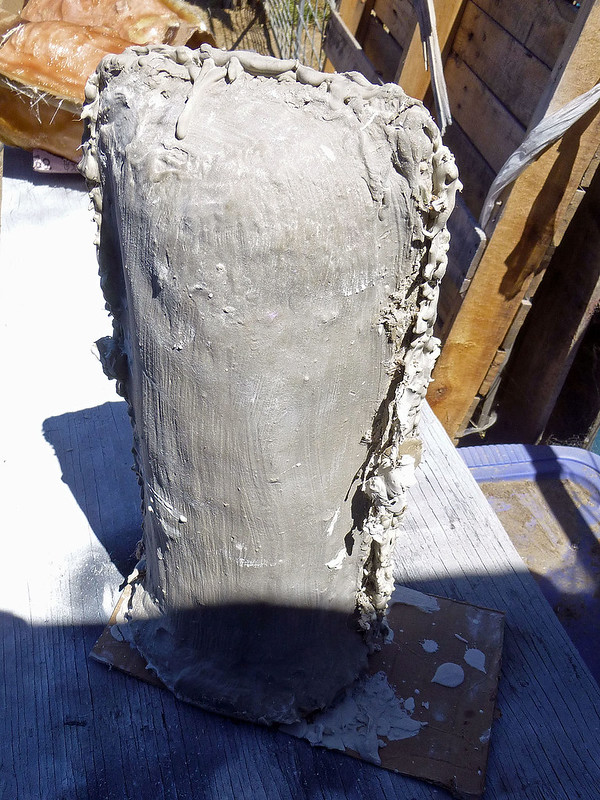
The knees were done in much the same way. Then it was time to set them up for molding. In this case, I'm going to be making a two-piece stone mold out of Ultracal 30, a gypsum product. I start by making a clay wall to form a drip tray around the base of the pieces:
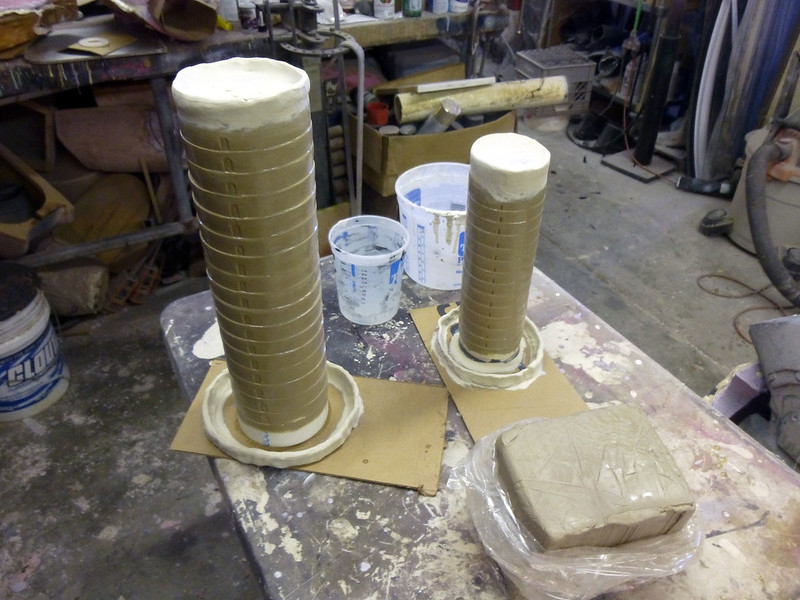
Then I use water-based clay (which won't bond to the oil-based clay and ruin the sculpt) to make a parting wall:
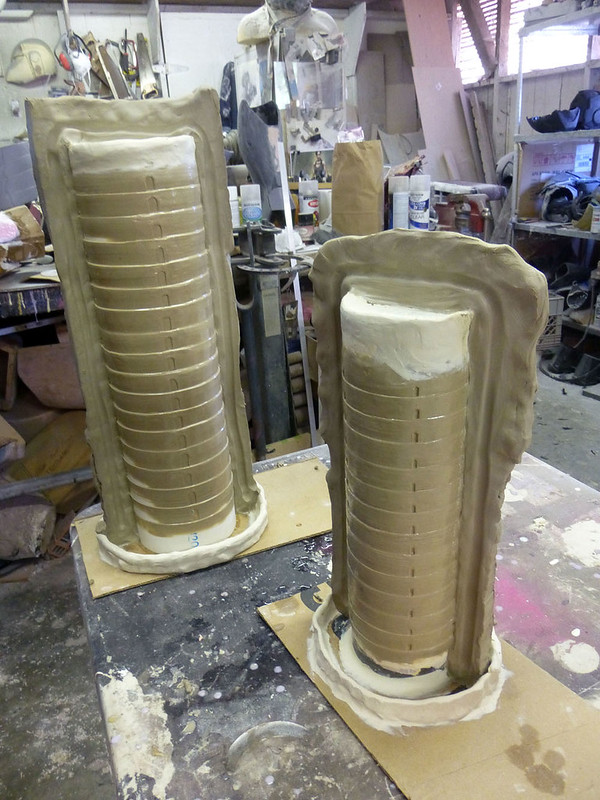
Notice the groove sculpted into the parting wall. Later this will serve as a registration key to align the two halves of the mold.
Once the parting wall is in place, it's time to start building up layers of Ultracal. After the first layer sets up, I reinforce the second and subsequent layers by adding strips of Ultracal-soaked burlap:
With the Ultracal built up on the first side, it was time to turn the whole arrangement around and get stared on the other half:
With the parting wall removed you can see the registration groove I was talking about is left behind as a raised ridge in the Ultracal:
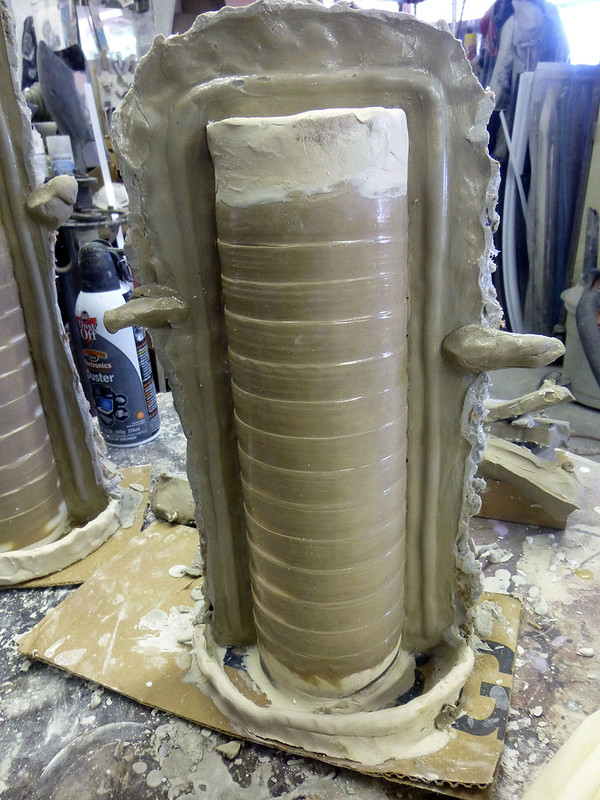
After peeling off the water-based clay, I used a soft bristle brush and some water to clean away any small bits or residue that were left behind. Then I coated the parting wall with petroleum jelly to prevent it from sticking to the second half. Then I added some clay blobs to give me a spot to pry against when it comes time to separate the two halves:
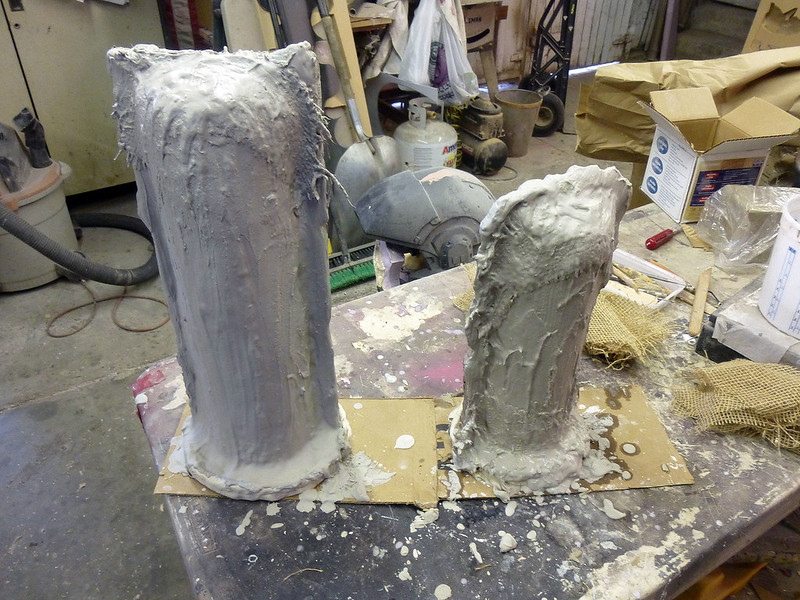
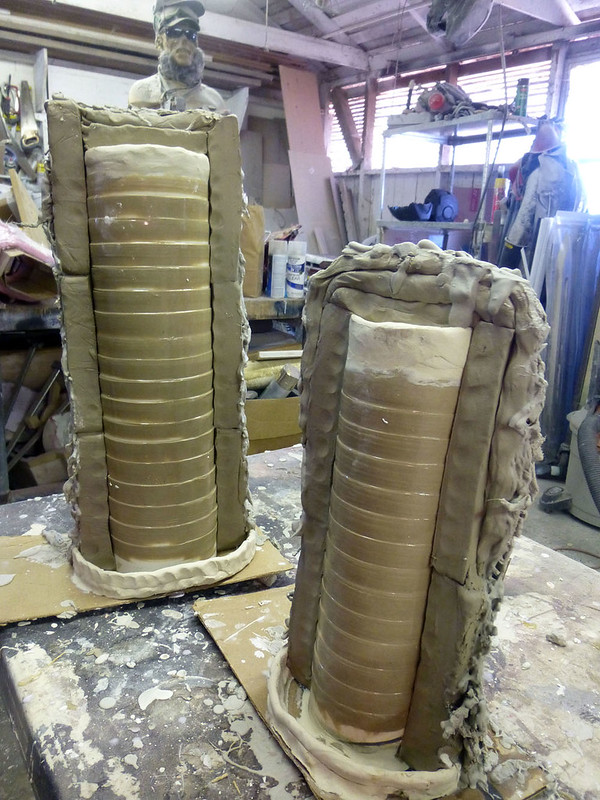
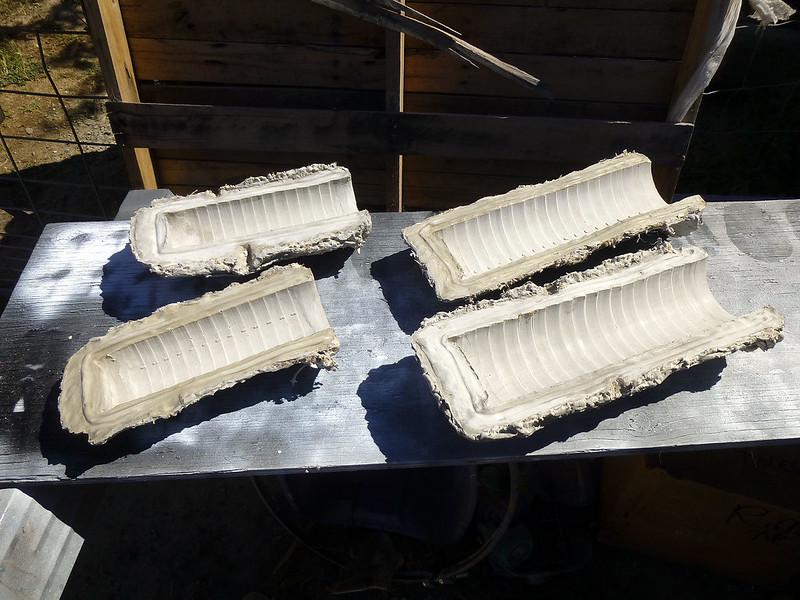
After building up the Ultracal and burlap for the second half, I set the molds outside to cure in the sun:
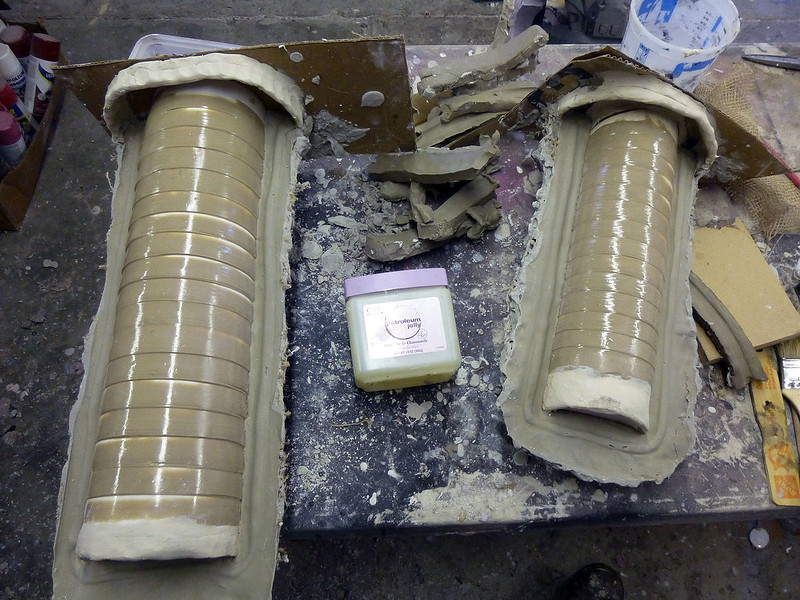
Once the Ultracal had cured, I pried the two halves apart and removed the sculpt:
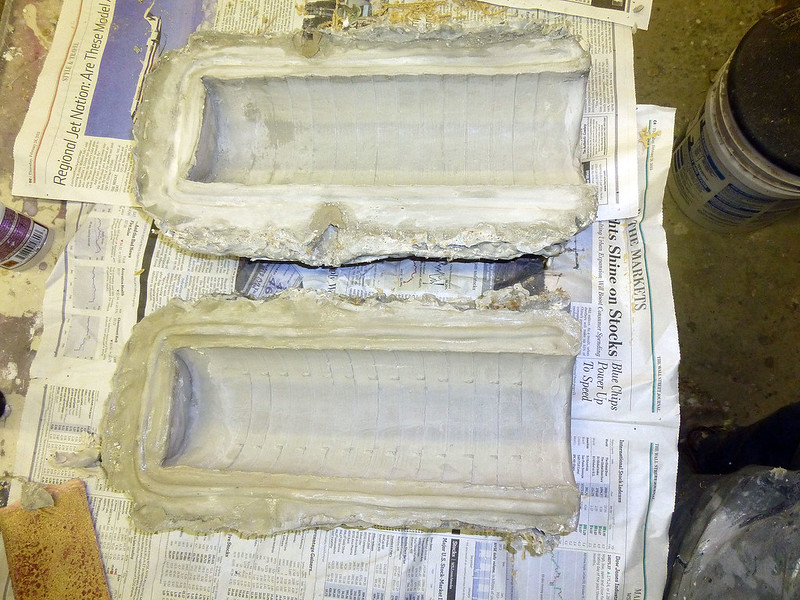
After cleaning out any oil-based clay residue with some rubbing alcohol and a soft brush, I set the knee and elbow molds out in the sun to cure a bit more:
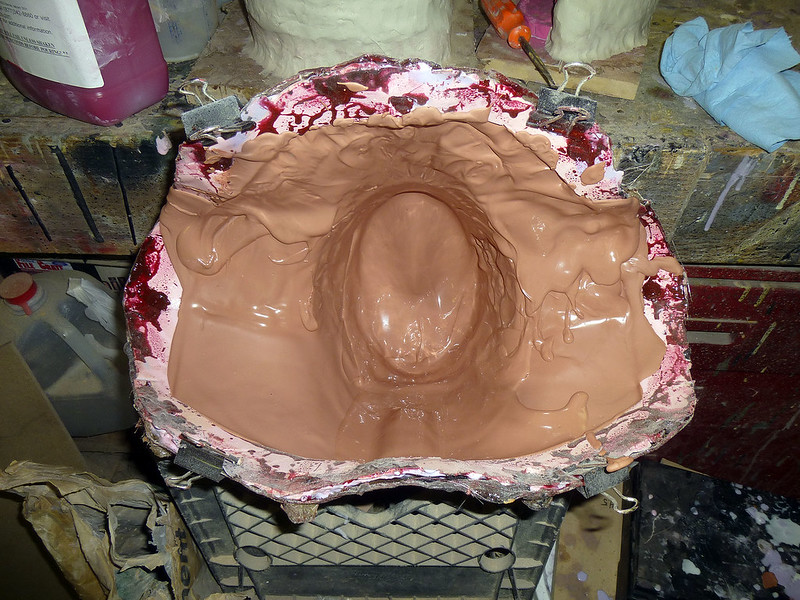
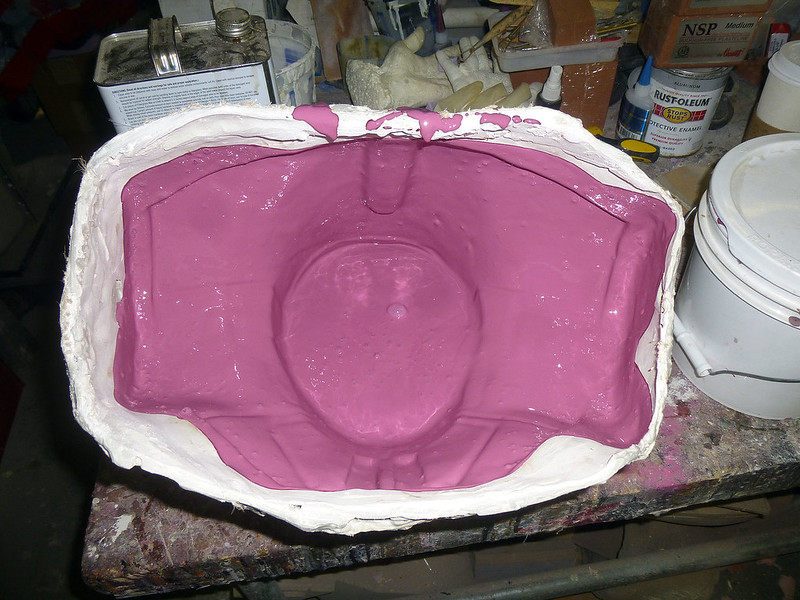
Once they were nice and dry, I clamped them closed again and filled both molds with liquid Mask Making Latex
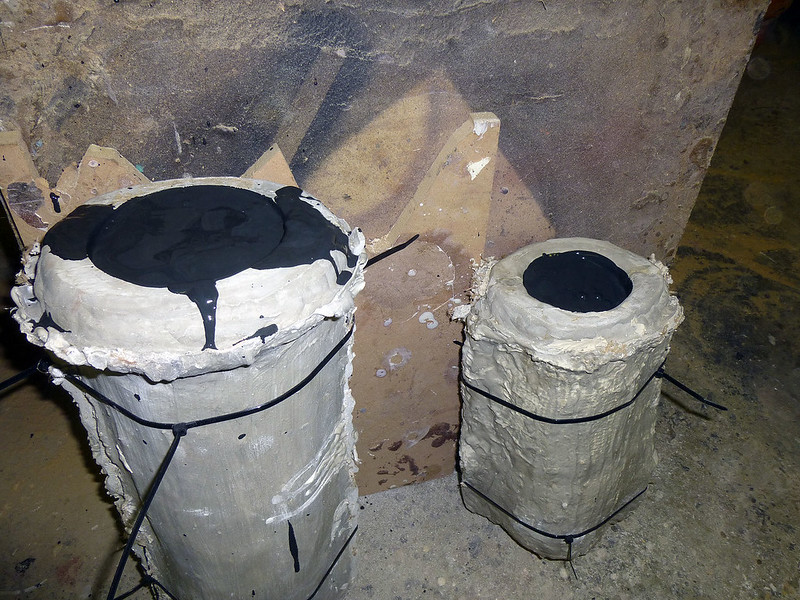
I used black for the first pair just to test out the molds. Mostly because I had a lot of it on hand.
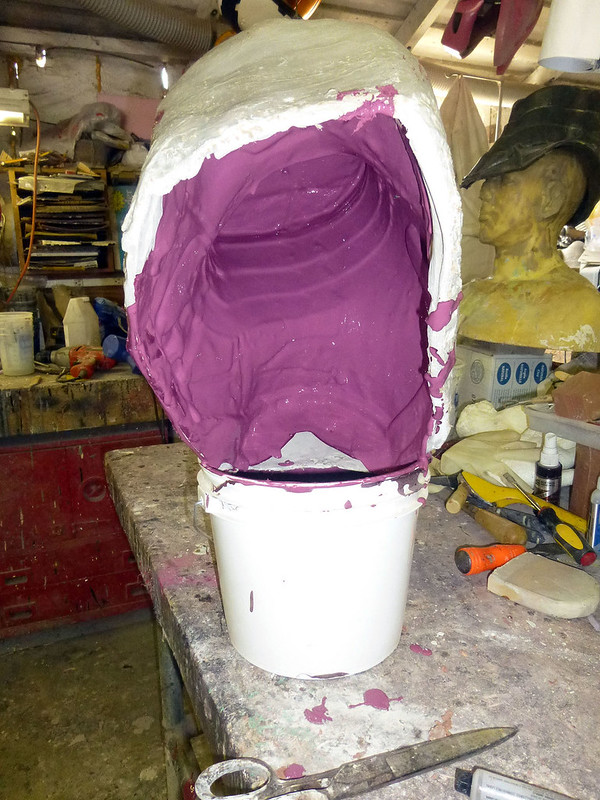
After shaking and tapping the molds to help any bubbles to the surface, the next step is to pour the latex back into the bucket:
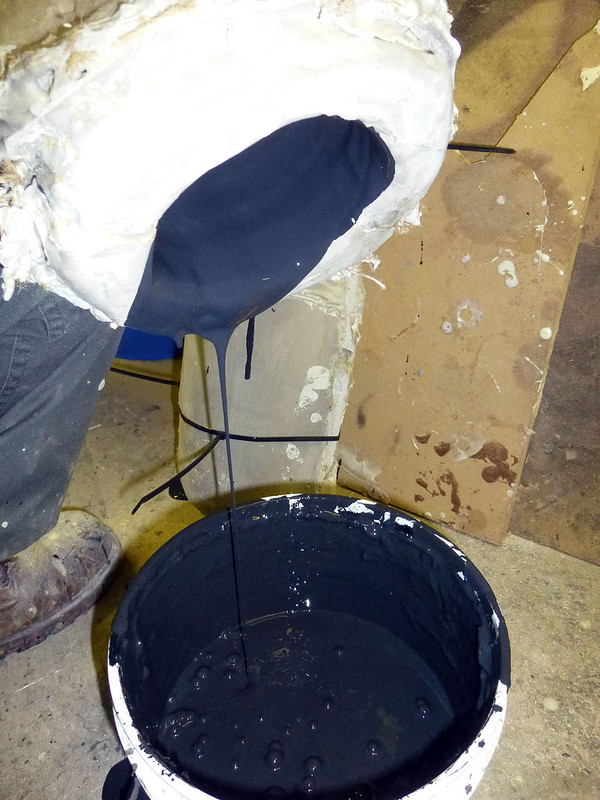
The idea is to leave behind a coat of latex on the inside surface of the mold. So I prop the mold up over the bucket to drain off any excess:
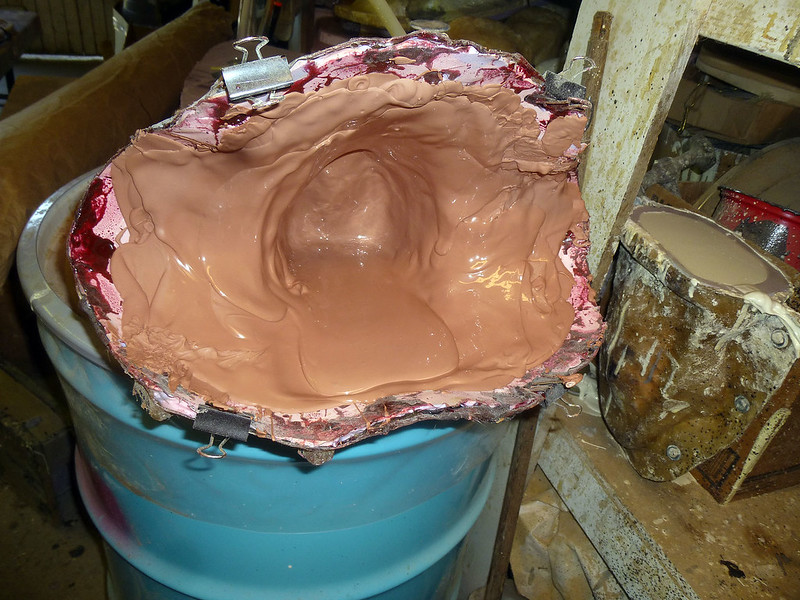
Then I set the mold back upright and let it dry overnight. Here's the mold with the first coat dried:
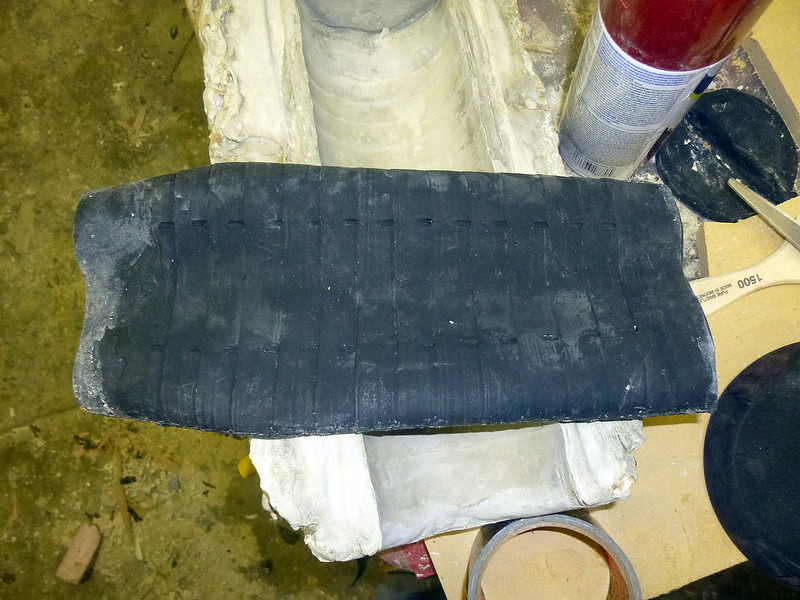
I did the first set of rubber parts with two coats. This makes a soft, thin skin. More coats will make a stronger piece. When the second coat had dried, I dusted the inside of the latex piece with talcum powder to prevent it from sticking to itself and then it's time to open up the mold:

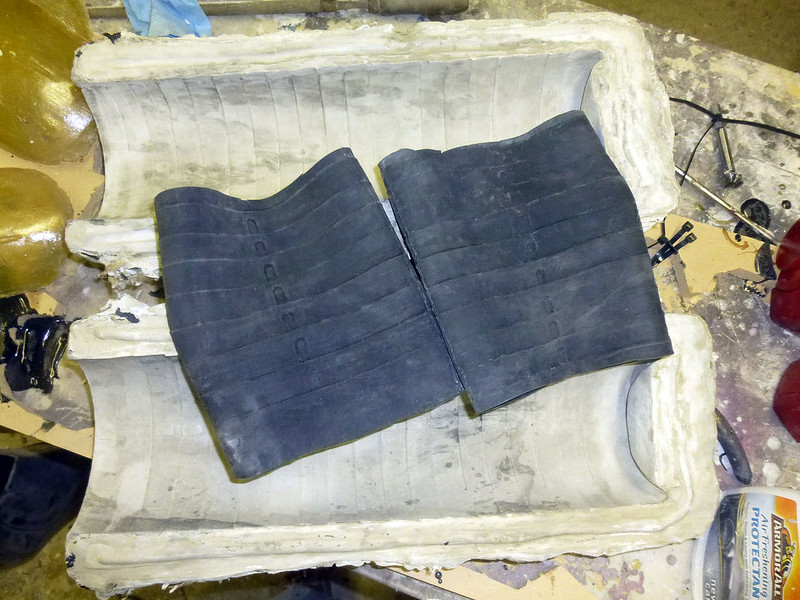
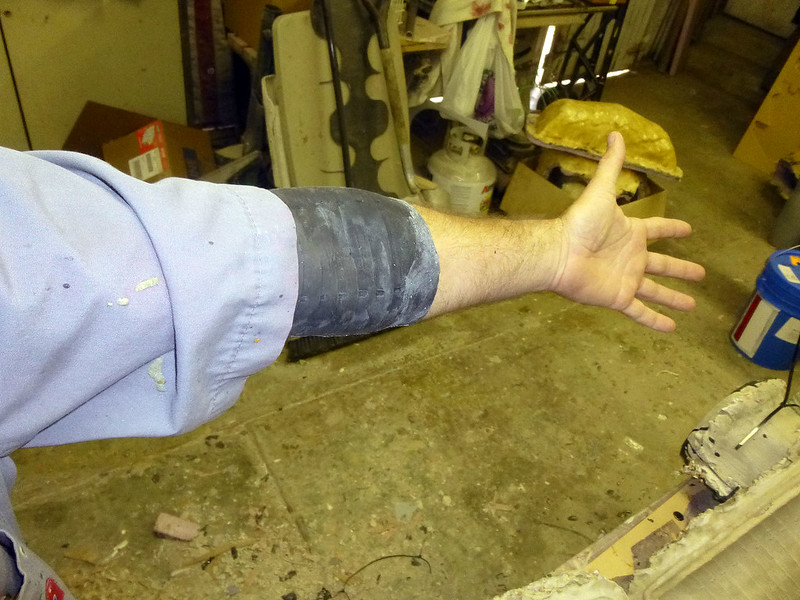
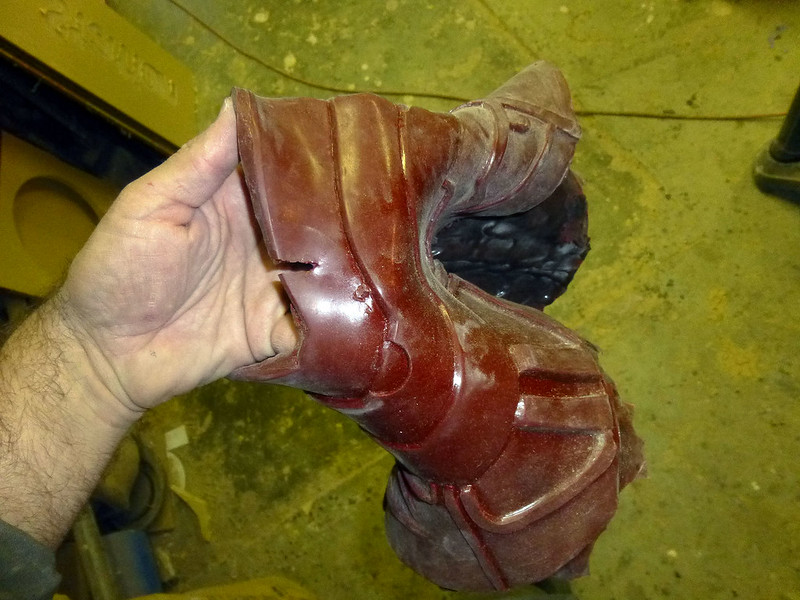
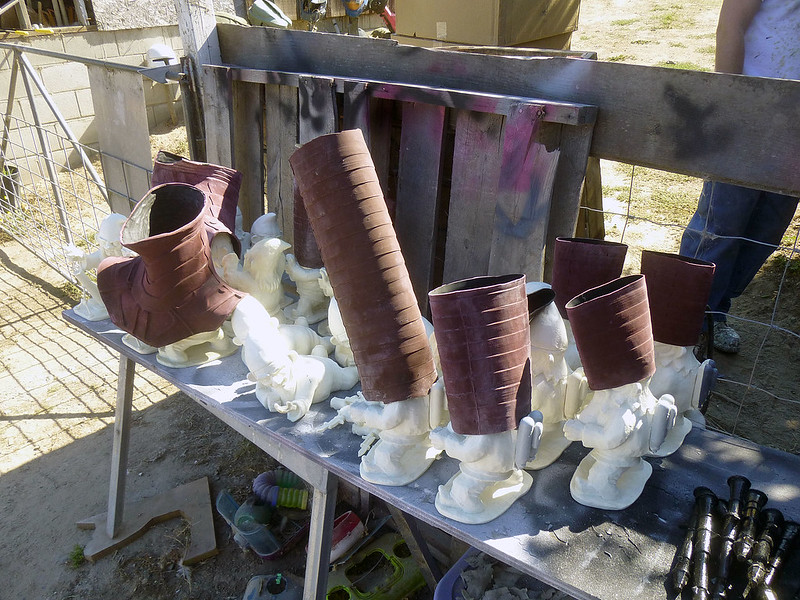
So here's the first pair of elbows:
After some quick work with a pair of scissors, they were ready to try on:
Success:
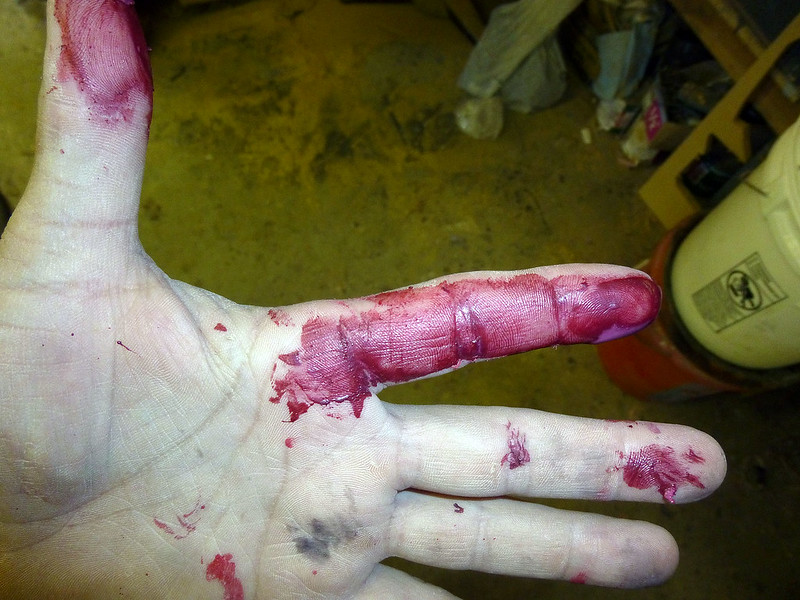
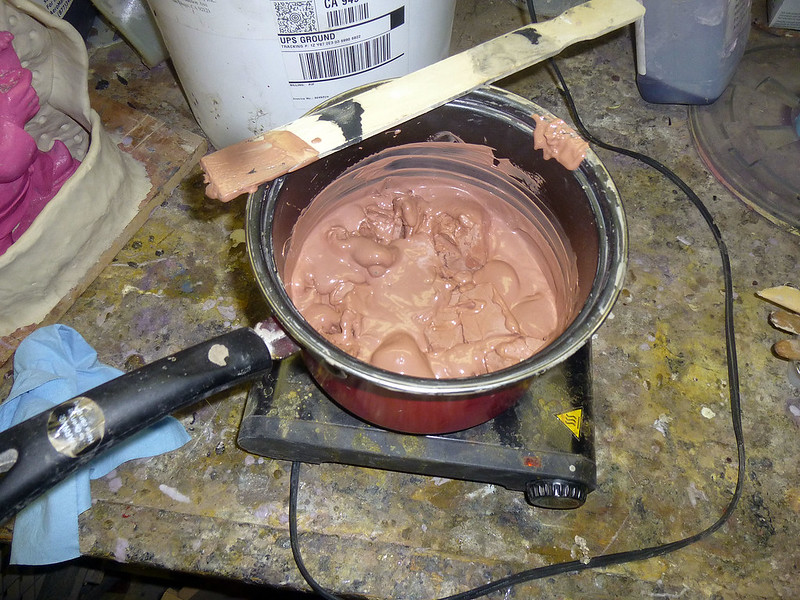
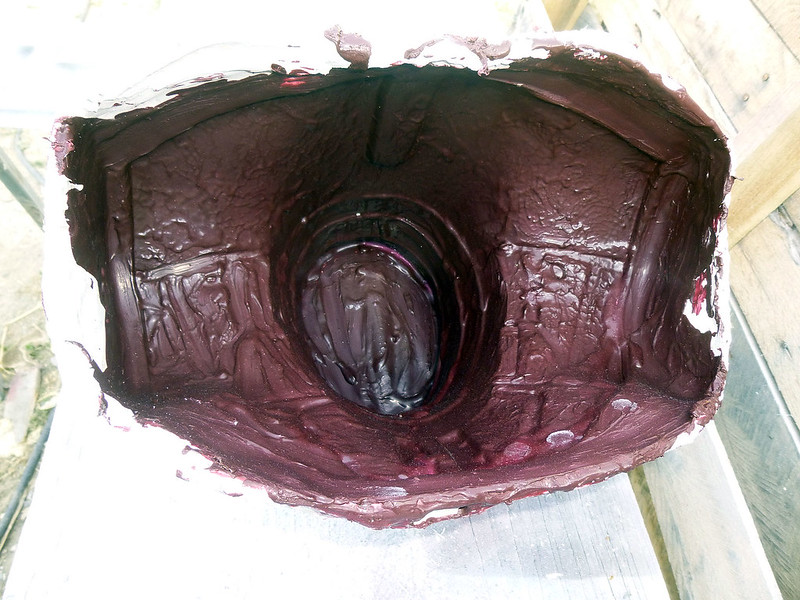
Now these parts can be painted, but if the paint wears off I don't want black scratches showing through. Instead, I tinted another bucket of latex to get the right base color:
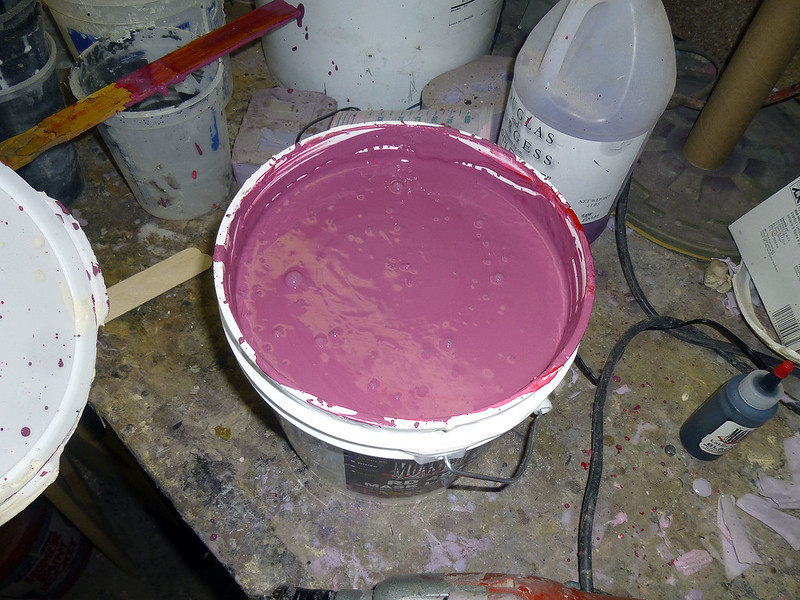
Getting the color right ends up being a lot of guesswork. This is because the latex darkens significantly when it dries. Based on the bits that dried on my fingers, I think I did pretty good:
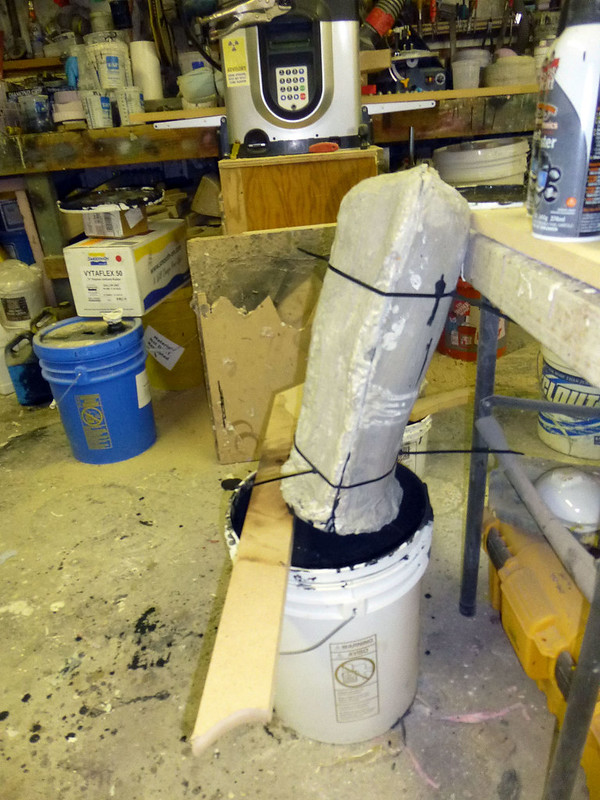
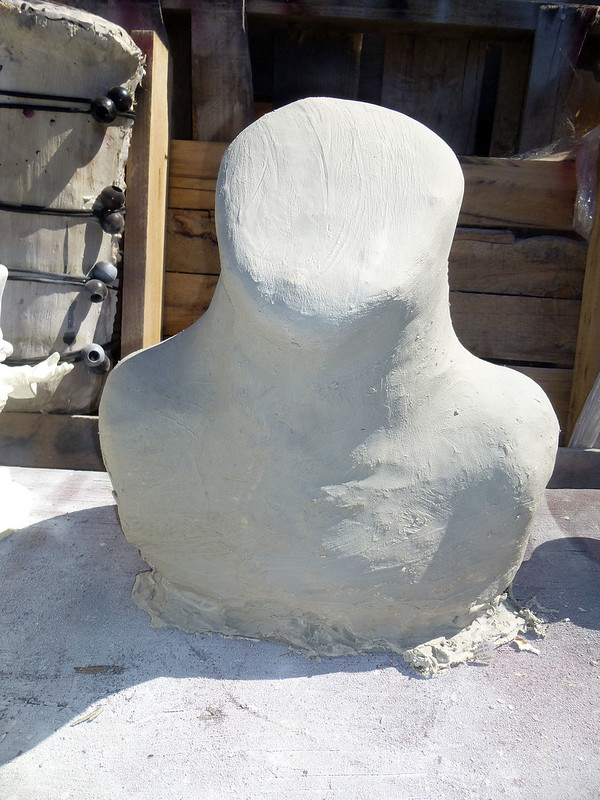
The Neck:
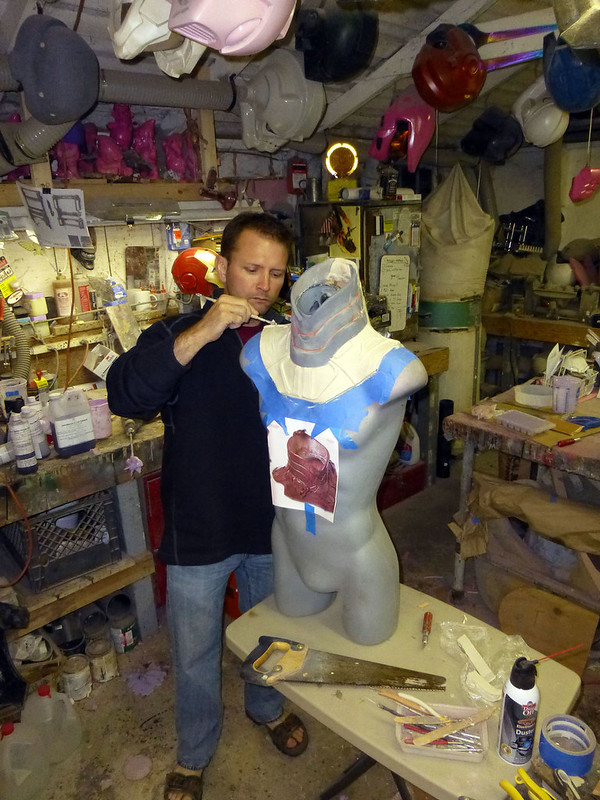
I started by printing out the models I had for the neck parts:
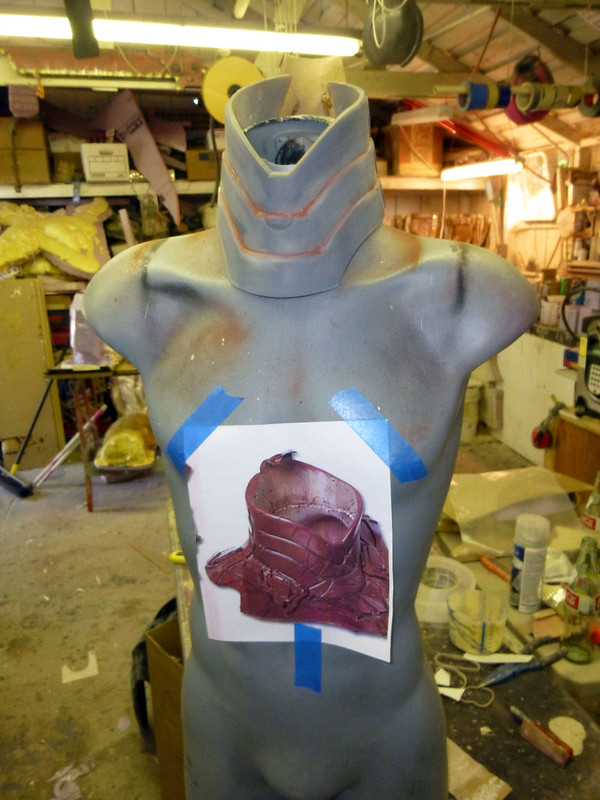
Since this didn't quite cover all of the same territory as the screen-used neck piece, I printed out a picture from one of the prop auctions that were held after the film finished shooting and used it as a reference to roughly match the parts of the neckpiece that were hidden by the chest and back armor.
Here I am working on the sculpt:
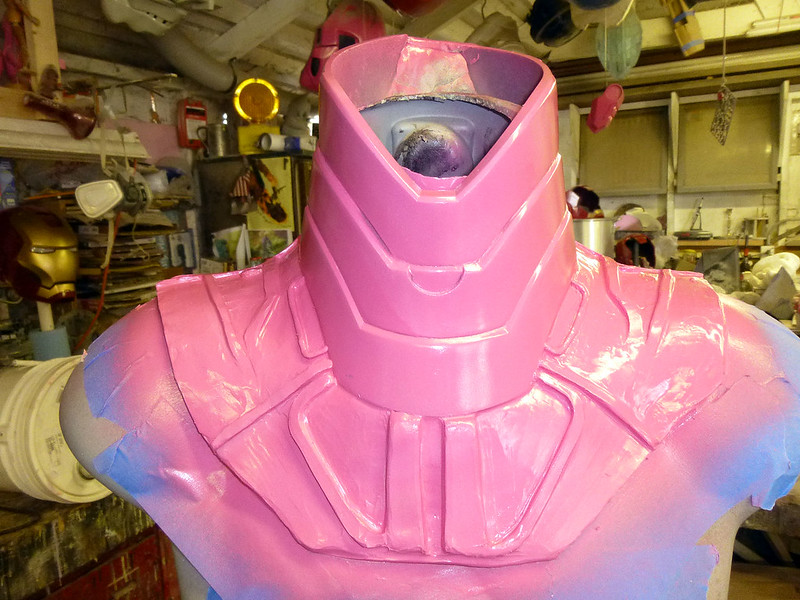
When I was satisfied that it looked the part, I gave it my standard gloss coat:
Shiny:
Since most of it would be tucked in out of sight, I didn't really get too bent out of shape about the inaccuracies and asymmetries. I was too eager to get the pieces out of the molds.
Here's the beginning of the mold which I started by laying up some thickened silicone:

The rest of the mold was a few more layers of silicone followed by a fiberglass mothermold. Using that mold, I rotocast some tinted urethane rubber and made the first draft:
When I tried it on, I absolutely loved it:
The urethane rubber it was cast in was originally designed to be used as a mold for concrete casting. Unfortunately, when you add pigments to it, it degrades the strength significantly. I wasn't worried about it, but after a couple of weeks of sitting on the headless mannequin, it started to crack and split:
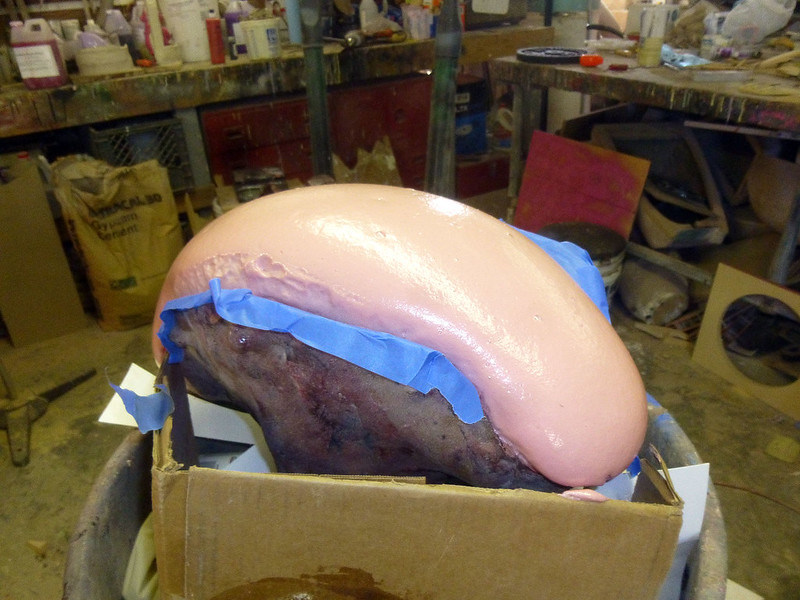
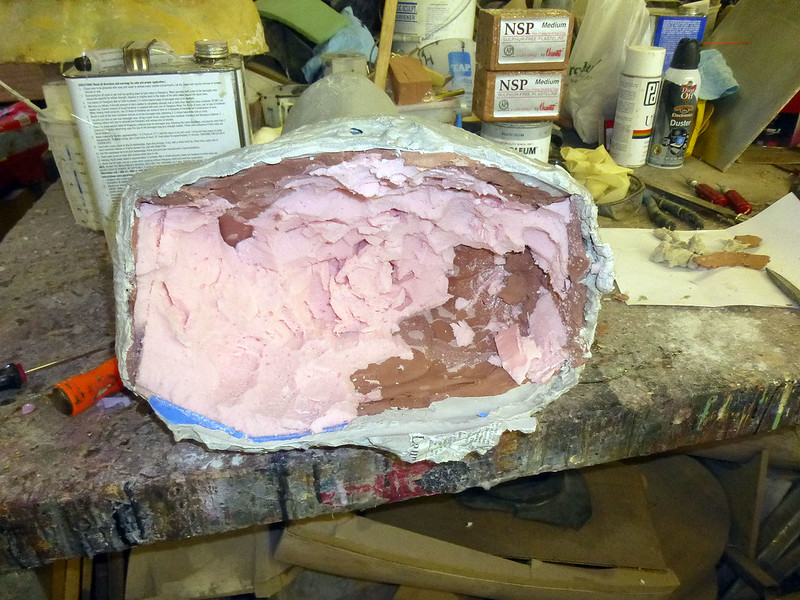
So it was time to go back to the drawing board. It didn't take long to decide that I would just go ahead and make the neck pieces slipcast latex as well. The only problem is that latex won't work in the silicone mold I made. I needed to make a gypsum mold.
To that end, I started by melting a few pounds of Chavant NSP oil-based clay:
When it was nice and liquid, I poured it into the silicone mold:
Since the urethane rubber casting had quite a bit of extra room inside, I decided to cast the clay copy thick at the back of the neck so I could carve it down and make it fit tighter:
I could've just filled the mold all the way up with clay, but to save weight I ended up filling it mostly with 2-part expanding foam:
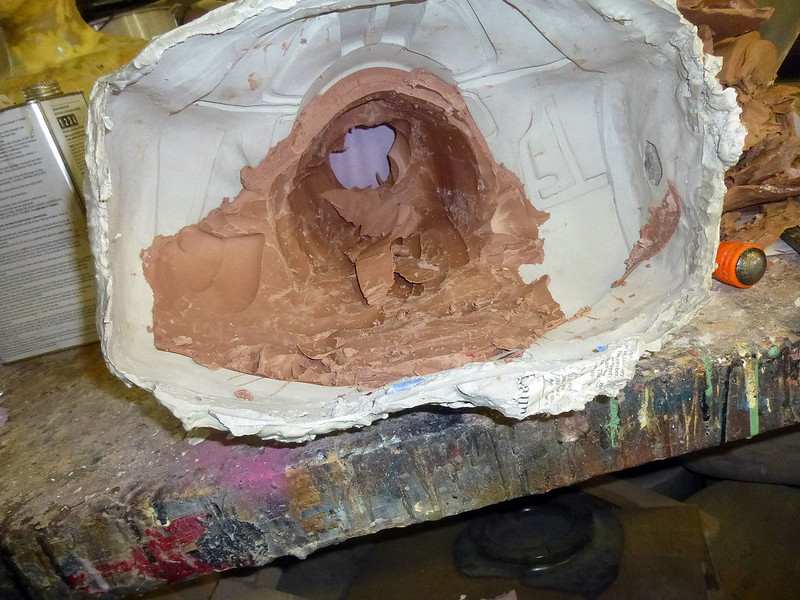
Once the foam had cured, I used a hand saw to shave the bottom flat so it would sit upright:

Then I peeled off the silicone jacket:
The clay casting was not too shabby:
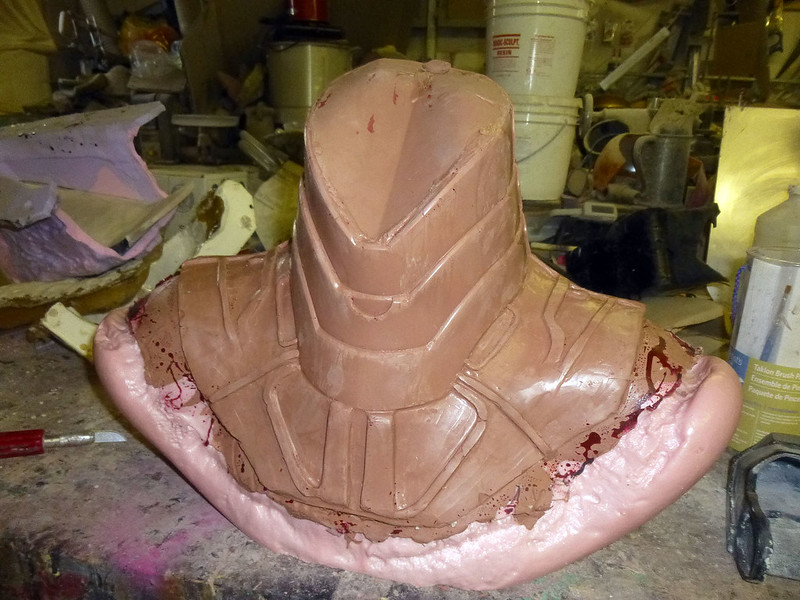
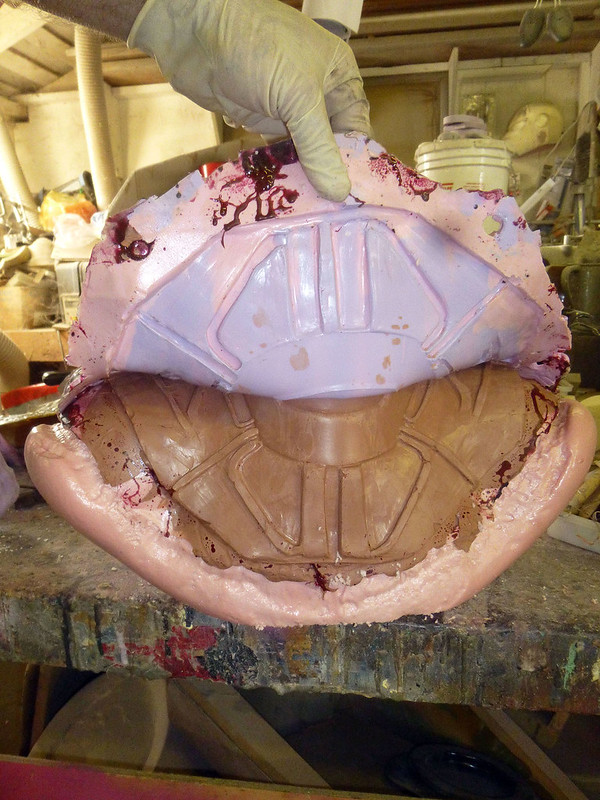
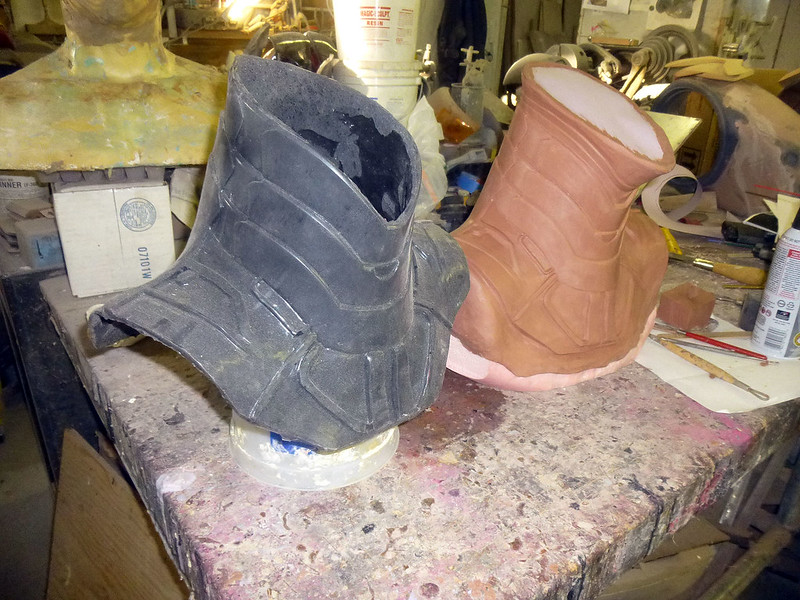
Once I had the clay copy, I went ahead and shaved off some of the back of the neck and added a bit more shape to the top edge in order to hide the wearer's chin in the helmet. Here's a shot of a foam casting from the original mold next to the clay cast after resculpting:
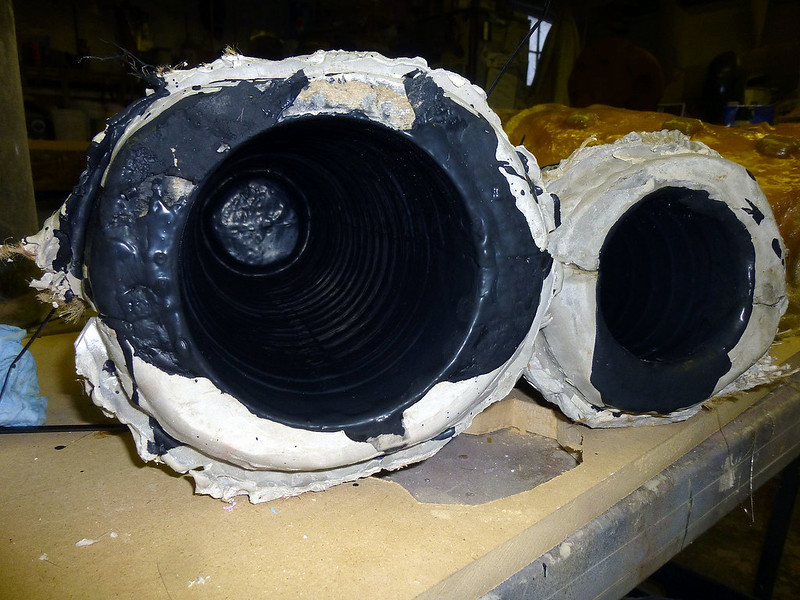
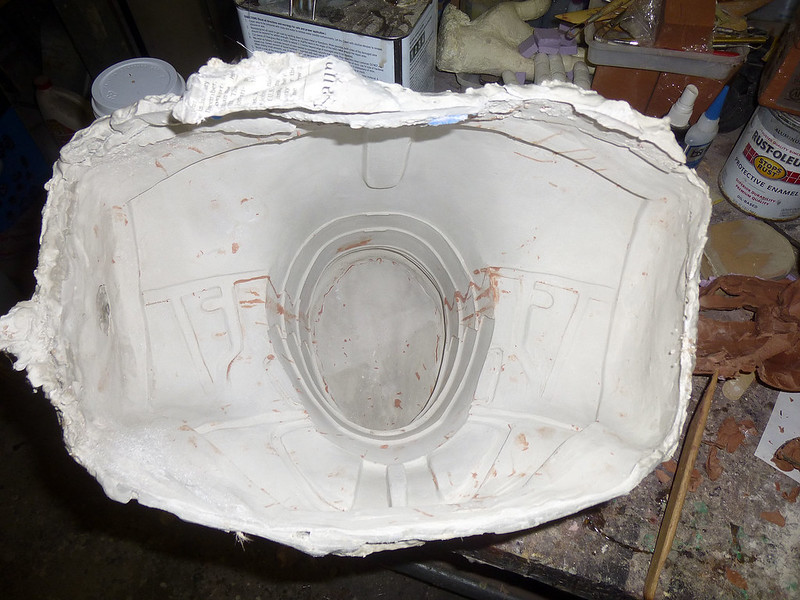
Since I didn't want to have to deal with cleaning up seams on the neck, I opted for a one-piece stone mold made of the same burlap-reinforced Ultracal-30:
Making a seamless mold meant breaking apart the original sculpt in order to get it out. I started by picking foam:
Then removing clay:
The last thing I did was scrub out the inside of the mold with a stiff bristle brush and some rubbing alcohol to eliminate any residual bits of clay:
Once the mold was clean, it was time to pour in the first layer of latex:
Here it is draining back into the bucket:
And after a few hours drying time:
Here's me trying on the first copy:
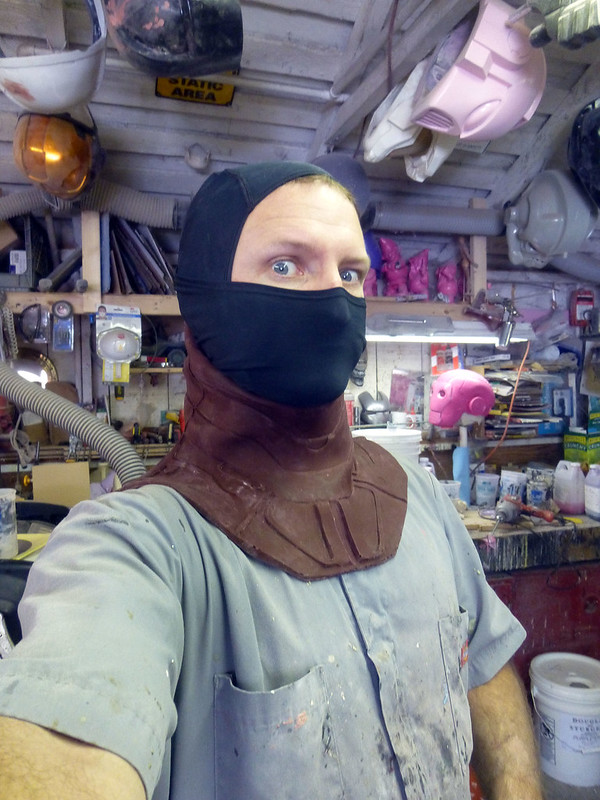
Yay!
Now that I had working molds for the rubber parts, it's time to move on to...
Painting:
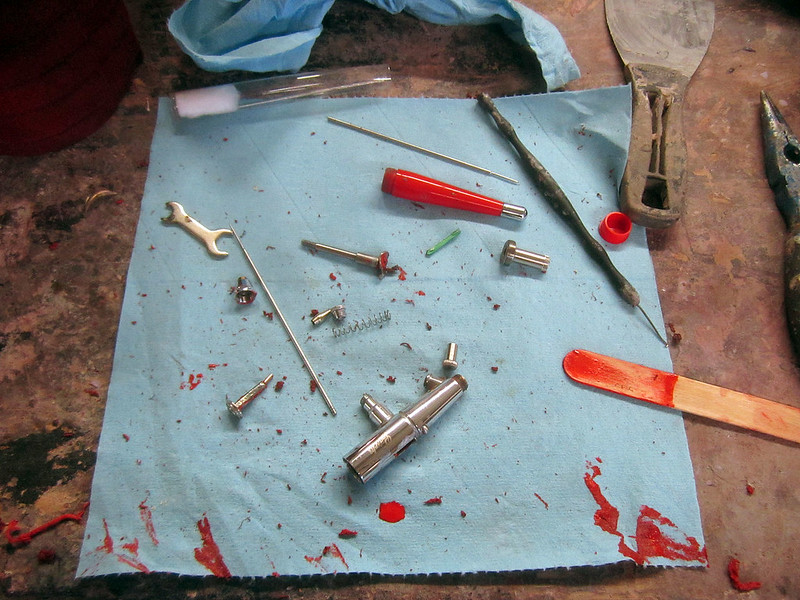
The first step in painting latex parts is getting them all scrubbed clean and dry:
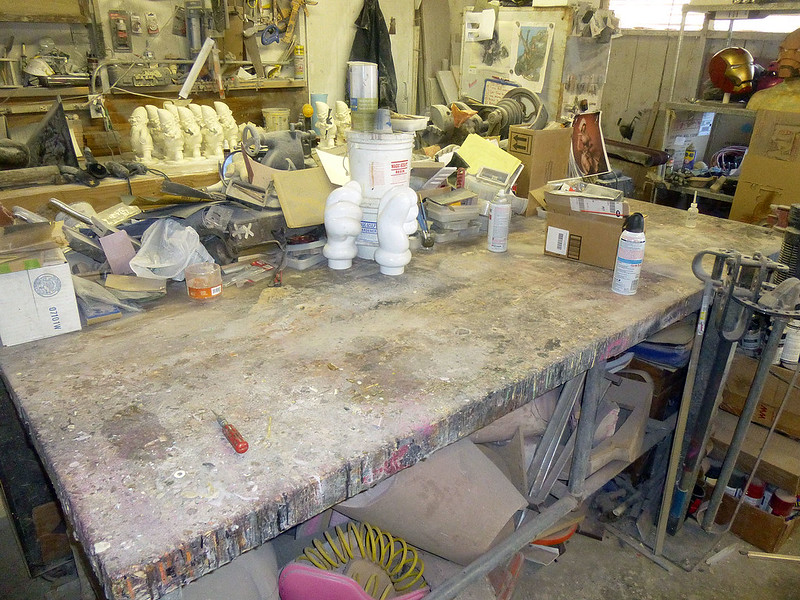
While those were drying, I cleared off more of my workbench than I've seen in years:
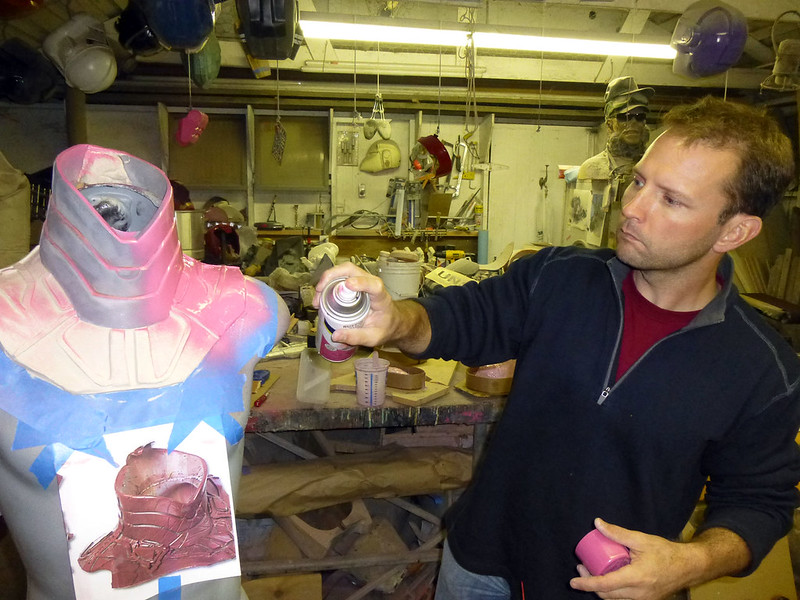
Then I used some clear liquid latex and a bit of red pigment to give them all a base color using the fattest needle I could get for my airbrush:
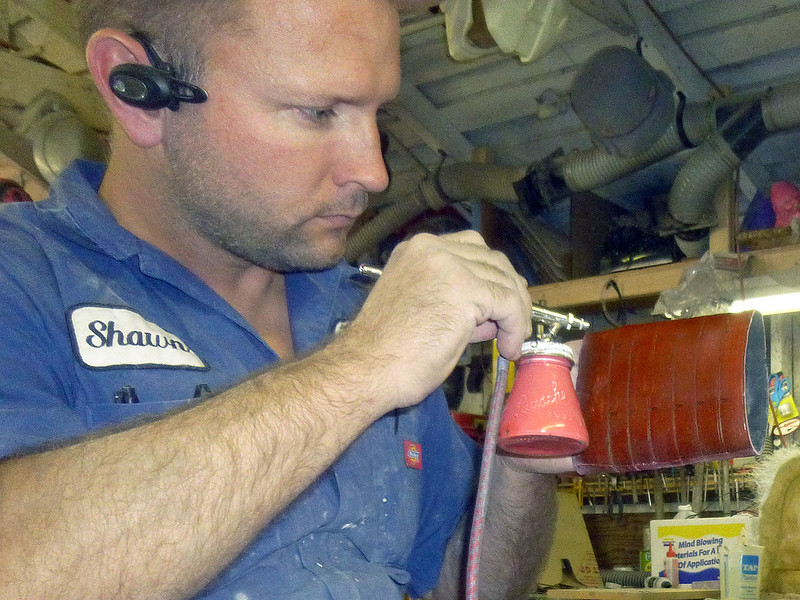
Here's one of the neck pieces with the base color:
The biggest problem with latex paints is that they tend to clog up the airbrush like nobody's business. I spent all day spraying for a few minutes, cleaning the airbrush, and repeating ad nauseum. I got very intimate with the airbrush innards:
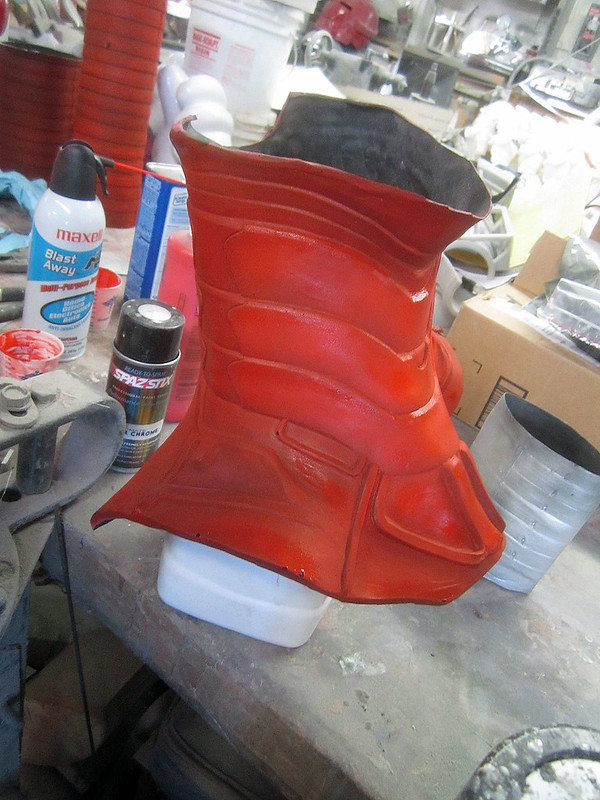
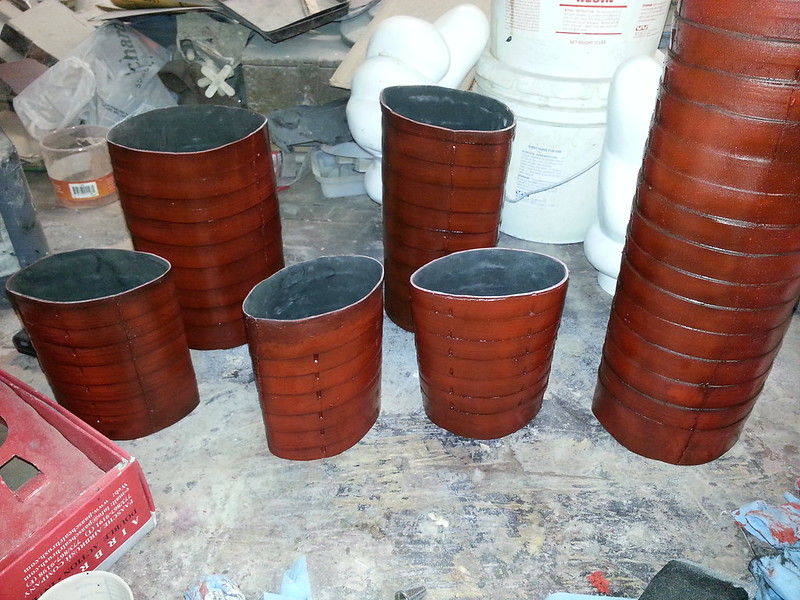
But at the end of the day at least I had rubber parts that were all completely the wrong color:
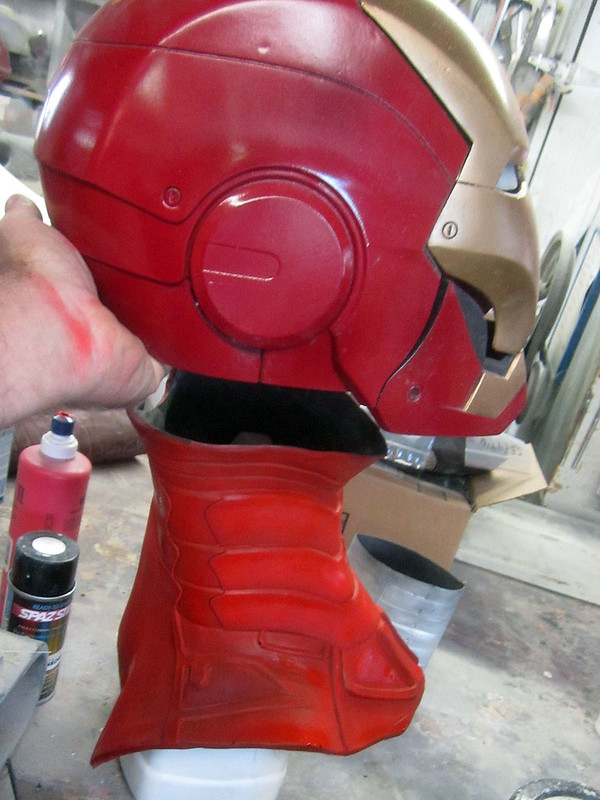
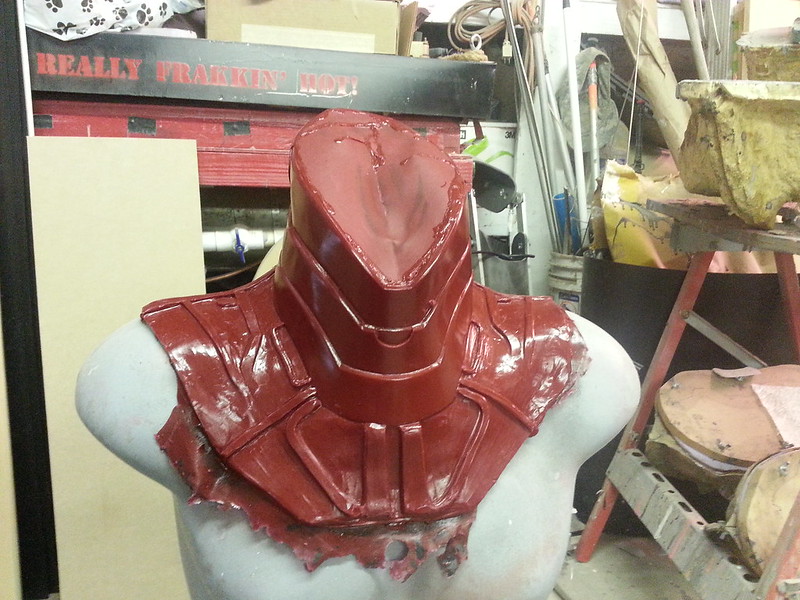
The next day I set about weathering the pieces so they'd stop looking like red rubber parts and start looking like the rest of the suit. Here I'm applying a blackwash to bring out the details:
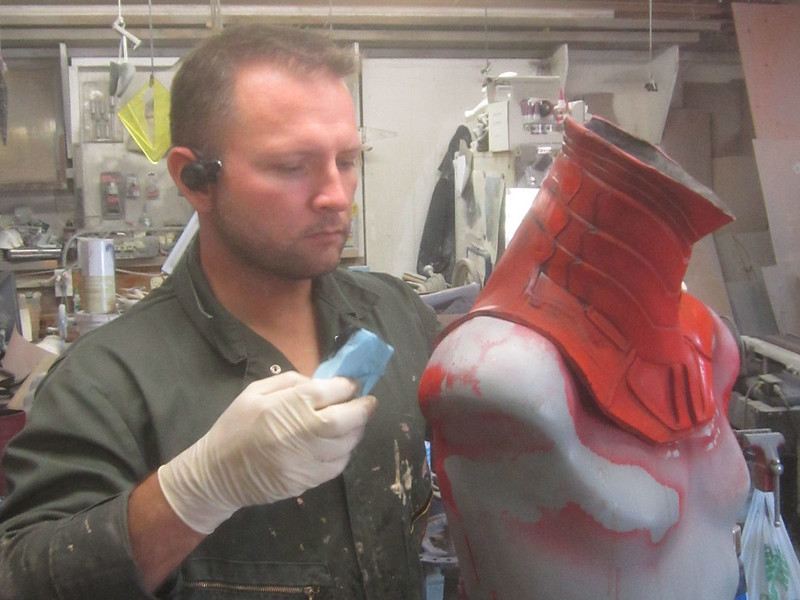
Here's a "during" shot so you can see the transition:
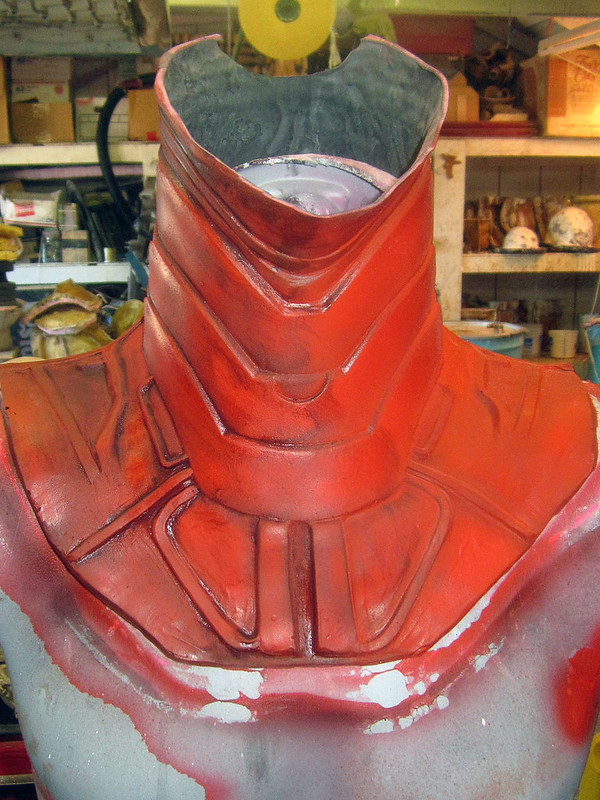
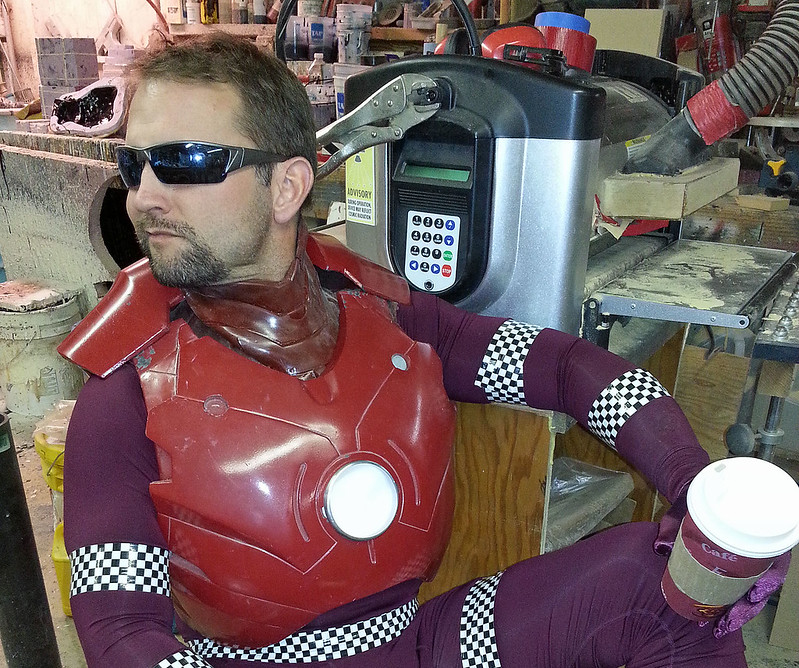
And a "before and after" showing an unweathered neckpiece next to the weathered one:
Much improved.
While the weathered parts looked pretty good, it was going to require a clearcoat to really bring out the look. I narrowed the options down to two different products. The first was "Flex Gloss" from Monstermakers.com. The second was "Snakeskyn" from Douglass and Sturgess:
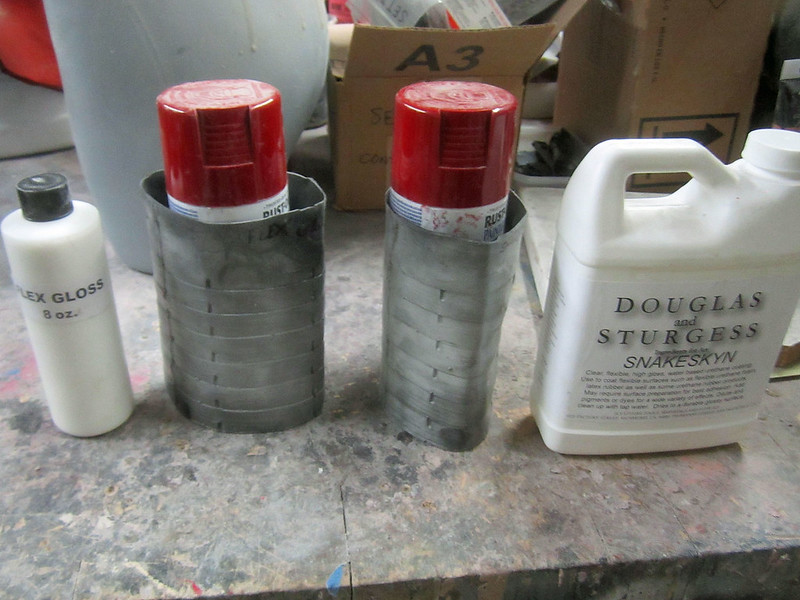
I picked out a couple of the elbow pieces, sprayed them silver (for no real reason) and coated one with Flex Gloss and the other with Snakeskyn. The next day I came to the shop, found they'd dried enough to wear, and put them on while I went about my work. After several hours they were both still shiny and whole, so I decided to go with the Snakeskyn for no reason other than I had more of it on hand.
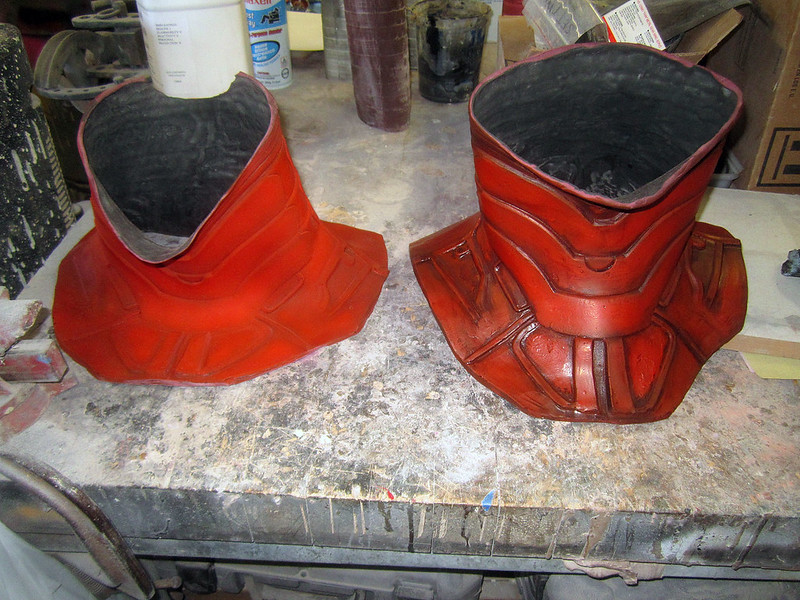
Here's the neck piece with the clearcoat:

And here's a smattering of knee and elbow parts:
Here's the workbench after a couple of days worth of rubber painting:

Stay tuned. I'm still well on my way to making an exceedingly accurate replica of the costume used on-screen:
But seriously, there's awesome brewing:

Stay tuned...
This is meticulously awesome! Can't wait to see the finished costume.
ReplyDeleteI am so, so impressed with the quality of your work. This is going to look incredibly accurate.
ReplyDeleteare you selling any yet?
ReplyDeleteShawn... that neck piece is amazing!! I want it!! lol it would sure beat the one that came with my masked rider suit :P
ReplyDeleteIs the drained latex wasted? If so, does it at least have some recyclable use? Thanks!
ReplyDeleteThe drained latex goes back in the bucket. Then the bucket gets sealed up airtight so it doesn't dry out.
DeleteSince latex is an air-dry product, it won't cure in the bucket.