
A while back a friend of mine asked me if I could help him build a replica of Han Solo encased in carbonite to hang on the wall in his basement bar (which he'd themed to look like the throne room of Jabba the Hutt). So while I was sitting in the cafe one morning, poring over photos of the original prop, my friend Jenny wandered in and asked what I was doing.
So I told her.
"Can you really make that?" she asks.
"Sure," says I, "it's actually not such a big deal."
"Does it have to be Han Solo?" says she.
"No," I replied, "it's actually easier if it's someone who can come into the workshop for lifecasting. That'll save me the trouble of finding or sculpting a copy of Harrison Ford's face."
"What if it was me?" says she.
The conversation ended with her gleefully agreeing to come to the workshop and put in all of the labor and pay for all of the materials required to make the project possible. My role was to provide parts and technical advice.
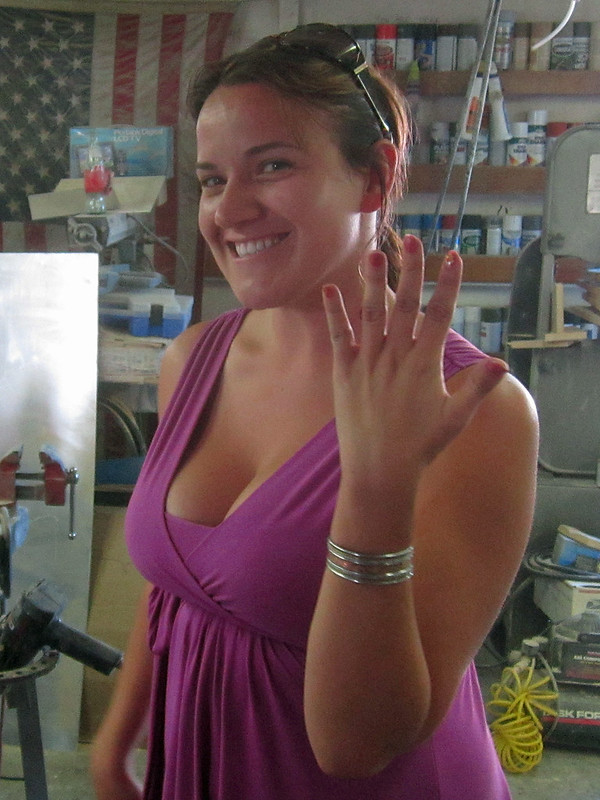
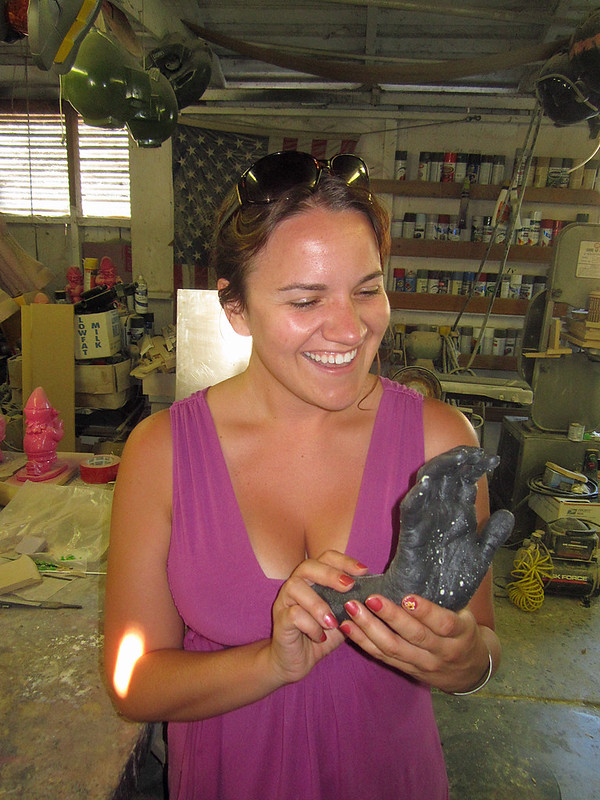
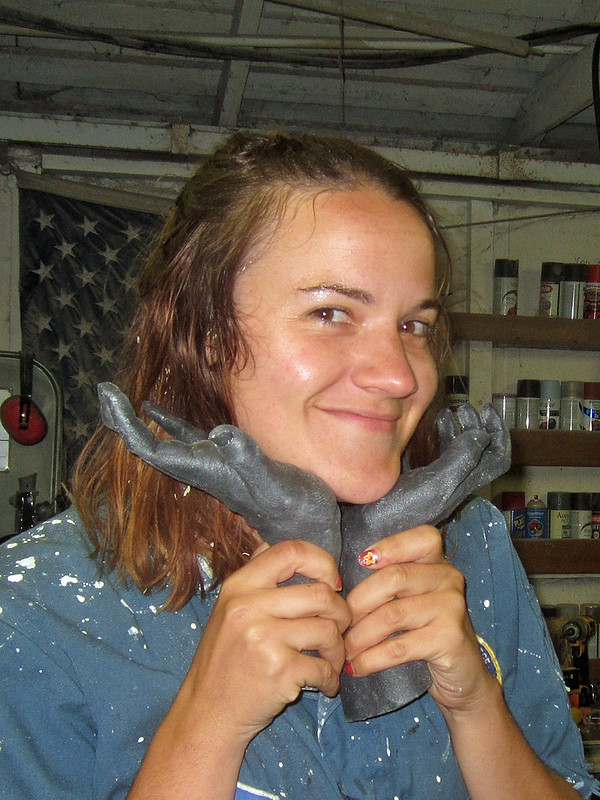
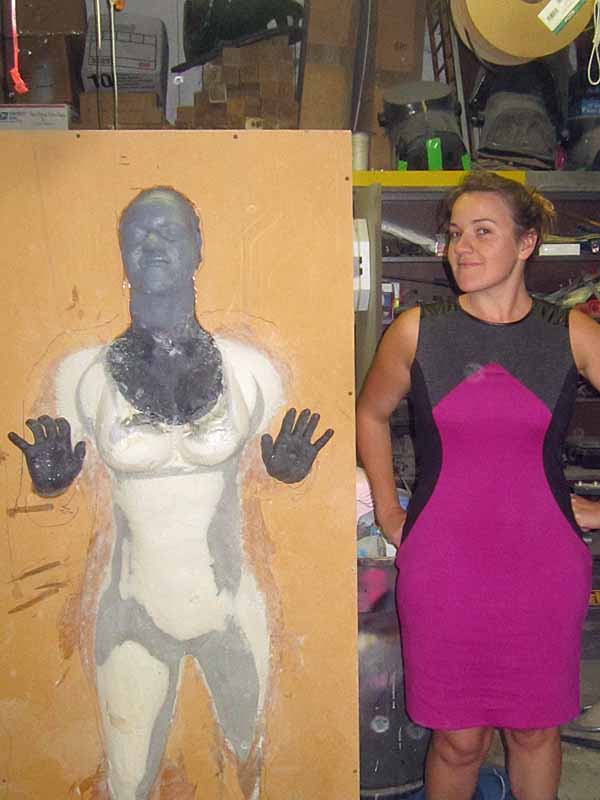
So here's a decent photo of how she looks on any given day (shamelessly stolen from her Facebook page without permission):

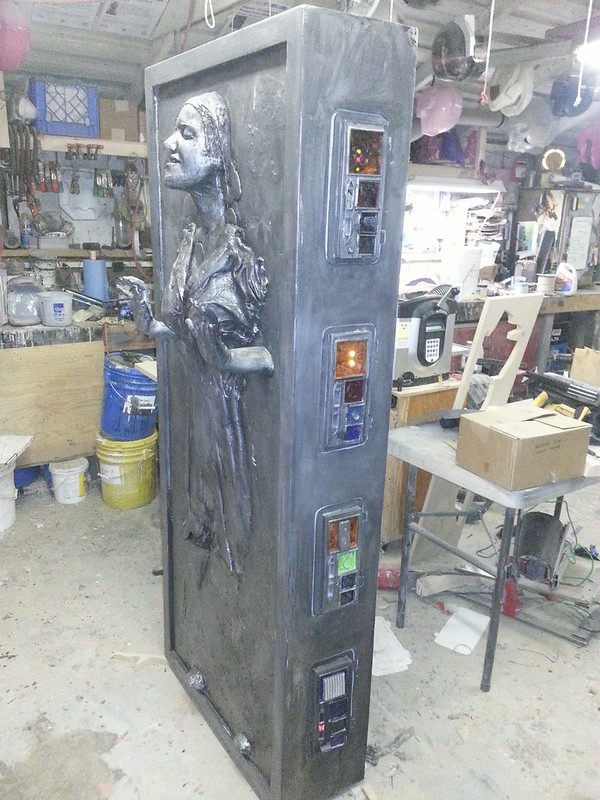
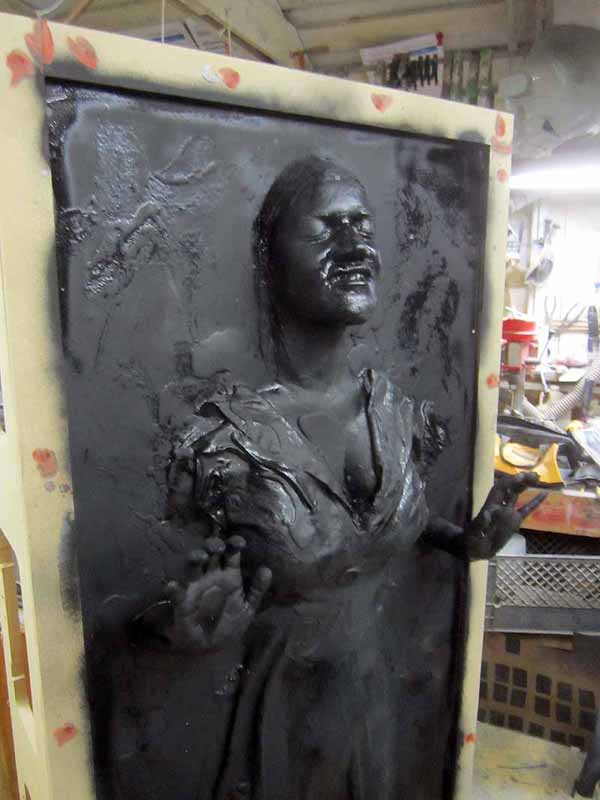
Here she is encased in carbonite in my workshop:

To see how it was done, read on...
Everything has to start somewhere. In this case I started with...
Part 1: the Hands
Here's a shot of Jenny showing us what her hand looks like:
In order to make an exact duplicate of someone's hand, the easiest (or at least cheapest) thing to use is called Dental Alginate
The material itself is sold in a powdered form. To use it, you mix it with water and it turns into a gooey mess with about the same viscosity as ketchup. After a few minutes, it hardens into a rubbery solid. It's safe to use in direct skin contact, and you can control how fast it cures by changing the temperature of the water that you mix it with.
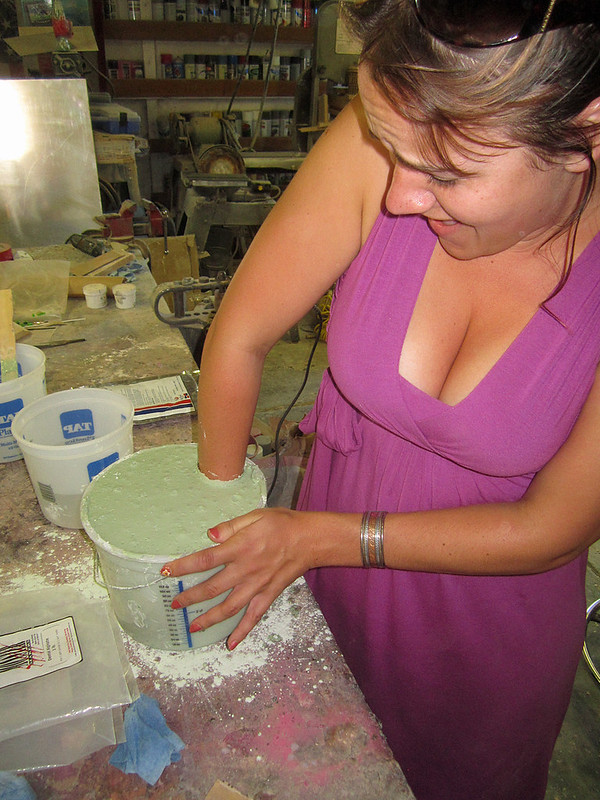
In order to make a copy of a hand, you mix up a batch of alginate in a bucket big enough to give you at least half an inch of clearance all the way around the appendage in question. Then you stick your hand into the bucket, wiggle it around to work the bubbles away from your skin, assume whatever pose you want the duplicate to have, and wait until the alginate solidifies.
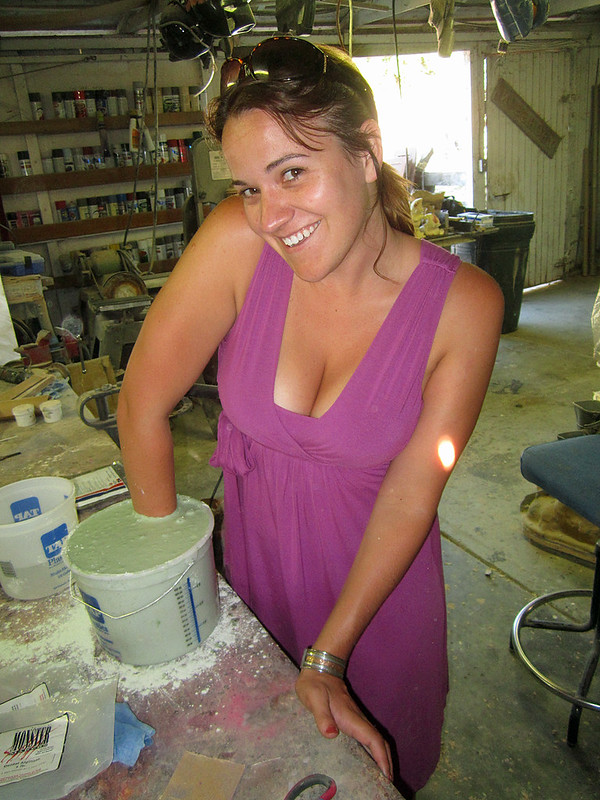
Here's Jenny waiting for set up time:
Once the alginate has solidified, you need to gently remove the hand by wiggling and twisting and pulling until you break the vacuum and you can slide out.
Here's Jenny wiggling (always a fun thing to watch):
Once she'd slid her hand out, this was the hole that was left behind:
The little bumps you see on the left side of the hole are the pores in her skin. The alginate picks up every fine detail. So much so, that the resultant castings will actually have fingerprints that are identical to hers.
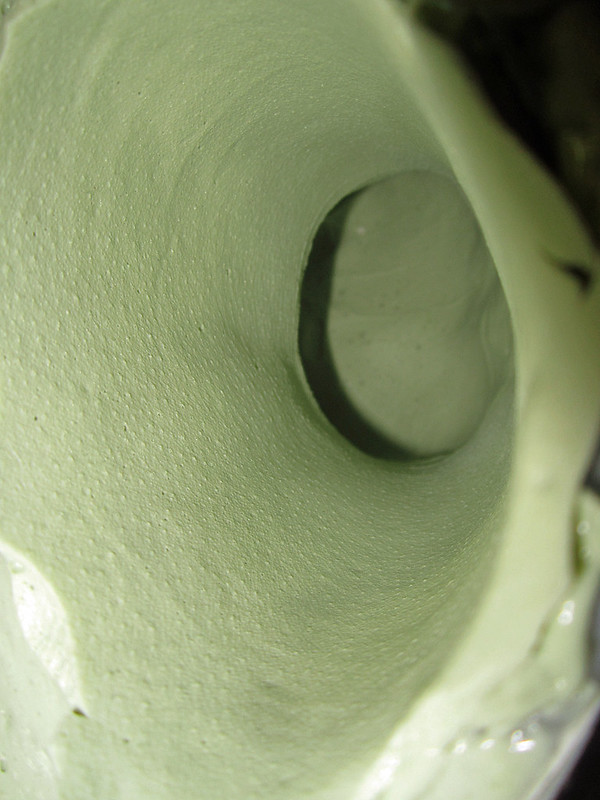
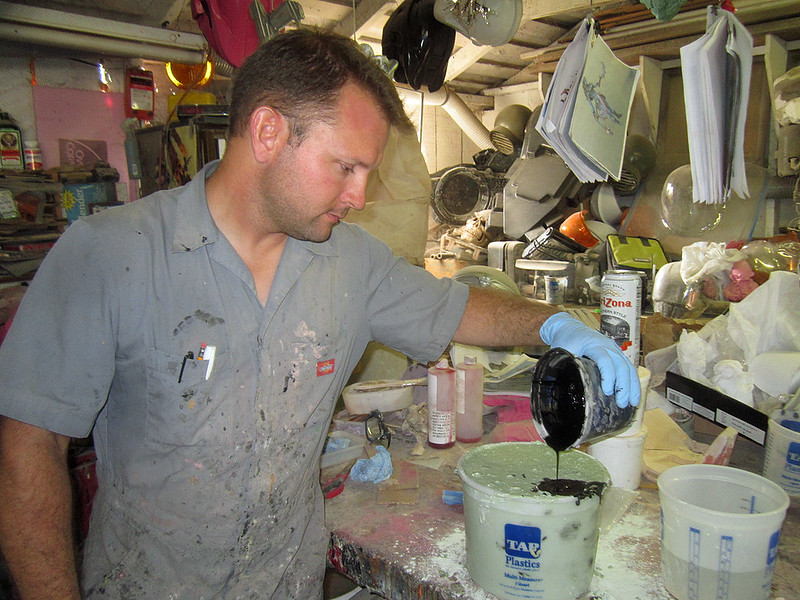
The one drawback to alginate is that, once it cures, it will shrink as the moisture dries out of it. So it's important to pour the casting as soon as possible. In this case I used black casting resin:
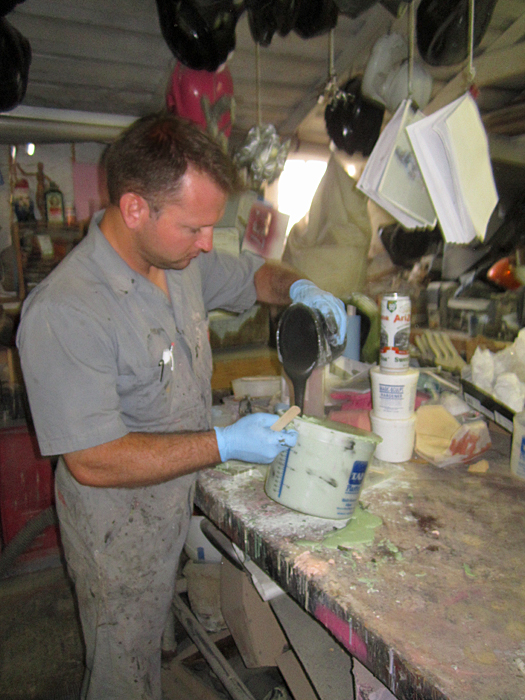
During the pour, you have to tip the mold down toward the fingertip side in order to let any trapped bubbles out:
Once the resin sets up, it's a simple matter of breaking apart the alginate and getting the cast resin piece out:
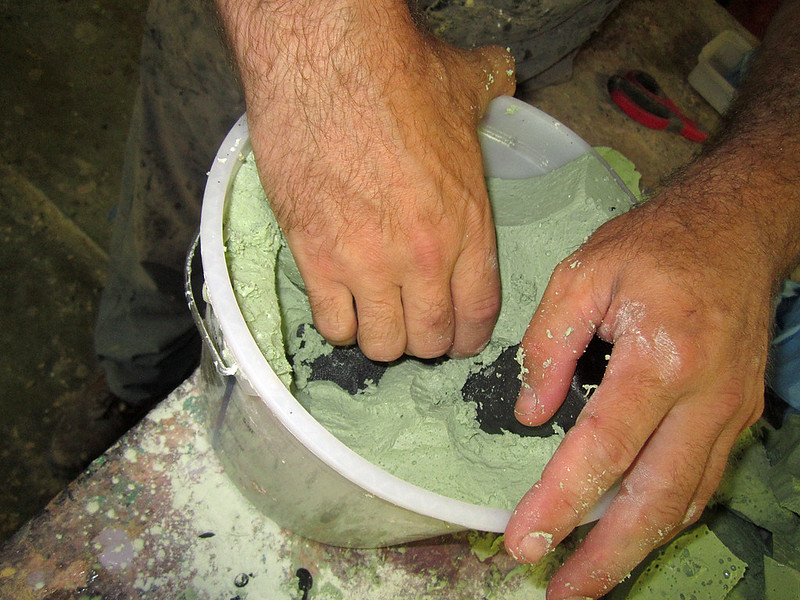
The result: a plastic hand identical to the original:
If you're making this same project at home, you need to repeat these steps as necessary for the number of hands your model has.
Part 2: Face/cleavage
Due to the potentially hazardous health side effects brought on by suffocation, making a copy of someone's face is a tiny bit more difficult. You still use dental alginate, but you can't just submerge their head and wait for it to cure. There's a few other things involved too.
Here's the materials:
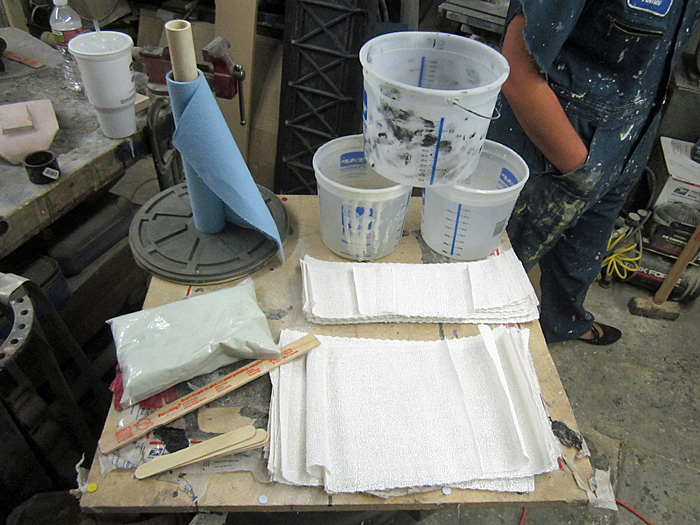 Pictured clockwise from bottom left are mixing sticks, a bag of powdered dental alginate, some paper towels, some mixing buckets, and a couple of different widths of plaster bandages.
 You'll also need a pair of straws for your
It's also a good idea to have your model wear a bald cap and coat their eyebrows and any facial hair with a healthy portion of moisturizing skin cream to keep the alginate from tugging at their hair. Finally, you should place them in a comfortably reclined chair.
Since this project was done on the cheap and I'm an inconsiderate jerk, we taped a plastic bag over her hair and had her sit on a bucket with her head leaned back on a nearby folding table. Good enough.
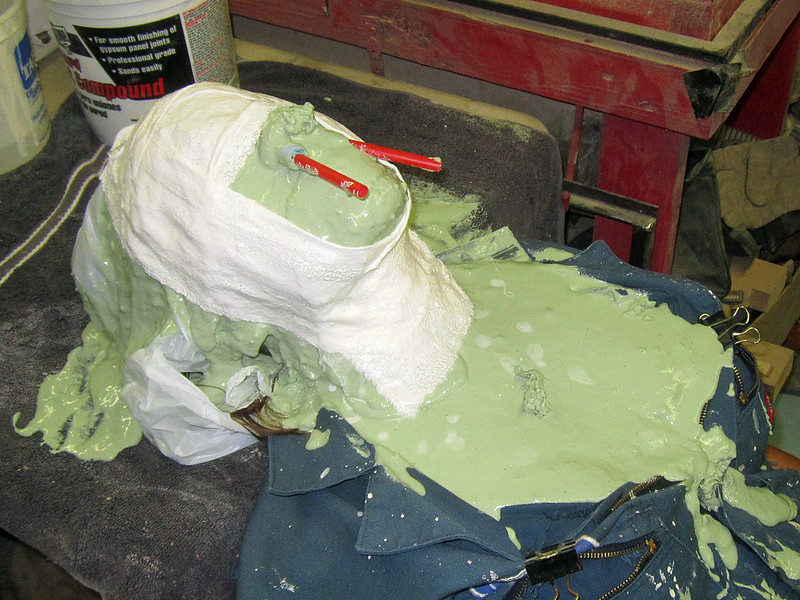
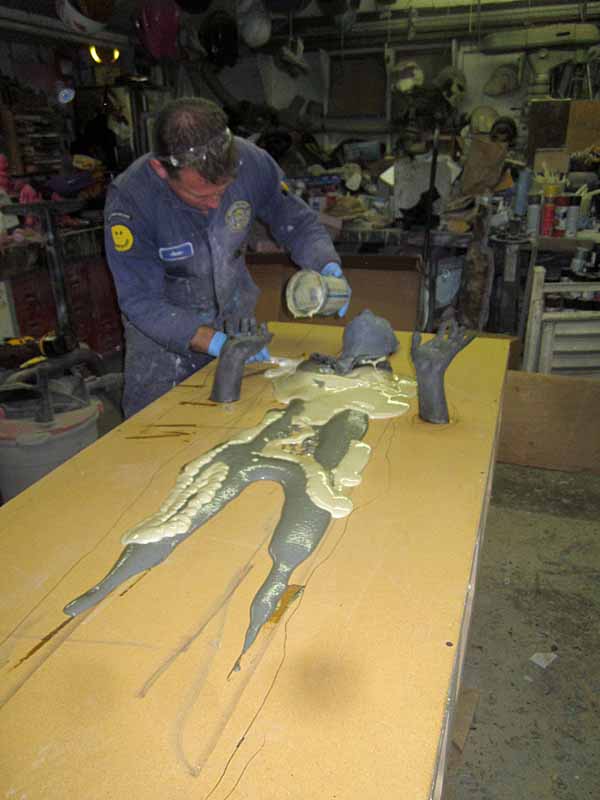
With all of that set up, it's time for the gloop:
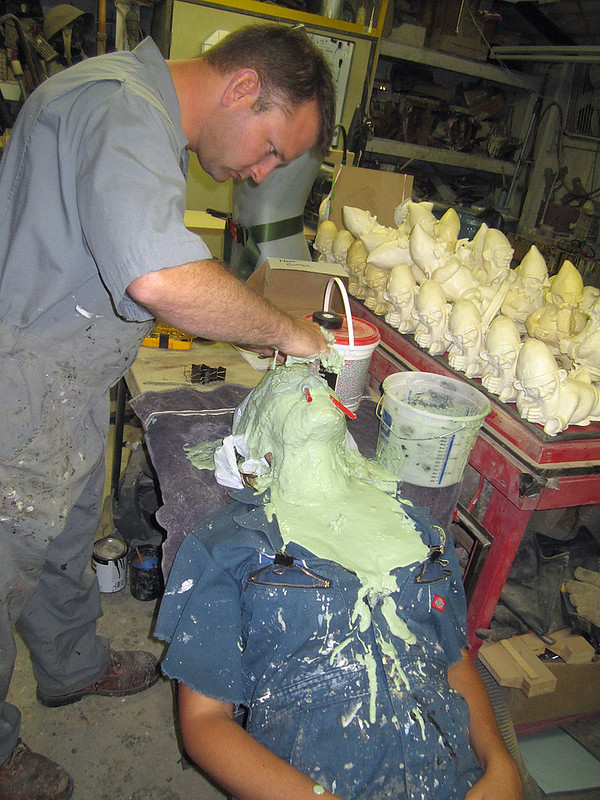
In this case, since the desired duplicate will end up having a healthy dose of exposed cleavage, I also had to layer the alginate over a significant portion of her chest. These are the sacrifices we make.
In order to speed up the process, you should mix the alginate with water that is at least lukewarm. The warmer you make it, the faster the alginate will set up. The trade-off is that you still need to give yourself enough time to get the whole job done before the alginate solidifies, so you don't want it to be too warm.
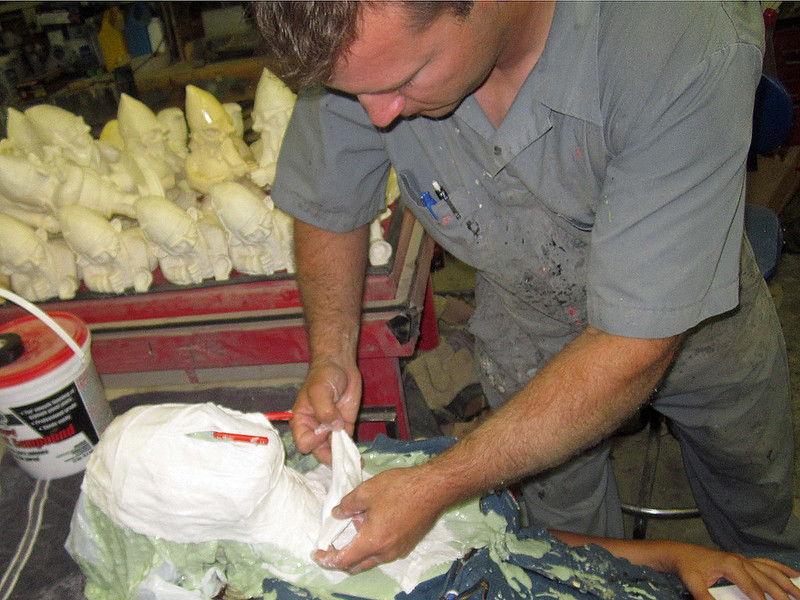
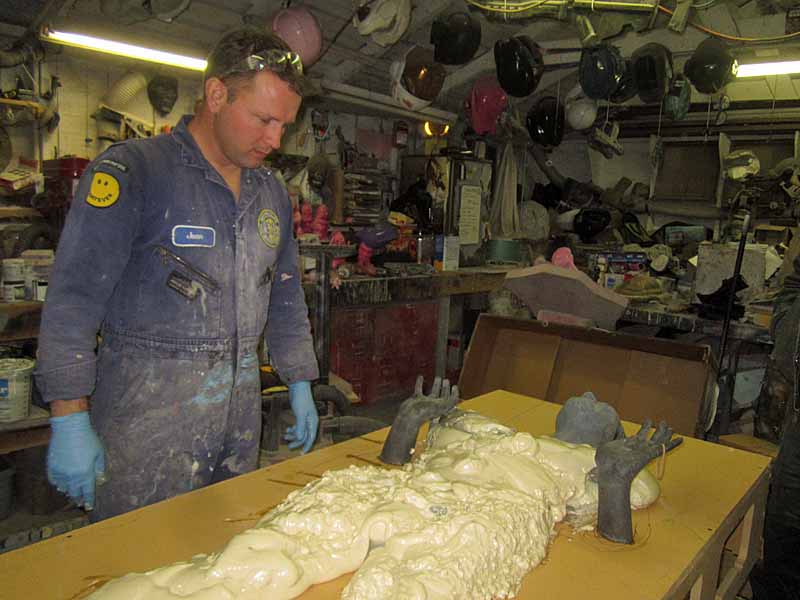
Once the alginate has set up, you need to build a layer of plaster bandages over it in order to support everything and maintain its shape once the person is removed from the inside.
Again, warmer water will help speed up the process. Here's the beginning of the plaster bandage layer being laid up:
Again, you want to work as quickly as possible to minimize the time your model will spend cocooned inside:
It's probably a good idea to ask long before you get to this point whether or not your model is claustrophobic.
Just saying.
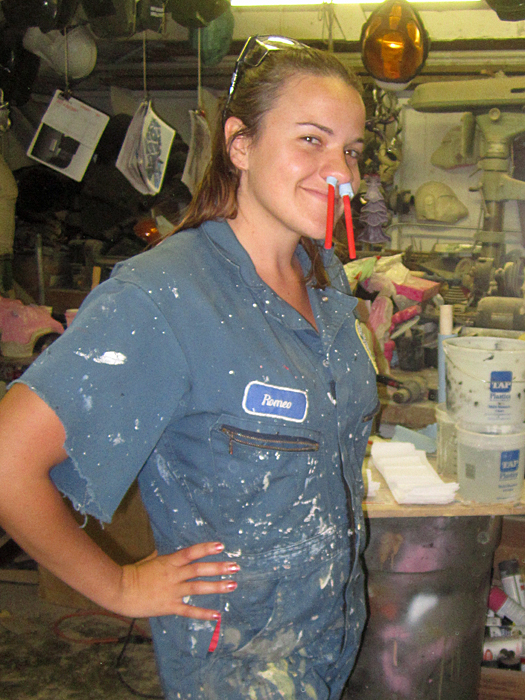
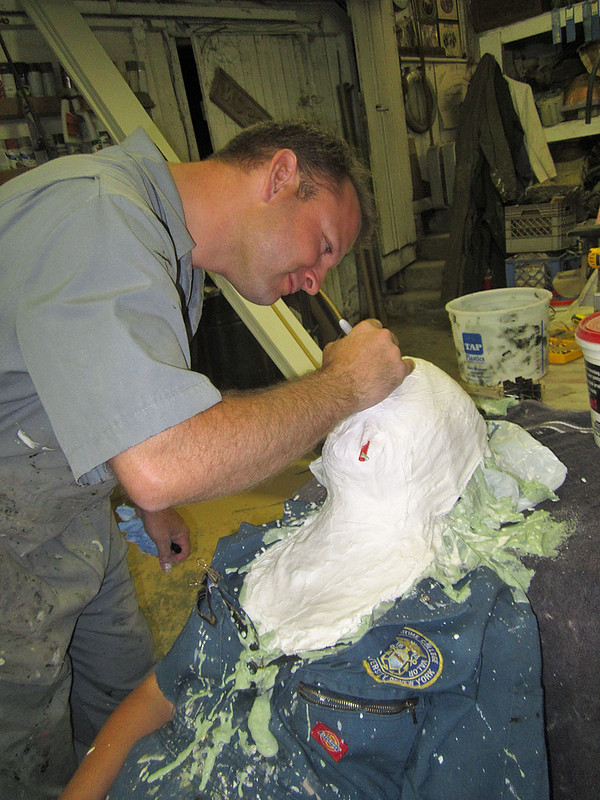
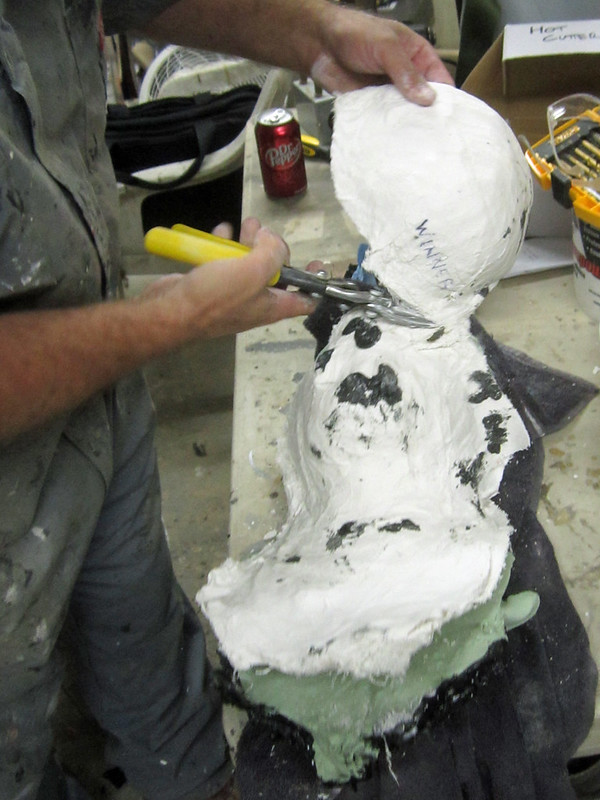
Using warmer water will help the plaster bandages cure faster. You know the whole thing is solid enough to remove it from the model's face when it has cured to the point where you can write embarrassing things on it:
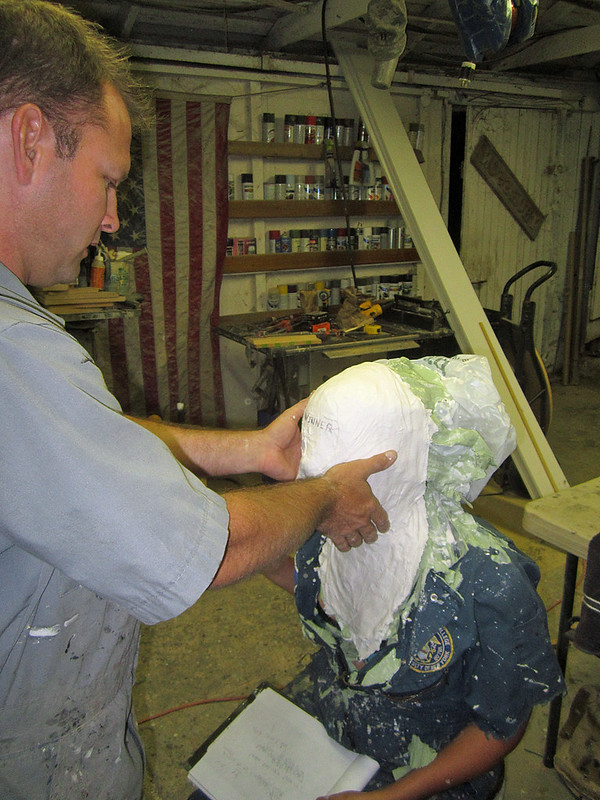
With the plaster bandages hardened, have the model lean forward. Once again, they'll have to wiggle and squirm until the alginate gives up its grip on the skin. In this case, I told her to smile her way out of it:
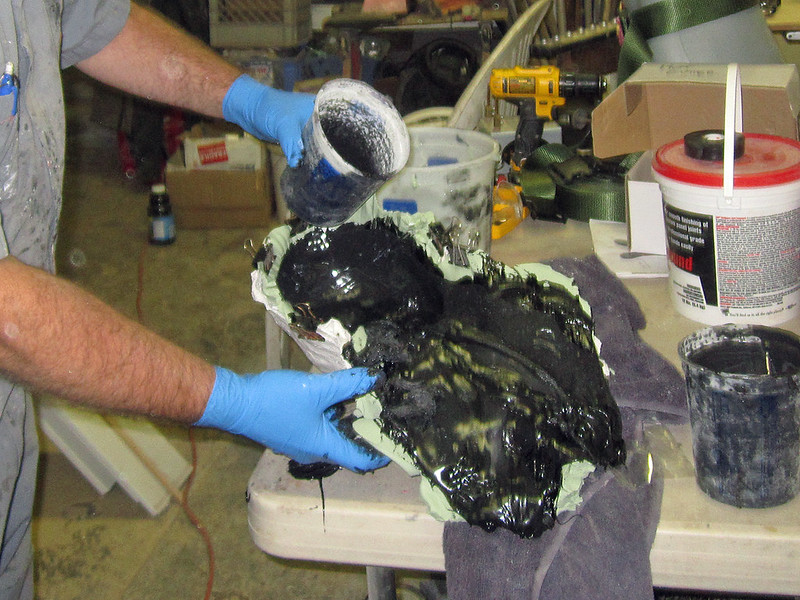
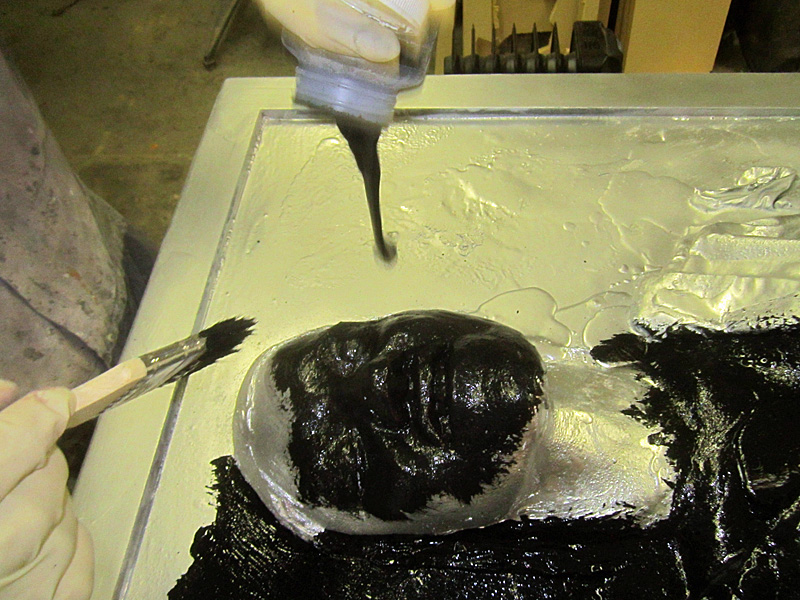
While the model goes off to pick the alginate out of her hair and teeth, I coated the inside of the mold with resin:

Then a bit more resin:
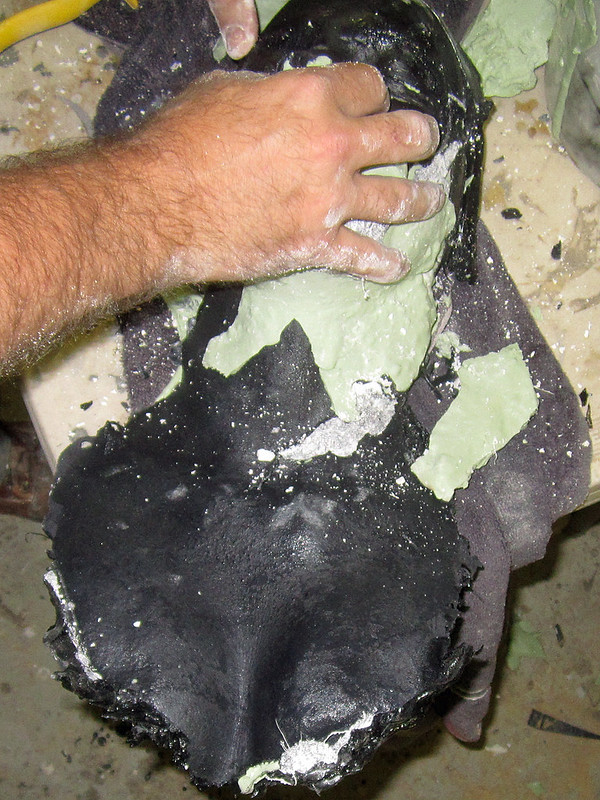
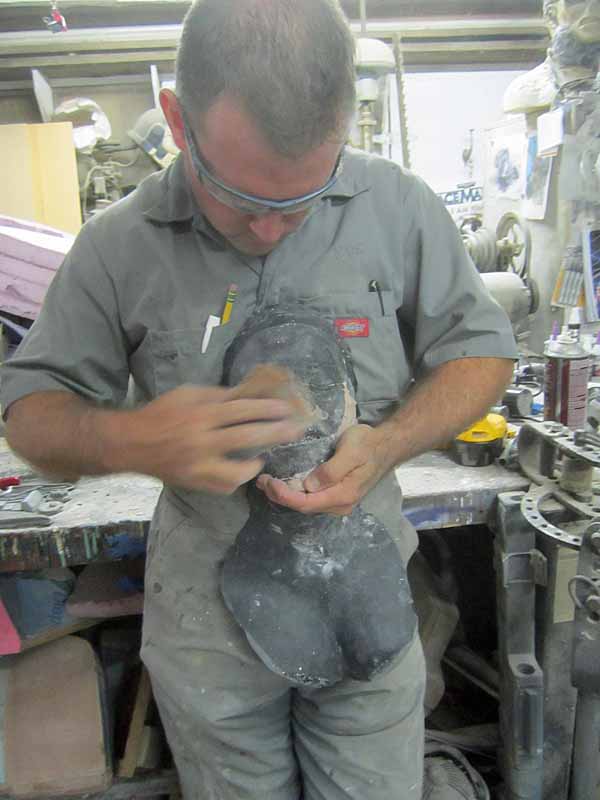
When the resin was built up thick enough to support itself, it was time to remove the plaster shell:
With the plaster shell torn away, it was time to clear away the layer of alginate:
How did it come out? Let's check:
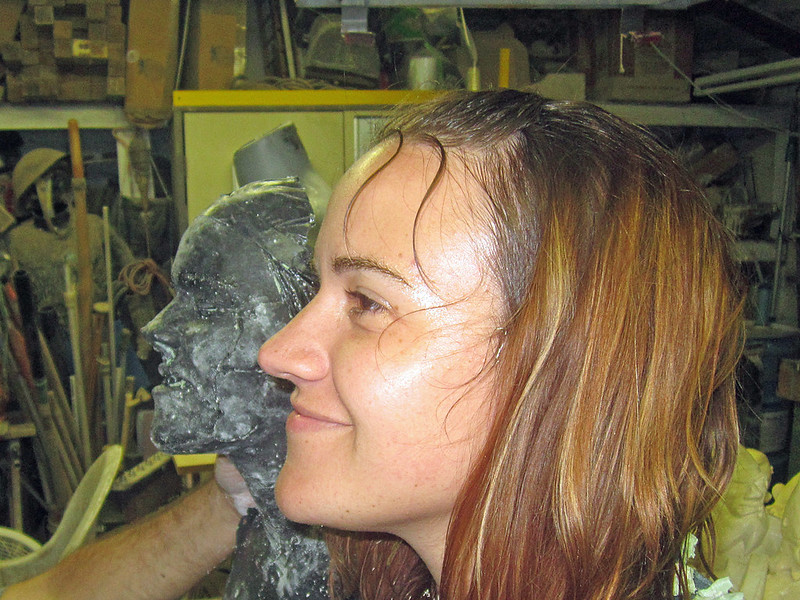
I see significant flaws. The alginate had separated from the plaster shell around the nose and I didn't notice in order to push it back into proper alignment. The result was a somewhat pug-nosed casting with the nose and upper lip pushed in. There was also a split in the mold along the left cheek that resulted in a somewhat excessive ridge on that side.
Regardless, she seems happy with it:
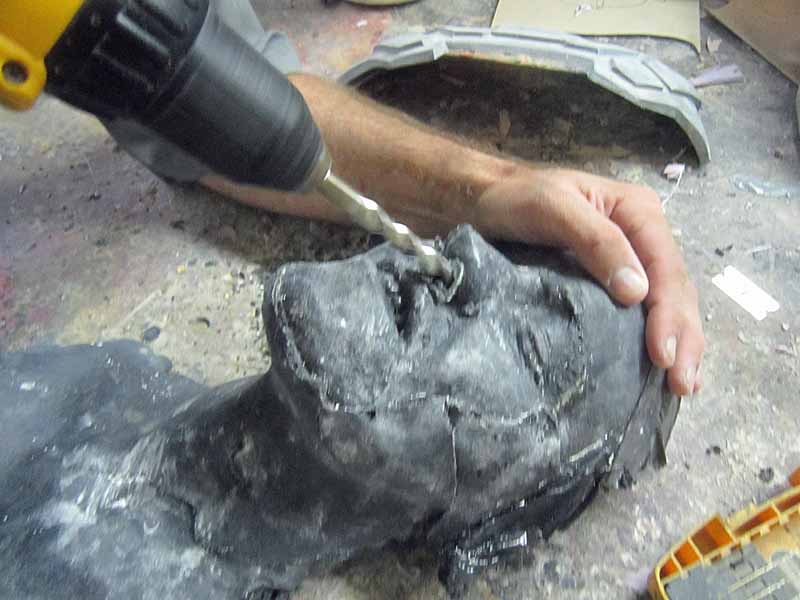
Having identified the problem areas in the casting, it's time to fine-tune and remove some of the flaws. First step: clear out the nostril plugs:
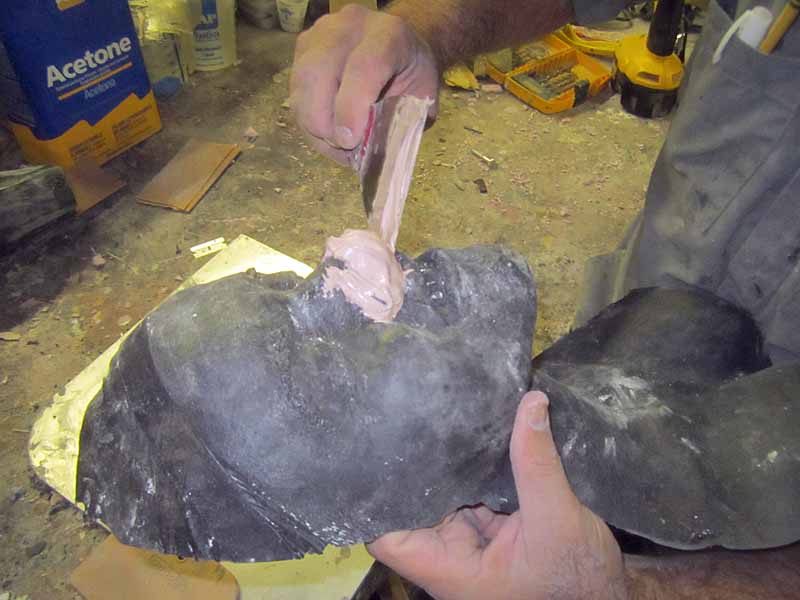
Next step, add a bit of Bondo to straighten out the squished nose:
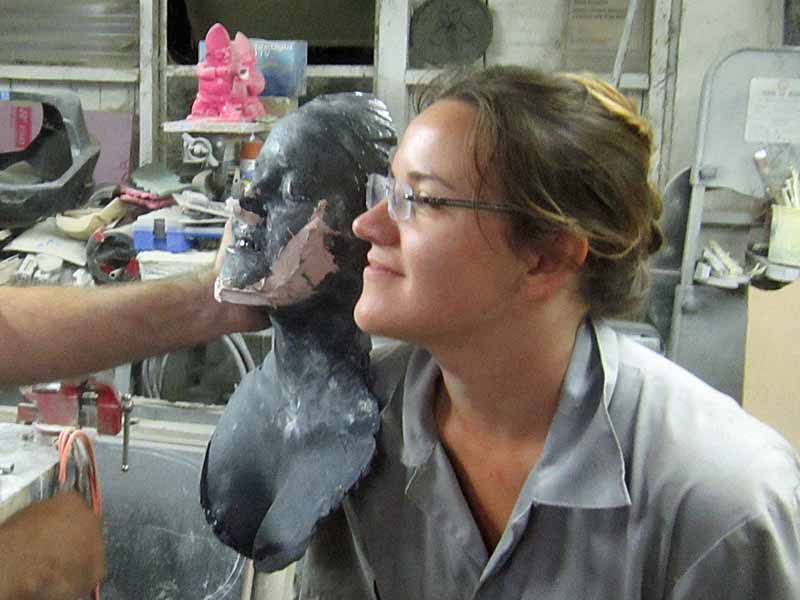
Compare against the original:
More tweaking the nose:
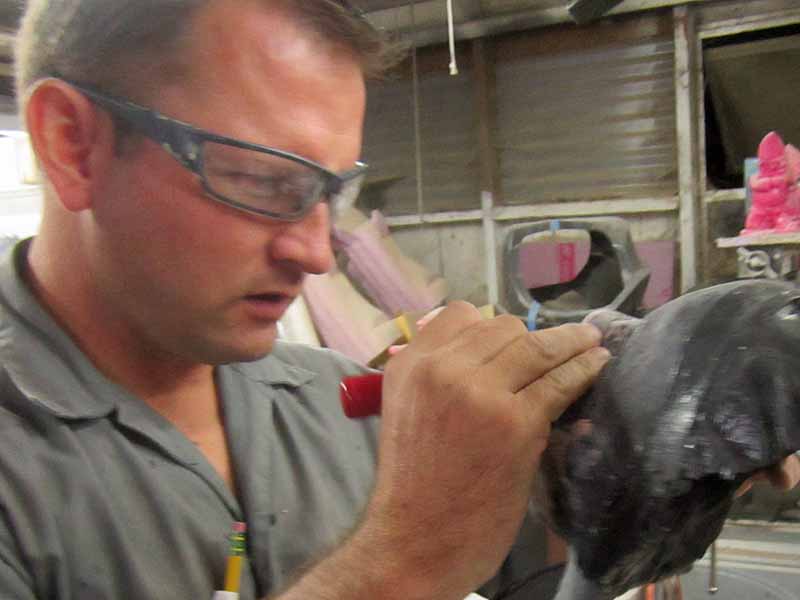
Nose sanding:
Prime to check shape:
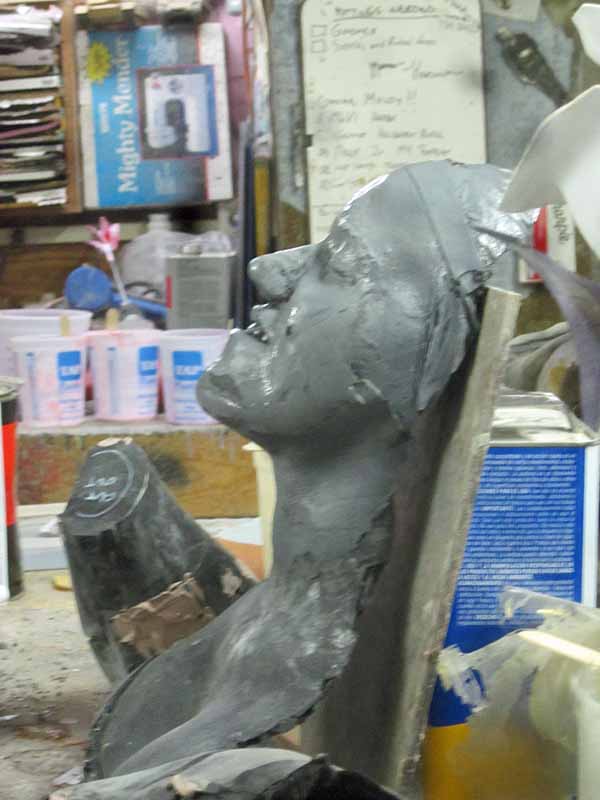
Good enough.
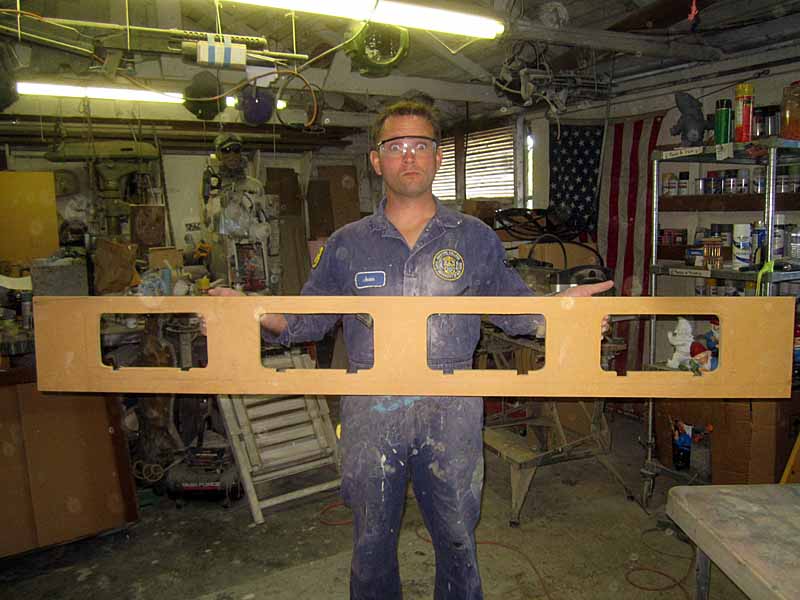
Part 3: the BOX
Before starting this project, I did quite a bit of research into the design and construction of the original, screen-used prop. Some of the most useful information can be found in the relevant discussion threads at the Dented Helmet, which is the Boba Fett costuming forum. So click that link if you want to know everything there is to know about the original piece and see how a few other makers have replicated it. Somewhere in there, they've even got a set of painstakingly researched set of blueprints with all of the dimensions of the box itself.
The original piece was tapered slightly from bottom to top. It was also slightly tapered from pack to front. Since this was a rush project and there was no reason to go completely insane matching all of the angles, I decided against making screen-accurate tapered sides. I also re-sized the whole piece because Jenny is quite a bit shorter than Harrison Ford was when they built the original.
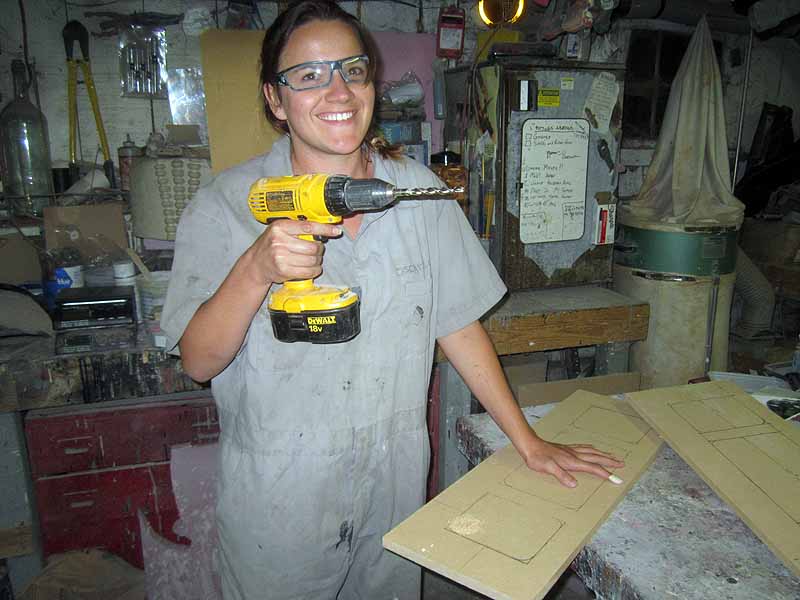
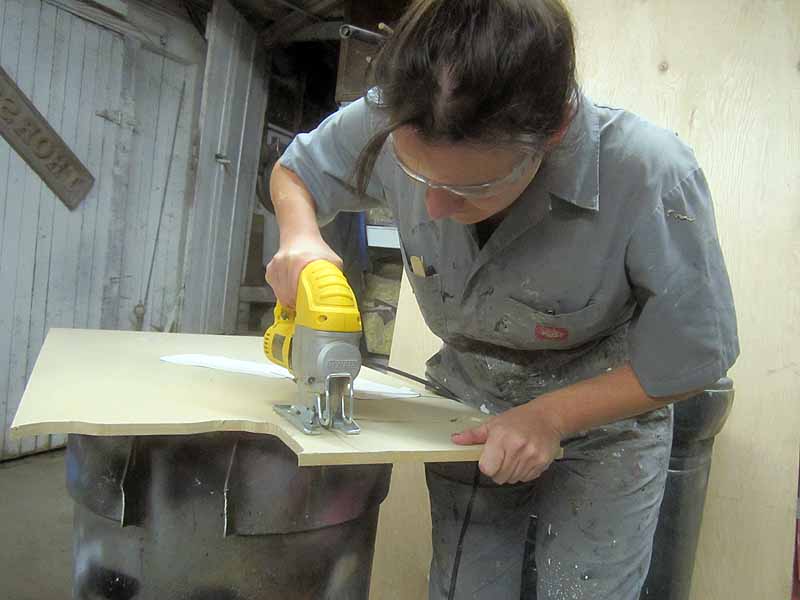
So I drew up a simplified template to match the look of the original while eliminating some of the less important details. Here she is laying out the cutouts that will go on the sides of the box:

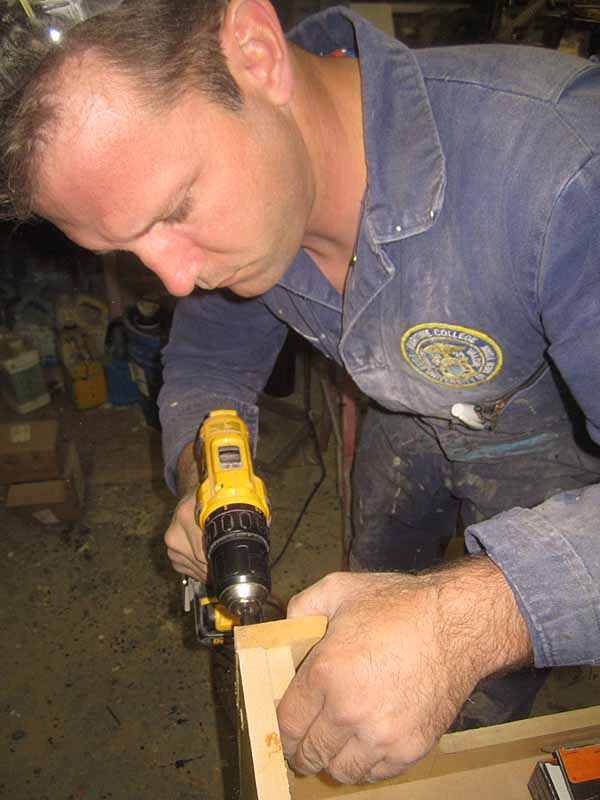
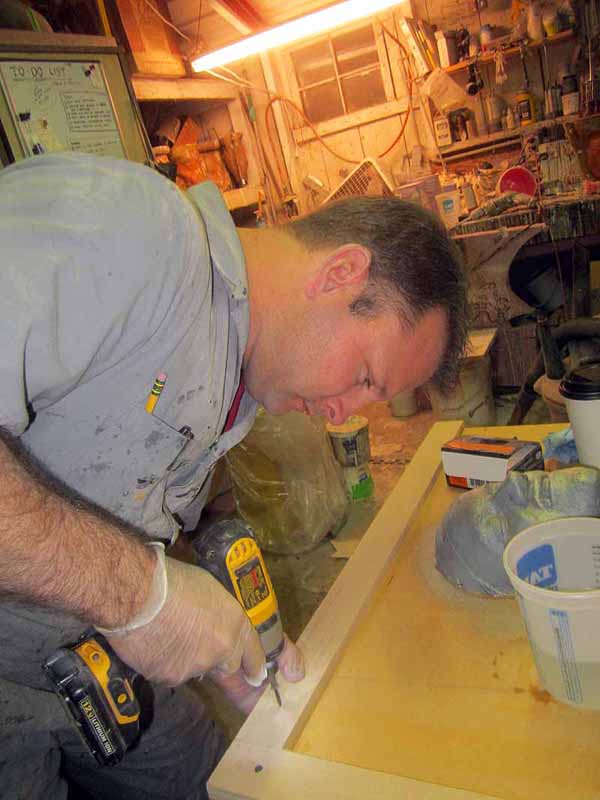
Because she was providing all of the labor, she was supposed to do all of the cutting and drilling. Unfortunately, at this point she had almost no power tool experience, so she needed to be watched in order to prevent her from drilling holes into her hands or, worse, something expensive.
Here she is drilling starter holes:
With the starter holes drilled, it was time for her to learn to use the jigsaw:

Here's a side piece all cut out:
 Some of the edges are even kinda straight.
Once the parts were all cut out, all of the seams were glued together with Gorilla Glue:

NOTE: Gorilla Glue will stick to your hands and make a tacky mess that will turn black with dirt and not wash off until you've scrubbed off the skin that it's attached to. Usually it'll take a week or two to get it all off. If you're not ready for that level of commitment, wear gloves.
In addition to the glue, they were screwed together too:
Here's the first three sides of the box coming together:

Once it was assembled, I had to have her test it for proper size:

After adjusting her position to match the pose from the original, I traced the outline of her body on the front panel:

Standing the whole thing upright, I glue the lifecast parts onto the surface, then screwed them on from behind:


This is about the time that this thing became large enough to be a nuisance filling up space in the workshop, so it was time to speed up the rest of the build.
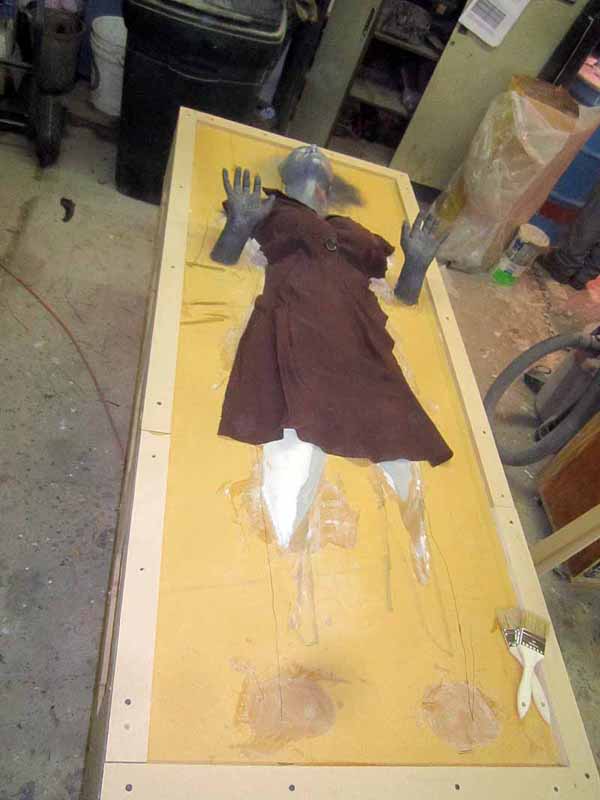
Part 4: the Body
The next step was building up the parts of the body that would be covered in clothing. Since they would be covered, there was no need to go through the lifecasting process. Instead, I sculpted these parts from scratch. I started by mixing a batch of expanding foam:
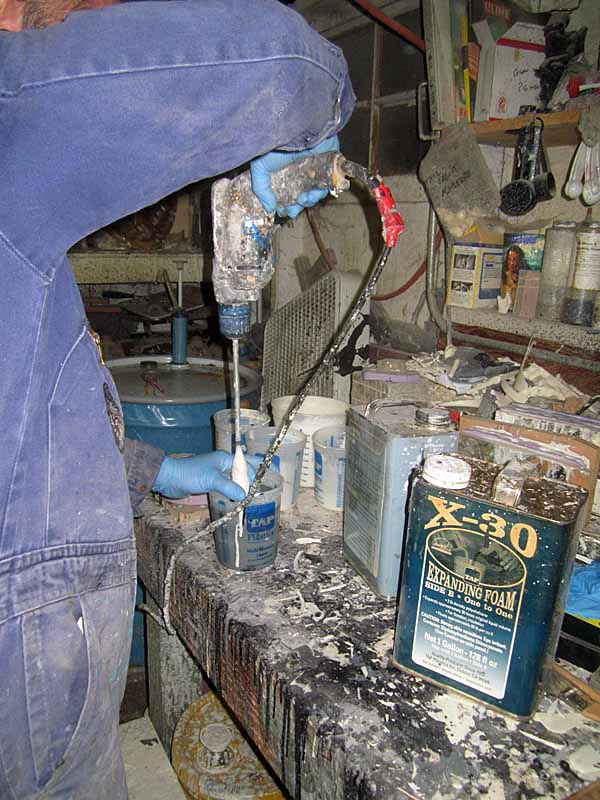
Then poured it into the outlined area:
Since the first batch was too small, I went ahead and poured another batch on top of it:
After about an hour it had expanded to full size and hardened enough to start shaping:
Rough shaping was achieved with a kitchen knife:

Smoothing and finer shaping was done with a body rasp:
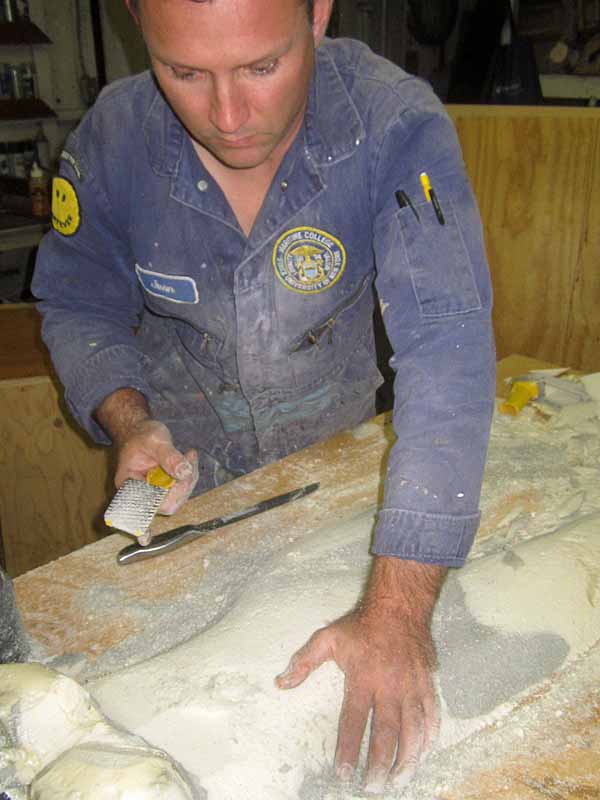
After a few minutes of work, I had a reasonable facsimile:
To trim the outline of the front panel, I cut strips of 1/2" MDF sheet:

These strips were then glued and screwed onto the surface:
With that, the bodybuilding was done. It's considered poor form to encase someone in carbonite when they're nude, so the next step was dressing up the body.
Part 5: Wardrobe
In this case, the donor dress was actually chosen very early on in the design process. Since only the front third or so of the body will be visible in the finished piece, the rest of the dress had to be cut away and discarded:
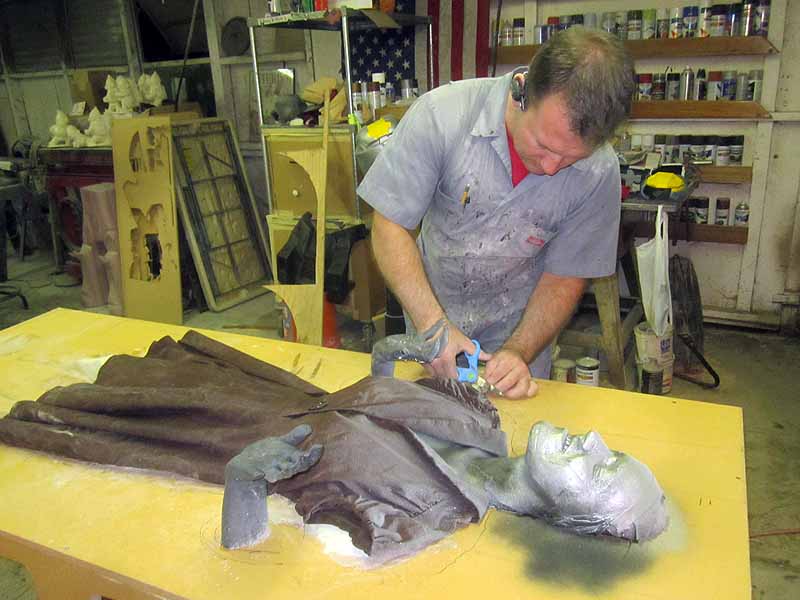
With the unnecessary parts of the dress removed, the next step was to drape the remainder over the body and decide how the fabric will fall:
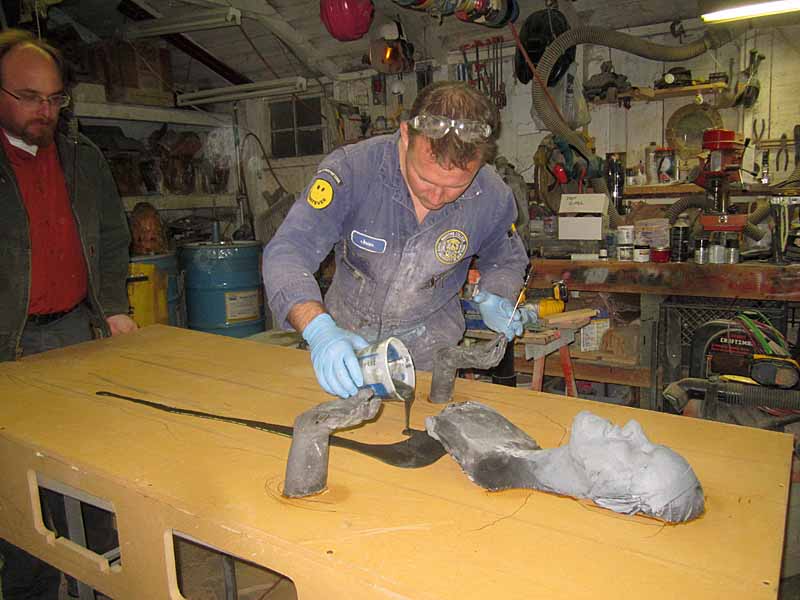
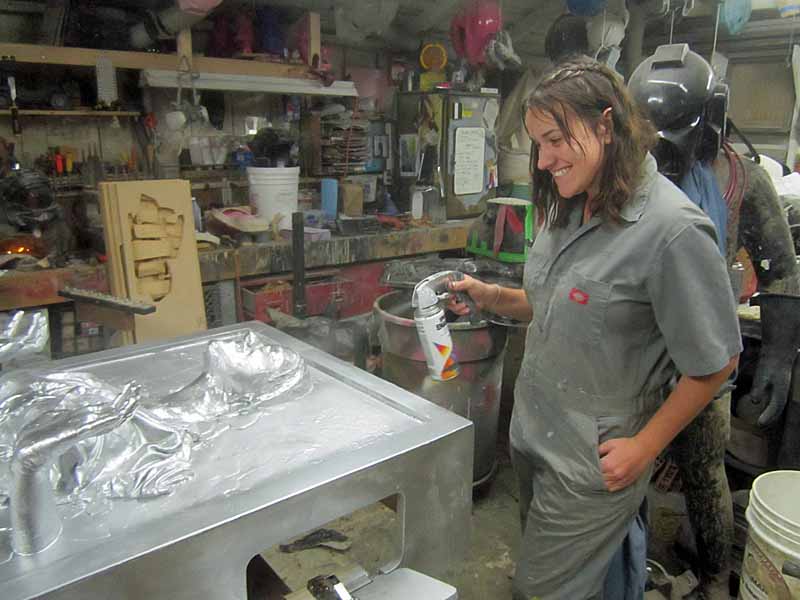
Once I was satisfied with the look of the dress, the next step was to coat the foam body form with a batch of urethane casting resin:
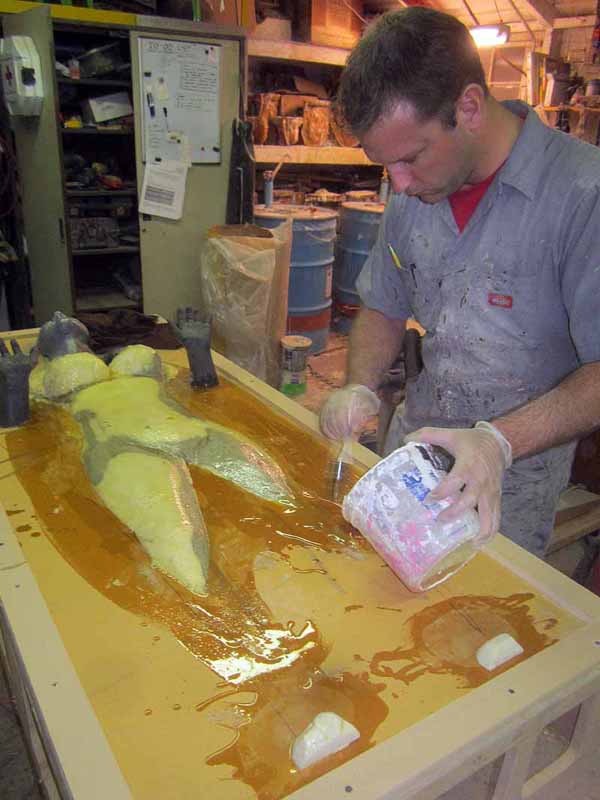
Working as quickly as I could, I re-draped the dress and soaked the fabric with more resin:
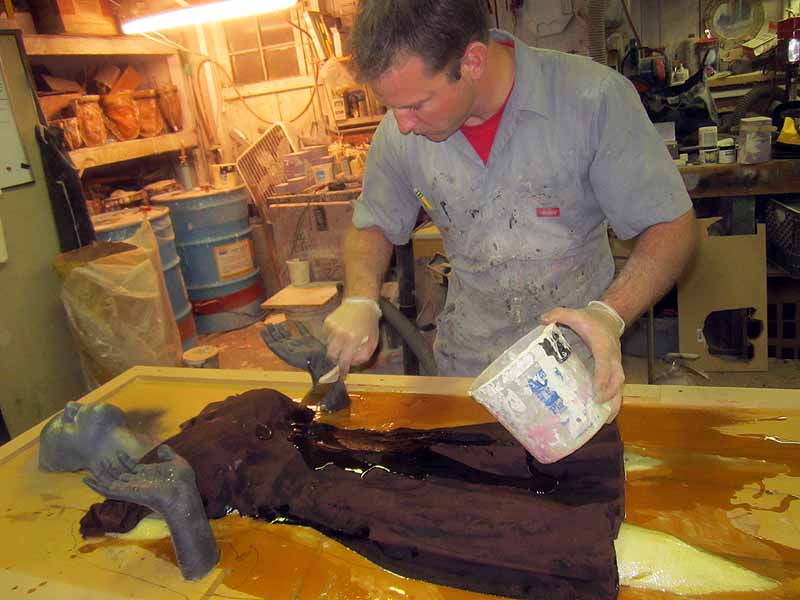
Here you can see the resin turning off-white as it starts to cure:

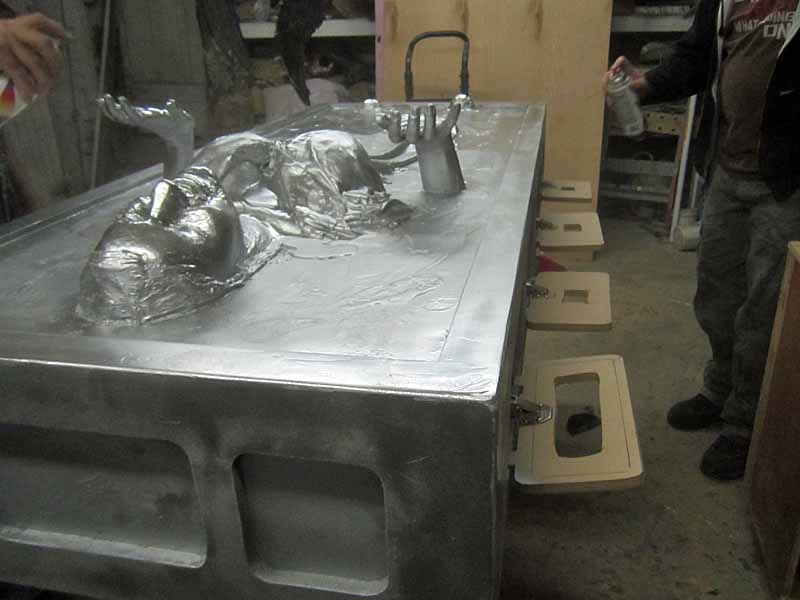
I mixed a couple of smaller batches of resin and used them to add texture to the flat open areas on the front of the piece. The goal was to stir up and stipple and puddle the resin so that there were no smooth areas left on the front panel.
With that done, all that remained was to mix a couple of batches of Bondo and fake a quick and simple hairdo:

Then it all got a good coat of black primer:
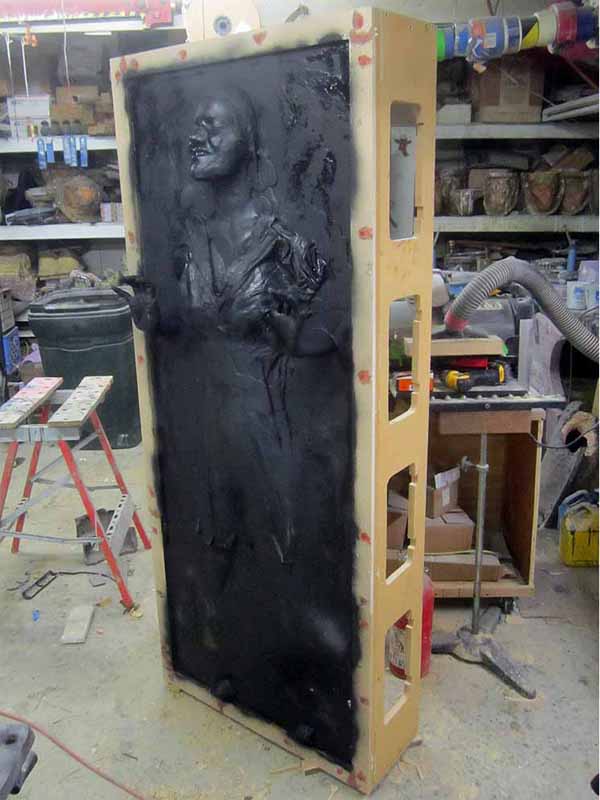
Here's a full-length shot:
With the big parts done, now it's time to focus on the small parts.
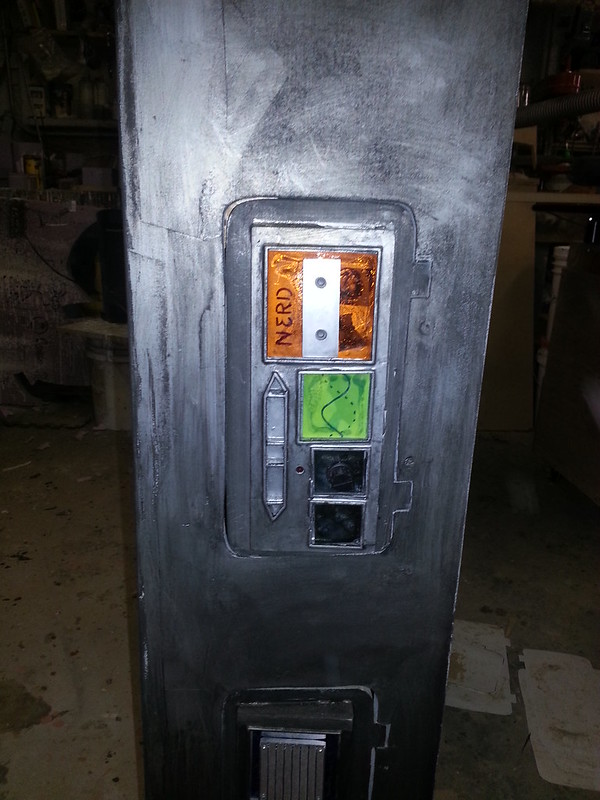
Part 6: Display Panels
The indicator panels on the side of the film-used prop were actually dashboard panels taken out of a 1978 Volvo, which were then molded and cast. I don't have any old Volvos in my workshop, so I had to resort to just making something up.
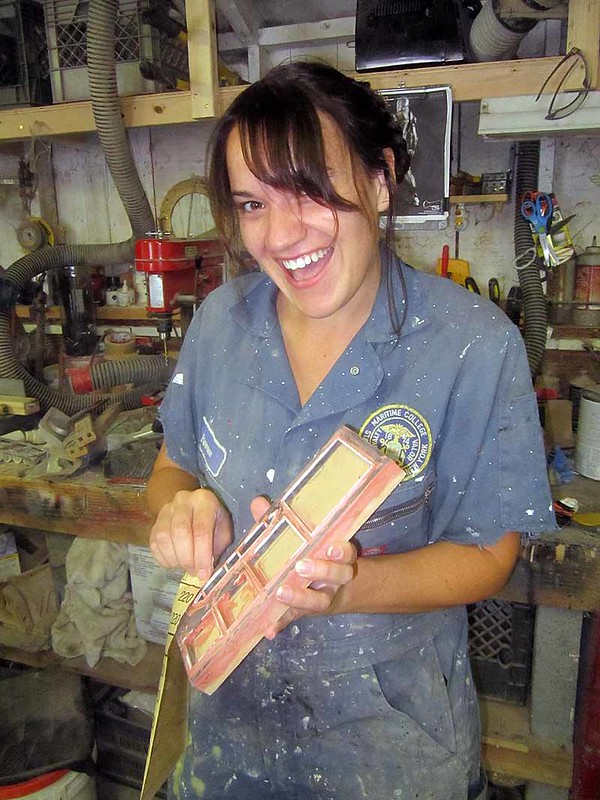
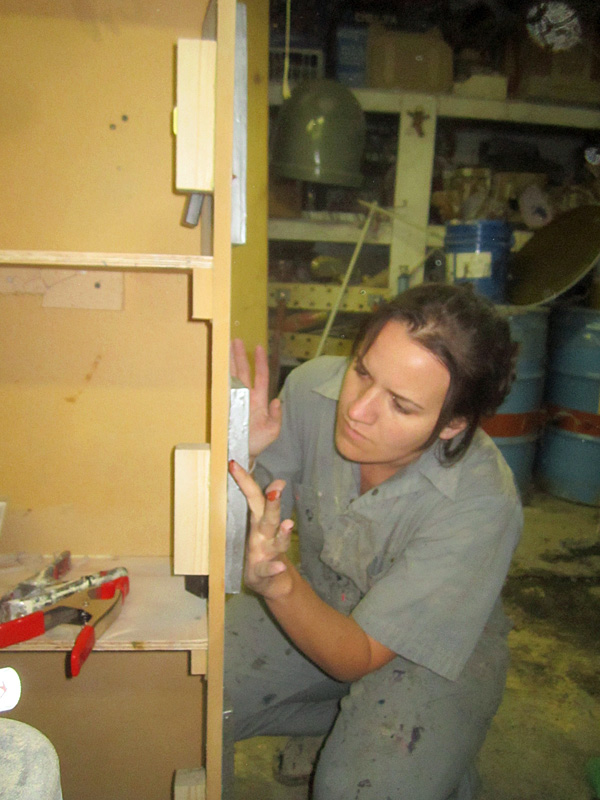
I tasked Jenny with finding a photo of one of the original panels. Then I handed her a block of MDF and told her to add sheet plastic to it and cut in windows so it would look as close as possible to the original. Here she is in the middle of that process:
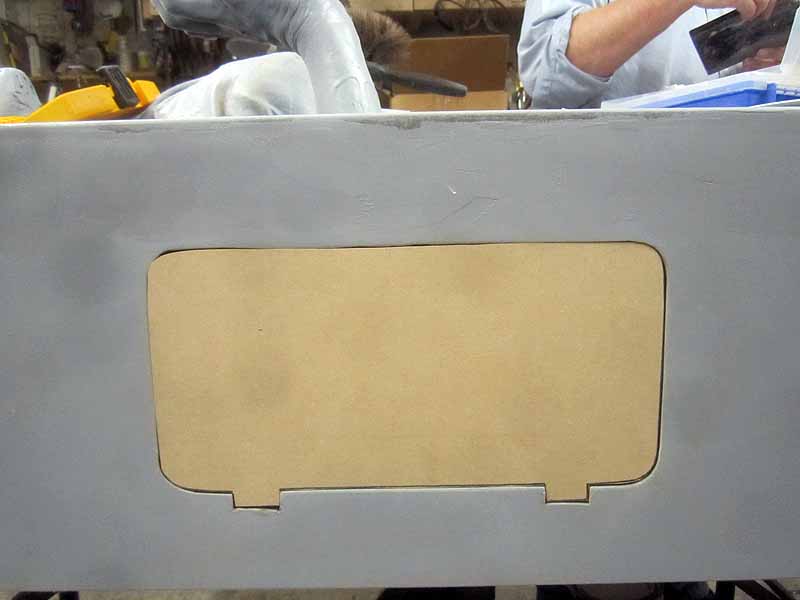
I also had her cut panels out of 1/2" MDF to match the holes in the side panels:
Here's one of them fitted in place before being pushed in for an adequate recess:
The original display panel Jenny made was molded and eight copies were cast in urethane resin.
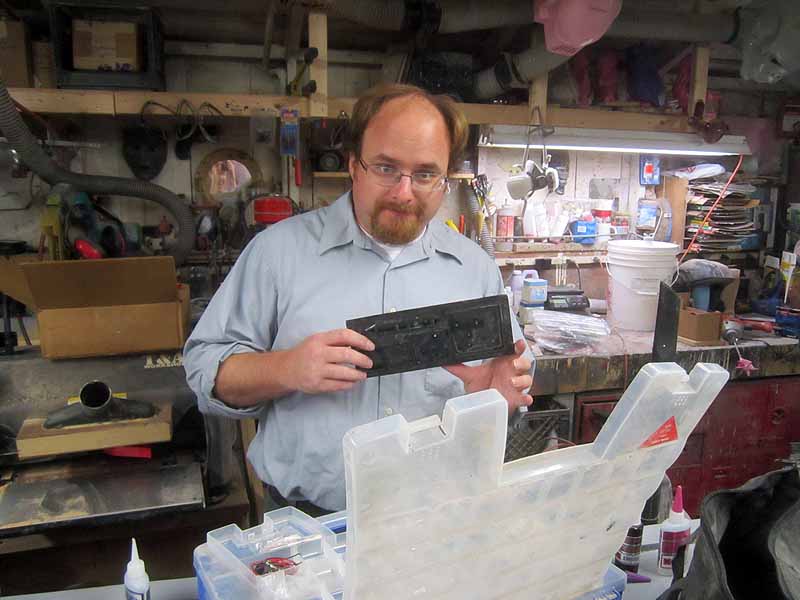
Holes were drilled randomly in the display panels and we wired them up with LEDs:
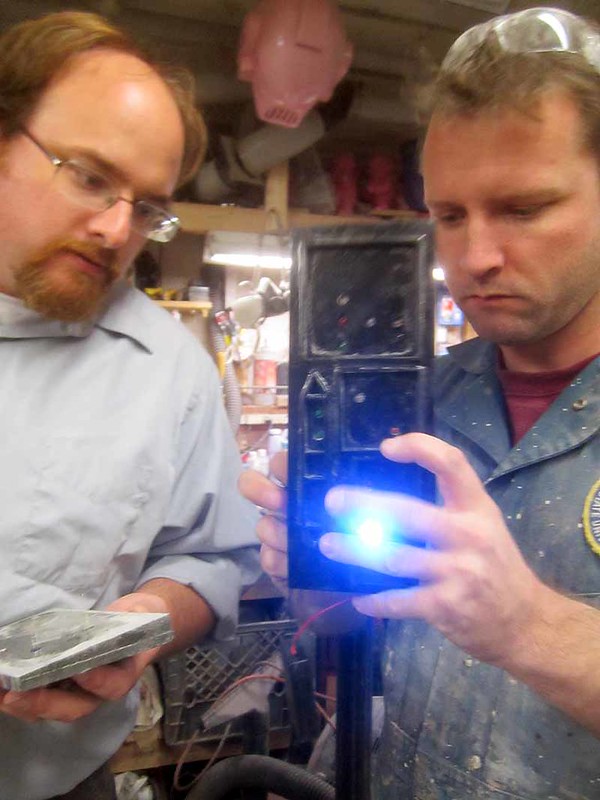
Lots of LEDs:
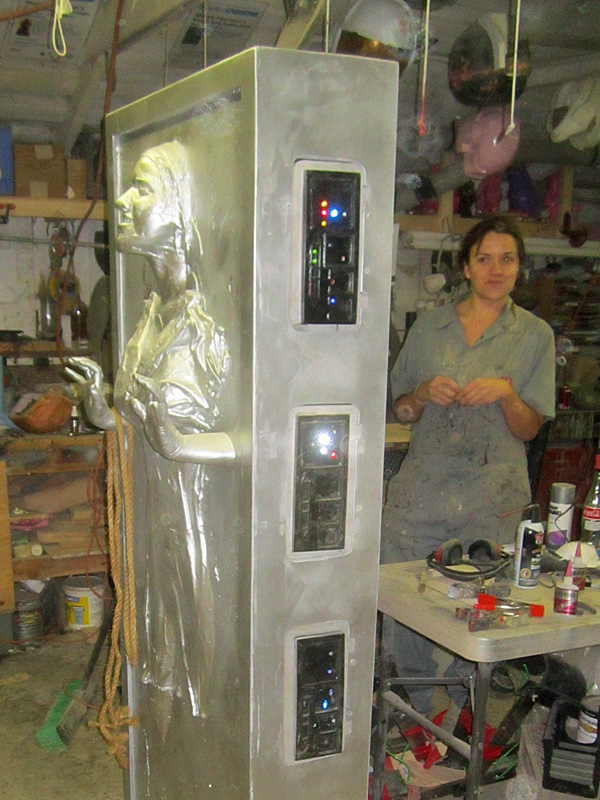
Seriously. Lots:
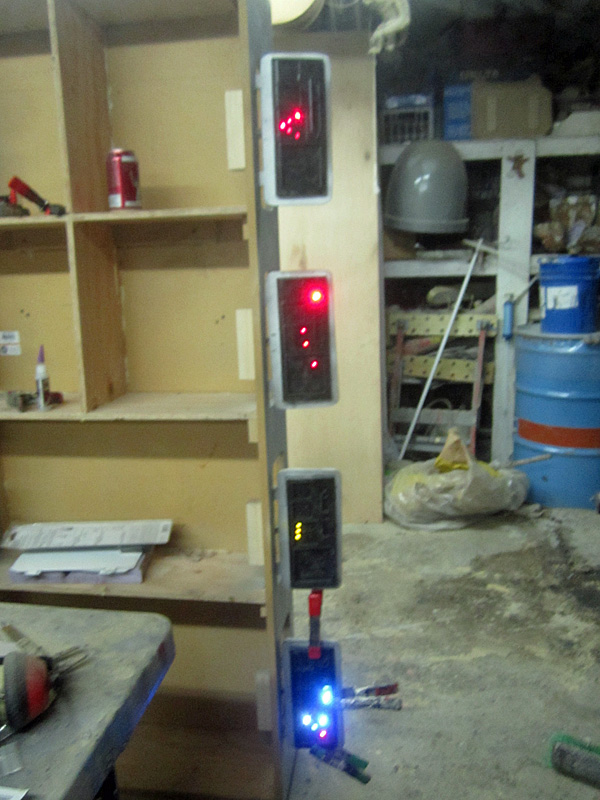
Some of them were blinking LEDs, some of them were high-intensity, all of them were completely added at random. Once the wiring was done, scraps of tinted acrylic were cut out to fit into the display windows and make them look a little less cheesy. Then we took some random small parts left over from the Ghostbusters project and glued them on to make the panels a tiny bit more interesting.
Here's what it looked like after it was painted:
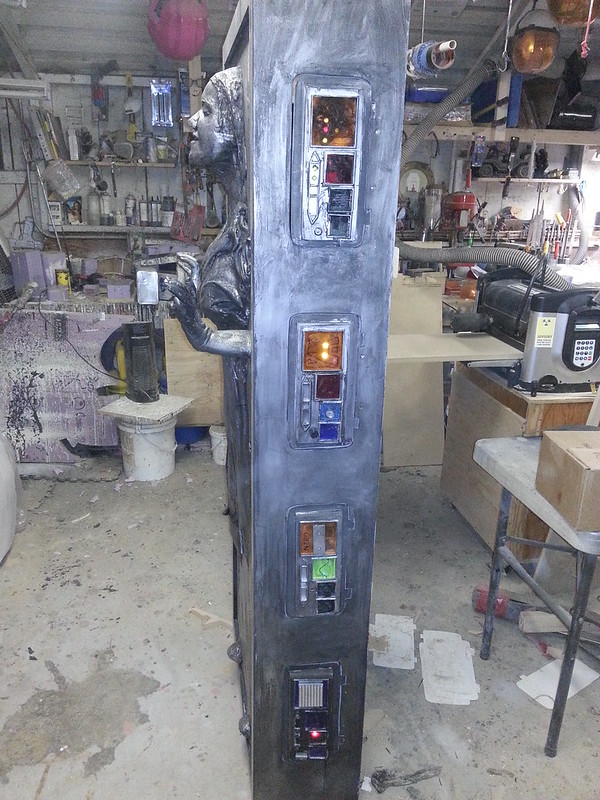
Here's some closeup shots of the panels:
Oh, right. I haven't described the painting process...
Part 7: Painting
This is the part where we take this amalgamated mess of pieces and parts and various materials and make it look like some sort of dark grey metal similar to pewter.
The whole process began with a few coats of silver spraypaint:
In between coats, Jenny put another layer of filler on the visible screw holes:
When the base color was completely done, it looked like so:

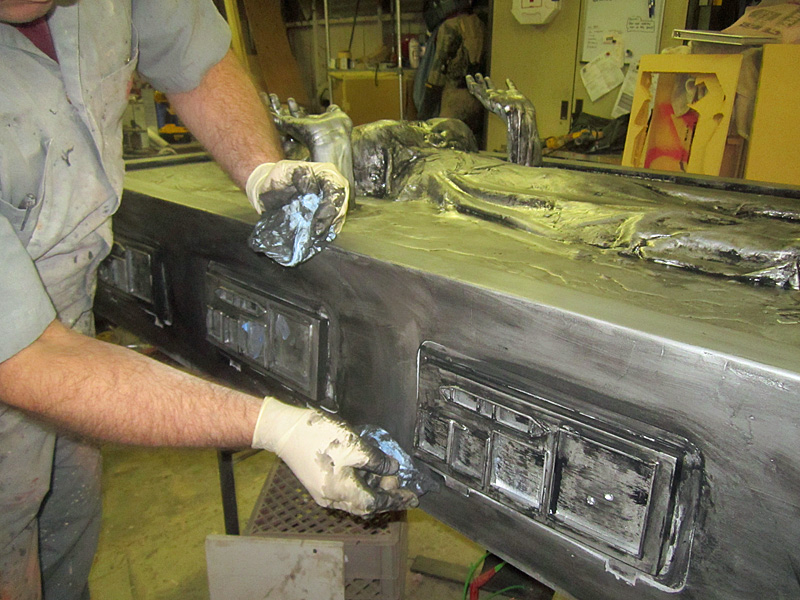
Once the silver had had plenty of time to dry, it was time for a blackwash. This would darken the color and bring out all of the various details and textures. In this case, I began by slathering it with black acrylic paint:
Jenny spread the acrylic paint over the whole thing:

Before the paint had any time to dry, the next step was to water it down and then wipe, dab, spread, and smear it all over with very damp rags:
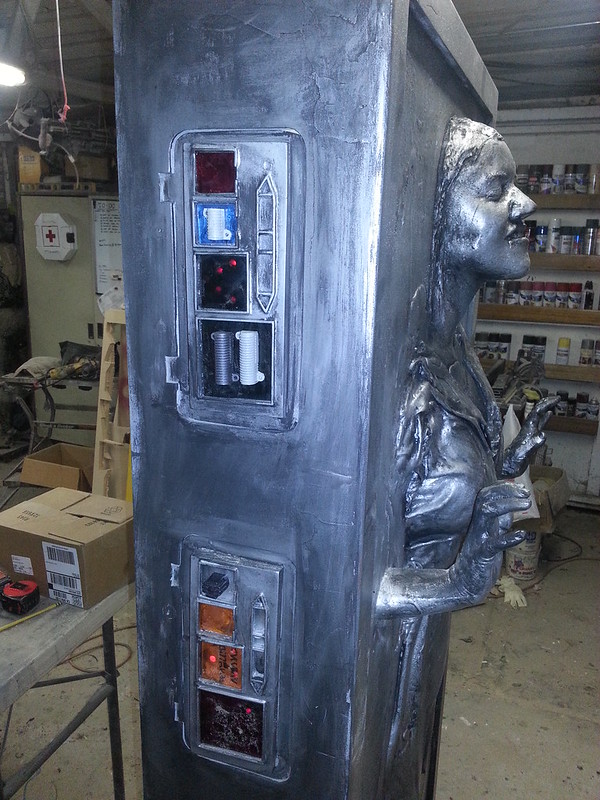
As the paint started to dry, we gradually switched to dryer and dryer rags until we were buffing nearly dry paint off of the highest surfaces and most prominent details. The resulting finish looked like so:
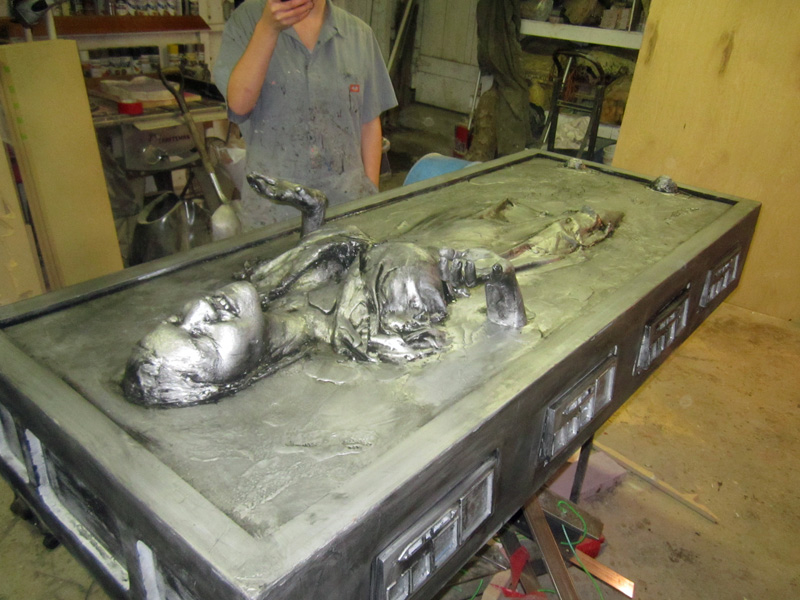
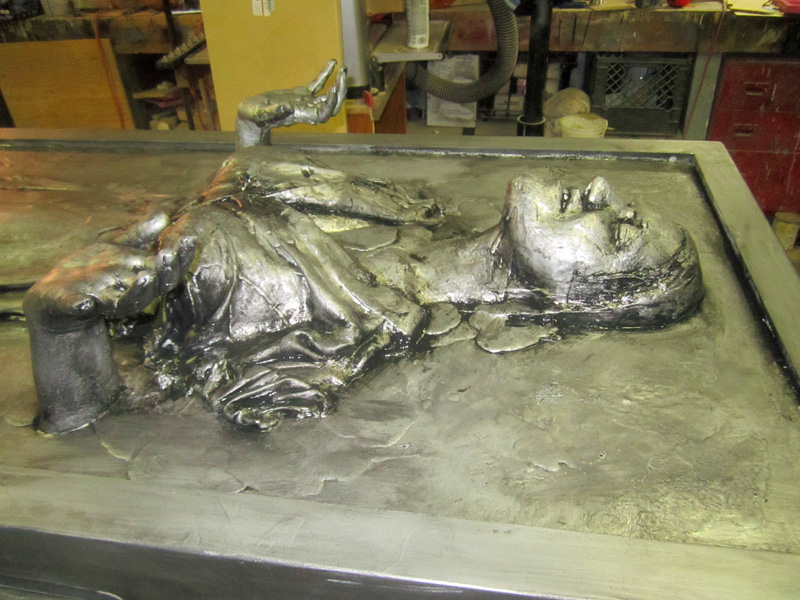
I think we managed a fairly decent approximation of the look of the original:

With the look of the outside all taken care of, it's time to figure out how the whole thing will work.
Part 8: Functionality
I forgot to mention it has shelves inside:
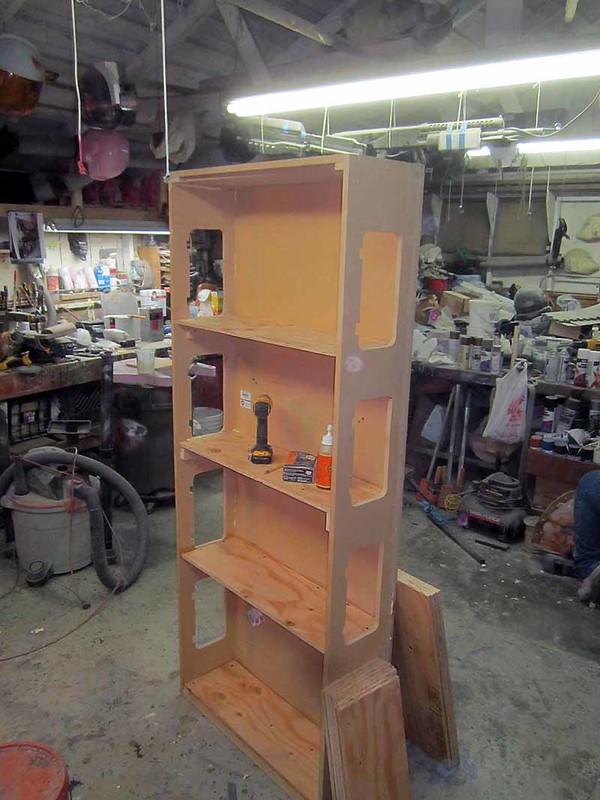
The recessed panels that the display panels are attached to are actually hinged:

Hinge installation gave Jenny another excuse to use power tools and frighten everyone within arm's reach:


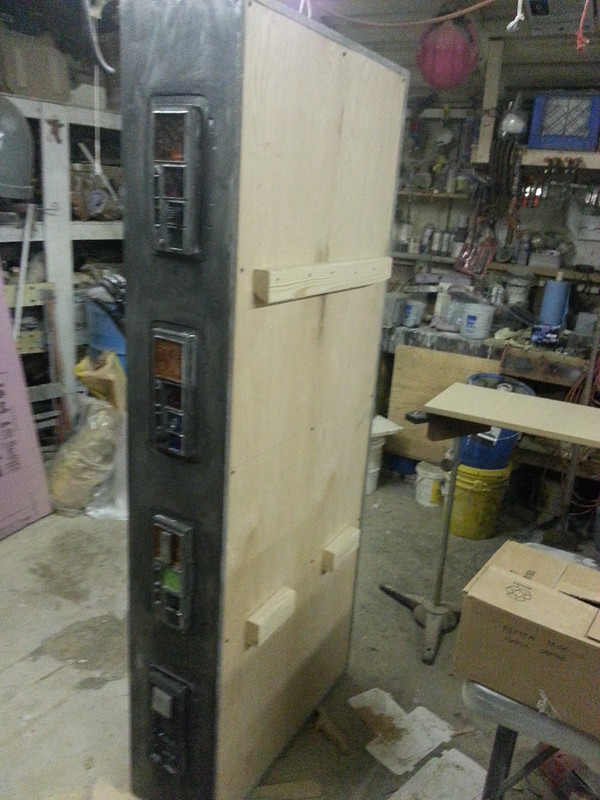
With all of the shelves installed and the hinges mounted, it was time to close up the back and fit it with cleats for hanging it on the wall:
Finally complete, all that was left was to load up "Jenny in the block" for delivery:
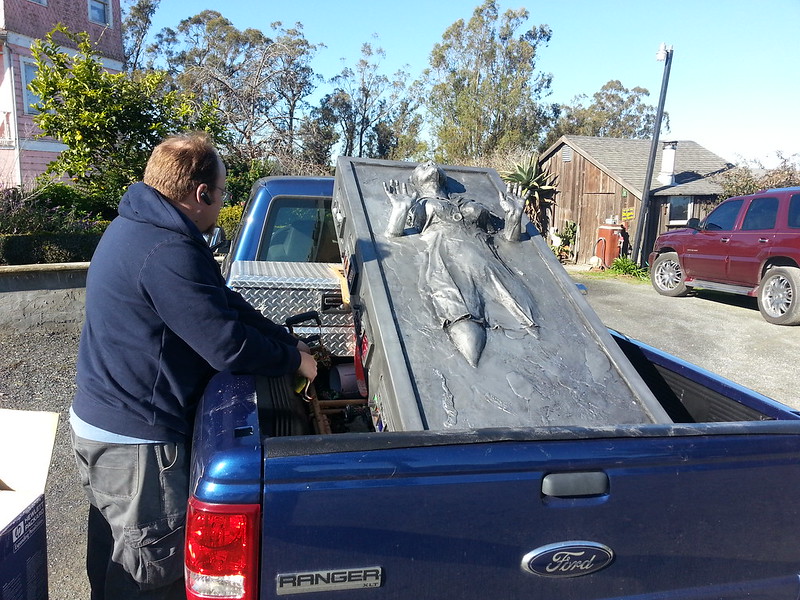
Once we had it in the back of the truck, I donned my Boba Fett helmet and we paraded it all the way through town before heading over to her house and surprising her with the finished piece (by leaving it there when she wasn't home).
Mission accomplished.
Part 9: Give it a Purpose
I'll get back to you on this part.
I should mention that I've got a lot of interesting projects coming along right now. Make sure you subscribe so you don't miss any updates.
You are a master.
ReplyDeleteWow, cool!
ReplyDeleteThat looks amazing.
ReplyDeleteVery nice!
ReplyDeleteI'm wondering why you wouldn't cast a torso piece rather than electing to sculpt one? If the body shape was to be radically different than Jen's in the final piece, sculpting would seem to be the way to go. Sine the final looks very much like her (and that ain't bad!), a cast piece would seem to save some time.
In any case, the final result is amazing. Thanks for sharing the process.
Brad Davis
GBs Fab Shop - http://gbsfabshop.blogspot.com
Sculpting the foam piece for the body took a little more than an hour and a few ounces of foam. If I'd cast it instead, I'd've had to come up with enough alginate to triple the lifecasting costs for this project. The time involved in taking the impressions would have been more than sculpting the body, and then I'd still have to use at least as much foam and resin to make the copy as I ended up using.
DeleteAh, thanks for the clarification. Since I am not much of a sculptor, the cast route was my immediate thought.
ReplyDeleteBrad
GBs Fab Shop - http://gbsfabshop.blogspot.com
That's fantastic. I always love dropping in on your blog. Very cool stuff.
ReplyDeleteAlso... since you seem to be one of the best people to ask. Who do you recommend to get larger amounts of RTV moldmaking silocone? It's not the exact same as the RTV Adhesive Caulking with just a release is it? I work in smaller scales with action figures, but sometime in the future I see myself expanding. Who or where would you recommend to pull some of that down?
ReplyDeleteThanks,
TheGeekSummit.BlogSpot.com
I get mine from aeromarineproducts.com. Tell them Shawn Thorsson sent you.
DeleteAnother awesome project Shawn!
ReplyDeleteI am surprised this post didn't result in the very attractive Jenny receiving several proposals for marriage, or at the very least invitations to dinner or an offer to send her flowers & chocolate.
ReplyDeleteMe too, but only slightly. My blog usually doesn't elicit any comments of any kind. This is one of the more vocal discussion threads I've seen.
DeleteMaybe if there was more cleavage...