For those of you who don't know, I've had a couple of costume parties lined up this summer. One was held at a fairly classy venue in Seattle while the other will be in Petaluma at a bit more kid-friendly location. My sister will be bringing her kids to the second one. Since she has two kids (and a husband) she will get to make four separate costumes. I don't know what she or her husband or her daughter will be dressed as, but a few weeks ago I found out about her son Trey.
Apparently she picked him up from school a while back and asked him how his day went. He replied, in the most serious tone an elementary-schooler could muster, "Mom," says he, "I've decided what I want to be for uncle Shawn's party."
"Oh?" she asks, "What's that?"
"Boba Fett"
So I get a call not long after that and my sister asks if I have any of the parts for the Boba Fett costume. I told her that while she was right to guess that I have the costume, she was wrong to guess that I'd have it in midget sizes.
At the time I was still camped out in a Washington, DC hotel room, needed a small project, and decided there was nothing I'd like more than to manufacture a miniature Fett helmet or two. I told my sister the rest of the costume would be up to her, but I'd be able to at least take care of that part. And so I began with...
Stage 1: The Prototype
Surprisingly, the most difficult part of the Fett helmet to get right is the dome. My original plan was to fabricate the entire helmet using the Pepakura program and any of a number of readily-available 3D models of the character. Once the dome was built, I decided that I didn't like the way the rest of the model was coming together and ditched it in favor of a scratch-built version using various thicknesses of sheet styrene. Once it was all cobbled together, it looked like so:

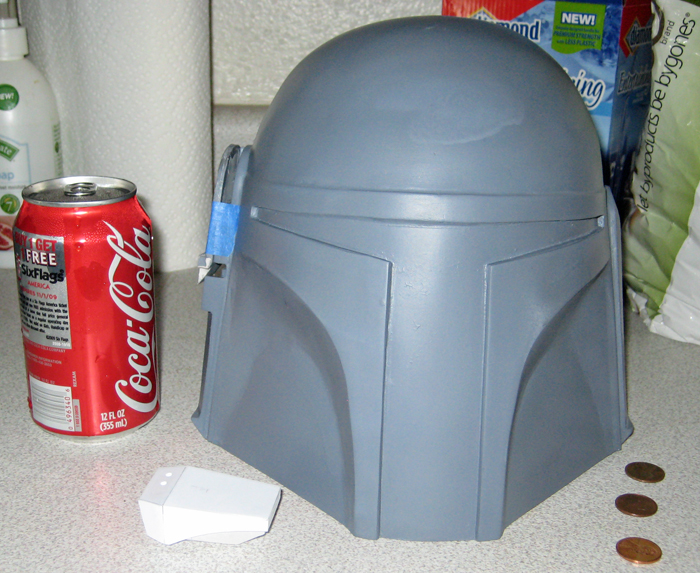
Then it got a healthy dose of primer:

Then a bit of Bondo and a lot of sanding to perfect the rounded dome:

At this point the wyf and I had left Washington DC and driven to New Orleans, so there were a few days' delay before the prototype got it's final coat of primer:

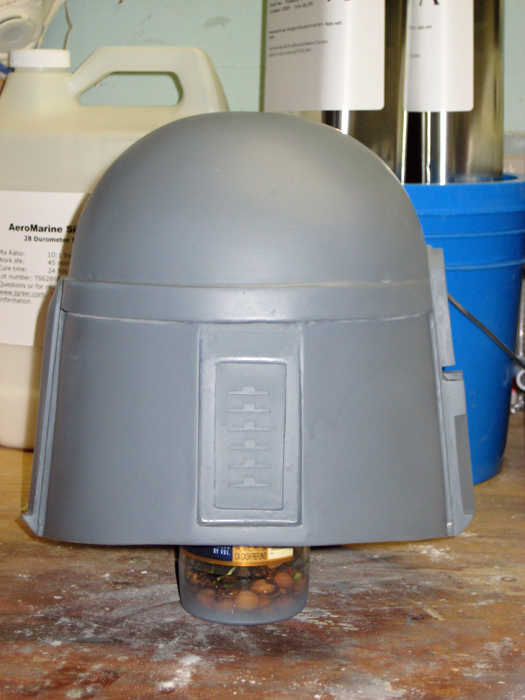
Then it sat in the back of the car for a few more days before I got around to adding these annoying little notches and other details on the backside:

Then I painted it lightish red like I tend to do with my prototypes, before moving on to...
Stage 2: Moldmaking
When you've got one of something and need lots of somethings, there's nothing easier than RTV (Room Temperature Vulcanizing) Silicone Rubber. It comes in a wide variety of flavors and colors and makes amazingly flexible, long-lasting molds. Depending on how it's mixed, you can pick up even microscopic details. It's expensive, but it's also worth the money. I buy mine from http://www.jgreer.com/, because they've got the best prices I've found as well as top-notch customer service.
The trick with moldmaking is to choose a mold material that works with you and to work around it's potential drawbacks. Silicone is expensive, so you want to use as little as possible. The problem is that it's also very flexible, so you need to build it up thick. The solution: a jacket and mother mold.
The jacket is the flexible rubber part that will pick up all of the minute details on the surface of the "master," also known as the prototype or original. Here I am coating the master with uncured silicone:

Once the jacket has cured, the next step is to build a rigid "mother mold" that will hold the jacket in place. I'd go into greater depth explaining this, but you can just google the term "mother mold" and you'll find plenty of tutorials. I'll write up my own some other time.
Once I had a working mold, I made my first casting. Since the undented version is styled after Jango Fett, the first copy had to be modified to make the Boba Fett helmet. In this pic you can see the new dented helmet on the left and the lightish red prototype on the right:

Stage 3: Funding
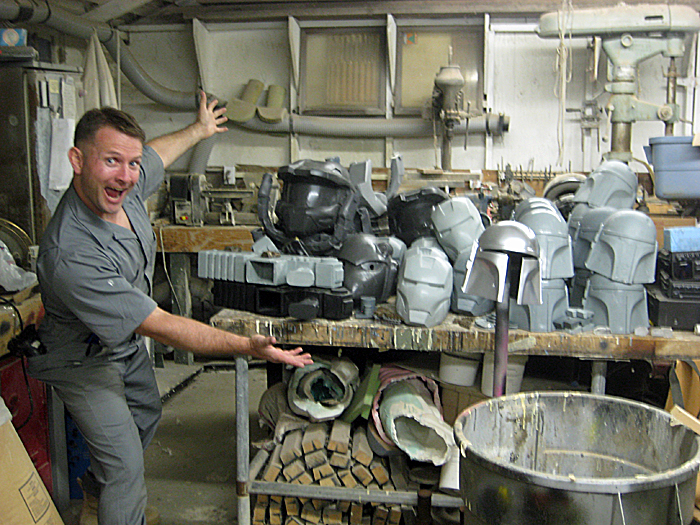
Like I said, silicone is expensive. While it's nice to have a helmet cast in urethane resin (also expensive) the only way for me to afford it on my current budget is to share the costs with similarly intense costumers who have a bit more cash and less time than me. Once I'd made a mold of the undented and dented helmets, it was time to crank out a few more and sell them. Here's the production run along with a few leftovers from other projects:

Stage 4: Painting
You can see in the photo above the one helmet painted silver in the foreground. That was casting #1, my nephew's helmet, at step 3 of what would end up being at least a thirteen step painting process. Step 1 was priming it. Step 2 was lightly sanding and then priming it again. Step 3 was painting it the best metallic silver I could find in a spray can. Steps 4 through 11 were masking off and spraying the various shades of green, grey, black, red, yellow, buff, and son on. Step 12 was to apply all of the hand-painted details with tiny little brushes. Finally, step 13 was to dust it lightly with three different versions of primer (rust, black, and grey) and then touch up the bare metal parts with silver paint again.
Here's a shot of the helmet around step 7 with the visor taped in place:

Before you ask, yes the visor is supposed to be green. The visor for the helmet used in production was made from a dark green welding faceshield that was cut to fit the t-shaped slot. It caused a few problems in some of the green screen effects shots when... Nevermind, I am a huge geek and nobody needs to know this stuff.
Once all that's done, it's time to glue in the visor:

The blue masking tape keeps me from coating the green visor in glue too. Once the glue is cured I have to touch up the areas of the paintjob around the visor. I suppose the smart answer would've been to glue the visor in first. Oops.
Stage 5: Upholstery and Whatnot
You can't have a helmet without some kind of padding. Usually I don't stop there. In fact, the last helmet I actually finished (Ana's Coast Guard HALO helmet) had headlights, port and starboard sidelights, and a defogging system with built-in ventilation fans. When I finish my next one, it will have all of that and a rear-view camera system, voice amplifier, wireless intercom, and a drinking tube. Fortunately, this little guy isn't going to need all of that.
Instead I've decided to settle for a simple headliner fabric glued to the interior of the helmet to make it a tiny bit easier to wear as well as a bit of foam rubber wedged into the top to add a bit more comfort.
Stage 6: Delivery
When my sister and her kids finally arrive, it will be time to wedge the helmet onto my nephew's head. The result? Stay tuned.

i was just wondering if u could make me a welding helmet either boba fett iron man or master or all of them helmet ima huge nerd and im a welder by profession so please e-mail me as soon as possible at
ReplyDeleteIt's an amazing idea. I like it.
ReplyDelete