
Some years ago I did my first build for Magic Wheelchair. It was a Davros chariot from Doctor WHO that we built for a young lady named Tori. I didn't get around to writing a blog article about it, but you can see pics of that build here: LINK. Then back in 2019 I did another one (LINK). So when they called me up a few weeks ago and told me that they had a rush project that needed to be done in time for a three-year old's birthday party, I couldn't really say no.
Meet Mason:


This little guy is a huge fan of dinosaurs and his favorite thing is to get his mother to drive him to the nearest construction site so he can watch all of the tractors and heavy machinery at work.
My task: make his wheelchair look like a compact tracked loader like this one:

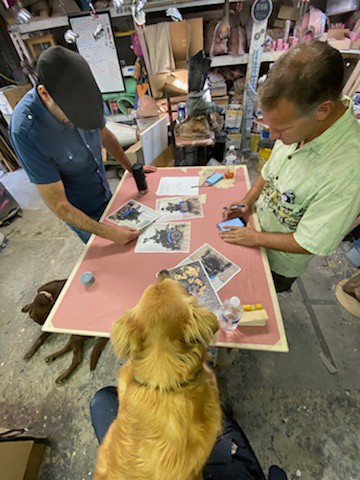
Conventional workshop wisdom tells you to measure twice and cut once. That makes a lot of sense when you have clear drawings or blueprints to work from and any actual numbers to work with. In this case, we had a couple of cardboard boxes stacked up to act as an approximate stand-in for the wheelchair. So instead of "measure twice, cut once," the ongoing mantra for this build was "sketch it on the tabletop, measure once, cut six or seven times, and design the whole thing once it's built." Things were going to be interesting.
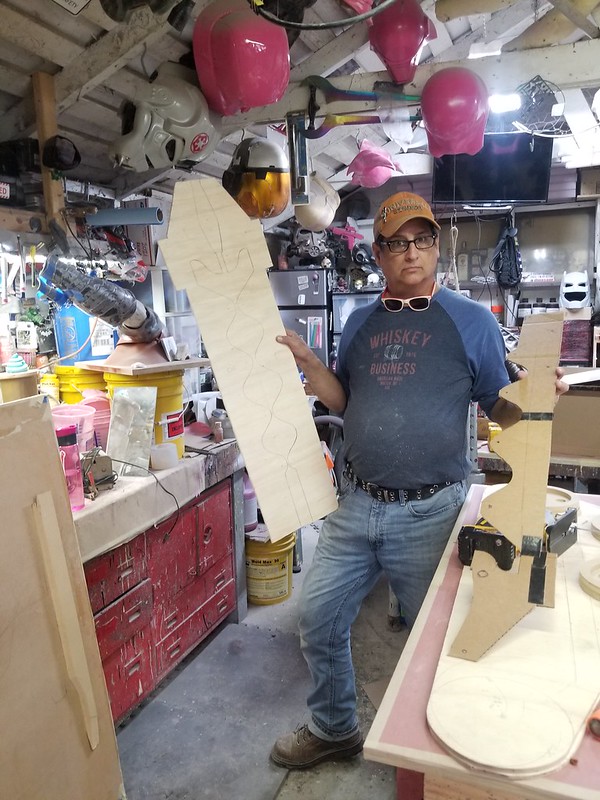
The first step was a planning discussion and a little math:
Here's my friend Jesse Cohen measuring out a template for the cardboard box wheelchair stand-in:

Once we were happy with that rough shape, Doctor Girlfriend and I got started cutting out and gluing up the panels for the main body:
The initial assembly went well enough:
Here's a shot of it from the outside:

Notice the cardboard circle inside that was a stand-in for the big drive wheel in the middle of Mason's wheelchair. Clearing that part of the chair was a major concern at this stage in the design/build process.
Lewis and I wrapped things up and had to pose for a pic at the end of the first actual building day:

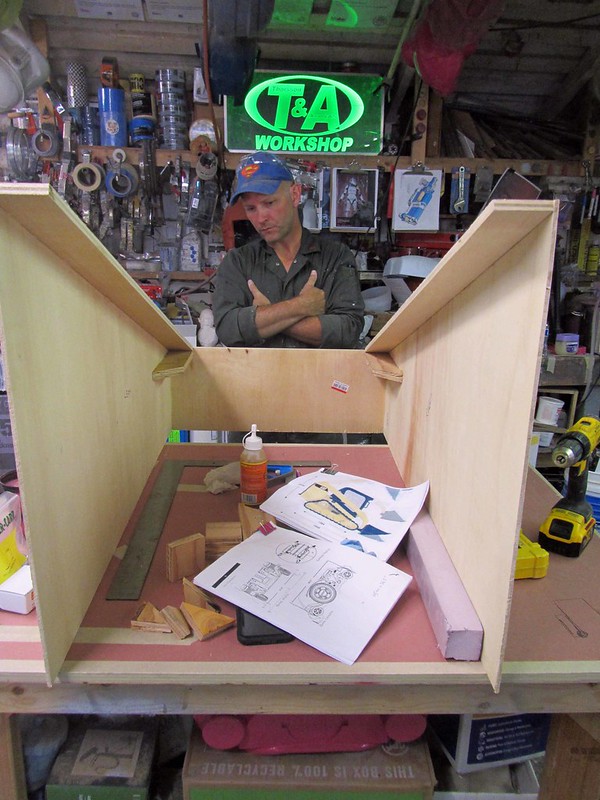
The next day started with the layout of the cab. After a bit of discussion we decided it made sense to make the profile a little on the Chibi side instead of trying for a scale model of a generic tracked loader. This thing was going to be adorable:
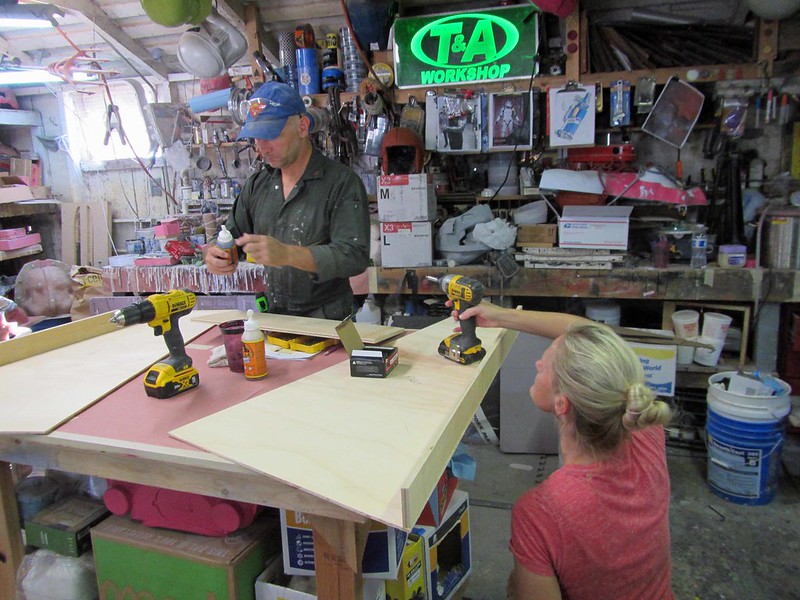
Before too long, the sides and top of the cab were cut out, then glued and screwed together. Then it was time to start thinking about the dimensions for the lift arms:

After a bit of head scratching and pencil sharpening, I'd worked out a profile. Using a piece of pipe as a hinge pin, the arm started to take shape. We also made a template for the final track shape:

With the shape worked out for the arm parts, I cut out all of the pieces and Shawnon set to work assembling them:

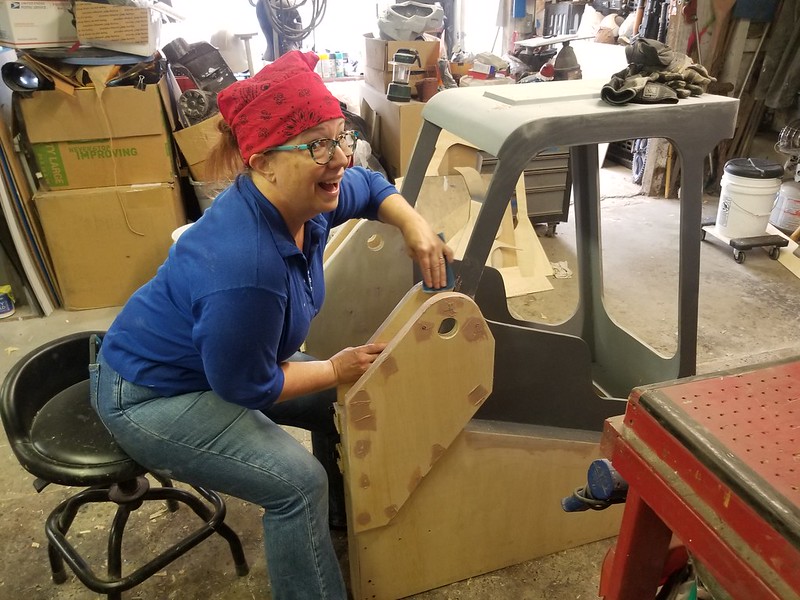
Meanwhile, my friend Danni was filling and sanding the edges and screw holes on the body and cab:

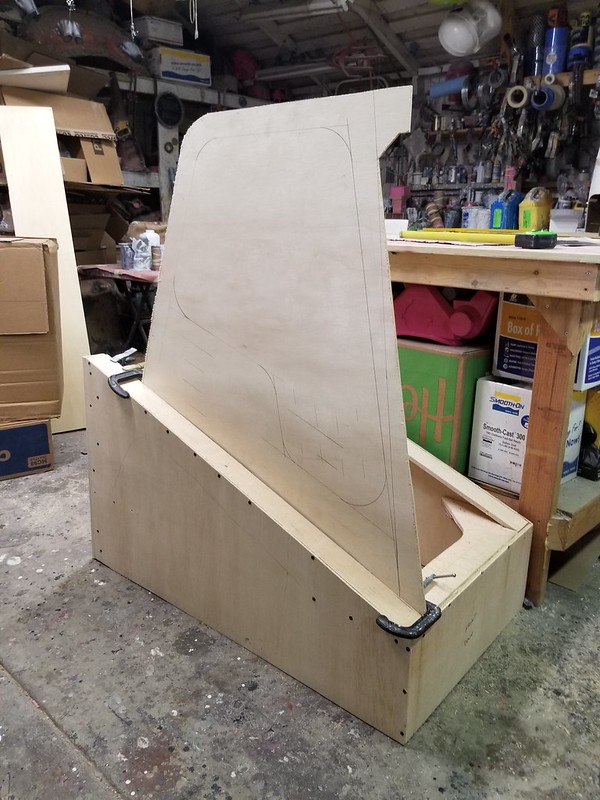
Pretty soon, things were looking good:

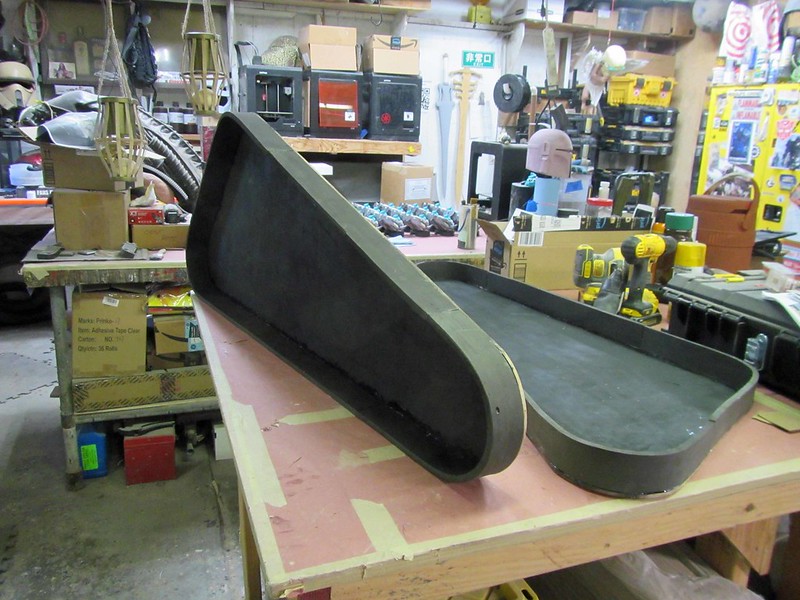
With the body mostly made and the arm taking shape, I got to work on the load bucket. I started by making the flat parts out of 1/2" plywood. Then I stapled a piece of non-stick plastic sheet to the outside:
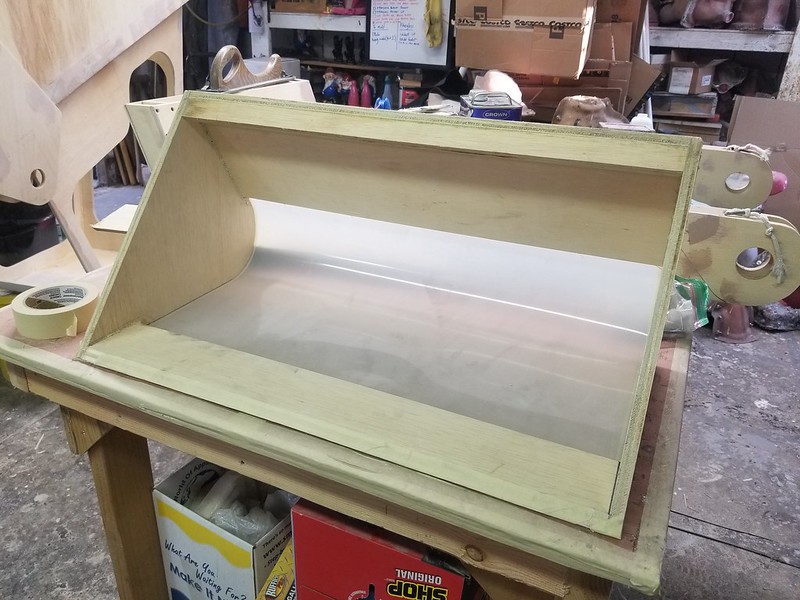
The whole inside of the curved area was coated with a generous layer of black gelcoat, then laid up with fiberglass:

Once that had cured, I did a quick test-fit:


While I ironed out the inside of the bucket:
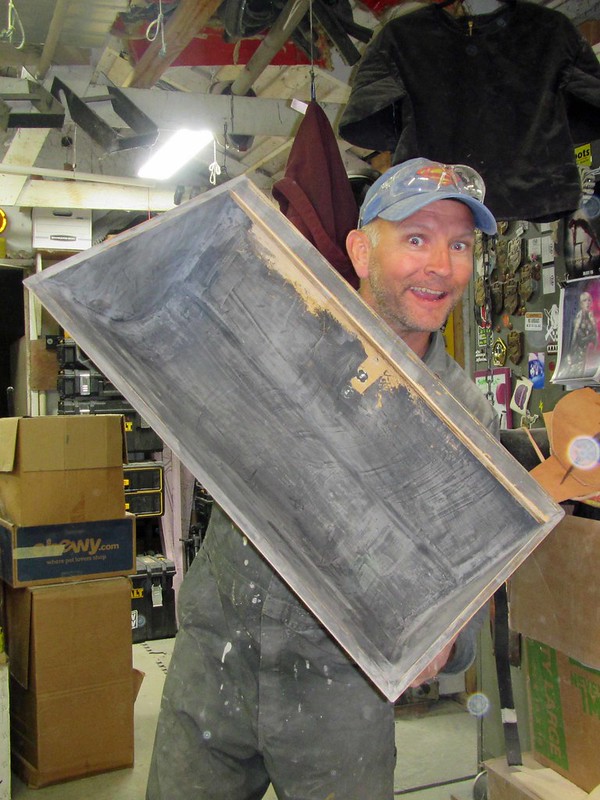
At the end of the day, the arms were ready for primer:

The main body was almost smooth as well:

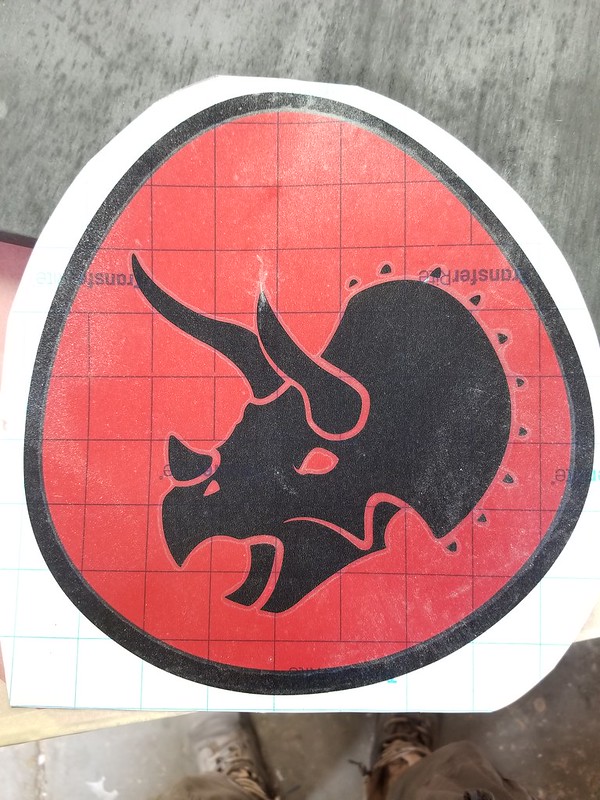
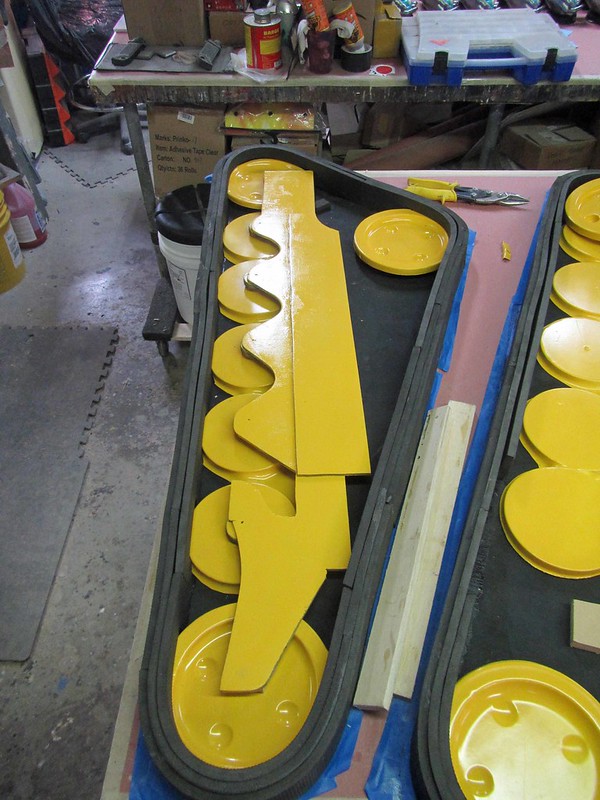
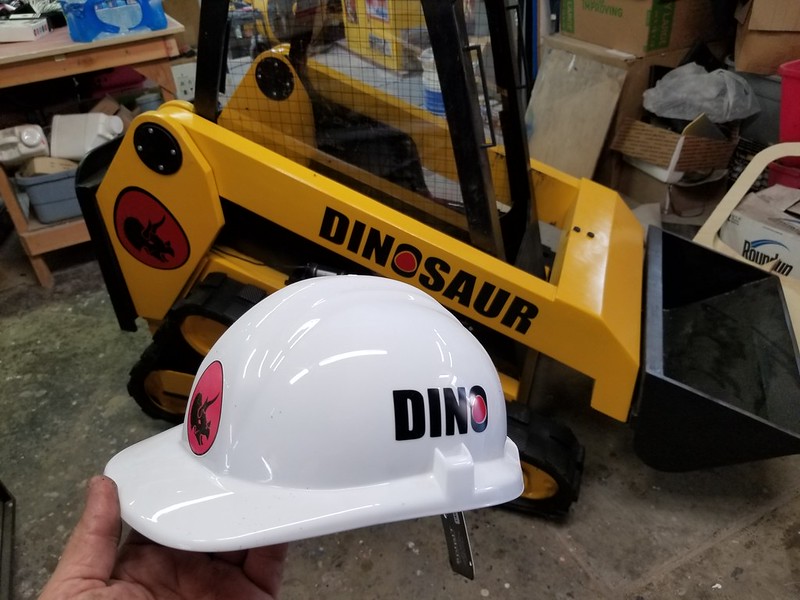
Since Mason is a huge fan of dinosaurs (he named his wheelchair "dinosaur") we decided to make this a Dinosaur brand loader. I had my shop assistant Rachel design a quick logo and branding reminiscent of Caterpillar construction equipment. After some significant discussion, we settled on the triceratops as the brand mascot for Dinosaur Heavy Machinery:
Looking good:

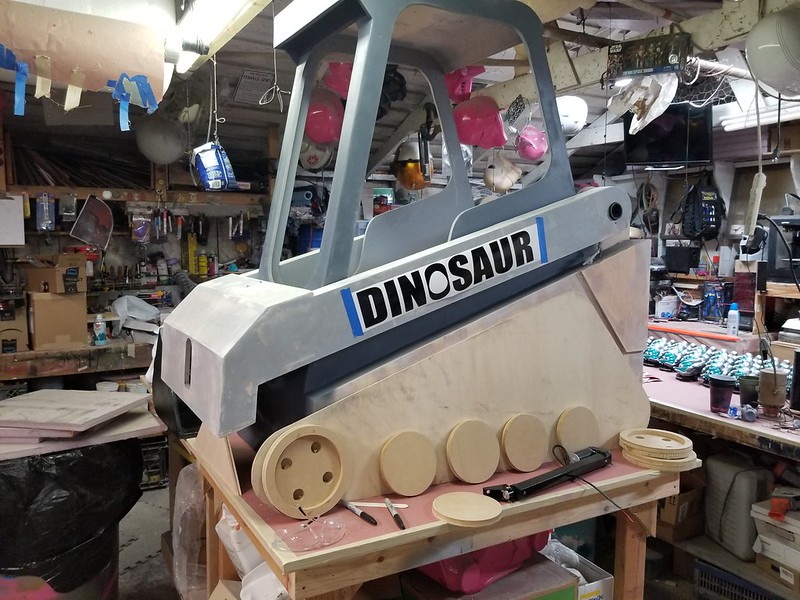
Meanwhile, Lewis was making the various elements that would become the suspension components:
Here's all of the parts laid out to get an idea of where we were headed:

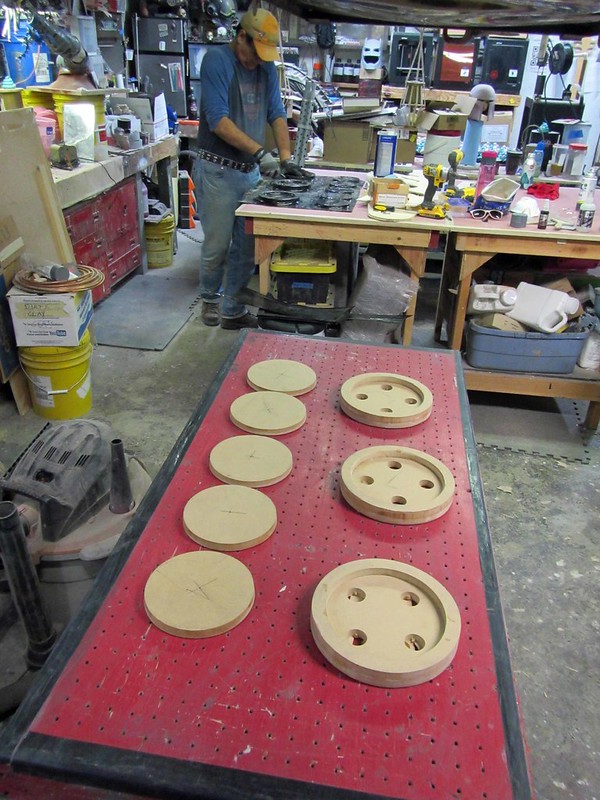
To reduce weight, we decided to vacform the track wheels. Here's the parts laid out on the forming table:
We made a couple of pulls in thin ABS plastic sheet:

We also formed a couple sets in high-impact polystyrene. We decided we liked the HIPS pieces better, so those were trimmed and fitted to the tracks:


Now that we had everything making sense, Lewis got to work assembling the tracks:

To make the finished machine a little more door and wall friendly, we decided to make the rubber tracks out of strips of 1/2" foam floor mats:
Here's Lewis fitting the pieces together after they'd been painted:

While there were a lot of people involved in this build, I am not at all exaggerating when I say that there's no way I could've finished this project without all of the hours that Lewis put in. The assembly of the track parts was a slow and detail-heavy process and he knuckled down and made sure the parts were all cut, painted, organized, and lined up properly for final assembly:
His wife Noelle also came by for a day of sanding and polishing to help us keep up with the rushed schedule:
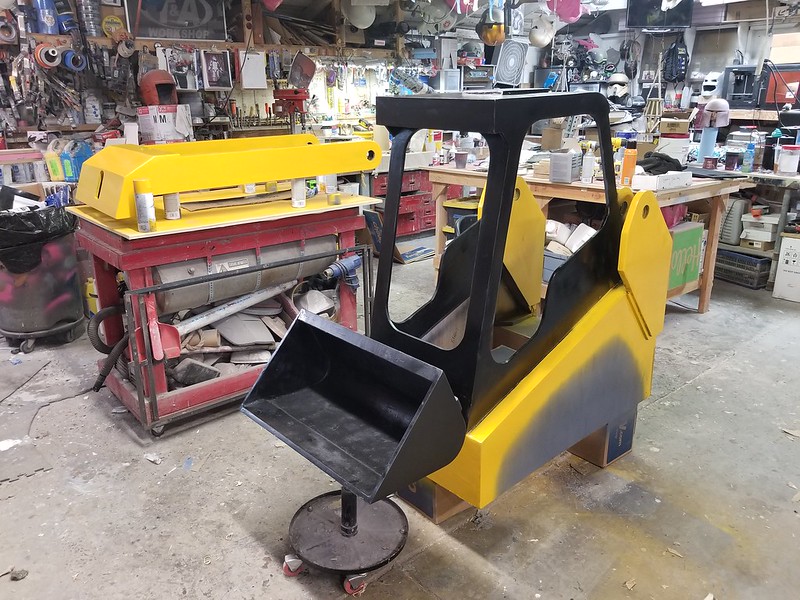
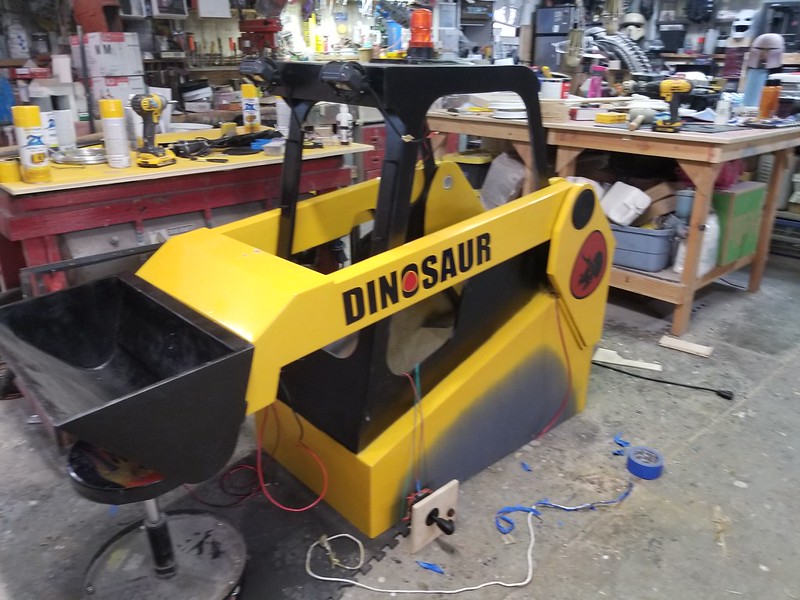
At long last, it was time to start painting things:

The knotted string sticking out on this end would be important later.
The yellow we used was the same Rustoleum Gloss Marigold that we used on Jazmine's Magic Wheelchair build a couple years ago. The only other color we used was Satin Black. This was finally starting to look like a thing:
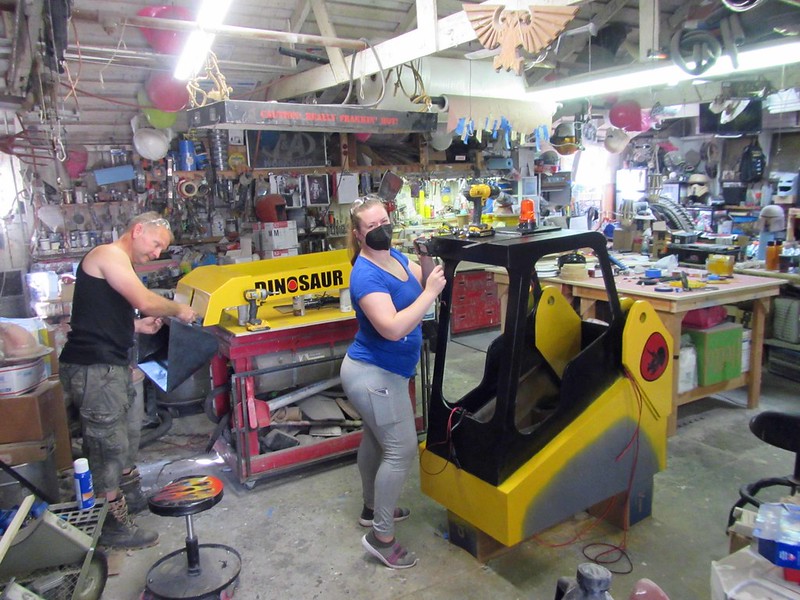
When the paint had dried, Kate applied the vinyl graphics:

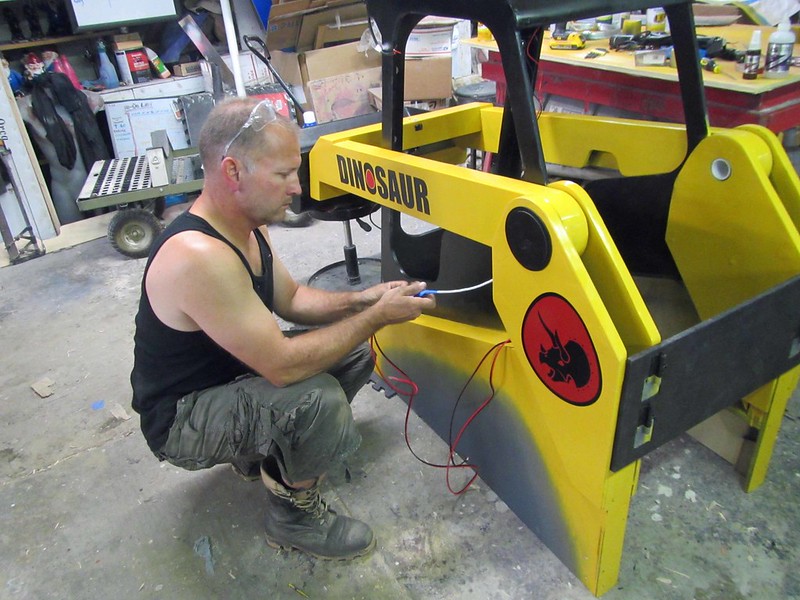
With most of the construction and painting done, we got started on the electrical parts. Kate installed the working strobe light and the headlights on the top of the cab while I ran the wires for the actuators that would lift the arm and tilt the bucket:
Snaking the wires down the length of the arm might have been a challenge, but thankfully I'd had the foresight to build in a piece of twine to use as a messenger and pull the wires through:
I still had to pull the arm back off in order to get the job done:


True to form, this is exactly when my dad stopped by and pointed out a few things I was doing wrong:

I can honestly say I'm grateful for every time he does that. It always ends up saving me a lot of mistakes.
Once the controller was wired, I could start testing it out:
The whole set of controls amounted to an arcade joystick and two toggle switches mounted to a piece of plywood:

I printed graphics to explain what each switch was for:

Then poked holes to mount the switches and joystick:

Here's the whole thing wired up from the backside:

As luck would have it, everything worked. Moving the joystick side to side tilted the bucket:


In order to attach the costume to Mason's wheelchair, we built in a backdoor panel that could be removed. Then we could lift the back end up a bit, drive the chair into the cab, and it would rest on top of the wheel struts on each corner of the chair. Lewis did most of the work making the backdoor panel while Kate and I were focused on wiring:

Since we were worried about the pinch points between the lifting arms and the sides of the cab, we decided to install window panels to keep stray fingers safe. Shawnon cut the panels out of some very thin clear acrylic I had in the shop:

To simulate the protective wire cage found on the cabs of most of these loaders, she laid out a grid of black lines on each of the windows as well:

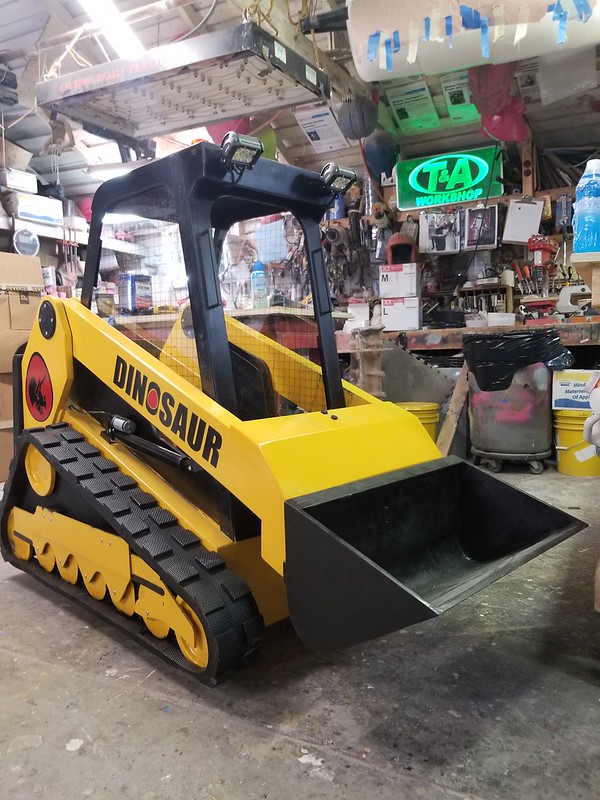
Once they were velcroed in place, the build was just about done:
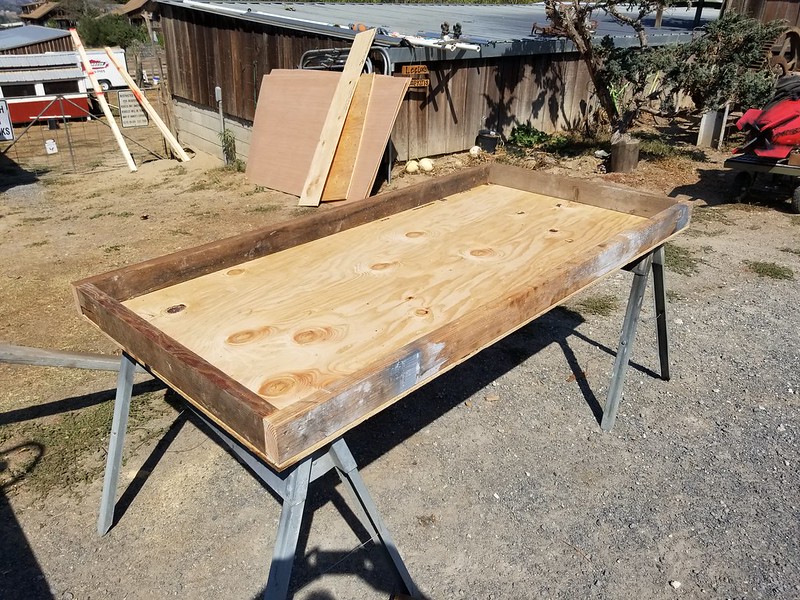
Of course, the next challenge was shipping. My shop is in Petaluma, California. Mason is in Missoula, Montana. So the whole thing would have to get loaded onto a truck and shipped. So now it was crate-building time. I started by making a deck big enough to park the assembled loader on it:
Then I started making the sides of the crate. This was all being done on the hottest day of the month and I was also gearing up to head to the Wasteland Weekend festival down in the Mojave Desert. For some reason this seemed like a good time to try out my post-apocalyptic costume to see how miserable I'd be in 100°F heat. It turned out not to be as bad as expected, but I did look a little ridiculous:

In the end, the loader was strapped down to the deck and everything was nice and snug:

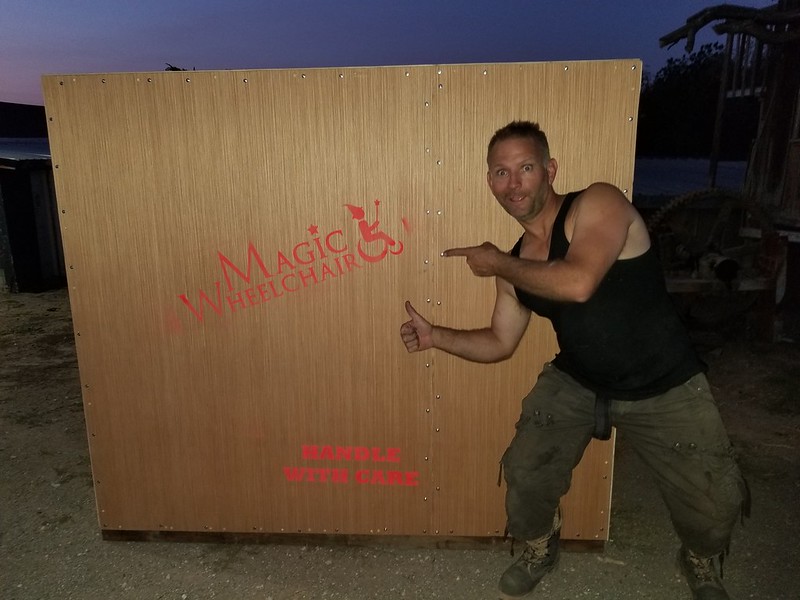
Once it was all sealed up, we stenciled a few logos on the outside and it was ready to go:

I was pretty far gone too:
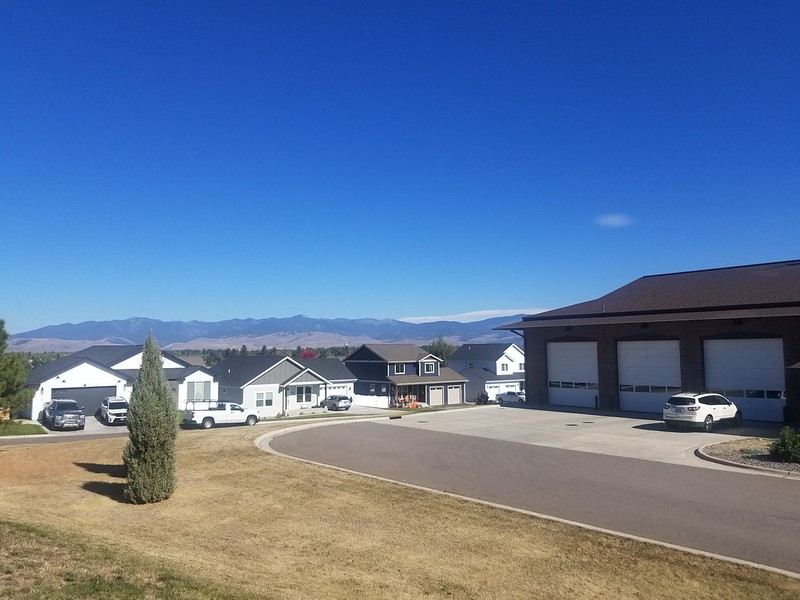
A week and a bit later, Shawnon and I flew out to Missoula, Montana so we could be present for the unveiling. Missoula is an absolutely charming town of 70,000 people nestled at the meeting point of a few mountain valleys. It's the kind of place where you find really nice people and a lot of pickup trucks:
When we arrived the day before the unveiling, the firefighters had already disassembled the crate for us. The loader had made the trip unscathed:

We were able to get a hold of Mason's parents and they brought his wheelchair down to the station so we could test the fit and make any necessary adjustments. I'm thrilled to say that we only needed to make a few minor tweaks and everything worked beautifully. Then we went out for dinner to discuss the plan of the day with the folks from Magic Wheelchair.
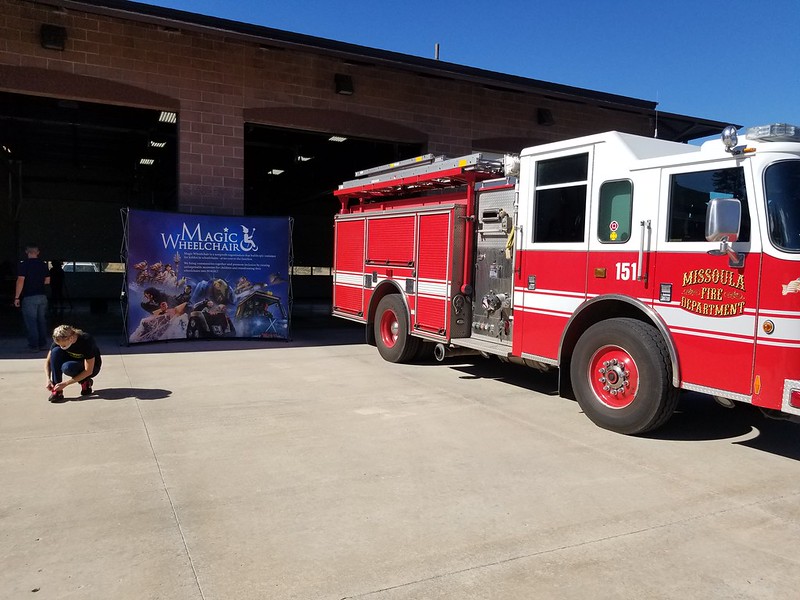
Here's a shot of Shawnon draping the finished loader in front of the Magic Wheelchair backdrop:

Before too long, the crowd had arrived. Once Mason rolled in, we did a quick countdown and slid the covers off of the loader. The little guy was so bashful in front of the crowd that he didn't want to look up, so it took a bit before he realized that this was for him. Then we mounted it on his wheelchair, strapped him in and showed him how to operate the bucket. He started warming up to it pretty quick:
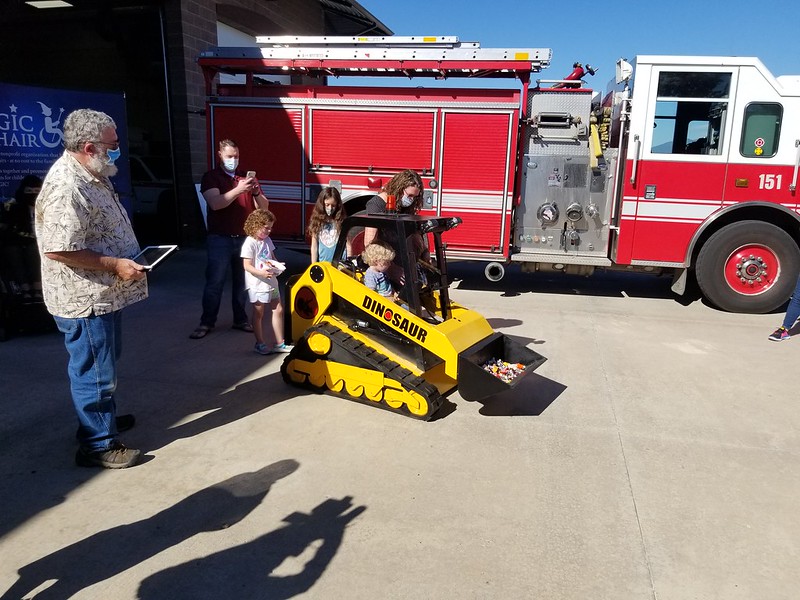
The local Alberton's Supermarket donated a birthday cake and a bucket full of candy for the proceedings:
The cake was pretty cool too:

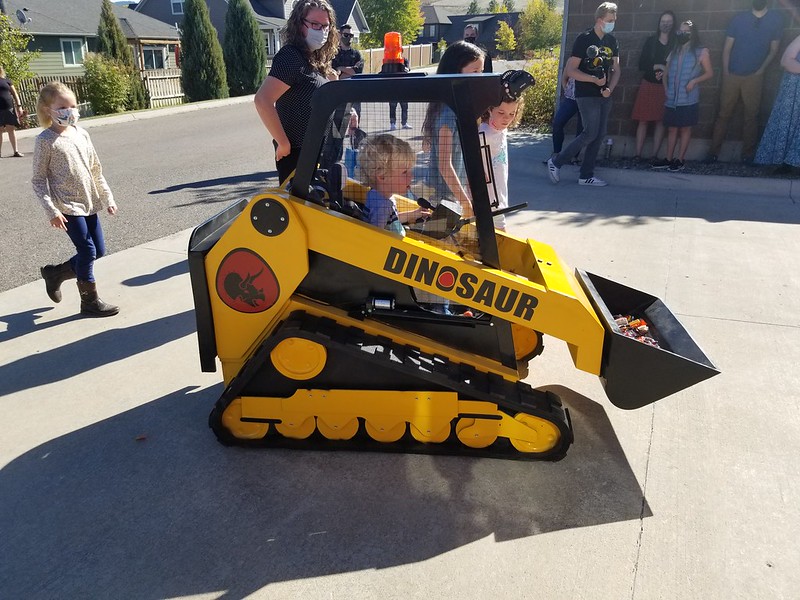
Here's a clip of Mason figuring out how to dump the bucket:

With the celebration ended, all that was left was for Mason to drive it home:

Later that evening, it turns out Mason made the local news:

Awesome job. What a fantastic birthday suprise for Mason. Thanks you for sharing this amazing build and story of the events.
ReplyDeleteThat was one cool wheelchair! Good job, I'm sure the little guy was overwhelmed :)
ReplyDelete-Miikka
I'm always fascinated by the work you do, but it's the stuff like this that puts you so over the top! Great Work!!!!
ReplyDeleteNate
Fantastic work on the build! I was pleasantly surprised when I saw the cake too! His smiling face says it all.
ReplyDelete