
A few years back, my girlfriend Shawnon bought a pair of tickets for us to go to Star Wars Celebration: Anaheim. When she told me about it, she said it was up to me to come up with costumes for us to wear. No problem. I figured I'd suggest something completely over the top sexy that she'd say no to and that way when I dialed it down to some compromise, it'd still be something I'd be excited about. So the first thing I thought of was Darth Talon, a female Lethan Twi’lek who debuted in Dark Horse Comics’ Legacy era stories. In case you don't know the character, she looks like so:

Shawnon has the figure to pull this off and I have the fabrication skills, but since the costume is mostly a lot of red body paint and not a lot of clothing, I didn't figure she'd be up for wearing it. Much to my surprise, she said she wanted to do it. I did not see that coming.
I decided that the few armored plates could be knocked out in a matter of hours and the boots and gloves could be purchased off-the-shelf on the internet, so the only thing that was any kind of tricky to fabricate was going to be the "lekku," also known as "brain tails." This would be a rubber prosthetic that would be adhered to her head, but made in very much the same manner as a latex Halloween mask with some flexfoam cast inside to keep them from going flat and looking all faccid.
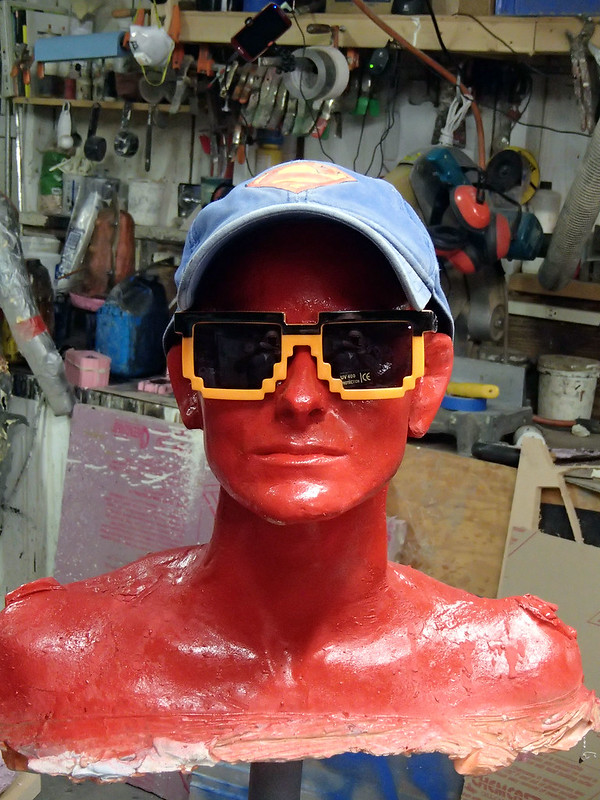
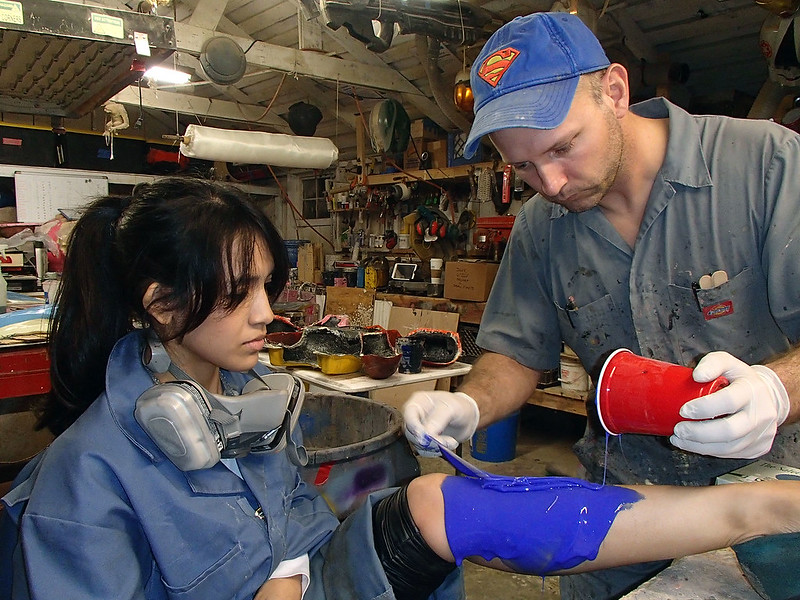
In order to make sure they'd fit Shawnon's tiny head, I'd have to sculpt them onto a lifecast of her. So step one was to put her in a bald cap, wrap her in plastic, and prep her for molding:
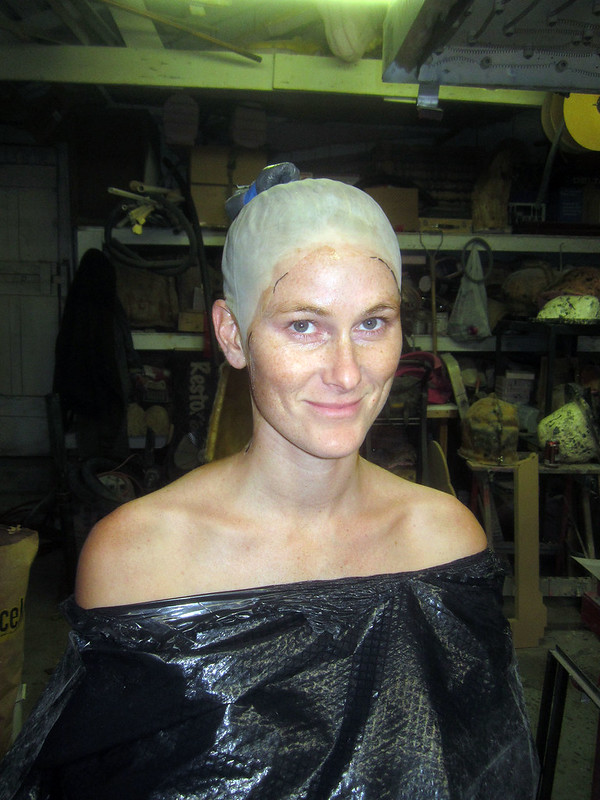
Since I only needed one copy of the lifecast, we molded her in alginate, a seaweed-based moldmaking material that's very safe for skin contact, but tends to shrink and crumble shortly after it sets up. Here's the alginate layer built up on her face:
Note the soft paper straws inserted into her nostrils so she could breath. A lot of people call this a bad idea because you run the risk of damaging the model's nostrils. I pad the ends with a bit of soft tissue and take great care to avoid bumping or moving the straws while we work. So far I've never had any problems with this method.
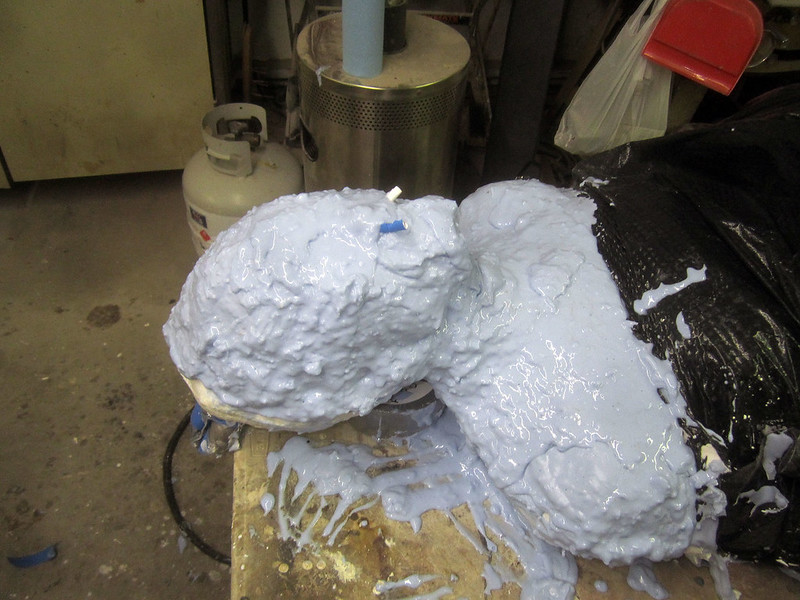
Because the alginate is flopply and flexible, it needs a plaster bandage mothermold:
Since we had a few minutes to wait while it set up, we took the liberty of labeling the mold:
Once the plaster was good and stiff, we removed the girlfriend from inside, strapped the plaster mothermold back in place around the alginate glove, then coated the inside with urethane resin to create a nice, hard shell. Then the resin shell was filled with rigid foam. For rigidity.
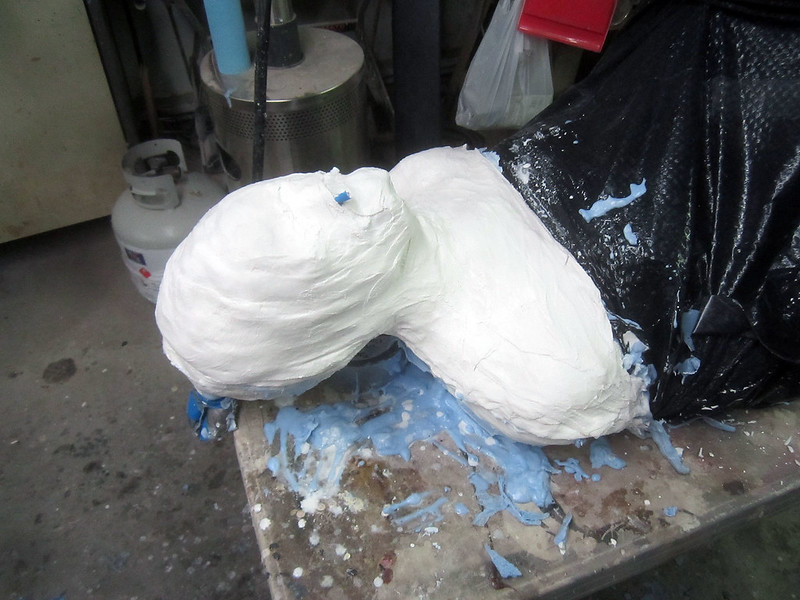
After removing the plaster layer, I took a saw to the bottom edge so we could have a nice, flat base to work with:
Then we peeled off the plaster and alginate to reveal the handy copy of Shawnon underneath, complete with nostril straws:
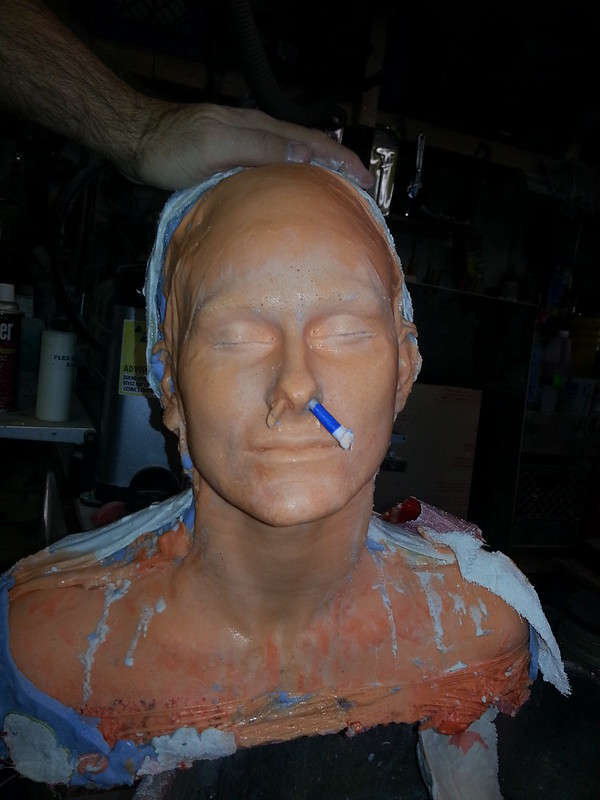
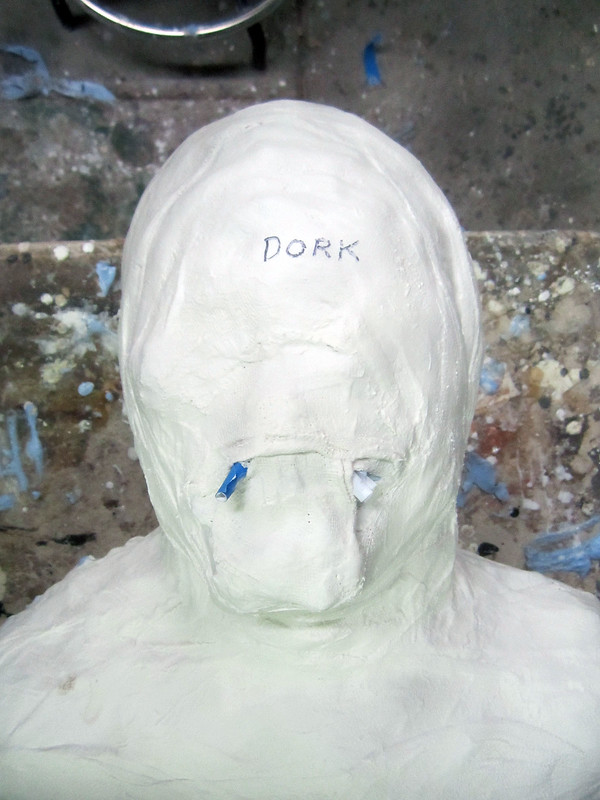
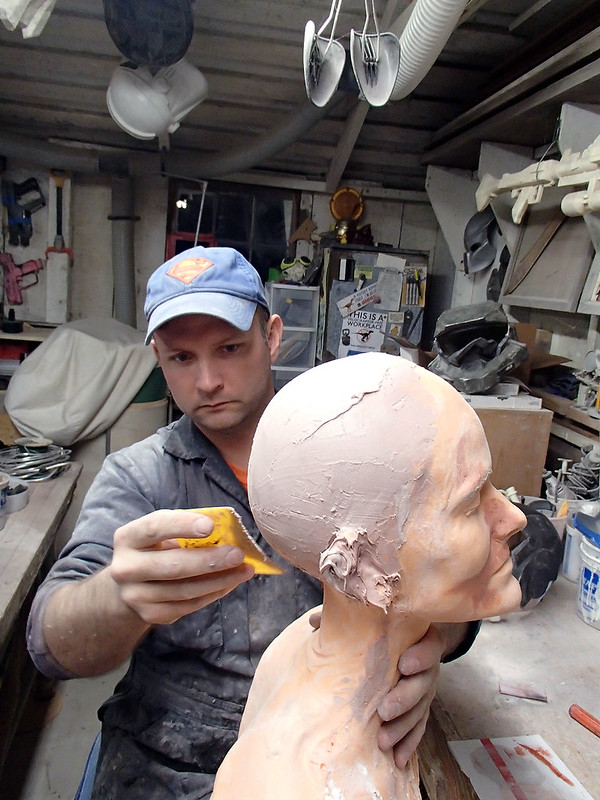
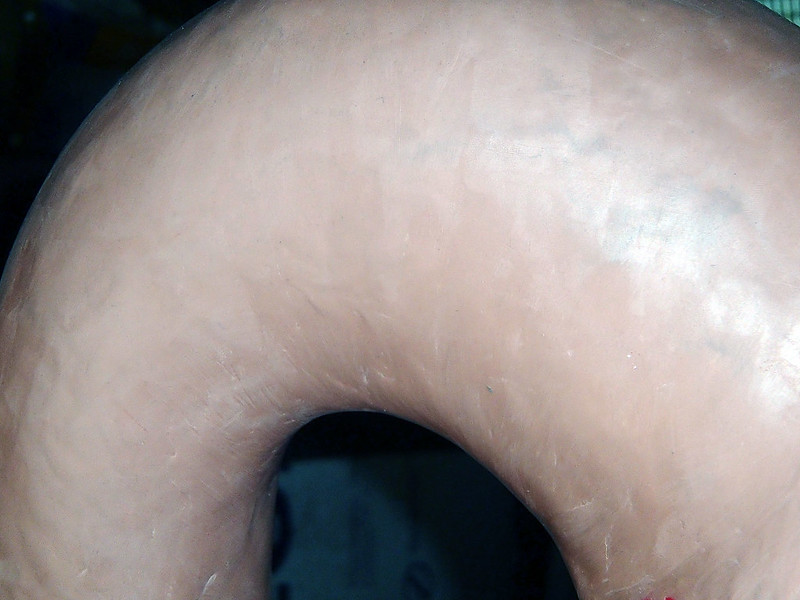
The next step was to smooth out the lumps and bumps caused by here hair under the bald cap and rebuild the one ear that didn't properly fill with resin:
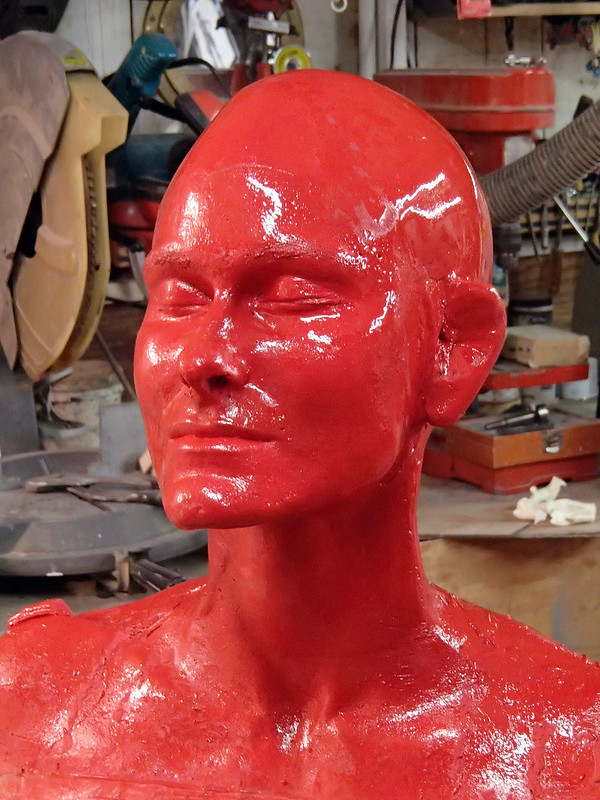
After a bit of sanding an a shiny coat of red paint, she was ready to go:
Shawnon would head back to Vet school while I worked on this project. For her part, she dove into a major fitness routine to get into proper fighting shape and look the part.
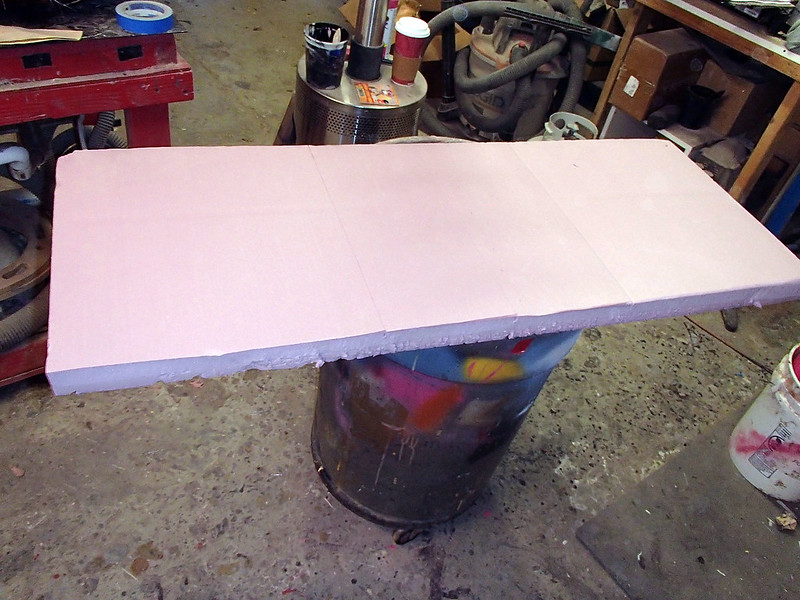
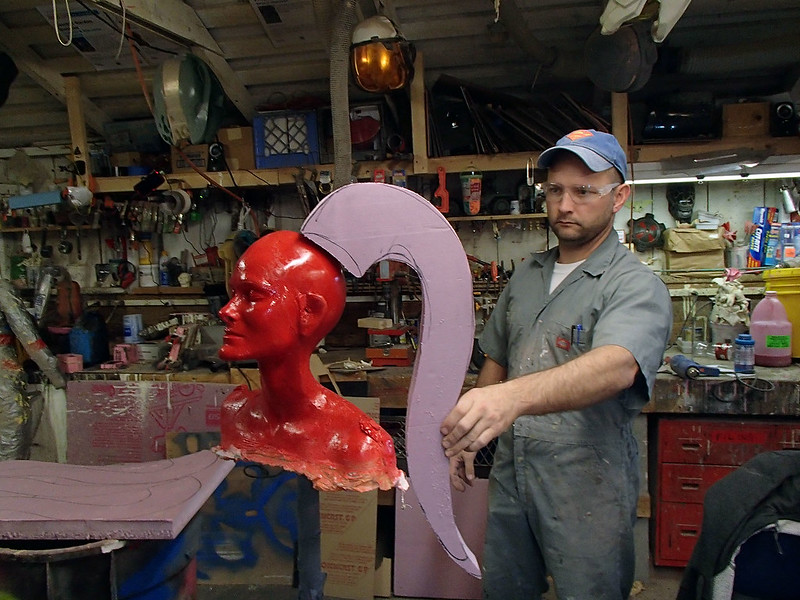
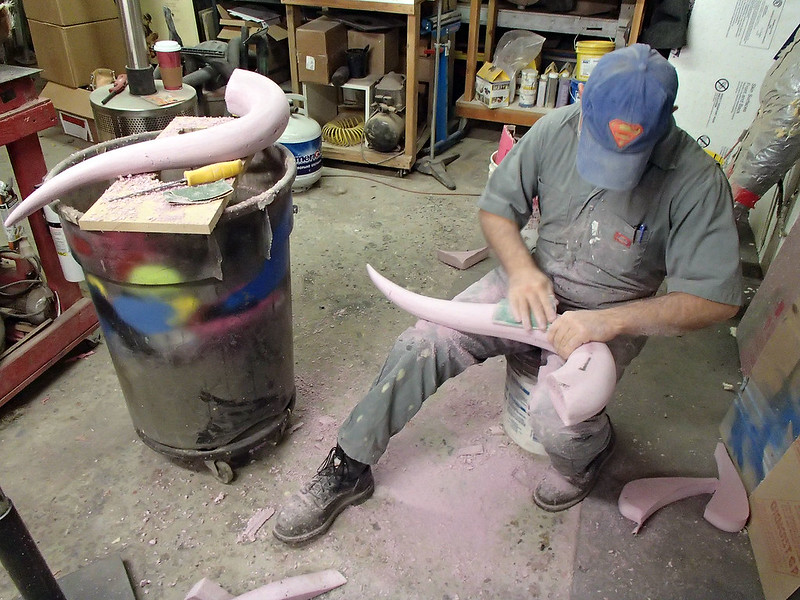
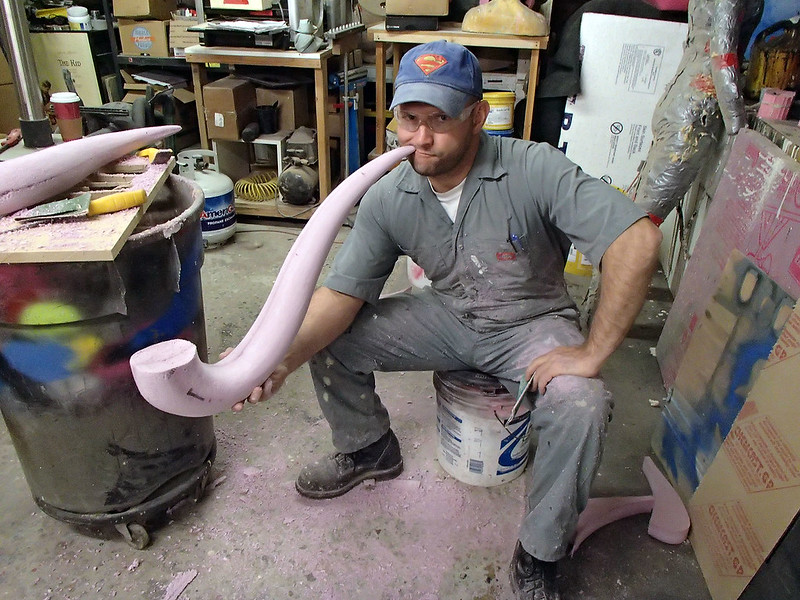
Since the brain tails were going to be somewhat large, I needed to start with a sculpting armature underneath. I didn't want to try and hang 40-plus pounds of clay off the back of the cast head (A: it's a lot of strain on the lifecast and B: clay costs money) so I started with a sheet of 2-inch insulation foam:
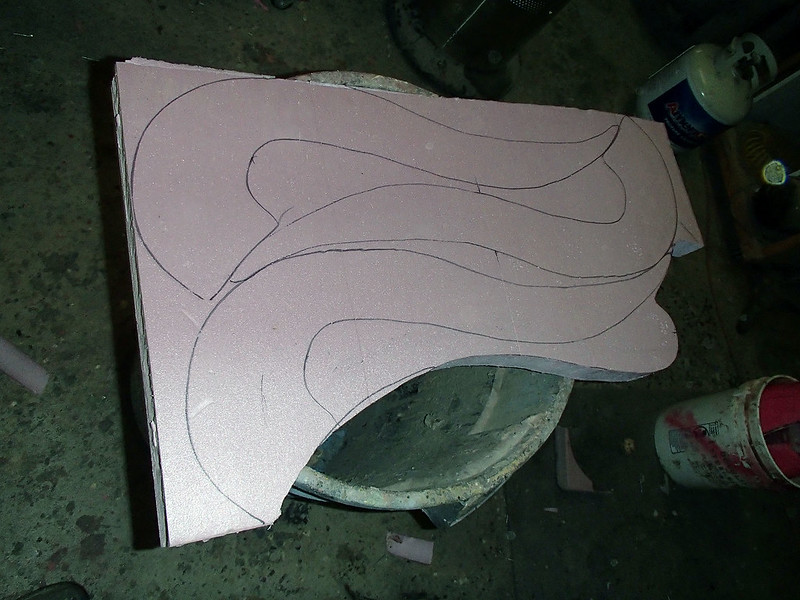
Then I drew a rough outline of the lekku profile:
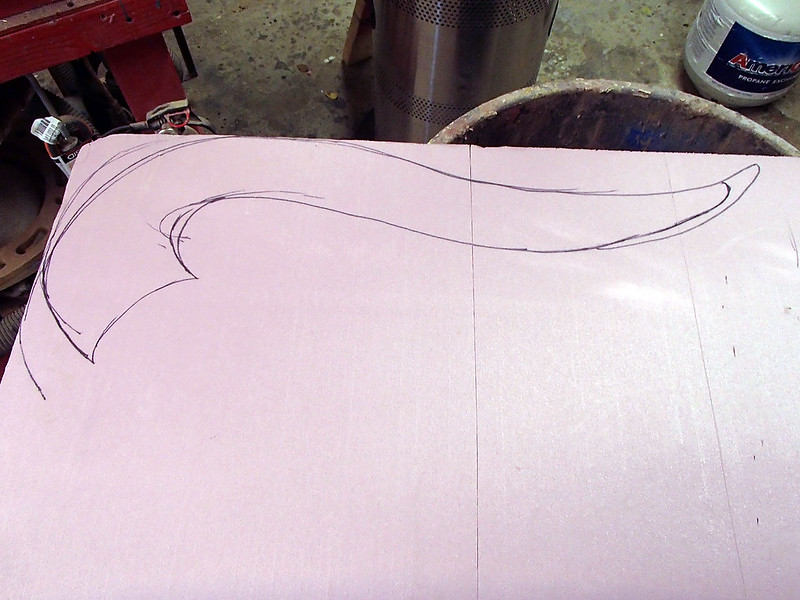
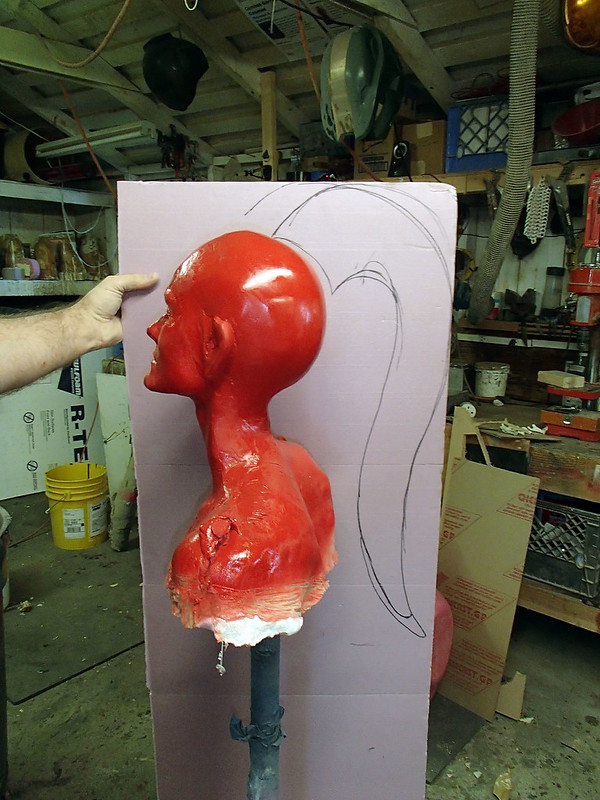
Holding it next to the armature, I decided it was about right size-wise:
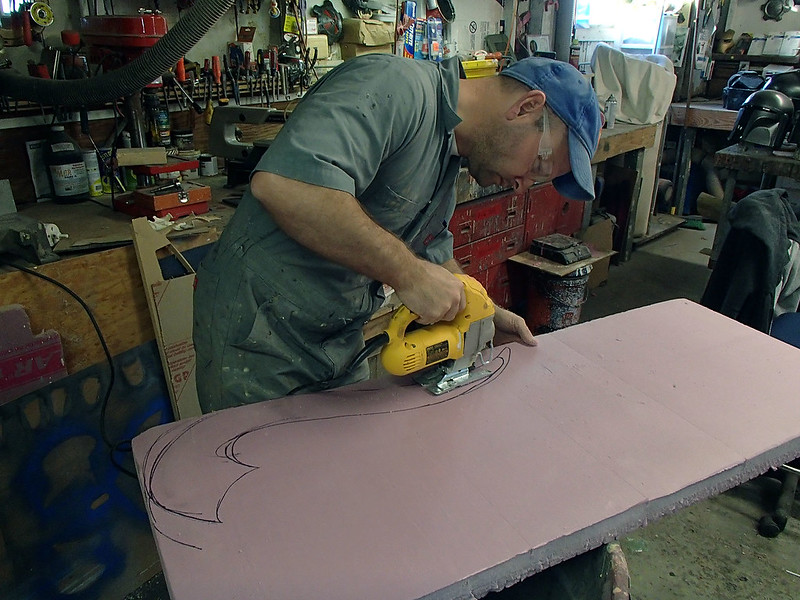
So I cut it out with jigsaw:
One final check and I was sure I was on the right track:
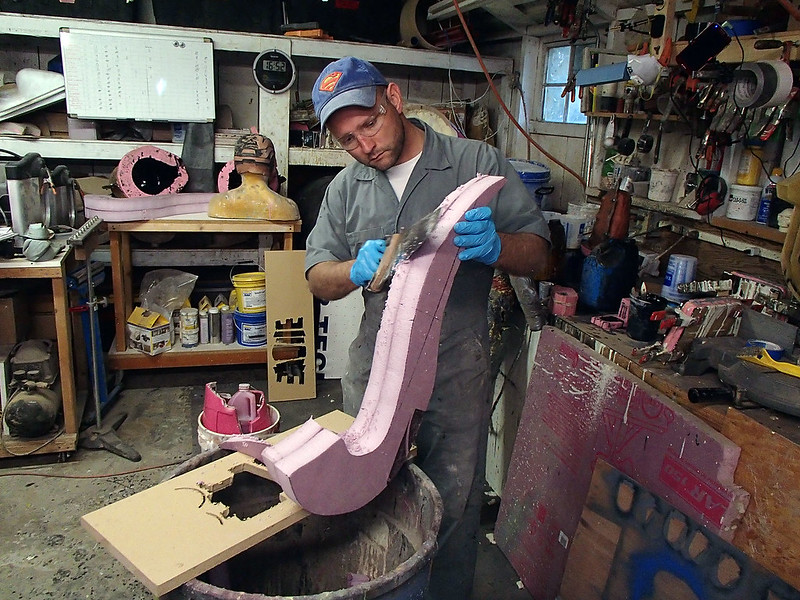
Then I used it as a template to trace three more copies:
Each pair was laminated together to form two nice, thick tails. Then I used a handsaw to rough out the tapered shape:
Still good:

After initial rough shaping with the saw, smoothing began with a series of rasps and coarse sandpaper:
Meanwhile, red Shawnon watched silently:
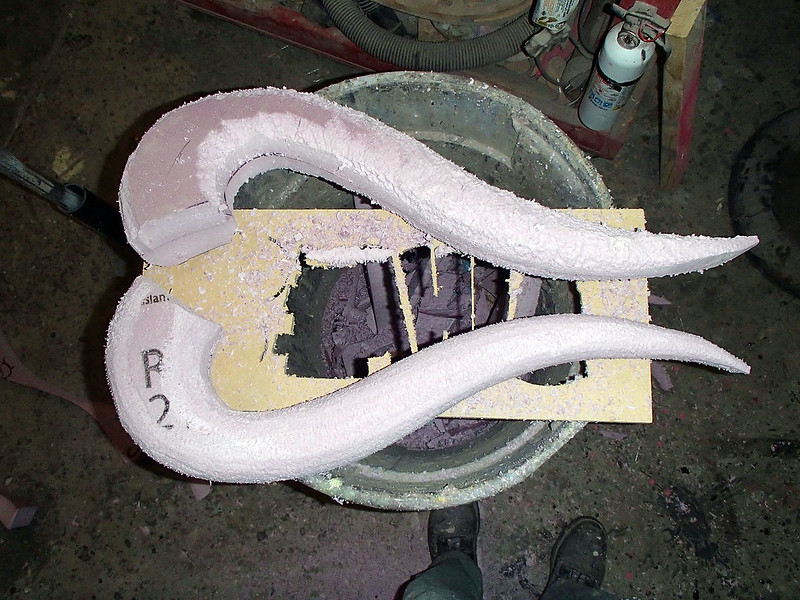
Final smoothing for the foam armatures was done with a scrap of 36-grit sandpaper:
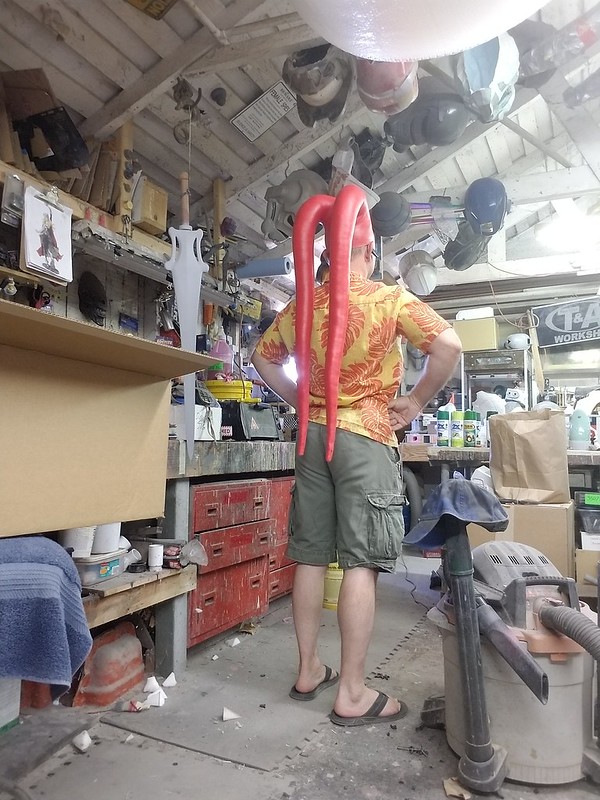
I was really liking the shape:
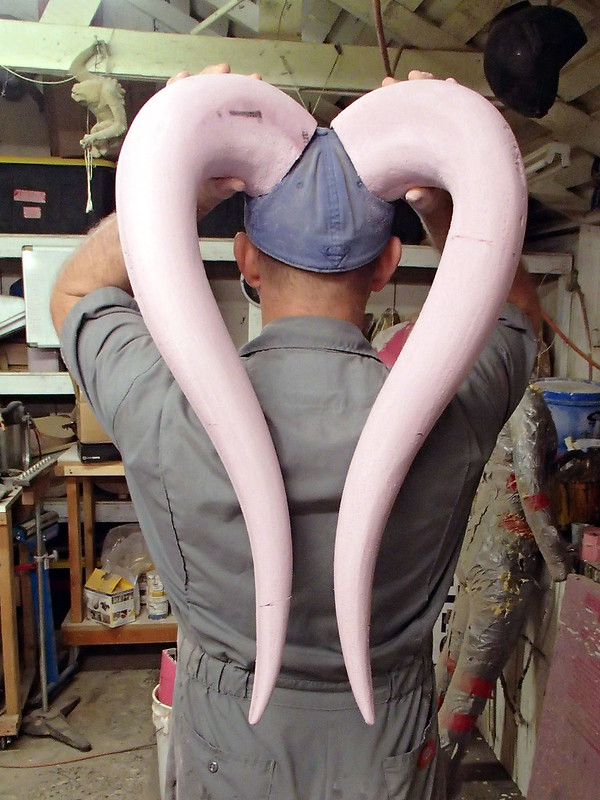
They started to seem like they could be useful for a lot of things:
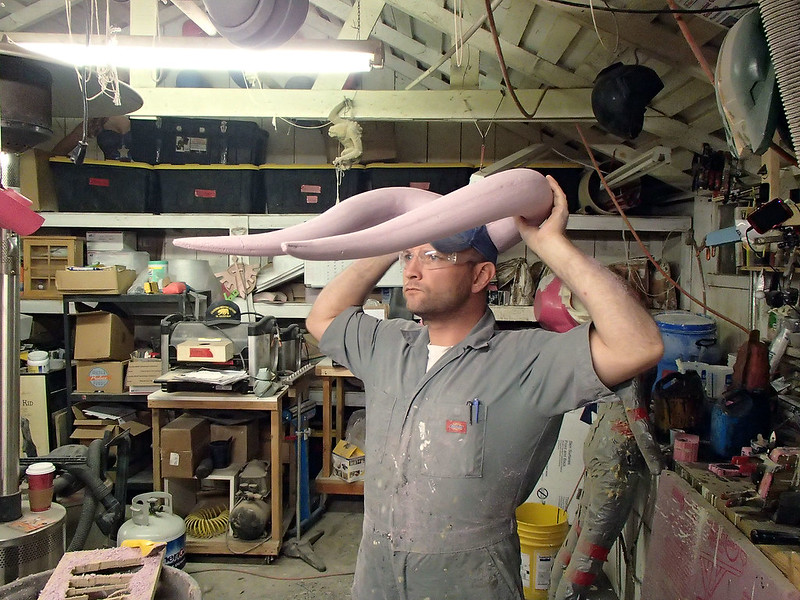
But somehow I stayed on track:
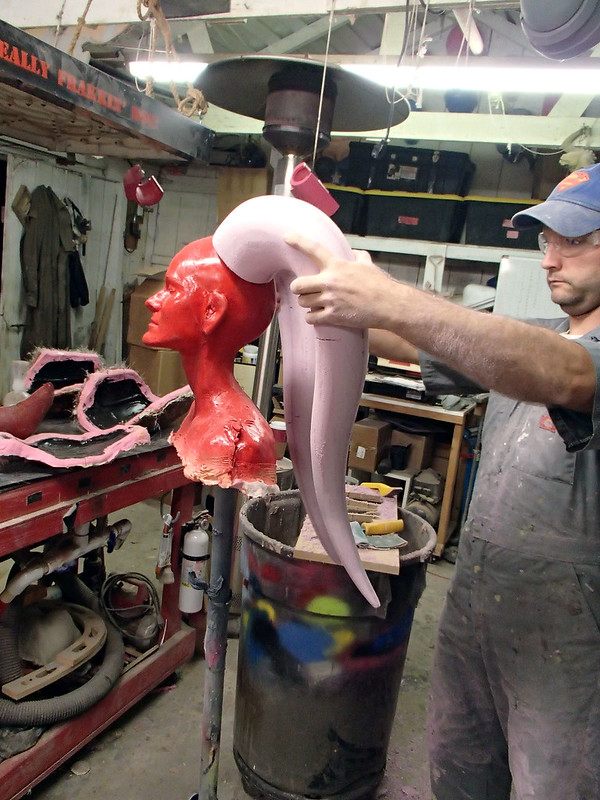
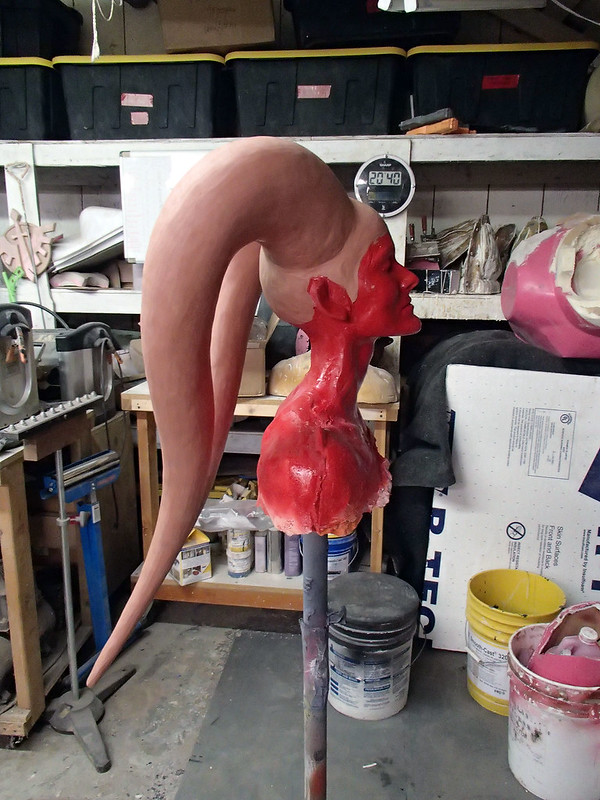
With the smoothing essentially finished, I finally got around to attaching the foam to Red Shawnon using hot glue:

The next step was to skin over the whole thing with oil-based clay:
For those of you who will ask, the clay I'm using is medium hardness Chavant NSP. I can work it with relative ease, and it's firm enough at room temperature to hold fine details:
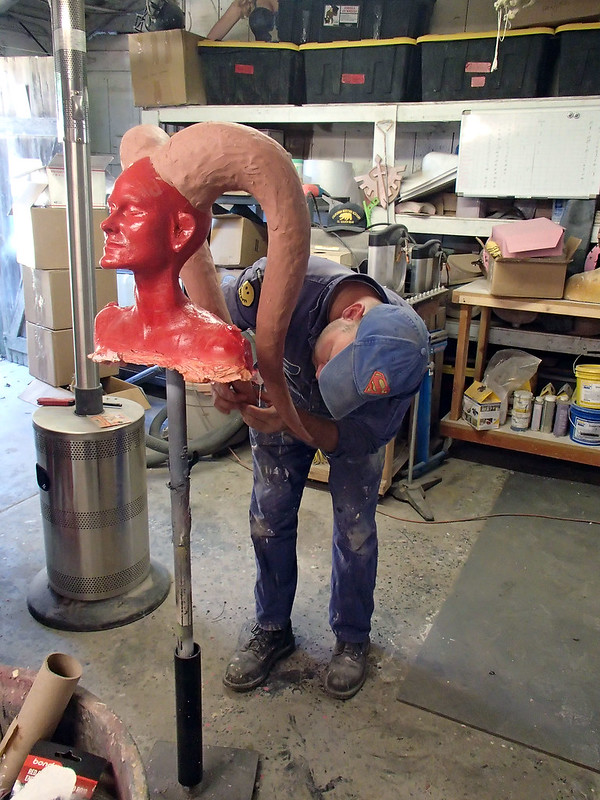
After a few minutes, the whole skin was in place:
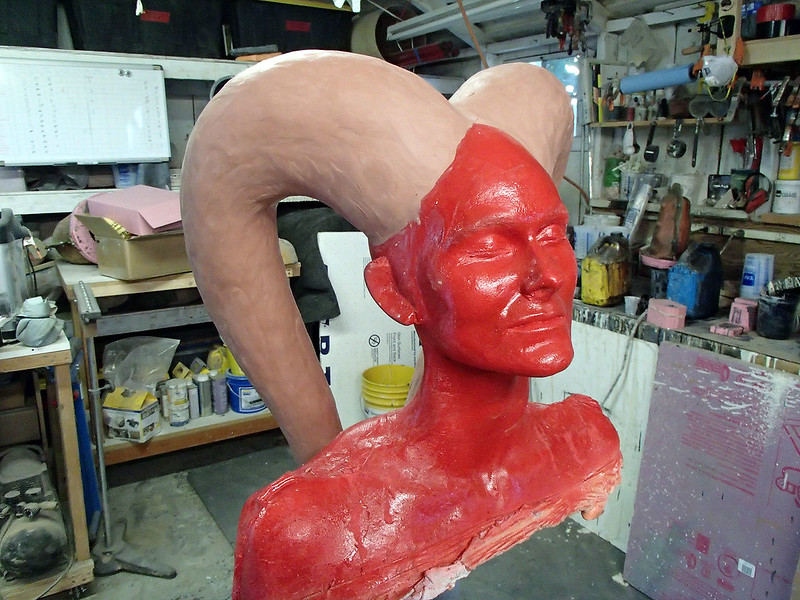
Then it was just a matter of smoothing out the clay with some basic sculpting tools and my thumbs:
Since the sculpt itself was pretty simple, smoothing was fairly quick too:
Each pair was laminated together to form two nice, thick tails. Then I used a handsaw to rough out the tapered shape:
Still good:
After initial rough shaping with the saw, smoothing began with a series of rasps and coarse sandpaper:
Meanwhile, red Shawnon watched silently:
Final smoothing for the foam armatures was done with a scrap of 36-grit sandpaper:
I was really liking the shape:
They started to seem like they could be useful for a lot of things:
But somehow I stayed on track:
With the smoothing essentially finished, I finally got around to attaching the foam to Red Shawnon using hot glue:
The next step was to skin over the whole thing with oil-based clay:
For those of you who will ask, the clay I'm using is medium hardness Chavant NSP. I can work it with relative ease, and it's firm enough at room temperature to hold fine details:
After a few minutes, the whole skin was in place:
Then it was just a matter of smoothing out the clay with some basic sculpting tools and my thumbs:
Since the sculpt itself was pretty simple, smoothing was fairly quick too:
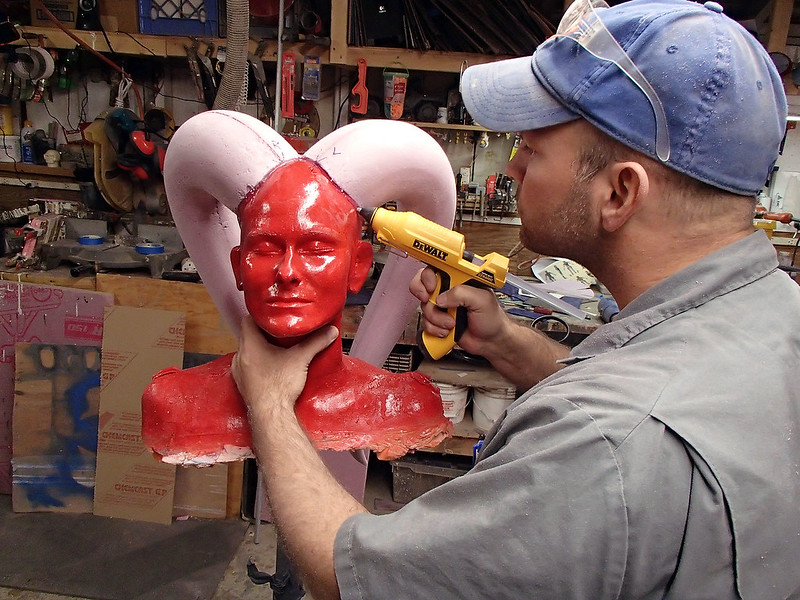
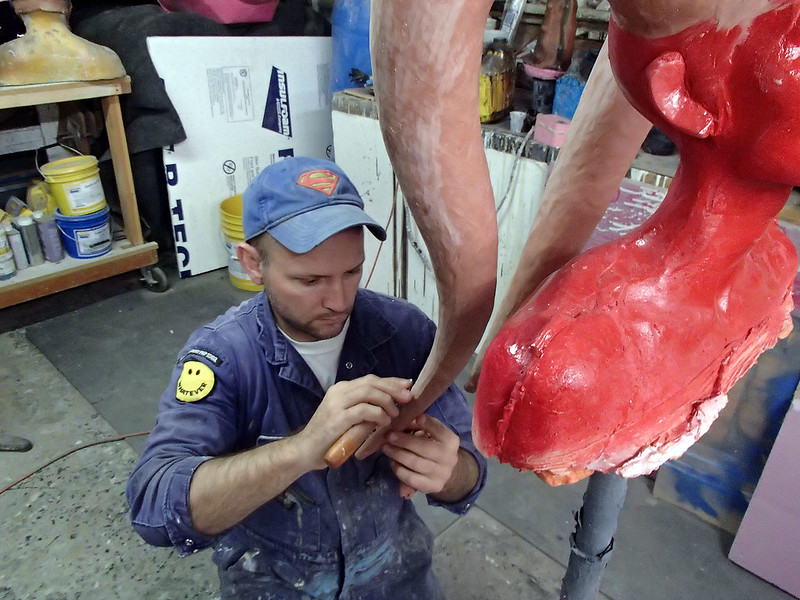
Most creatures' skin isn't actually perfectly smooth though. In order to tamp some believable skin texture into the surface, I enlisted the help of my friend Daniela who let me mold a patch of her skin to use as a texture stamp:
The resulting texture was so subtle that it was almost impossible to photograph with my crappy shop camera, but it made the surface much more believable as part of a living being:
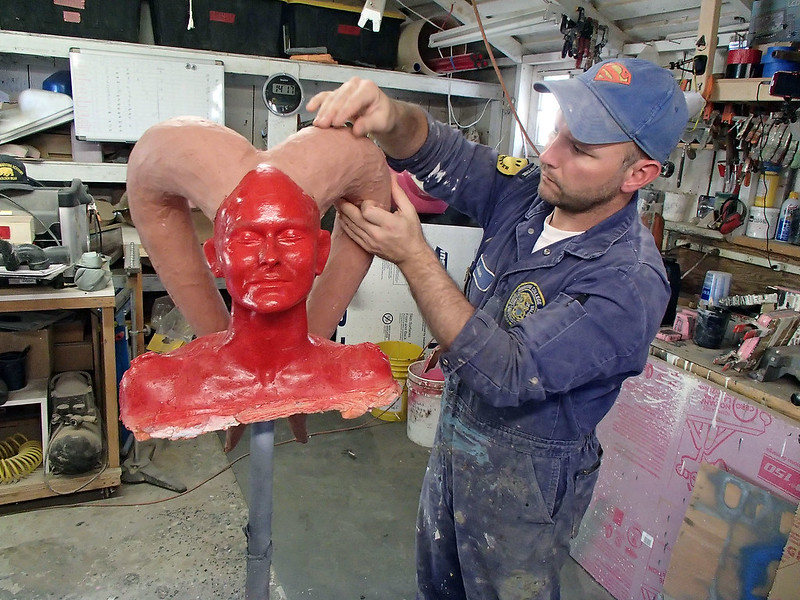
Everything was going well, but for the next step to make sense, you're going to need some more context...
You can't quite tell from the background of these photos, but I had a few other projects going on at the time. That's not unusual for me, but this time it had gotten a bit extreme.
Originally the plan was for me and Shawnon to go to this convention for four days. Since we didn't want to wear the same thing every day, we'd need a total of eight costumes to wear between the two of us. No problem. Thinking "the more the merrier" I invited my friend Matt and his wife to join us on this trip. Short on ideas for what to wear on the 4th day, I joined Matt's plan to dress himself and his wife as Death Watch Mandalorians and we decided we'd step up the quality of his costumes, pull some molds, crank out a couple more costumes, and go as a foursome. Then his wife started to invite more friends with the promise that "Matt and Shawn are making costumes for everybody." Not realizing how deep we'd gotten into this, I reached out to a few local friends to make a bigger, more impressive group. Then I decided to make a few copies of my Sith Acolyte outfit for one of the other days so we could do a big group on more than one day of the four-day convention.
By the time I realized things had gotten crazy, we sat down and drew up a list of everyone that was counting on us for costumes. We had 35 names on the list for the Death Watch group at its peak, most of which were people that weren't helping with the build(s) in any way.
So it had gotten a bit silly.
I started pumping the brakes and we got that list down to eighteen people. I was still determined to finish my Starkiller ensemble and make a half-dozen Sith Acolytes to go along with Shawnon's Shae Vizla costume and had yet to mold the lekku for Darth Talon.
When it started to get down to the wire, project triage started going into effect. I'd put every penny I had and every waking hour into making sure I'd get everything done and I was consistently spending 16-20 hours a day on my feet in the workshop. Needless to say, mistakes were made.
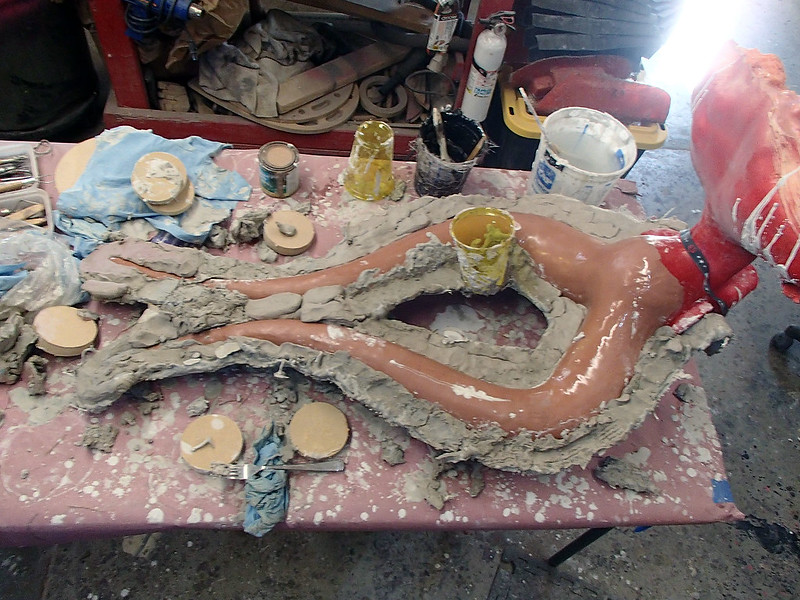
Realizing that I was running out of time, I decided I needed to hurry up and start molding these lekku so I could get to the painting and finishing stages and check this one off of the to-do list. It was getting pretty late, probably around 1AM, and I was alone in the shop. The heater was going and I'd had plenty of caffeine, so I didn't consider the fact that I was working at a level of exhaustion that was akin to being stumbling drunk and moments from falling over. It was going to be a two-part mold and I just needed to make the first half before going to bed so I could knock out part two once I'd woken up. I've made plenty of molds like this and part one shouldn't take me more than an hour or two.
I laid the sculpt down on a table with a soft, padded surface built up out of rags and towels, then cut a bunch of inch-thick strips of water-based clay to act as a parting wall so I could build up the first half of the Ultracal gypsum mold. If you're not familiar with the process, there's a lot of pictures in my write-up of Jazmine's Magic Wheelchair from last year. You can see that here: LINK. One of these days I'll write a more detailed how-to.
Water-based clay is used because it can be easily removed from the oil-based clay sculpture without doing any damage. Because I was pretty strung out, I neglected to take any pictures. Just imagine the sculpt in the pictures above laying flat on the table with a strip of clay added on all the way around with mold registration keys notched into it.
Then I went ahead and mixed up a batch of Ultracal, a gypsum product not entirely unlike Plaster of Paris, but stronger, lighter, and much better suiting for making latex slipcasting molds. The plan was to drizzle on a nice, thin "print coat" or "beauty coat" that would pick up all the details on the surface of the sculpt. Since the water-based clay parting wall wouldn't be able to support much weight, I'd have to wait until that layer firmed up a bit before adding additional layers of Ultracal and burlap reinforcement for strength.
The print coat went on just fine. When it started to firm up a tiny bit, I mixed up a thicker batch of Ultracal and ladled it on top. So far so good.
I started mixing a third batch. This one would have strips of burlap laid into it to make it stronger like rebar in a concrete wall. As I was mixing the powder into the bucket of water, I heard the problem. The worst noise that could be heard at this stage in this project, a wet, sloppy, cow patty splatter noise of a chunk of the water-based clay parting wall falling off of the sculpt and taking a bunch of the Ultracal with it.
ShrlOPF-splat.
A four-inch section of the parting wall had collapsed, and set off a miniature Ultracal avalanche above itself.
At this point, there are two options. The smart option is to take a hose to the sculpt, gently wash off all of the not-quite-cured Ultracal and the water-based clay parting wall, set the sculpt back on the table, build a new parting wall with better support, and start over. This would ensure a nice, smooth parting wall and make it easy to built the second half of the mold after a proper bit of rest and a refreshed mind.
That's the smart option. I went with the other option.
I figured I could wedge the collapsed section of parting wall back into place, add a bit more clay to the underside to shore it up, and rebuild the Ultracal on top (since I had a mixed batch starting to cure in the bucket next to me). Worst case (according to my exhaustion-muddled mind), I'd just have to smooth out a little bit of the patched area with a knife or some sandpaper before I built the second half.
I figured I could wedge the collapsed section of parting wall back into place, add a bit more clay to the underside to shore it up, and rebuild the Ultracal on top (since I had a mixed batch starting to cure in the bucket next to me). Worst case (according to my exhaustion-muddled mind), I'd just have to smooth out a little bit of the patched area with a knife or some sandpaper before I built the second half.
No problem.
As I was working the collapsed section back into place, things seemed to be working. Then it happened again...
As I was working the collapsed section back into place, things seemed to be working. Then it happened again...
ShrlOPF-splat.
Another small section fell off on the other side of the mold. This is when I had a brilliant idea: I could just hold the drooping sections in place for a few minutes until the Ultracal set up and would hold its own weight. Maybe jamming some wadded newspaper in place would help hold it up temporarily as well.
ShrlOPF-splat. Another chunk sloughed off and landed on the table.
ShhhhhrlOPF-SPLAT. Another chunk slimed its way off the sculpt and splattered itself on the floor.
ShrlOPF-splat.
Over the next hour and a half, I turned into a sleep-deprived, slightly deranged version of the little Dutch boy with his fingers in the dike, fighting a desperate, losing battle to support an ever-growing number of collapsing mold sections with nothing but my own two hands and whatever random garbage happened to be within arms reach of the table. I was so hyper-focused that I didn't notice my shop heater had run out of fuel and in the rapidly dropping temperature, the Ultracal was going to take longer and longer to set up.
Eventually, it stopped falling. The Ultracal hardened enough to stay put and I figured I was in a good place to add the reinforcement layers. Once the build-up was done, I took a step back, cringed at my not-quite-perfect patchwork, and called it a night.
That was around 3:30AM.
I awoke with a start at 0730 and rushed out to the shop to see how much fixing I'd have to do before making the second half of the mold. Now bear in mind that in order to make it possible to separate the two halves and have them form a watertight seal during the slipcasting phase, the parting wall or "flange" needs to be nice and smooth. I figured I could fix a couple of rough patches.
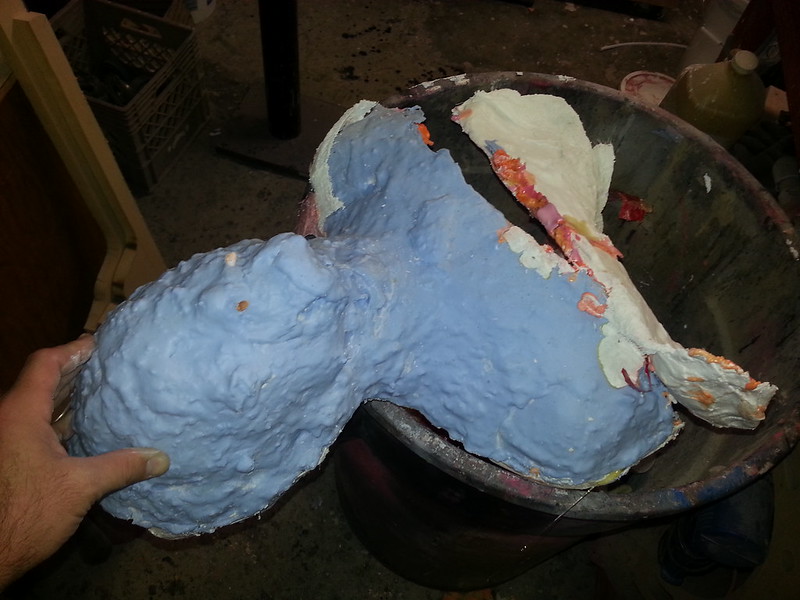
I was not at all prepared for the disaster I found when I removed the clay wall:
I was not at all prepared for the disaster I found when I removed the clay wall:
The whole thing looked like dried oatmeal. There was no way I'd ever have time to fix it and almost no way I'd be able to make it smooth without accidentally marking up the original sculpt. I was devastated. There was no way I'd be able to fix this. Instead, I'd have to remove the Ultracal, re-sculpt the lekku, and try the process over with a slightly better plan. At this point, there just wasn't enough time.
Then I had to tell Shawnon that the costume she'd spent the last four months getting in shape for wasn't going to come together. I had failed.
That failure put a damper on much of the rest of my experience at that event. I tried to take pride in the twenty-five other costumes* that my team and I had put together in preparation for the convention, but somehow this one not being done had overshadowed the rest of the done things.
There were a lot of lessons I learned from this particular project and the other projects that I was running at the time. The main one was recognizing that even I have limitations and I need to avoid falling into what I call the "superman trap," where I convince myself that I can do anything and everything and blindly railroad myself into some level of misery rather than just saying "no" from the get-go like some kind of sane person.
I haven't given up on this project though. Somewhere along the way, a friend introduced me to the beautiful work of "Twilek Pam," which you can check out at her website: twilekpam.com/
I now have a beautyfull pair of long, red lekku cast in silicone, as well as all of the tattoo stencils I'll need to match Darth Talon's signature look whenever I get a minute to tackle this project again:
More on that someday...
*Not exaggerating about the twenty-five other costumes. That was the weekend we debuted Shawnon's Shae Vizla costume, six Sith Acolytes, and nineteen Mandalorians.
*Not exaggerating about the twenty-five other costumes. That was the weekend we debuted Shawnon's Shae Vizla costume, six Sith Acolytes, and nineteen Mandalorians.
Your failure sounds a lot like my successes. But seriously, I followed all of those builds and didn't realize you did it all for one event. That's epic! One failure in such a large group of costumes is actually pretty amazing. I do like that you shared this though. I find that my best lessons are learned in failure, not success. Bet you never make that mistake again.
ReplyDeleteDocumenting unsuccessful work, is good way to show others what NOT to do. I try to include these in my build blogs as I progress. I've not attempted casting yet, on my list to do tho. The work you do is next level and the results of your (& teams) hard work show! I hear yah on the Superman trap tho. Keep up the awesome work/projects.
ReplyDeleteThank you for sharing! I've started making lekku as well and it's certainly a process! The way I've been doing it I take the sculpt and then brush thin layers of silicone on and after they've cured fully I turn it inside out and voila! Lekku! It's a bit less intensive of a method than making a slip mold and filling that. I've done it with latex as well and that turned out fine too.
ReplyDelete