
They were pretty cool, but there's also 999 other chapters of Space Marines to choose from. So the next challenge was to make another set of armor from my molds and dress it up in the iconography of a completely different chapter.
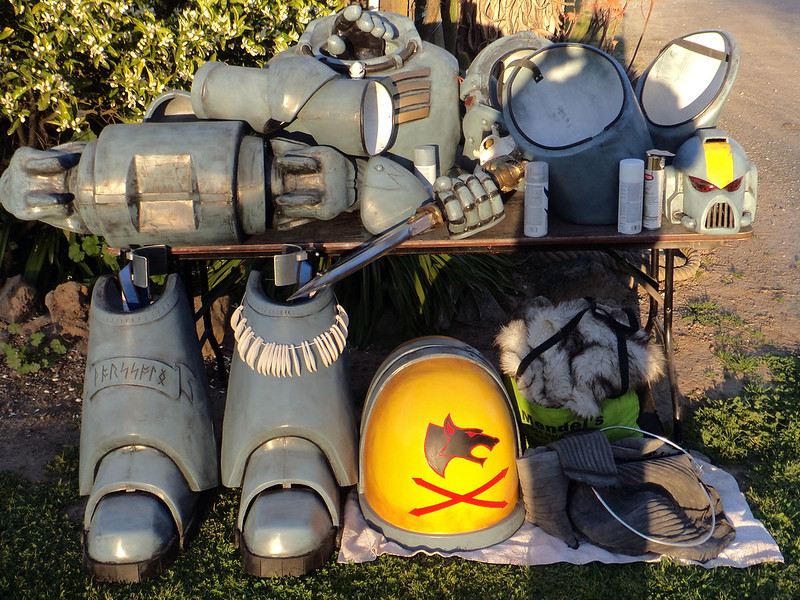
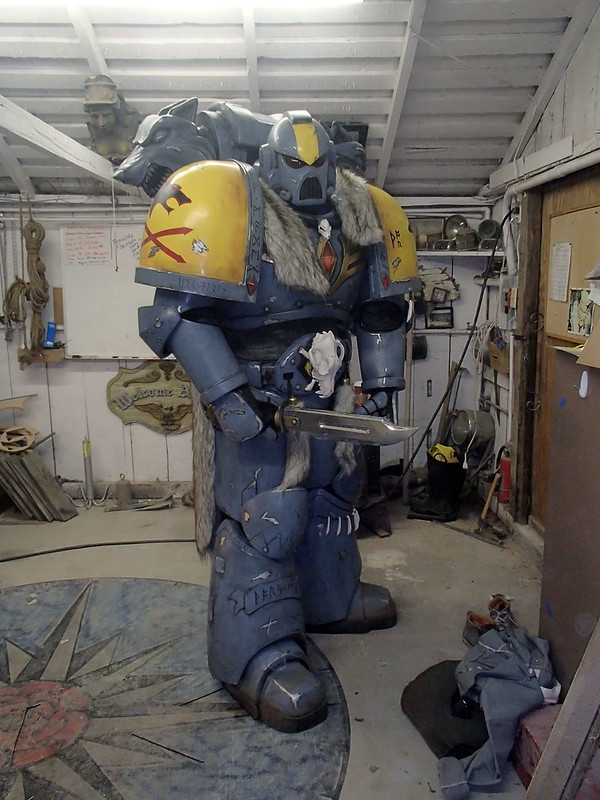
The result: a Space Wolf!
While the Dark Angels tend to look like they're covered in relics handed down from the Catholic church, Space Wolves are the aesthetic descendants of Vikings. Their Codex offers up a rich tapestry of bits and pieces to add to the standard armor and I'm really happy with the finished project:

For more details on this build, read more...
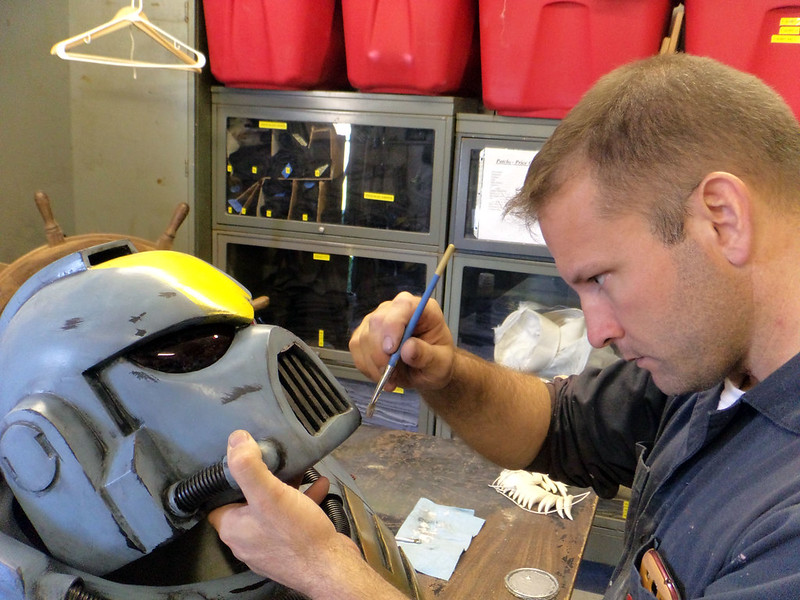
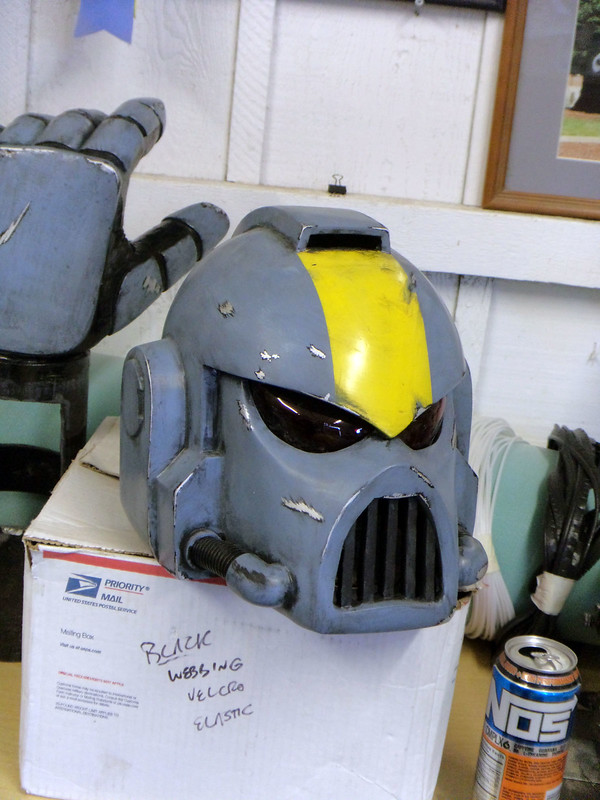
I've promised myself that every time I make another one of these guys I would make some improvements along the way. The first thing I did was rebuild the helmet to make the proportions better and lay up a a fiberglass mold to make the notoriously flimsy shoulder pauldrons out of tougher stuff.
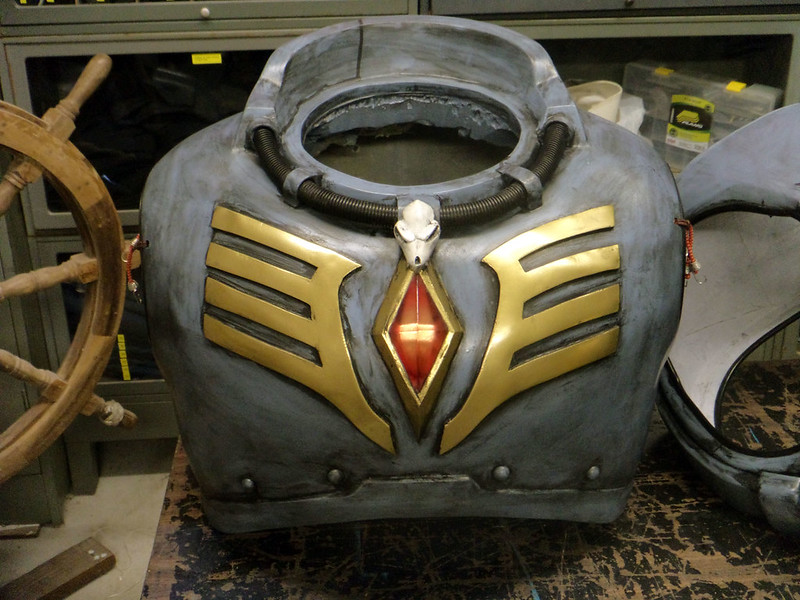
This time around, the part that seems most in need of improvement is the chest. Vacforming some of the very deep parts meant that the first few marines I made had some pretty thin pieces and were prone to tearing along the bottom edge of the chest. This will not do.
So I pulled the three forming bucks for the chest out of the big pile of forming bucks and spliced them back together with superglue, fiberglass, and Bondo:
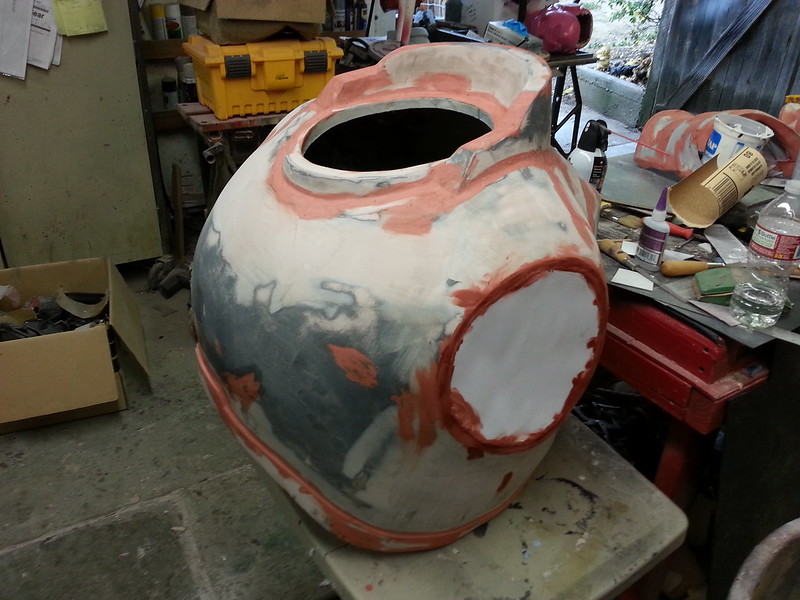
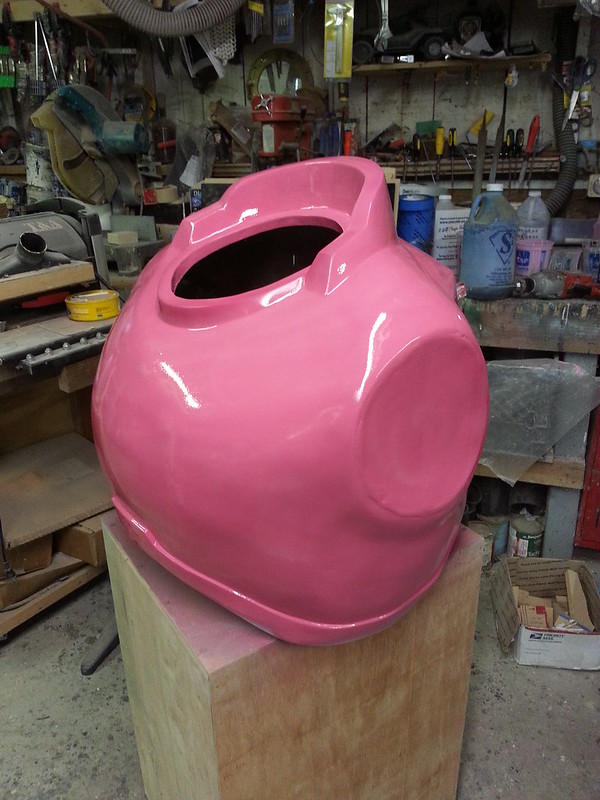
Then I filled and sanded and painted and sanded and polished the whole thing until it was as perfectly, glassy smooth as I could get it:
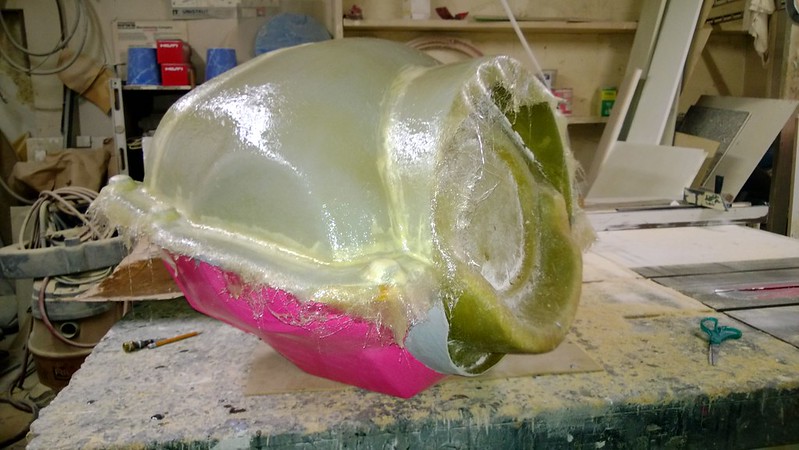
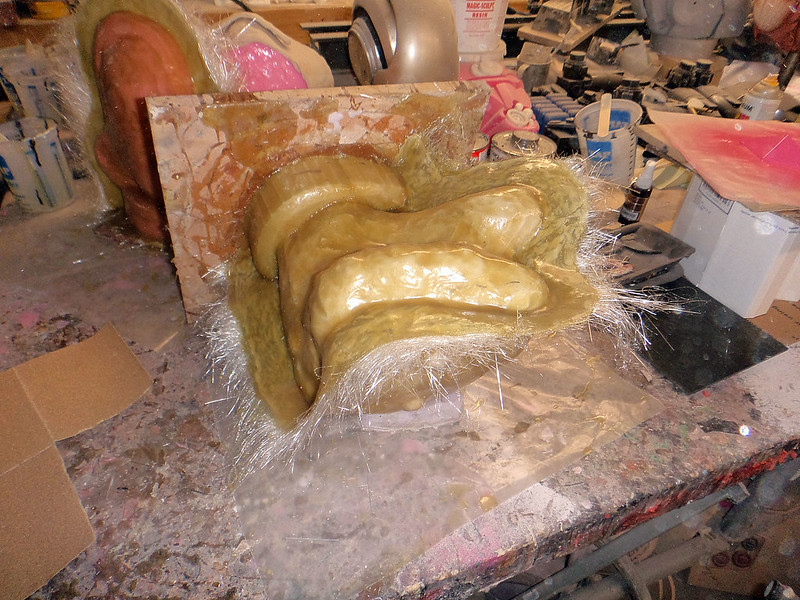
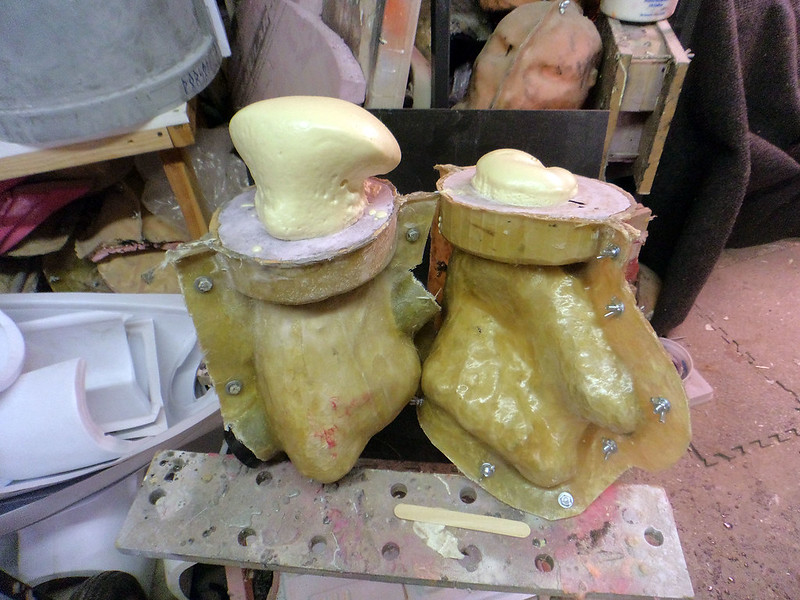
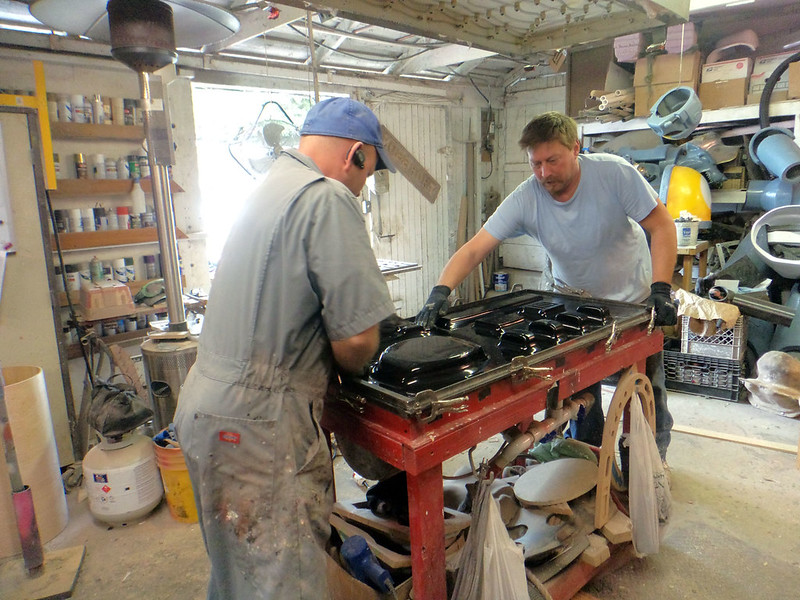
Then I handed it off to my friend Eric who does professional fiberglass work so he could do a better job of making the molds than I would. Here's the moldmaking in progress:
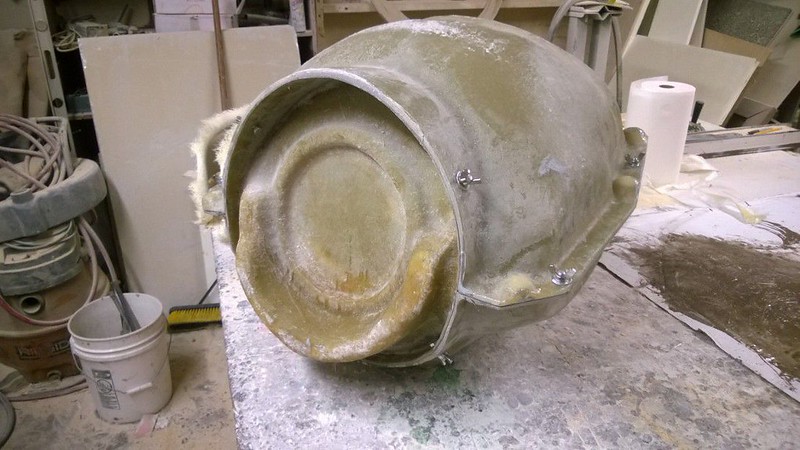
The mold was laid up in three separate parts (front, back, and top) allowing it to pop off of the part easily after layup. Here's the completed mold once it was cleaned up:
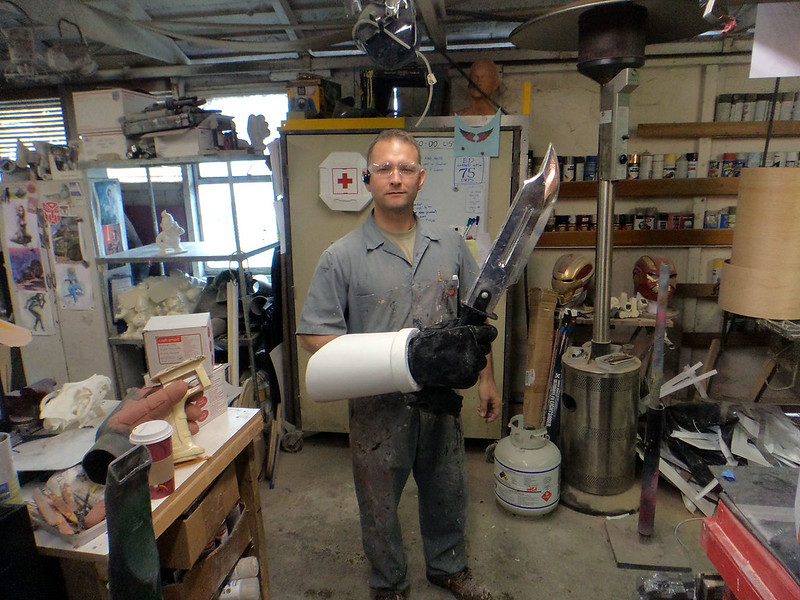
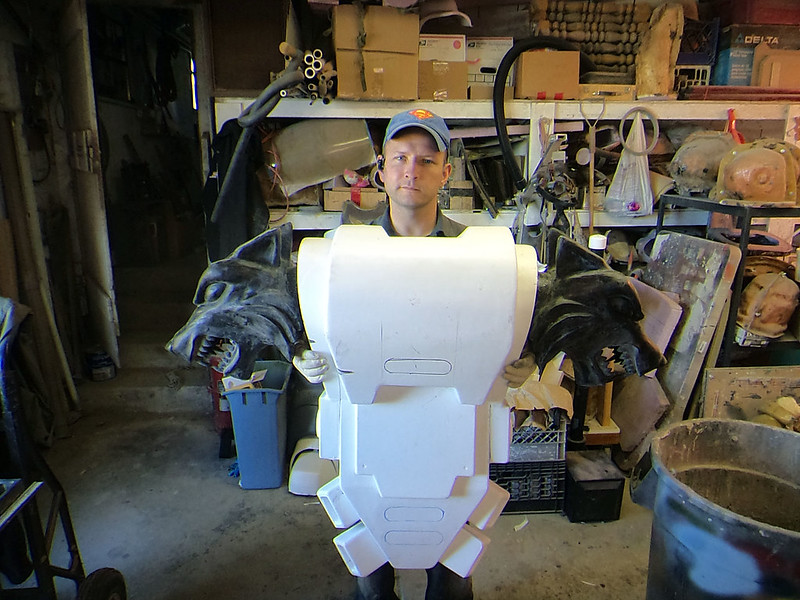
And here's the first lightweight fiberglass copy:

How lightweight? So lightweight in fact, that I can lift it with my little finger:
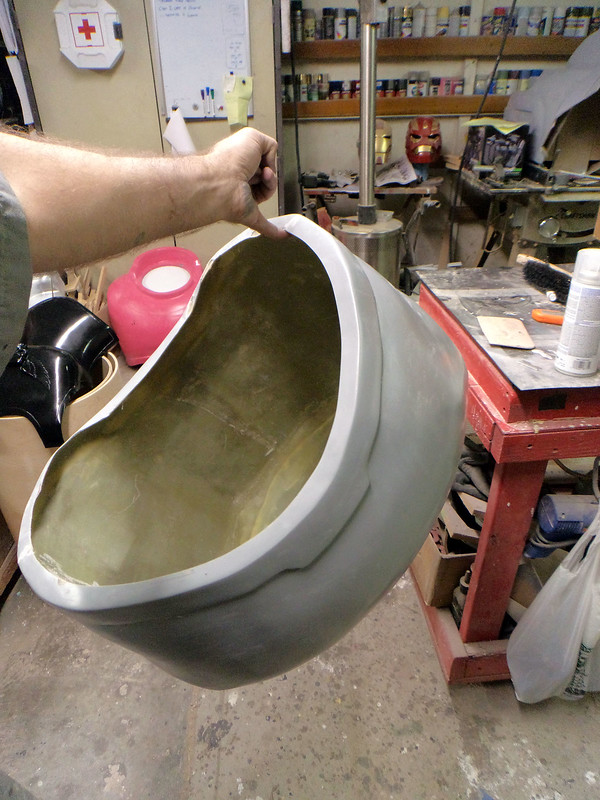
So that's an improvement.
The other part of these guys that's always bothered me was the hands. I originally had tried to make them as a bunch of separately cast parts that I could rearrange in various poses each time I assembled a different suit. Each knuckle of each finger was a separate piece and the end result ended up just being heavy and unnatural looking. So clearly it was time for new and improved hands.
I started by taking one of the cast palms from my other Space Marines and sculpting on new fingers:
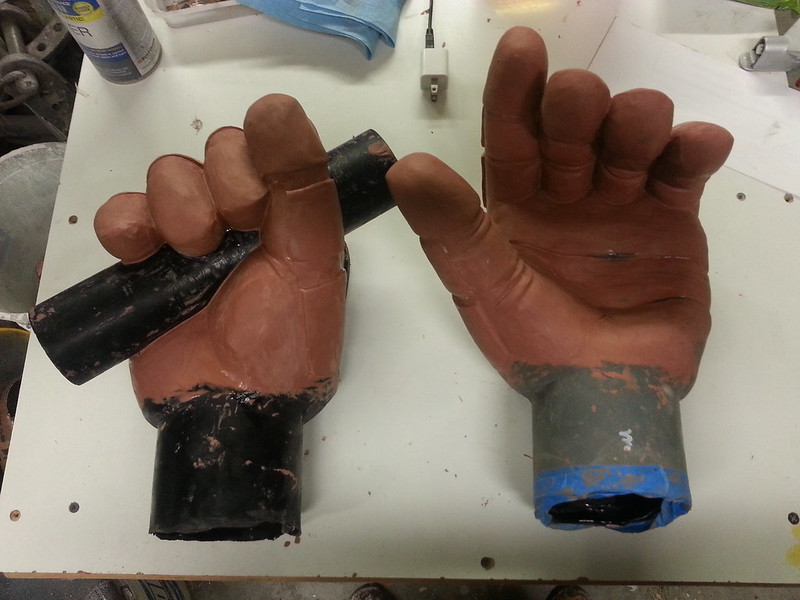
The plan for the Space Wolf was to build him a giant hammer or axe that would require a two-handed grip. So the right hand is set up to be cast around a piece of pipe.
Once I was happy with the sculpt, it was time to begin making molds:
After a quick print coat on the deepest detail areas, the hands were mounted by the wrist holes and layered over with ever more silicone rubber:
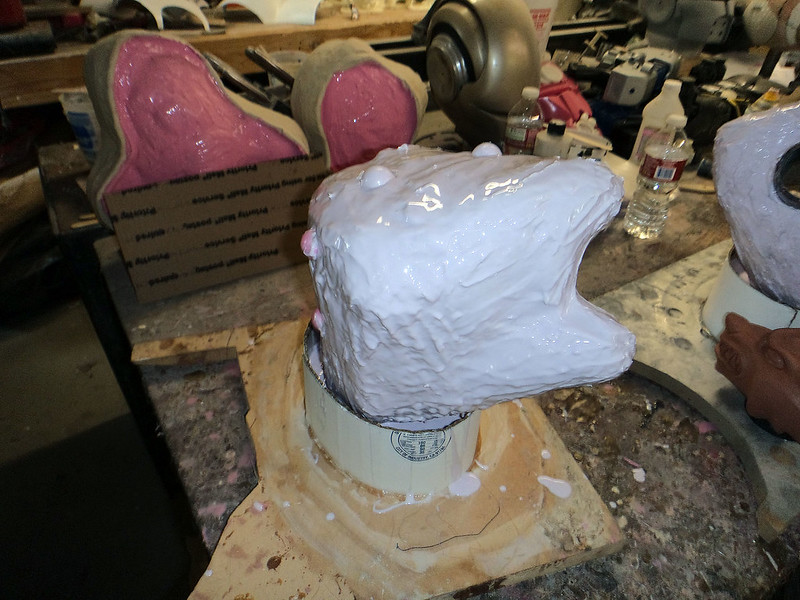
Here's my friend Jason prepping one of the hands for a mother mold:
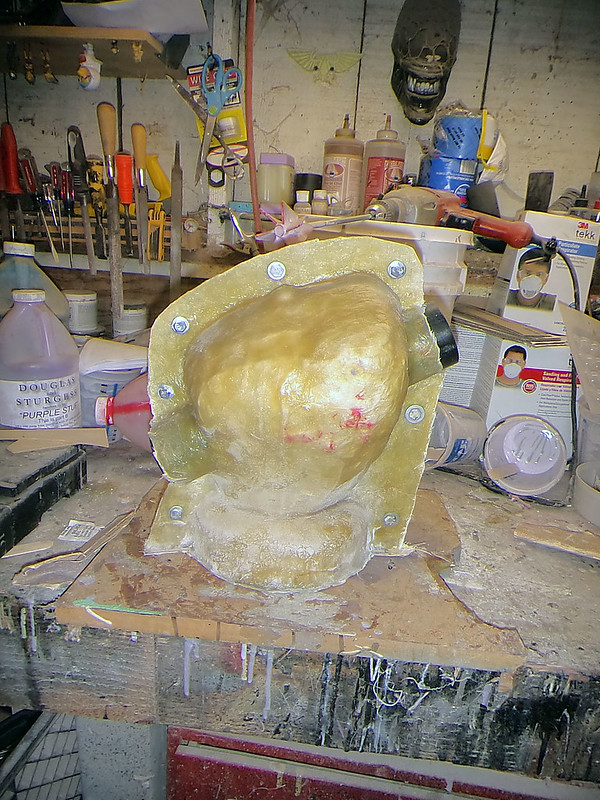
The mothermolds were two-part shells made of fiberglass:
Once the glass had cured, they were trimmed and drilled and fitted with bolts:
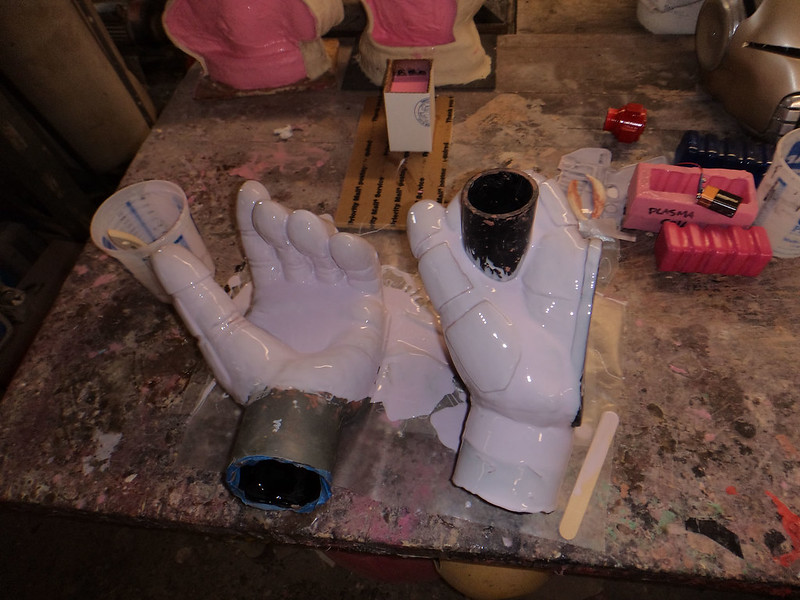
After rotocasting a few layers of resin inside each mold, they were filled with rigid urethane foam for a tiny bit of added strength and a minimum of added weight:
The new one-piece hands are much much lighter and at least as durable:
With the hand molds made, I could no longer postpone pulling out all of the vacforming bucks:

Then we started cooking plastic and making armor:
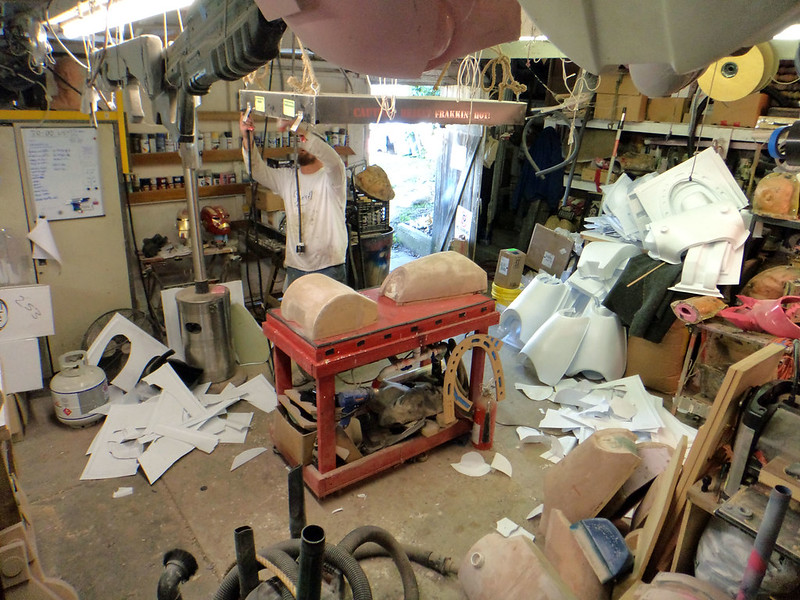
I suppose I have a pretty good sized workshop, but it starts to become very small when I put one of these guys together:

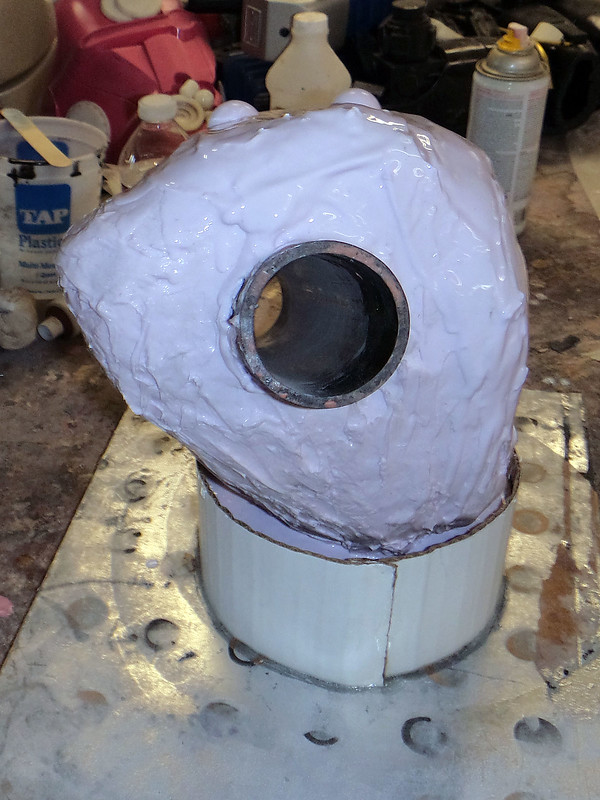
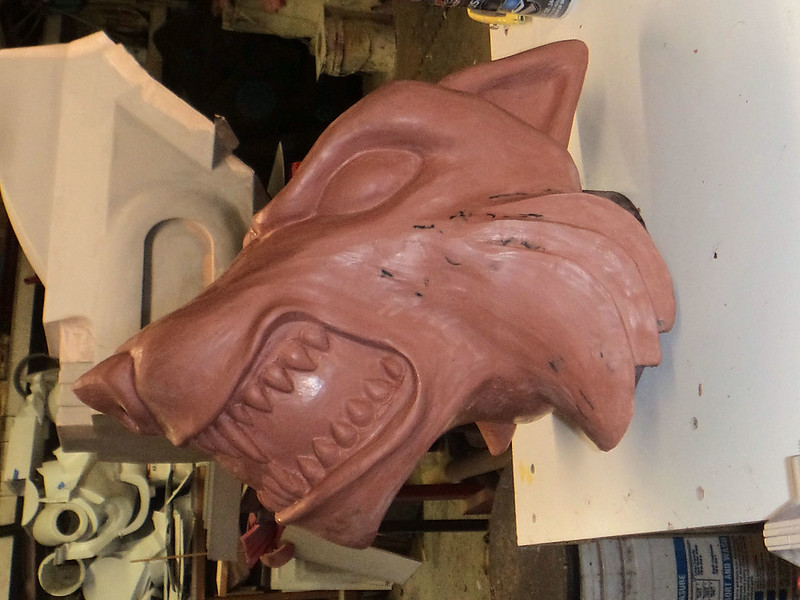
In keeping with the Space Wolf theme, the vent nozzles on the backpack needed to be custom sculpted:
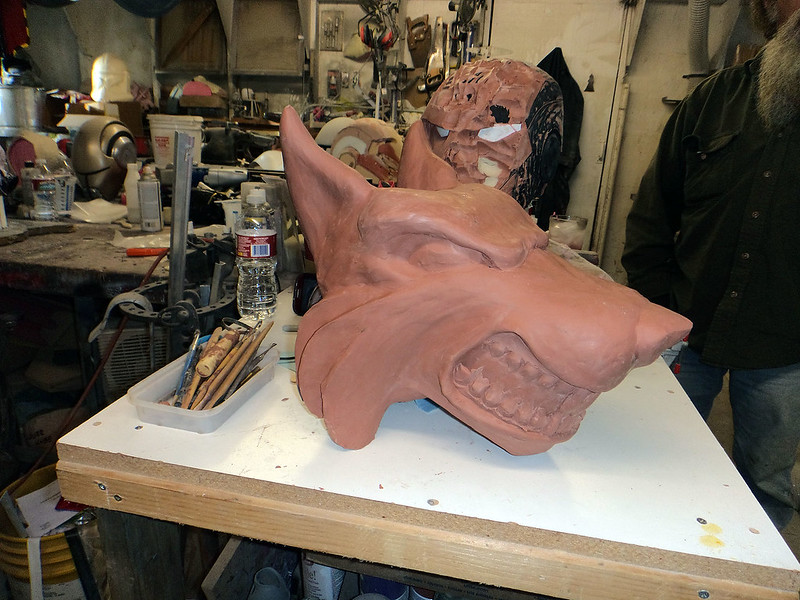
I was pretty happy with the end result:
Molding it presented a few minor challenges:
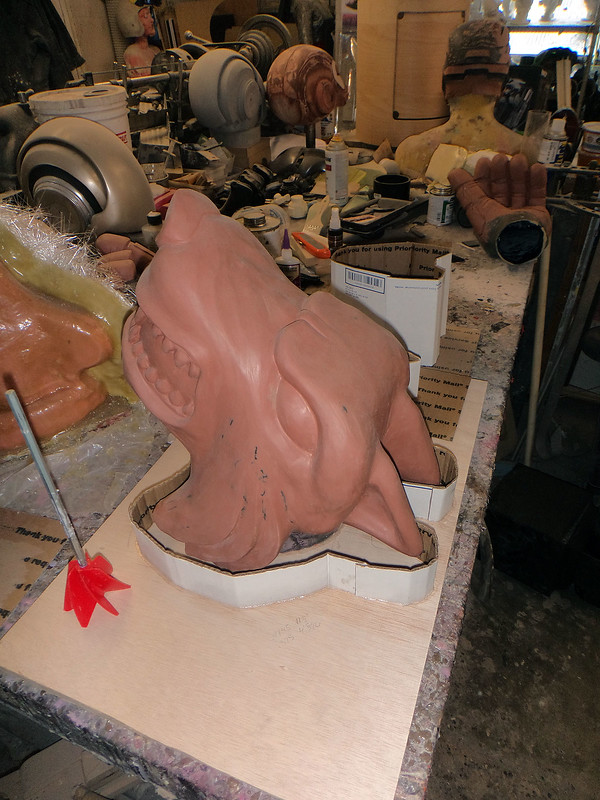
But as usual, I was able to overcome:
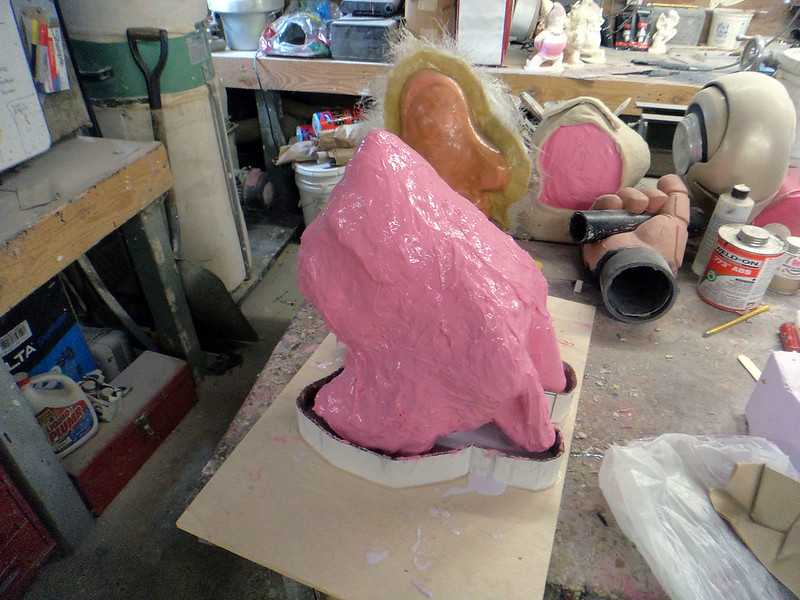
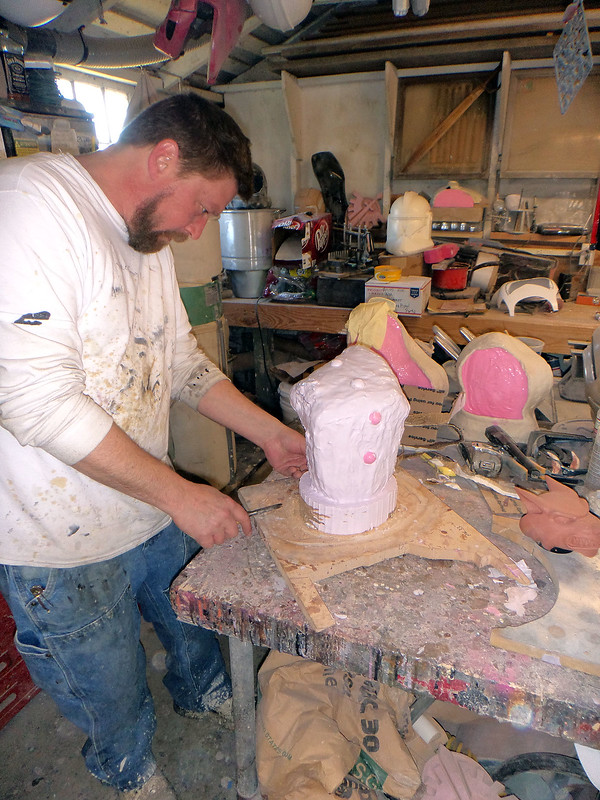
Here's Jason putting the finishing touches on the mothermold:

Once the mothermold was removed, it was a simple thing to demold the original sculpt:
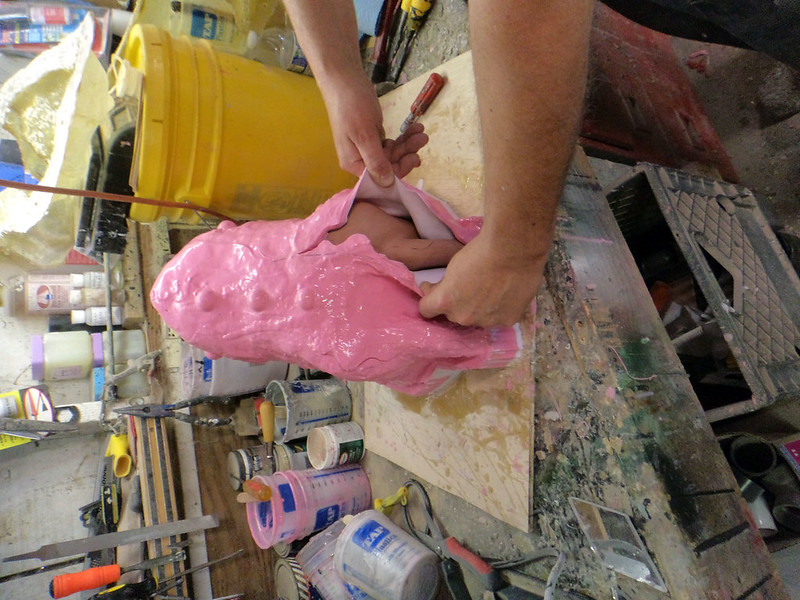
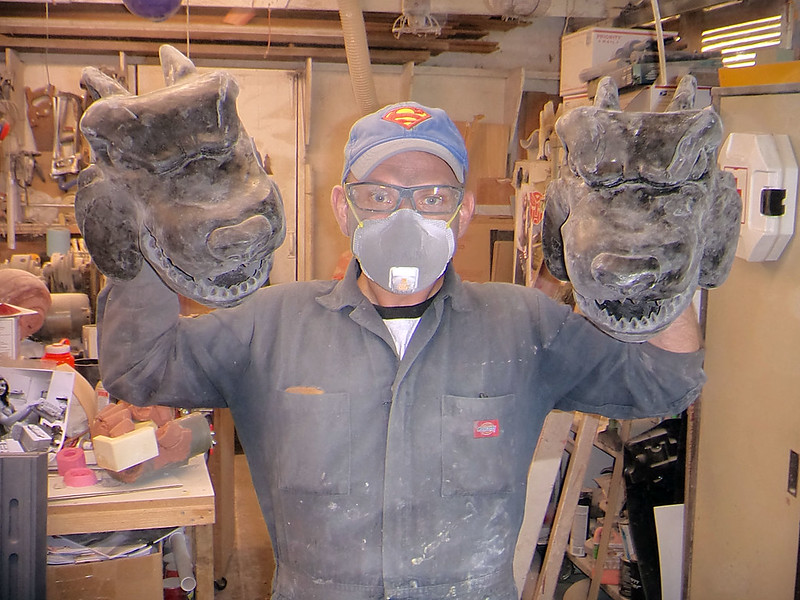
Here's the first two cast parts:
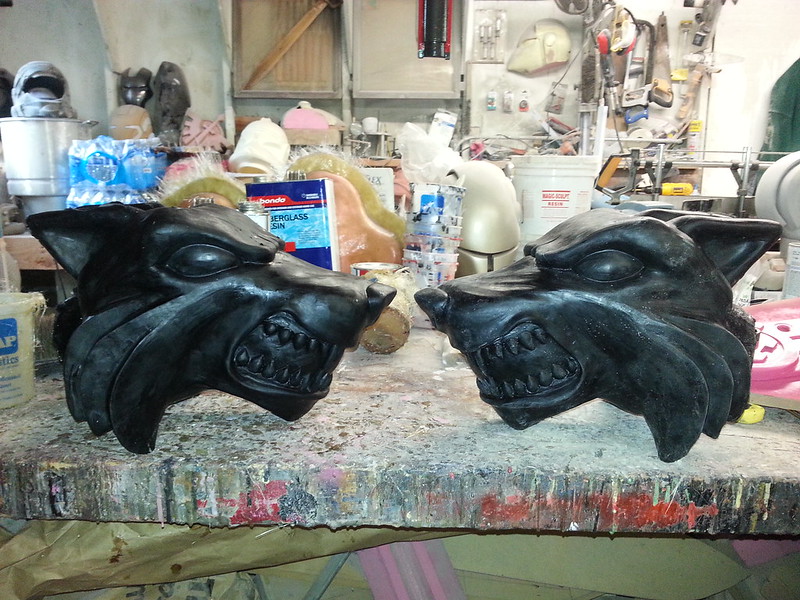
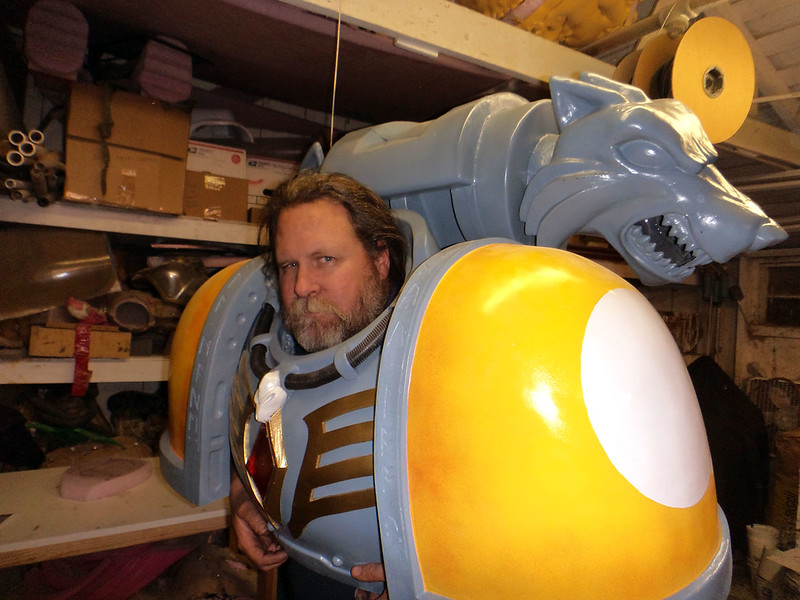
RAWR:
Mounting them onto the pack itself was pretty quick work:
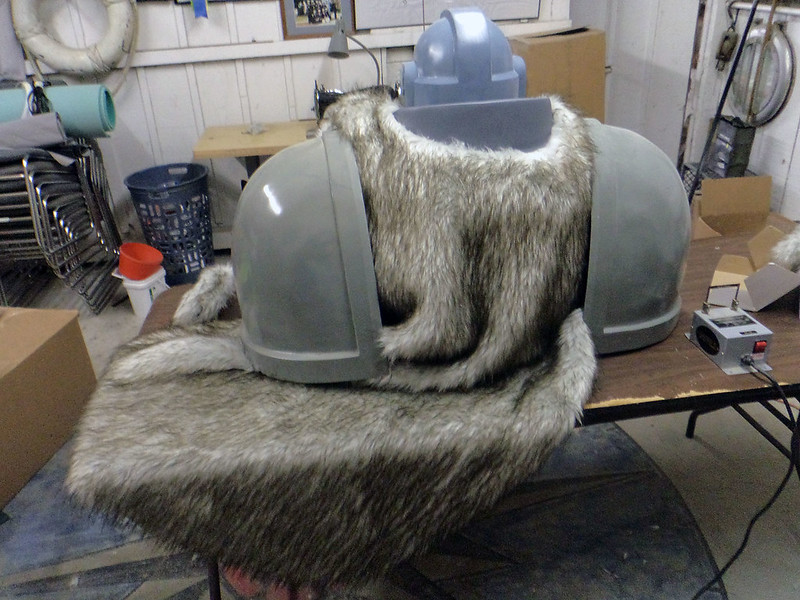
The next thing to tinker with was the wolfskin cloak:
The entire thing was made from a single piece of faux fur I picked up at a local shop in San Francisco's Haight Ashbury neighborhood:
I also sculpted a wolf-head knife pommel:

The clay sculpt was then boxed up for molding:
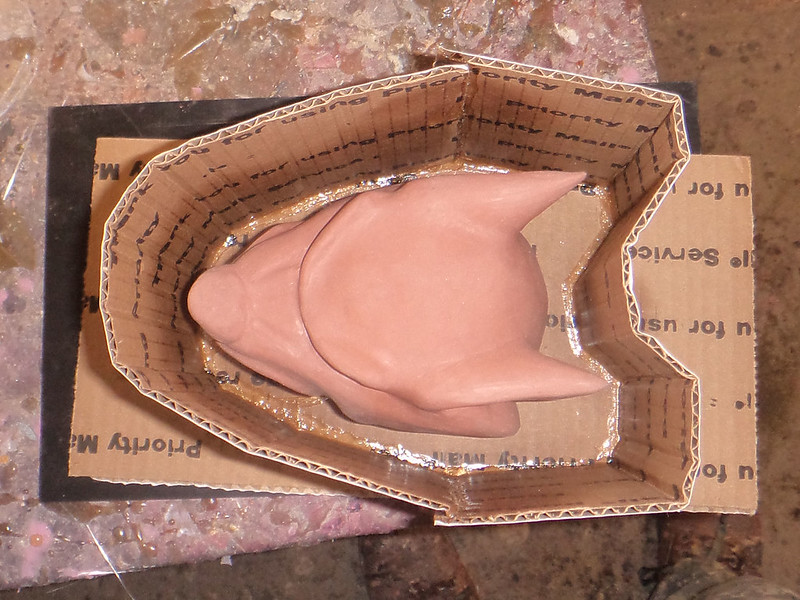
The mold itself was a simple block mold in silicone rubber.
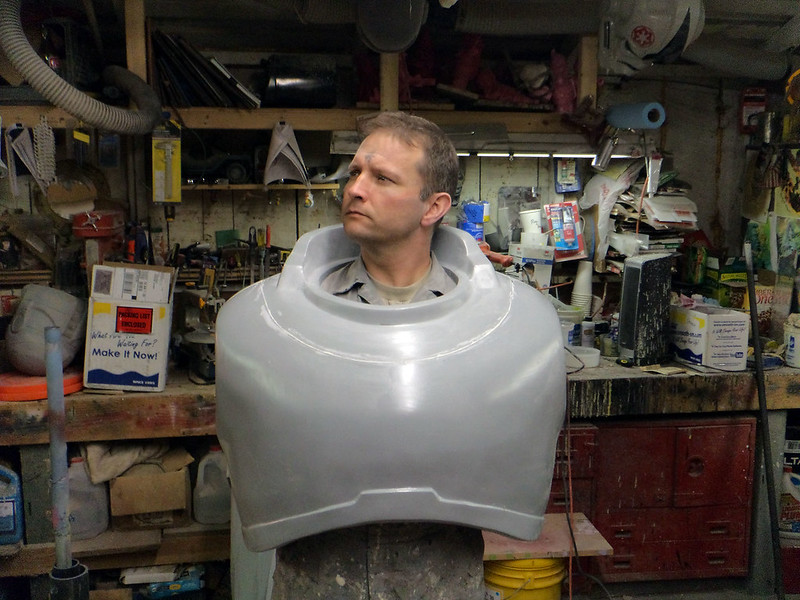
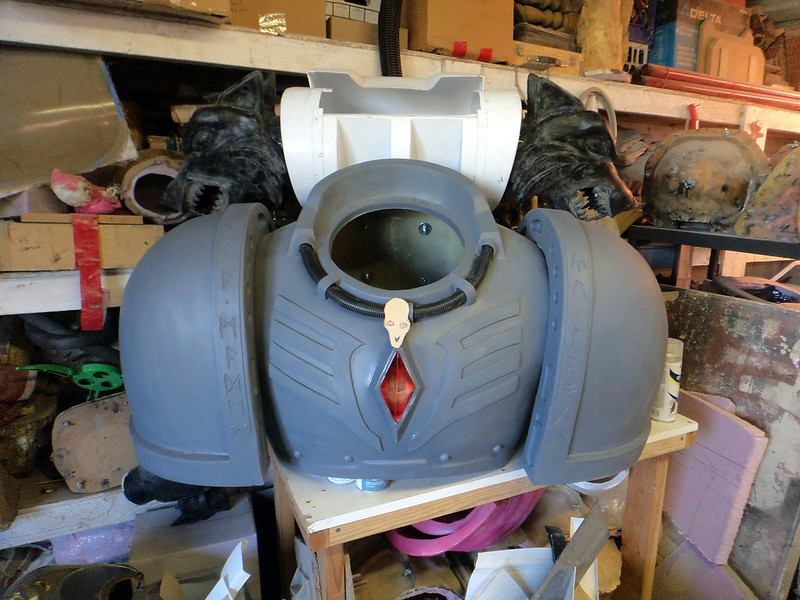
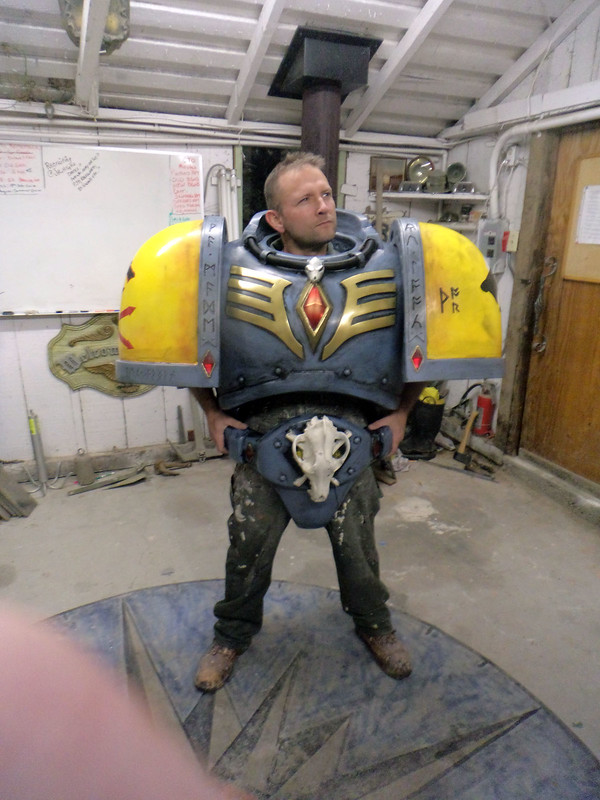
Getting back to the chest, after I'd trimmed out the neck and arm holes in chest armor I couldn't resist the urge to try it on:
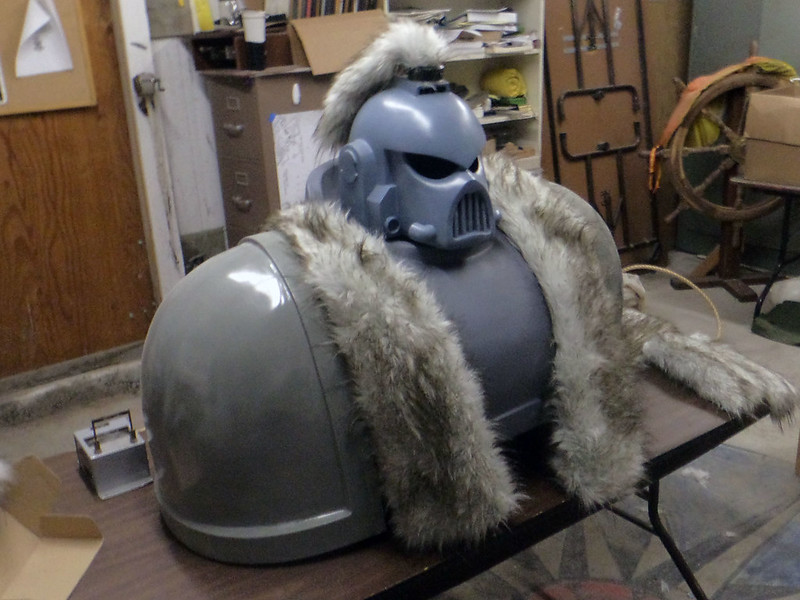
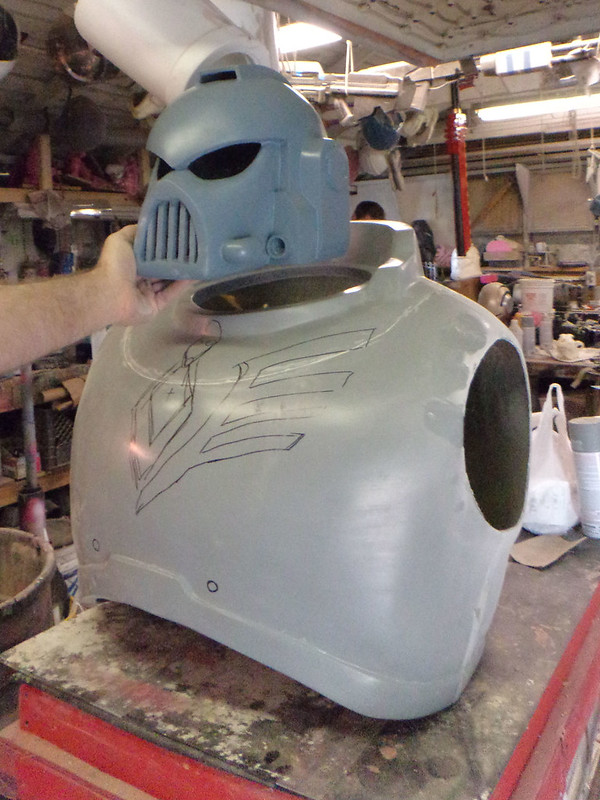
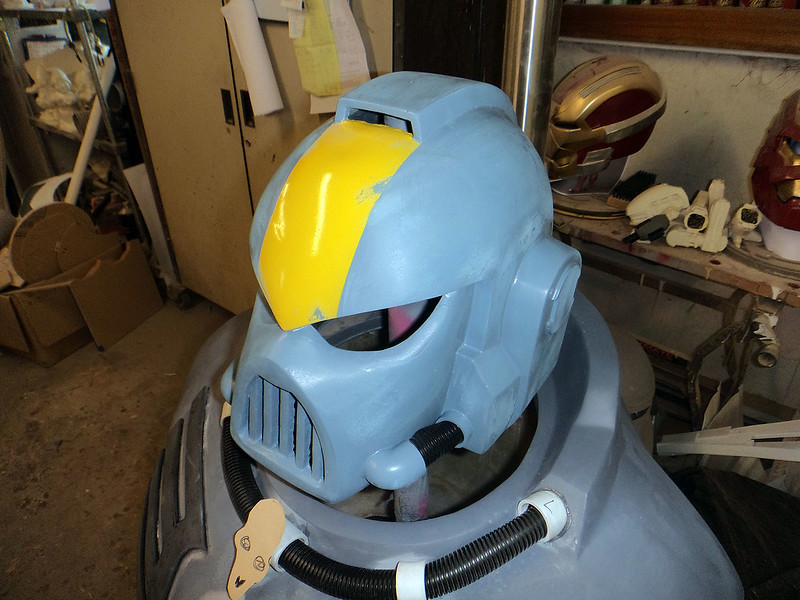
Here's a test-fit with the helmet:
Unlike my previous suits with the winged icons on the chest, this was going to have a large gemstone in the same place. The gem was the easy part:
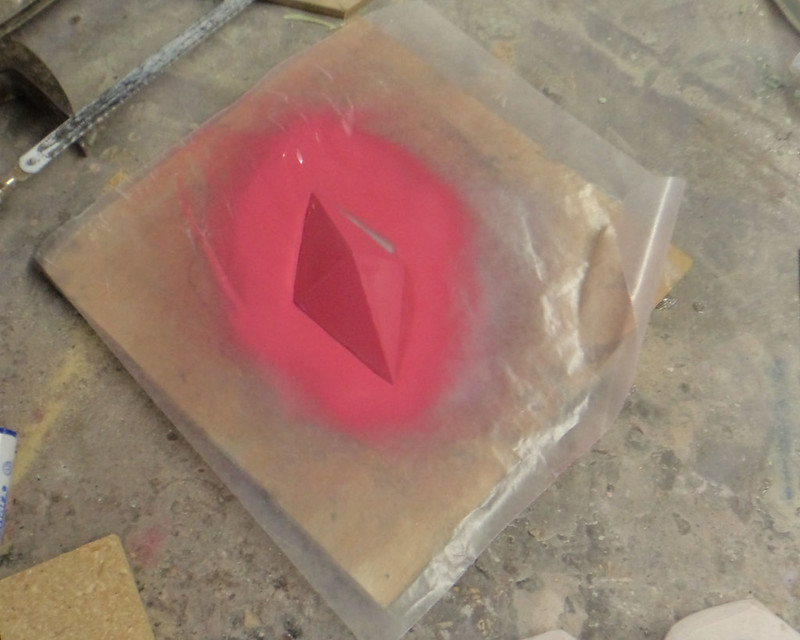
That was a simple block of tooling foam, rough shaped on the belt sander and coated with a high gloss finish. Then I pulled a mold off of it and cast copies in clear resin with a bit of red transparent pigment. It took a few tries to get a color that I liked:
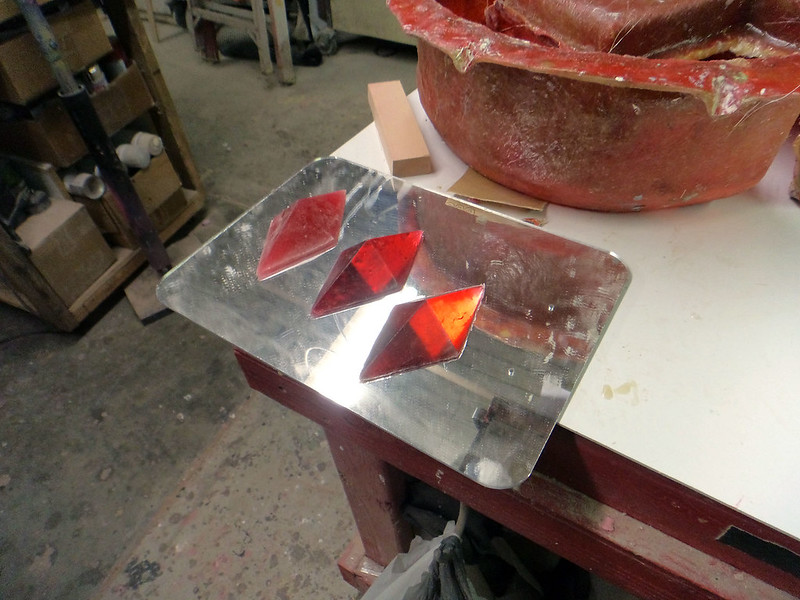
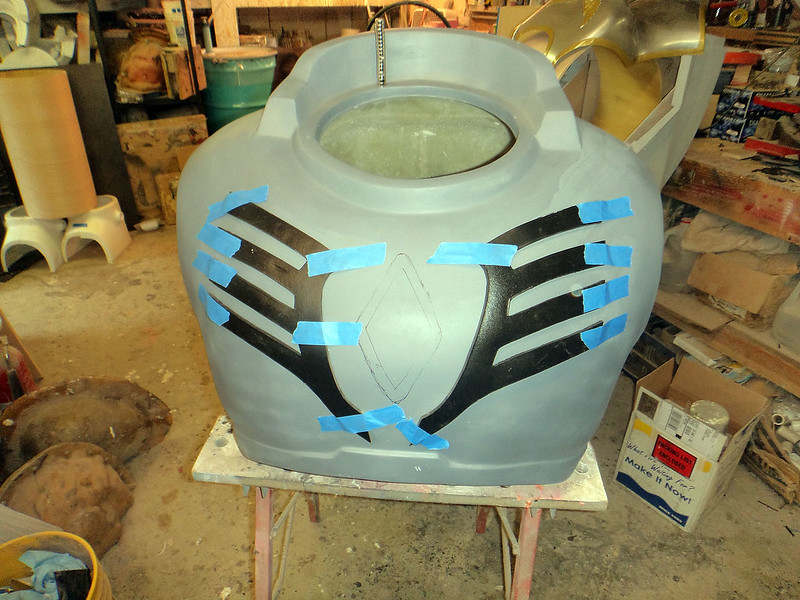
Using the demolded prototype gem, I moved on to mocking up the rest of the chest trim:

The trim details were cut out of foam PVC sheets (often called "Sintra") and heated up until they could be reshaped to conform to the curve of the chest:
Once those were bonded to the fiberglass chest, I added some more details around the neck:

These were sections of PVC cut to various lengths and fixed into place:
I built up a bit of bulk around the hose rings with some body filler, the I cut out a piece of mirrored acrylic sheet to act as the beginning of a setting for the gemstone in the middle of the chest.
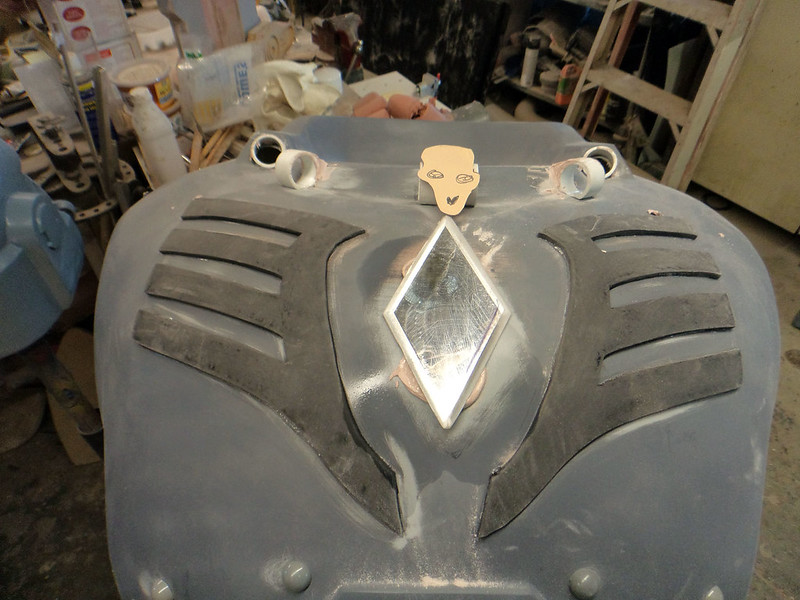
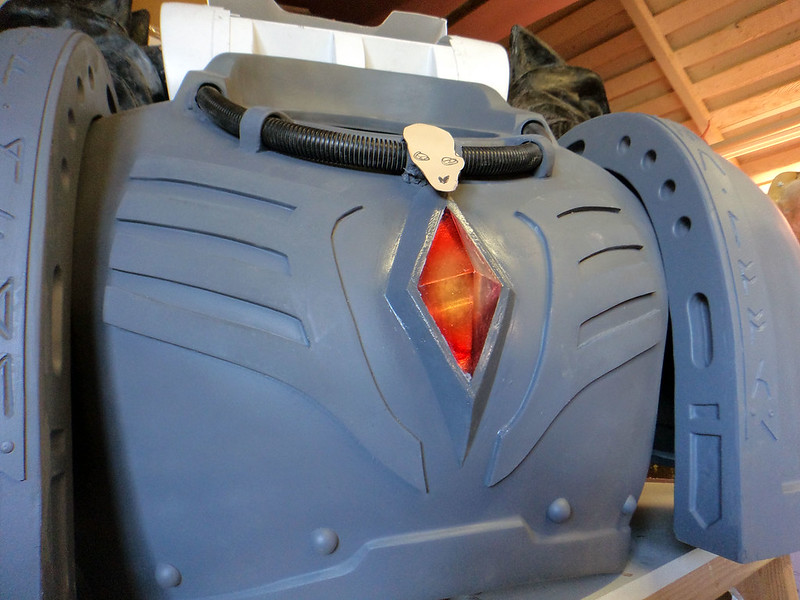
Once the gemstone was glued in place, it was masked off and everything got a coat of primer:
The mirror backing really helped to bring the gemstone to life:
The last little detail for the chest was the tiny wolf skull at the throat:
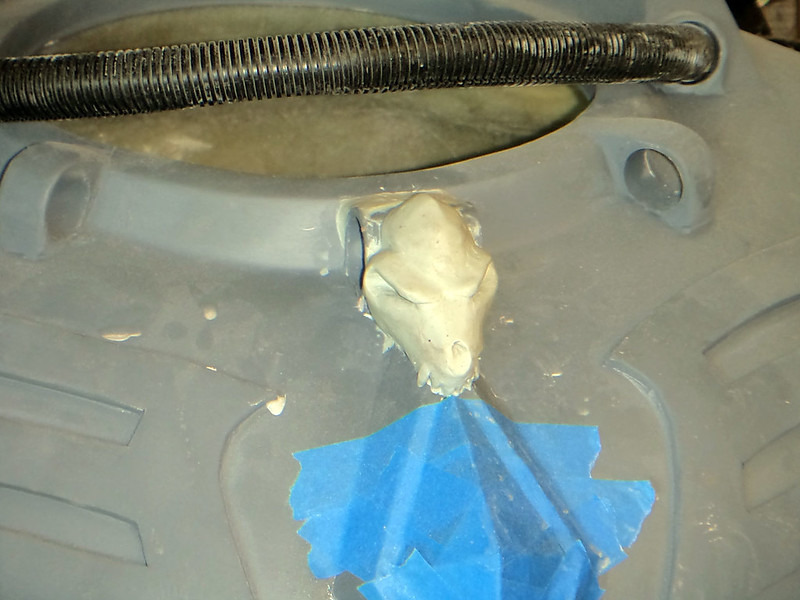
This was sculpted in epoxy putty and re-tooled a bit after it had hardened.
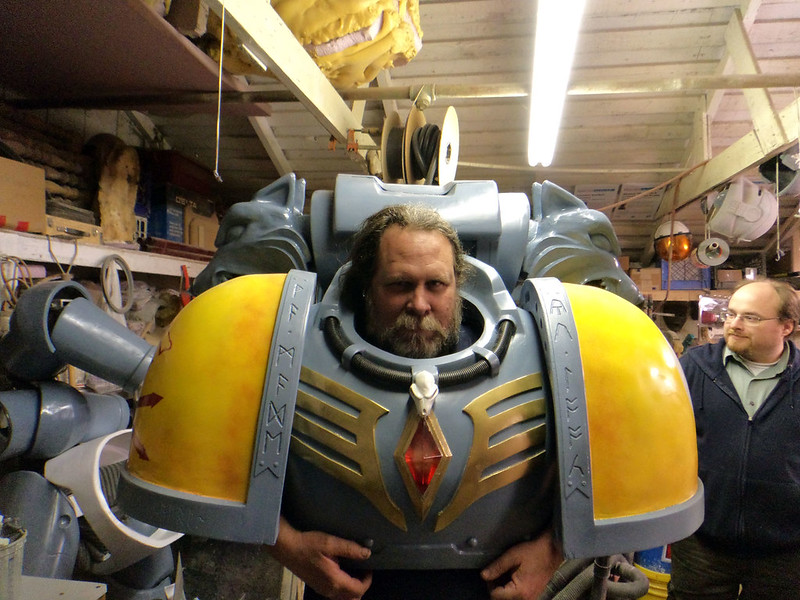
A little bit of paint and things were really starting to take shape. Here's my epically bearded friend Don trying on the chest and shoulders:
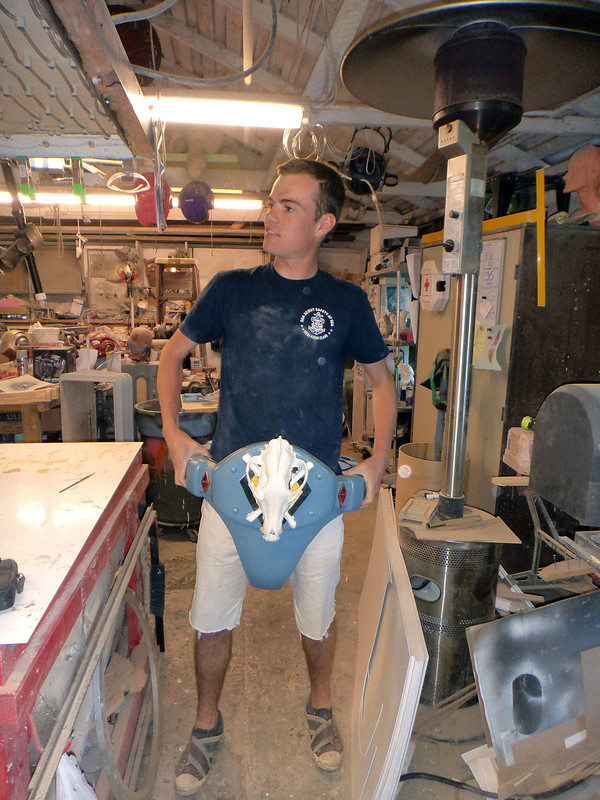
The belt was another interesting detail. I started with a new set of vacformed belt pieces to retrofit onto the same belt/pelvis parts I made for the Dark Angels:
Then a resin cast replica of a Grey Wolf skull (which you can buy here: LINK) and built up a few details behind it:

Once these parts (and the rest of the suit) got their base paintjobs, it was time to start picking out details and adding all of the icons:

There was also the occasional test-fittings and jackassery:
Once the weathering began, things started to turn awesome:

It was also starting to take up a lot of space:
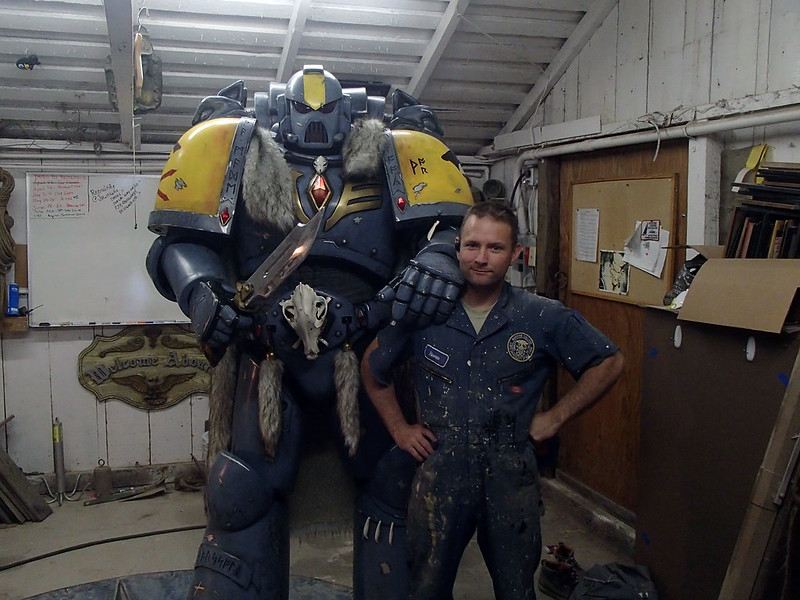
But once all of the weathering had dried, it was time to try the whole thing on:
Since I wanted it to look as big and imposing as possible, I had Loki try it on (he's about 6'2" tall in these pics):
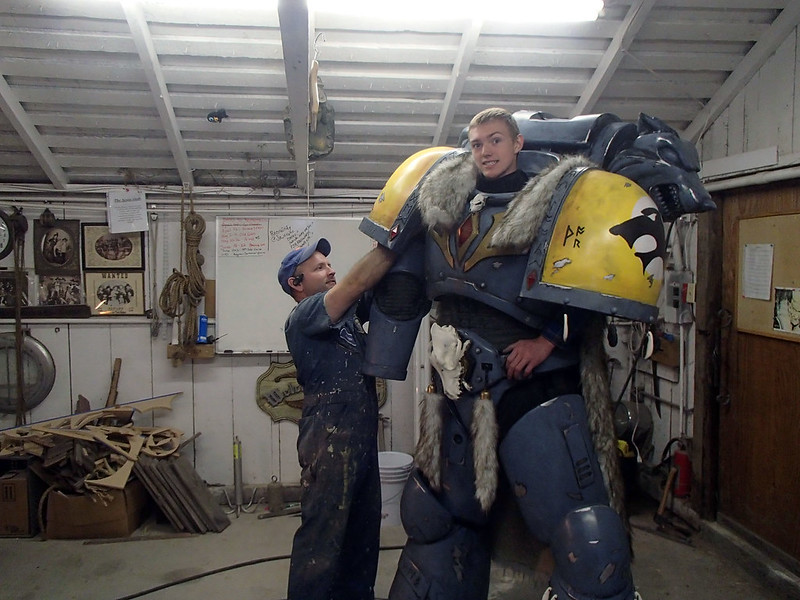
Not too shabby:
Sooner or later, I'm sure I'll end up building yet another Space Marine. I can't seem to leave that universe well enough alone. For now, you can see a lot more behind-the-scenes photos from this build (as well as a few more finished photos) in this Flickr album: LINK
Stay tuned for more insane projects in the days, weeks, and months to come...
An entertaining and informative read as always. I really enjoy looking through the backgrounds of your pictures trying to figure out what else you are working on. I like that damaged Iron Man helmet (or is it an Ultron head?) in the first picture of the wolf head backpack vent.
ReplyDeleteThere's a bunch of helmets in that shot. You might mean the disassembled "Godkiller" helmet sculpt on the right (https://flic.kr/p/nomvE9) or the Sith Stalker helmet on the left (https://flic.kr/p/owLQep)
DeleteAlways a lot going on in the background.
I was just on your instructables page. Do you still take commissions? And is you do, would space marine armour be available? Me and my friend are trying to get some Blood Angels suits for a convention next year.
ReplyDeleteI was just on your instructables page with the dark angel suit, and I where you had put a comment saying you do commissions. Do you still, and if so, would it be possible to order a Blood Angels suit?
ReplyDeletei really like your work..if you are look for a good challenge try a Chaos Marine, can go really intricate if you wanted
ReplyDeletenice
ReplyDelete