
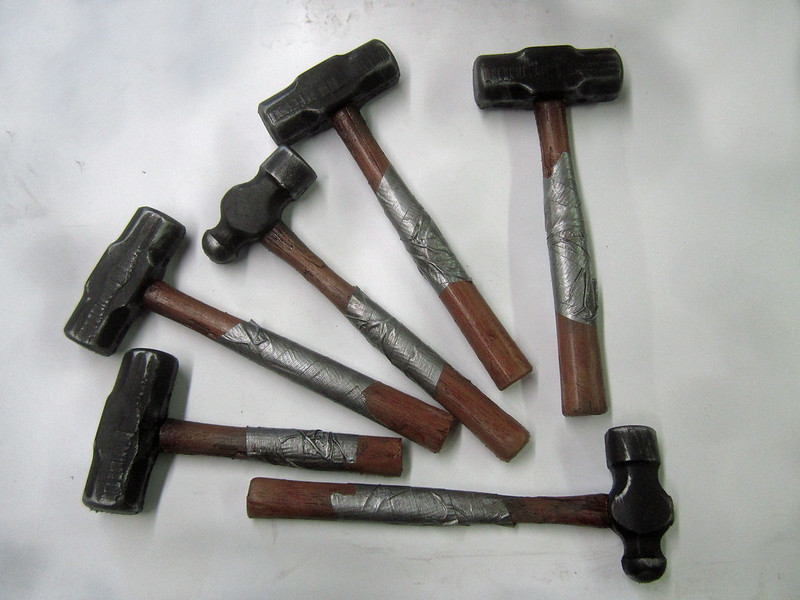
For the purpose of this demonstration I will be making molds to copy a few hammers.
Hammers are hard and heavy. One of the basic tenets of society is that throwing hammers at your friends will rapidly result in not having friends.
But what if you want to keep your friends and you can't resist the urge to throw hammers at them? Well my friend, you've come to the right place. Here's how to simulate a variety of typical, run-of-the-mill hammers with soft, pliable, non-concussion-inducing flexible foam.
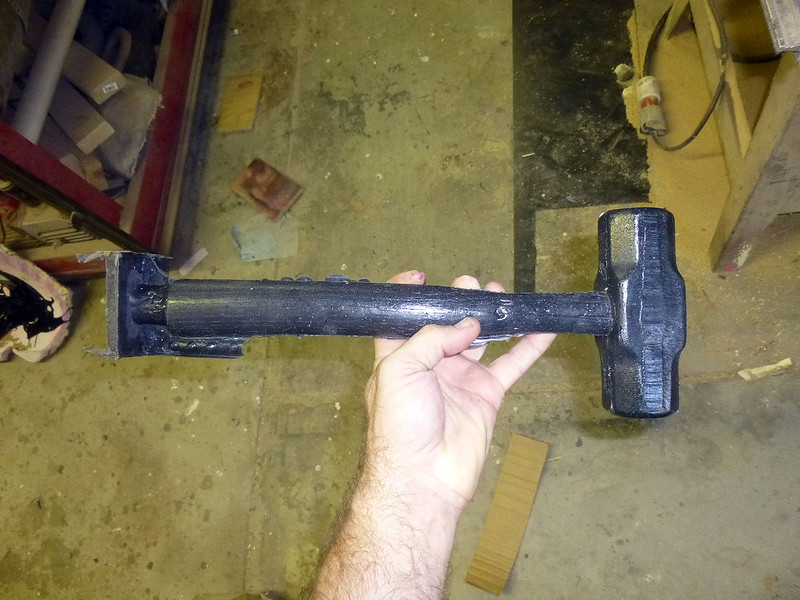
Here's a picture of a fully-finished foam rubber hammer:
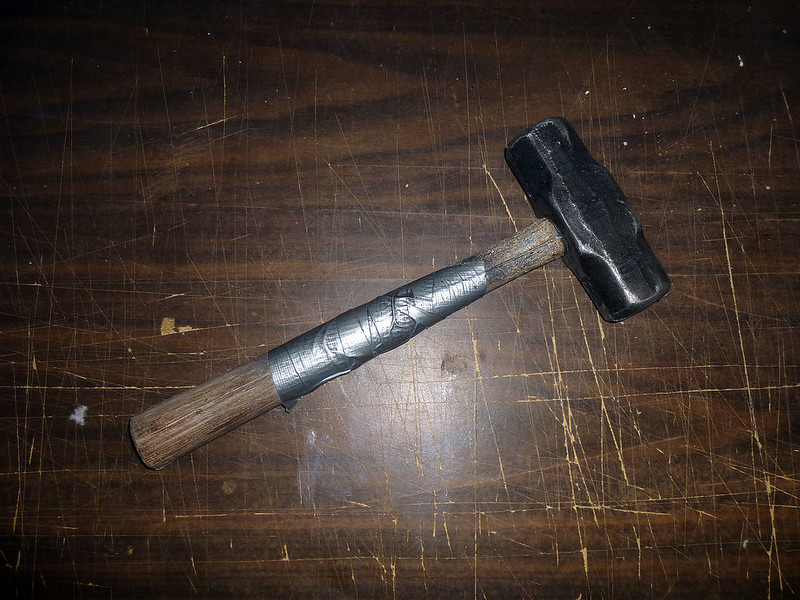
If you'd like to know how to make one, read on...
Before we get started, I'd like to recommend you pick yourself up a copy of The Prop Builder's Molding & Casting Handbook
Now that I've mentioned that bit, let's get hammered...
Step 1: Prepping the master for molding.
Before we can begin the moldmaking process, it's important to be sure that the piece we'll be molding is ready to be reproduced. To that end, we'll take our original hammer, clean off any loose dust or rust or blood or bone chips, and fill in any cracks or splits that will cause the silicone to catch and rip later on.
Step 2: Building a mold box.
You can get away with using any watertight container you might happen to have on hand, but in order to limit the amount of pricey silicon moldmaking rubber to just what you need, it's better to make a custom box. Since I'll be casting these pieces in expanding foam, I'll also need a box that I can use to clamp the rubber mold shut as the foam expands.
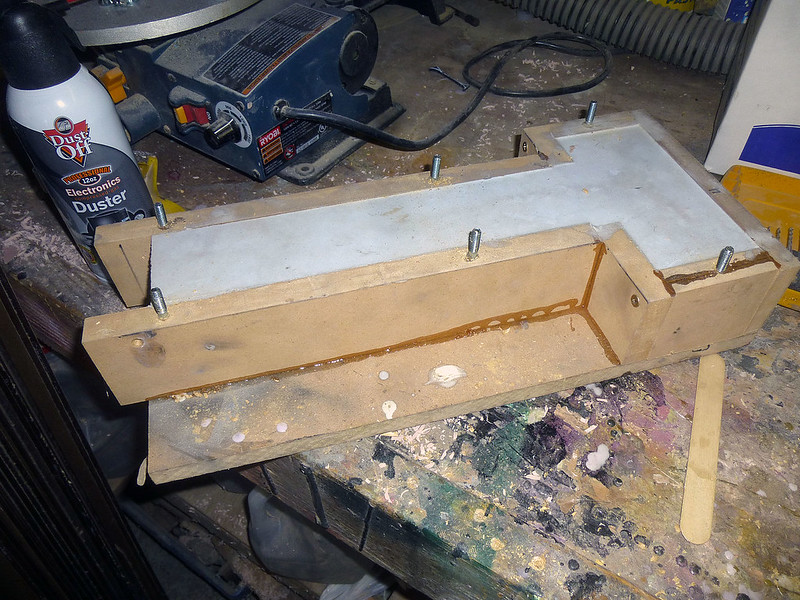
For these hammers I made boxes out of medium density fiberboard (aka "MDF") which is readily available at your local home improvement store. The box is sized and shaped to allow for 1/2" clearance on all sides of the original hammer. This includes making it deep enough for the hammer to have 1/2" clearance above and below it:
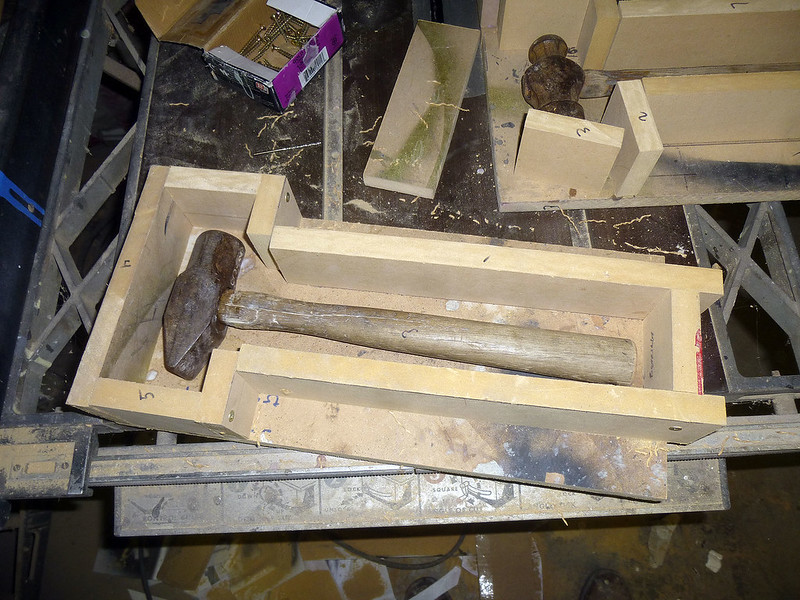
NOTE: If you're one of those metric weirdos, 1/2" is about 1cm.*
Now it'd be silly to just make a bunch of copies of a single hammer. That's why I'm going to make a bunch of copies of three different hammers, each uglier than the last:

When building the mold box(es) be sure to use screws so you can take it apart later. You can glue it if you really want to, but you'll come to regret it. Maybe not today and maybe not tomorrow, but soon and for the rest of your life.
Step 3: Building a clay bed.
In order to make a two-piece mold, I build a clay bed to mount the original hammer into. This clay bed will determine the shape of the second half of the silicon mold, so you'll be designing the "parting wall" where the two halves of the mold will split apart.
It needs to be thick enough to allow for that 1/2" of clearance between the hammer and the bottom of the box.
Once there's enough thickness built up, the hammer is placed into the clay. Then it's time to smooth the clay bed and make sure that all of the edges are watertight. The last thing you want is to have silicon drooling out all over your workspace. It's considered a major moldmaking faux pas.
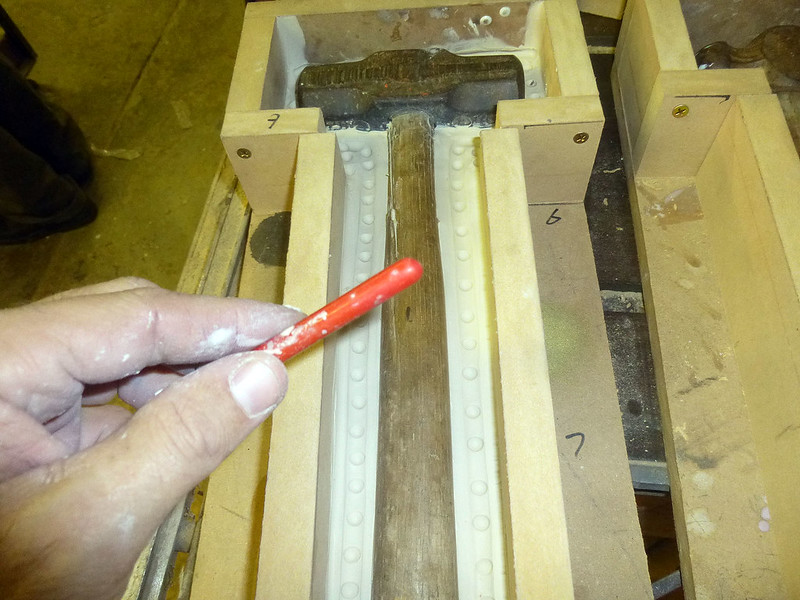
The last thing to do is to make "registration keys." These are dimples that will help to keep the two halves of the mold properly aligned when it comes time to make castings.
For my molds, I usually make registration keys by dimpling the surface of the clay bed with the back end of one of my sculpting tools:
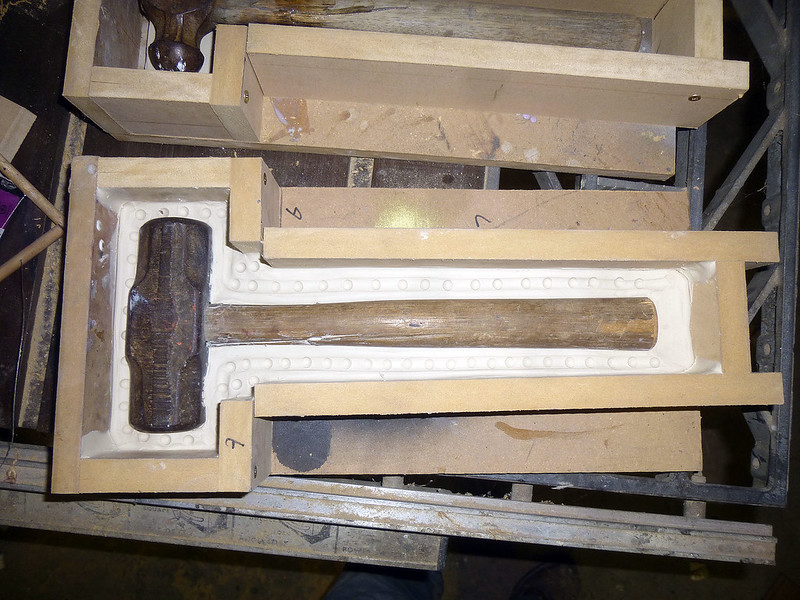
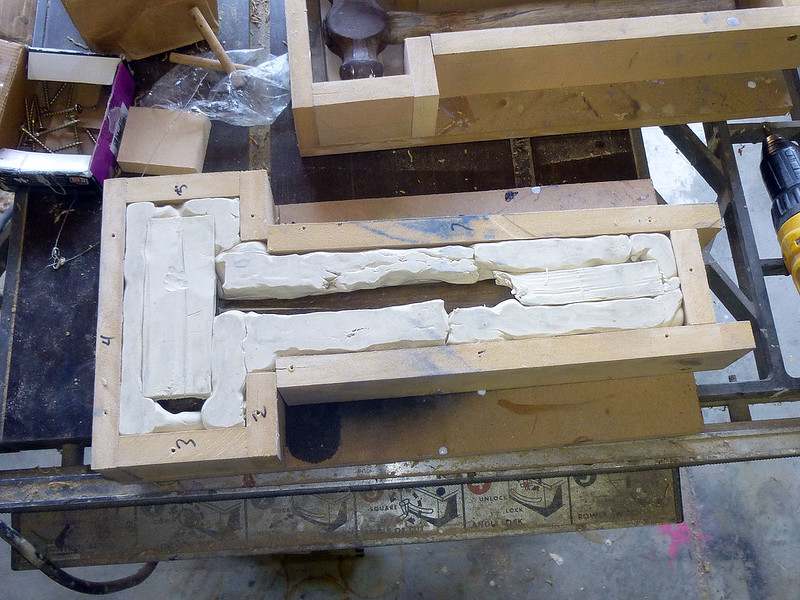
Here's a prime example of a perfectly executed clay bed, ready for rubber:
Step 4: Enter the Goop!
Now that I have a properly sized box with a perfectly built clay bed and masterfully sculpted registration keys, it's time to mix up a batch of rubber. In this case I'm using a two-part, tin cure silicon RTV (Room Temperature Vulcanizing) moldmaking rubber which is dirt cheap, but I don't like it so I won't recommend it for fear of getting angry emails from former fans. Instead I'll recommend trying something from Smooth-On. It's better.
After mixing the rubber in accordance with the manufacturer's instructions, it's time to pour it into the mold. At this point, you want to avoid introducing any additional air bubbles into the mixture. Bubbles will show up as flaws on the cast pieces that will take time to repair. Time saved by cutting corners at this stage will be paid for later. With interest.
When you pour the rubber into the mold, start by pouring into a corner and allowing the material to flow over the part(s) in the mold box. I'll usually raise the mixing container to seemingly ridiculous heights while pouring:
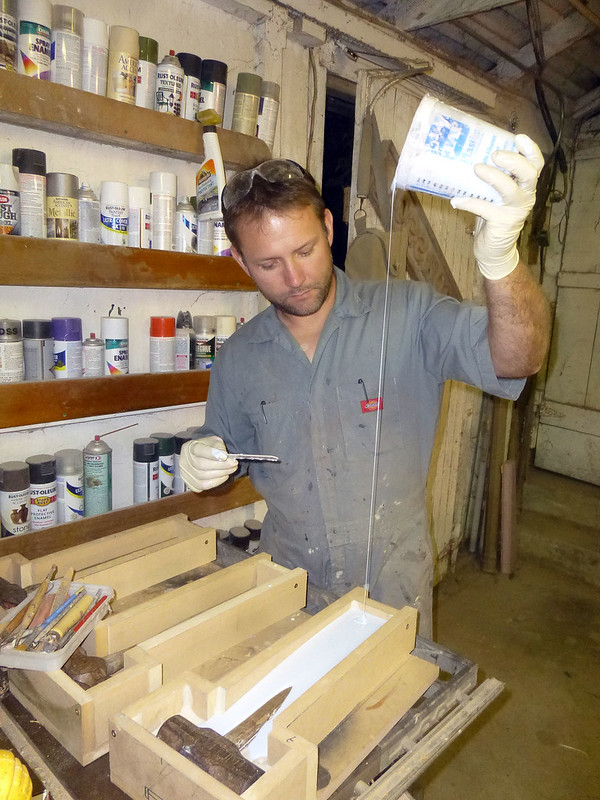
It's not just for panache that I do this (although you can't help but be impressed with my rubber-pouring flair). The rubber stretches out to a tiny thread as it falls, popping any entrained air bubbles on the way down.
Now you can be even more impressed with my rubber-pouring flair.
Since I'm cheap and miserly with my goo, I'll often take chunks of old, dead molds and sink them into the batches of rubber as I'm pouring. These pieces will bond to the new rubber and become an integral part of the mold when it's all cured:

If you don't have old, dead molds laying around for this purpose, you can just go ahead and pour in more new rubber. This is merely a cost-cutting measure.
Once you've filled the mold box all the way up to the tippy top, leave the mold to cure for however long the manufacturer suggests. I suggest going home and getting a good night's sleep. Or reading a book. Maybe going outside... or shopping... or finally asking that someone special out on a date. Whatever you need to do just to keep you from poking your sticky boogerhooks into the freshly poured rubber before it cures.
Step 5: Clay Bed Begone!
Having spent some quality time away from the molds, I return to find the rubber has cured and the molds are ready for me to mess with them again. I start by flipping the whole arrangement over, unscrewing the bottom of the box and peeking inside:
Gross, look at all of that clay getting in the way of my beautiful new silicon rubber. Let's get rid of it:

As you can see, everywhere I made a dimple in the clay there is now a matching bump in the newly cured rubber:
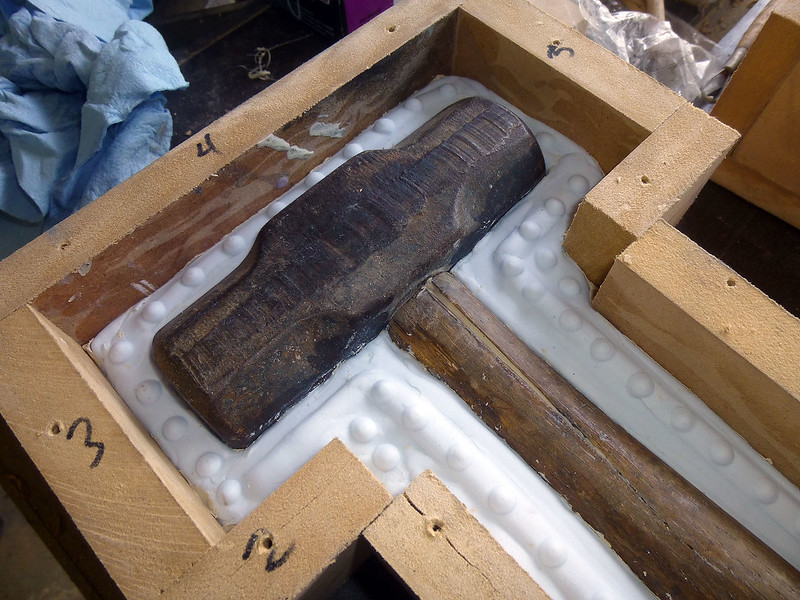
This will become an important plot element as our story unfolds...
Step 6: Pouring the Second Half of the Mold
If you only remember one thing about silicon moldmaking rubber, it's this:
Silicone sticks to almost nothing except for more silicone.
And don't eat it.
Two things. Dammit.
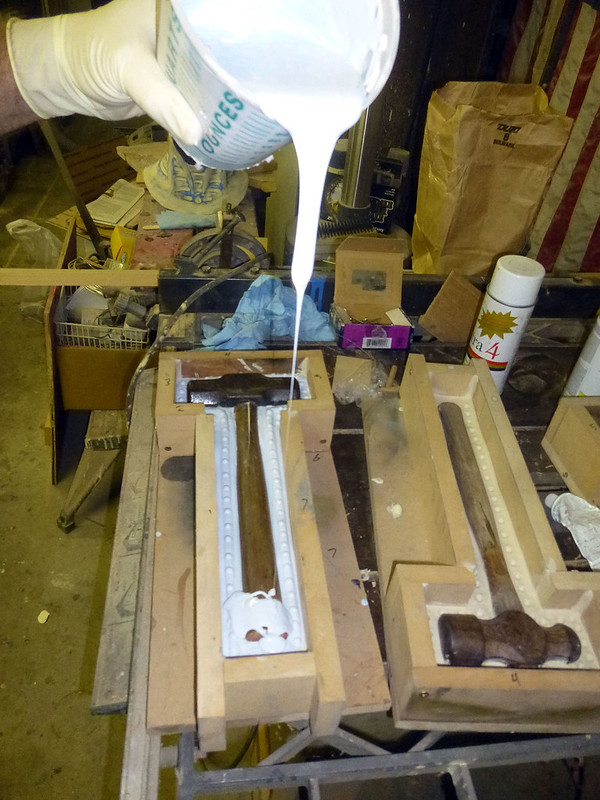
Before pouring the second half of the mold, something must be done to be sure that the two halves won't stick to each other and undo all of that hard work spent making the clay bed. This calls for some kind of release agent. Petroleum jelly will work, but I prefer something that I can spray on in an extremely thin coat so that the two halves will still meet up nice and tight. So far I've had good results with this Ultra-4 spray.
According to the instructions on the can, "A little goes a long way. A lot does no better." I don't really subscribe to that notion. I use a lot. Then I use a little more. It goes a long way.
After spraying on more mold release than I probably need, it's time to mix up another batch of rubber and pour it into the box just like I did for the first half:
When the box is filled all the way to the tippy top, it's time to set it on a level surface to cure overnight. Since my girlfriend** is currently overseas, I spend this time away from the molds enjoying fresh air and a period of much-needed rest. You can do as you must.
Having done so, move on to...
Step 7: Opening the mold.
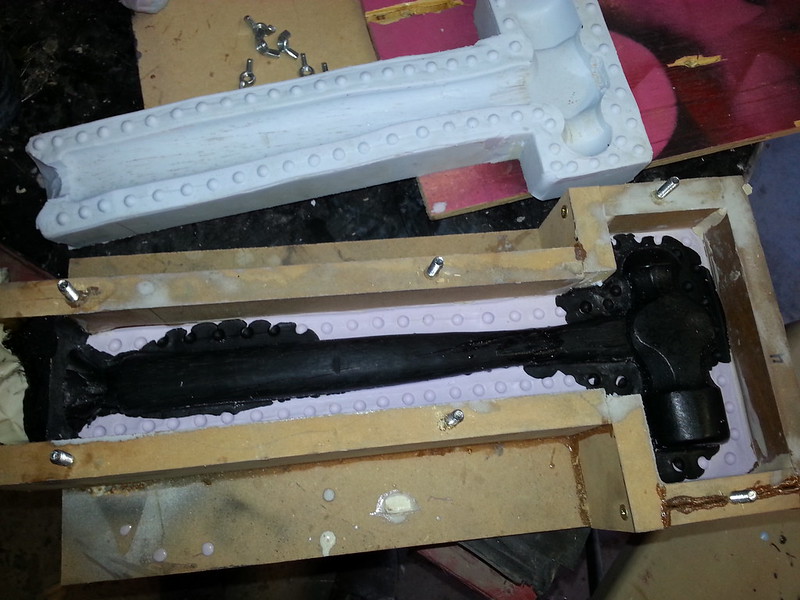
Once the silicone has cured, it's time to pull the mold apart:

Ta-da!
Having successfully separated the two halves of the mold, I cut a funnel shape into the rubber at the end of the handle so I can pour casting material into the mold.
Step 8: Put the Mold Back Together
At this point I can go ahead and rebuild the box using glue and screws and making it permanent. I will not have to completely disassemble it again. In accordance with the prophecy.
To add a bit more snazzyness to the whole thing, I use hanger bolts:
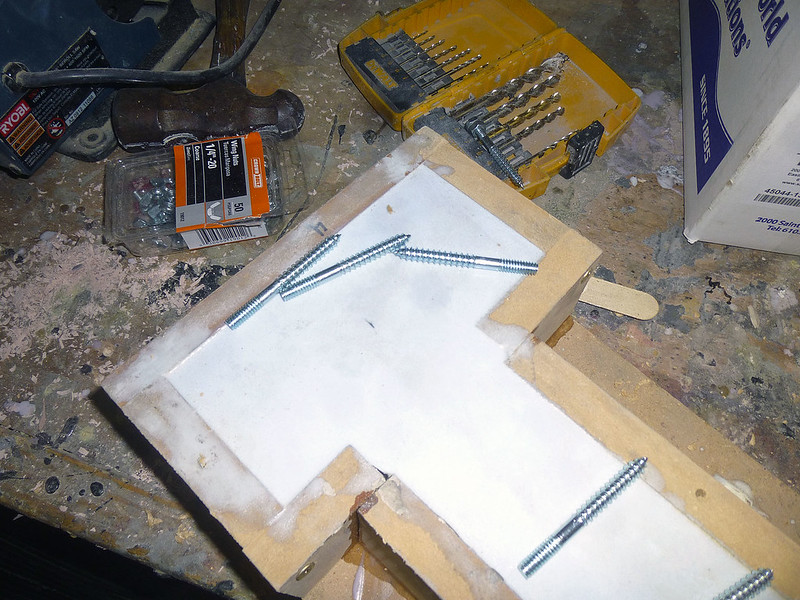
These have wood screw threads on one end and bolt threads on the other side so I can mount them into the mold walls thusly:
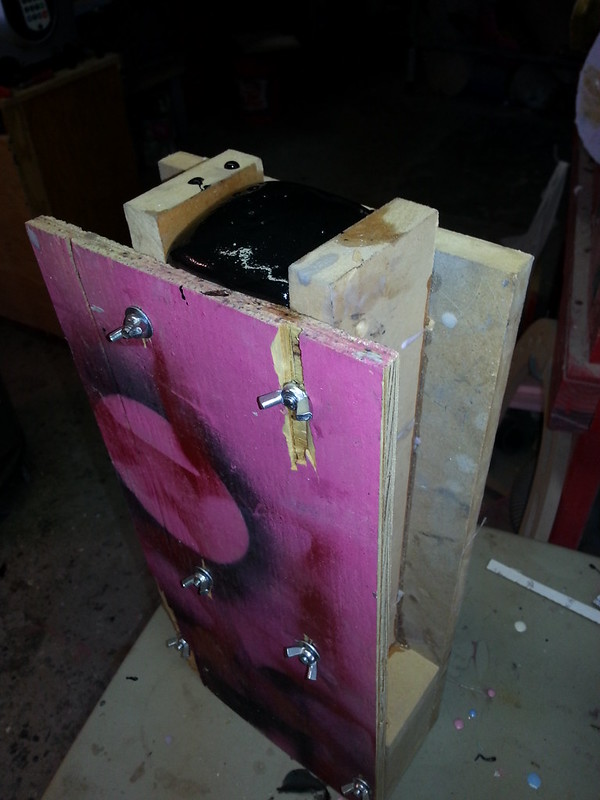
My favorite type of nuts are cashews. My second favorite type of nuts are wing-nuts. I use them to hold the lid on:

Cashews have no practical application here.
Since I'm using a 2-part flexible expanding foam to make the final castings, the mold will have to be able to retain its shape against the pressure as the foam expands. Once the lid is clamped on, it's time to pour in some foam:

When it finishes expanding, a little bit of overflow is a good thing:
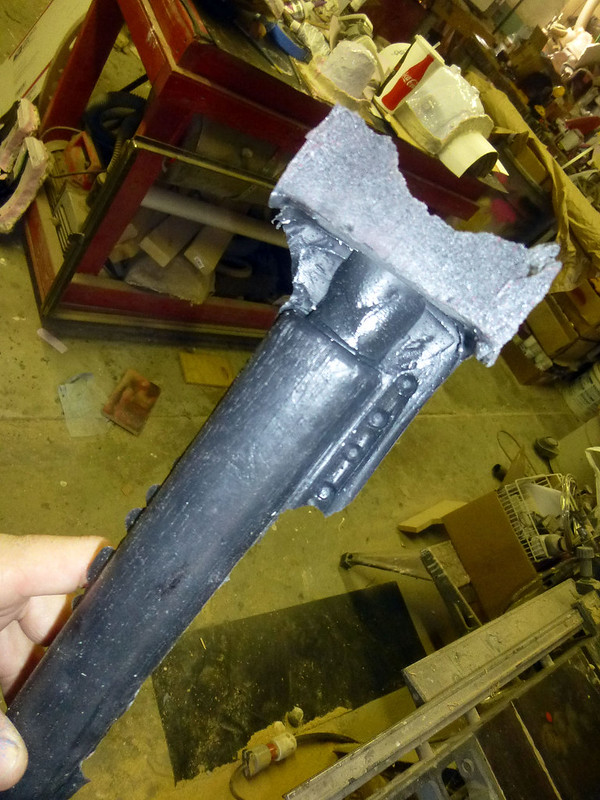
After allowing the foam to cure for a couple of hours, it's time to open up the mold again:
Since nothing will stick to silicone, removing the casting is just a matter of pulling it out of the mold:
Then I just need to trim off the excess from the pouring sprue and the "flashing" where the foam expanded into the seams:
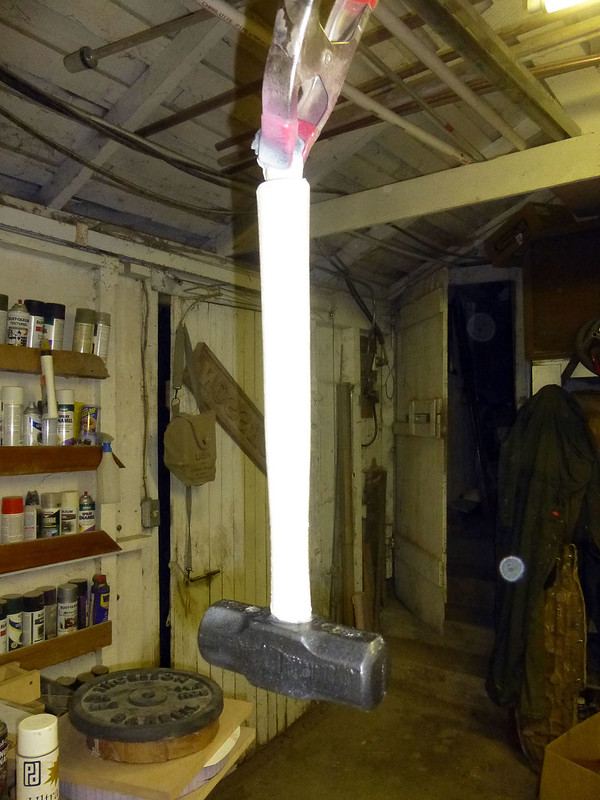
Once the excess is trimmed off, I sprayed on a tan color for the handle and a gunmetal color for the head:
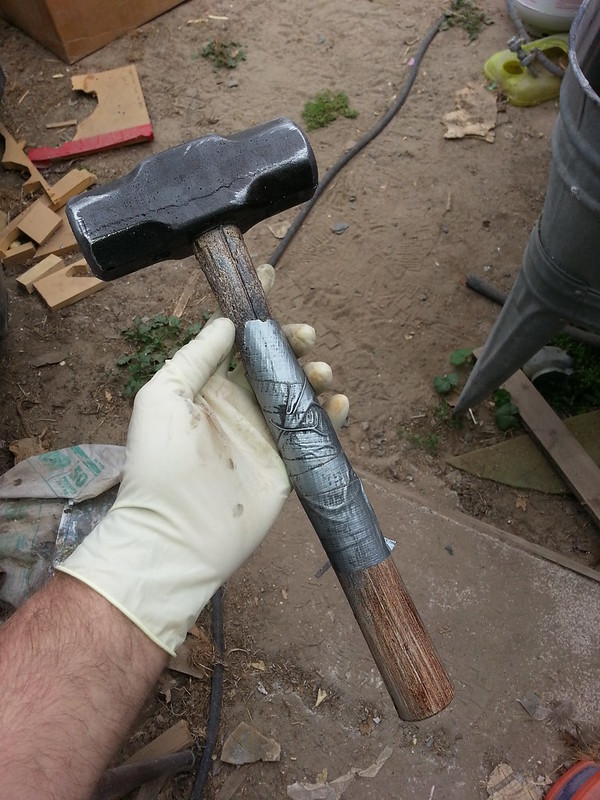
Then I gave it a bit of weathering and a coat of mahogany woodstain to bring out the grain texture. With the addition of a bit of duct tape and blackwash, it was done:

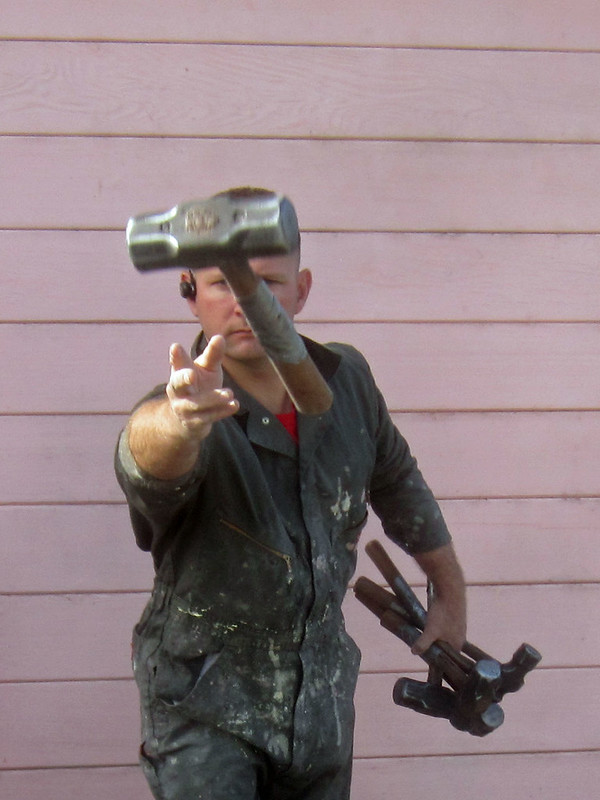
Seeing this thing hurtling toward your face is enough to make you drop whatever you're doing and duck***:
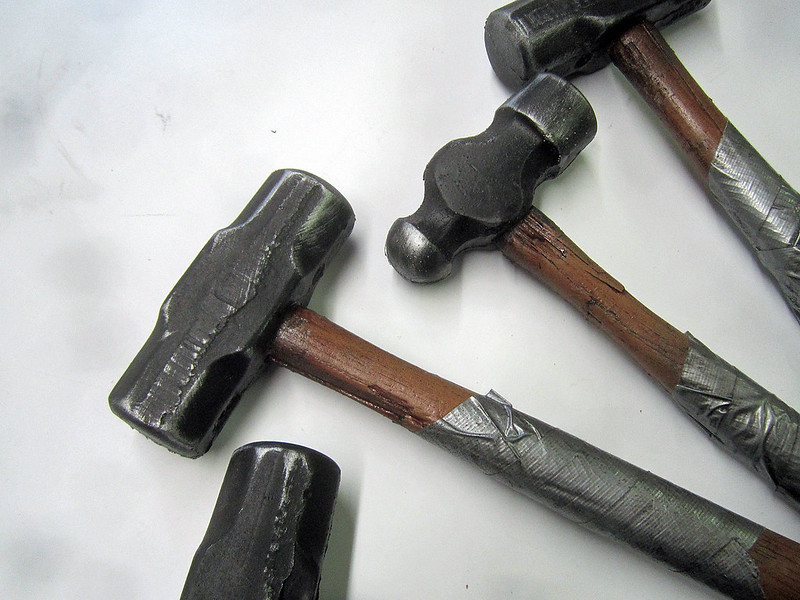
Here's a few more painted hammers in a slightly darker color:
And a detail closeup:
If you've been following along at home and building your own hammer mold, now is the time to congratulate yourself. With this masterpiece complete, it's time to truly bask in it's glory and wonder. Stand up. Applaud. Clasp it to your weeping breast in celebration as men do.
Then wing it at a friend:
And so a good time is had by all. Or at least one.
More projects upcoming. Be sure to subscribe so you don't miss any updates.
*I know, it's not exactly the same. What I'm saying is there's some leeway.
**She's totally real. Really.
***This has been repeatedly verified in a laboratory setting (my workshop) with a variety of test subjects (everyone who has unwittingly walked into my workshop in the last couple of weeks).
Funny and very informative. + subscriber. I'd like to hire you sometime as well (when you're available for freelance).
ReplyDeleteSure, thing. Shoot me an email at sthorsson99@yahoo.com with a description of the project you have in mind (pictures help), a rough idea of the budget you have in mind, and some idea of the timeline you need it by.
DeleteWhat kind of clay do you use and where do you get it? thanks!
ReplyDeleteI use a soft, oil-based clay like this one HERE.
DeleteBut you can get away with just about anything as long as it won't cause problems for your silicone.
You do the same thing when you sculpt something out of clay right? How do you keep the clay bed from sticking to and ruining your sculpture?
ReplyDeleteDepending on the exact shape of your sculpt, you may end up building your mold completely differently. If this method is appropriate for the shape of your piece, sculpt it out of a very firm oil-based clay and use a soft water-based clay to build the parting wall. When you remove the parting wall, you can use a soft brush and some water to remove any residual water-based clay that is stuck to your sculpt.
DeleteThis is seriously awesome, thank you. I do have a quick question: You said, "rebuild the box using glue and screws and making it permanent", so how do you take it apart afterwards if you've glued it?
ReplyDeleteThe one side with the wingnuts is removable. The rest is glued/screwed together and does not need to be taken apart anymore.
DeleteExcellent tutorial. I love your writing style. I just saw your Master Chief helmet at Reynolds today, picked up a card, and the rest is history. Looking forward to more.
ReplyDeleteI can't tell you enough how helpful this is to someone like me just starting out- Thank you.
ReplyDeleteIn the first 101 (The one sided mold) you walked though, did you use the same kind of expanding foam or a different material?
I'm trying to understand how you made the first one so light weight, yet it doesn't have any of the excess that this 2 sided mold did out of the spout.
Last question- When using the expanding foams, is it unwise to use them for a surface that you want to come out as perfectly smooth? For example, if you were copying, oh, a vase or something that is smooth, would the foam be porous one it cures? Like micro pin holes?
I used the same foam on the barbell plates. I just clamped a board over the opening to keep it from expanding out of the mold.
DeleteFor a vase, I'd recommend rotocasting with urethane resin instead of casting in foam. I've got a lot of examples of helmets made using this same method.
many thanks. I have been looking for a few days for an answer which clay i can take. In Germany there are unfortunately no famous Prop Maker i could ask and others gave me no answer. Was the probably too stupid question i think :)
ReplyDeleteI am grateful for this blog to distribute knowledge about this significant topic. Here I found different segments and now I am going to use these new instructions with new enthusiasm.
ReplyDeleteรับ พิมพ์ ฉลาก สินค้า