
The first type of mold I demonstrated was a one-sided mold occasionally referred to as a "block mold." This is the type of mold you make when you need to replicate something with a flat side that has no details. When laid on that side, the piece has to have no significant undercuts where bubbles will be trapped.
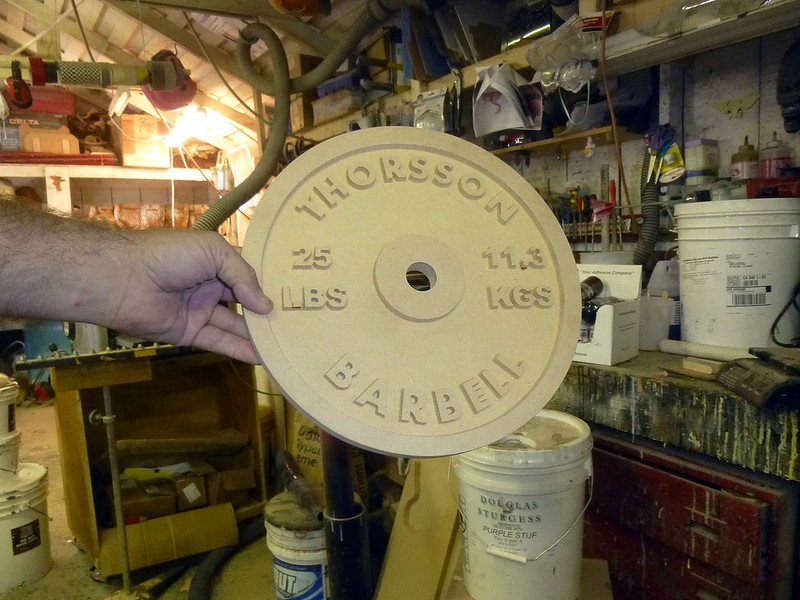
I decided that the perfect candidate for reproduction would be a simple barbell plate. I started by carving out a quick prototype on my CNC machine:

Here it is after a light sanding:
I gave it a couple of coats of primer to seal up the surface and then it was time to set it up for molding.
First, I glued it down to a piece of cardboard so it wouldn't float away once I poured silicone over it. Then I used more cardboard to glue together a watertight wall around the plate with an approximate standoff of one inch.
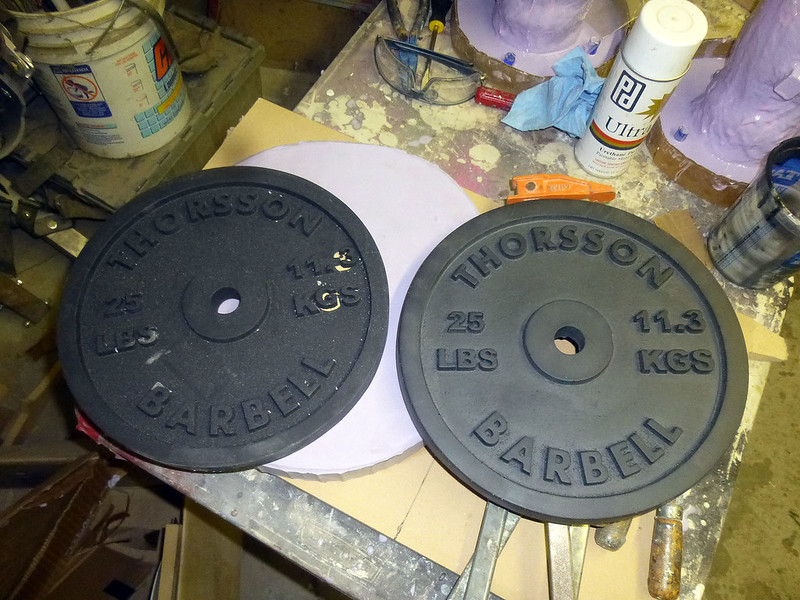
Here's a shot of the painted prototype with mold box built around it:

After double-checking to be sure that the box wouldn't leak, I mixed up a batch of silicone RTV moldmaking rubber and began pouring:
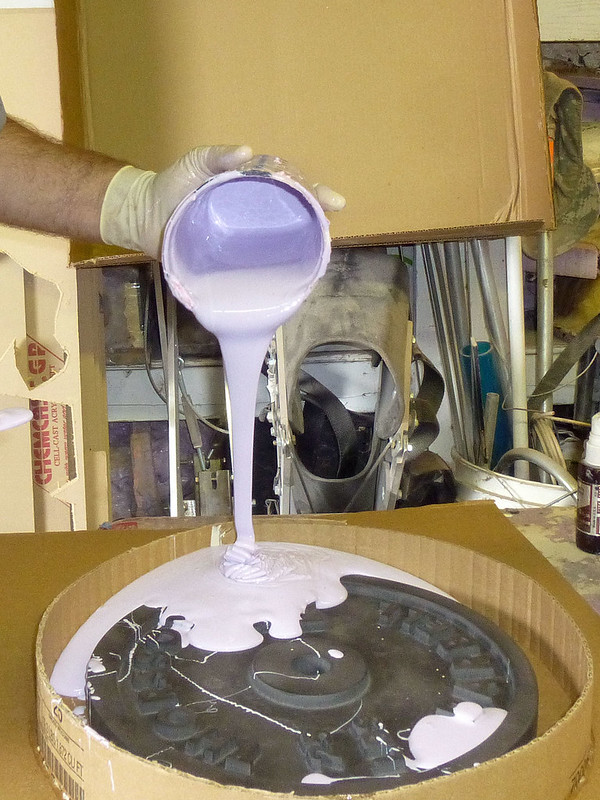
When pouring the rubber, it's a good idea to start pouring into a low part of the mold. This way the rubber will flow up and over the part in the mold without trapping as many bubbles against the surface of the part.
After filling the mold box so that there was at least 1/2" of silicone over the top of the part, I left it overnight to cure. You want that half inch of rubber so that any bubbles will have a chance to rise up and away from the surface of the piece you're replicating. Any bubbles in the rubber now will become warts on the copies when it comes time to make castings.
Once the rubber had completely cured, the next step was to flip the mold over and remove the cardboard:
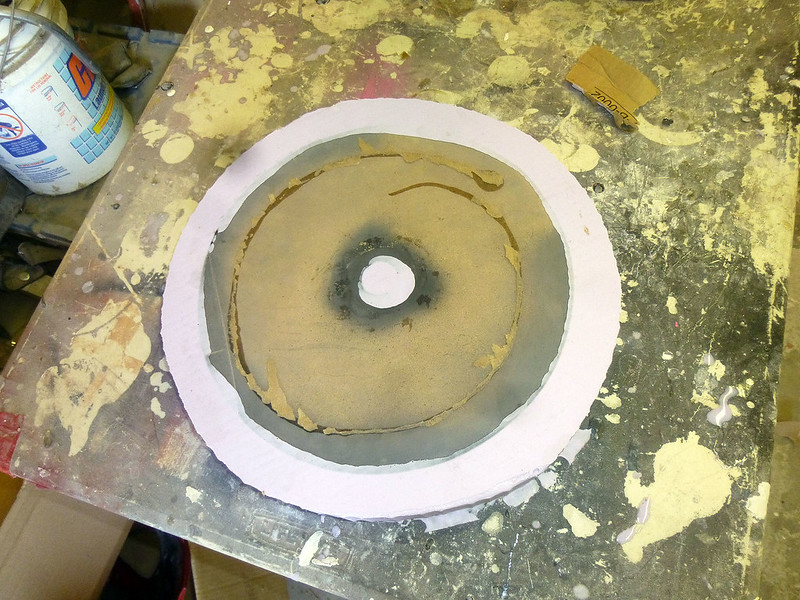
With the cardboard peeled off, you can peel the rubber off of the prototype:
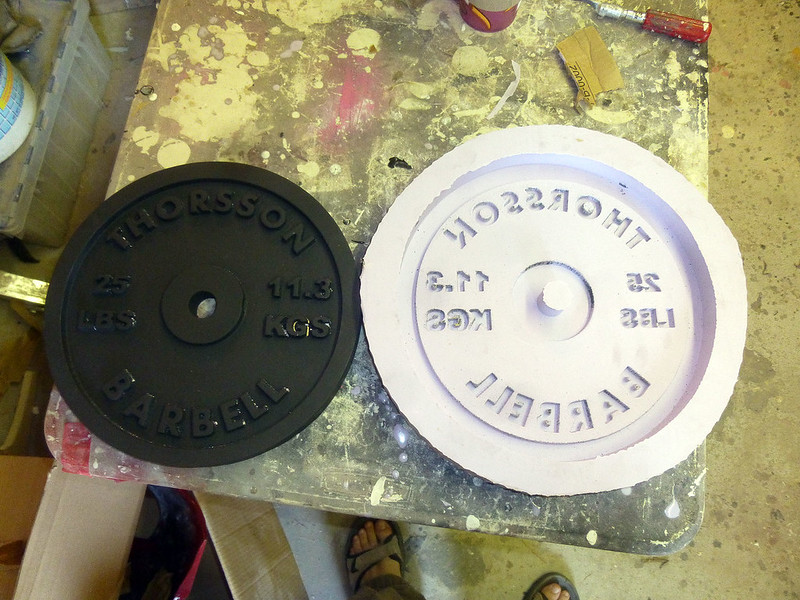
To make a copy of the prototype, it's just a quick matter of filling the silicone mold with a lightweight casting resin or expanding foam:
Depending on the quality of the silicone rubber you use, you can get anywhere from twenty to sixty castings out of a mold like this.
While it looks just like any other 25-lb barbell plate, this particular casting weighs about 4 ounces. It makes it look like I have really strong fingers:
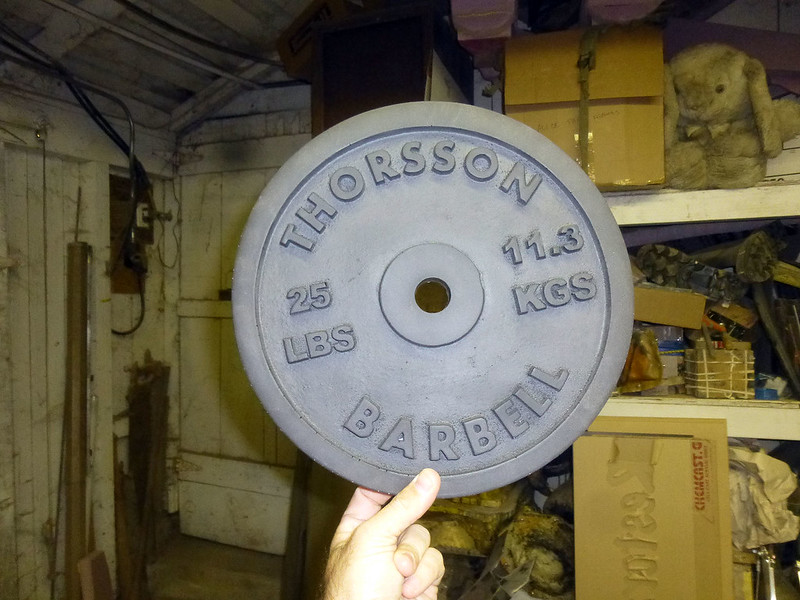
Since I cast this particular plate in flexible foam, it'll bounce when you throw it at someone.
Fun!
I'm thinking of starting silicon moldmaking and figured this was as good a place as any to start. Any suggestions?
ReplyDeleteRead everything you can get your hands on. Watch as many tutorial videos as you can find, especially those that are published by the manufacturers of the moldmaking materials. Start with something small. That way your learning curve won't be as expensive as if you flub something big.
DeleteAlso, have fun and follow all of the safety precautions on the labels.
Picture this: You are working (volunteer) for a low budget community theater in the props and costumes departments. The play you are currently working on is The Rocky Horror Show. You are the only one on props, and you have to make a ton of'em...in a very little timeframe. Then they cast a super scrawny kid to play the buffed up Rocky. The kid can't handle simple handweights!
ReplyDeleteYeah.....This tutorial would have been SO HELPFUL back then. lol
The 80 painted CDs on dowels served their purpose, but these weights would have been amazing to see up on stage, instead.
Really loving your blog, thus far! :)
what kind of expanding foam do you use?
ReplyDeleteHow did you paint the cast, given that it is flexible foam?
ReplyDeleteWhat kind of paint did you use, given that your cast is flexible foam? Thinking about cracking paint problems.
ReplyDeleteNone. The foam is tinted with black pigment. Even if they're torn in half, they're the same color all the way through.
Delete