
This beast makes a great first impression. When I first saw the trailer for the game, this is the one that made me say "I want that." It's massive and mean-looking and will look great hanging on my wall under the mounted heads of the monsters it's taken down.
In the game it's carried by a hunter named Griffin Hallsey. Here's a portrait of him:

If you're someone who likes to dress to impress, this is not a bad look. And while much of his swagger can be attributed to his jaunty hat or stylish vest, the thing that really catches folks' attention is the massive harpoon gun:

Very sexy.
Here's a shot of the harpoon gun all by itself::
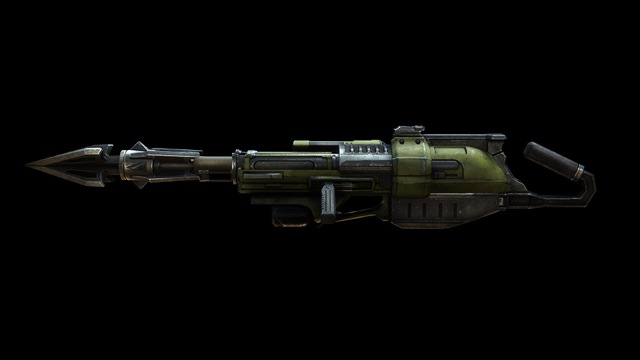
Still sexy.
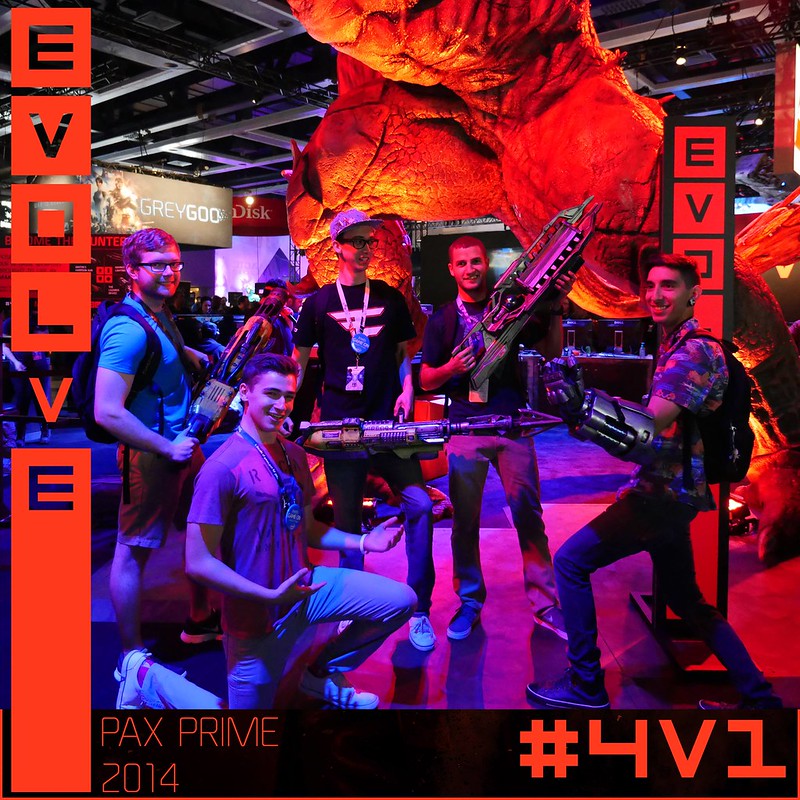
Over the course of three and a half weeks, my crew and I turned this in-game digital model into practical prop that could be carried around and shown of at conventions. Durable enough to be handled by the convention crowd, it was first passed around at PAX Prime in Seattle so folks could pose for photos with their life-size, 2-story tall Goliath monster from the game. Here's a quick video from the event:
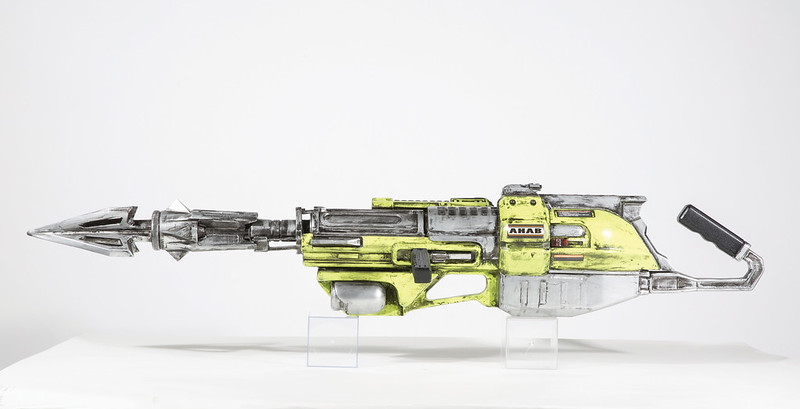
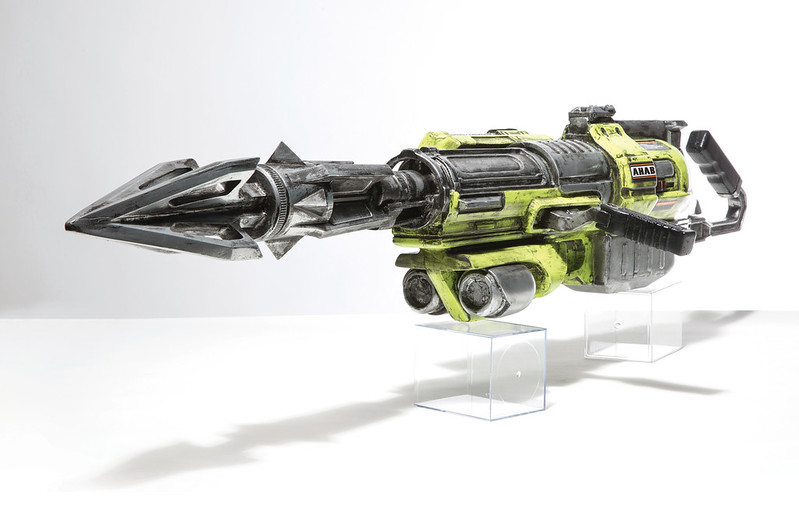
Here's a studio shot of the finished Piece:
For a detailed account of how it was made read on...
When the folks at 2K Games decided that this was one of the four pieces they wanted at their booth, they sent me a handful of renders. Here's one of them:
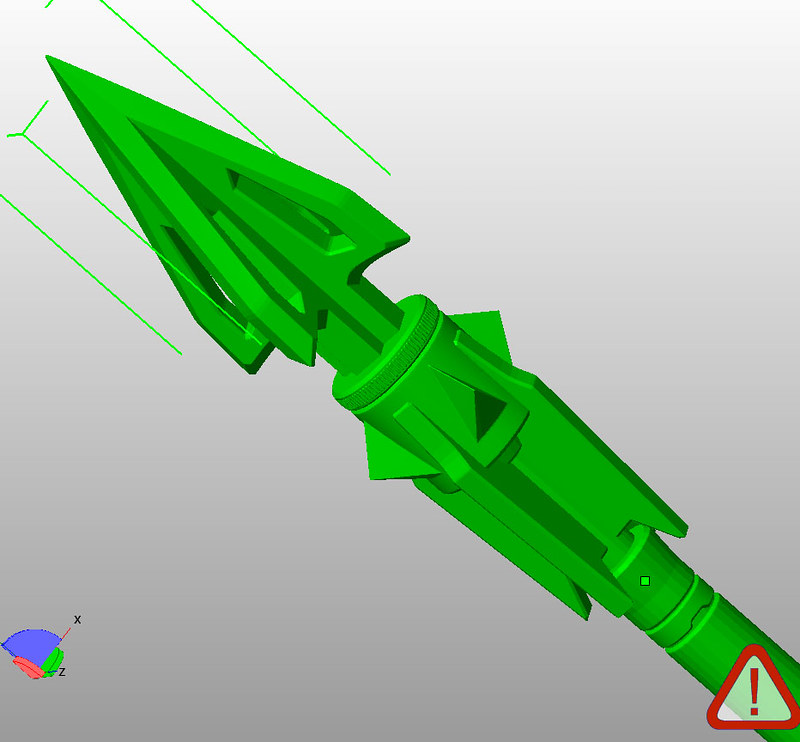
When I asked if they could send me the in-game digital model, they were happy to provide both the playable model and the highly detailed model used to render the gun for cinematic cut-scenes. Here's a render of that model without any of the surface textures:

And a closeup shot of the harpoon tip:
At first glance the model was detailed enough to make it useful for a mostly digital fabrication. The challenge at this point is turning a cinematic model into something that I can use for my Carvewright CNC machines as well as 3D printers. I started importing the model into Blender and separating it by loose parts.
There were a lot of pieces. A lot.
Many of them were hollow shells with open geometry or no assigned thickness. That's fine when you're making a model that just has to be used to render things in game, but it plays havoc when the machines are trying to figure out exactly what to do with the parts.
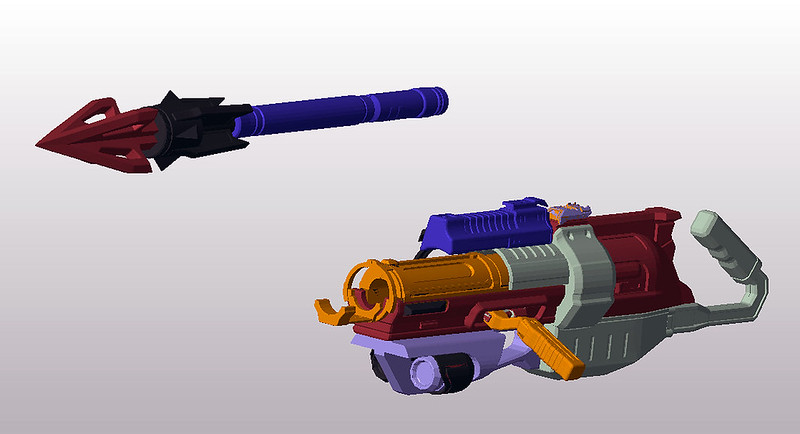
Using a combination of Blender, Netfabb, and occasionally even Sketchup. I spent a couple of days combining the various hollow shells into solid pieces and filling in all of the holes until I had a variety of solid parts that I could feed to the machines. In this picture, each of the different colored parts represents a separate piece that would be carved on the Carvewright or grown on the 3D printers:
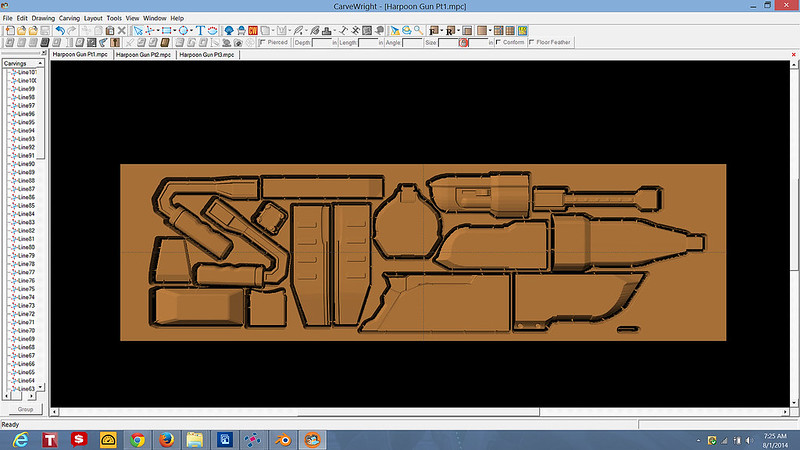
I started by converting each of the pieces into STL files and importing them into the Carvewright designer software. Then I sliced them into pieces that could be carved out of pieces of 3/4" Medium Density Fiberboard (MDF). Here's what the first two carving jobs looked like when they were laid out on the computer:

Then I uploaded the files to the Carvewright, plugged in my ear plugs, and let it work its magic:

To oversimplify things, the Carvewright works in much the same way as an inkjet printer. It feeds a board through slowly while a cutting head moves back and forth across the board, cutting it to various depths along the way. As the board feeds out of the machine, the parts take shape:
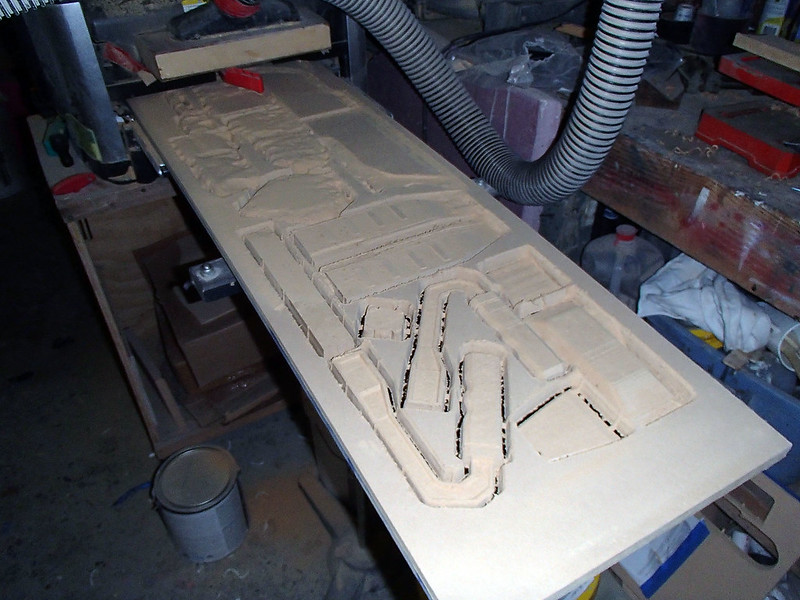
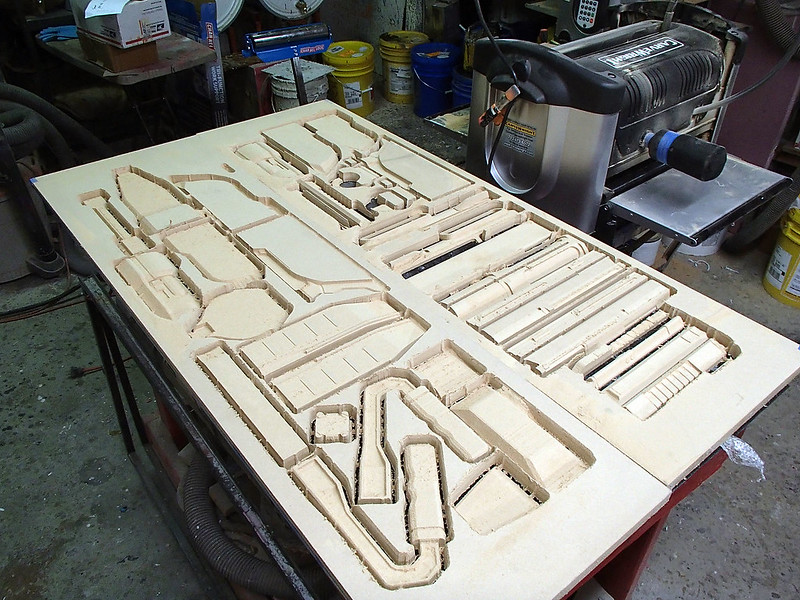
Here's the first two carving jobs laid on a workbench:
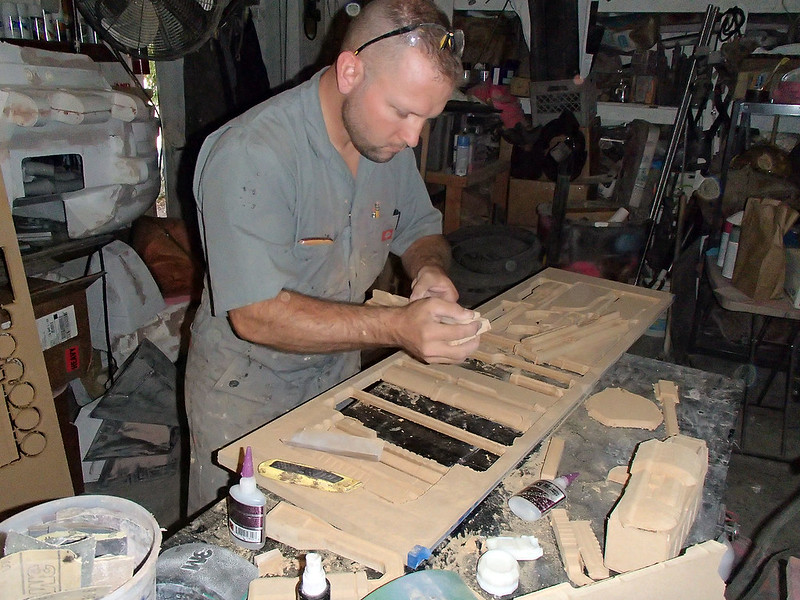
With all of the sliced pieces carved out, the next step is to cut them off of their support tabs and assemble them into fully-formed three dimensional pieces:
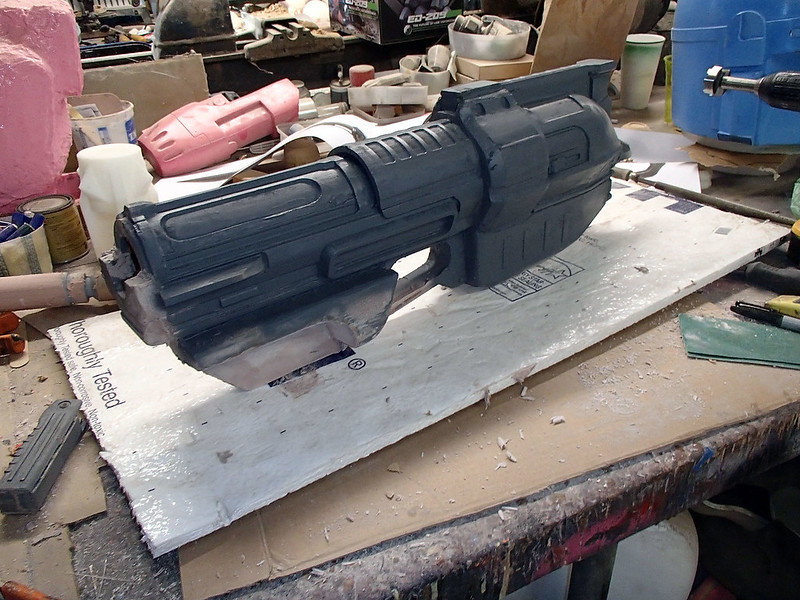
After a couple of hours of fitting and gluing, the main body of the harpoon gun had really started to shape up:
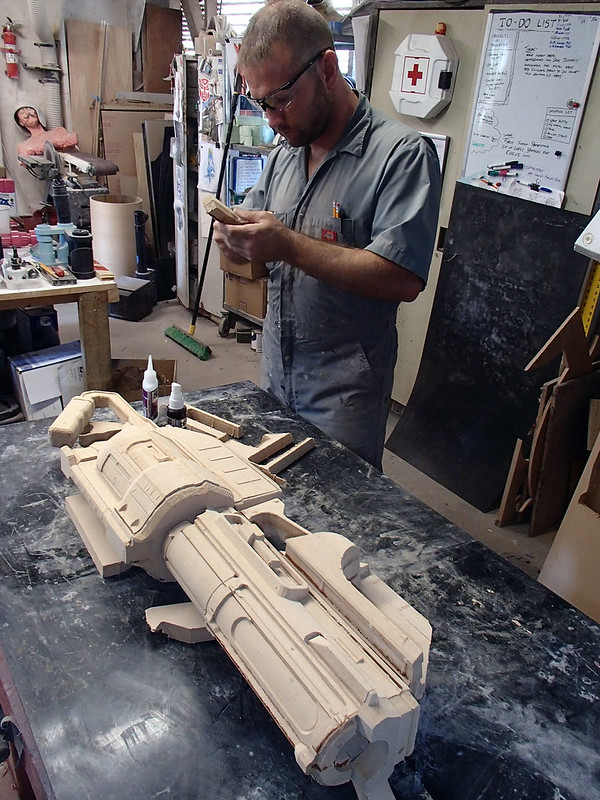
Not to shabby:
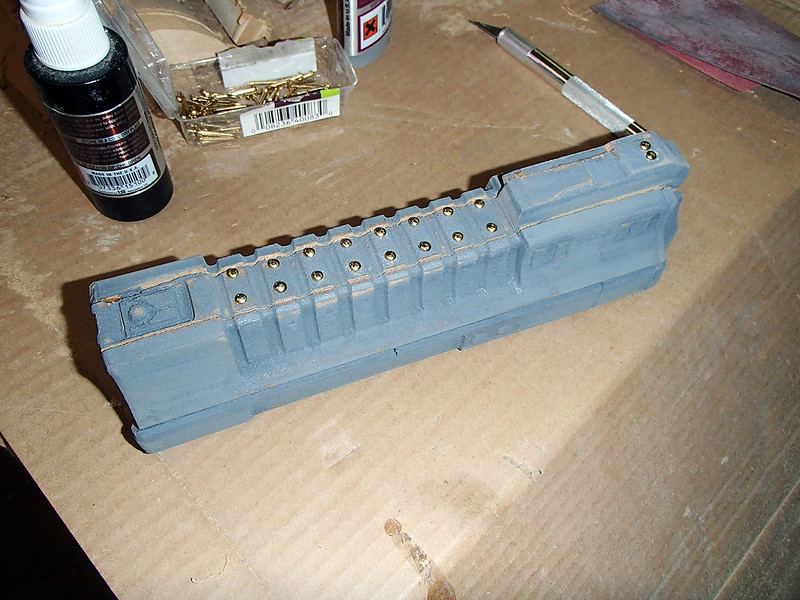
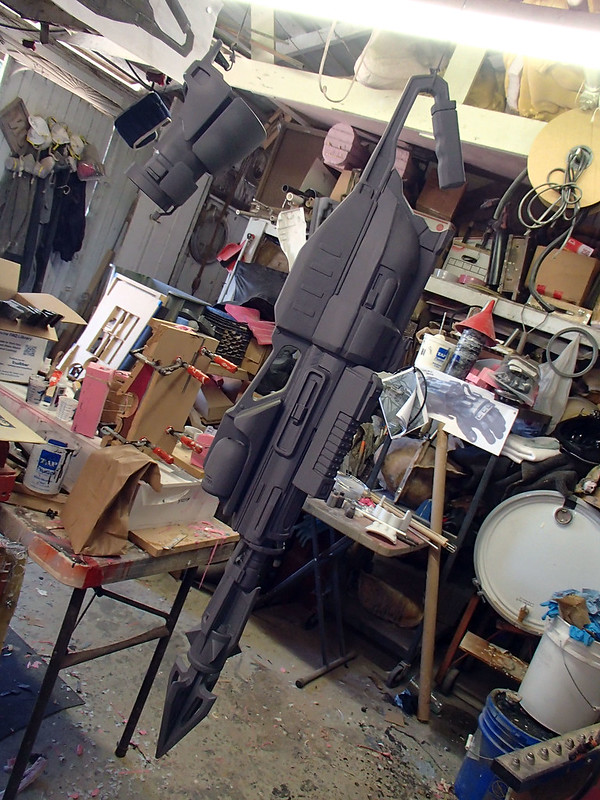
Since MDF is exceptionally soft, the next step is to soak the surface with primer to help bond the fibers together. So I start with a heavy coat, allow it to dry, then lightly sand off the fuzzy fibers that are sticking out higher than I want. After a couple of iterations of this process, it looked like so:
As you can see, there's still a lot of visible seams where the slices were joined together. This is a job for Bondo auto body filler:
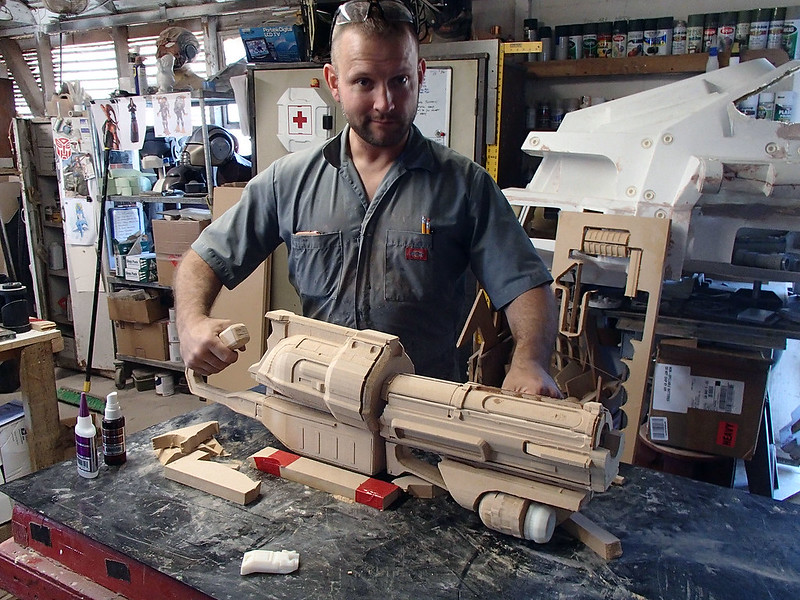
Some of the smaller parts had too many fine details that would've been obliterated by the 1/16" ball-nosed cutting bit on the Carvewright. So these pieces were grown on a variety of 3D printers. These included a Makerbot, a Zortrax M200, and an Objet30. Here's the main body with some of the printed parts dry-fit into place:
At this point in the project, there's a lot of sanding and filling to be done. At the end of each day it's often hard to see progress in the big picture:
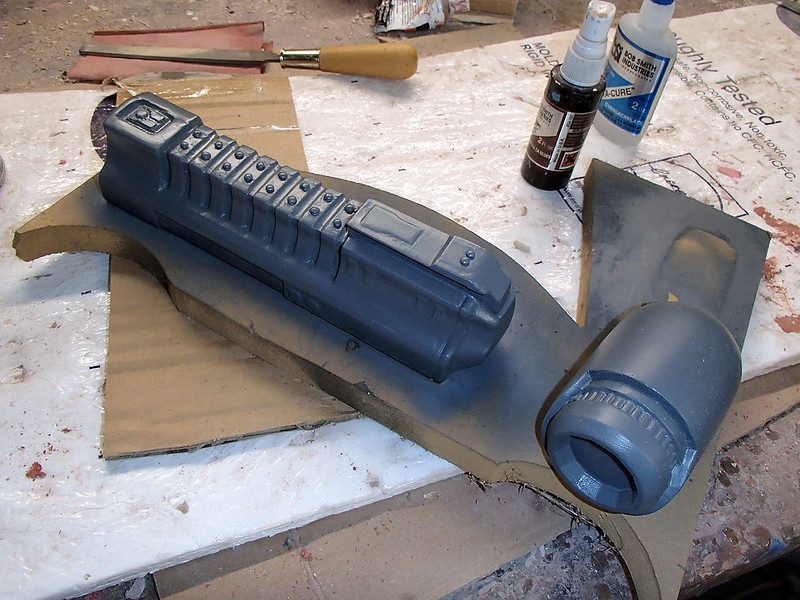
This piece goes on the top of the main body and, for lack of knowing better, I started calling it the scope:
Somewhere in the middle of all of the sanding and filling on the main body, the harpoon tip was ready to mold.
The problem with MDF is that it's soft, breakable, and horribly prone to moisture damage. The reason to use it is that it's cheap and easy on the Carvewright. But using it also means that I have to mold the pieces and cast them in something more durable and less likely to dissolve in water.
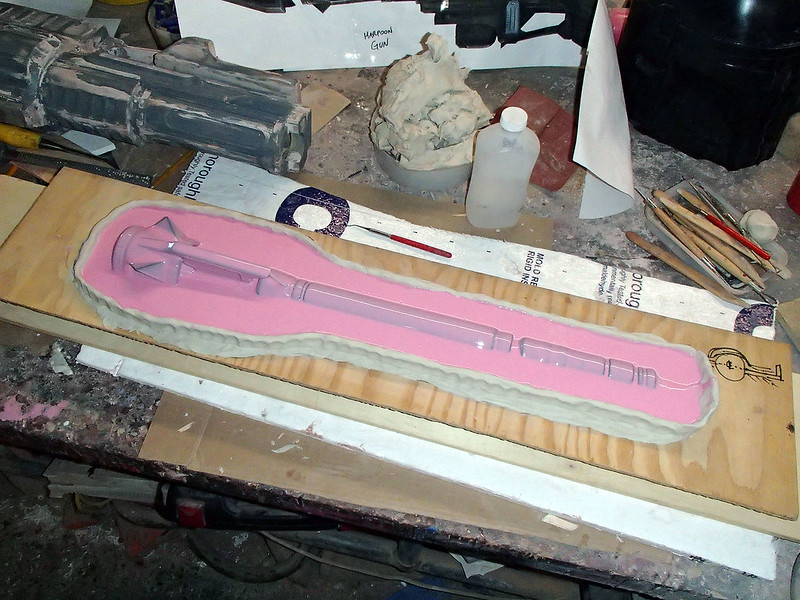
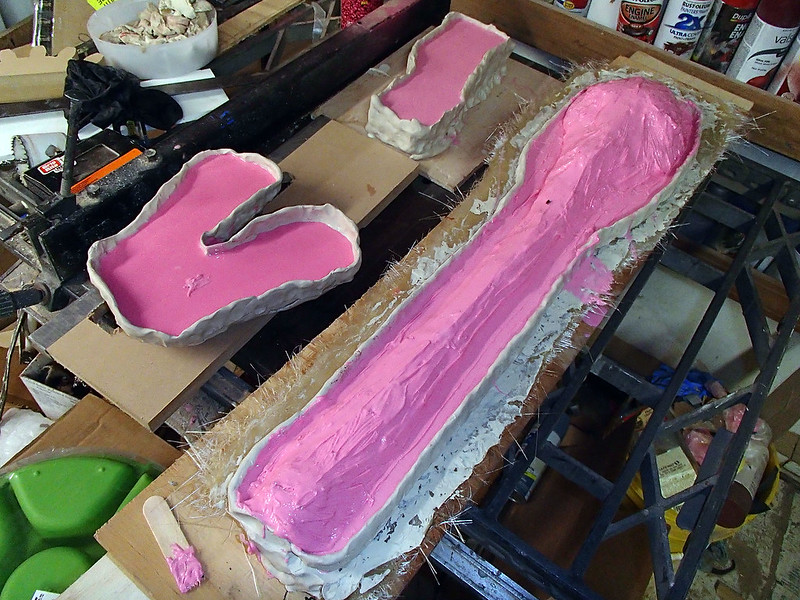
The harpoon tip had a lot of undercuts and holes in it. Rather than try to figure out a way to make a mold for the whole thing, I sliced the digital model into quadrants, carved one of them, and cast four copies of it. You can see that quadrant prepped for molding on the right in this pic:
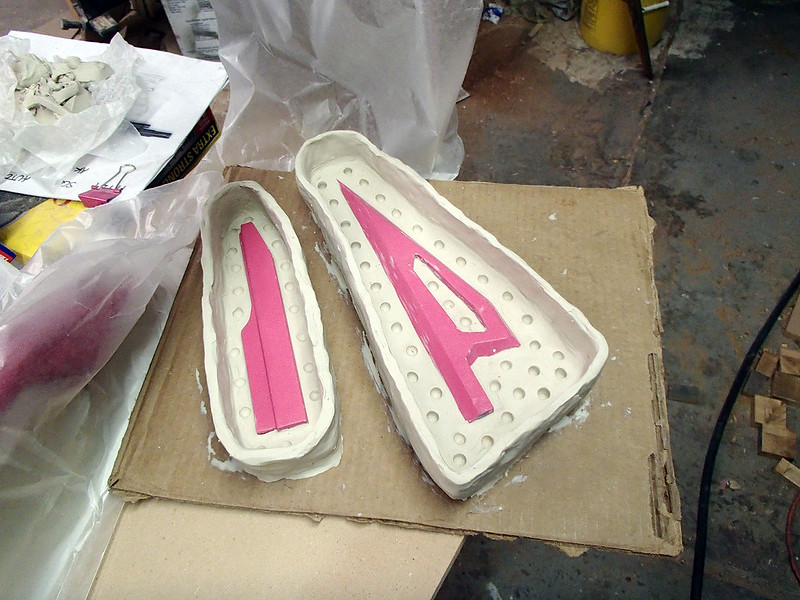
The piece on the left is for the lightning gun, but we'll get to that one at a later date...
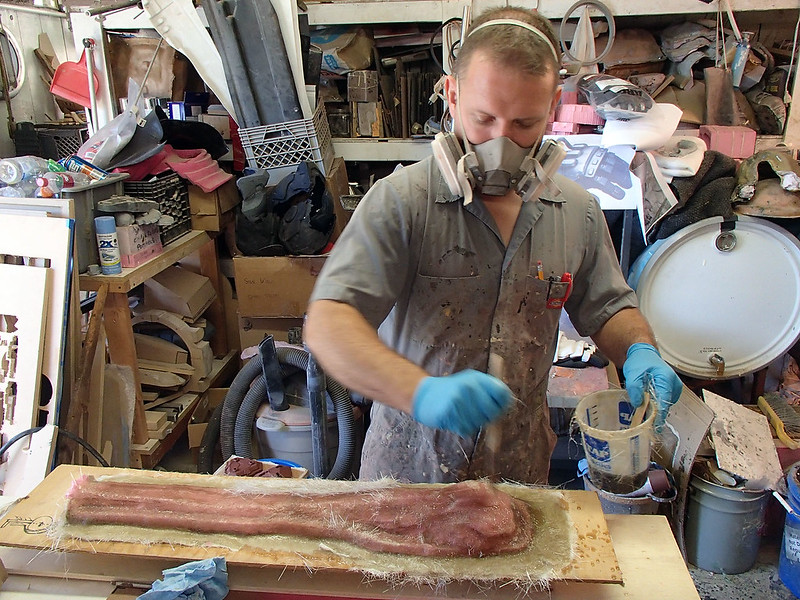
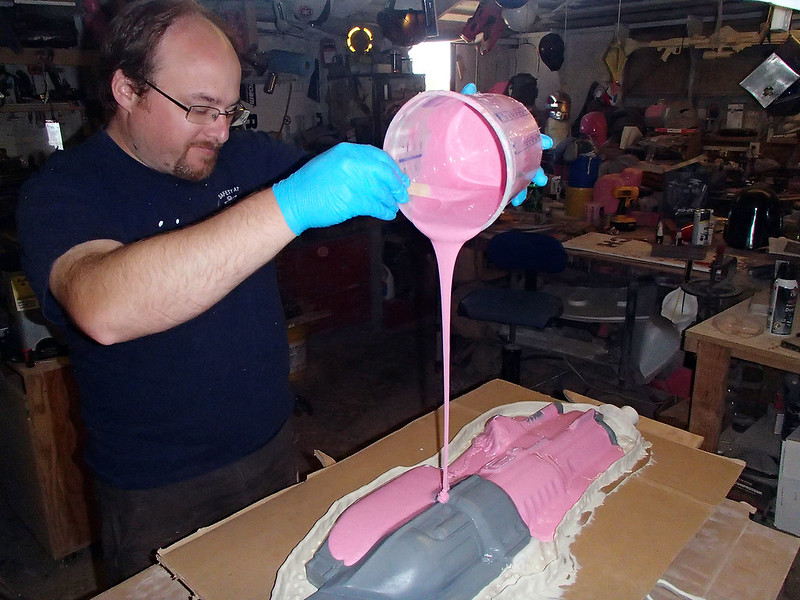
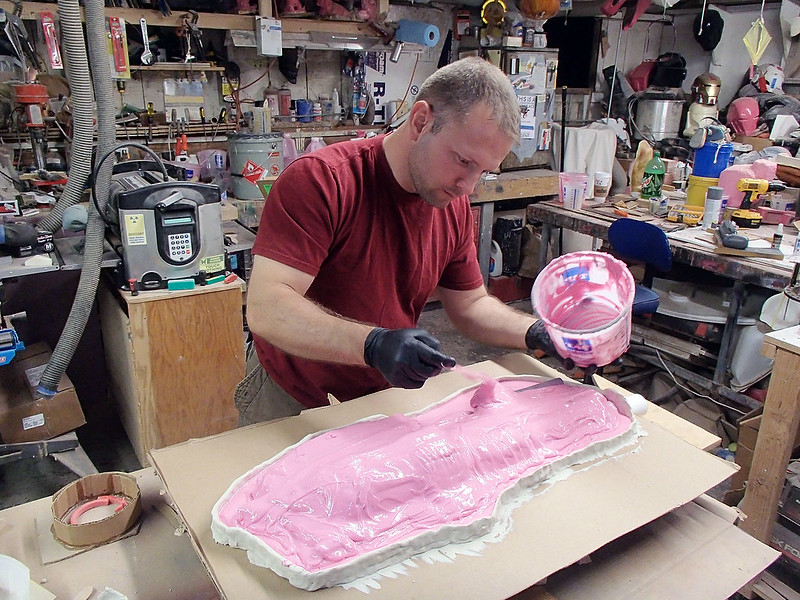
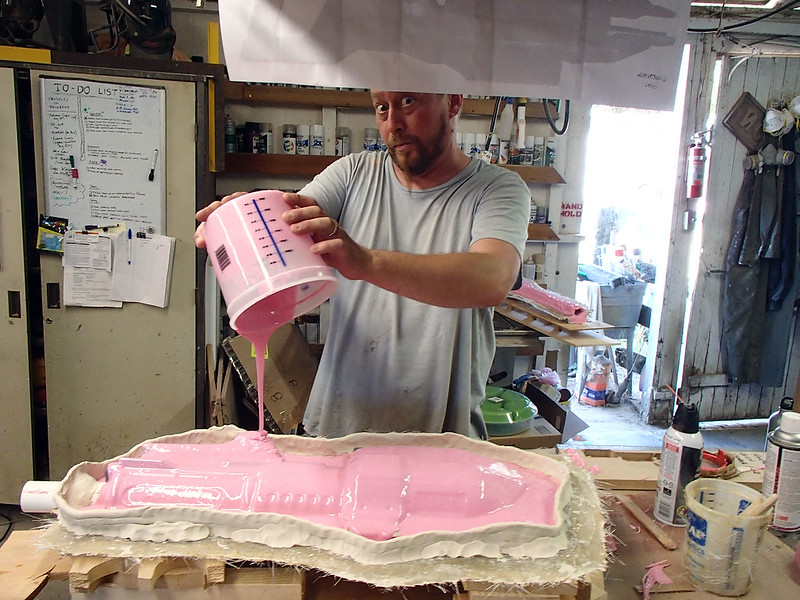
Once the clay mold box was made up, it was time to mix the first batch of silicone:
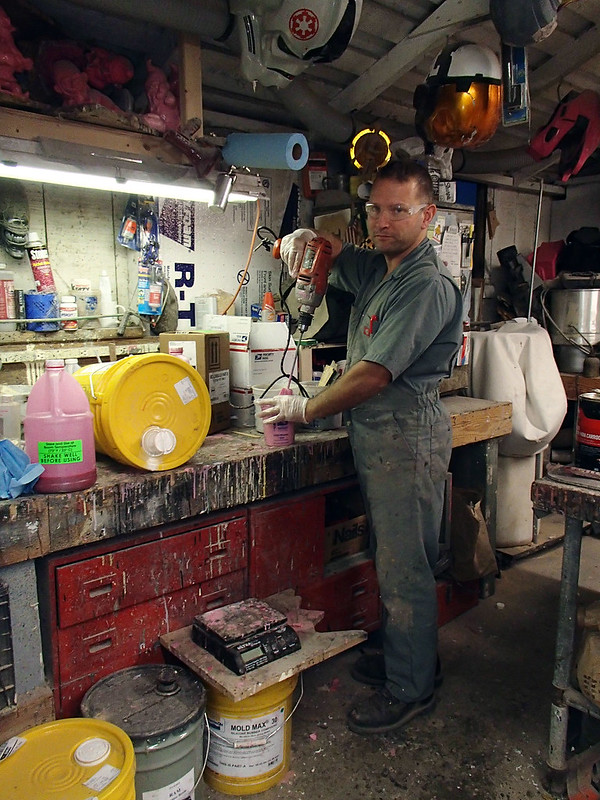
In this case I'm using Mold Max 30 from Smooth-On. I like it because it's relatively inexpensive and cured to a fairly firm rubber that doesn't distort or shrink very much in the process. It also has a long cure time that allows bubbles to evacuate without having to use a vacuum chamber. Here I am pouring the first half of the mold:
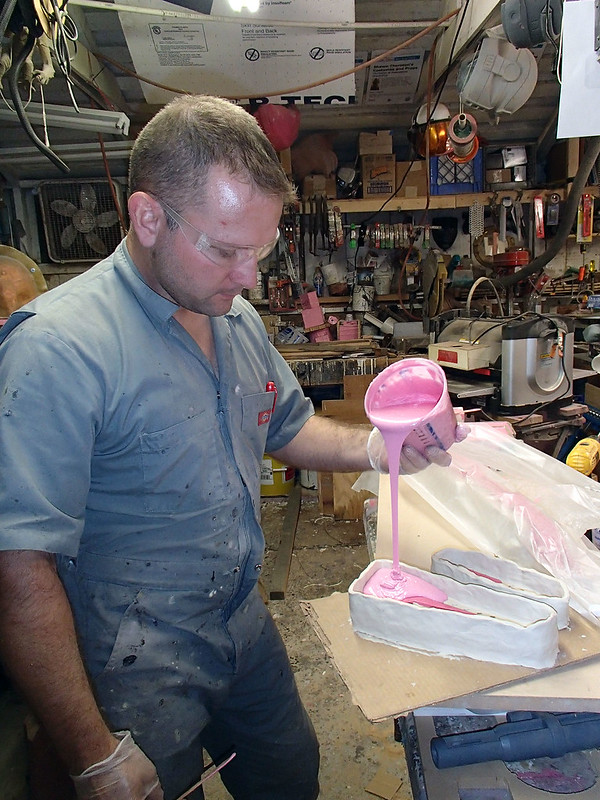
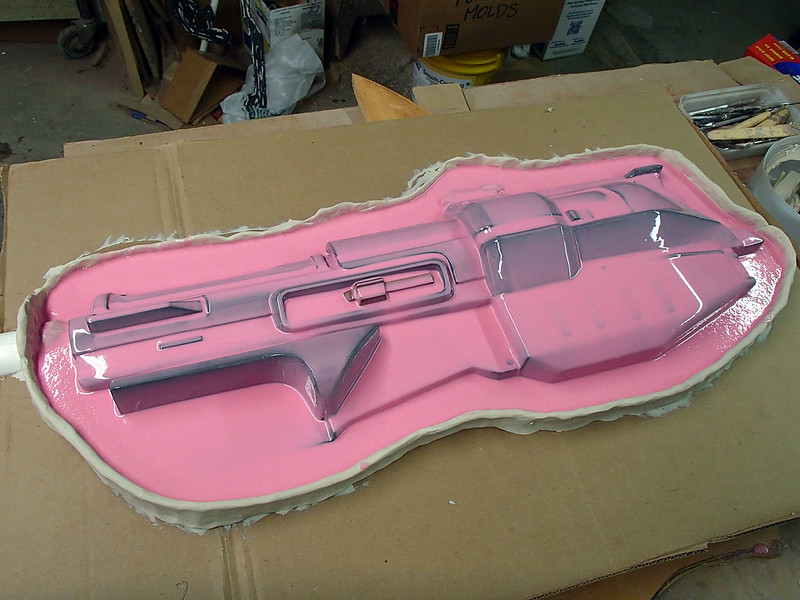
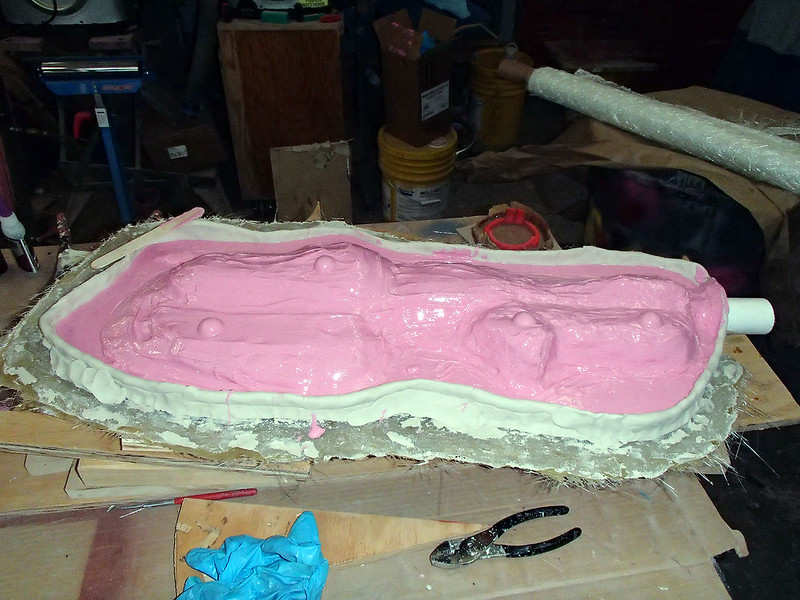
Poured:
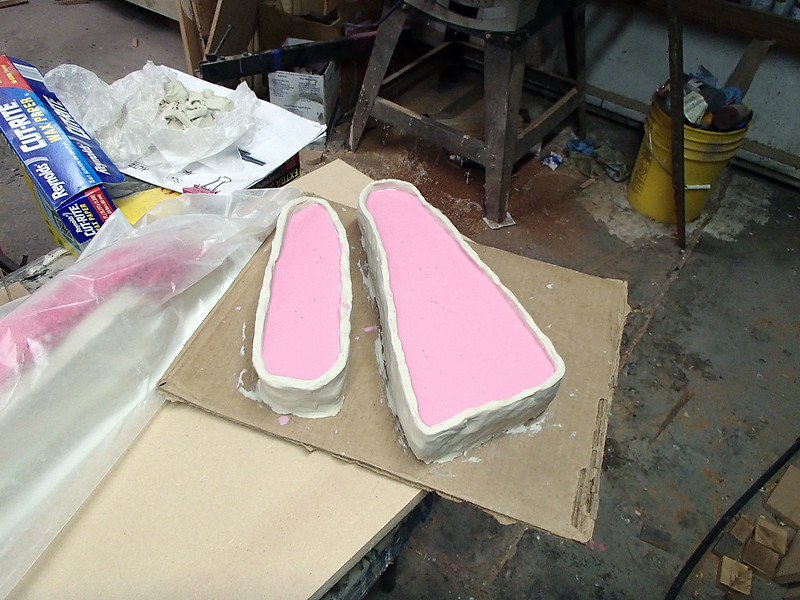
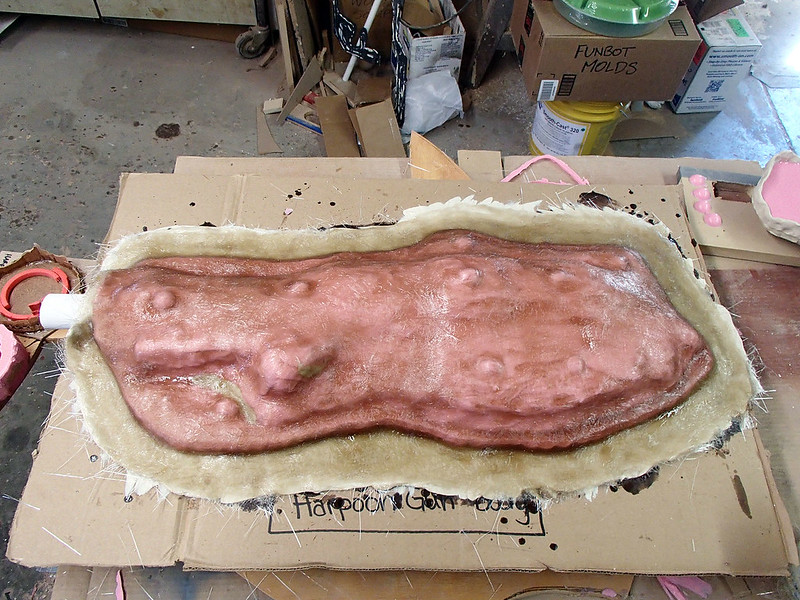
Once the first half had cured, I flipped it over, removed the clay from the back side of the part, and applied a release agent. Then I poured another batch of silicone to make the second half of the mold. Once it cured, the two parts separated cleanly and I had a 2-part block mold that was ready for casting:

While I was waiting for the rubber to cure, I was doing more sanding:
And more sanding:
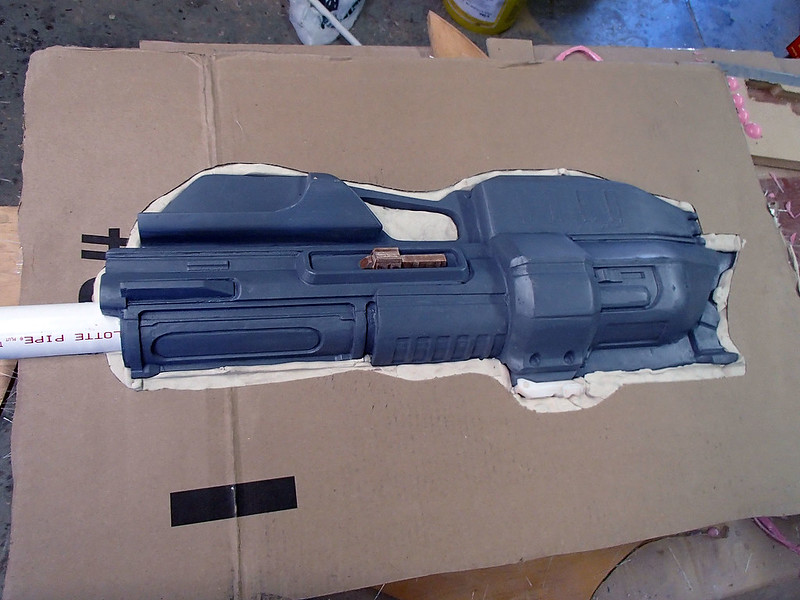
At the same time, the main body of the harpoon was taking shape:

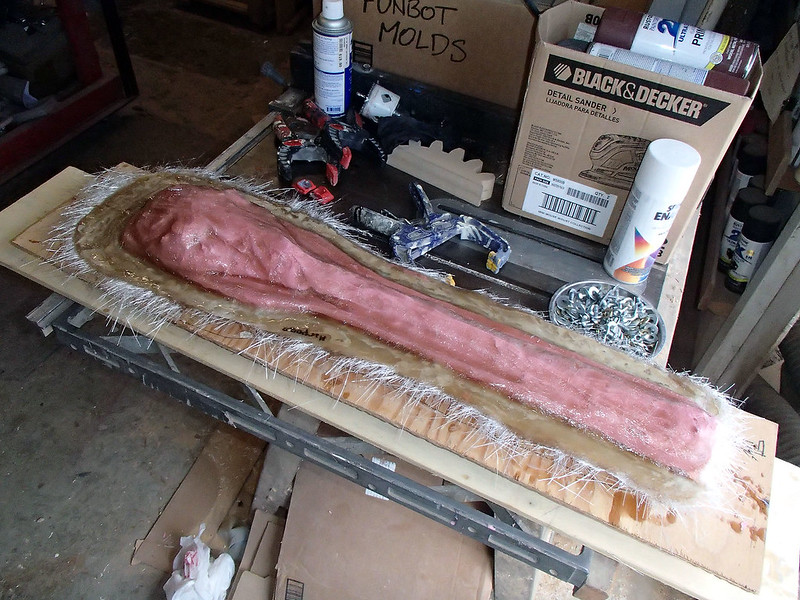
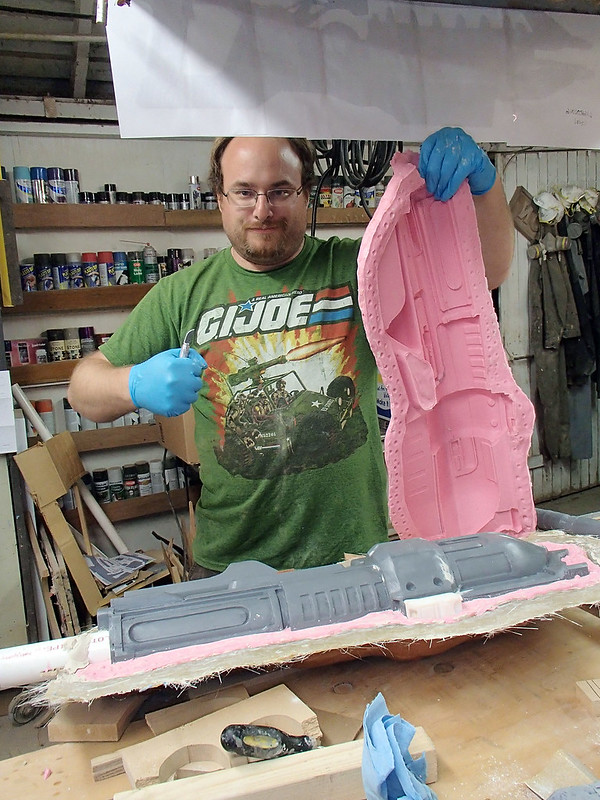
Since the harpoon body was made up of 3D printed parts as well as carved wooden parts, it wouls sure shatter into garbage if someone dropped it. So once it was sanded and smooth, I made a silicone mold of it as well. This mold was made a bit differently to save on expensive silicone. I started with a clay mold box as before and poured a thin "print coat" to pick up all of the details:
While I was doing that, my assistant Kate took over the sanding:

Don't tell her, but she might be better at it than me:
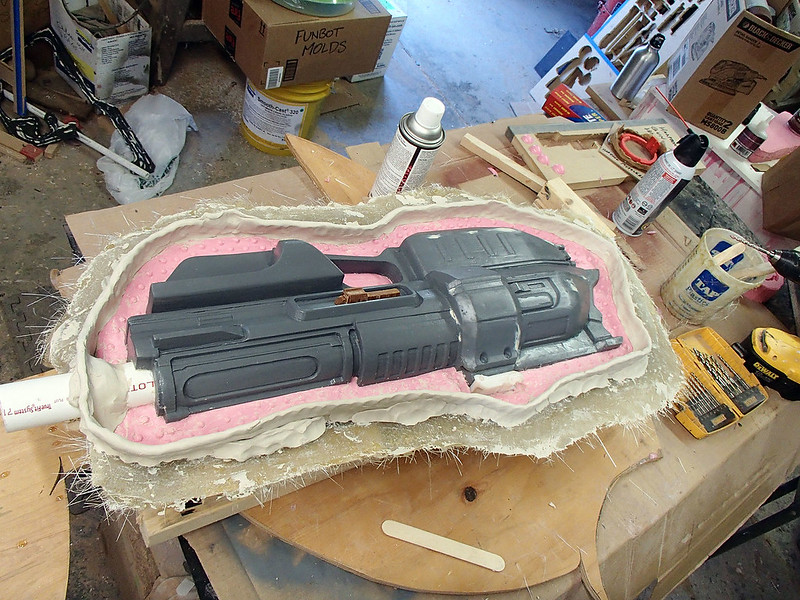
Once the print coat had cured, I added a thickening agent to the next batch of silicone and built up a rubber jacket about 1/2" thick:
If I'd just made a box mold big enough to cover the thick end of this piece, It would've taken about ten times as much silicone. But being a weird lumpy shape like it is, I can't exactly clamp two halves of this mold between a pair of boards. Instead, I have to make a fitted "mothermold" to keep everything straight.
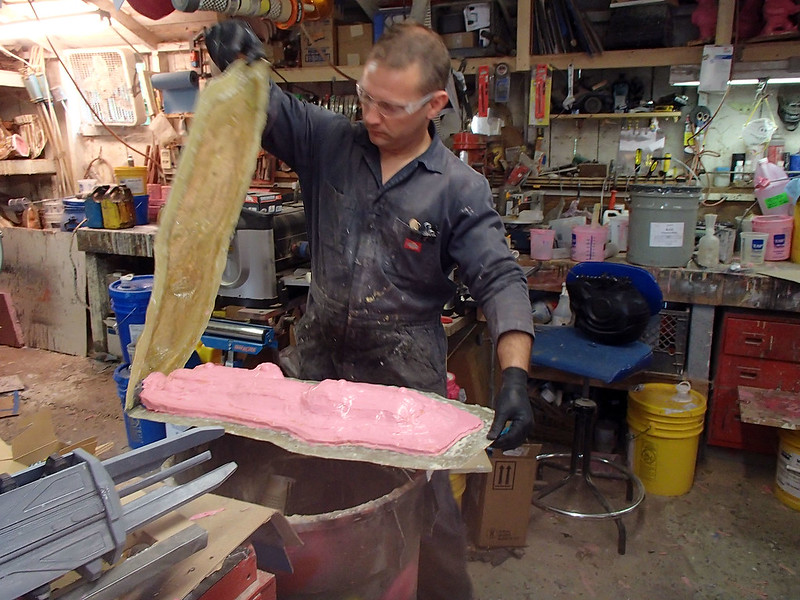
So once the silicone cured, I laid up a fiberglass shell over it:
When the fiberglass had cured, I flipped the whole arrangement over:

After peeling off the clay parting line, building up a drip wall, and applying a release agent to keep the 2nd half of the mold from bonding to the first half, I laid up the silicone on the other side of the harpoon body:
Then built up the 2nd half of the fiberglass mothermold:
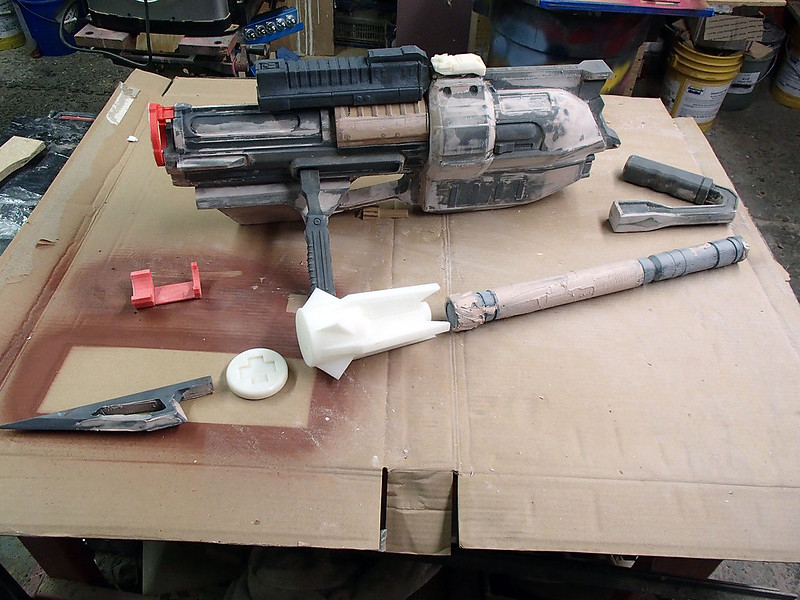
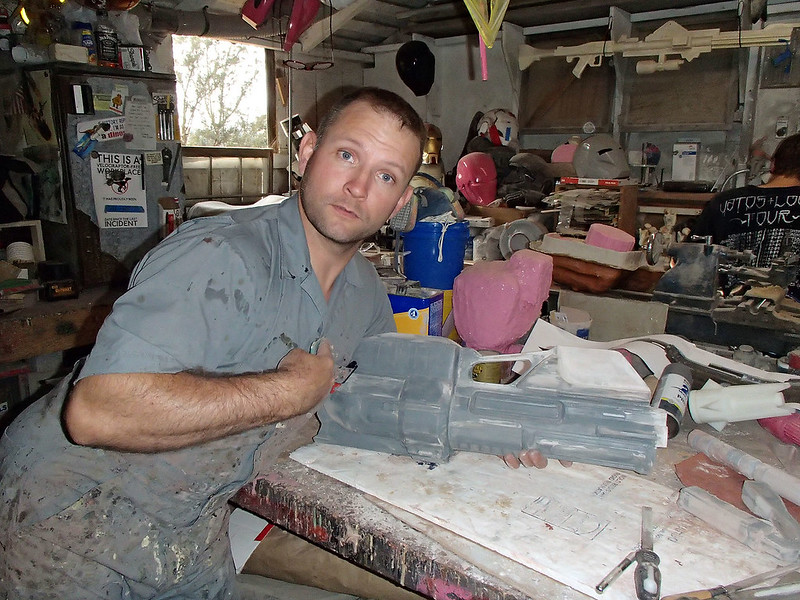
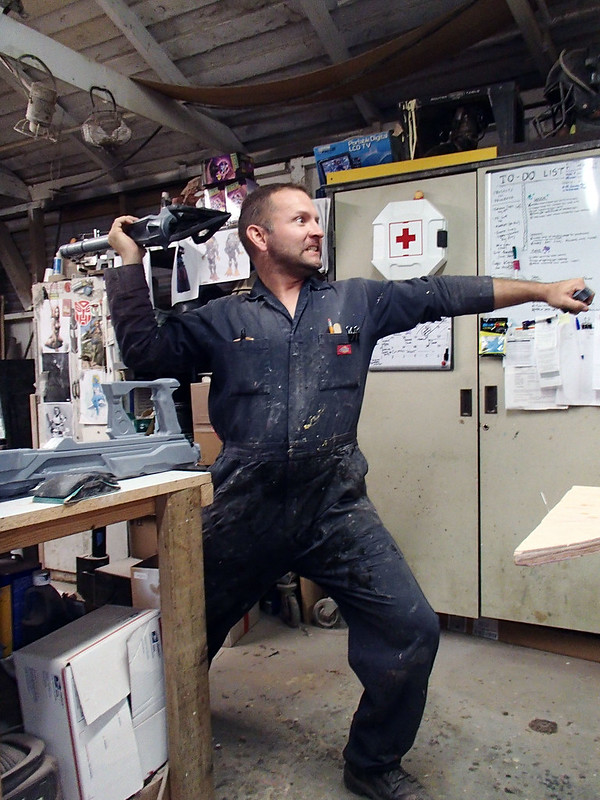
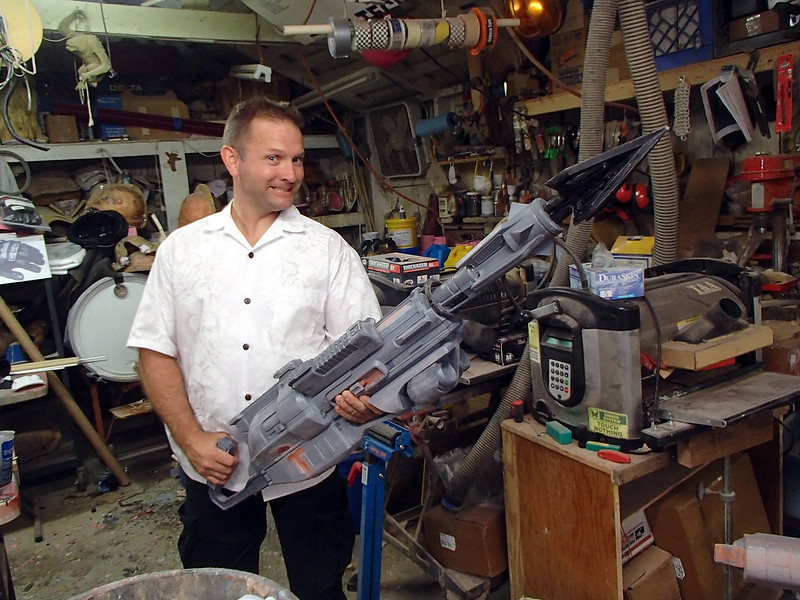
Once the fiberglass mothermold had cured, I removed the prototype and cast a copy in an impact-resistant urethane resin. The four cast parts of the harpoon tip were then added on the end. Here's Dan holding the completed harpoon:
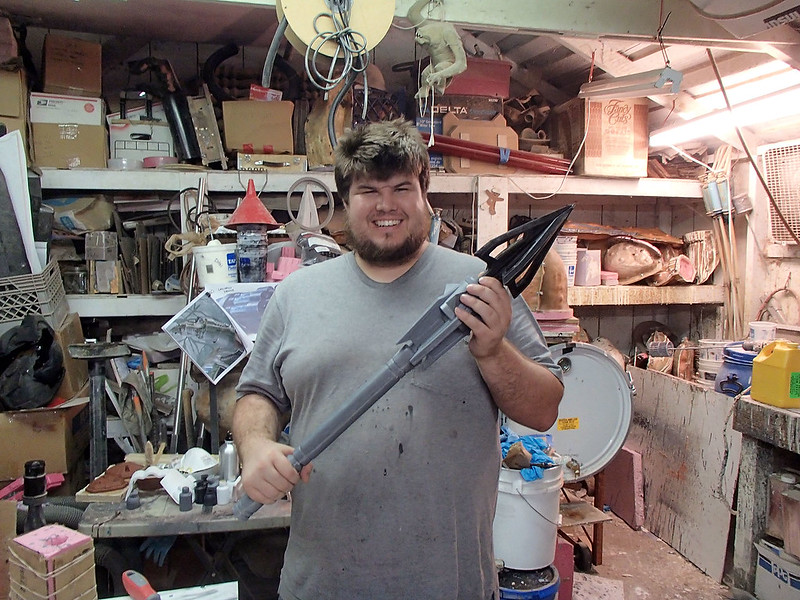
I couldn't resist the urge to take goofy posed photos with it:
Back to the other piecs, the scope was ready for molding as well as the round detail bits for under the main body:
The main body was molded in much the same way as the harpoon body. I started by stacking blocks of scrap until they were almost up to the centerline of the whole thing:

Then I cut a piece of cardboard to fit close around the whole thing, built up the clay parting wall, and my friend Matt poured the print coat:

Here's Matt with the bucket of goo:
And the print coat once it had mostly settled and stopped flowing:
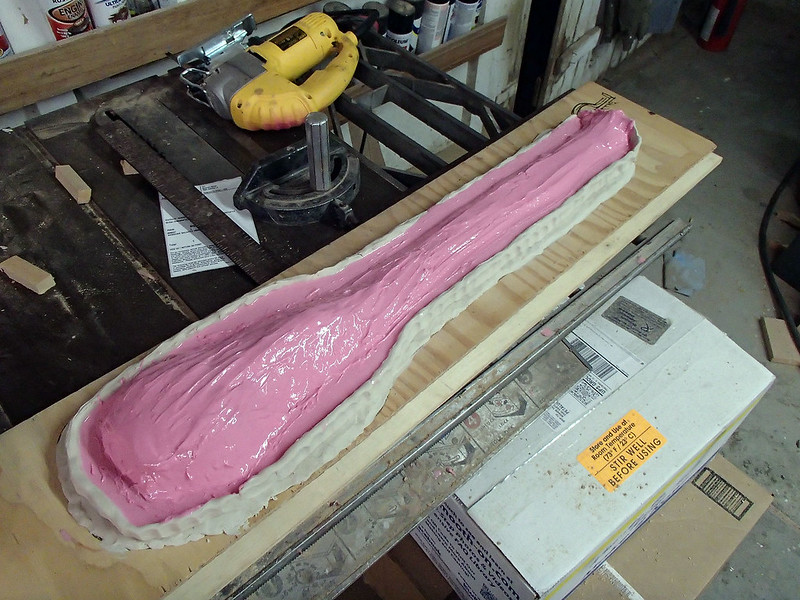
With the print coat cured, it was time to build up more thickness:
You need the mold on a piece like this to be about 1/2" thick. If it's much thinner, it'll tear easily, not to mention collapsing under its own weight or seating improperly in the mothermold. If it's much thicker, it's just a waste of expensive silicone rubber.
Once I'd built up adequate thickness, it was time to lay up the fiberglass mothermold for the first side:
Then, after the fiberglass had cured, I flipped the whole thing over:
Then I pulled off the cardboard, cleared the clay off, and built up a clay drip wall to contain the silicone for the 2nd half of the mold:
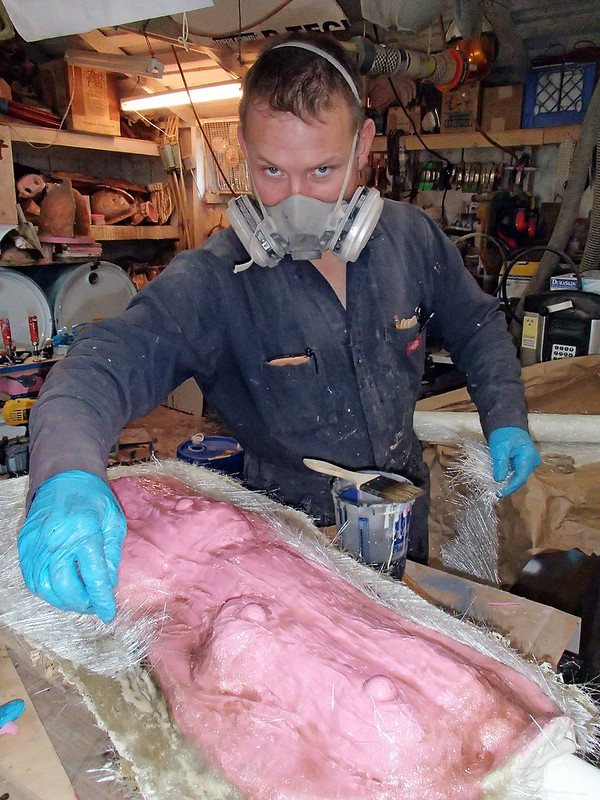
After applying a release agent, my assistant Jason poured on the print coat:
Then I thickened this side up as well:
The little half-dome shapes are "registration keys," small silicone shapes that I cast in a separate mold so that I can stick them into the rubber as it cures. These shapes make it easier to ensure that the rubber jacket mold is properly aligned in the fiberglass mothermold once it's put together prior to casting.
With the silicone cured, it's time once again for fiberglass:
The next day I was pulling the mothermold apart when I nicked myself:
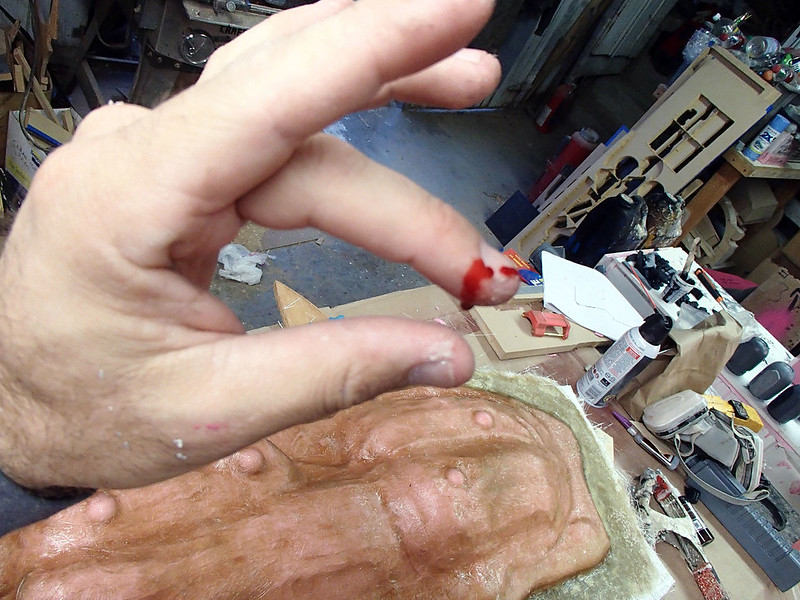
It's annoying and I should've been more careful with the sharp edges of the glass, but I'm just superstitious enough to believe that these little blood sacrifices to the Project Gods are helpful in ensuring the whole thing will be successful. Still, oops.
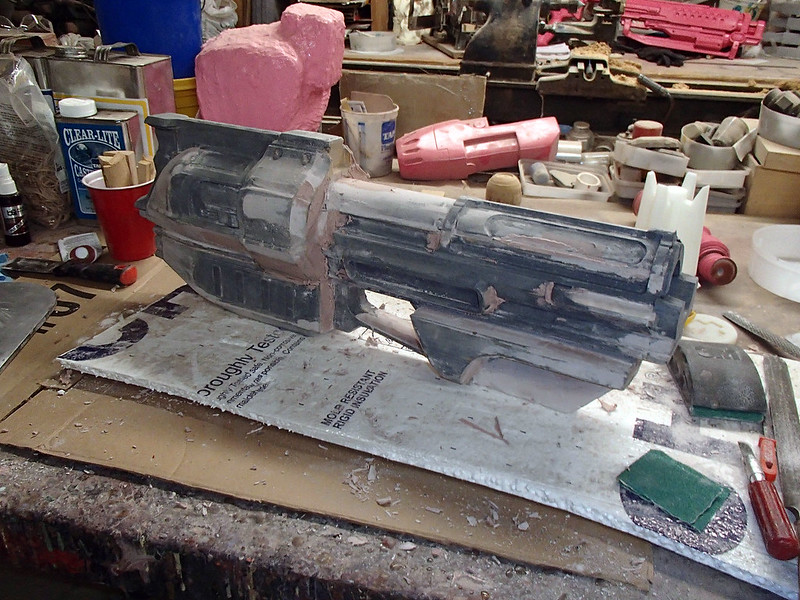
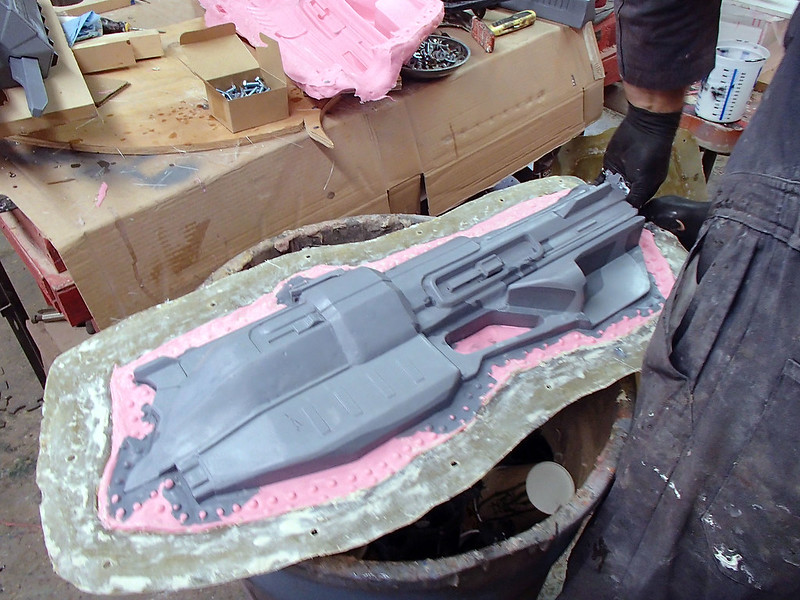
Once the fiberglass mothermold was pried apart, it's time to remove the rubber jacket from the prototype:
Here's the two halves of the mold:
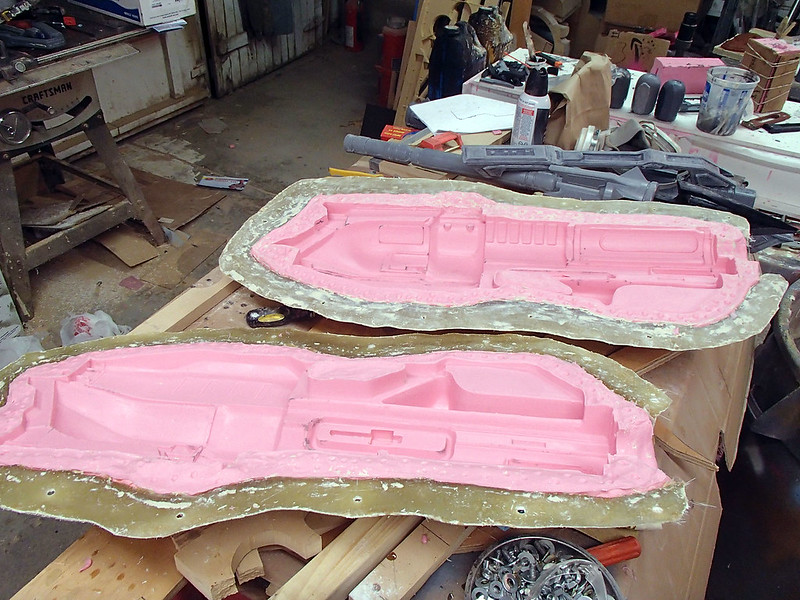
If I cast this piece as one solid chunk, it'd weigh a ton. Instead I want it to be hollow.
While the two halves are laid open like this, I coated them with multiple layers of impact-resistant urethane resin. I added a grey pigment to make it less obvious if the paint gets scratched on the finished piece.
Once the layers were thick enough to have the kind of strength and durability I was looking for, I waited for them to cure and then bolted both halves of the mold together.
To bond the two halves of the cast part together, I made up another batch of resin and poured it into the muzzle end of the mold. Then I sloshed it around along the seam until it cured. After a couple of layers were poured in this way, I let the whole thing cure before pulling the mold apart:
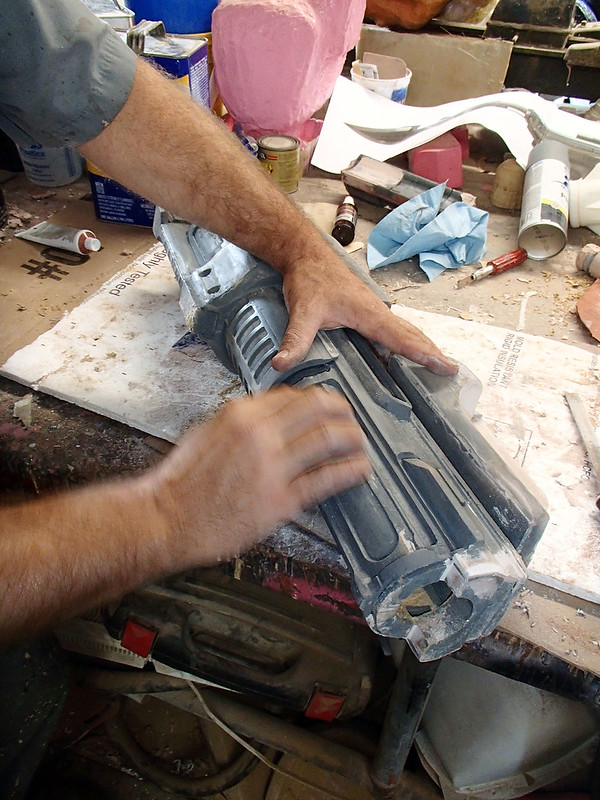
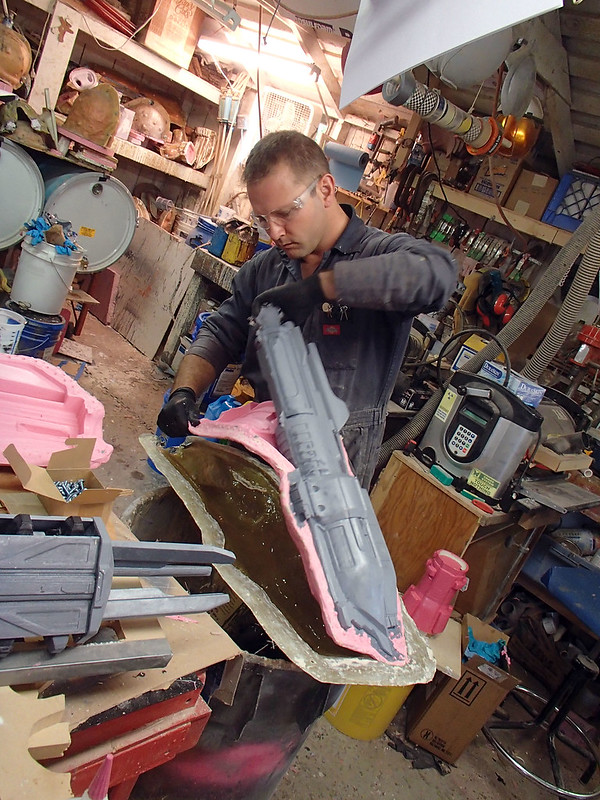
At this stage, it's important to remove the rubber jacket mold with a flourish, lest you miss the moment:
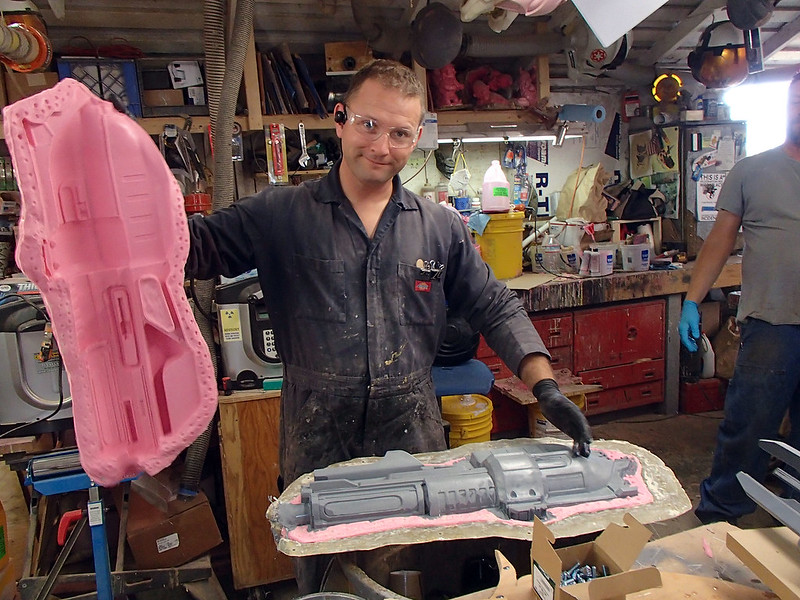
There's a bit of flashing where the resin leaked in between the two halves of the silicone rubber mold, but the end result is a good-looking casting:
At this point, it's just a question of peeling off the other half of the mold:
Then, about the same time as the edges were cleaned up and the primer had dried, my girflriend Shawnon stopped in to check it out:
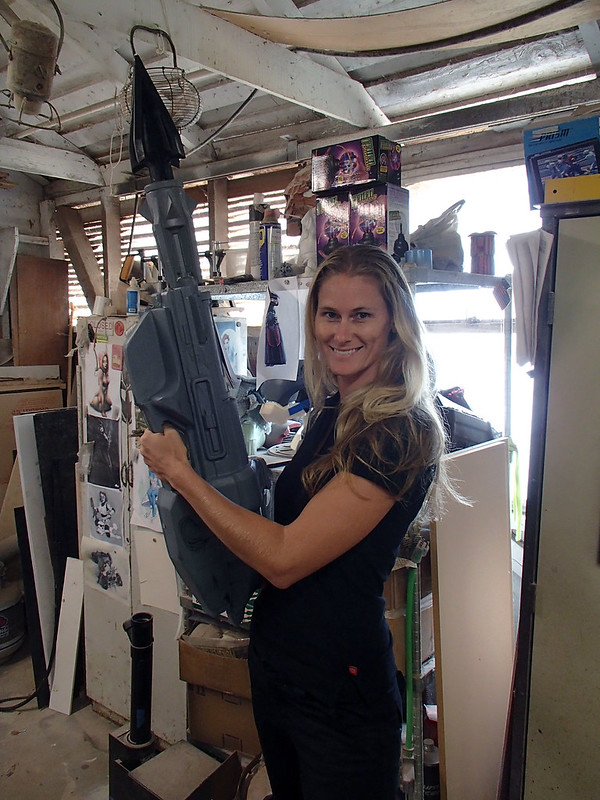
This thing is huge. I was very proud of it:
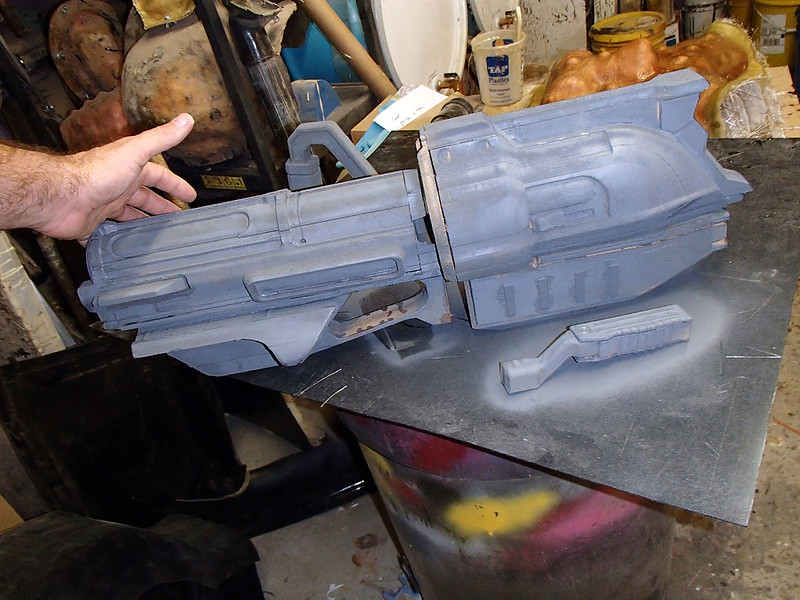
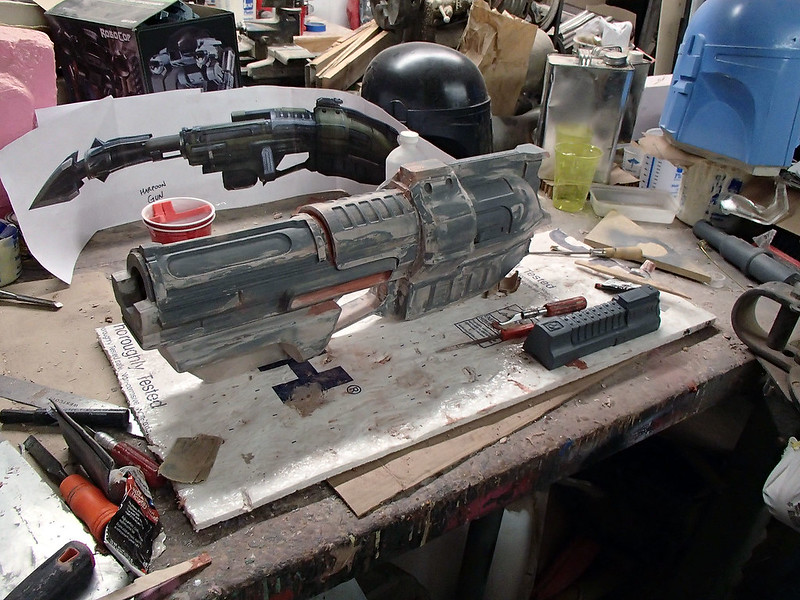
Once all of the small parts were added on, it was time to give it all a good smooth coat of primer:
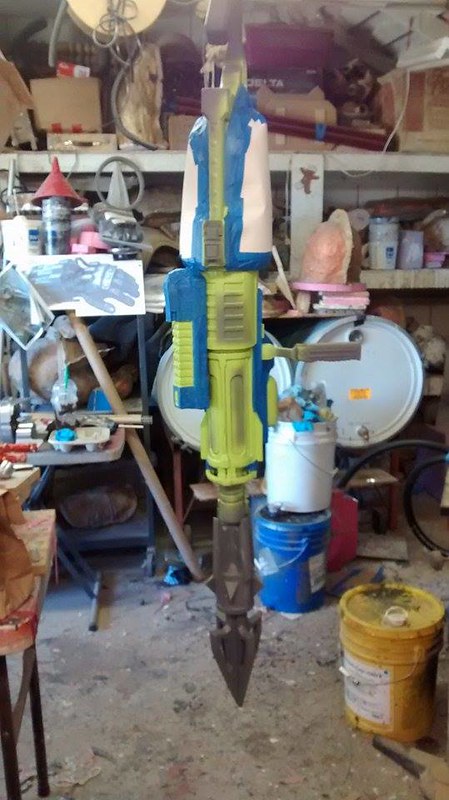
The in-game weapon is a very light lime green color, so that's what I used for a base coat:

This was as far as I personally got to see this piece get. After I sprayed the base color, I had to get on a plane to Japan with another project. So once the base coat had dried, my assistant Kate masked off all of the parts that weren't going to be painted metallic:
Once the metallic colors were added, my friends Matt and Mark gave the whole thing a heavy blackwash to add some much-needed grime:

Then it was time to add a some custom-printed vinyl labels:
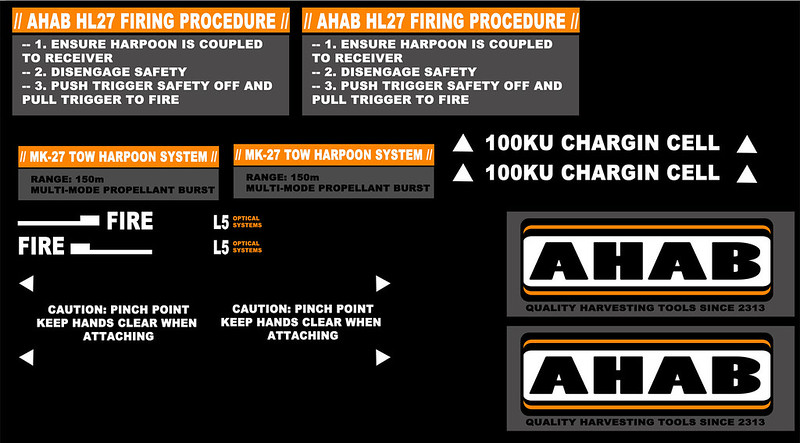
I'd usually have some fun with the fine print on something like this, but the textures that were sent to me were so highly-detailed that there wasn't any room to make any changes.
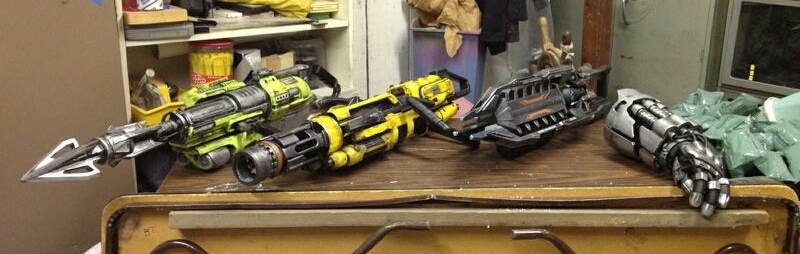
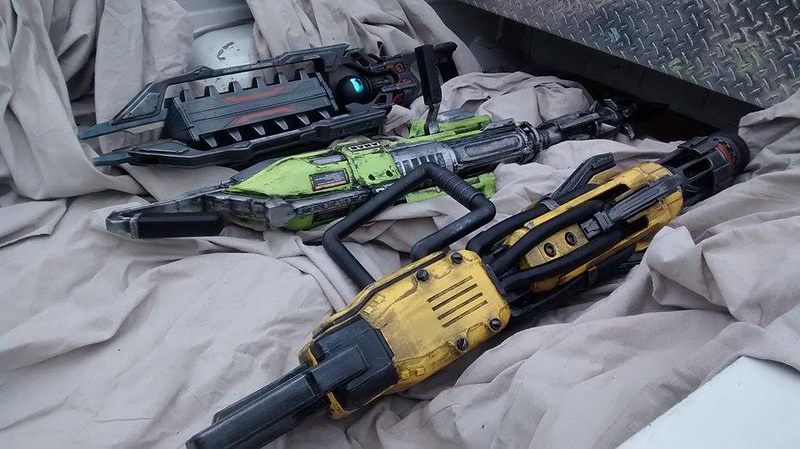
All finished, it was set on the bench to await pickup with the rest of the lineup:
Here it is loaded in the pickup:
Once again, here's a glossy studio photo of the finished piece, courtesy of Make: magazine:
Here's another studio photo, also courtesy of Make:
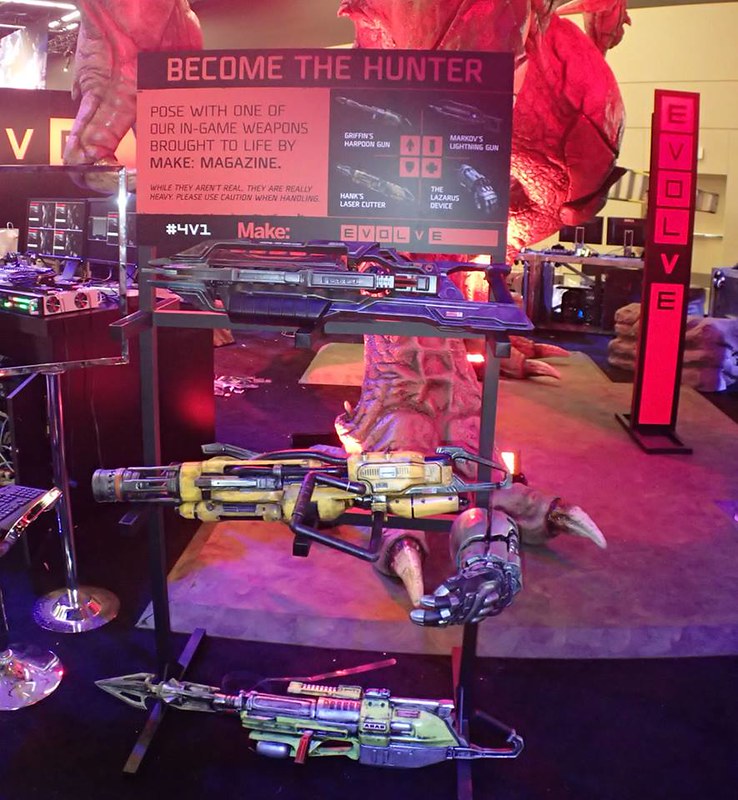
A few days later, it was on display at PAX Prime in Seattle:
I'll be writing up the build process for the lightning gun next, so stay tuned...
.
How I wish I lived on the west coast still.
ReplyDelete