About Me

My photo
I make toys for kids who don't want to grow up. I'm on the lookout for new projects. If you're interested in commissioning me to build something ridiculous, shoot me an email.

Friday, March 26, 2021

Quick and Easy Project of the Week: Jarnbjorn

Back in November, Do3D.com was having their Black Friday sale and offering deep discounts on all of their printable prop models.  While I already had a lot of things in the pipeline, the files were priced so cheap I couldn't resist the urge to stack up a bunch of things to keep the printers running during the idle time between more important projects. 

One of the models I got was their rendition of Jarnbjorn*, Thor's axe as depicted in the Sideshow Lady Thor statue:


Since I'd already made the comic book version of this costume (build details here: LINK) I figured I might as well add this one more prop weapon to the wall of potential armaments for her to carry.  The axe is pretty sexy on its own:


Considering the steady stream of rayguns and robot parts I've been making, it would be nice to do something a little more analog for a change.  Plus, I have a stark shortage of melee weapons on the big wall of prop weapons.  This beast was just what the doctor ordered.

The modelers at Do3D did a pretty good job of translating that sculpt into the digital realm:

Jarnbjorn Model by Do3D


Printing the Head:

The head of the axe was way too big to print in one piece.  Instead, over the course of a few days, my fleet of Zortrax M200 3D printers grew the head as a series of separate chunks.  Here's the digital layout showing one of the first pieces set up in the Zortrax software:

Jarnbjorn Print Setup in Zortrax Software

After printing six or seven such chunks and gluing them together with copious amounts of CA glue, I started adding primer and had the printed head mostly done:

Printed Head During Smoothing

Printed with about 30% infill, the head of the axe was a good compromise between strength and weight.  A carefully balanced notion of low cost and durability.  That's all well and good since I would not likely be using it to cleave the heads of dark elves invading the nine realms. 

Making the Handle:


If the handle was going to be 3D printed as well, it would need some kind of reinforcement to keep it from breaking whenever someone gets overzealous about brandishing it.

So what to use for handle reinforcement?  After noodling over a few options for printing it hollow and filling it with resin or fitting it with a metal rod or wooden dowel, I started thinking of all of the additional work I'd need to do in order to smooth out the print lines.  Then I'd still have to prime, prep, and paint on a convincing wooden finish.  Then I'd have to pick out all of the leather parts and paint them to look the part as well.  In the end I decided that there was no really good reason to print the handle at all.  I would do something different.  Something new.  Something completely revolutionary.

I would build a wood-looking axe handle from scratch.  Out of wood.

I know, I know.  It sounds crazy, but I actually had all of the necessary technology close at hand.  My friend Mark works at a mill that makes custom trim and molding for home restoration contractors.  I asked him to keep an eye out for a suitable scrap of something pretty-ish.  He managed to find me a six foot piece of cedar 4x6 that would do nicely.

To make my initial cut for the shape of the handle, I printed out a side view of the 3D model scaled up to lifesize.  Then I laid it out and traced it onto the big ass cedar plank:
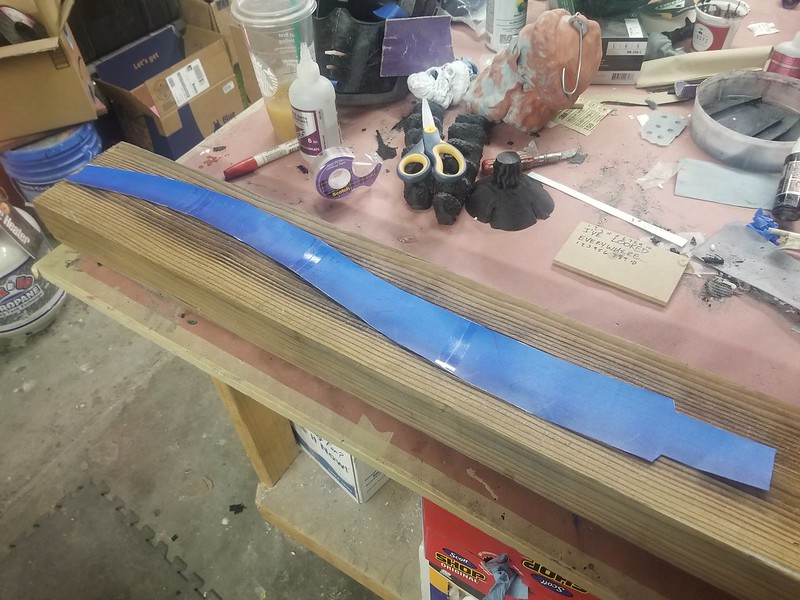
Handle layout


Because I'm lazy and the bandsaw was in a whole different building, I made the initial cut with a jigsaw instead.  This meant that I had to make the cut on both sides and I ended up with an understandably ugly edge:
Handle Rough Shaping

I did the initial rough shaping the end of the handle with a rasp and a knife.  Eventually it was a good fit for the head of the axe:
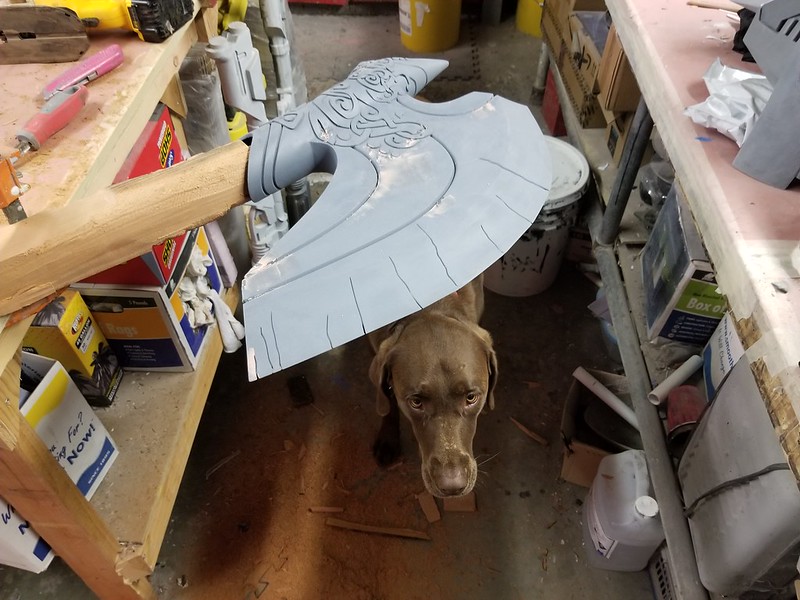
Tiki and Axe Head

My plan had originally been to round out and taper the handle with a spokeshave or a draw knife.  But digging through my father's odd assortment of antique woodworking tools, they turned out to be a bit rusty and way overdue for a sharpening:

Dad's Spokeshaves

Since I really wasn't in a sharpening and stropping mood, and because the open grain of the soft cedar wood would make it a tricky proposal at best, I opted to skip the spokeshaves.  Instead, I did more rough shaping with a rasp and a drywall knife.  This is the decision of some sort of deranged person, but it was late and I was on a roll.
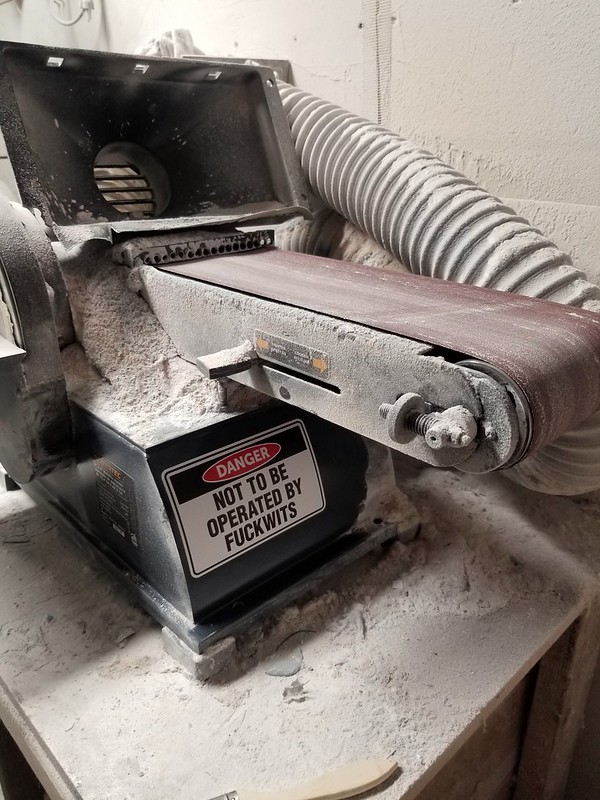
When I was pretty happy with the overall proportions, I did the final rounding and smoothing on the flat and the round end of my trusty bench mounted belt sander:
Belt Sander
If you need that same warning label for some piece of your equipment, you can find your own here: https://amzn.to/2XlOmUj

I'm pretty happy with the results.  Wood is pretty:
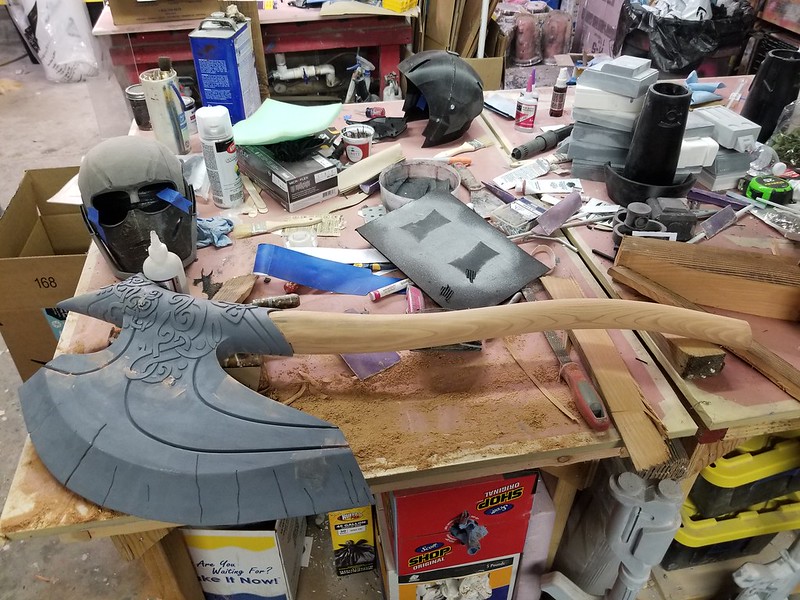
Rounding Begins

The next day my nephew stopped by the shop.  He was pretty happy with the results too:
Nephew Test Fitting Axe

After sanding the handle down to 220-grit, it looked about like so:
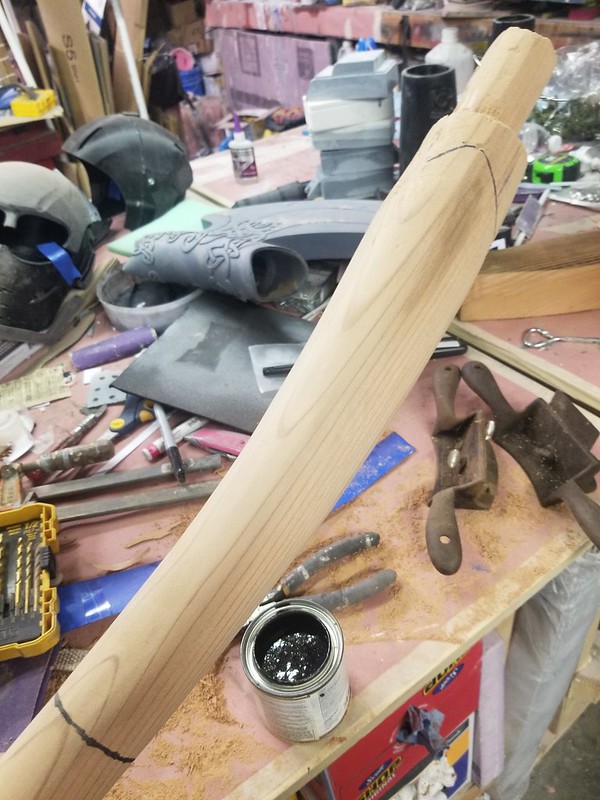
Natural Grain

Of course, the handle of Jarnbjorn shouldn't look like a buttery soft chunk of cedar.  Instead it should look like it was hewn from something mightier than oak by dwarven forgemasters of Nidavellir  over a thousand years ago.  Fortunately, Minwax makes that exact color:
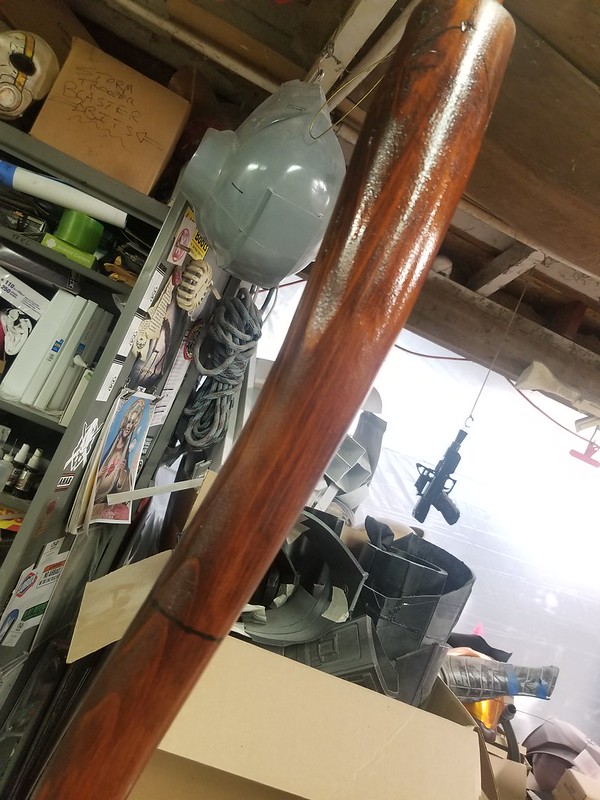
First Stain Pass

Once the stain was set, I went ahead and laid on a few coats of satin polyurethane finish to even out the sheen and toughen up the surface of the handle.

With the shape, shade, and sheen all figured out, it was time to start adding the remaining details.  I started with the faux iron rings.  These began as strips of scrap ABS plastic I had laying around:
Handle Rings

Each strip was pre-bent to help it sit properly in place:
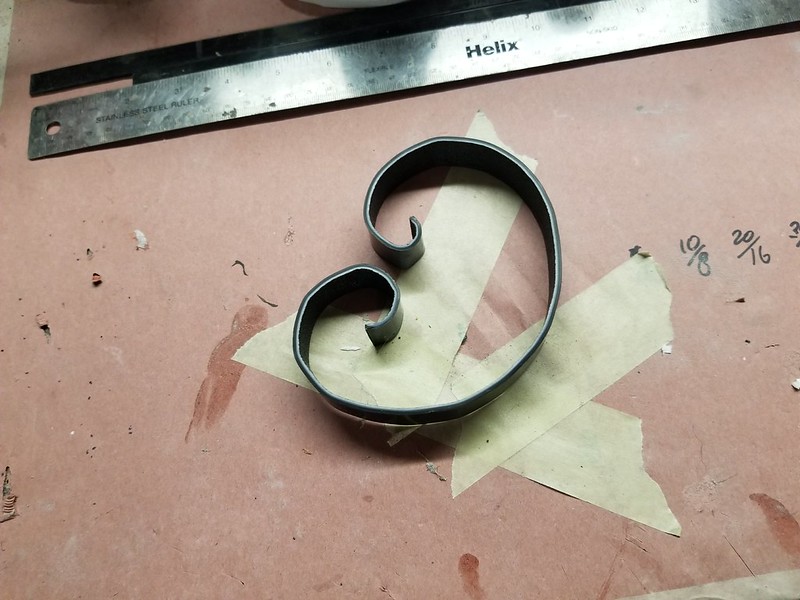
Handle Rings

Once they were fitted, the excess length was trimmed off;
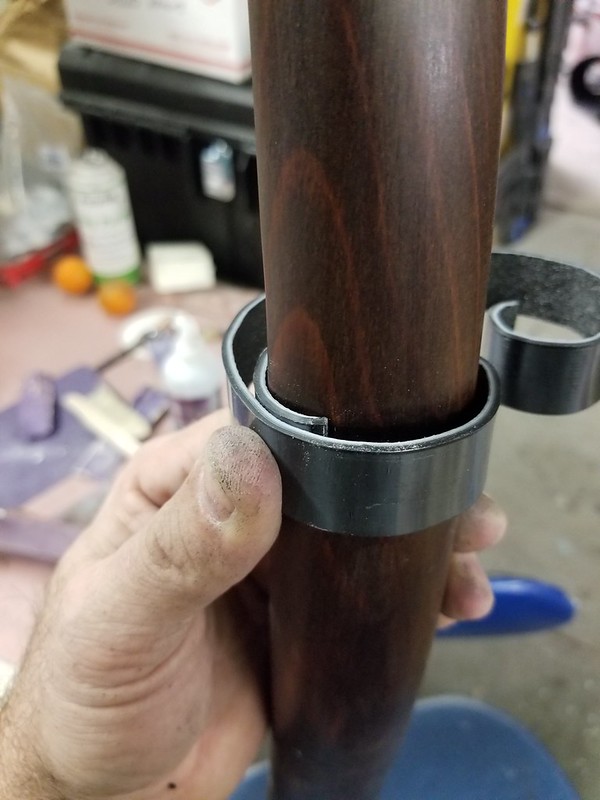
Handle Rings

They were glued in place as well as nailed with furniture tacks:
Handle Rings

The final detail was a styrene half round fitted along each edge:
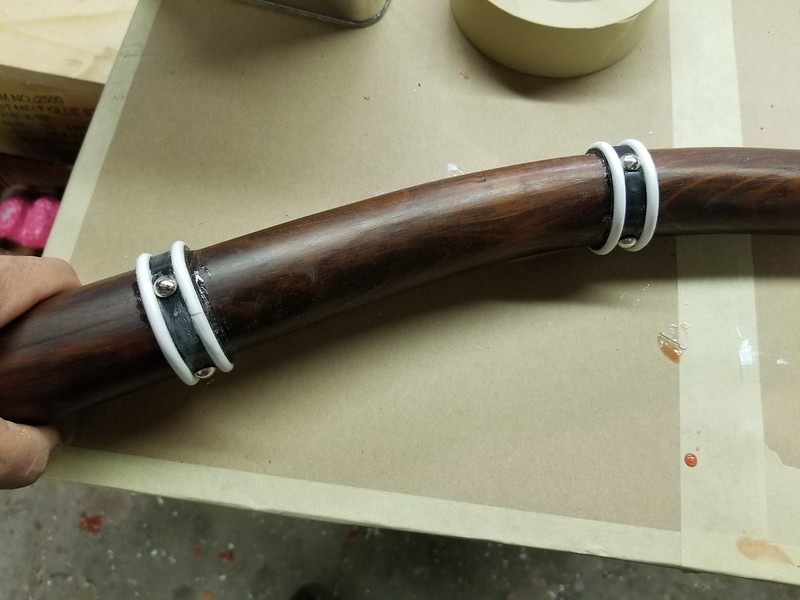
Handle Bands Progress

At this point, the whole thing was really starting to look the part:
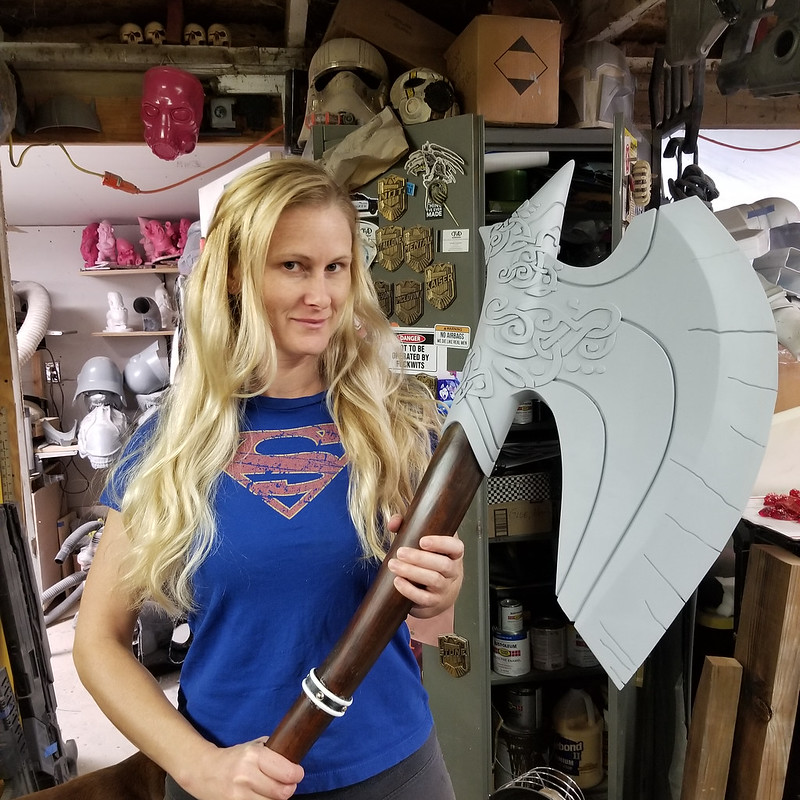
Handle Bands Progress

The metal rings were painted with a few coats of hammered metallic silver paint:
Hammered silver metallic basecoat

Silver Bands

Once the paint had dried, it was time to take off the masking tape and get to the leather parts.

Fortunately, I tend to have sacks of leather scraps kicking around in storage for no particular reason.  For the grip section between the iron rings, I used a soft, black buckskin leather like so:

Leather wraps

For the brown binding, I had a strip of thicker cowhide that looked to be the right color:
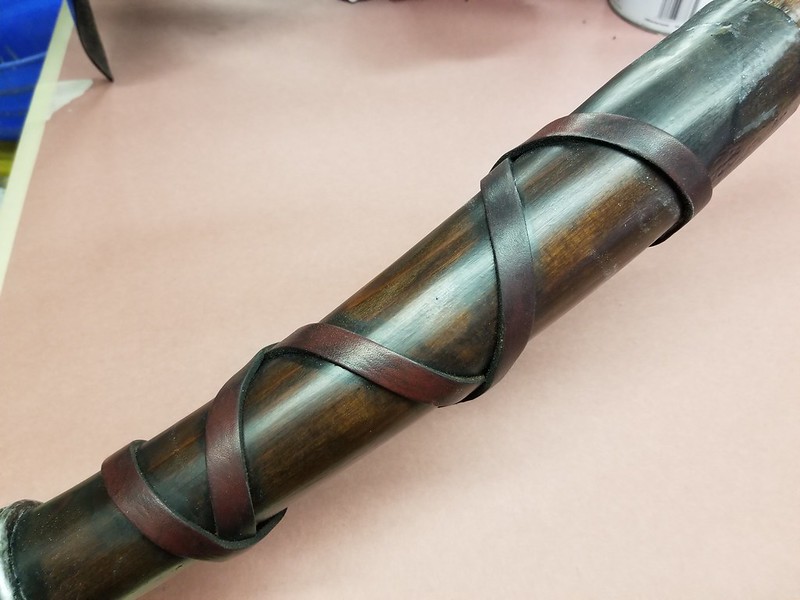
Leather wraps

And lo, the handle was maked:20210225_154504


Painting the Head:

Meanwhile, the head still looked like a 3D printed, chintzy piece of crap. After a few coats of primer, I gave it a cheap coat of rattlecan silver and instantly regretted it:ugly silver head

Still, I figured maybe I'd like it better once I'd picked out the inlay details in gold:
Ready to Weather

Still not loving it, I gave the whole thing a blackwash:
blackwash progress

I guess it was a bit better:
Blackwash Completed

The other nephew thought it was cool:
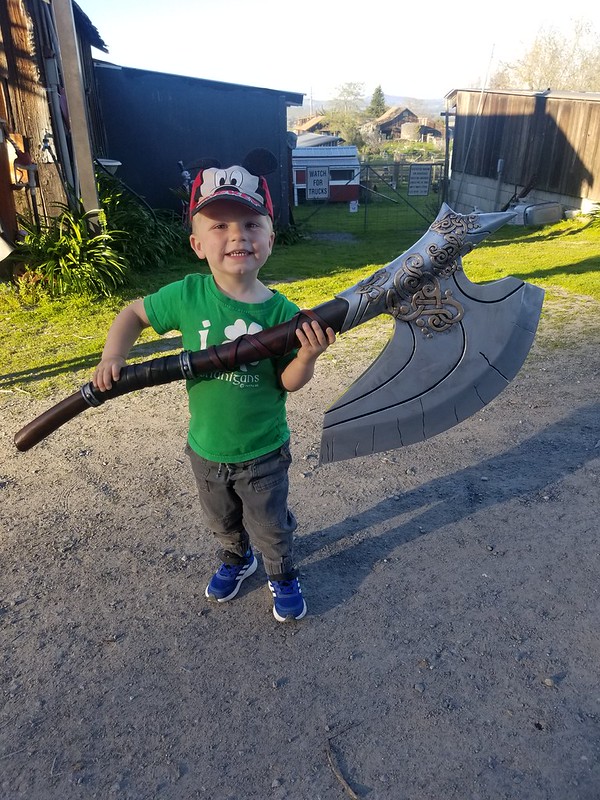
Sizing Test

But still, I felt it needed to be better looking.  That may be due in part to the fact that I've been messing around with a lot of stuff like this:
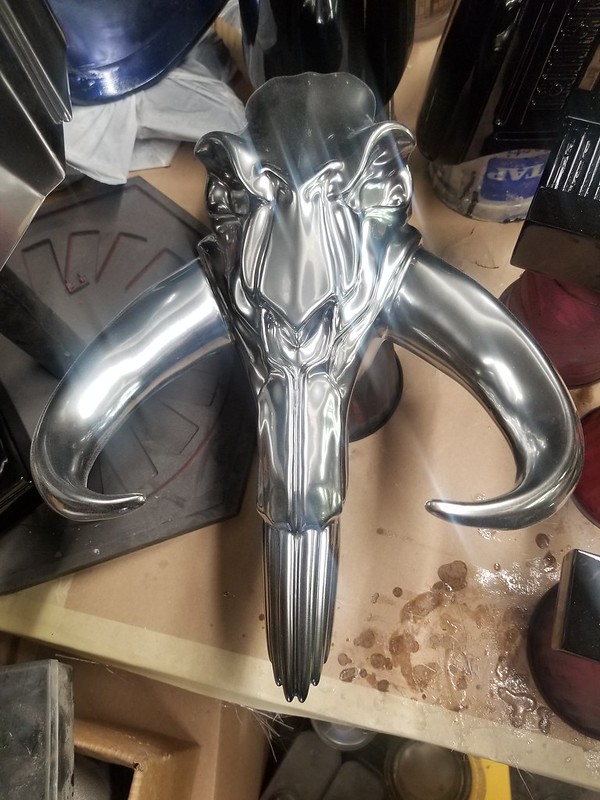
Alumaluster Mythosaur Skull Wall Hanging

While Jarnbjorn wasn't especially shiny in the statue, I couldn't shake the notion that this was supposed to be an axe wielded by a god, forged by the mythical master weaponsmiths of Asgard and blessed with the blood of Thor himself.  It shouldn't look quite so shabby.  

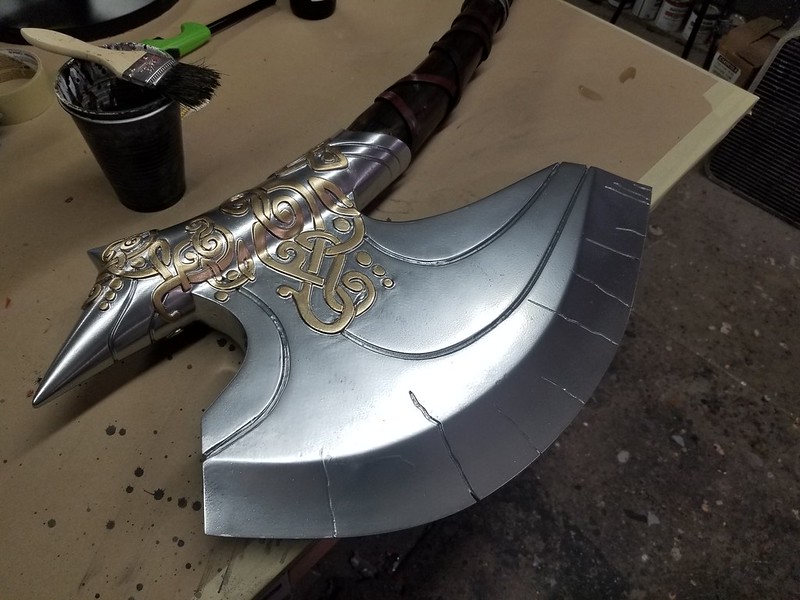
So I went ahead and stripped off the paint, sanded everything down to 600 grit, and gave it a nice glossy coat of black:
Repainting Jarnbjorn Head Gloss Black

Once that was done curing, I dusted on a nice, shiny coat of Alumaluster:
Jarnbjorn Head in Alumaluster

A little while later I was working on an unrelated project that needed some gold candy coat.  So once those parts were sprayed, I broke out a brush to pick out the inlay by hand:
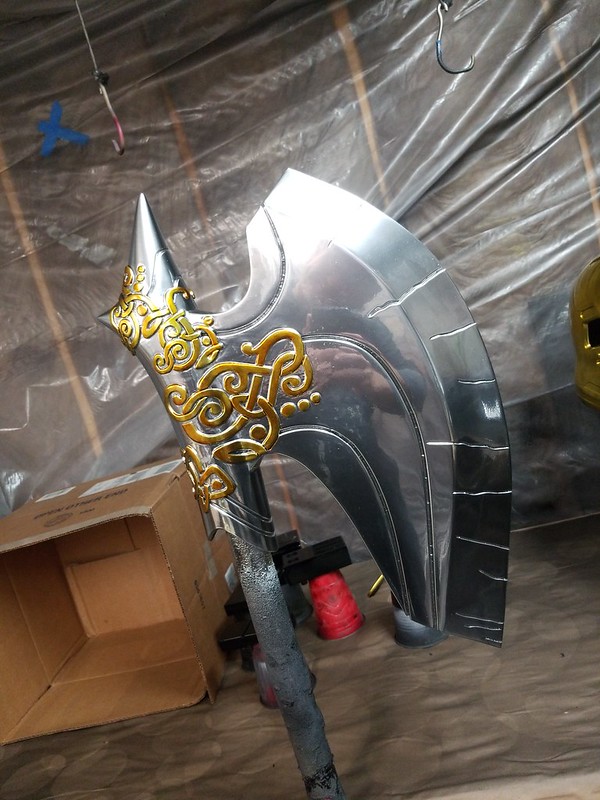
Repainting Alumaluster with Gold Candycoat

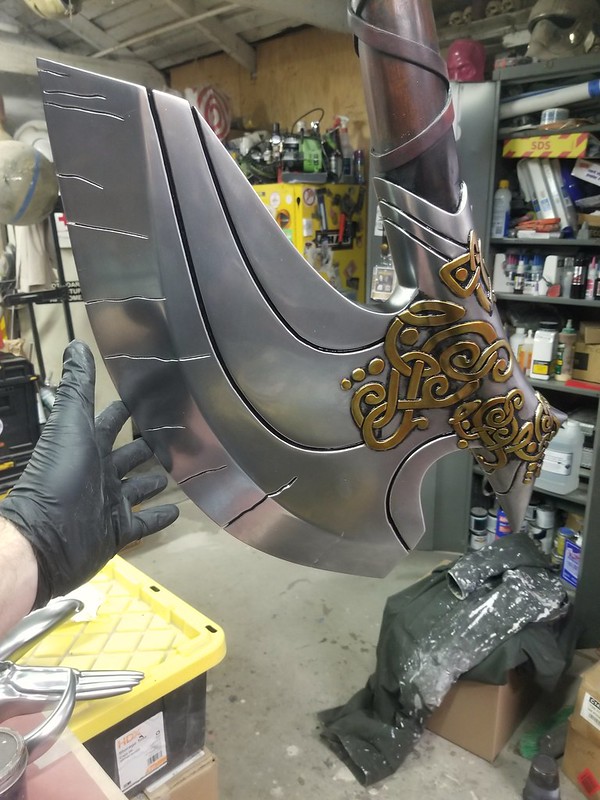
Then the whole thing got a couple coats of automotive clearcoat and finally, when the axe head was installed on the handle, it was given another blackwash to take just a bit of the shine off of it and give it the look of a relic worthy of a place of honor in the armory of Asgard:
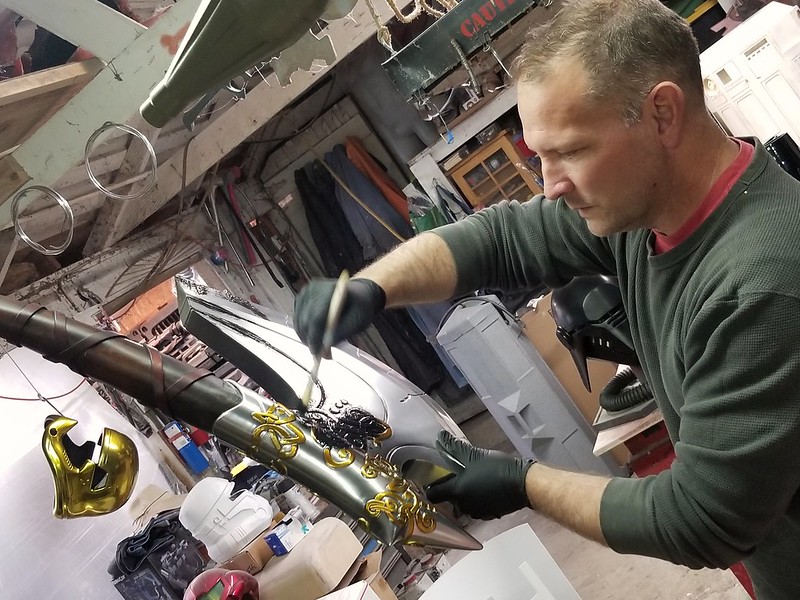
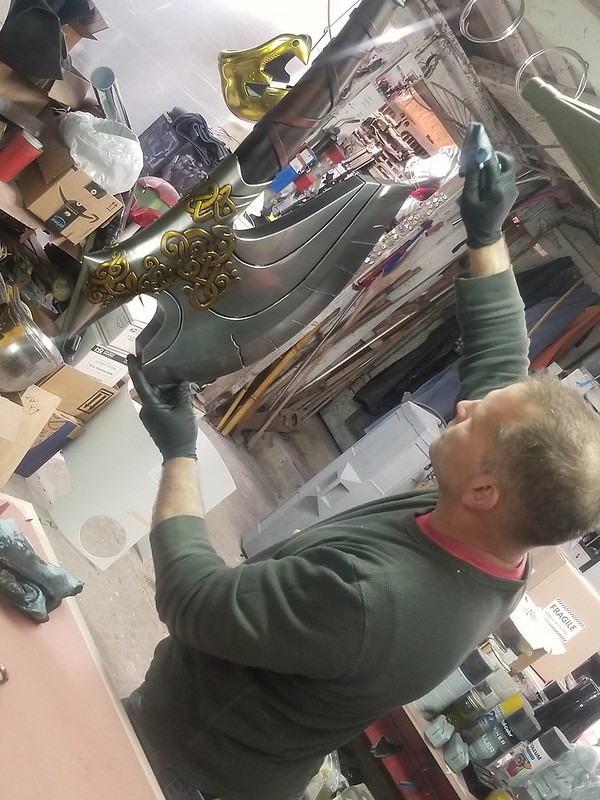
Oil Based blackwash

Ragging off

Blade finished

In this case, the black was a flat black oil-based paint and the thinning and wiping was done with mineral spirits.  This isn't an option with normal hardware store spraypaint because the thinner is likely to mess up the finish, but the automotive urethane clearcoat is stable enough to be unmarred when the thinner is wiped off with a rag.  The end result is a nice, durable finish that won't rub off quite as easy as an acrylic blackwash.  It makes me happy:
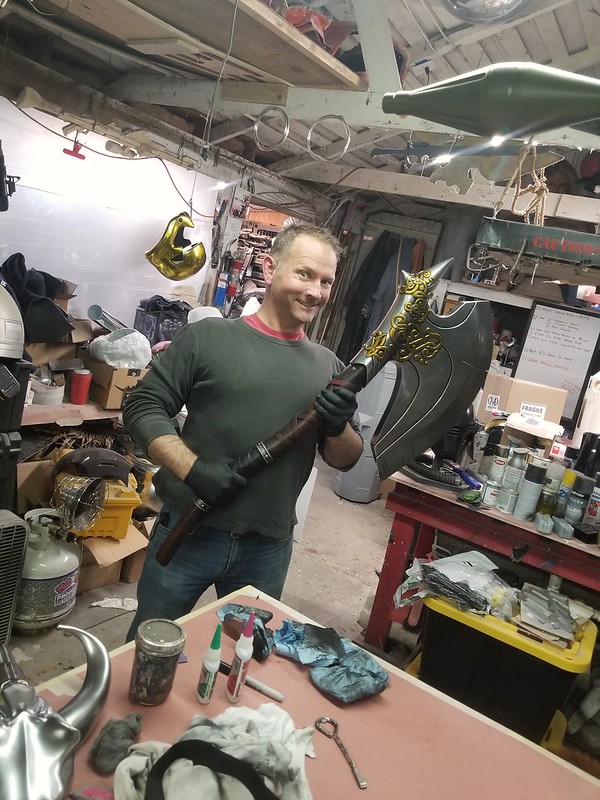
Jarnbjorn Done!

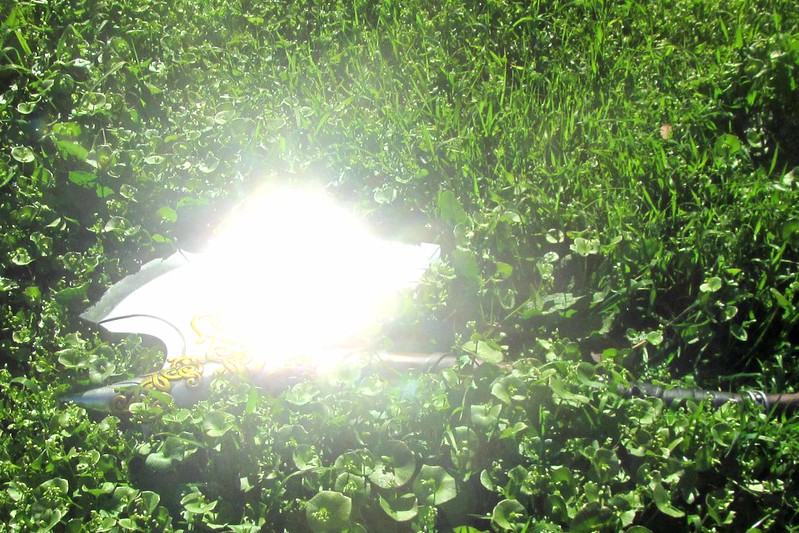
So then the fully-finished thing of beauty sat on the shelf for a minute waiting for a clear, sunny day so I could get some photos of it in natural light.  That proved problematic:
Jarnbjorn Finished003

One of these days I'll get the Lady Shawnon dressed up in the Thor costume and do another location shoot.  In the meantime, here's Jarnbjorn in all it's glory:
Jarnbjorn Finished002

Jarnbjorn Finished001

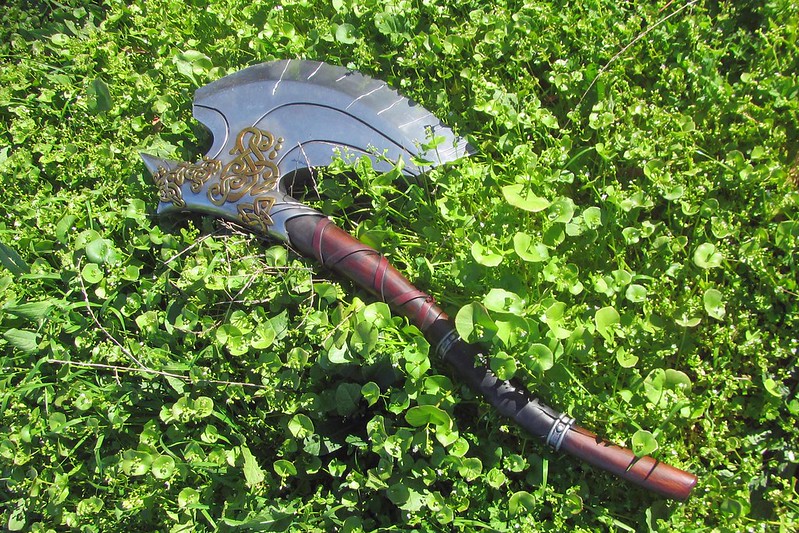
It's still a bit tricky to find a "natural" backdrop that showcases all of the different colors and textures:
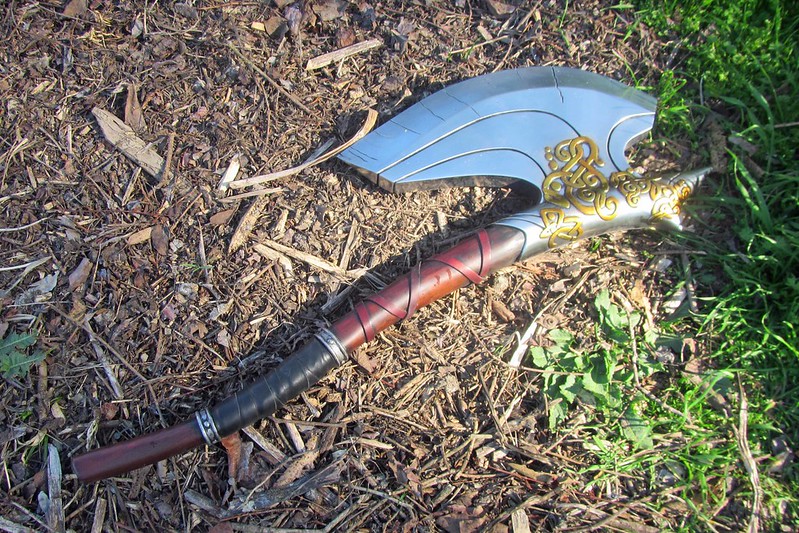
Jarnbjorn Finished004

But having taken a few photos, it was time to test it out:
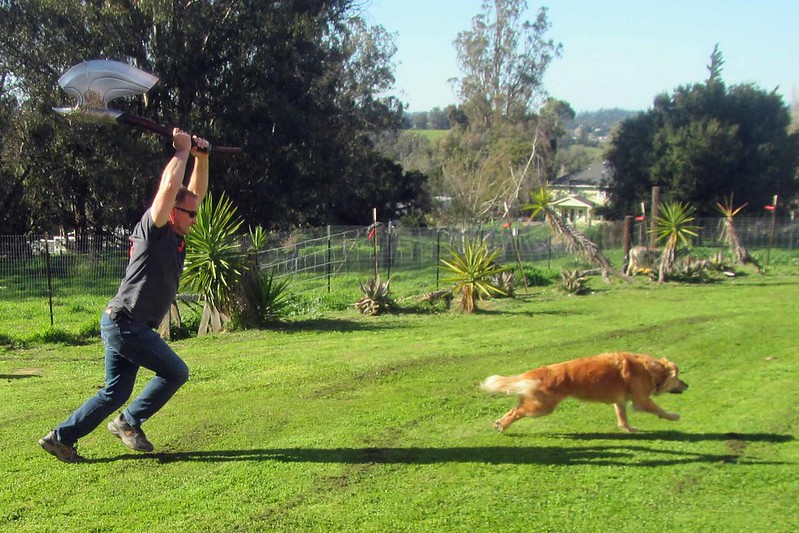
Jarnbjorn Finished005

The Lady Shawnon tried it out too:
Jarnbjorn Finished006

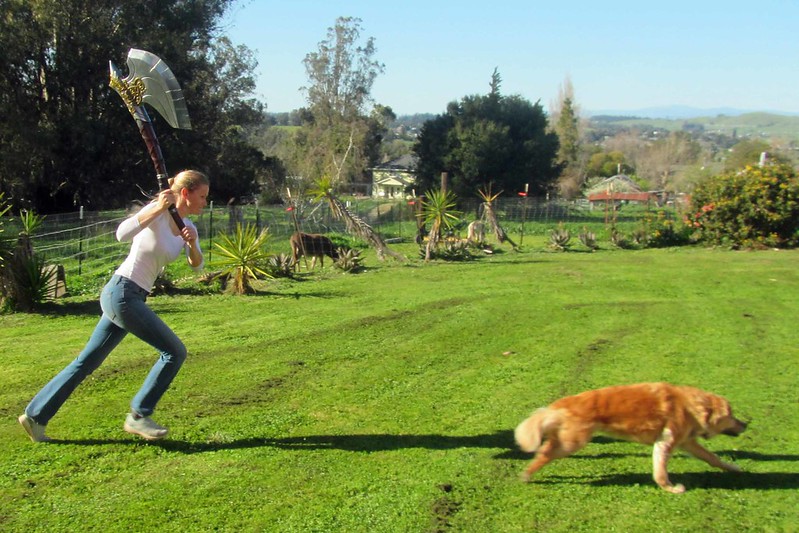
Before anybody gets too excited about us abusing my poor dog Leeloo, know that she wasn't even the least bit frightened and the only way to get her to run for these staged photos was to kick a ball for her to chase.  You can see the ball in this failed attempt:
Jarnbjorn Finished010

And when it was all said and done, she remained perfectly happy and healthy:
Jarnbjorn Finished009

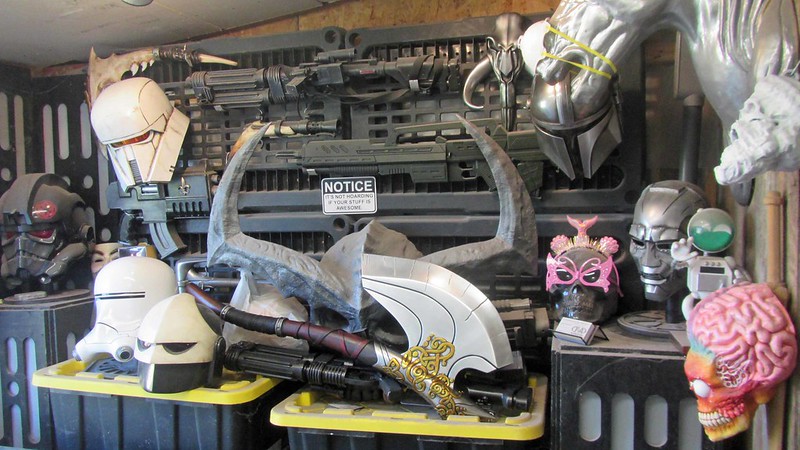
Jarnbjorn, meanwhile, will rest amongst the pile of recently finished things until I find a better place to display it:
Jarnbjorn Finished007

FINIS


*In Old Norse, "Járnbjǫrn" means "Iron Bear."  Now that's a thing you know.

Tuesday, February 23, 2021

February UFO Sightings in the Workshop

Once again, as time goes flying by, I find myself looking around the shop and pondering the huge drifting piles of things I've been working on in between more serious projects.  It turns out I have the attention span of a chipmunk when it comes to these kinds of hobby projects and I seem to be building a collection of started things just a bit faster than I've been building my collection of finished things.

With that in mind, here's just a handful of the UnFinished Objects scattered around the shop lately.

First off, I got a bit excited during a slow day a while ago and decided to break out a handful of helmets that are in progress lately:Backburner Projects Dusted Off

The Sabine Wren helmet, Primaris Space Marine, and Samus Aran are all cast from my molds.  The Havoc Trooper is 3D printed from files made by Marko Makaj.  The rest are kits I've picked up from other makers recently.  These kinds of things are good for me to keep on hand whenever I get frustrated and need a thing I can finish in a hurry and feel accomplished.

On an unrelated note, I decided to make a replica of Jarnbjorn, the axe which Thor wielded before he got his hammer, Mjolnir:
Handle Bands Progress
The head was printed from a file I got at Do3D.com.  The handle is a scratch build I've been tinkering with whenever I find a few extra minutes and happen to have whatever tool I need in my hand.

For the past however many months, I've had my Cobra Commander helmet mold sitting on the bench where I do my fiberglass layup.  So whenever I mix up a bit too much material, I end up with another helmet blank.  Once they get trimmed a bit and painted dark blue, the Cobra Commander helmets become Cobra infantry trooper helmets.  At some point I should probably quit:
Cobra Trooper Helmet Lineup

I have a steady stream "someday" projects lined up.  So whenever the once in a while happens and there's a few days where my fleet of 3D printers isn't doing anything important, I have them constantly cranking out parts so I won't end up waiting on the printers when I have time to tinker on fun stuff.

One such frivolous project is the Halo rocket launcher prop that I don't need at all, but I've been wanting for ten years.  At this point almost all of the parts have been printed, so it's nearing the prep and paint and make it look cool stage.  In the meantime, it's huge:
Barrels Assembled

Speaking of huge, sometime last year I started making parts for Paz Vizla, the heavy infantry Mandalorian.  One of the more interesting parts was his heavy blaster.  Here's most of the printed parts all lined up together:
Heavy Blaster Prototype WIP

While I've already molded and cast most of the pieces and parts, I haven't quite made time to make a mold for the main body.  That changed last week when I finally got around to turning some scrap MDF into a cradle for it:
Mold cradle begins

At the rate I'm going, I'll be casting parts sometime next week:
Blaster Body Moldmaking


As usual, there's tons of other works in progress scattered around the workshop, I'm about to wrap up a couple of builds all at once, so stay tuned for more interesting articles coming soon.

Wednesday, February 3, 2021

My Creative Process

A few years back someone named Marcus Romer posted the following tweet:


Each and every time I find myself in the middle of a project that's careening toward a deadline and getting  frustrating, I hit step 4 and remind myself of this particular tweet.  It haunts me.

But I've found that, just like the seven stages of grief, this generalized process isn't quite the hard and fast catchall rule that folks might think it is.  The various stages can affect different people in different ways or not at all.  In my case, it tends to mutate into a few different versions...

Version One:

This is the most common variant for me.  It starts with a prospective client (usually someone I've never heard of before) saying something like, "I'd like to hire you to build this insanely elaborate, beautiful, wearable piece of artwork.  Money is no object, I must have it."

This version of the process usually goes like so:

1. This will be awesome.

2. This will be tricky.

3. This will involve a tremendous amount of time and materials to do it right.

4. After noodling it over at great length, collecting as much reference as I can and generally getting really excited about step one, I tell the client, "it's going to cost $price." Then we get very quickly to the next step.

5. The end.

That's how my creative process usually goes.

Version Two:

This is the version that starts with a repeat customer or frequent collaborator hiring me for a project.  We have worked together in the past and know what to expect from one another.  This version proceeds thusly:

1. This is awesome.

2. This timeline is pretty tight, but I've done more with less, so I can pull it off.

3. The client has just remembered five details that will seriously limit the ways I can make this happen.  I'm feeling pretty good about step 1, so I agree with all of it.

4. This will be tricky, but I've got a handle on it.

5. Due to a change in location/availability/priorities/global pandemics, this needs to be finished much earlier.  In this revisited iteration of step 2, I'm still feeling pretty cocky, so it's no problem.

6. This budget is starting to get tight, so it's time to start making compromises to meet the deadline.  This usually means removing "value added" features and extras that the client didn't specify, but I was really looking forward to showing off.

7. This is shit.  I never should've taken on this project.  I don't know what I was ever thinking.

8. I am shit.

9. There's a glimmer of light at the end of the tunnel.  I hate everything about this project, but at least it's so awful that I don't have to worry about this client ever coming back to me for anything else, so I can crawl in a hole and disappear when it's all wrapped up.

10. This is as done as it's going to be.  The whole thing needs to ship tomorrow.  My mom, girlfriend, and/or shop staff tell me it looks amazing, but they don't count.

11. It's crated and shipped.  My fate is in the hands of a freight company now.

12. This might be okay.  Maybe it'll be crushed in shipping, insurance will pay for it, and the failure won't be my fault.

13. The client has received it and seems happy, but they're probably just being polite.

14. Days, weeks, months, or years later, unexpectedly, I see something and say, "wow, somebody really hit that build out of the park.  I wish I'd have done that well when I built it."

15. Looking closer, "hey wait," says I, "this is the one I built."

16. This is awesome.


Version 3:

This is the version that usually applies to my passion projects and hobby builds:

1. This is awesome and I can knock this out in a couple of weeks after hours when I wrap up my paying projects for the day.

2. This is fun.  I love having a goofy project that's just for me.

3. Someone just saw a snapshot of the work in progress online and asked if they could buy one of these from me.

4. I guess I don't mind making a second one.  At least that will offset the cost of materials involved.

5. Word has gotten around in some fan club, facebook group, online forum, or knitting circle and people know that I can make this thing.  So I guess I'm doing a few more.

6. This is no longer fun, but at least it's paying the bills for a minute.

7. Once I get the first fifteen of these things knocked out, I'll make one for me.

8. Remember that thing I started last year for fun?  One of these days I should dust off my copy and finish it.

9. Oh hey, this would be good to bring to event X.  

10. Event X is in two weeks?  Time to rush this thing to the finish line.

11. This is good enough for the event.  I'll make a better copy when I have time.  

12. An amateur photographer snaps a photo of this thing at Event X that ends up going viral online.

13. A bunch of people on the internet exclaim, "this is awesome!" while a similar number of other internet people remind me that they would've totally done a better job if they deigned to waste their time on such frivolous things and I might as well just hurry up and kill myself.

14. That was fun.


Version 4:

This is the one that usually starts with an unknown person contacting me from some dark corner of the internet and asking for special treatment.  Something like, "can I get it at a discounted price?" or "I know you wrote that you'd only paint it red, but I really want it to be green."  I usually know exactly how this is going to end before it begins, but once in a very rare while I cave and relive the following:

1. This is awesome.

2. This is proceeding on schedule.

3. The client is asking questions that make it clear they didn't actually read my last email.

4. The reply to my new, shorter explanation of what I'm doing makes it clear that they didn't read that either.

5. The client suggests postponing the project because of whatever reason they claim, but in reality it's because they've just realized they can't actually afford it.

6. After months of putting me off, the client is suddenly in a huge rush and must have this thing way too soon for me to get it done without a massive overhaul of my shop, schedule, staff, etc.  I assume they just got their tax return or birthday money or something.

7. This has shipped out with time to spare for the new, rushed deadline.

8. This tracking information shows that the client signed for the delivery, but I haven't heard anything from them.

9. Buyer's remorse sets in when the client's wife finds out he bought a painstakingly fabricated custom costume that's worth more than the family car and threatens divorce.

10. Buyer breaks out a microscope and finds a nitpicky detail error on the bottom of one of the boots and tries to use it to justify a complete refund while still keeping the finished product.

11. I bend over backwards and do everything I possibly can to replace the problem part, all while reminding the client that I am not Wal-Mart.  This is custom work made to their exact size and color specifications that I can't re-sell to someone else.  All sales are final.

12. I vow to never agree to special deals or price breaks ever again.

13. A photo of the finished piece pops up in my Facebook memories feed a year later.

14. This is awesome.


Version 5: 

This one usually starts with me seeing a character in a movie or video game and thinking, "my girlfriend has the exact right physique for that character, so I should build it."  Then it goes like so:

1. This is awesome.

2. This is tricky.

3. She doesn't seem particularly thrilled, so I'll be building it on my own, but she says she'll wear it to the next convention.

4. Some shiny new thing has caught my attention and I'm going to put this project in a box and shelf it for a minute until I can focus on it again.

5. It's been how many months since I started that?  I guess I should take another look at it.

6. I don't know what I was thinking with the build plan I had in mind.  Time to re-think the whole thing and start over.

7. This is the 187th time Dr. Girlfriend has made a snide remark about how I'm never going to finish this particular thing.

8. This is coming together nicely and I think it's going to look pretty damned good.

9. It's all strapped together and she's having a great time showing it off at the event.  

10. I wish I'd come up with something for me to wear.

11. A photo of my girlfriend has 1,800 upvotes on a subreddit for fans of the thing I built.

12. This is awesome.


Version 6: 

1. This is awesome.

2. This is tricky, so I'm going to sideline it and tinker with something else while I noodle over the next step.

3. (Roughly 5 years later) What the hell was this for?  Glue it to the wall as another reminder of abandoned projects past.


There are countless other variations, but these are pretty much the way things shake out for me most of the time.  So it goes for a masochistic stress addict with a terminal case of Obsessive Creative Disorder.