For quite some time now I've had a prototype of this rifle kicking around my shop and getting in the way:
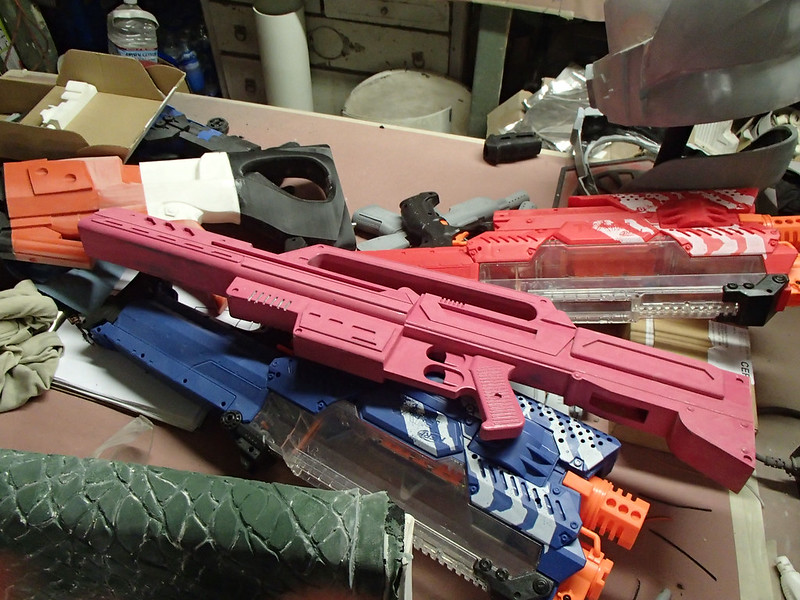
It was made from a digital model by my friend Michelle Sleeper. You can see more of her work here: LINK. She started with an original screen-used Morita prop and decided that it was going to take too much work to make it presentable. Instead, she took painstaking measurements off of it and produced a nice, clean, straight, damage-free digital model which I was able to bring into the real world with my collection of CNC machines and 3D printers. Once it was sanded smooth and painted up to be nice and shiny, it immediately got set aside so I could focus on other frivolous projects.
Then months passed.
When I finally found time to mold it, it just needed to be dusted off prior to building a mold box around it. Then I built up a clay bed and set the rifle into the box like so:
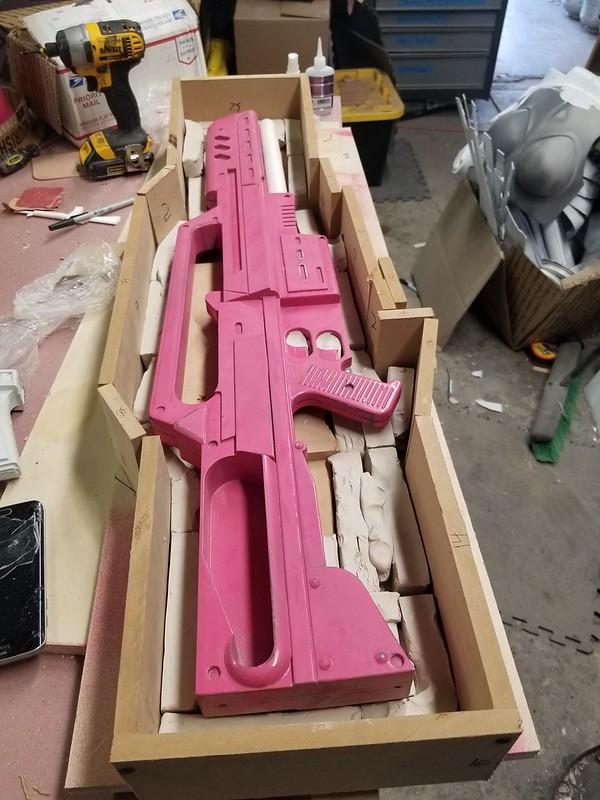
Then the clay bed was covered with more clay to make a watertight mold wall around the rifle along its centerline. Because I have no regard for those of you reading along at home, I neglected to take any photos of that process before I filled the mold box with silicone rubber. Freddy helped:
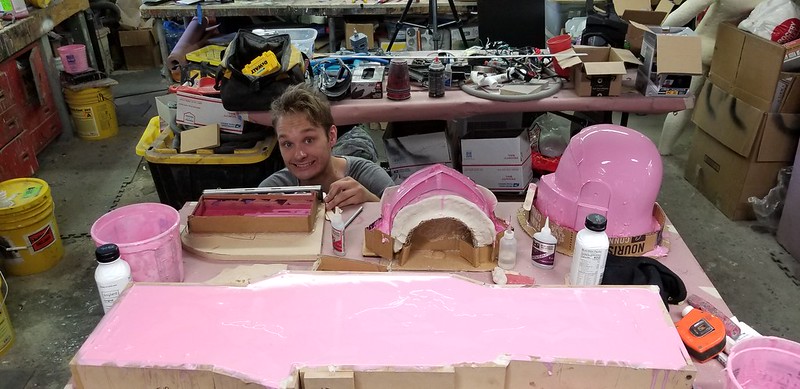
When that cured, we screwed a lid down on top of it, flipped the whole arrangement over, and removed the bottom of the box. With the clay removed, it looked like so:
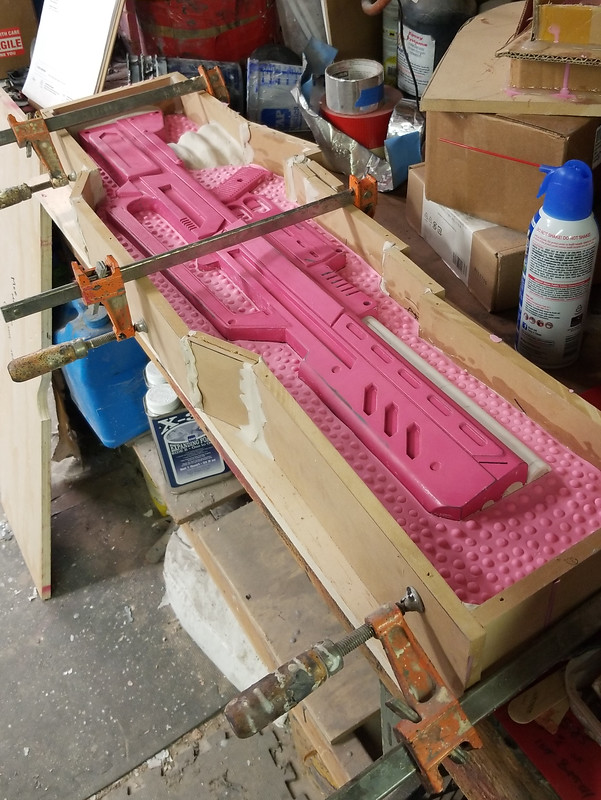 Note the big lump of clay still in the mold on the far end. That's going to form the plug for the magazine well. It'll all make sense soon.
After spraying on a judicious coat of mold release, we filled the second half of the mold with silicone rubber:
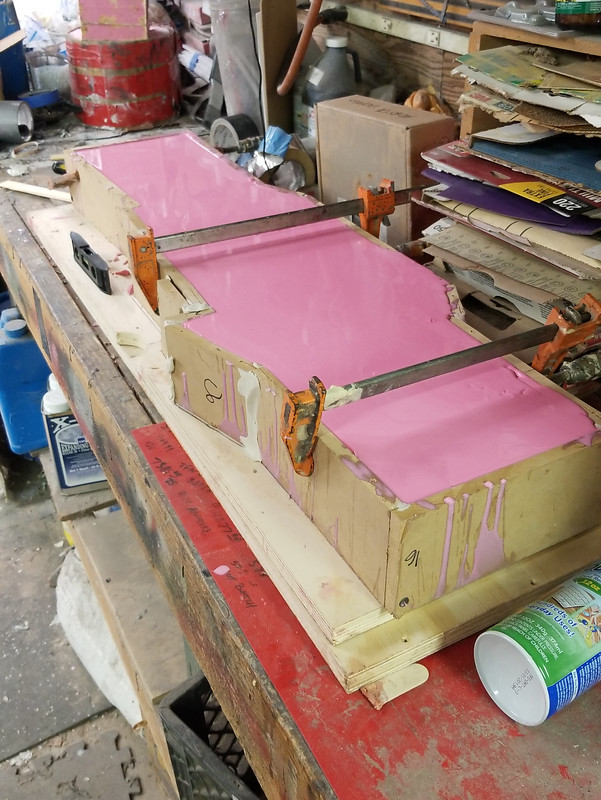
After the second half cured, we removed the box and took out the lump of clay for the magazine well plug. The resulting hole was sprayed with more mold release and then filled with another batch of silicone:
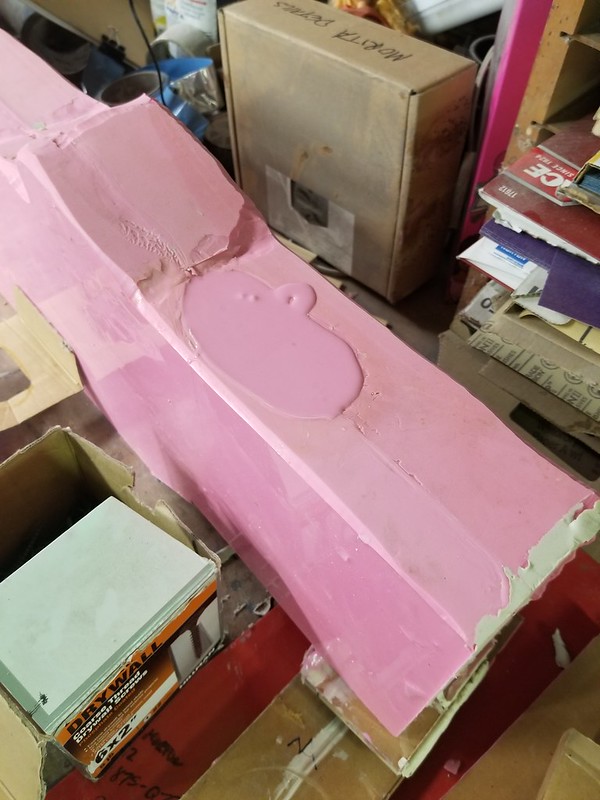
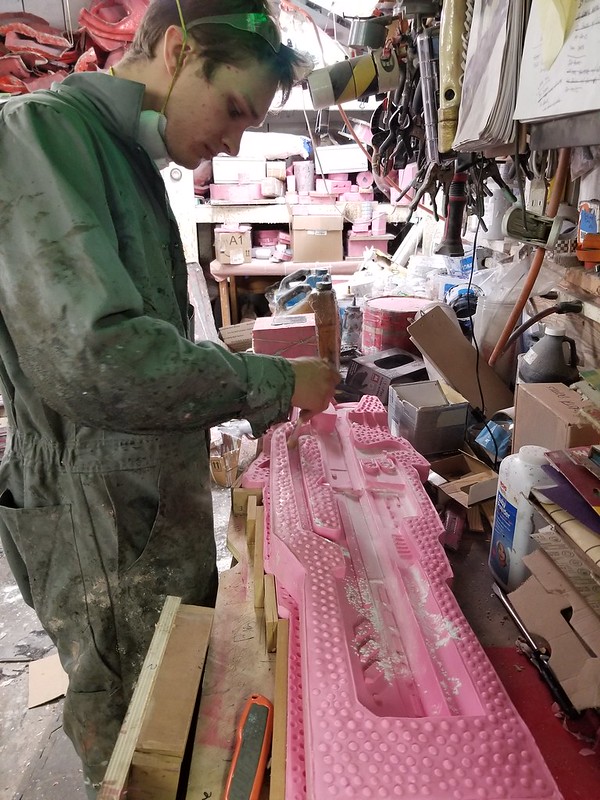
After that cured, the mold parts were peeled apart:

Then the molds were dusted with talcum powder:
In order to keep the weight down and to add a bit more rigidity to the resin cast, a length of PVC pipe was capped on both ends and placed into the mold:
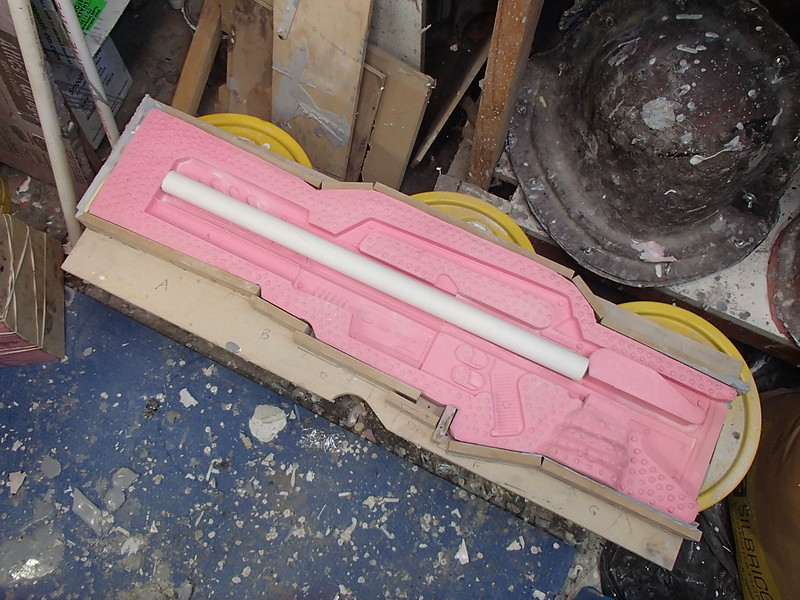
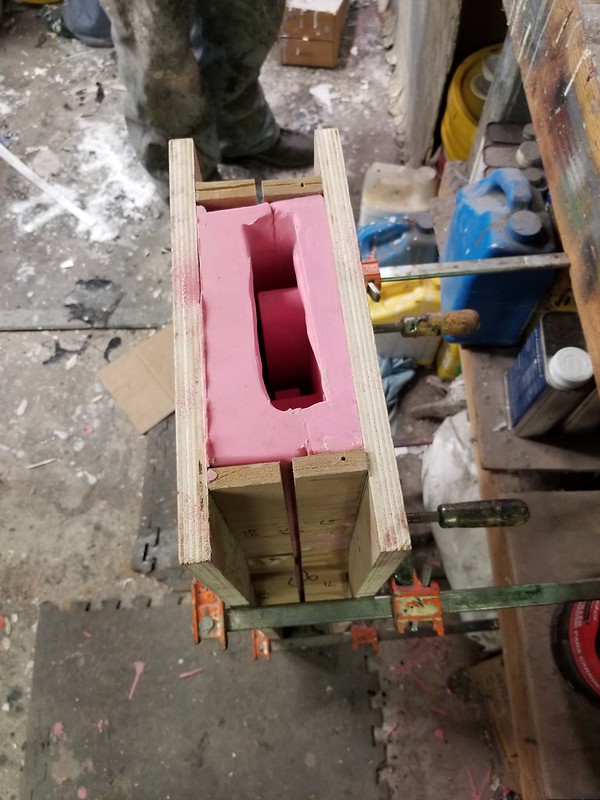
Finally, everything was clamped back together and ready for casting:
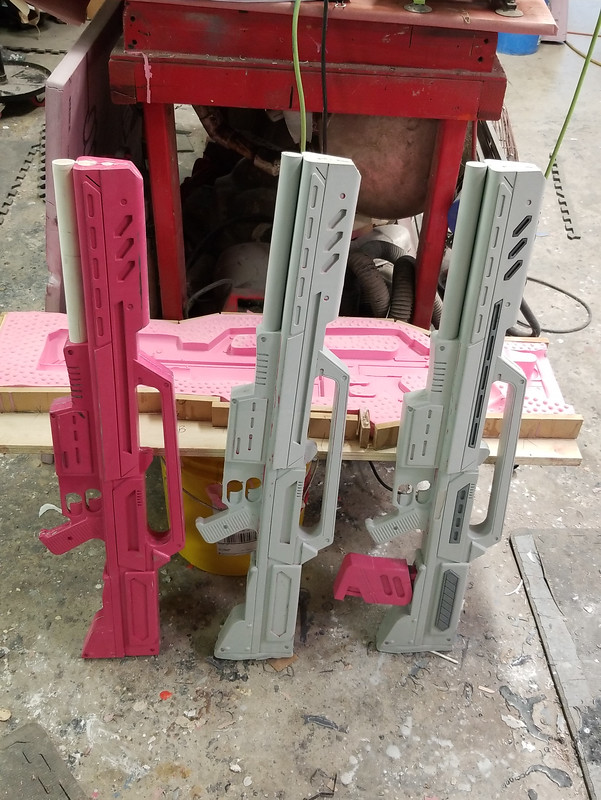
Once the first cast was out of the mold, I couldn't resist the urge to cast a second rifle. Here's the first two next to the prototype:
Here's my young friend Briar trying one on for size:

At this point I still had to mold the rest of the details and add-ons:
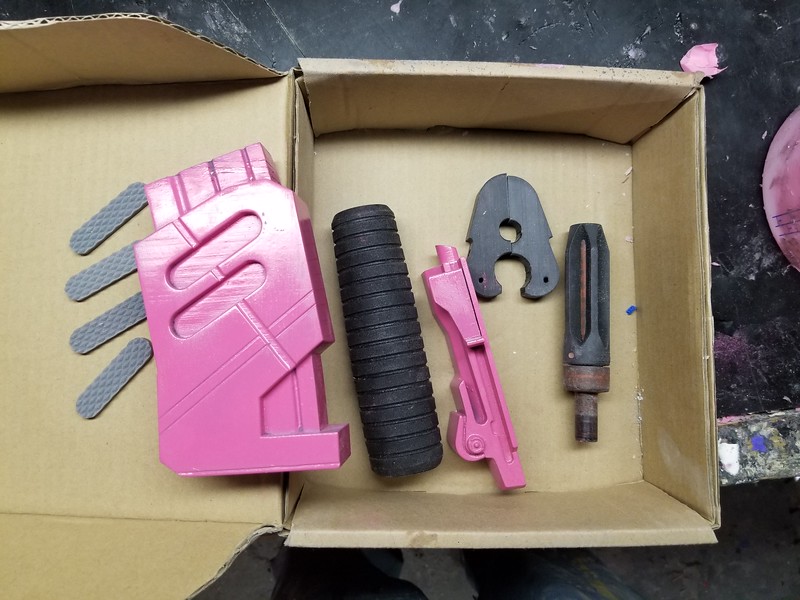
They were all simple block molds for the most part. Once the castings started coming out, it was time to begin assembly:
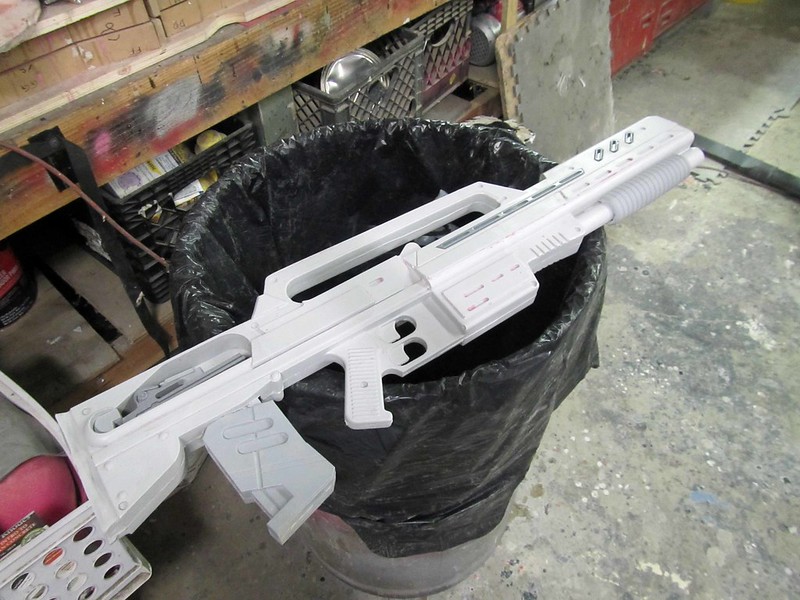
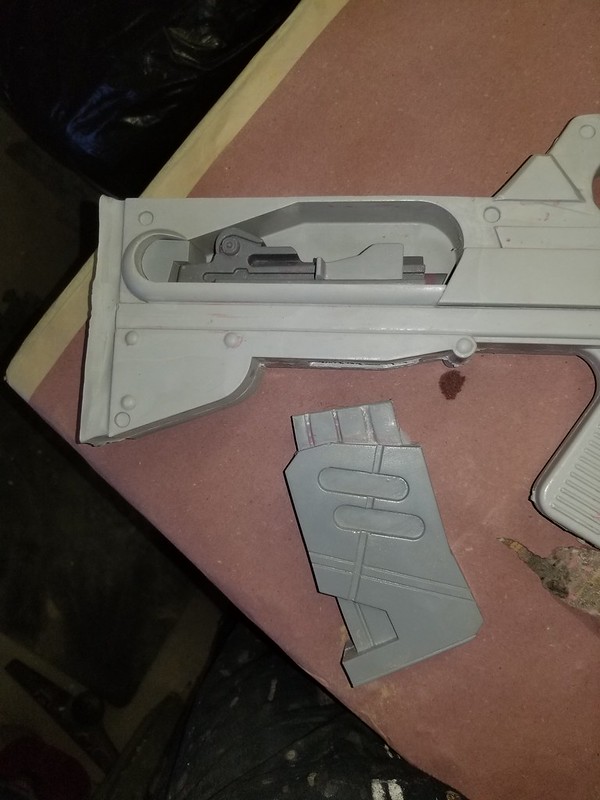
Michelle even made a model of the Ruger Mini-14 action to fit into the opening at the rear of the stock:
The last piece I molded was the muzzle assembly. It consisted of an actual M-60 flash suppressor and a magazine tube cap off of a 12-gauge shotgun fitted to a 3D printed bracket:
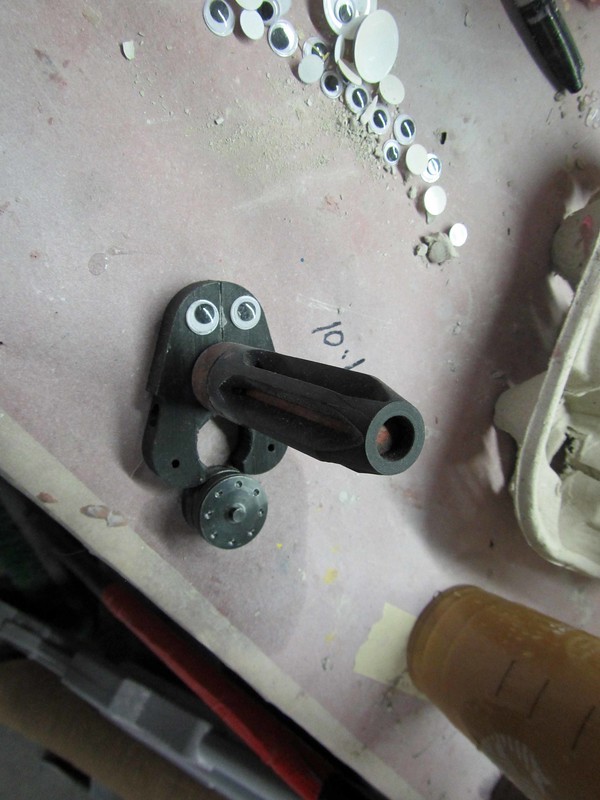
So far so good:
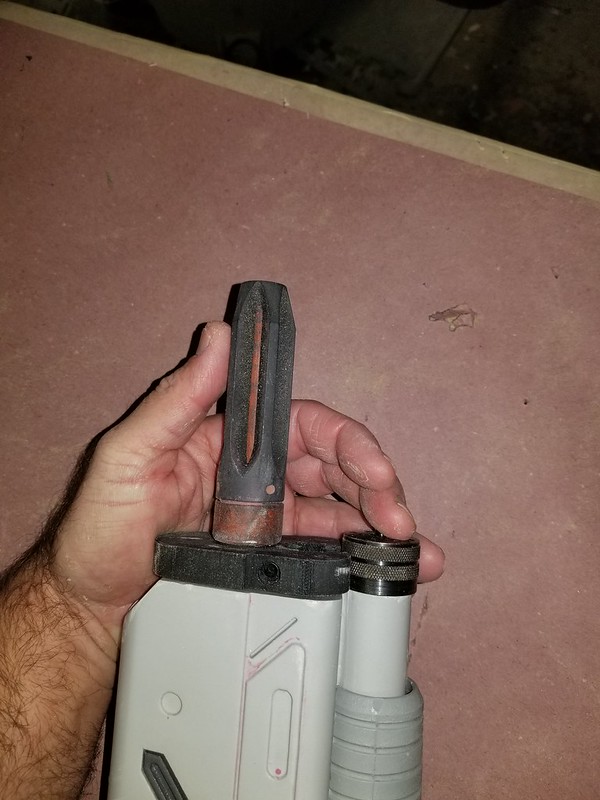
The final parts were a piece of tubing to simulate the shotgun barrel and a hand-sculpted bracket to tie it all together:
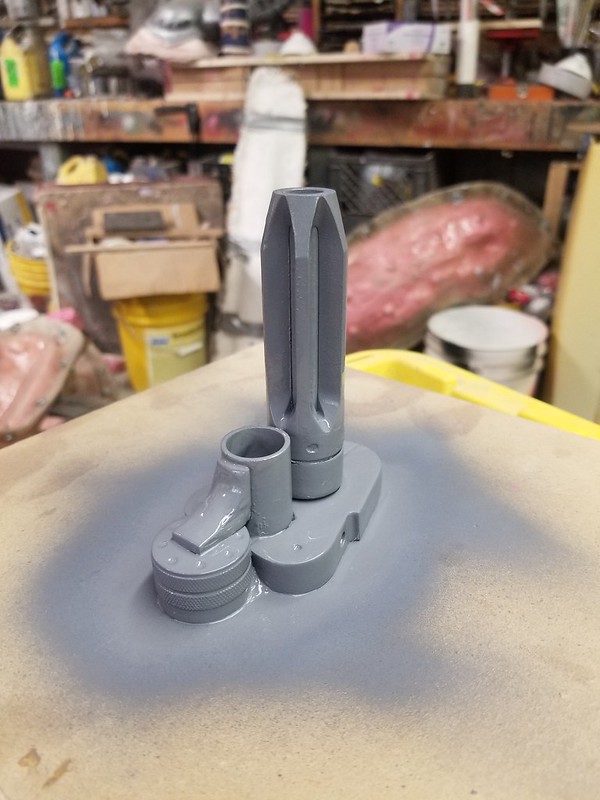
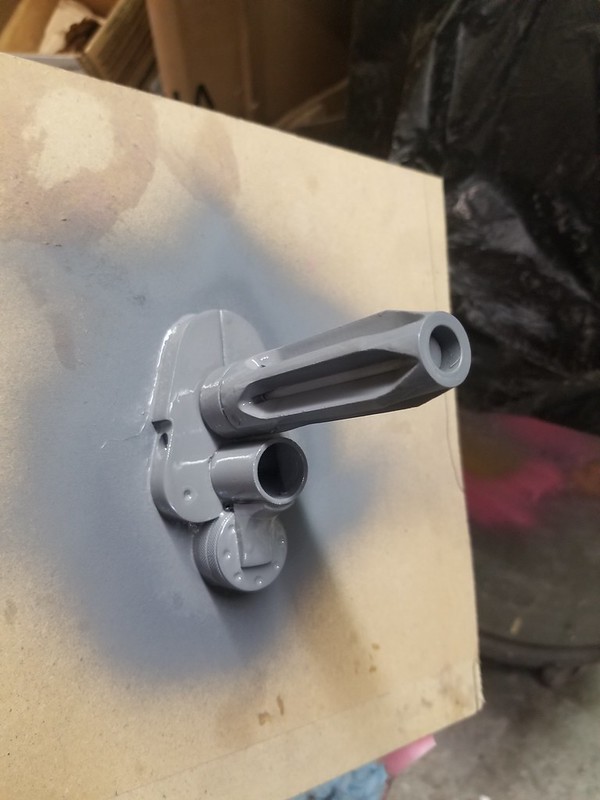
Once it was all done drying, I made up another mold box and filled it with rubber:

The castings came out perfectly:
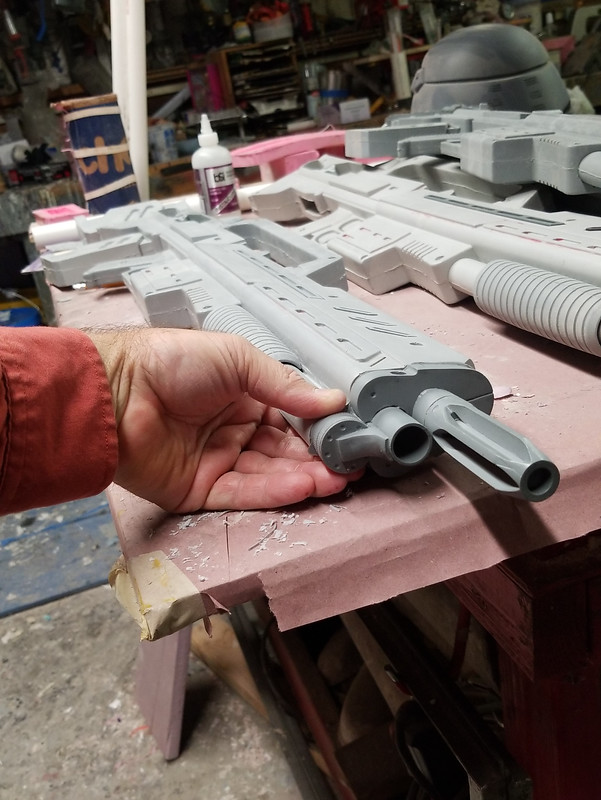
With the muzzle cast, I now had the full set of parts:
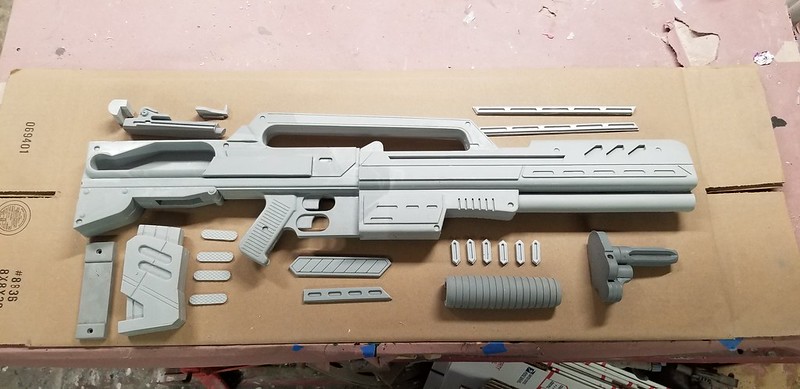
The whole set of parts worked out to a total weight of under six and a half pounds:
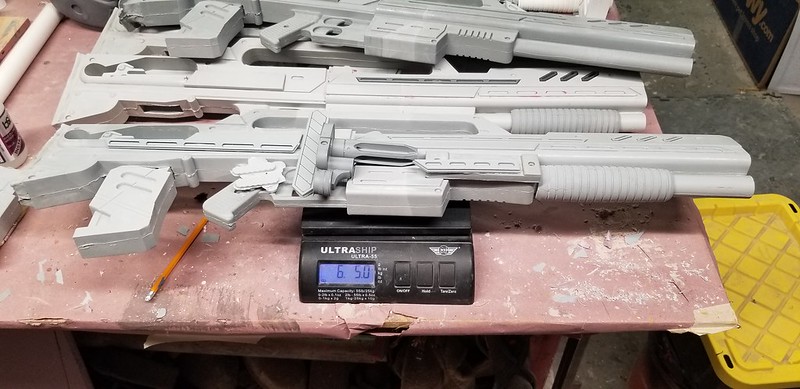
Now that all of the molds were made, it was time to make more parts:
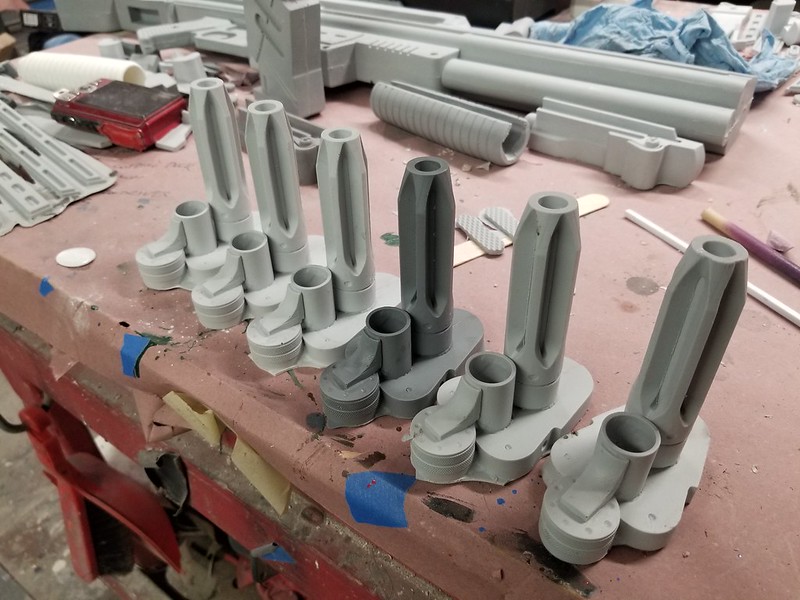
If one rifle prototype was in the way, this stack was going to become a problem:
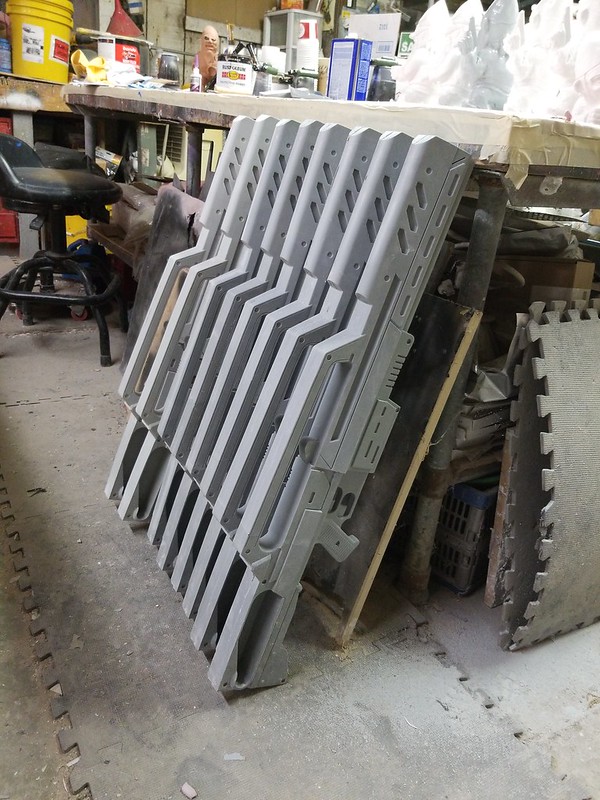
BUILDING
Sanding off the seam lines and applying a quick bit of spot putty took no time at all:
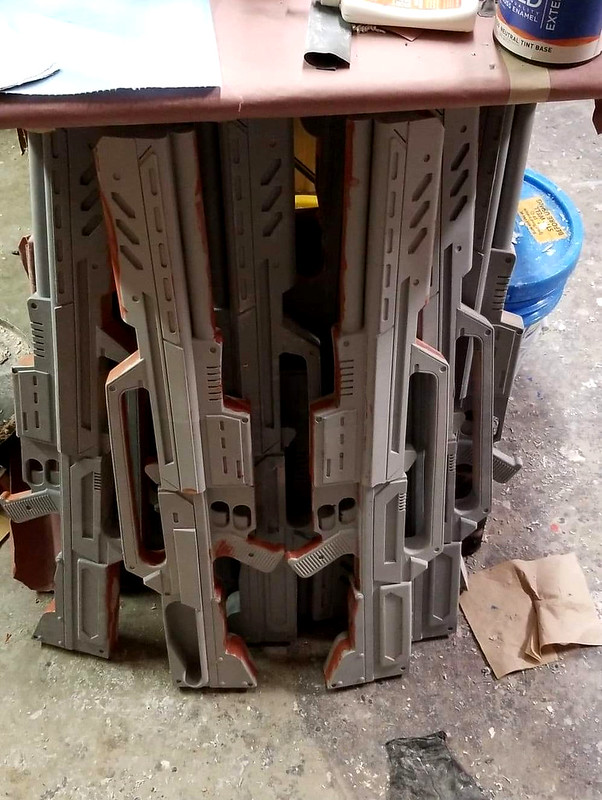
Meanwhile, I trimmed the excess resin off of all of the other parts too:
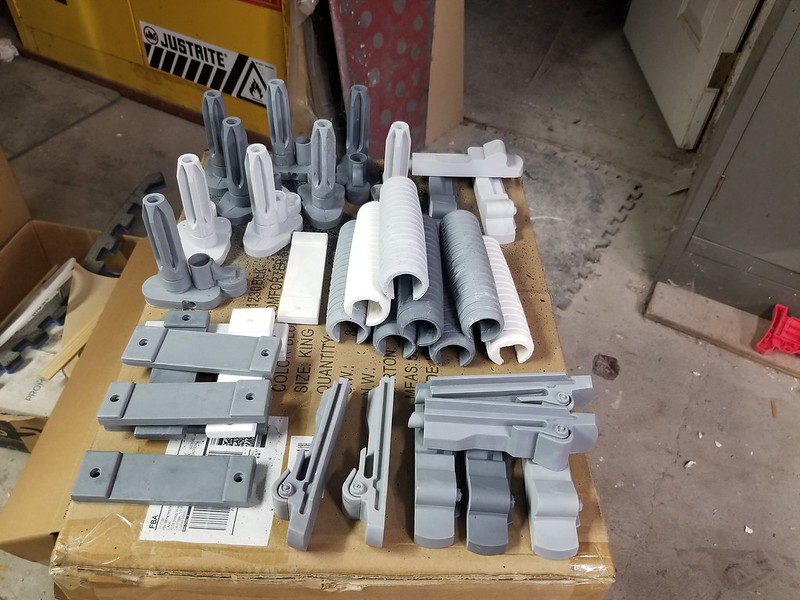
After a quick wash with warm soapy water, the parts were rinsed clean and primed. Then they were ready for...
PAINT
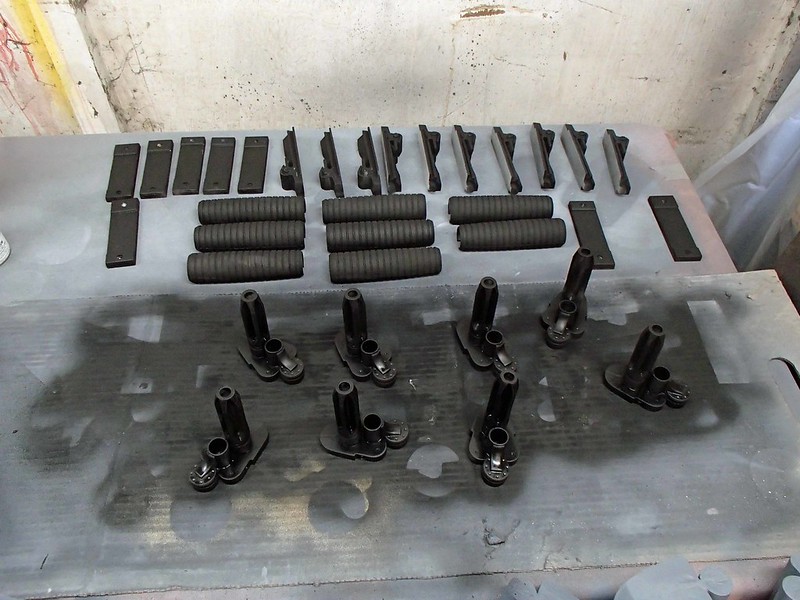
The receivers, buttplates, muzzles, and little details for the magazines were painted flat black to start:
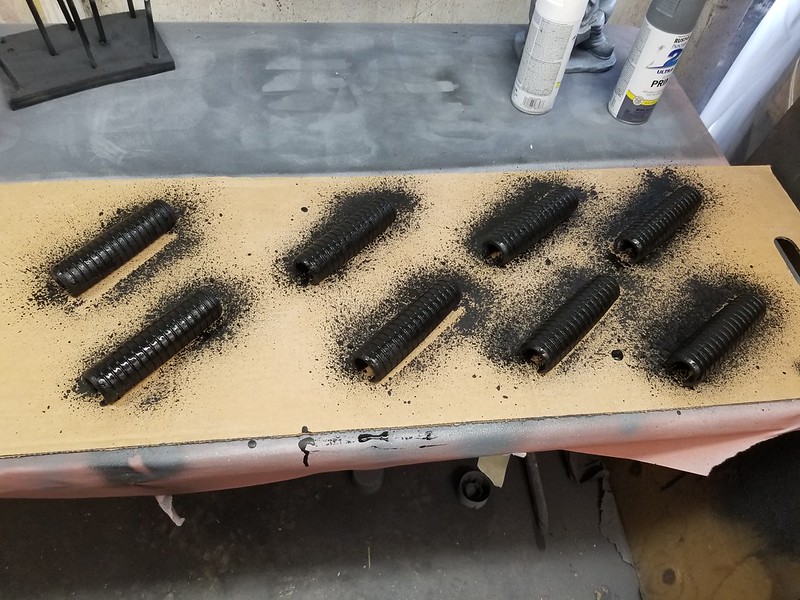
The shotgun grips were given several coats of textured truck bed coating:
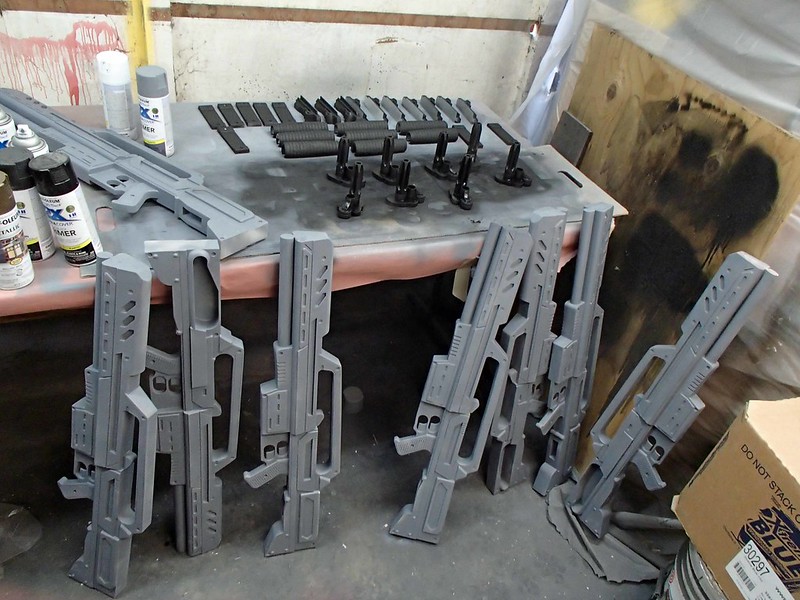
The main bodies of the rifles were given a couple coats of greay sealing primer:
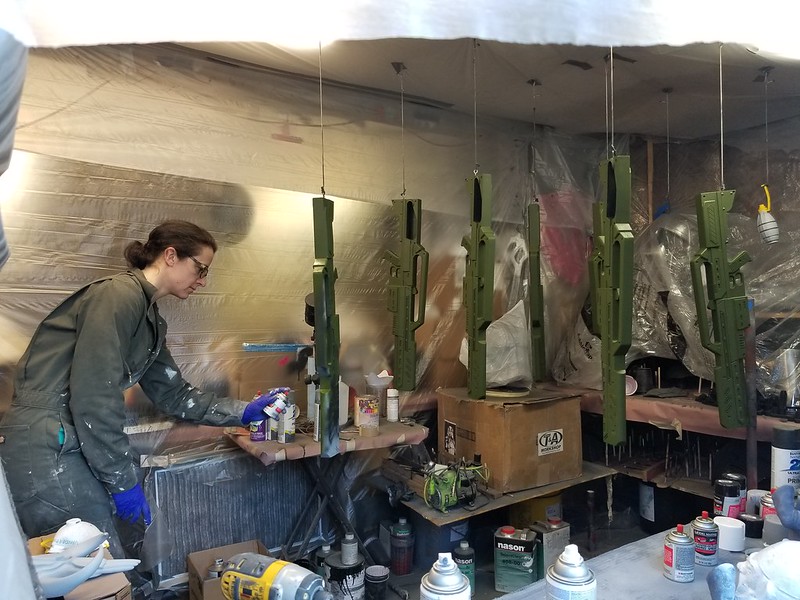
Then they were basecoated with Flat Medium Green from Model Masters:
The triggers, shotgun barrel section, and the recess in the side of the butt where the receiver goes were picked out by hand with flat black paint. Then the rest of the pieces could be glued into place:
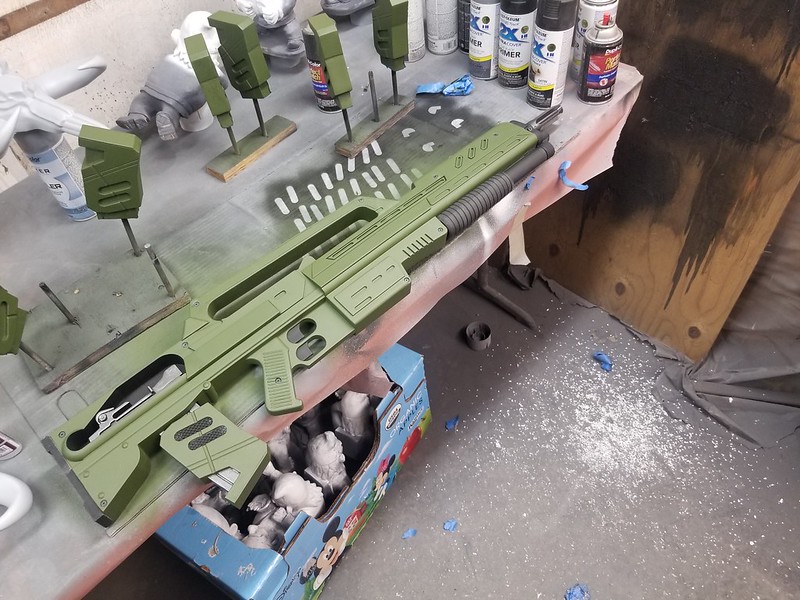
The muzzle assembly was masked off and the flash suppressor was painted in a gunmetal metallic:
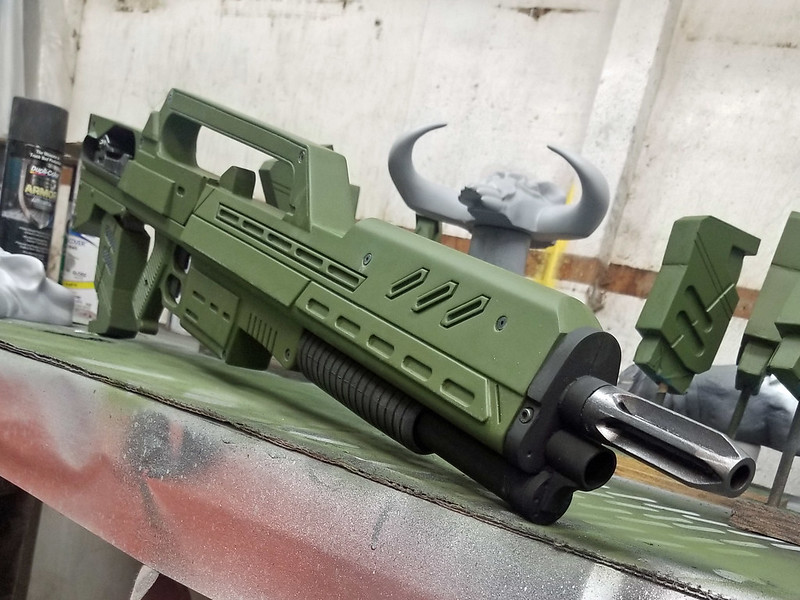
At this stage, the base green was way too light. Fortunately, the flat sheen did a great job of soaking up the blackwash. This helped pop out the details and brought the color down to something much more screen accurate:
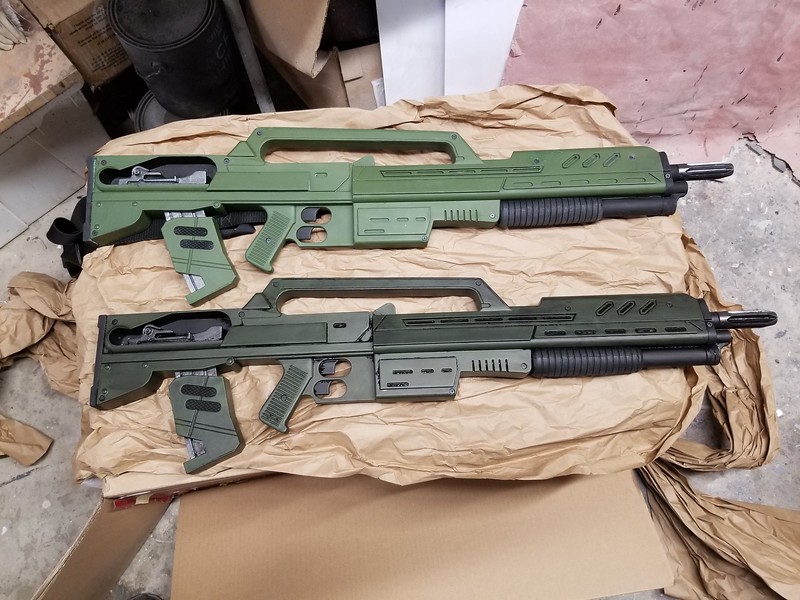
After a bit of silver was drybrushed onto the shotgun barrel, muzzle, and receiver, the whole thing was given a coat of matte clear for protection.
The last touch was adding...
THE SLING
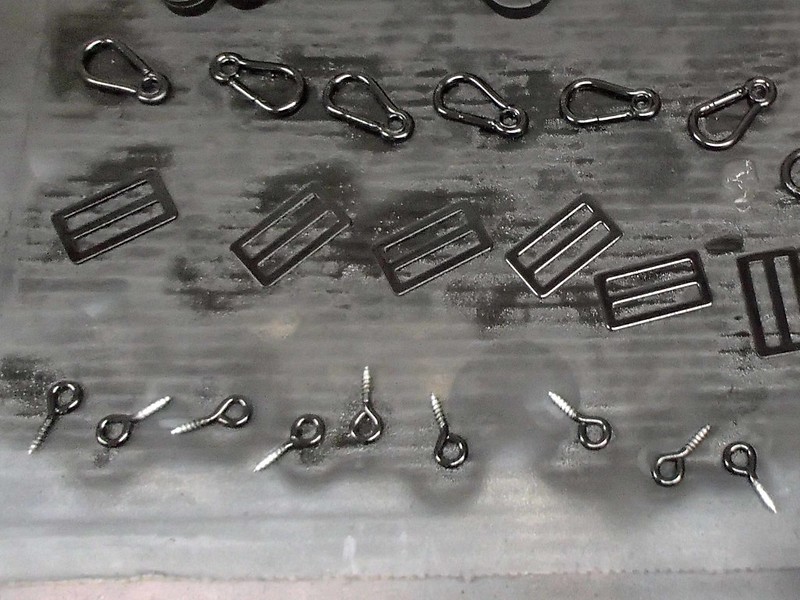
Making a sling sounds simple enough until you take a closer look at the odd contraption that was custom-made for these rifles in the film. I guess it's called a "safari style" sling with some garnish to make it look a little more complicated. Here's the ingredients:
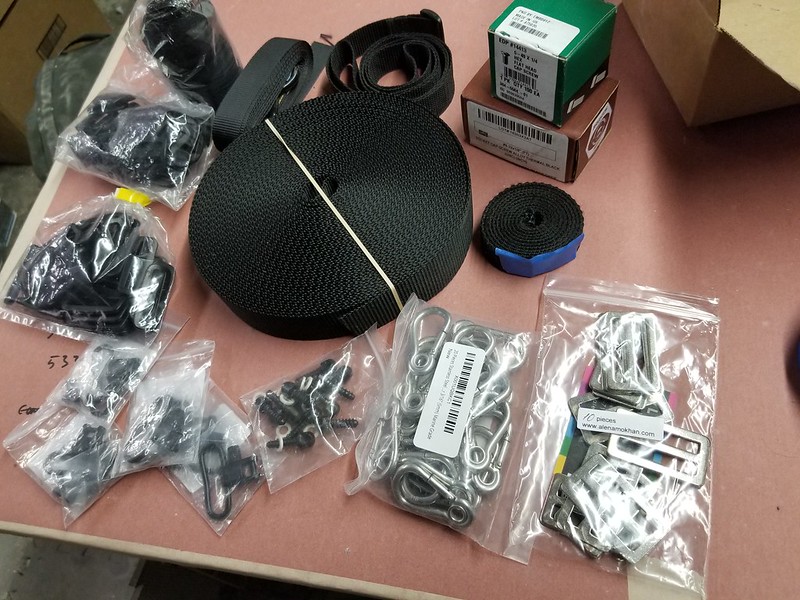
Since I couldn't find flat metal sliders and tiny little carabiners in the correct black finish, I had to settle for painting them myself. So here's step one:
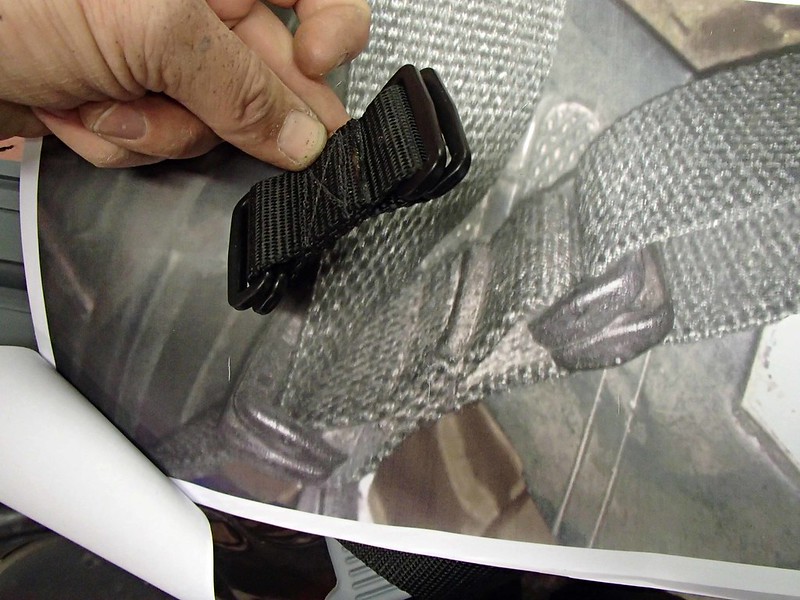
The slider on the sling was this doubled-up pair of paired plastic slide loops:
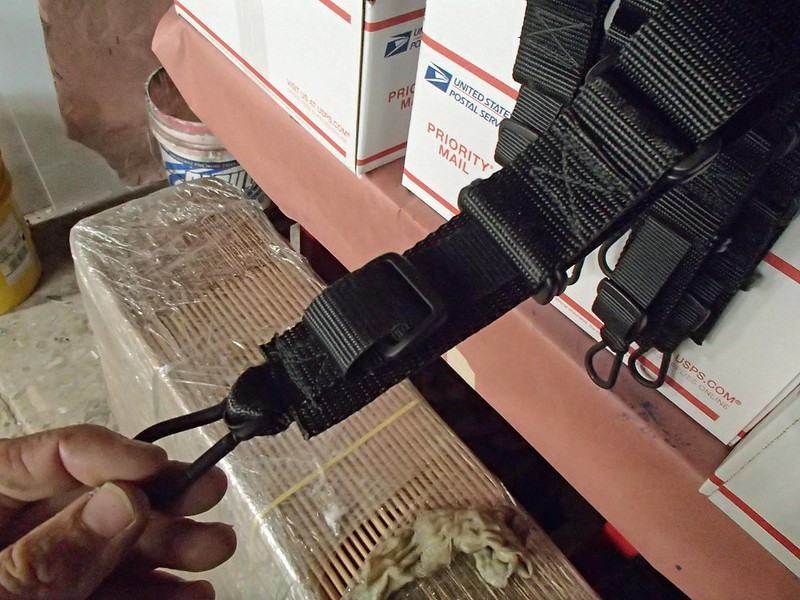
The carabiner was slipped onto a piece of 3/4" nylon webbing which was then sewn onto the end of the 1-1/2" webbing the rest of the sling was made of. There was also this weird little vestige of 1" webbing with a slide trapped on the end of it for no reason I can think of:
I ended up quitting after I'd made seven of them:

With the sling attached, this project was basically finished:
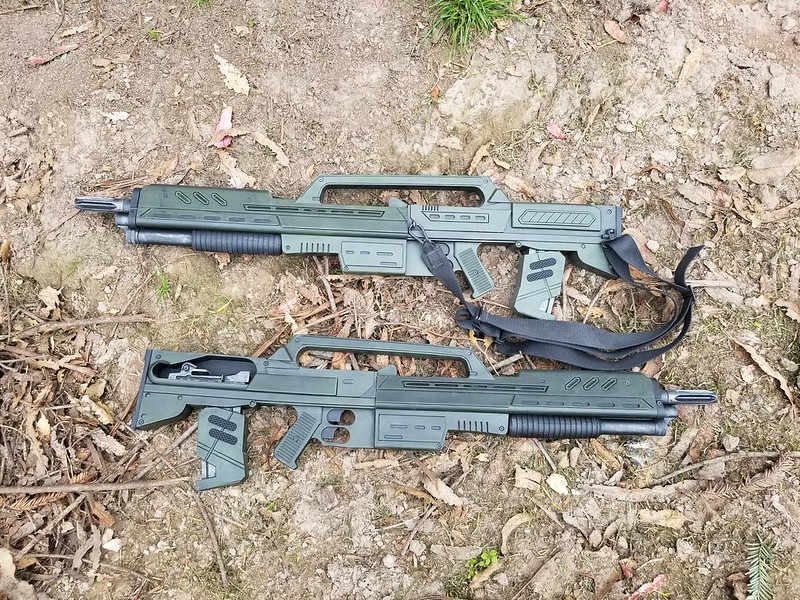
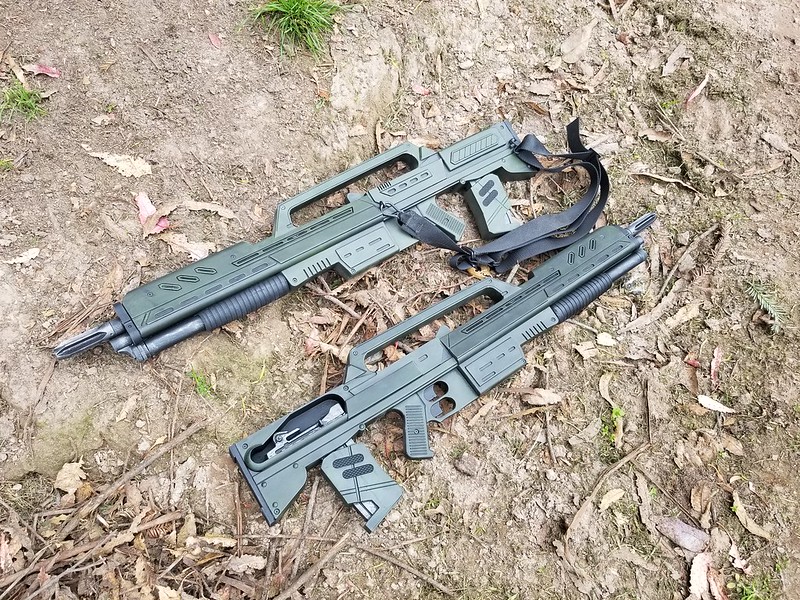
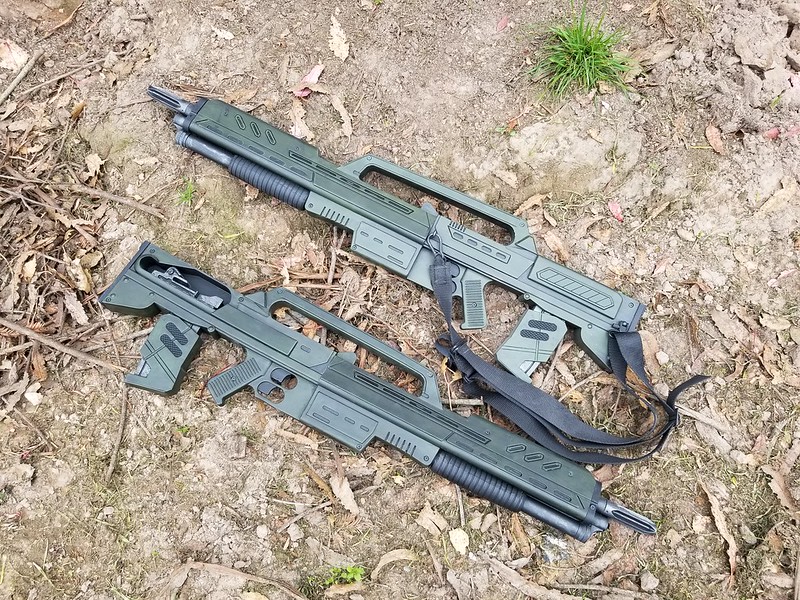
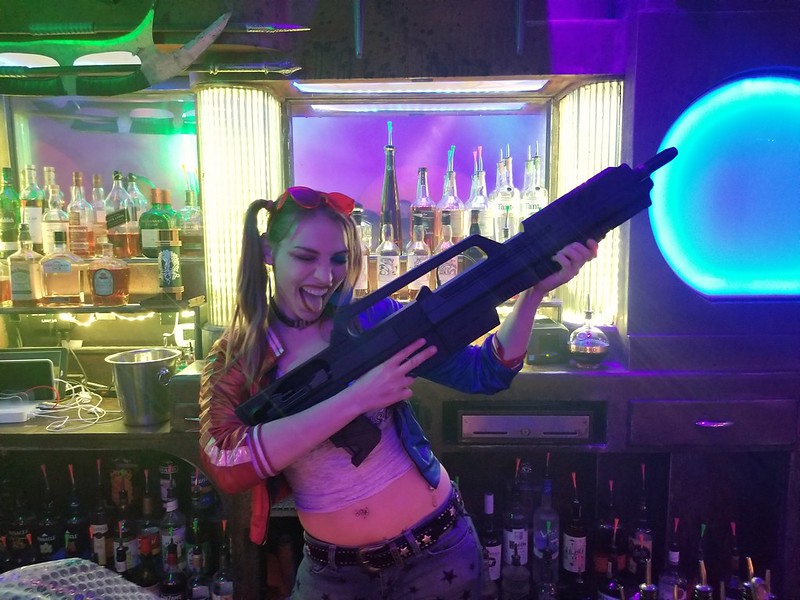
Most of them went to friends, but I ended up keeping two handy so I can take cool photos like this one at the Scum and Villainy Cantina in Hollywood:
Otherwise, they just hang on the recently finished projects rack:
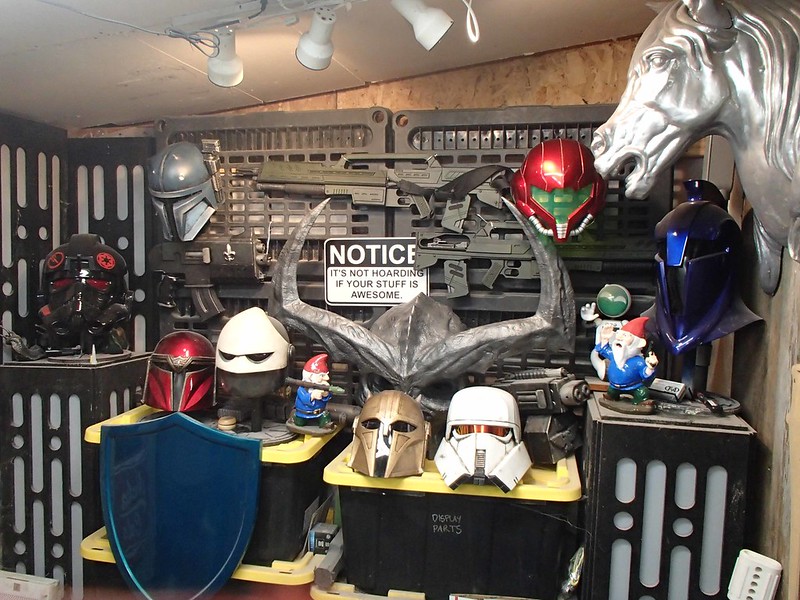
That's cool and all, but I've also got these other things lying around the shop, just begging for me to replicate them:

I may make the carbine version of the Morita too. Who knows?
Stay tuned for more...
A while back I got to see the first three episodes of The Manadalorian before they were released as part of a special event for costume fan clubs. While the show was pretty good and I liked it a lot, the real standout for me was this lady:

This is the Armorer. A sort of spiritual leader for the enclave of Mandalorians hiding out on the planet Nevarro. As the show progresses we see that she has the respect and deference of these legendary warriors and turns out to be a badass in her own right. Add that she's a maker of things and I couldn't resist the urge to bring this one to life.
Here's the finished helmet:

To see a detailed explanation of how it was made, read on...
What makes the grass grow? Blood, blood, blood!
For the first time in quite a while, I've actually had the time to sit down and focus on sculpting for a minute. The result, a new variant of Combat Garden Gnome. This version is charging headlong into battle with his bayonet fixed:
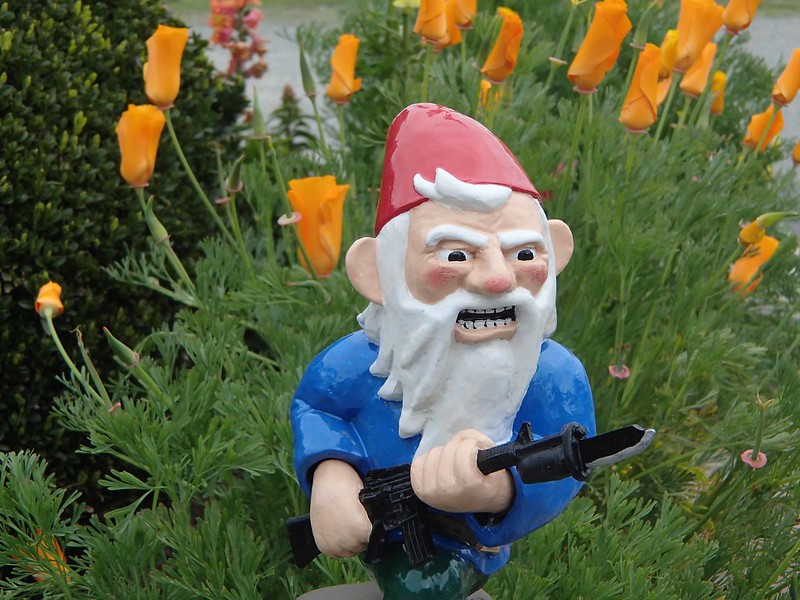

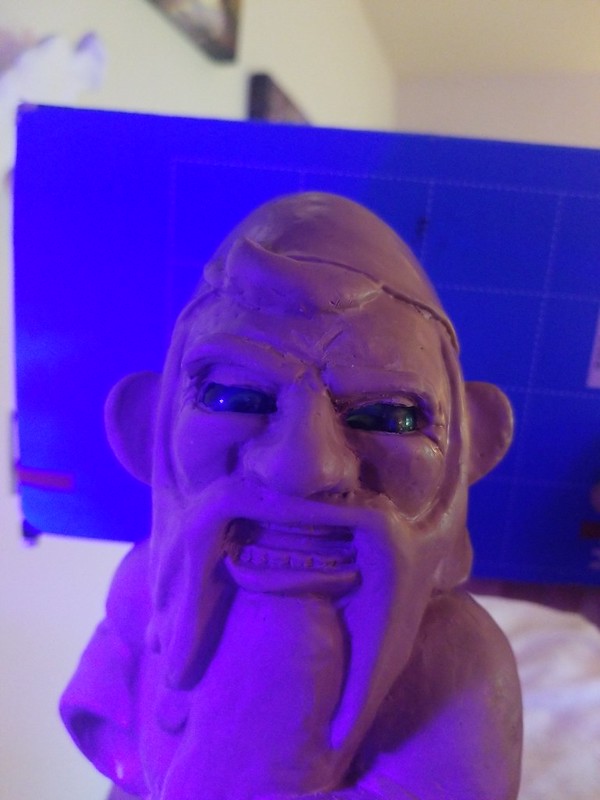
As with all of my Combat Garden gnomes, the original was hand-sculpted by me in oil-based clay and then molded to reproduce him in urethane resin. I'm especially proud of his angry little face:
Once the first cast was out of the mold, it was painted with high-gloss exterior paints and deployed in my mother's garden. There he will stay, facing all-comers in the endless battle for lawn dominance:

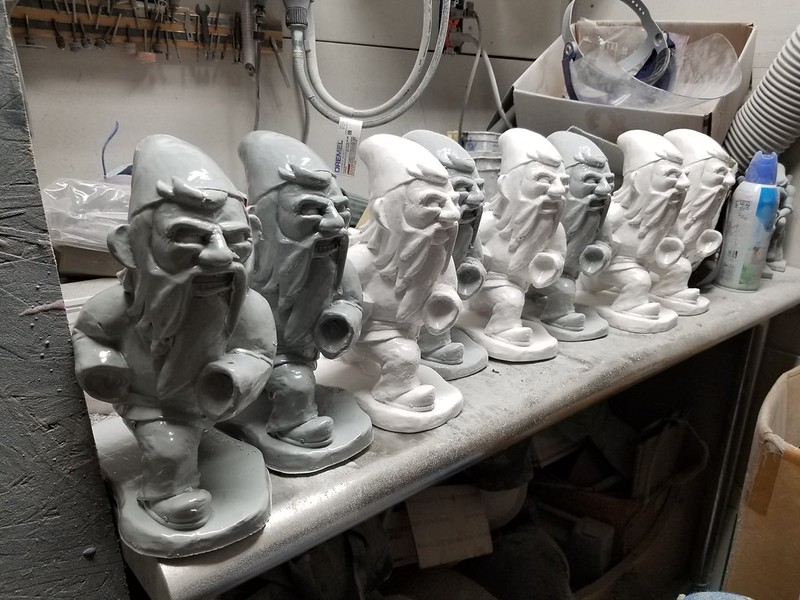
Meanwhile, work continues on the rest of the castings:
If you'd like one for your very own, you can order them here: LINK
If you're feeling artistic and want to paint one yourself, you can order the unpainted version here: LINK
I've got a couple more sketches in the pipeline, so stay tuned for more Combat Garden Gnomes.
.
A while back I was lamenting the fact that I need more colors in my portfolio of finished projects. I've done a lot of bare metal-looking things, lots of black and white and military greens. There's been a few shades of grey and for some reason a lot of blue, but ever since the HALOween project a few years back, there hasn't been a lot of bright colors. Then even when I am doing something bright, it usually gets weathering added to take down a lot of the shine.
So I needed something a bit different. If only to prove to myself that I can still do shiny and clean-looking stuff.
Enter this lady:
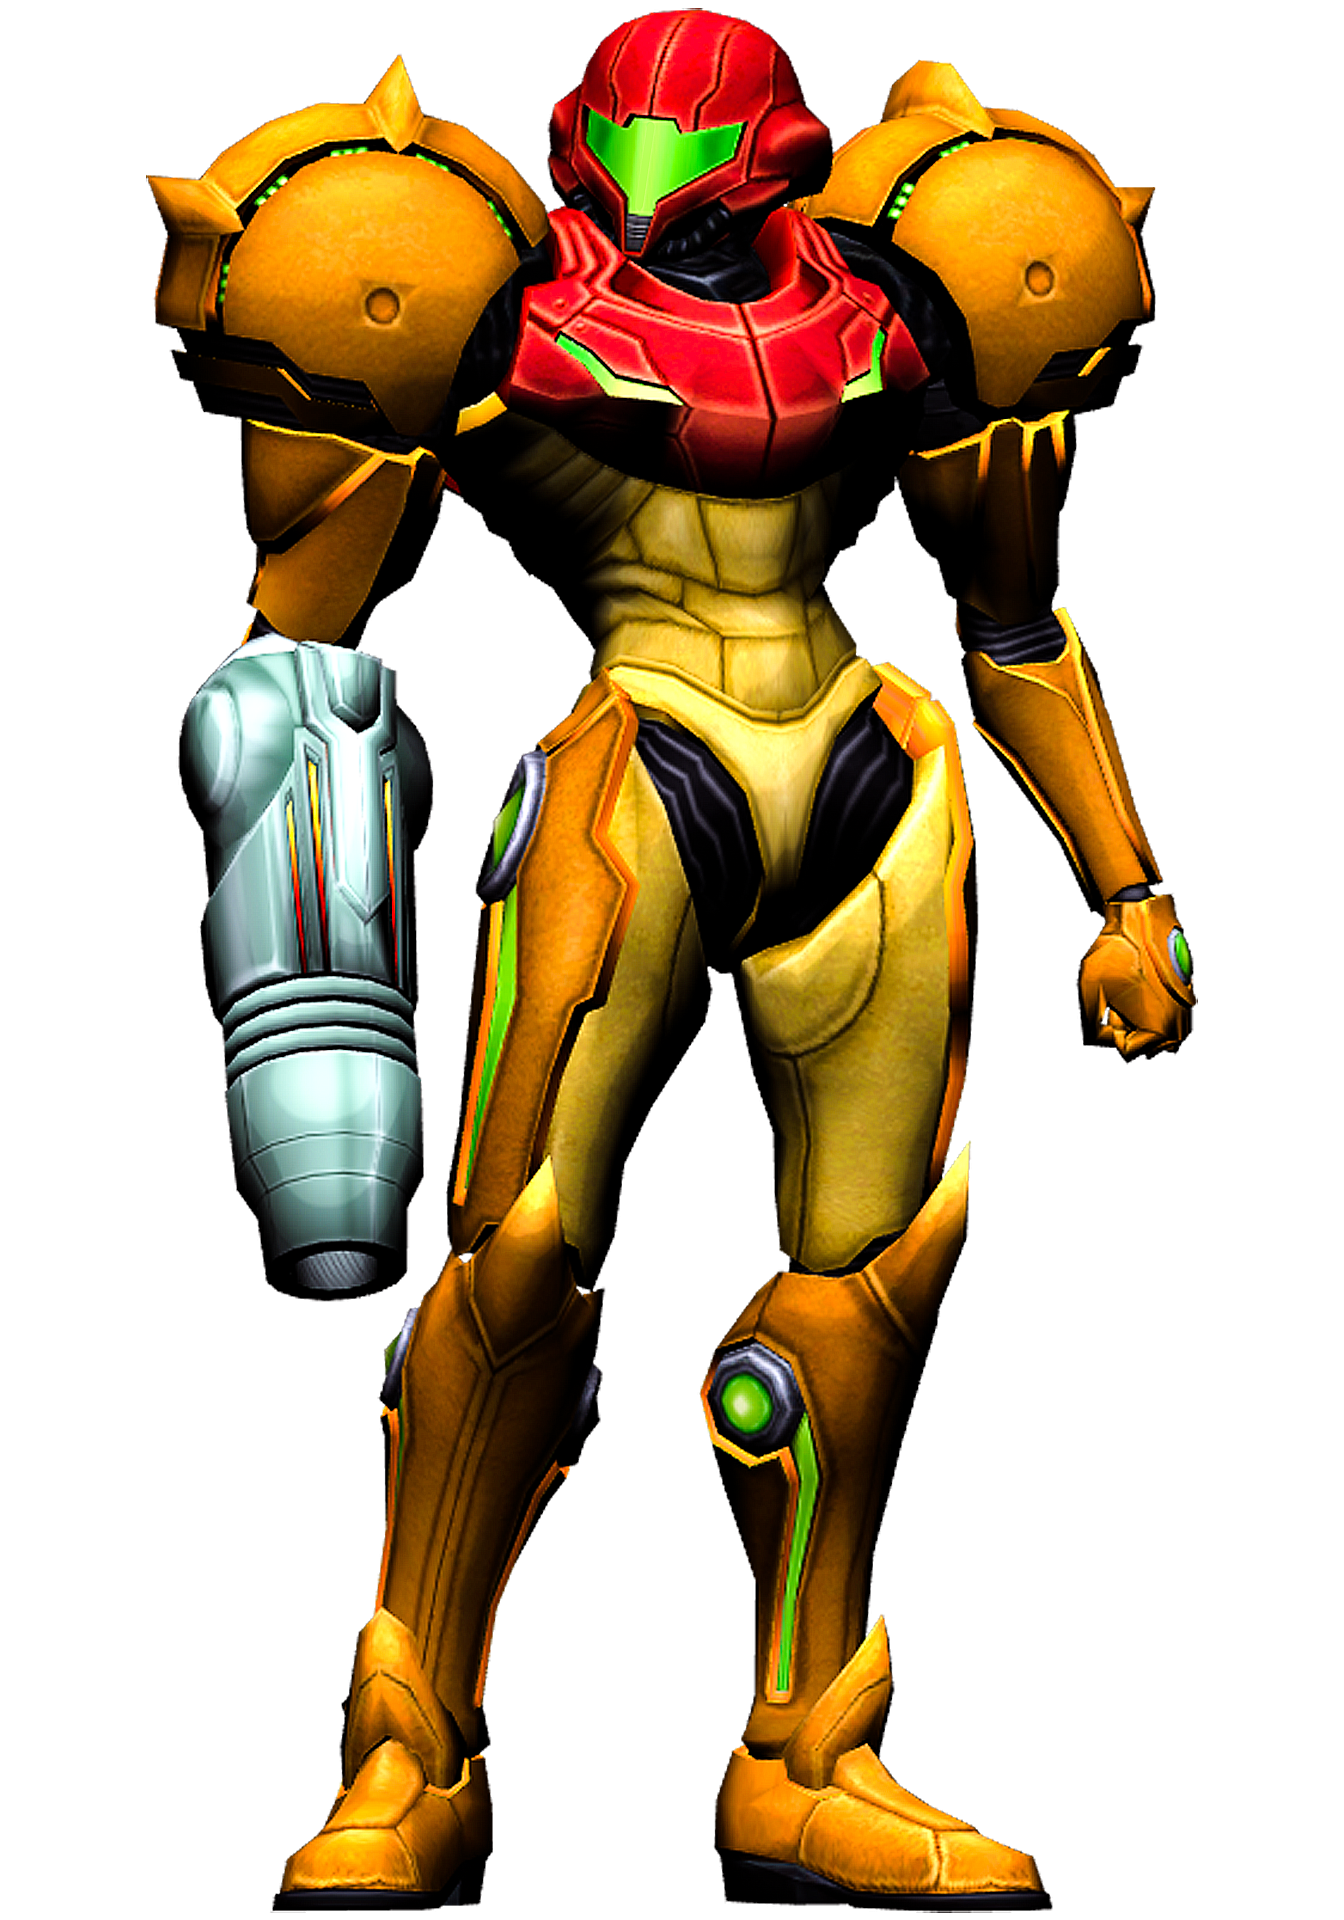 This is Samus Aran from Nintendo's Metroid games. Not only is she completely decked in bright colors from head to toe, she's almost never shown with even the slightest scratch on her armor.
That'll do.
Since I was taking this project on a whim, I figured just making the helmet would be enough to satisfy this weird new desire to make something shiny. I started by contacting my friends at Do3D.com to get a hold of their printable Samus helmet.
They really do great work:
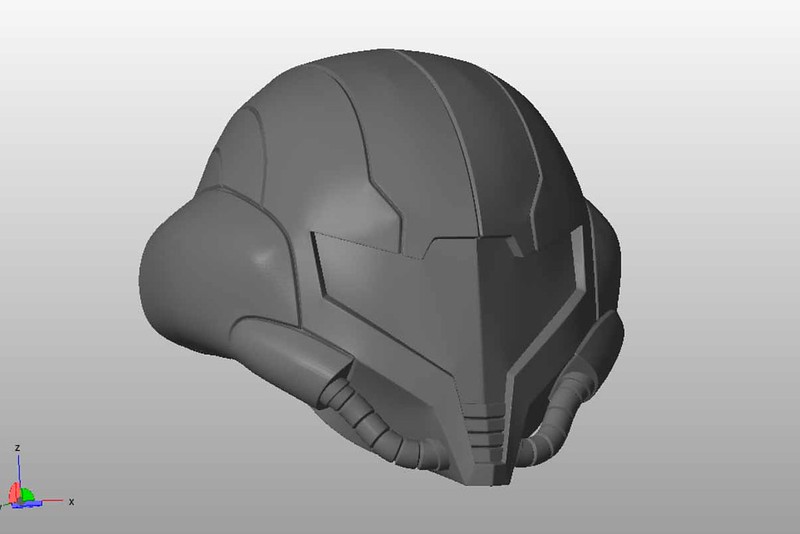
So I split up the model into smaller pieces that I could print with leftover bits of filament on the ends of all of my nearly empty spools. After a couple of days, it looked about like so:
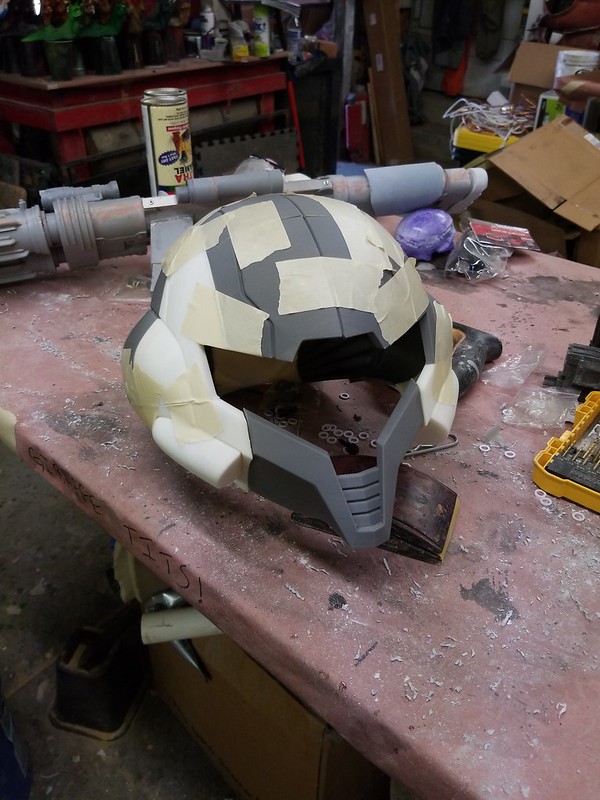
With the parts lightly sanded and glued together, all that was left was a bit of filler work on some of the areas where I messed up the alignment a bit:
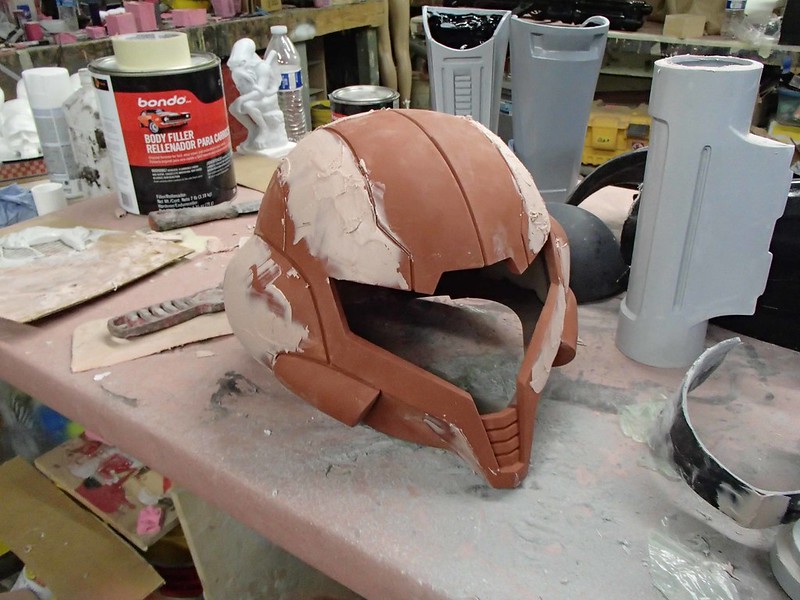
The final coat of primer let me know I had everything smooth and proper:
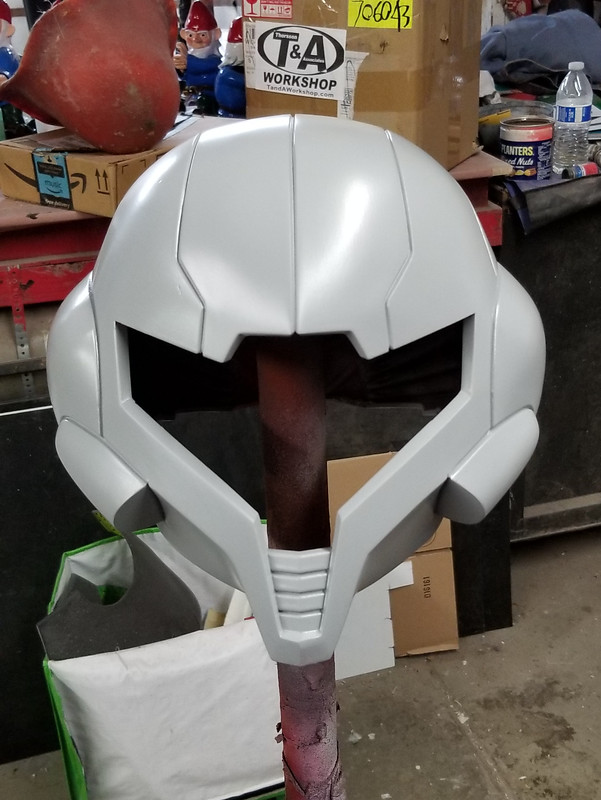
Then everything got a nice glossy coat of my standard lightish-red prototype color. Here's Doctor Girlfriend trying it on for size:
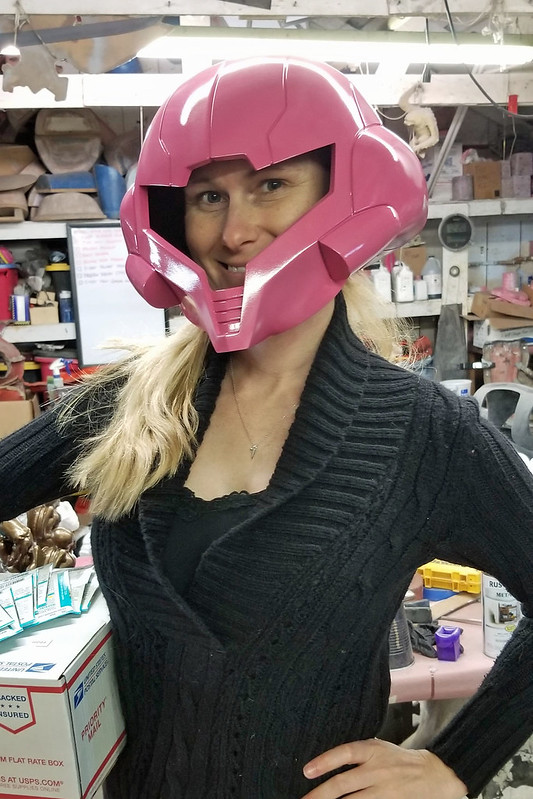 Perfection!
The last step was to heat form a piece of acrylic for the faceshield:
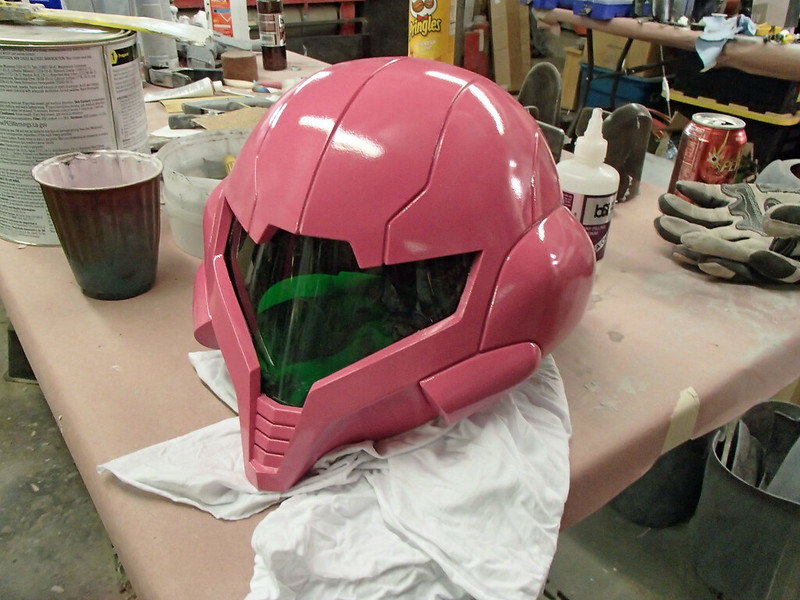 Of course, at this point, the color didn't matter. It was more important to get the shape right. With that in mind, we just used a scrap of whatever was laying around.
That done, the whole thing was molded. The mold itself was a two-piece rubber jacket mold with a two-piece fiberglass mothermold.
Heres the beginning of the parting wall being built up:
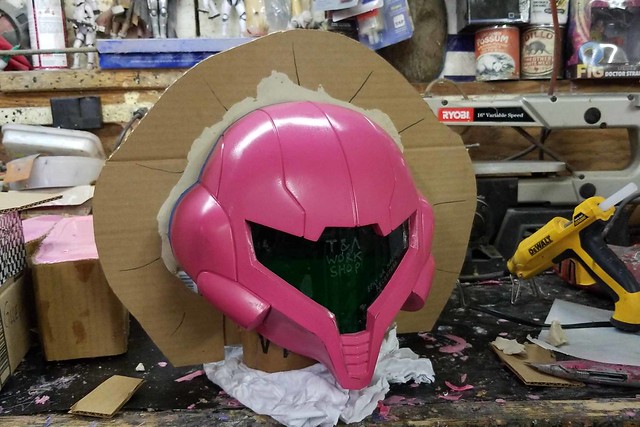
Once the clay wall was dimpled with registration keys, a drip lip was built up around the edge and the silicone print coat was poured on:
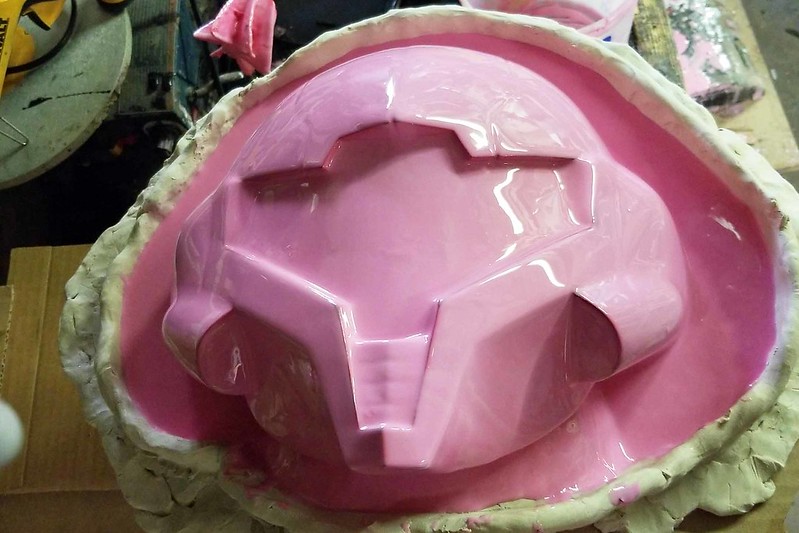
After building up a few layers of thickened silicone, I had about half an inch of rubber over the front half of the helmet. This was covered with registration keys and another thin layer of silicone to smooth it out:
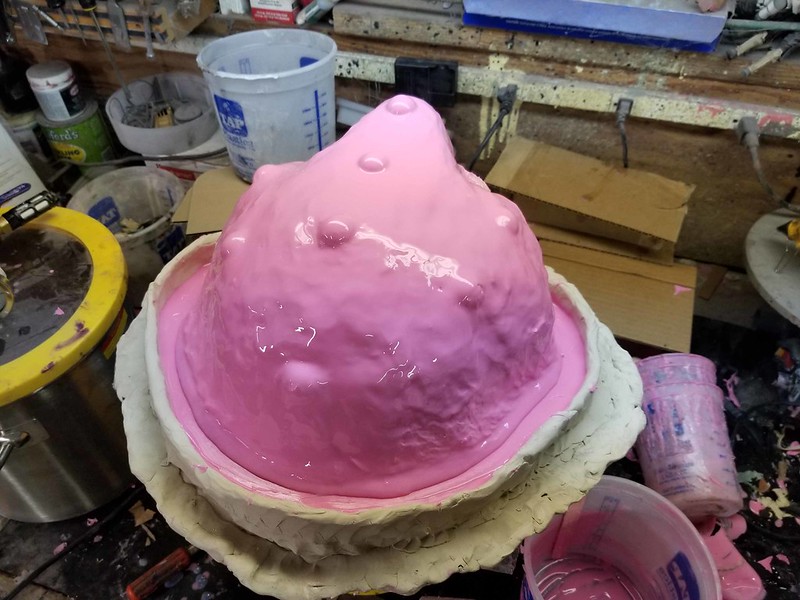
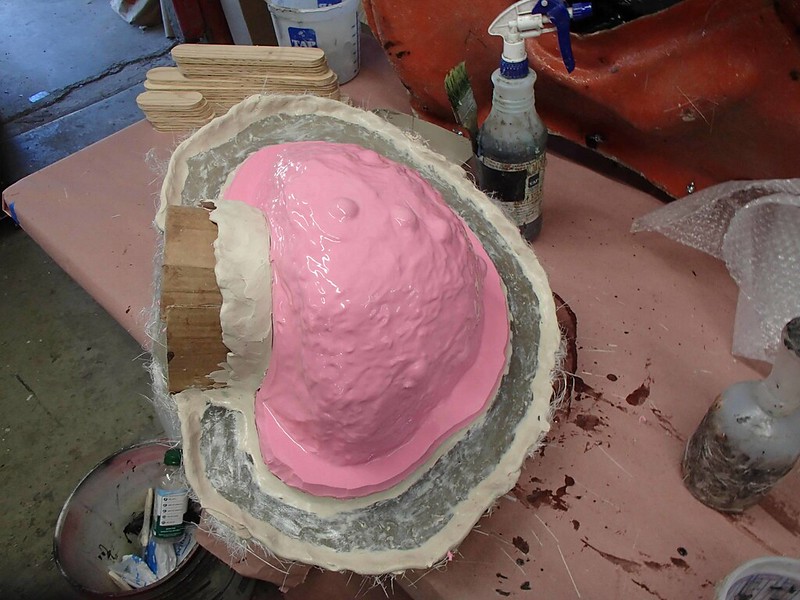
That cured and I laid up the first half of the fiberglass mothermold. Then I flipped it over, removed the clay wall, and molded the second half. Here it is somewhere in the middle of the process right before the second half of the mothermold was made:
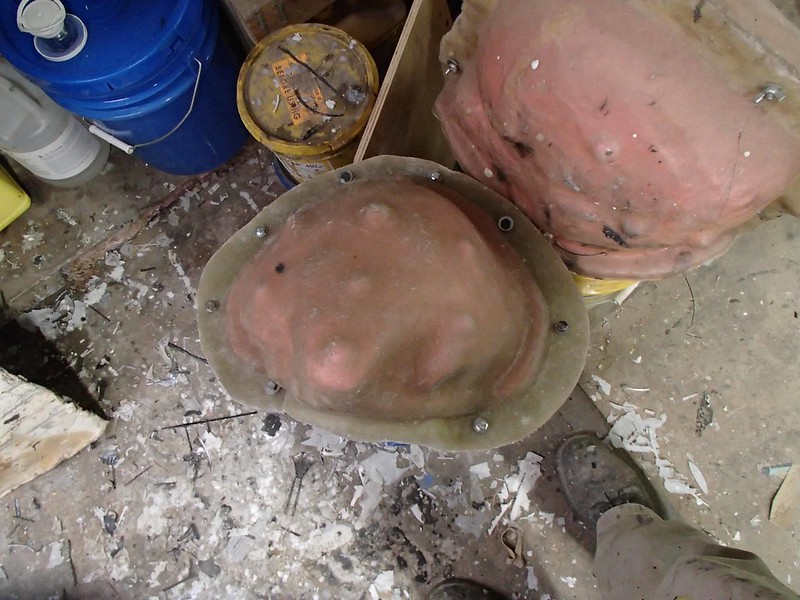
This is the complete mold ready for rotocasting:
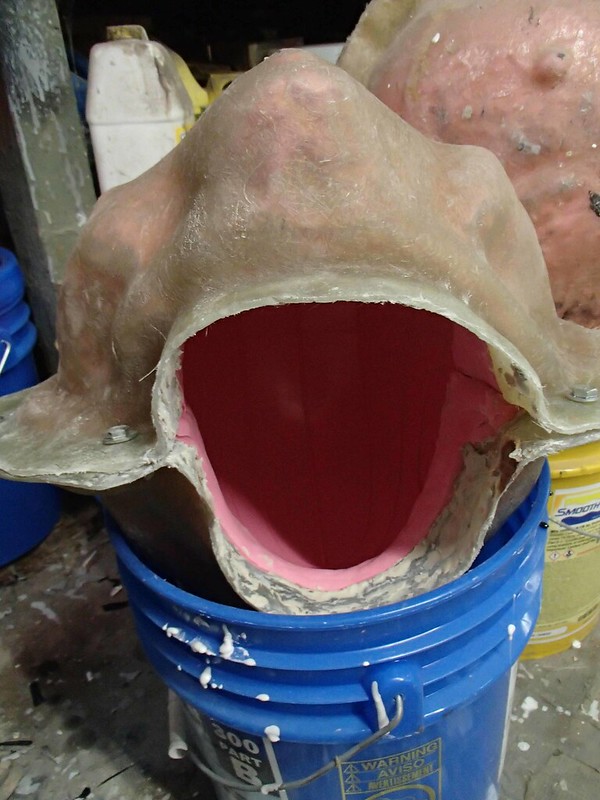
It's also conveniently sized to fit nicely on top of a 5-gallon bucket:
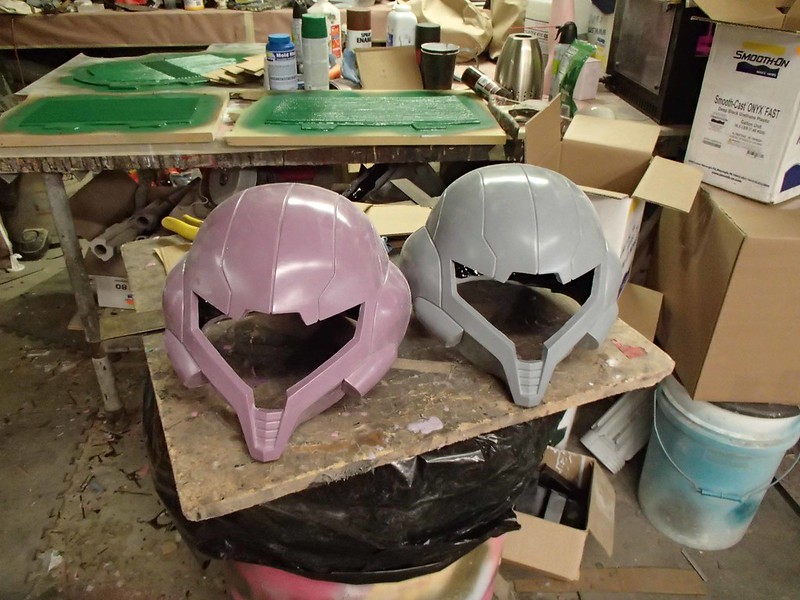
The main body of the helmet was rotocast in four layers of urethane casting resin. The third layer had a small amount of microballoon filler mixed in to give it more body. This makes the shell a bit thicker without adding any significant weight. The final, innermost layer was made with Smooth-Cast Onyx to make the finished product less likely to warp if it gets too warm. With a bit of trimming around the neck and face holes, the first two kits looked pretty good:
Because I'm impatient, I decided it was a good idea to do a quick and dirty rattlecan paint job on one of the first two kits. Here it is with a fluorescent green tinted acrylic faceshield:
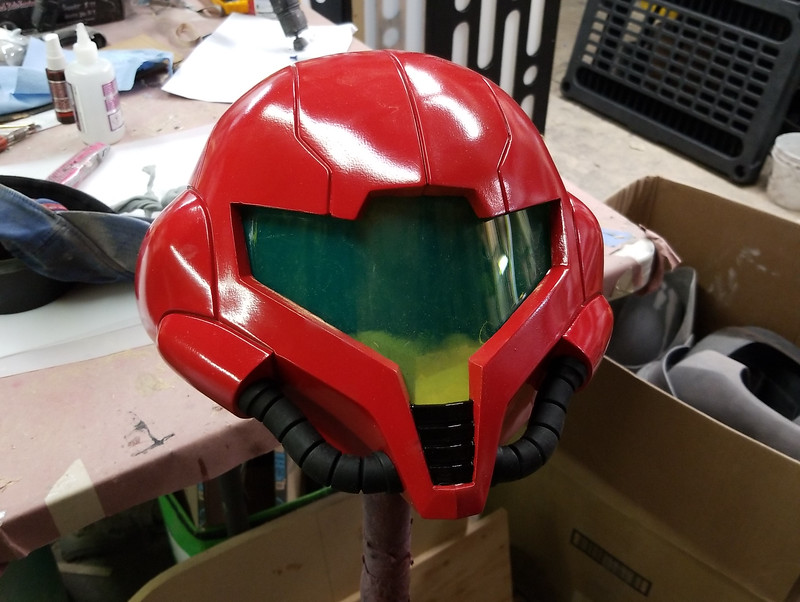
Not too shabby:
Then I decided it'd be better to do more:
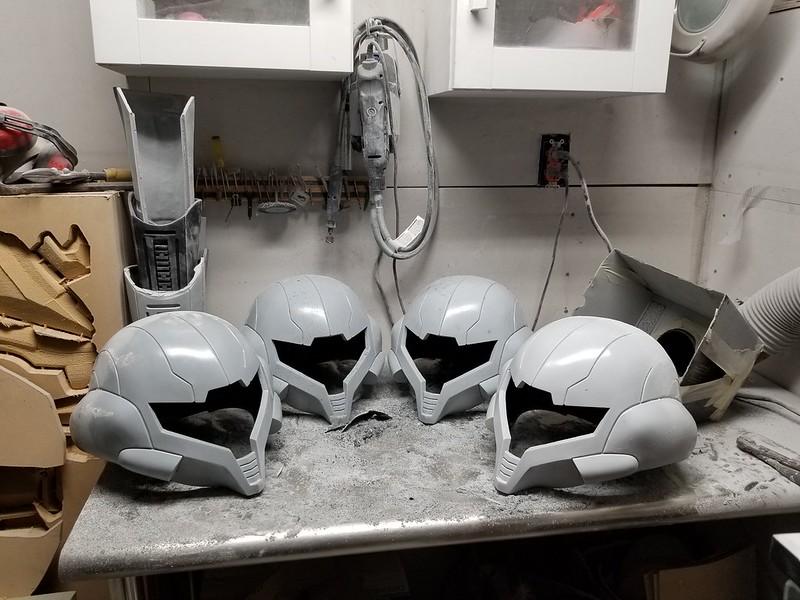
I set up four helmets for paint. This way I'd have some to mess around with in case there were any issues with the finish. Each one started with black primer, then a plain silver basecoat:
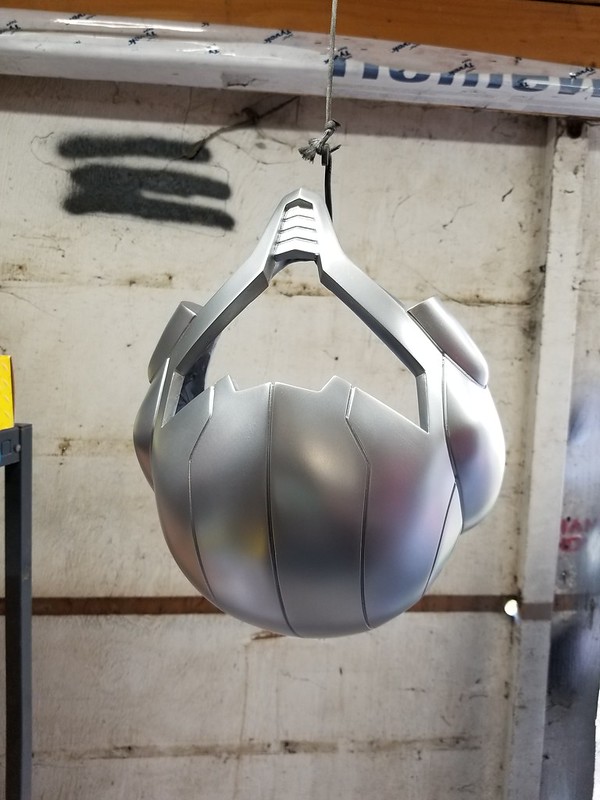 The silver was Ford's "classic silver" if memory serves.
Once the silver basecoats had dried, they each got four coats of "Wild Cherry Red" candycoat from House of Kolor:
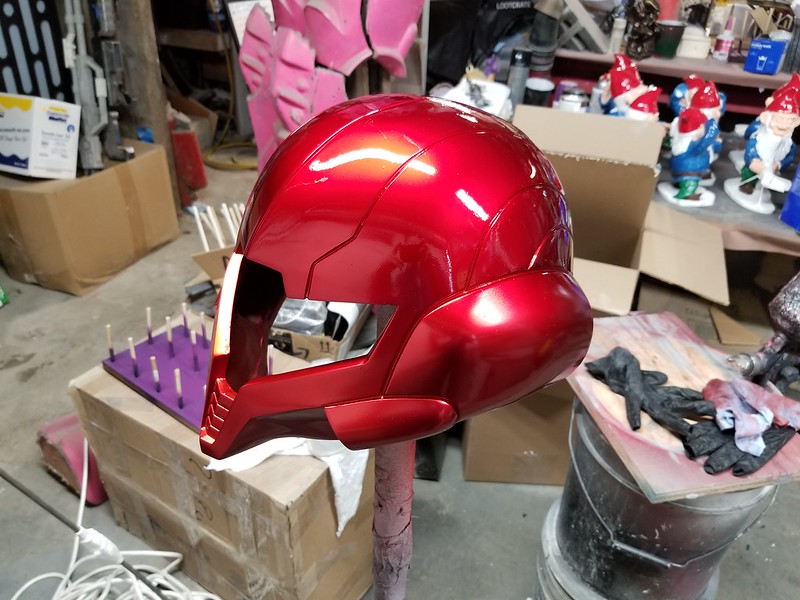
Shiny!
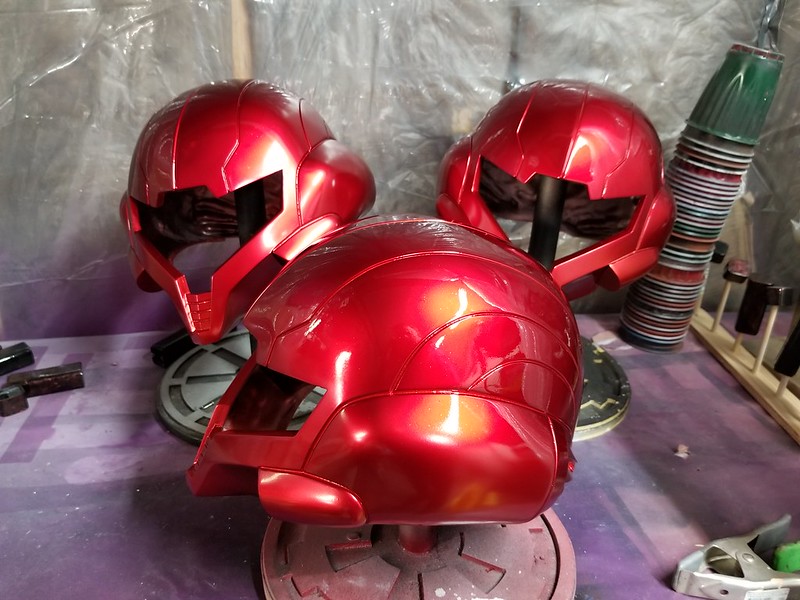
Candy coats can be kind of a nightmare to work with. They're usually applied over a metallic to create a finish system that exhibits a deep, colored sparkle that can't really be matched with typical automotive paints. Then they get a clearcoat to maximize shine and protect them from the elements. This is what makes them part of a “three stage” or “tricoat” system. You can also add other effects to the candy "intercoat," the second stage of the finish system to give them even more shimmery or pearlescent qualities. For now, I was just experimenting with getting the candy color laid down in a uniform thickness to make the color and depth as consistent as possible.
I'd like to say that I nailed it on the first try, but in truth it took me a couple of rounds before I was completely satisfied with the finish. These things have a way of highlighting even the slightest flaw in the prep work, so if there's even a tiny scratch or faint sanding swirl, it positively glows in the dark once you lay down a candy coat on top of it.
Case in point, this cast of the helmet looks pretty good:

Then when you look closer, you can see a couple of specks of something that were embedded in the candycoat:

But after of wet-sanding and repainting a few times, I finally had a few candycoated helmets that didn't make me want to scream. This one wasn't one of them:

Once the clearcoat was sprayed on, the candy really came to life:

The cheek hoses were picked out in black with the raised elements hand painted with a metallic aluminum enamel:

The visor was formed out of 1/8" thick transparent fluorescent green acrylic, then glued in place. Then I installed some LEDs around the edge to light up the wearer's face inside:

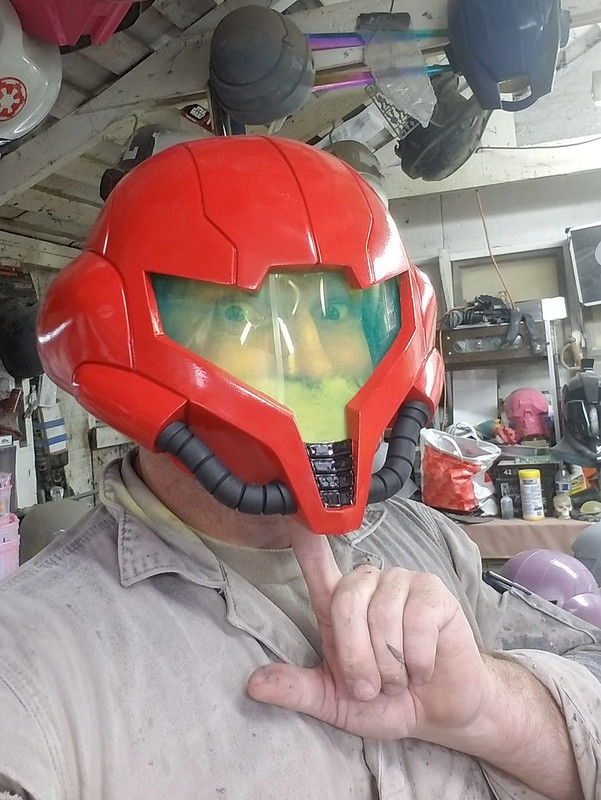
It looked a bit silly on me:
 Of course, it's not supposed to look great on me. Here's the Lady Shawnon test fitting it:

Much better-looking than me:

So there it is:

Finally here it is on display:
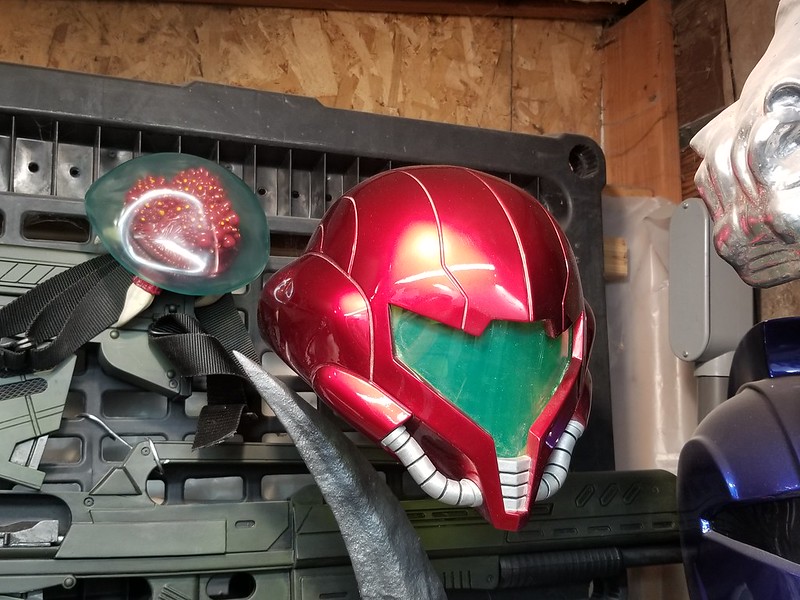
So shiny. So red. It has a place of honor on the recently-finished projects wall:
Now it's only a matter of time until I cave in and start building the rest of the armor.
Stay tuned...
Dear Readers,
It's been a good, long while since I've taken the time to sit down and write up a blog post. I hate to say it, but with the lack of comments my posts tend to get and the seeming shortage of traffic that's going on, it's hard to stay motivated to generate content.
Still, I figure I'll give it all another go now that the shelter-in-place quarantine is going on. It seems likely that y'all have a bit of free time and might need something or other to read to help pass the time while this global COVID-19 pandemic has us all staying home and slowing things down a bit.
Some of my nearly complete project write-ups include building replicas of the Morita Assault Rifle from Starship Troopers, Samus Aran's helmet from the classic Metroid video games, the beginning of Armorsmith's costume from the hit Disney Plus series the Mandalorian, and lifesize Mouser bots from Teenage Mutant Ninja Turtles.
I've also been thinking about diversifying my writing a bit. I worry that my last few posts have become somewhat rote with a string of "I started with this and then did this, and then this, and then this, and then it was done." I suppose it's not as entertaining as it used to be. I've also not taken any time to write about anything else going on in my life such as my retirement from the Naval Reserve last year, the Lady Shawnon moving back home from Nevada, our growing collection of saltwater aquariums, the new cat(s) hanging out in the workshop, and more.
With that in mind, what would you like to see more of? How-to's and tutorials? Gross descriptions of boat maintenance projects? Sea stories from my time in the Navy and the Merchant Marine? Dog, cat, chicken, and fish pictures? Scantily-clad young women with science fiction weapons? I figure there are parts of my unusual life experience that might be interesting for at least a few people, but since they're normal for me it doesn't occur to me that it might be worth writing about. Let me know in the comments.
Thanks for reading,
-Shawn


