About Me

My photo
I make toys for kids who don't want to grow up. I'm on the lookout for new projects. If you're interested in commissioning me to build something ridiculous, shoot me an email.
Showing posts sorted by date for query shae vizla. Sort by relevance Show all posts

Sunday, June 11, 2023

Phase One Clonetrooper Build

 As a young Navy lieutenant station in Newport, Rhode Island back in 2004 I had just started getting into cosplay and prop replica building.  I'd made a passable set of stormtrooper armor from scratch and was looking really excited about the new clone troopers that had appeared in Star Wars Episode II: Attack of the Clones.  

I spent a lot of time looking for whatever reference images I could find and stumbled across a website called starwarshelmets.com.  There you could find all sorts of information about every helmet that had appeared in the original trilogy and suddenly all sorts of images of these new clone troopers.  There was even a page about fan-made clones and even then, just a year or so after the movie had come out, there were a few fans who'd absolutely nailed perfect replicas of this helmet despite the fact that the production itself had used only CGI animated versions for the films.

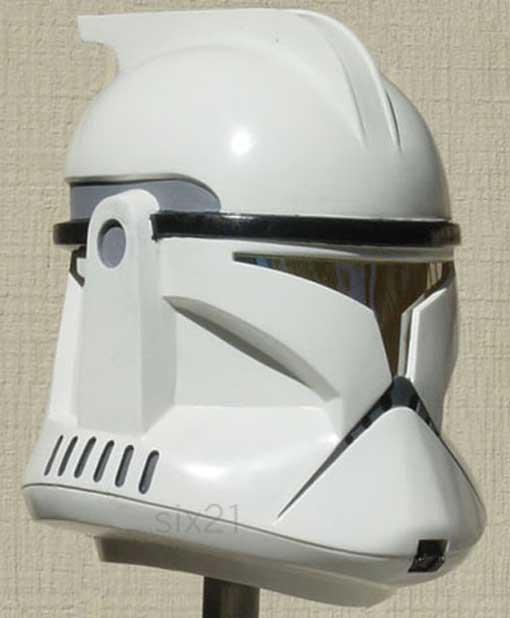
At that time there were only two really spot on fan-made helmet replicas and no affordable licensed replicas available.  Of the two fan-made replicas, one was a one-off made by someone called "King Jamie" and the other was this beauty made by "Clone Six:"


I didn't really know anything else about it at the time except that it was gorgeous and I wanted one.

Fast forward eight or nine years.  I had moved back to Northern California and gained a bit of notoriety as a capable costume maker.  I had just finished my Ironman suit and had a stack of Halo Spartan armor and the internet was starting to notice me.  

Then one day I get a message through the Replica Prop Forum from a user named "clonesix" asking if I was going to the NorCal RPF get together because he'd really like to meet me in person.  I was more than a bit surprised.  I had no idea where in the world this person was located and not only did he turn out to be in the US, but California.  Northern California even!   He was actually living just outside of Sacramento, not even two hours drive from me in Petaluma.  

I ended up going to the gathering and met Jon (aka "clonesix") and got to see one of his gorgeous suits of armor in person:
Clonesix Clonetrooper Armor at the NorCal RPF Prop Party

Jon told me all sorts of details about the development and construction of the suit and explained that he called himself "clonesix" on all of the forums because of this project.  He had built six clonetroopers for he and his friends to wear to Wondercon.  Only six.  After that he was done making clones and had no plans to make more.

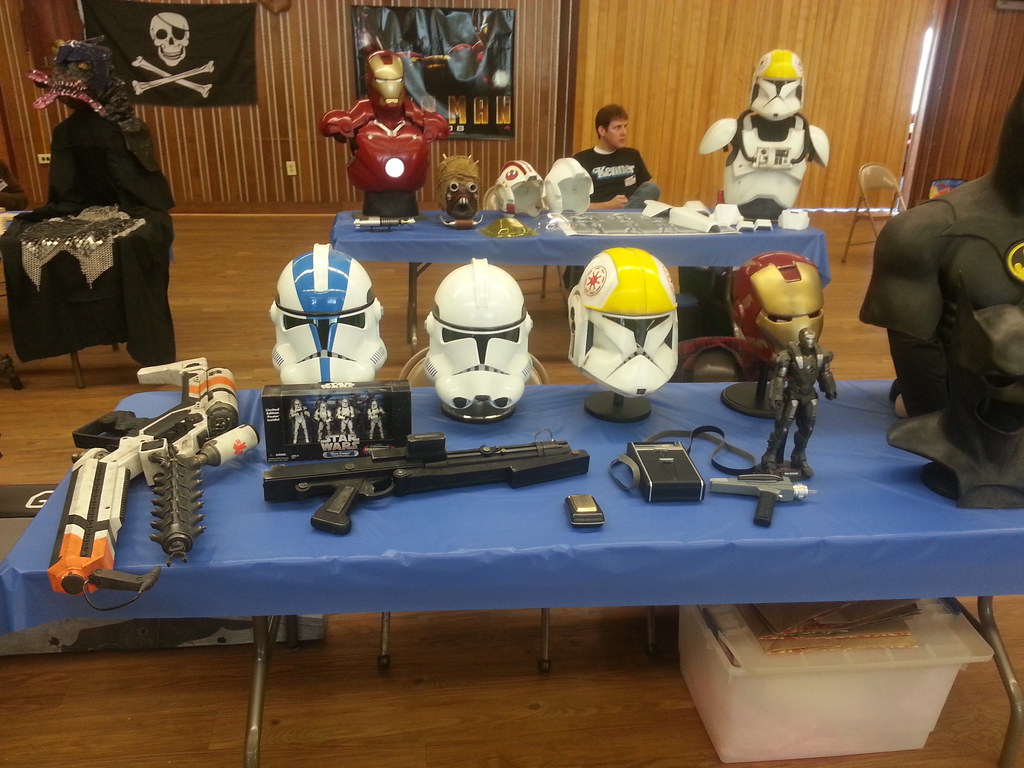
Fortunately, he had given all of the molds and vacforming bucks to his friend Darren who could continue making clones for other fans.  As luck would have it, Darren was there too.  This is him at his tables with a bunch of cool stuff he had brought for show-and-tell:
Darren at the RPF Prop Party

Darren and I got to talking and ended up collaborating on a few things together.  First, he made the vacformed parts of this suit:
Shae Relaxed Stance

That was our Shae Vizla build.  You can read mroe about it here: LINK.

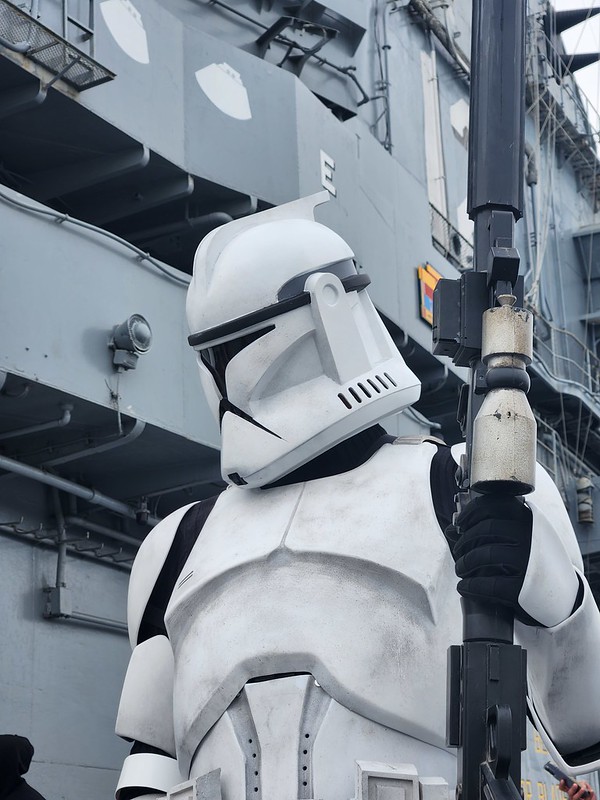
Somewhere along the way, we worked out a trade and I finally had got me a complete kit to make myself a set of clonesix clonetrooper armor.  Then, before I had a chance to actually build it, I got a second set from him.  These two giant boxes of parts migrated around my shop from corner to corner and shelf to shelf waiting for me to finally get around to doing all of the trimming and assembly, then painting and rigging to make them wearable.  Then when a friend of mine asked me if I could dress him up for a local comic convention at the USS HORNET museum, that was the last little nudge I needed to get this project back on the workbench for a minute.

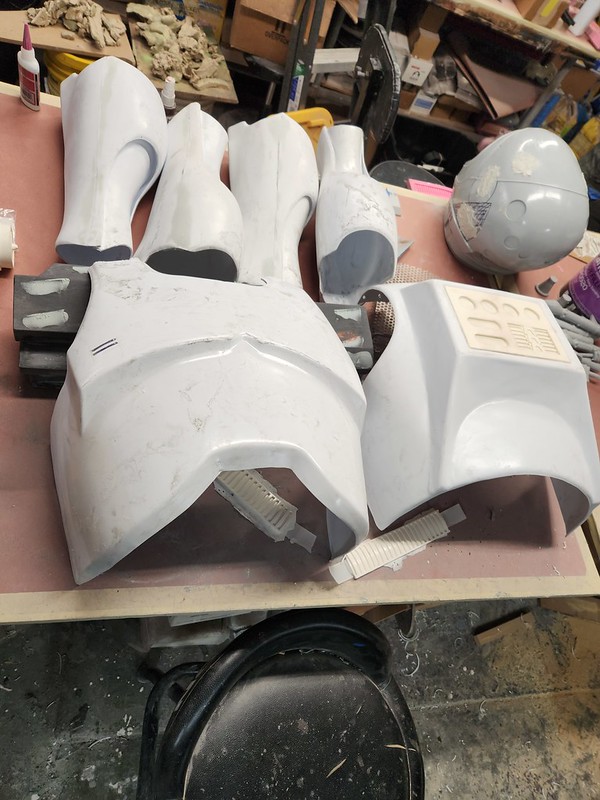
In the middle of reorganizing the shop again, I dug these two boxes out of my storage shed and laid out the pieces I'd need to make up the full set of clonetrooper armor:

Untrimmed Clone Parts

At that point, I had about a week to go before the convention.  

The parts I got from Darren were vacformed perfection.  The plastic was a nice, thick 1/8" high-impact polystyrene.  Stronger than your typical cosplay kits tend to be.  In pretty short order, I had everything trimmed and primed:
20230316_193201

The arm and leg parts required a bit of assembly before filling and hiding the seams, but even that didn't take all that long.  Here's two sets of lower legs and the backplate with the resin cast detail insert, all ready to go:
20230316_193154

All of the trimmed, assembled parts were primed and given a coat of satin white paint:
20230317_003855

20230317_003911
Then it was time to start rigging the parts to make them wearable:
20230317_150132

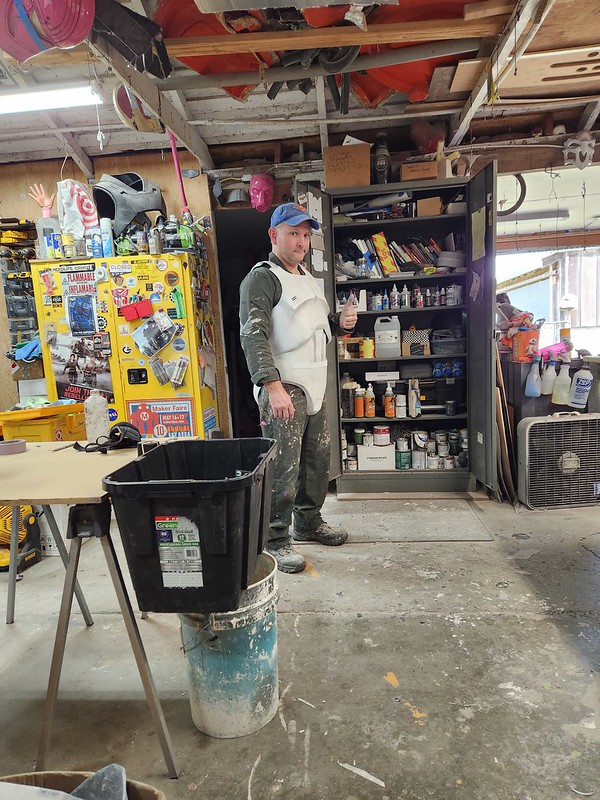
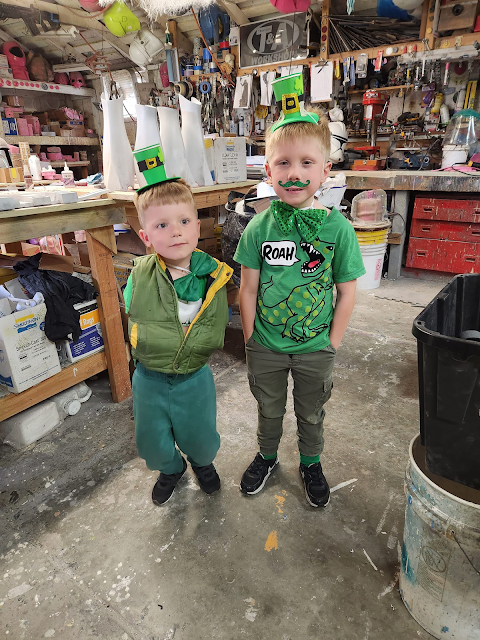
While I was in the middle of rigging, wearing the torso armor as seen above, my nephews walked into the shop and told me I looked "ridiculous."  For complete context, they were dressed like so:  


So take their opinions with a grain of salt.

Weathering the painted armor was a matter of lightly dusting the parts with grey primer, then buffing it back off with Scotch pad:
20230317_165503

The resulting effect was a very subtle shading in the recesses that really brought out the details in the suit:
20230317_165509
Then all we had to do was drive out to Alameda and get Jay all dressed up out in the parking lot:
20230318_112806

I was a bit nervous because we'd never had a chance to do any test-fitting or adjustments prior to actually just showing up at the convention, but Jay turned out to be the exact right size for the suit.

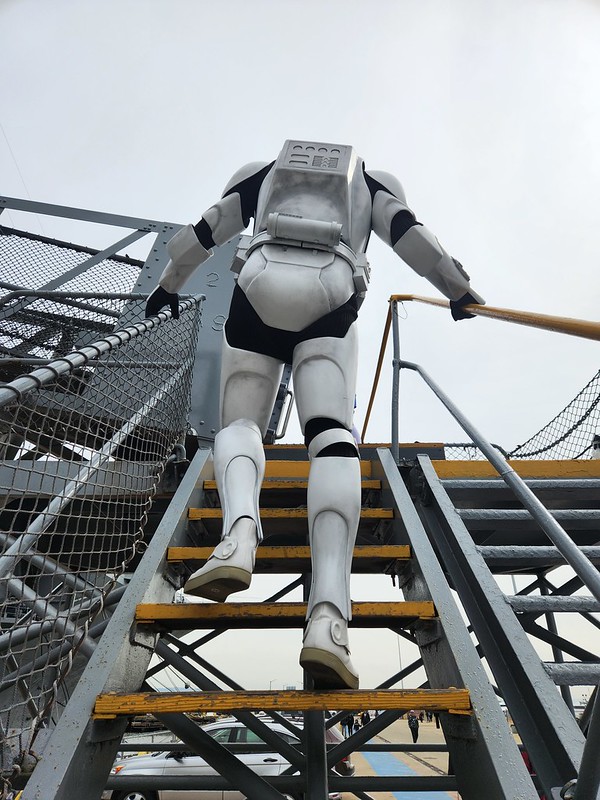
Surprisingly he was even able to do stairs:
20230318_115233

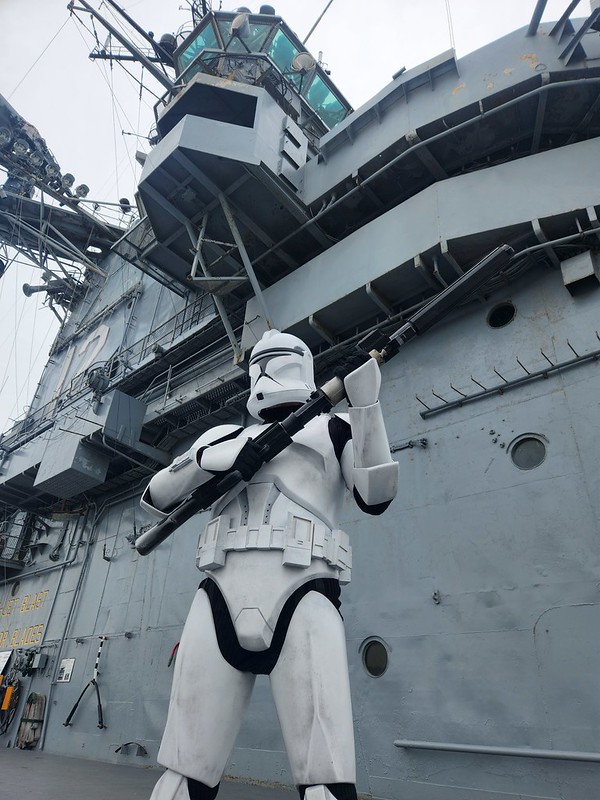
Once we were on board Jay got around quite a bit:
20230318_121407

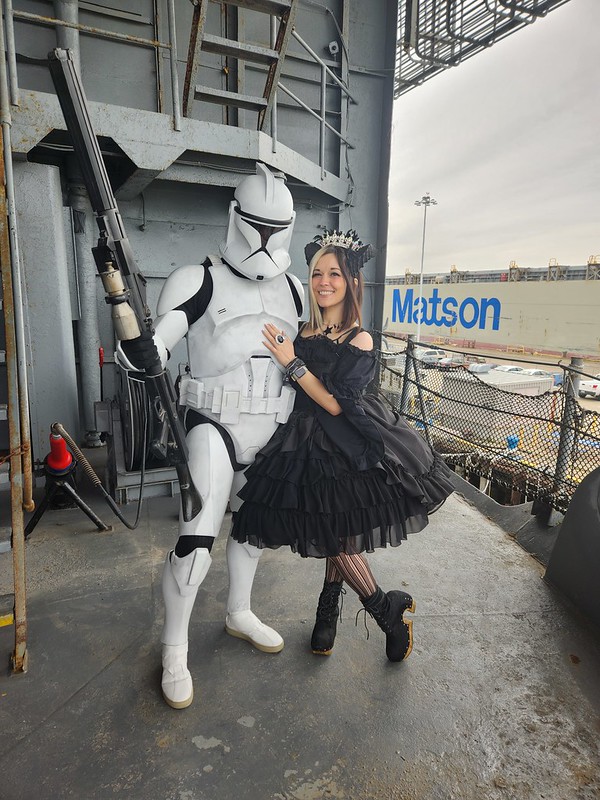
His girlfriend Renee caught up with us a few minutes later:
20230318_120404

I didn't get to see too much of whatever else was going on with the convention.  Jay and I were too busy finding really cool photo opportunities:
20230318_122434

20230318_122751

20230318_125725

20230318_130653

20230318_131019


At the end of the day we had a lot of fun.  Then we piled the armor into the passenger seat of my car and it was time to go home:
20230318_213206
I still have a whole other set of parts to put another clone together.  Stay tuned to see what else I do with those.  It shouldn't take too much longer to make up my mind...

Sunday, December 13, 2020

December UFO Sightings in the Workshop

I've been doing better about actually finishing blog entries about completed project lately, but there's also a chance that people are missing the occasional chance to see UnFinished Objects (UFOs) I'm not currently finishing in the shop.  So I figured why not write up a few of my works in progress.

Every once in a while someone will ask me the ill-advised question, "how many projects do you currently have in the works?"  The answer: no idea at all.  While I usually only have one or two primary paying projects for clients going on at a time, I also have a significant stack of hobby projects in some stage of completion.  

How many hobby projects?  Still no idea.  The closest thing I can come up with was a list I started a few weeks ago.  I was talking with one of my shop assistants about the photo spread we did for Make Magazine volume 32 back in the day.  It was when we shot this pic:

MAKE Centerfold

This image was actually a composite of a whole bunch of separate photos.  Most of the characters were shot individually and the separate images were combined into this one big photo.  All of those characters were shot in one long day.  We loaded up three or four pickup trucks with costumes, drove out to Make's studio (then located down the road in Sebastopol, CA) and strapped people into costumes one or three at a time to pose for the camera.  It was a long day, and by the end of it my crew and I were pretty worn out.  By the time the staff from Make called it done we still had another eight costumes that were never even taken out of their crates.

Ever since then, I've thought it would be a good idea to do another photoshoot day to add onto this composite image of all of my finished stuff.  The only problem is that whenever I think of scheduling the big photoshoot day, I keep thinking it'll be better to wait until I finish the next big thing I'm working on.  After all, it'd be terrible to go through all that effort and not have, say, the Mark I War Machine costume in the lineup.  So if I just put if off for another month, it'll finally seem complete.  As a result, I have now been kicking that particular can down the street for years.  So how many things are on the list that need some time in front of the camera?  I started noodling it over and wrote down a list:


Later I sat down and generated a nice, neat spreadsheet version of the list and added even more things I didn't think of the first time.  Along the way I came up with a few fun facts.  First off, I have 23 unique costumes that are camera-ready right now and weren't in the Make spread.  I have more than one example of 6 out of those 23 (i.e., I have 5 Deathwatch Mandalorians and 8 Sisters of Battle.  Those are only two of the twenty-three line items on the list).  In addition to those 23 finished costumes, I have another 53 costumes or free-standing props (such as ED-209 or my BB-8 build) that would be welcome additions to the next photo spread.  Of those 53, 22 could be ready for camera in a week or less.  Of course, that's each one of them taking a week or less to finish and it would require me to be able to focus on one thing at a time and not start working on something else.  

So I guess I have a problem.

I also came to realize that I have a new problem.  When we did the Make spread, there was one photographer with his lighting setup and backdrop.  I brought a crew of fourteen or so people to alternate between being in costumes and helping each other get in and out of costumes.  Even with all of that support, we only had time to shoot seventeen costumes (some of which we shot two at a time).  So even if I was to just pull out everything that's ready to go tomorrow, I'd still probably not have enough time to get good photos of everything in a single day.  So I'm starting to think I'll have to just plan for a big photo session every couple of months until I'm caught up.  Hopefully by the time the pandemic is under control and I can start getting large groups together I'll be able to make it all happen.

With that in mind, here's a few of the things that are out on the bench taking up much of my time and thought when I'm not working on the things that pay my bills.

First up, the Havoc Trooper:
2nd Primer Pass for Helmet

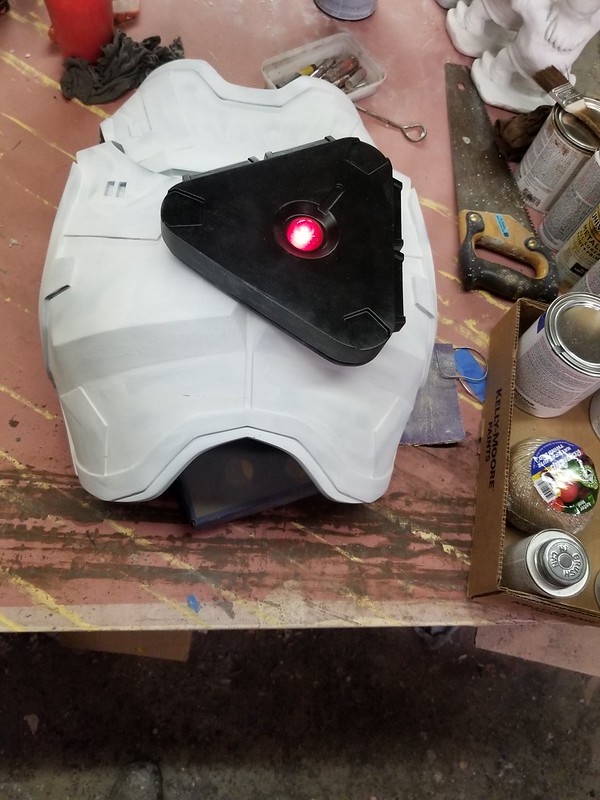
A few years back, I made a Shae Vizla costume and a handful of Sith Acolytes to attend Star Wars Celebration Anaheim.  These were characters from the trailers for the Old Republic MMO.  I had a lot of fun building these and have been wanting to bring more things to life from that era of the Star Wars universe.  So when a very talented 3D modeler name Marko Makaj offered up 3D printing files to create the complete Havoc Squad Trooper, I figured it would be a good thing to keep my printers busy instead of letting them sit idle between more important projects.  The results have been great:
Shield Generator Test Fitting

At this point I've printed all of the armor parts and done about half of the sanding and prep work to get them ready to paint.  I may still re-print the thigh armor though since they're a bit tight on me.  I've also printed the blaster rifle, knife, shield generator (the black thing with the red light pictured above) and the pistol and sheath.  I'm not sure if I'll go through the added trouble of printing any of the big heavy blasters, but it's tempting.  The best part is that Marko included all of the files to print every piece of gear these guys are shown carrying in each of the trailers:


This includes the backpack (not pictured).  If you'd like more info about how to get a hold of these files to print your own copies of this ensemble, Marko has started a Patreon page at https://www.patreon.com/mysterymakers.

As long as I'm plugging his work, I should also bring up my Heavy Infantry Mandalorian build.  You might remember this helmet I made a while back: 
Sunset Heavy Infantry Mandalorian
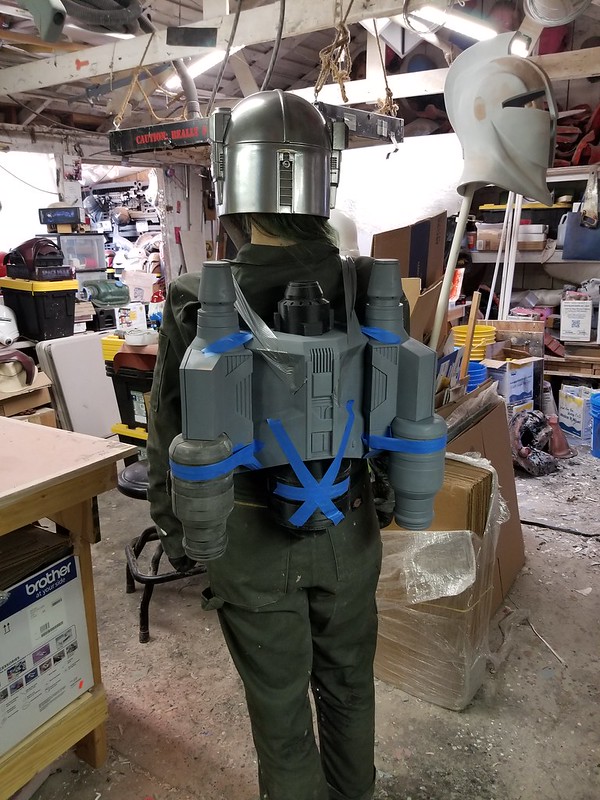
While the helmet was based on a heavily-modified file from Do3D.com, I've been building the rest of the parts from Marko's files:

HIM Upper Body Parts Printed

This includes the jetpack:
HIM Jetpack Test Assy

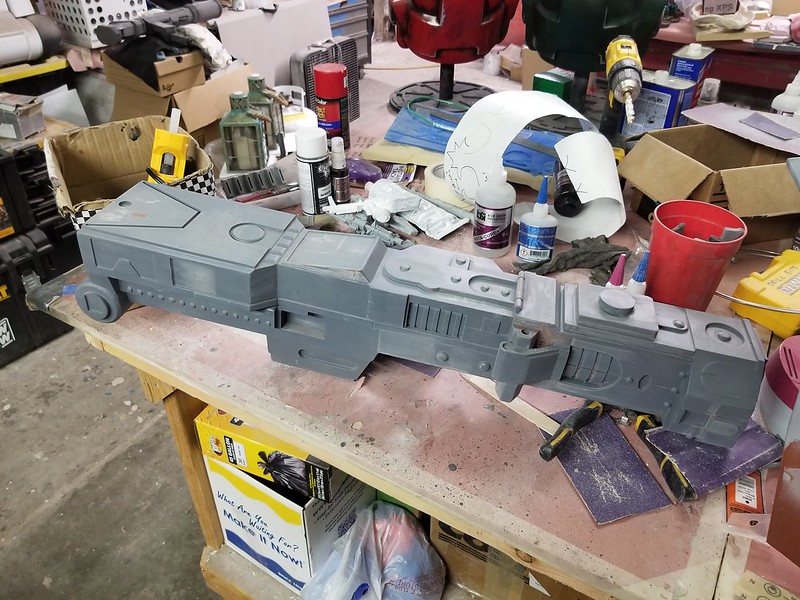
While I've been making slow and steady progress on all the parts, the next thing I'm about to finish molding is the main body for his heavy blaster:
HIM Blaster Main Body

That big chunk of plastic will be the final portion of this beauty: 

Fully assembled, the complete blaster will be just a hair under five feet long (or 1523.17mm if you're one of those people).  So it's not small.

While I'm on the subject of Mandalorians, I need to mention another 3D modeler who's been doing some great work.  Sean Fields of Project 842 has made all kinds of amazingly accurate models of various Star Wars things.  His file was the starting point for my Sabine Wren helmet from Rebels:       
Fitting and Trimming 3
I've molded and cast a few copies and, because I can't make up my mind, I'll probably make enough copies to match her ever changing color scheme from each season of that show.

In the same vein, I started with Sean's model and built the helmet belonging to Sabine's mother, Ursa Wren:
First rough-trimmed cast

Sean was also responsible for the models used to print my Battle Droid which is now tucked into a box awaiting a week's worth of sanding to prep it for paint:
Battledroid Parts 2

As long as I was in a helmet casting mood, I figured I might as well go ahead and mess around with a custom paintjob on at least one of them.  So I rolled out a cast of my Heavy Mando and started messing around with camouflage patterns:
Kryptek Knockoff Stenciling Done
It's still early on, but I think it'll be a fun thing when it's all said and done.

So that's a lot of Star Wars stuff, but as usual my complete distractibility means there are plenty of other franchises I'm making things from as well.  Case in point, a while back I finished up the helmet for Locus from Red vs. Blue:
Locus Helmet Painted

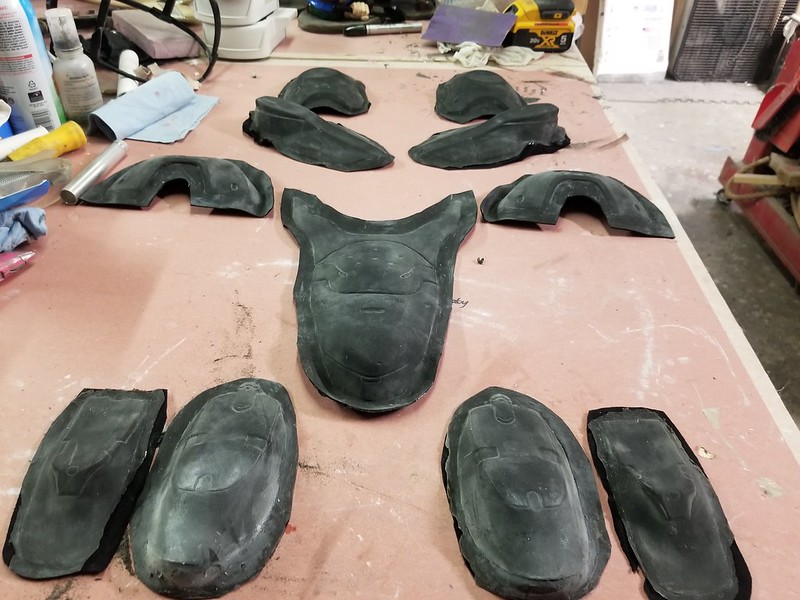
As much as the helmet looks cool all by itself just sitting on the shelf, I still feel compelled to make the rest of his outfit.  While I've made plenty of Halo 3 armor, the newer stuff from Halo 4 and 5 requires much more detailed and elaborate undersuits than the previous iterations.  So I decided to start with that as a base before making the armor parts to wear over it.  While a lot of it will be custom sewn with panels of neoprene and scuba hex fabric, there are a few pieces that just need to be custom cast sculptural parts.  So I've been making stone molds and slipcasting them in latex just like halloween masks, but with fabric backing cast into the rubber.  Here's the parts I've made so far:
Latex Undersuit Parts

What you're seeing here is the crotch, knees, elbows, shoulders, and hip pads.  There's another half dozen or so bits that still need to be molded and cast, but they're coming right along.

Finally, some time ago I started tinkering with making a Mouser from the Teenage Mutant Ninja Turtles.  My plan was to make one, but due to an odd set of miscalculations, I now have a handful of boxes squirreled away in the darkest corners of my shop which contain all of the parts I need to make at least seven of them.  Needing more things to do with my hands a while back, I broke out one of the boxes and started the final assembly for one of them:
MOUSER body progress

I'm still not done deciding exactly how much articulation I want to give the neck, but once I get that sorted out, I'll somewhat rapidly have a squad of these guys standing around.  For now they're just kinda hanging out in pieces:
Mouser Eating Doorknob

So that's a few of the current UFOs cluttering the workshop.  As you can see from the background of most of these photos, there's still plenty of other things I'm tinkering with.  Be sure to stay tuned so you don't miss the next exciting installment of me actually getting around to writing about things that are getting finished.


Wednesday, June 17, 2020

Project Fail: "Brain Tails"

Someone pointed out the other day that all of my blog entries are pretty straightforward.  Projects are described in detail from start to finish without any sidetracks or screw-ups along the way.  "Don't you ever make mistakes or have any failed attempts in your builds?" they asked.  "Sure," says I, "but I don't really want to advertise my rare disasters to the world."  It was suggested that going over a failed project could be just as helpful as going deep into the ones that worked out, so I guess I'll give that a shot.

 A few years back, my girlfriend Shawnon bought a pair of tickets for us to go to Star Wars Celebration: Anaheim.  When she told me about it, she said it was up to me to come up with costumes for us to wear.  No problem.  I figured I'd suggest something completely over the top sexy that she'd say no to and that way when I dialed it down to some compromise, it'd still be something I'd be excited about.  So the first thing I thought of was Darth Talon, a female Lethan Twi’lek who debuted in Dark Horse Comics’ Legacy era stories.  In case you don't know the character, she looks like so:
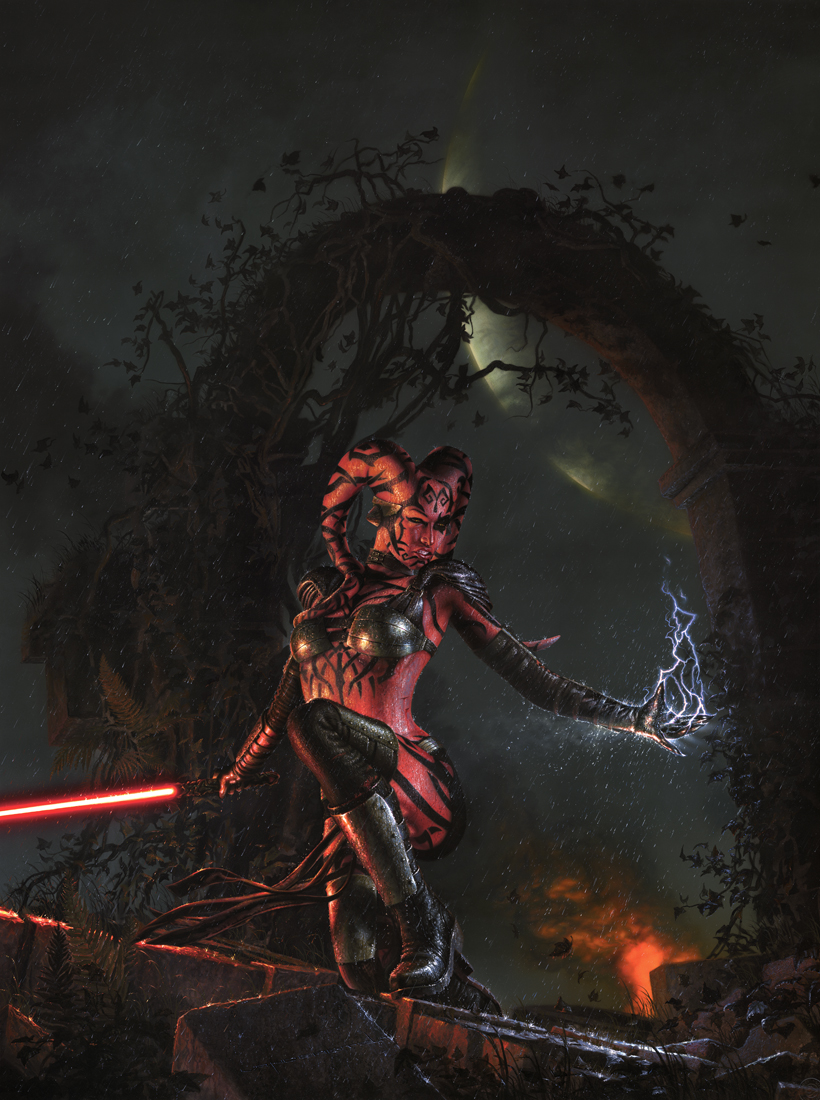
Shawnon has the figure to pull this off and I have the fabrication skills, but since the costume is mostly a lot of red body paint and not a lot of clothing, I didn't figure she'd be up for wearing it.  Much to my surprise, she said she wanted to do it.  I did not see that coming.

I decided that the few armored plates could be knocked out in a matter of hours and the boots and gloves could be purchased off-the-shelf on the internet, so the only thing that was any kind of tricky to fabricate was going to be the "lekku," also known as "brain tails."  This would be a rubber prosthetic that would be adhered to her head, but made in very much the same manner as a latex Halloween mask with some flexfoam cast inside to keep them from going flat and looking all faccid.

In order to make sure they'd fit Shawnon's tiny head, I'd have to sculpt them onto a lifecast of her.  So step one was to put her in a bald cap, wrap her in plastic, and prep her for molding:
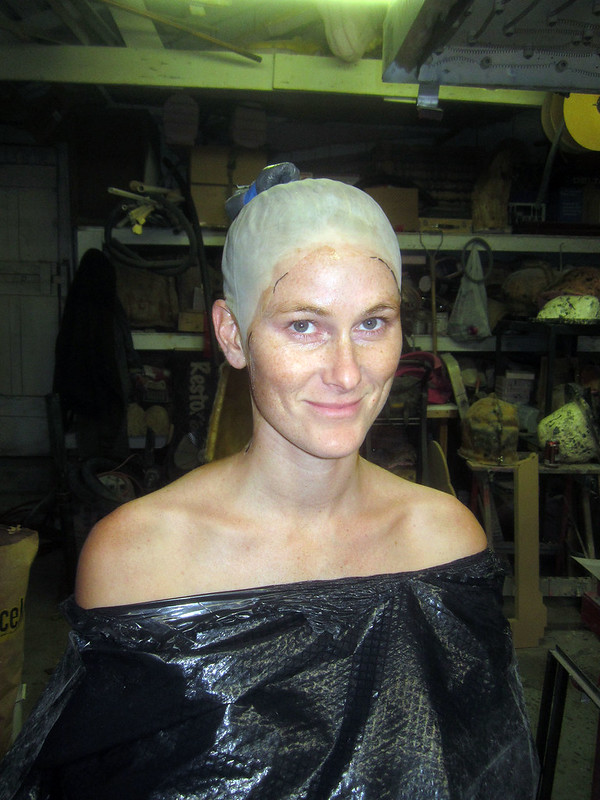
Bald Shawnon

Since I only needed one copy of the lifecast, we molded her in alginate, a seaweed-based moldmaking material that's very safe for skin contact, but tends to shrink and crumble shortly after it sets up.  Here's the alginate layer built up on her face:
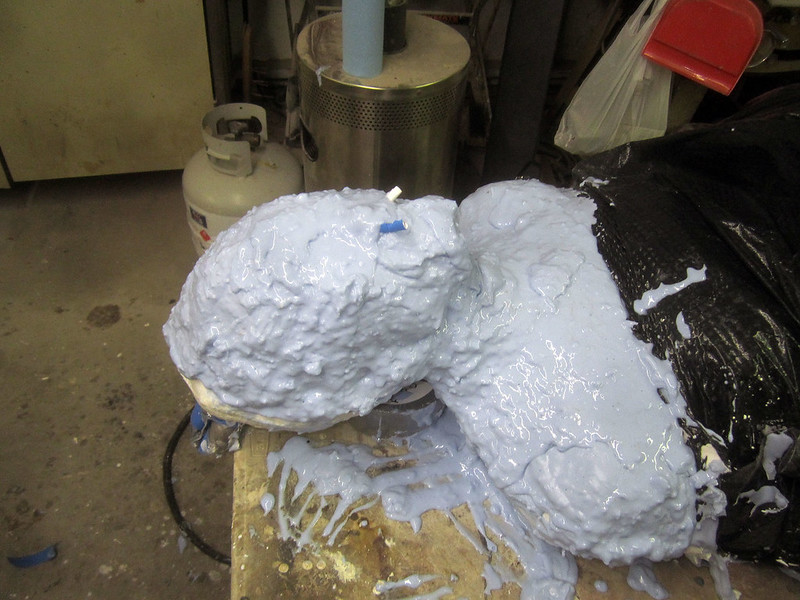
Front Layered
Note the soft paper straws inserted into her nostrils so she could breath.  A lot of people call this a bad idea because you run the risk of damaging the model's nostrils.  I pad the ends with a bit of soft tissue and take great care to avoid bumping or moving the straws while we work.  So far I've never had any problems with this method.

Because the alginate is flopply and flexible, it needs a plaster bandage mothermold:
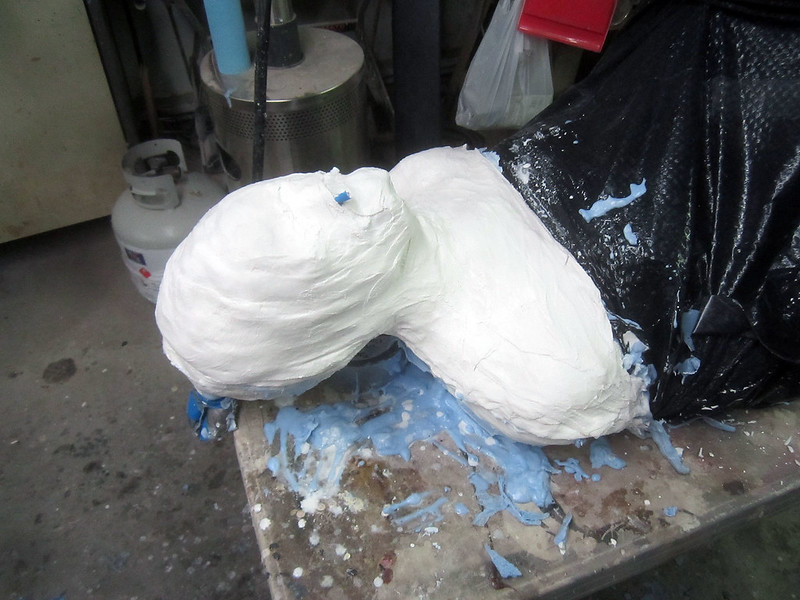
Plaster Mothermold Front

Since we had a few minutes to wait while it set up, we took the liberty of labeling the mold:
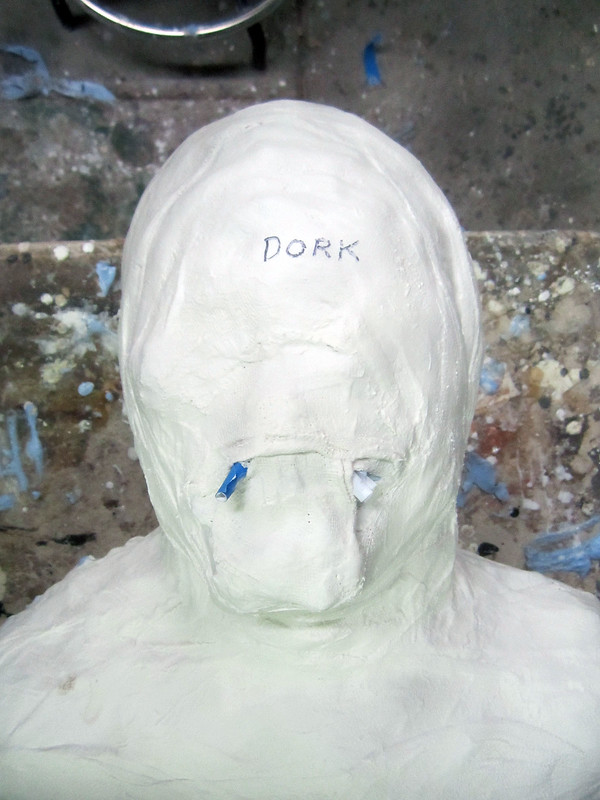
Cured Enough to Write On

Once the plaster was good and stiff, we removed the girlfriend from inside, strapped the plaster mothermold back in place around the alginate glove, then coated the inside with urethane resin to create a nice, hard shell.  Then the resin shell was filled with rigid foam.  For rigidity.

After removing the plaster layer, I took a saw to the bottom edge so we could have a nice, flat base to work with:
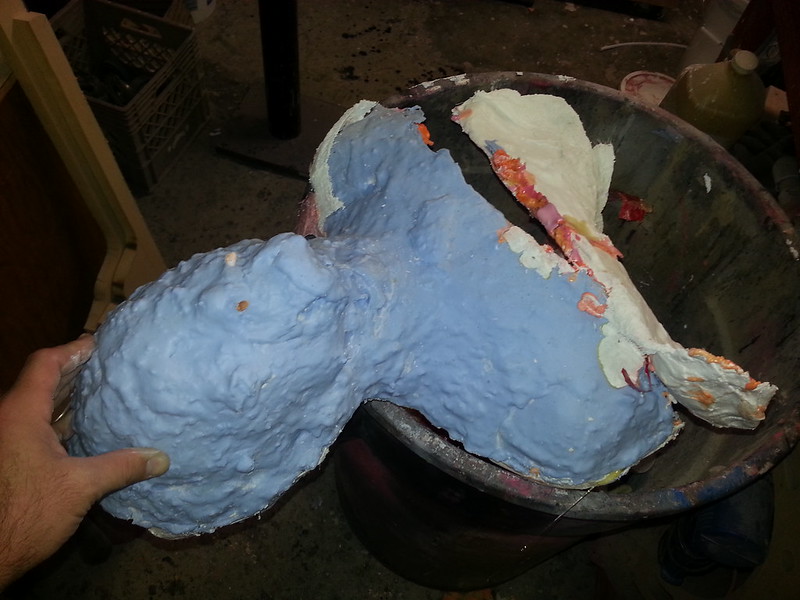
Plaster mothermold removed

Then we peeled off the plaster and alginate to reveal the handy copy of Shawnon underneath, complete with nostril straws:
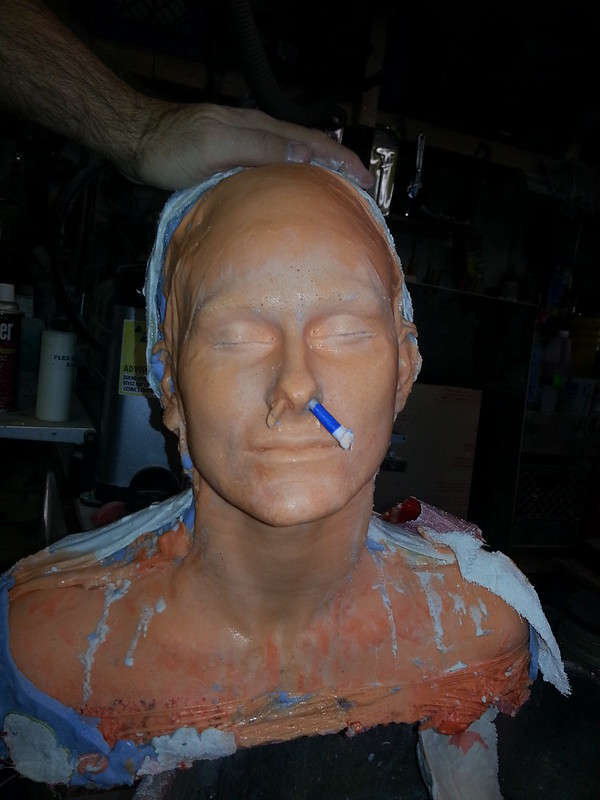
Front

The next step was to smooth out the lumps and bumps caused by here hair under the bald cap and rebuild the one ear that didn't properly fill with resin:
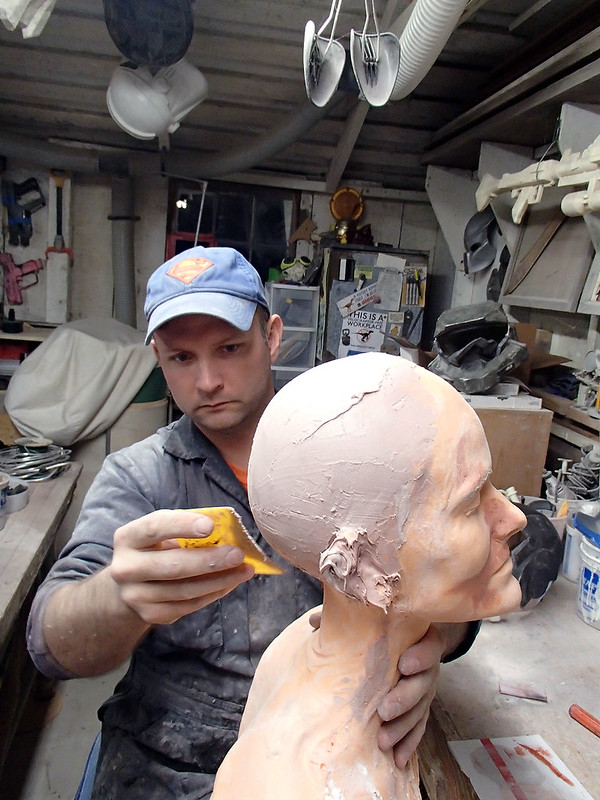
Smoothing Head

After a bit of sanding an a shiny coat of red paint, she was ready to go:
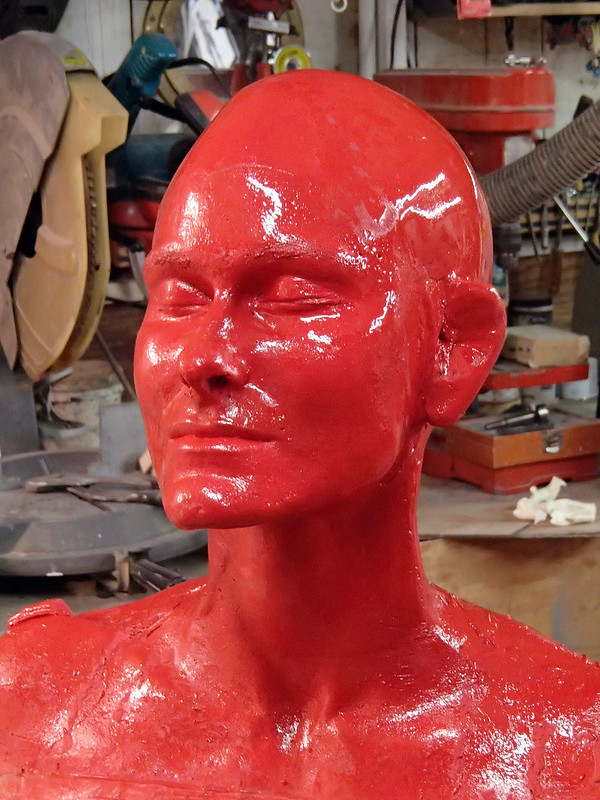
Lifecast Shiny Front

Shawnon would head back to Vet school while I worked on this project.  For her part, she dove into a major fitness routine to get into proper fighting shape and look the part.

Since the brain tails were going to be somewhat large, I needed to start with a sculpting armature underneath.  I didn't want to try and hang 40-plus pounds of clay off the back of the cast head (A: it's a lot of strain on the lifecast and B: clay costs money) so I started with a sheet of 2-inch insulation foam:
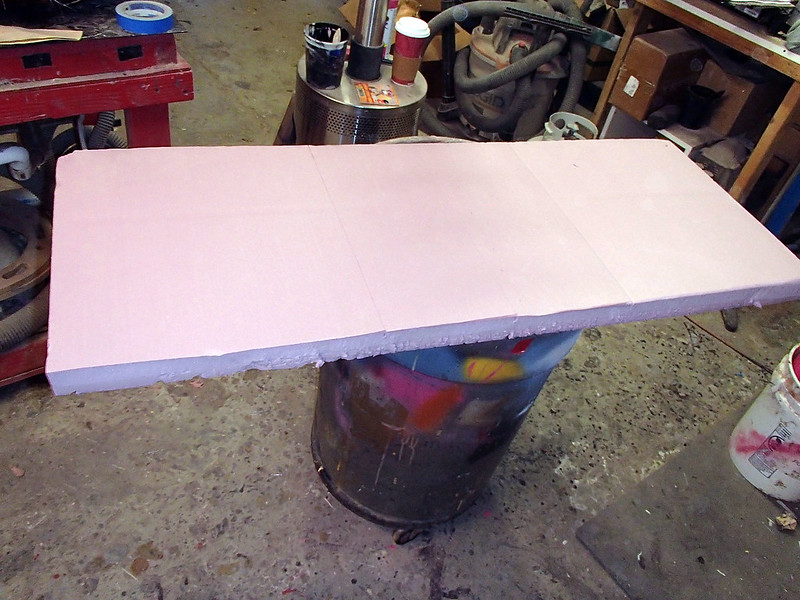
Foam

Then I drew a rough outline of the lekku profile:
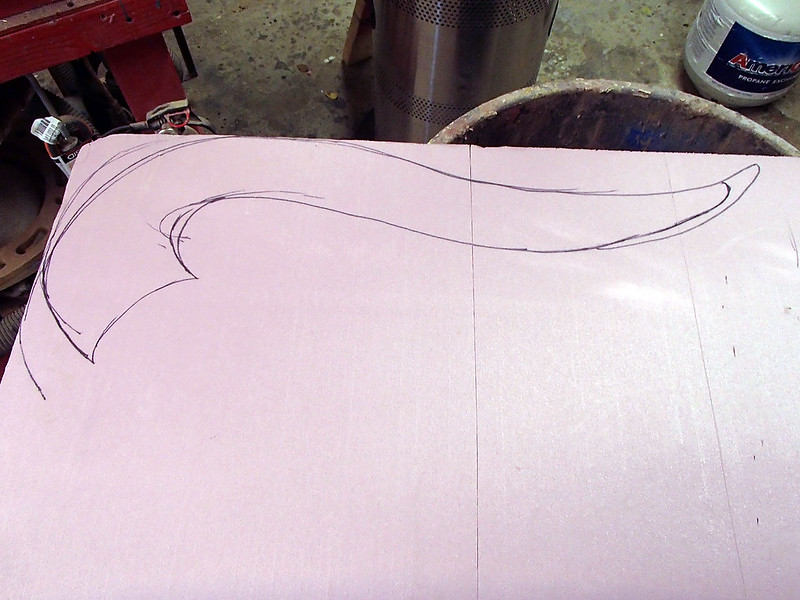
Shape Drawn Out

Holding it next to the armature, I decided it was about right size-wise:
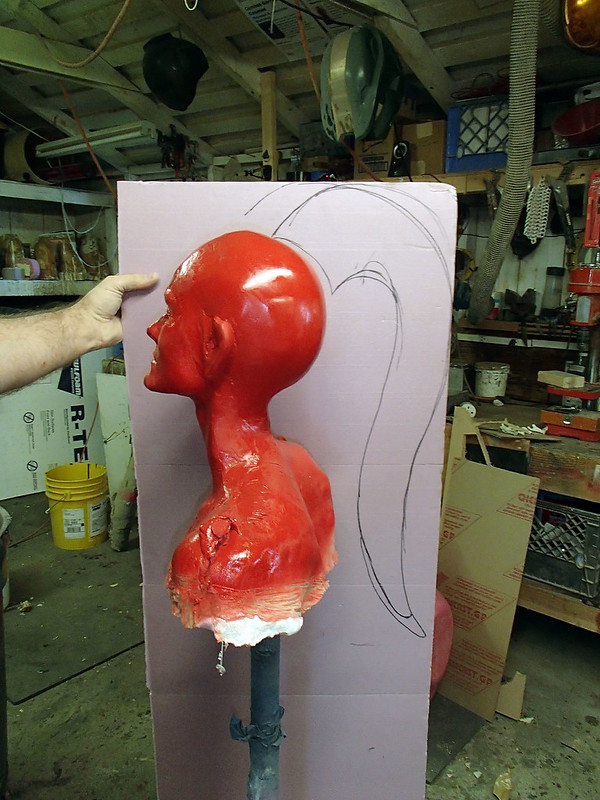
Checking Sizing

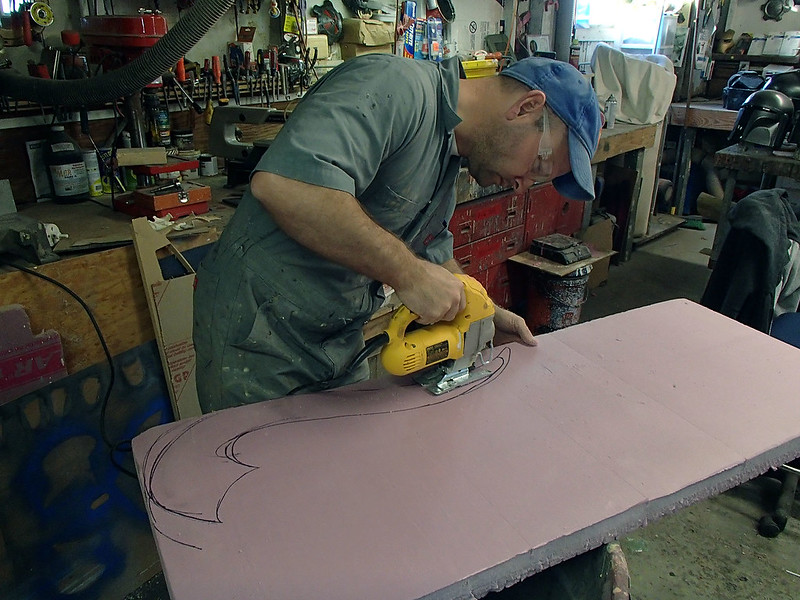
So I cut it out with jigsaw:
Cutting Out Lekku Shape

One final check and I was sure I was on the right track:
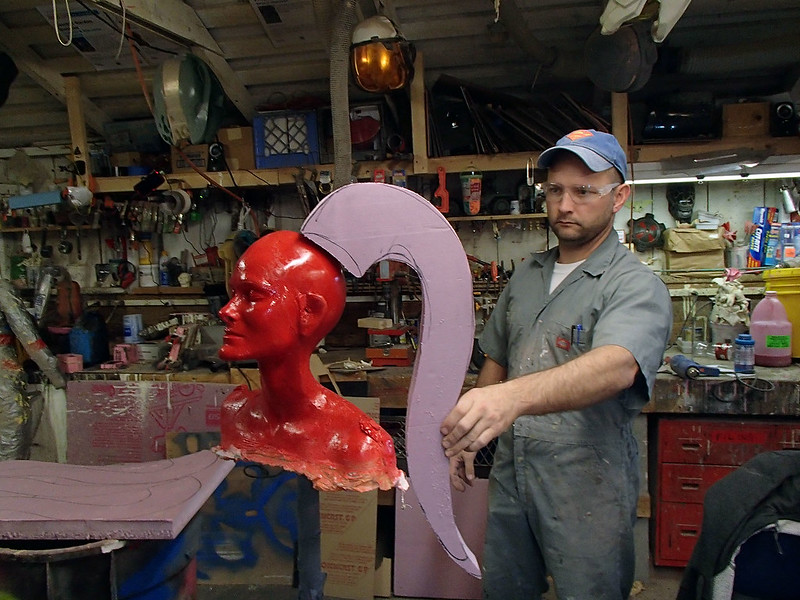
Confirming Sizing

Then I used it as a template to trace three more copies:
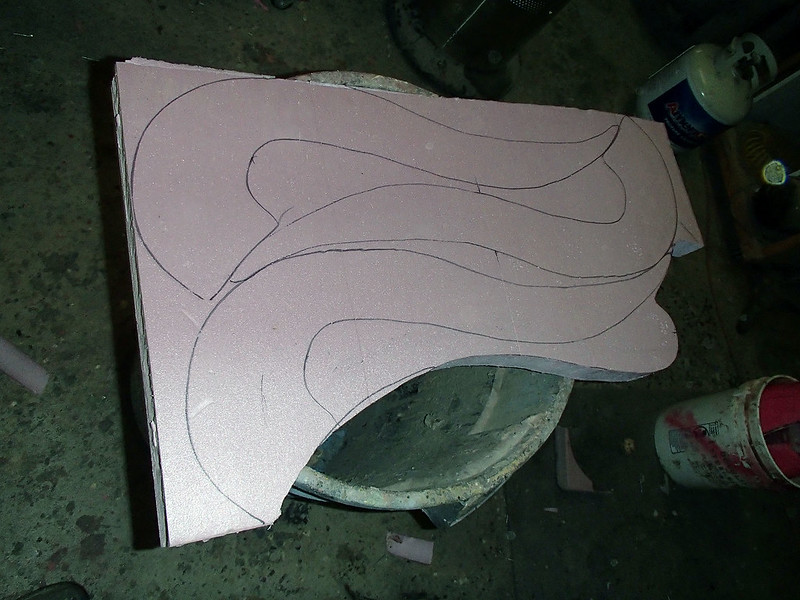
Copies Traced Out

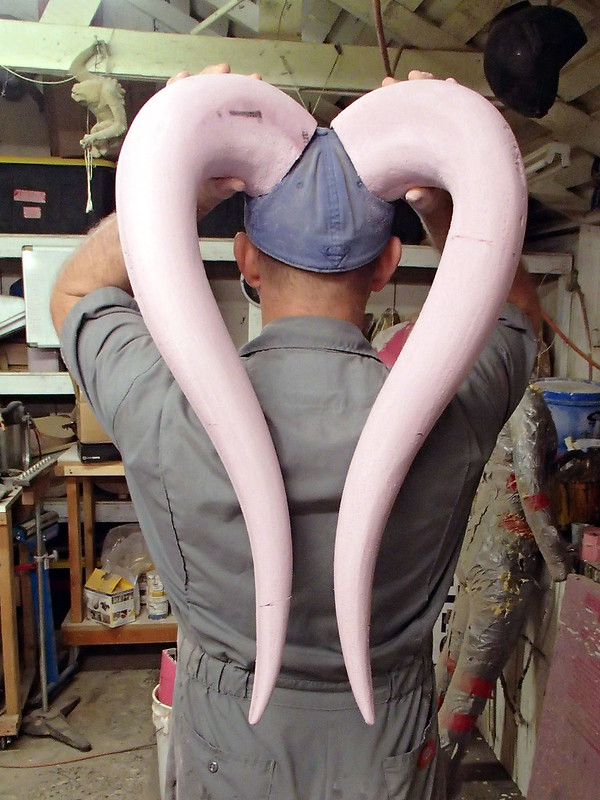
Each pair was laminated together to form two nice, thick tails.  Then I used a handsaw to rough out the tapered shape:
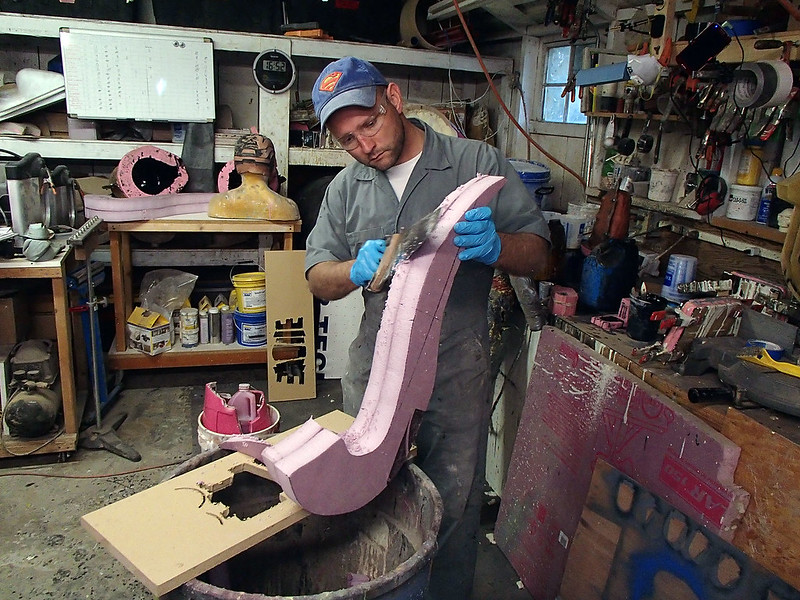
Rough Shaping

Still good:
Test Fit

After initial rough shaping with the saw, smoothing began with a series of rasps and coarse sandpaper:
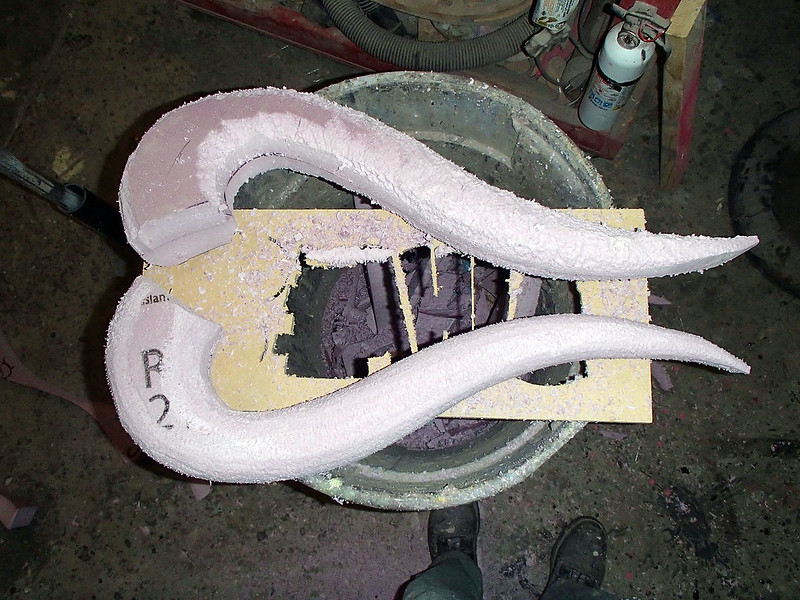
Rough Shaped Lekku Forms

Meanwhile, red Shawnon watched silently:
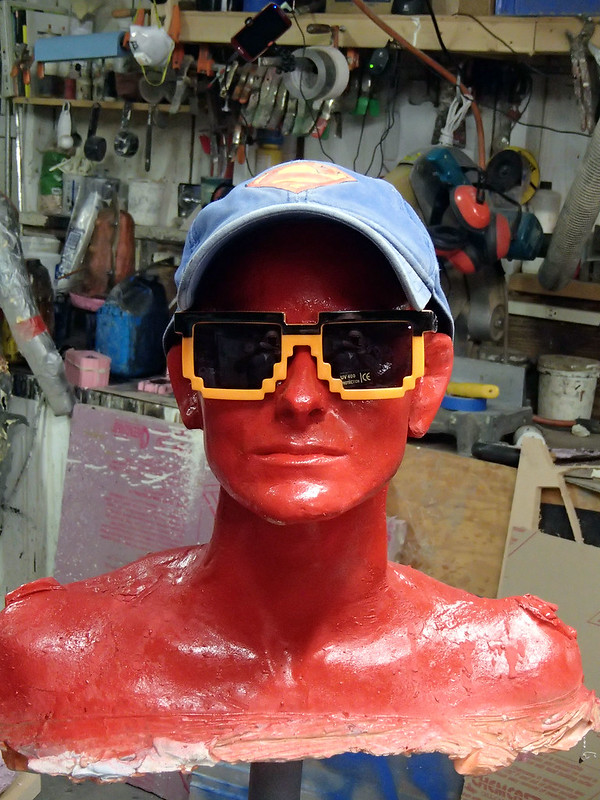
8-bit Glasses

Final smoothing for the foam armatures was done with a scrap of 36-grit sandpaper:
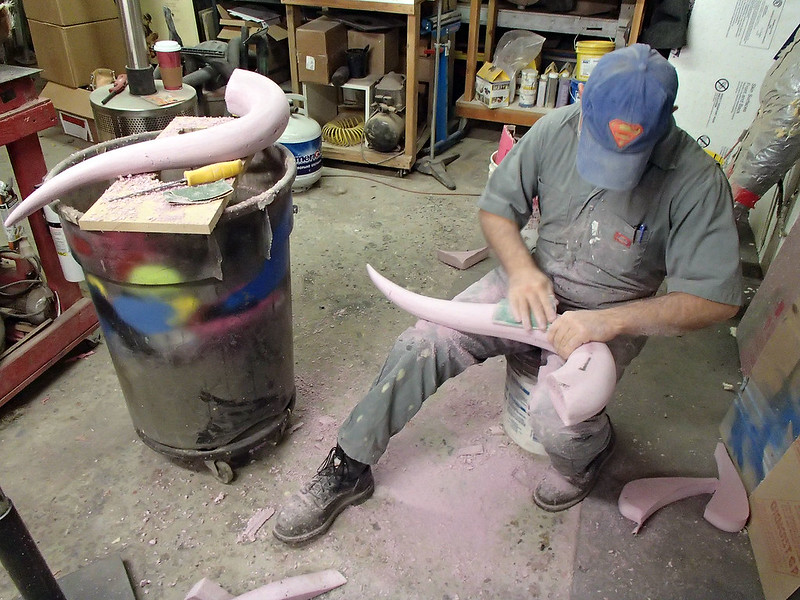
Sanding Smooth

I was really liking the shape:
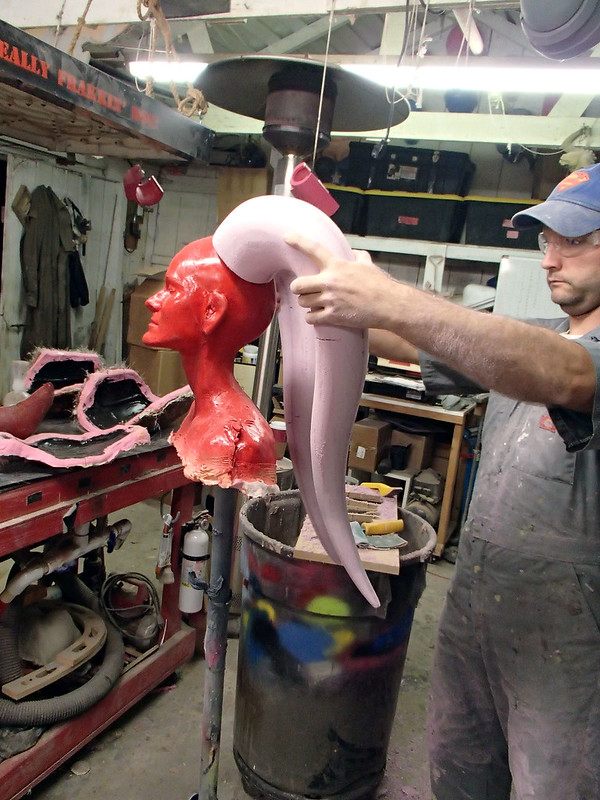
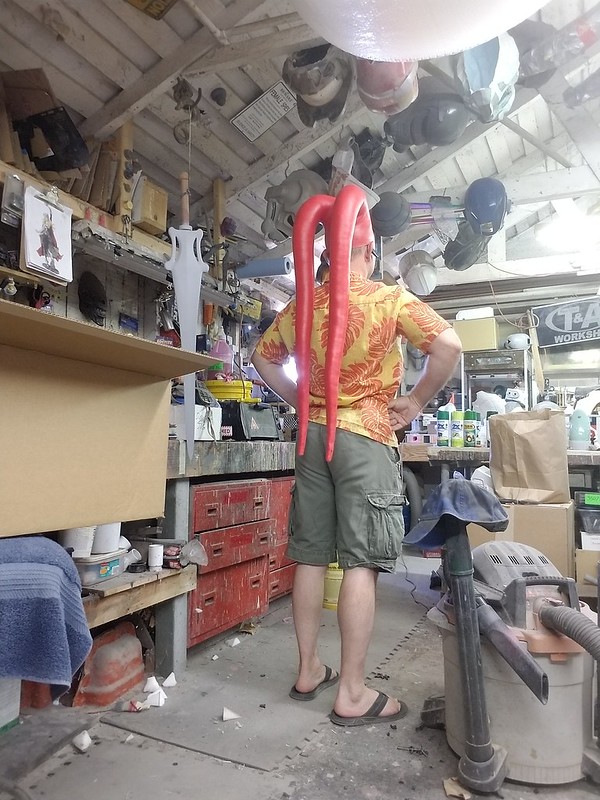
Rough Test Fitting

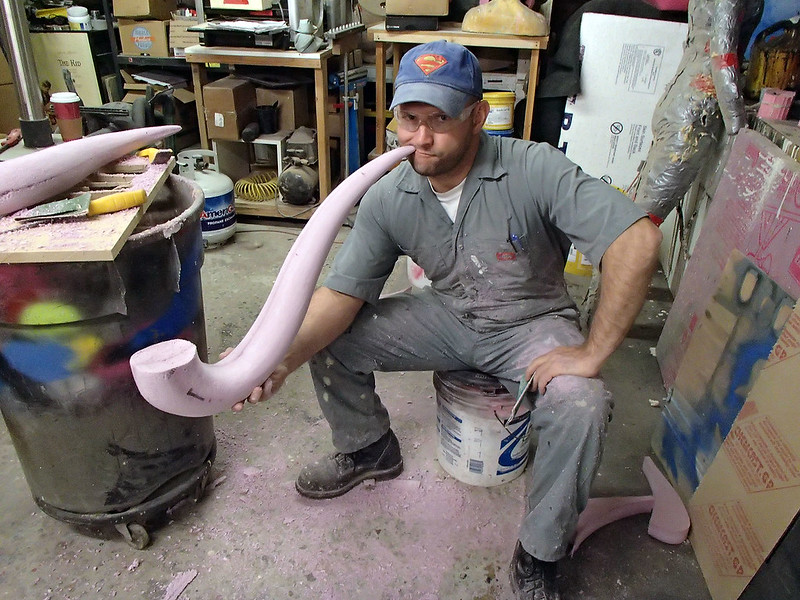
They started to seem like they could be useful for a lot of things:
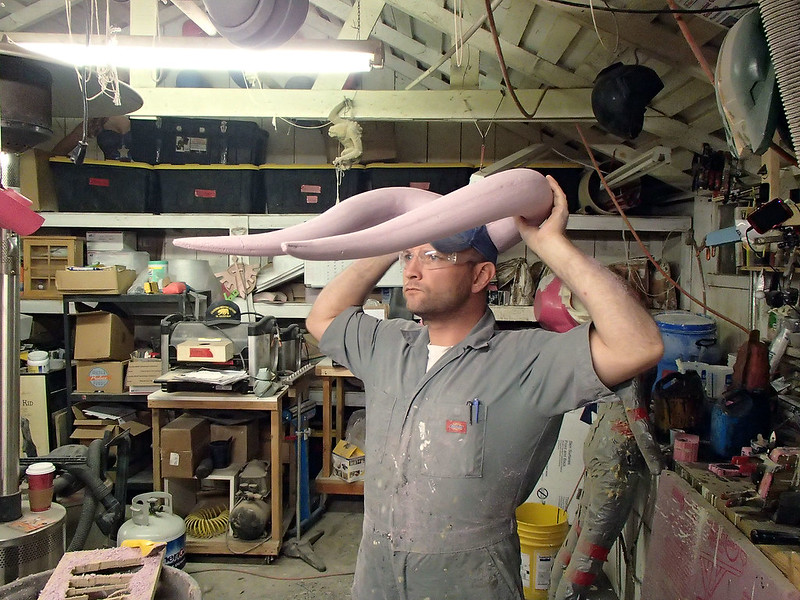
Horny


Smoking Lekku

But somehow I stayed on track:
Aligning Foam Forms

With the smoothing essentially finished, I finally got around to attaching the foam to Red Shawnon using hot glue:
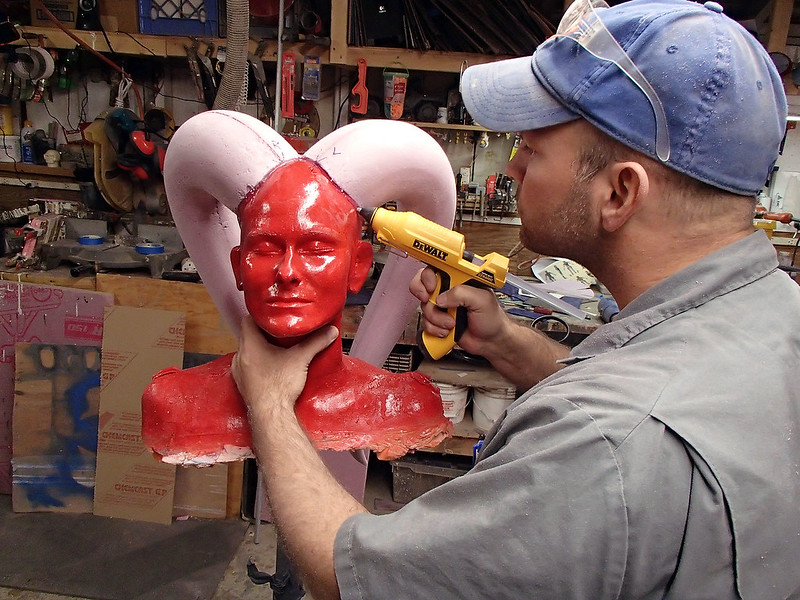
Gluing on the Foam Base Shapes


Sculpting Armature Assembled

The next step was to skin over the whole thing with oil-based clay:
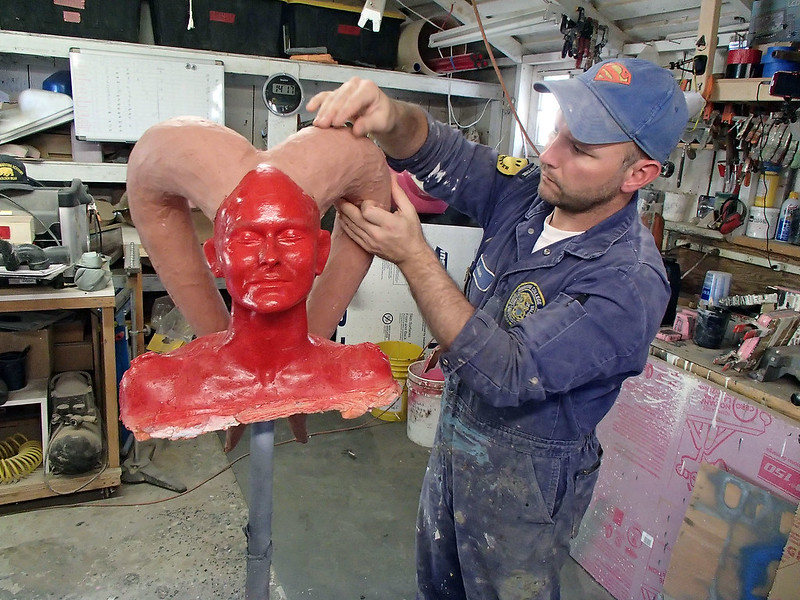
Skinning

For those of you who will ask, the clay I'm using is medium hardness Chavant NSP.  I can work it with relative ease, and it's firm enough at room temperature to hold fine details:
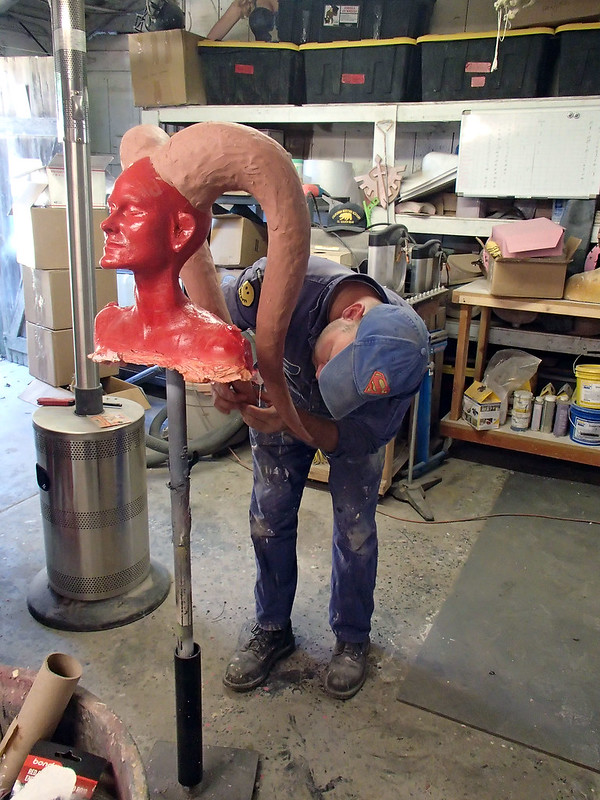
Skinning Progress

After a few minutes, the whole skin was in place:
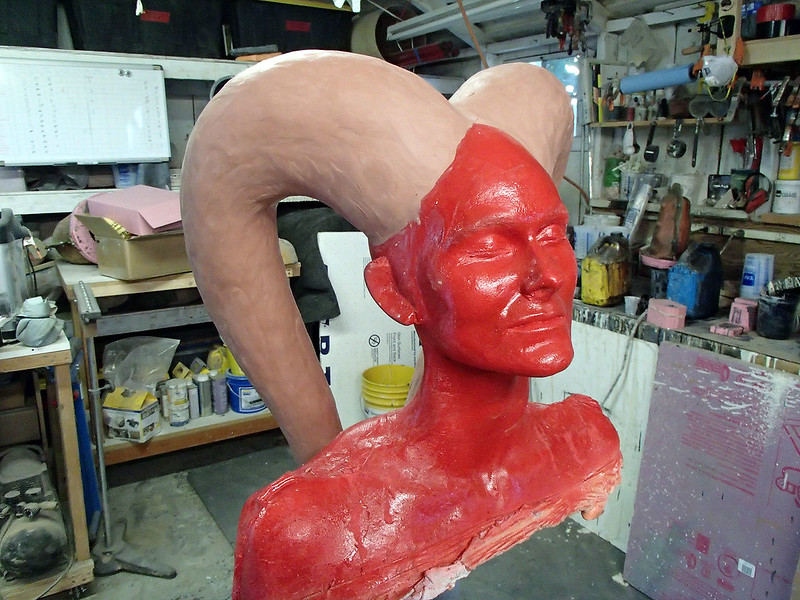
 Skin Nearly Done

Then it was just a matter of smoothing out the clay with some basic sculpting tools and my thumbs:
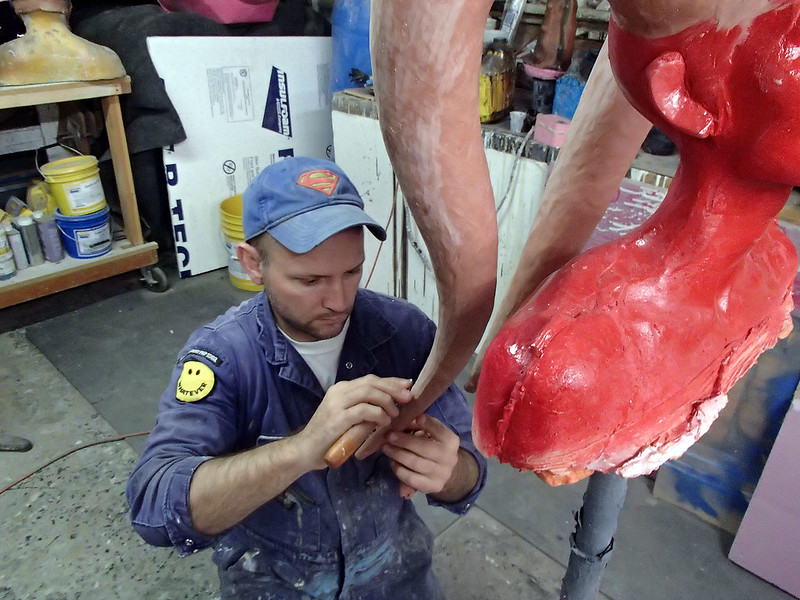
Smoothing Begins


Since the sculpt itself was pretty simple, smoothing was fairly quick too:
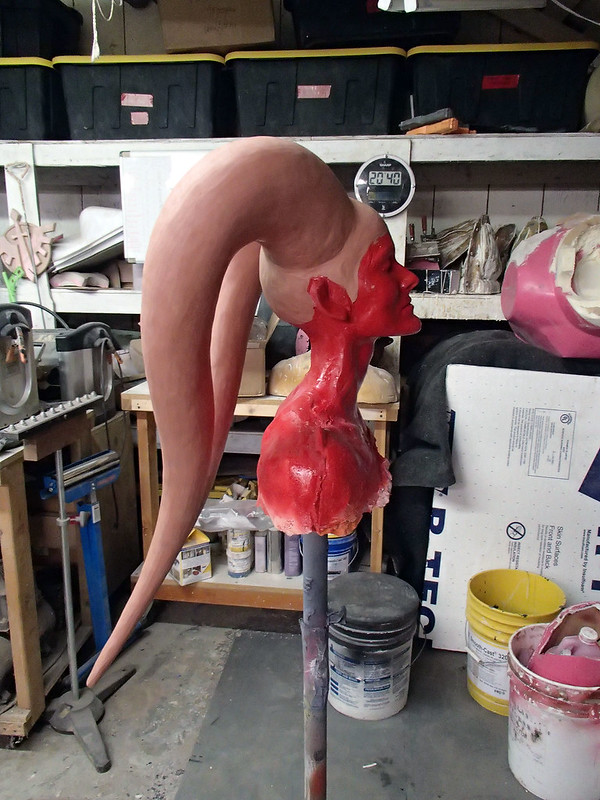
Smoothed Sculpt Side View

Most creatures' skin isn't actually perfectly smooth though.  In order to tamp some believable skin texture into the surface, I enlisted the help of my friend Daniela who let me mold a patch of her skin to use as a texture stamp:
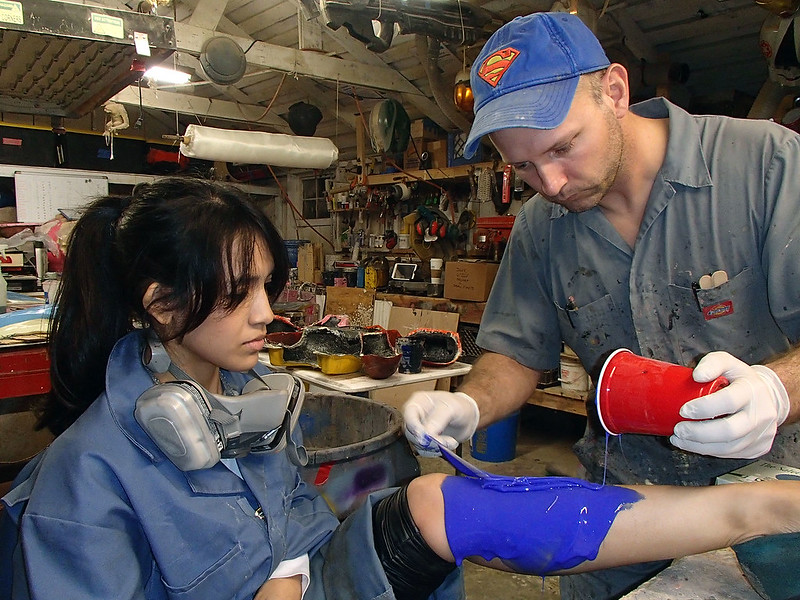
Making a Skin Texture Stamp

The resulting texture was so subtle that it was almost impossible to photograph with my crappy shop camera, but it made the surface much more believable as part of a living being:
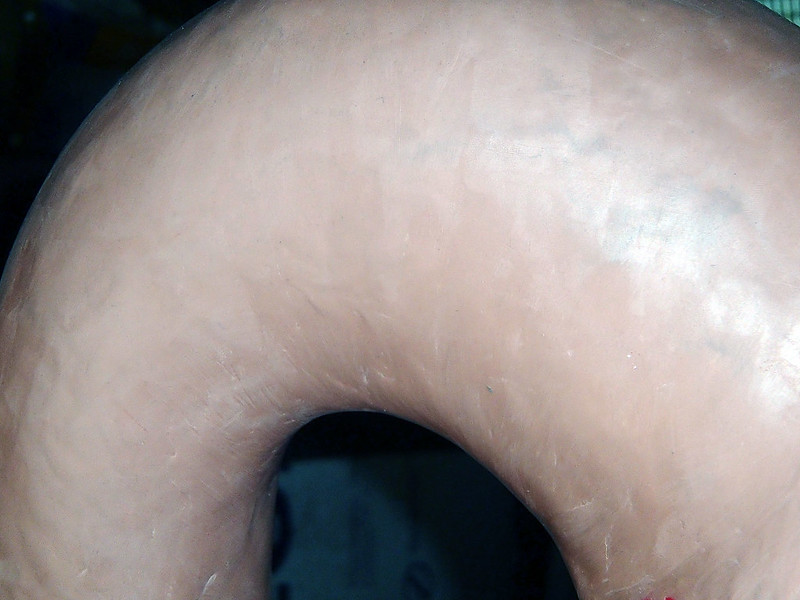
Sculpt Still Needs Smoothing

Everything was going well, but for the next step to make sense, you're going to need  some more context...

You can't quite tell from the background of these photos, but I had a few other projects going on at the time.  That's not unusual for me, but this time it had gotten a bit extreme.

Originally the plan was for me and Shawnon to go to this convention for four days.  Since we didn't want to wear the same thing every day, we'd need a total of eight costumes to wear between the two of us.  No problem.  Thinking "the more the merrier" I invited my friend Matt and his wife to join us on this trip.  Short on ideas for what to wear on the 4th day, I joined Matt's plan to dress himself and his wife as Death Watch Mandalorians and we decided we'd step up the quality of his costumes, pull some molds, crank out a couple more costumes, and go as a foursome.  Then his wife started to invite more friends with the promise that "Matt and Shawn are making costumes for everybody."  Not realizing how deep we'd gotten into this, I reached out to a few local friends to make a bigger, more impressive group.  Then I decided to make a few copies of my Sith Acolyte outfit for one of the other days so we could do a big group on more than one day of the four-day convention.

By the time I realized things had gotten crazy, we sat down and drew up a list of everyone that was counting on us for costumes.  We had 35 names on the list for the Death Watch group at its peak, most of which were people that weren't helping with the build(s) in any way.

So it had gotten a bit silly.

I started pumping the brakes and we got that list down to eighteen people.  I was still determined to finish my Starkiller ensemble and make a half-dozen Sith Acolytes to go along with Shawnon's Shae Vizla costume and had yet to mold the lekku for Darth Talon.

When it started to get down to the wire, project triage started going into effect.  I'd put every penny I had and every waking hour into making sure I'd get everything done and I was consistently spending 16-20 hours a day on my feet in the workshop.  Needless to say, mistakes were made.

Realizing that I was running out of time, I decided I needed to hurry up and start molding these lekku so I could get to the painting and finishing stages and check this one off of the to-do list.  It was getting pretty late, probably around 1AM, and I was alone in the shop.  The heater was going and I'd had plenty of caffeine, so I didn't consider the fact that I was working at a level of exhaustion that was akin to being stumbling drunk and moments from falling over.  It was going to be a two-part mold and I just needed to make the first half before going to bed so I could knock out part two once I'd woken up.  I've made plenty of molds like this and part one shouldn't take me more than an hour or two.

I laid the sculpt down on a table with a soft, padded surface built up out of rags and towels, then cut a bunch of inch-thick strips of water-based clay to act as a parting wall so I could build up the first half of the Ultracal gypsum mold.  If you're not familiar with the process, there's a lot of pictures in my write-up of Jazmine's Magic Wheelchair from last year.  You can see that here: LINK.    One of these days I'll write a more detailed how-to.

Water-based clay is used because it can be easily removed from the oil-based clay sculpture without doing any damage.  Because I was pretty strung out, I neglected to take any pictures.  Just imagine the sculpt in the pictures above laying flat on the table with a strip of clay added on all the way around with mold registration keys notched into it.  

Then I went ahead and mixed up a batch of Ultracal, a gypsum product not entirely unlike Plaster of Paris, but stronger, lighter, and much better suiting for making latex slipcasting molds.  The plan was to drizzle on a nice, thin "print coat" or "beauty coat" that would pick up all the details on the surface of the sculpt.  Since the water-based clay parting wall wouldn't be able to support much weight, I'd have to wait until that layer firmed up a bit before adding additional layers of Ultracal and burlap reinforcement for strength.

The print coat went on just fine.  When it started to firm up a tiny bit, I mixed up a thicker batch of Ultracal and ladled it on top.  So far so good.

I started mixing a third batch.  This one would have strips of burlap laid into it to make it stronger like rebar in a concrete wall.  As I was mixing the powder into the bucket of water, I heard the problem.  The worst noise that could be heard at this stage in this project, a wet, sloppy, cow patty splatter noise of a chunk of the water-based clay parting wall falling off of the sculpt and taking a bunch of the Ultracal with it.

ShrlOPF-splat.

A four-inch section of the parting wall had collapsed, and set off a miniature Ultracal avalanche above itself.

At this point, there are two options.  The smart option is to take a hose to the sculpt, gently wash off all of the not-quite-cured Ultracal and the water-based clay parting wall, set the sculpt back on the table, build a new parting wall with better support, and start over.  This would ensure a nice, smooth parting wall and make it easy to built the second half of the mold after a proper bit of rest and a refreshed mind.

That's the smart option.  I went with the other option.

I figured I could wedge the collapsed section of parting wall back into place, add a bit more clay to the underside to shore it up, and rebuild the Ultracal on top (since I had a mixed batch starting to cure in the bucket next to me).  Worst case (according to my exhaustion-muddled mind), I'd just have to smooth out a little bit of the patched area with a knife or some sandpaper before I built the second half. 

No problem.

As I was working the collapsed section back into place, things seemed to be working.  Then it happened again...

ShrlOPF-splat.

Another small section fell off on the other side of the mold.  This is when I had a brilliant idea:  I could just hold the drooping sections in place for a few minutes until the Ultracal set up and would hold its own weight.  Maybe jamming some wadded newspaper in place would help hold it up temporarily as well.

ShrlOPF-splat.  Another chunk sloughed off and landed on the table.


ShhhhhrlOPF-SPLAT.  Another chunk slimed its way off the sculpt and splattered itself on the floor.


ShrlOPF-splat.  

Over the next hour and a half, I turned into a sleep-deprived, slightly deranged version of the little Dutch boy with his fingers in the dike, fighting a desperate, losing battle to support an ever-growing number of collapsing mold sections with nothing but my own two hands and whatever random garbage happened to be within arms reach of the table.  I was so hyper-focused that I didn't notice my shop heater had run out of fuel and in the rapidly dropping temperature, the Ultracal was going to take longer and longer to set up.

Eventually, it stopped falling.  The Ultracal hardened enough to stay put and I figured I was in a good place to add the reinforcement layers.  Once the build-up was done, I took a step back, cringed at my not-quite-perfect patchwork, and called it a night.

That was around 3:30AM.

I awoke with a start at 0730 and rushed out to the shop to see how much fixing I'd have to do before making the second half of the mold.  Now bear in mind that in order to make it possible to separate the two halves and have them form a watertight seal during the slipcasting phase, the parting wall or "flange" needs to be nice and smooth.  I figured I could fix a couple of rough patches.

I was not at all prepared for the disaster I found when I removed the clay wall:
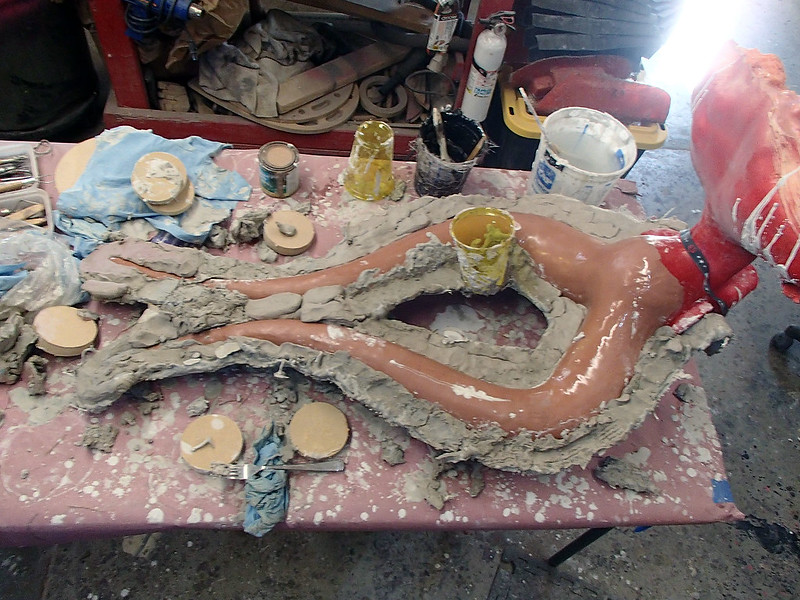
Lekku Moldmaking Nightmare  

The whole thing looked like dried oatmeal.   There was no way I'd ever have time to fix it and almost no way I'd be able to make it smooth without accidentally marking up the original sculpt.  I was devastated.  There was no way I'd be able to fix this.  Instead, I'd have to remove the Ultracal, re-sculpt the lekku, and try the process over with a slightly better plan.  At this point, there just wasn't enough time.  

Then I had to tell Shawnon that the costume she'd spent the last four months getting in shape for wasn't going to come together.  I had failed.

That failure put a damper on much of the rest of my experience at that event.  I tried to take pride in the twenty-five other costumes* that my team and I had put together in preparation for the convention, but somehow this one not being done had overshadowed the rest of the done things.

There were a lot of lessons I learned from this particular project and the other projects that I was running at the time.  The main one was recognizing that even I have limitations and I need to avoid falling into what I call the "superman trap," where I convince myself that I can do anything and everything and blindly railroad myself into some level of misery rather than just saying "no" from the get-go like some kind of sane person.

I haven't given up on this project though.  Somewhere along the way, a friend introduced me to the beautiful work of "Twilek Pam," which you can check out at her website: twilekpam.com/

I now have a beautyfull pair of long, red lekku cast in silicone, as well as all of the tattoo stencils I'll need to match Darth Talon's signature look whenever I get a minute to tackle this project again:
Lekku Back

More on that someday...

*Not exaggerating about the twenty-five other costumes.  That was the weekend we debuted Shawnon's Shae Vizla costume, six Sith Acolytes, and nineteen Mandalorians.