
I try to avoid letting my 3D printers sit idle. By my reasoning, there's all kinds of things on my wish list that I'd like to print and I'd hate to find myself waiting on the machines. Instead, whenever they're not working on a custom project for a client, they're building me a backlog of hobby projects that I can smooth out and finish at a later date.
Usually it's not a serious distraction, but sometimes I get excited about something and it gets in my way. The latest, this set of parts modeled by Sentinel Props:

I found these models on Thingiverse while I was doing some late night websurfing. You can download them for yourself here: LINK
While I've loved Fallout stuff for years, I've never played New Vegas. But living in California, it seemed fitting that I should at least have a New California Republic Ranger helmet mixed in with the rest of my collection. So, armed with this model and some down time on my machines, I set to printing parts.
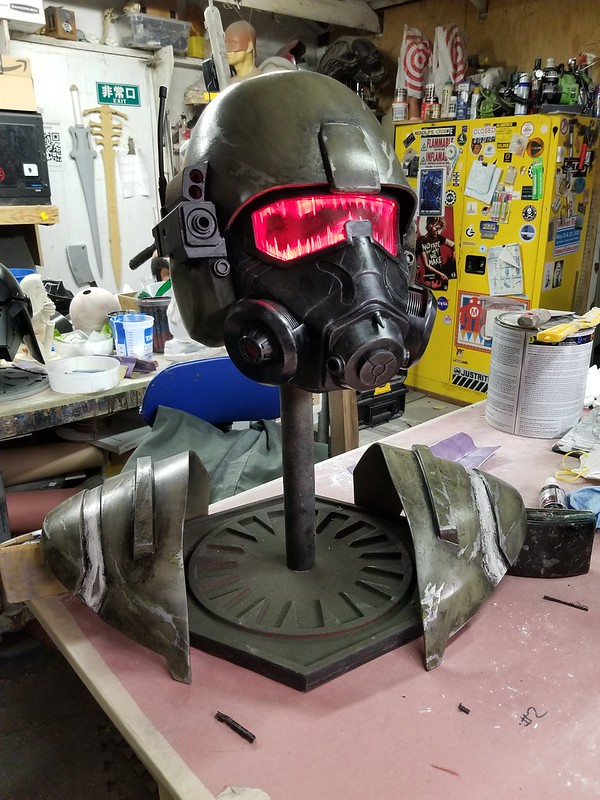
In no time at all, I had me a helmet:
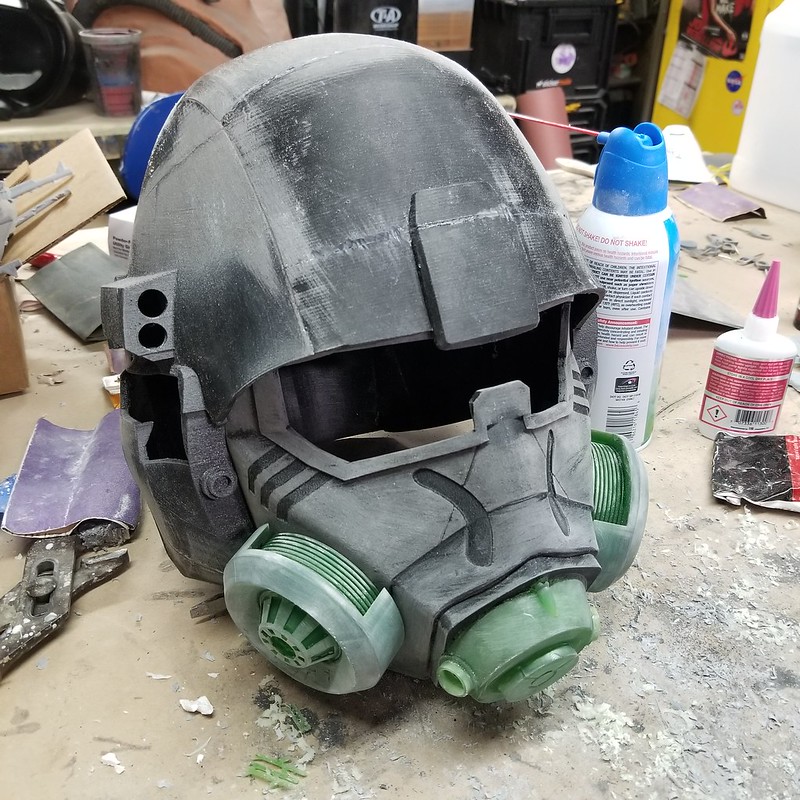
The reason the gas mask details are a different color at this stage is that I printed them separately on my Elegoo Mars MSLA printer. I really love that little machine. You can get one here: LINK.
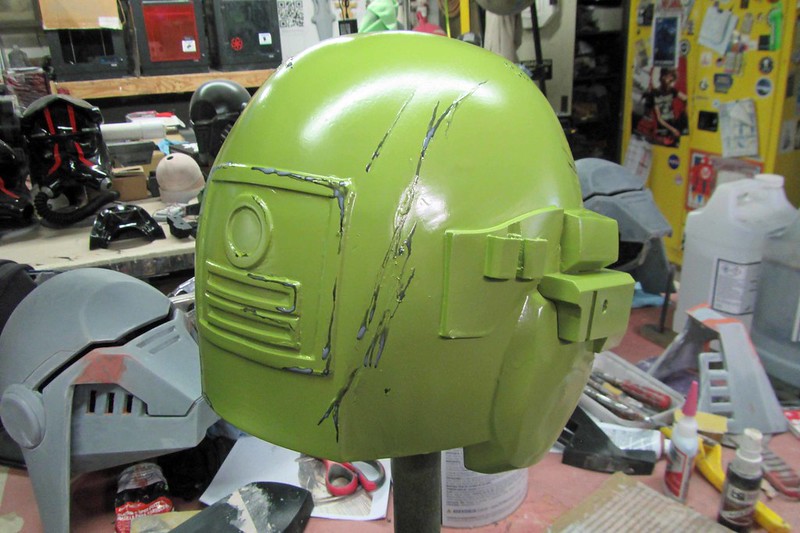
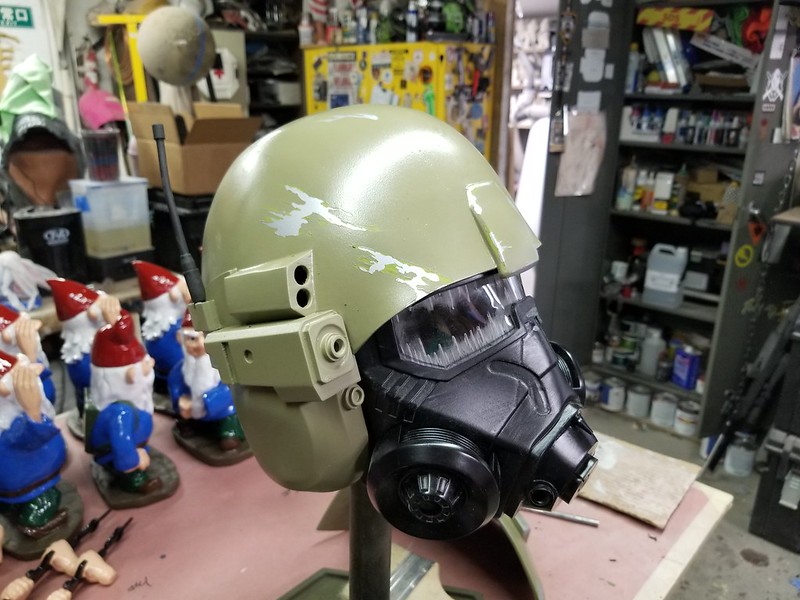
After just a bit of sanding and filler work, it was looking pretty good:

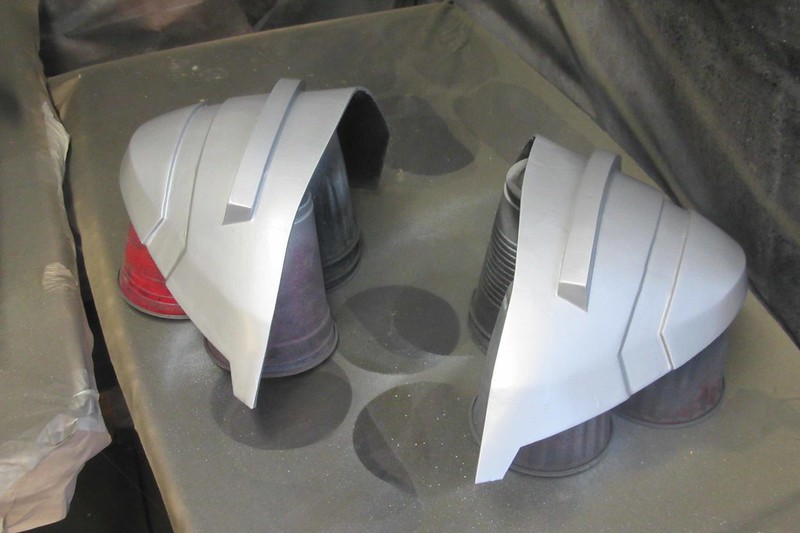
While I was tinkering with the helmet, I figured I was on a roll and I might as well go ahead and print the shoulder armor as well:

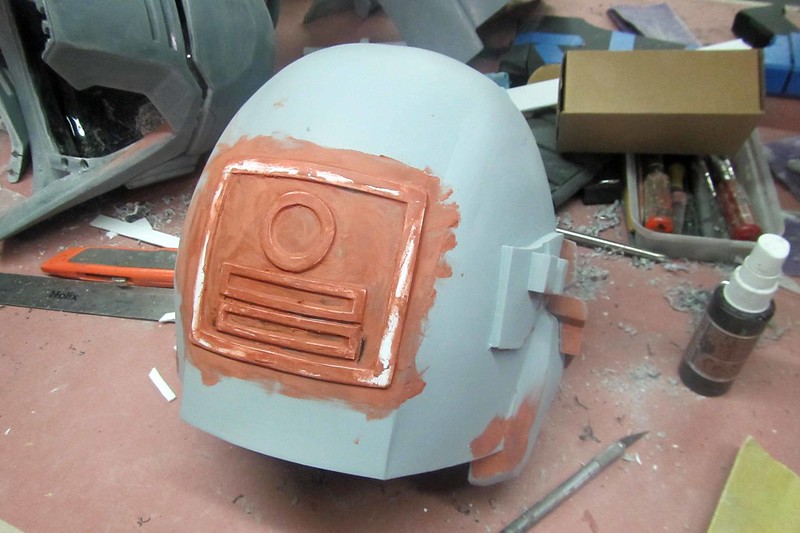
The helmet model had some inaccuracies, but the most noticeable missing detail was these raised parts on the back. I cut the shapes in 1/16" styrene sheet and glued them into place:

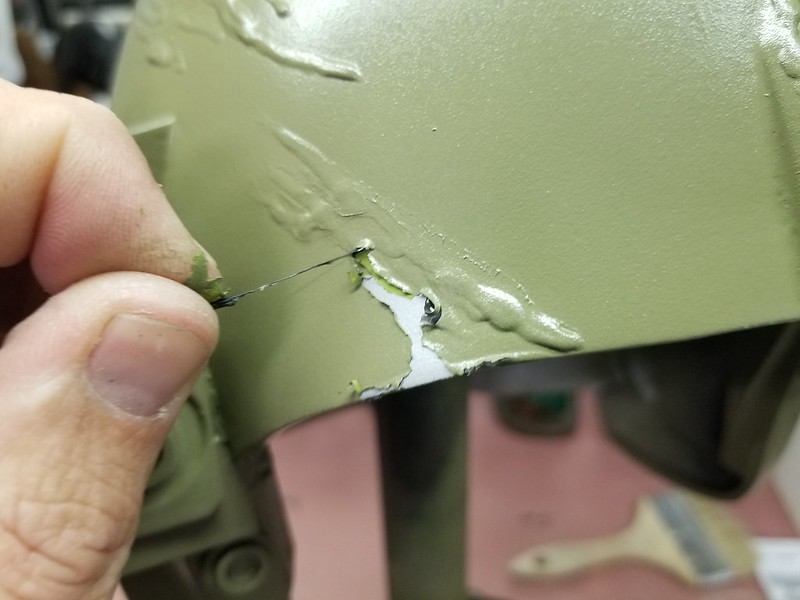
After a tiny bit of sanding, I laid some spot putty in place to help blend the edges:
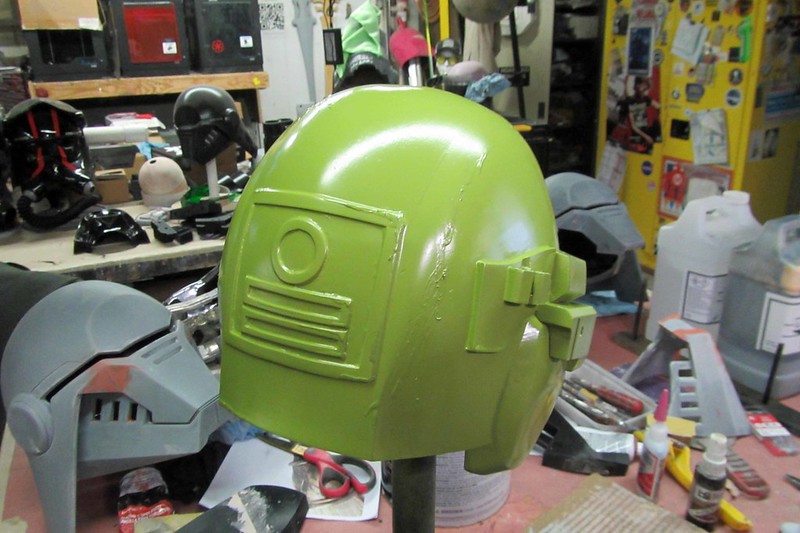
Once that dried I did a bit of sanding and priming. Then it all got a coat of matte aluminum spraypaint:

When the base metallic layer had dried, I masked off some "scratches" with liquid latex, then gave it all a base coat of Rustoleum "Eden" satin spraypaint:
When that had dried, I used more liquid latex to mask off slightly more scratches:
Once that had dried, the helmet got a coat of "Oregano" satin spraypaint:

When that was good and dry, I peeled off the masked latex areas:
The shoulders got the same treatment:

With the spray painting and scratching done, the star stencil was sponge painted onto the left side of the helmet:
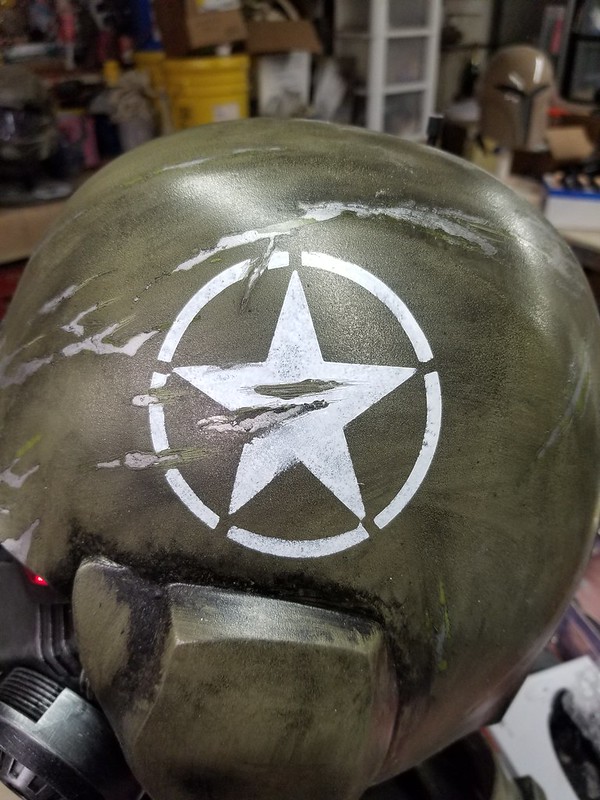
and the whole thing was given a liberal coating of blackwash:
After a tiny bit of sanding, I laid some spot putty in place to help blend the edges:
Once that dried I did a bit of sanding and priming. Then it all got a coat of matte aluminum spraypaint:
When the base metallic layer had dried, I masked off some "scratches" with liquid latex, then gave it all a base coat of Rustoleum "Eden" satin spraypaint:
When that had dried, I used more liquid latex to mask off slightly more scratches:
Once that had dried, the helmet got a coat of "Oregano" satin spraypaint:
When that was good and dry, I peeled off the masked latex areas:
The shoulders got the same treatment:
With the spray painting and scratching done, the star stencil was sponge painted onto the left side of the helmet:
and the whole thing was given a liberal coating of blackwash:
"But wait," you say, "how did you get the eyes to light up like that?"
Well I'm glad you asked, Mister Segue. Here's how...
LIGHTING THE MASK
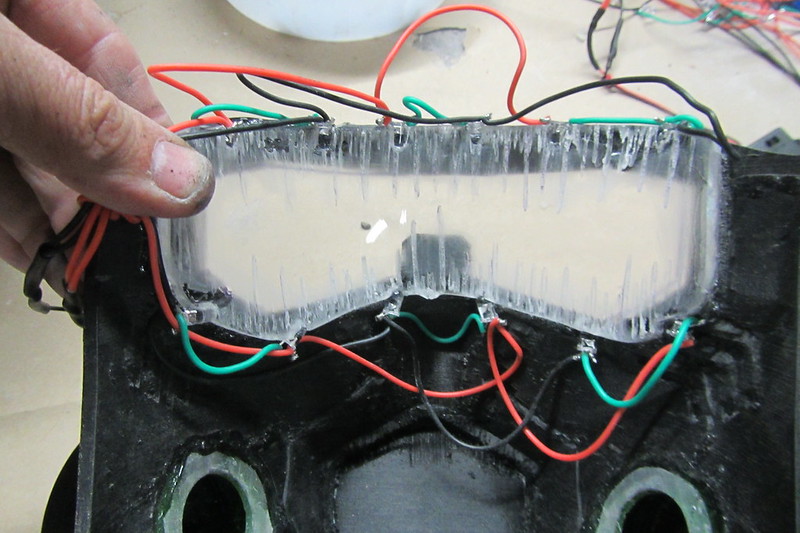
Before I could make the gas mask lens light up, I had to make the gas mask lens. In this case, I used a piece of 1/4" acrylic that was cut to the rough shape, heated in a toaster oven until it was floppy and soft, then clamped it in place and allowed it to cool:

Then I took the clear acrylic lens and gouged a bunch of scratches around the edges on the inner face with a Dremel and some coarse sandpaper:
Then I wired up an array of ultra-bright red LEDs and glued them into notches on the edge of the acrylic:
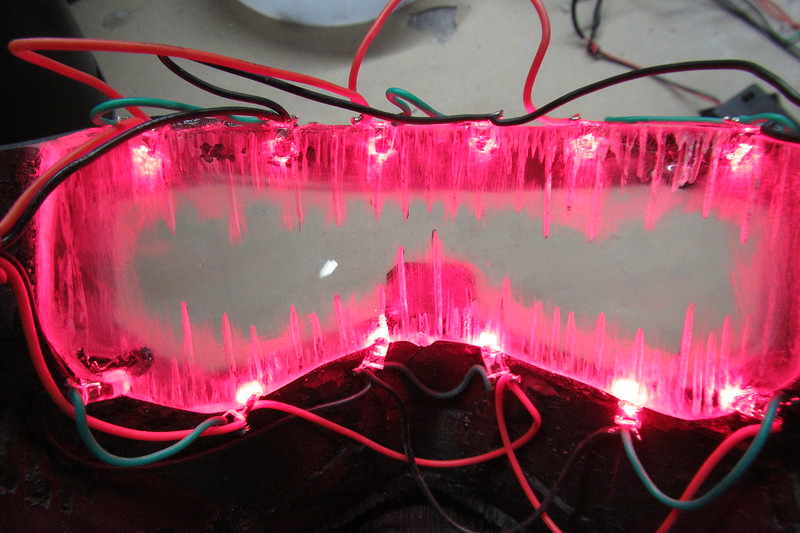
When the LEDs are powered up, they edge-light the scratches in the acrylic and give it the just right glow:
Here's the look from the outside:

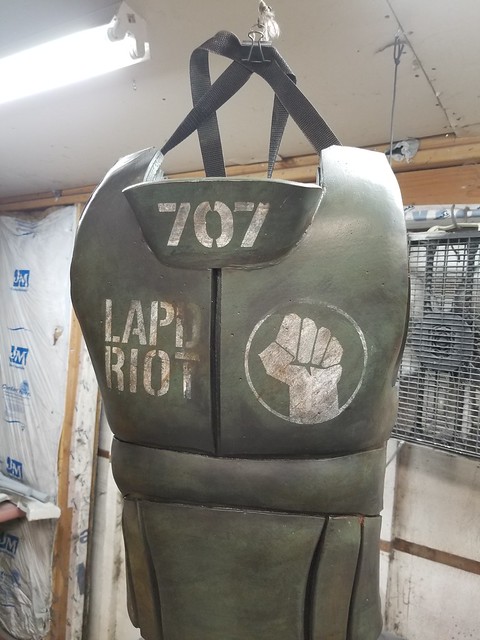
CHEST ARMOR
When it came time to make the chest armor, I figured there was no reason to reinvent the wheel. Looking around the interwebs, it looks like lots of other cosplayers online have made theirs in foam. While I don't tend to do too much foam fabrication, I figured there was no reason I couldn't do the same.
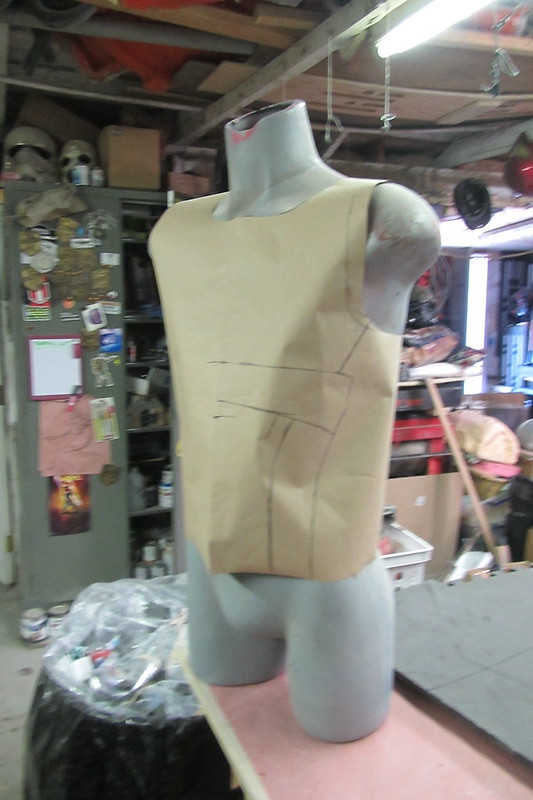
I started by mocking up a pattern in paper on a mannequin I had kicking around the shop:
I started by mocking up a pattern in paper on a mannequin I had kicking around the shop:
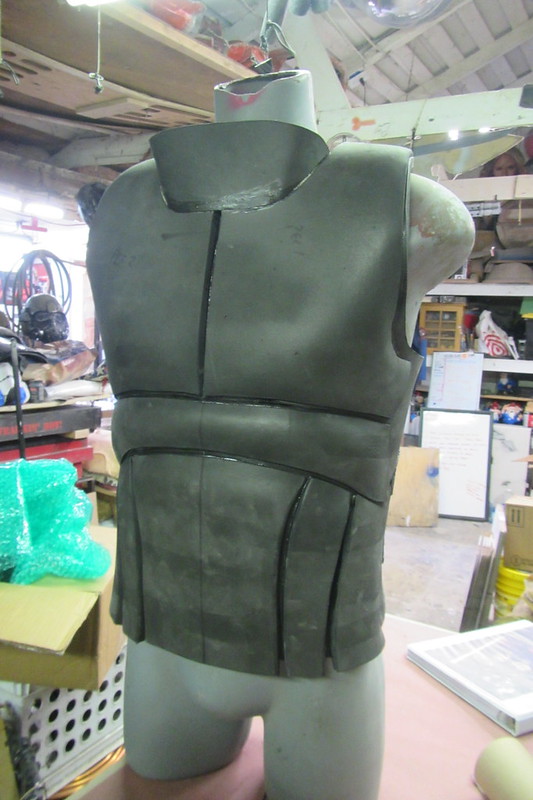
Then the base shape was cut out of 1/2" foam:
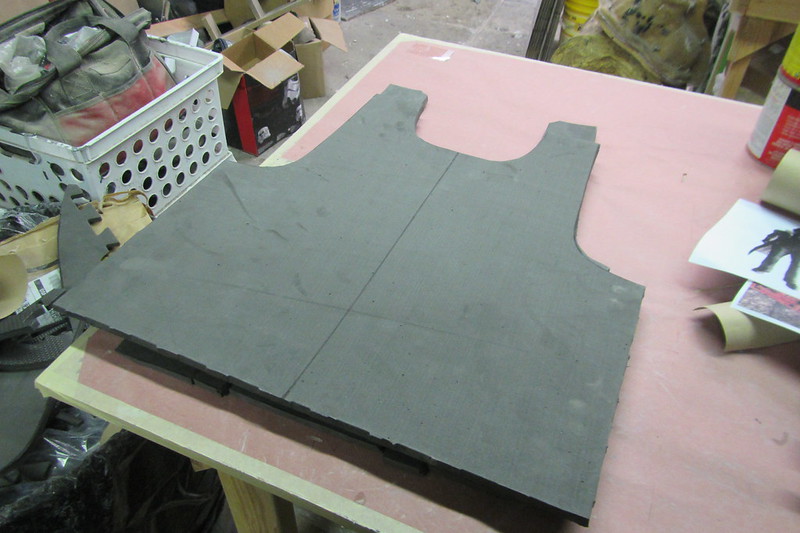
That piece was heated and formed to fit onto the mannequin:

Then I cut out the raised panels:
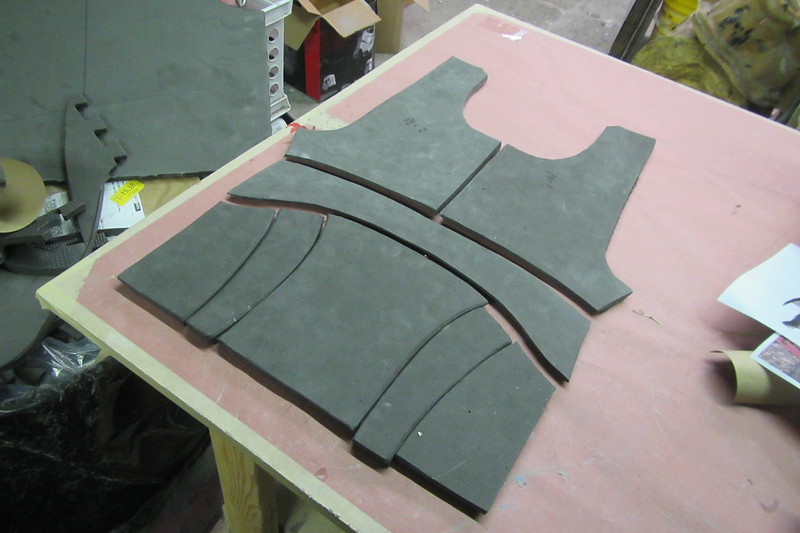
Those were also heated and formed, then adhered to the base shape using Barge contact cement:
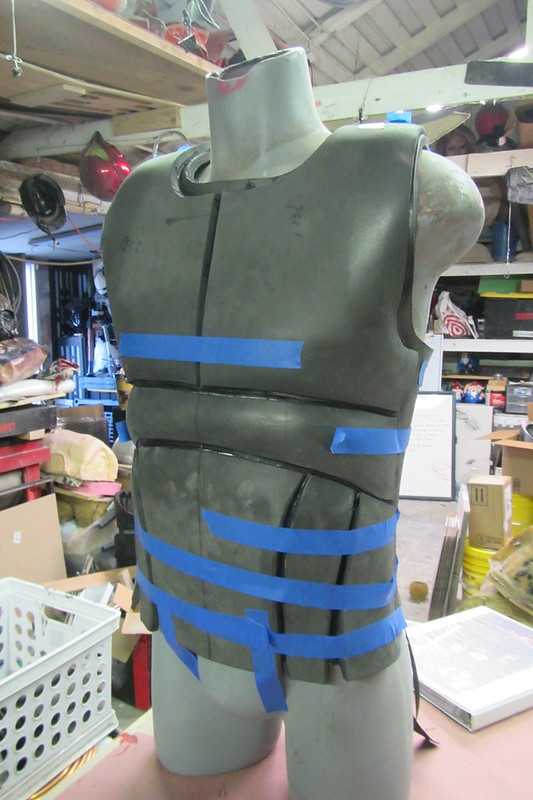
Once the glue had dried, I removed the blue masking tape:
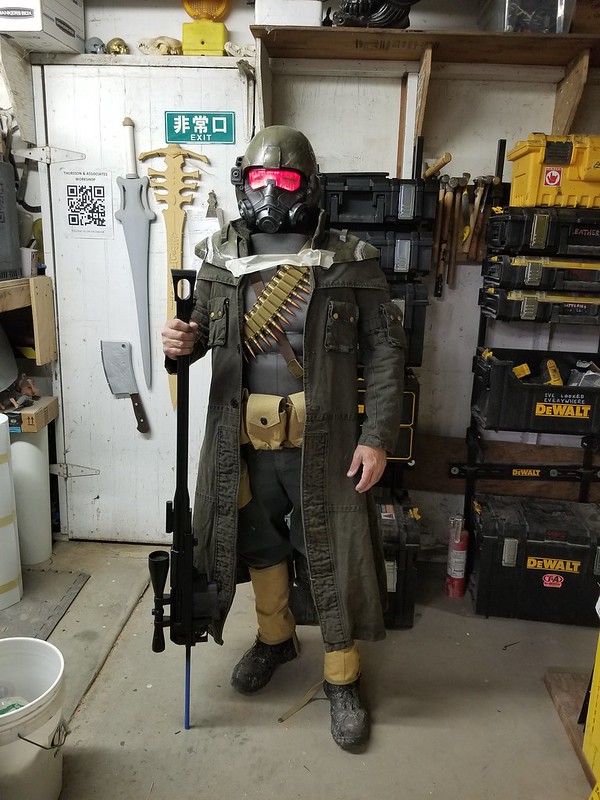
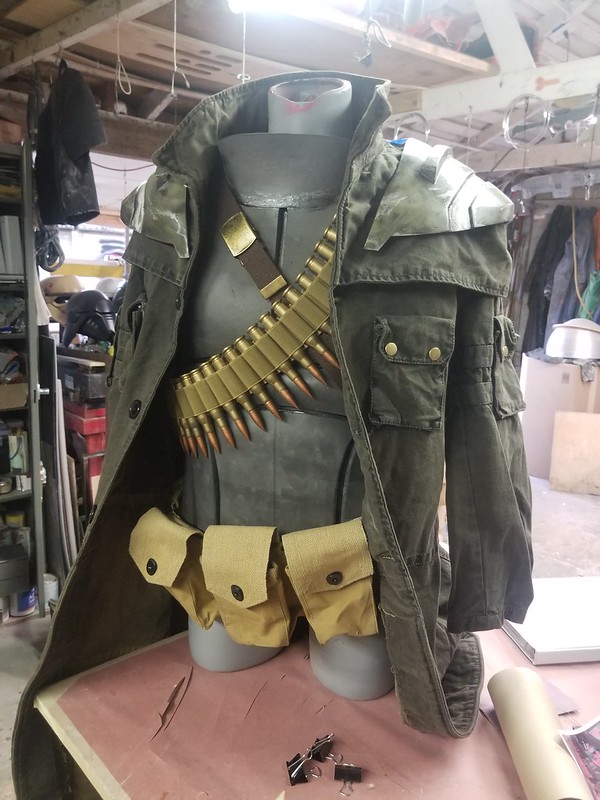
With all of the bandoliers, belts, straps, and the duster in place, it looks pretty good. Even before painting it:
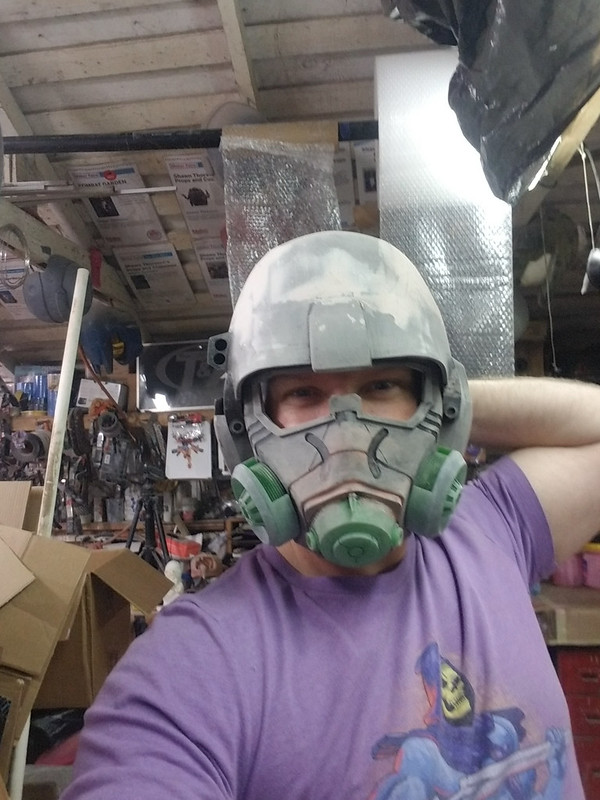
Unable to resist the urge, I had to try it on:
Painting the armor was a matter of spraying on a couple of coats of Plasti-Dip rubberizing paint, then a light coat of Krylon Italian Olive:

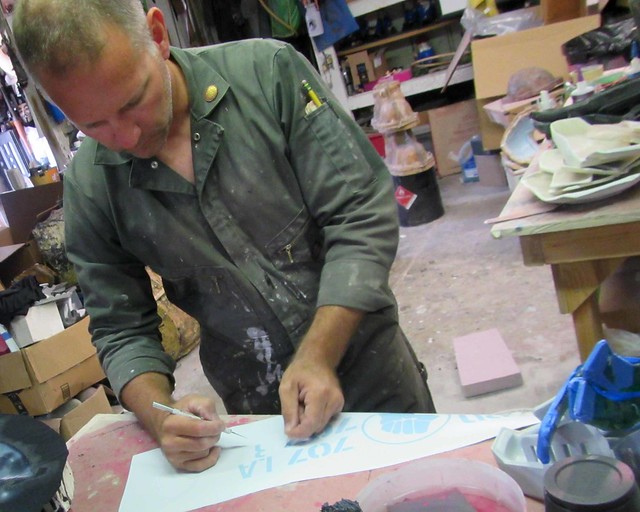
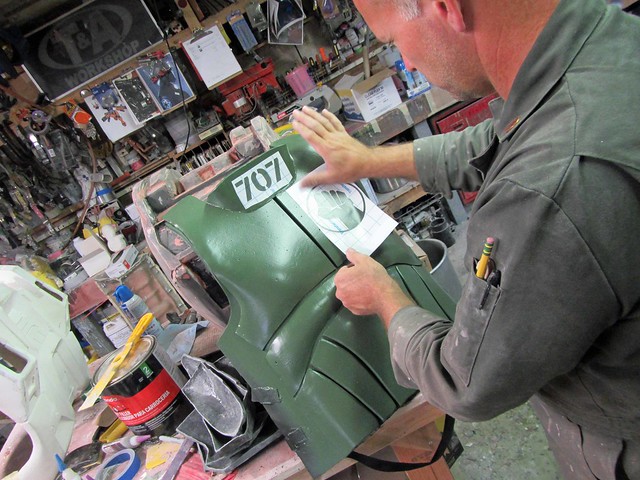
Once that had dried, I used the vinyl cutter to make the necessary stencils:
Here I am placing them onto the armor:
So far so good:
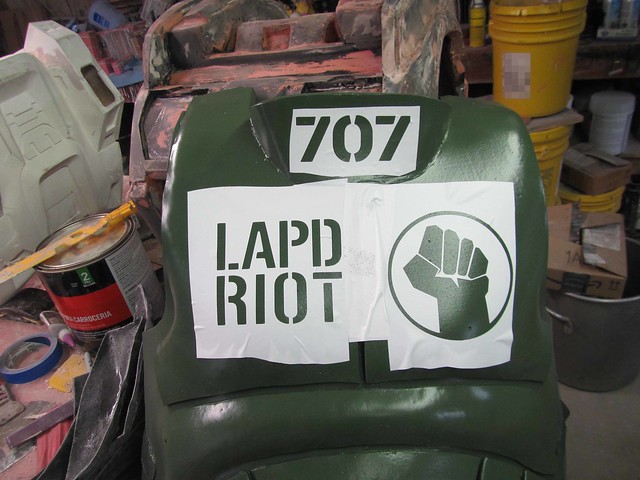
I wanted the stenciled markings to have a distressed look, so rather than spray them to get a nice, even coat, I used a crumpled up paper towel to daub the paint onto the stencils:

The result was appropriately uneven:
Once the stencils were peeled off, things were looking pretty good:
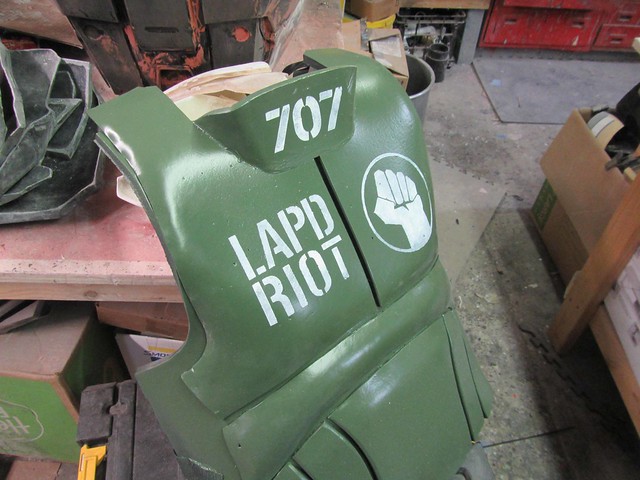
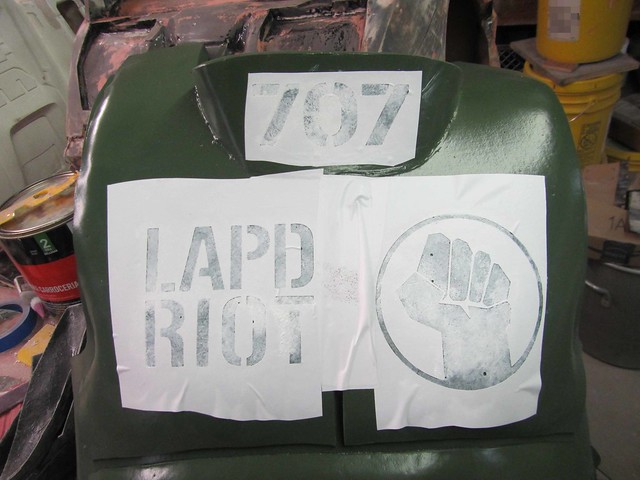
Too good in fact. In order to make it look like a thoroughly abused piece of pre-war police gear that was scavenged in a post-apocalyptic wasteland, I gave it a series of washes with black and various shades of brown:
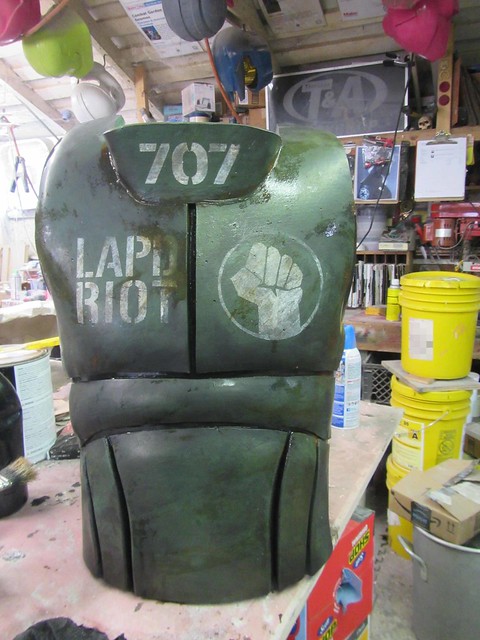
Once that had dried, the whole thing got a couple of coats of clear Plasti-Dip to even out the sheen and hold it all together:
The Soft Parts, Belts, and Pouches:
I don't like to sew. I'm able to do it and I'm told I'm even pretty good at it, but most of my sewing time consists of me chugging away at a bunch of things I don't have any formal training in while thinking "somewhere out there there's someone who knows how to do this, can do it faster, and might actually enjoy it." I'd like to hire that person. So in this case, I went with as many off-the-shelf items as I could find.
Somewhere earlier on in the build, I picked up the duster from DarkMatterProps on Etsy (LINK). It's an absolutely gorgeous garment with tremendous attention to detail and I couldn't resist the urge to try it on as soon as it arrived:

The other thing I needed was some ammo belts and pouches to finish out the look.
"Wow," you're thinking, "that bandolier with the rounds for the anti-materiel rifle looks pretty amazing. But you're going to run into problems trying to carry live rounds into some convention."
You're not wrong. So they're not live rounds. They're not even dummy rounds. In fact, they're completely 3D printed on that little Elegoo Mars printer. It just took a few minutes of cleanup for each piece, then they were ready to paint: 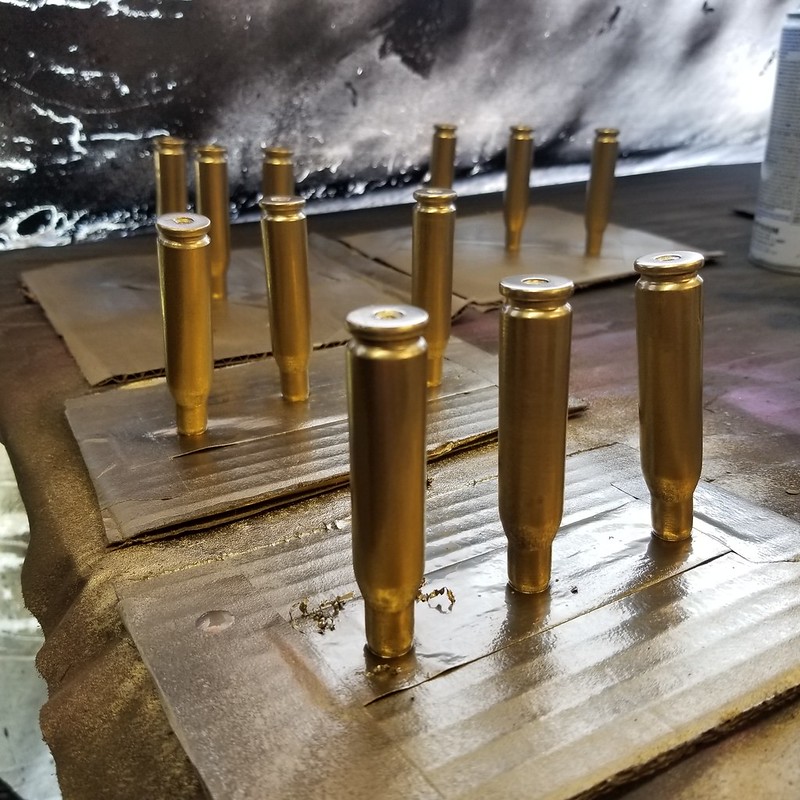
The bullets were painted separately from the casings, then they were just glued together:
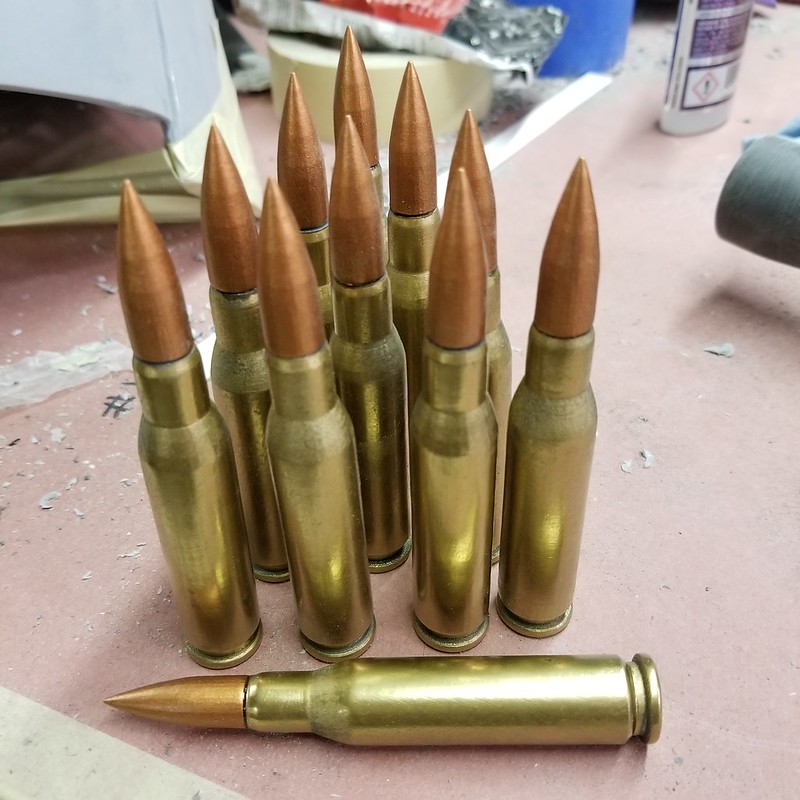
Shiny!
The bullets were painted separately from the casings, then they were just glued together:
Shiny!
But I digress.
I was also working on the Anti-Materiel Rifle.
THE RIFLE:
This was 3D printed:

If you want to print one for yourself, the models were posted by Josh Tenny on Myminifactory.com. You can download it for yourself here: https://www.myminifactory.com/object/3d-print-fallout-new-vegas-anti-material-rifle-100602
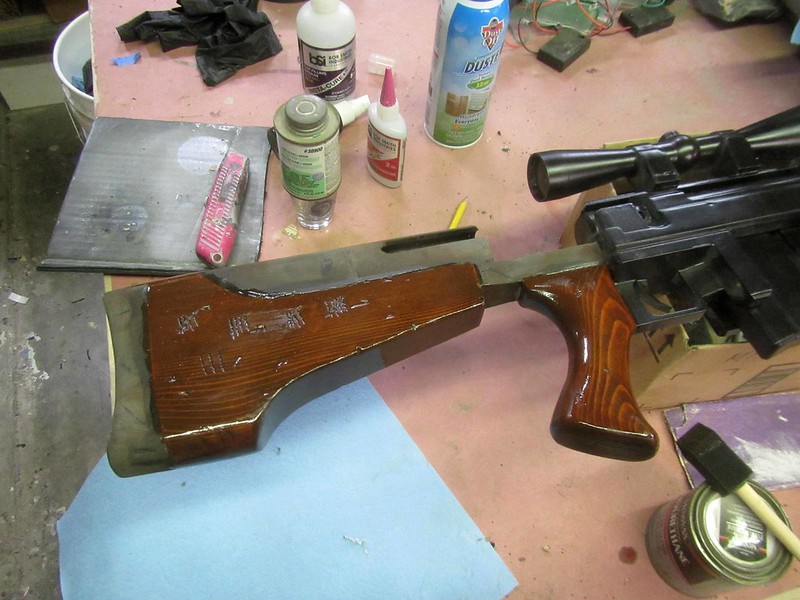
While I could've gotten away with just printing the whole thing and then painting it to look believable, I decided to class it up a bit. To that end, I made actual wooden furniture for it:

Once these pieces were smoothed out, stained, and given a few coats of satin urethane, they were installed on the printed parts:
With that done, it was just a matter of adding some weathering and age:
With that done, it was just a matter of adding some weathering and age:
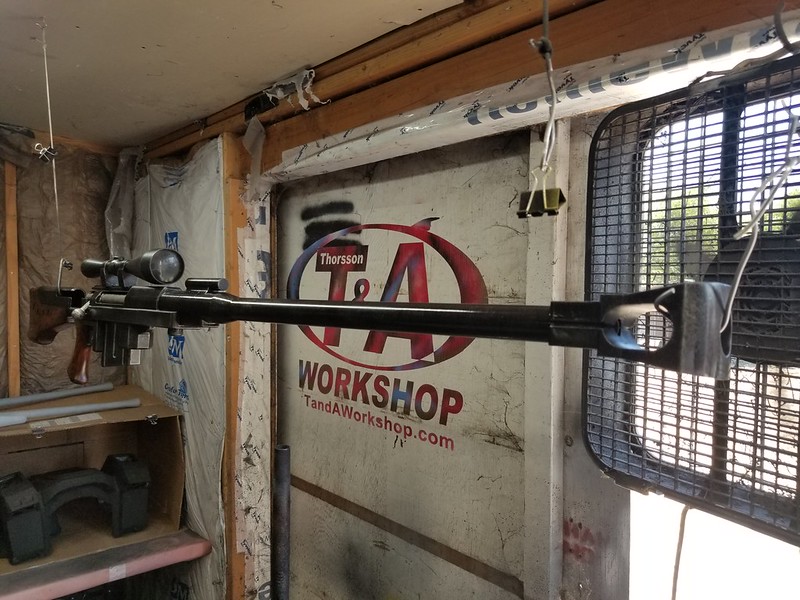
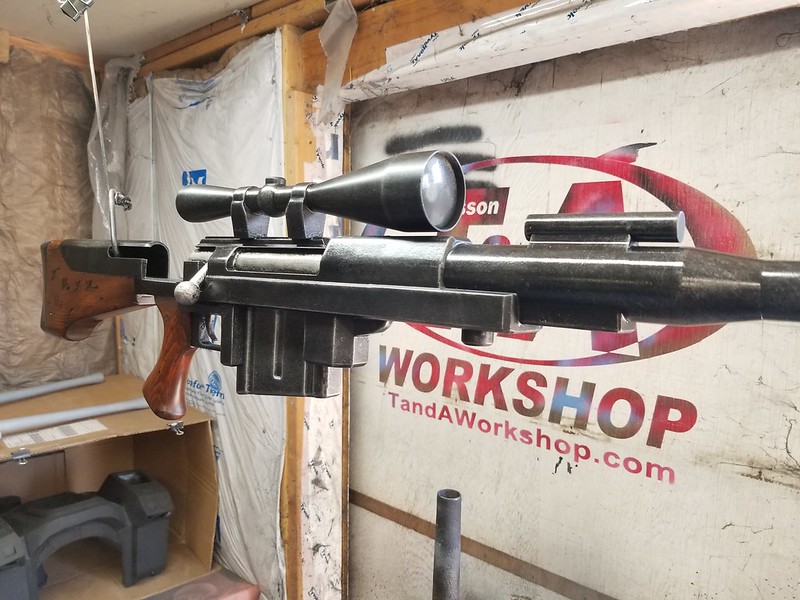
Of course, as long as the rifle is, it's tough to get a good snapshot that shows the whole thing while also showing the details. Here's the action up close:
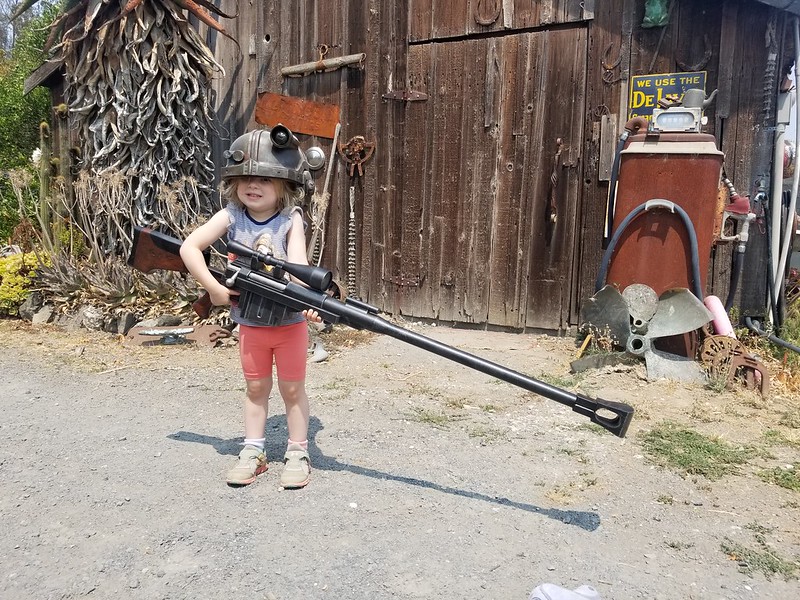
Better, here's a bigger picture showing the whole thing before I'd installed the sling with a small child for scale:
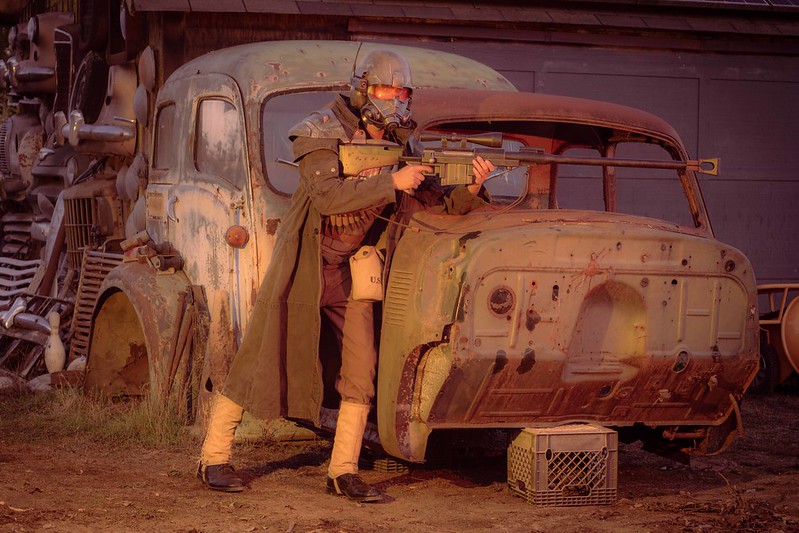
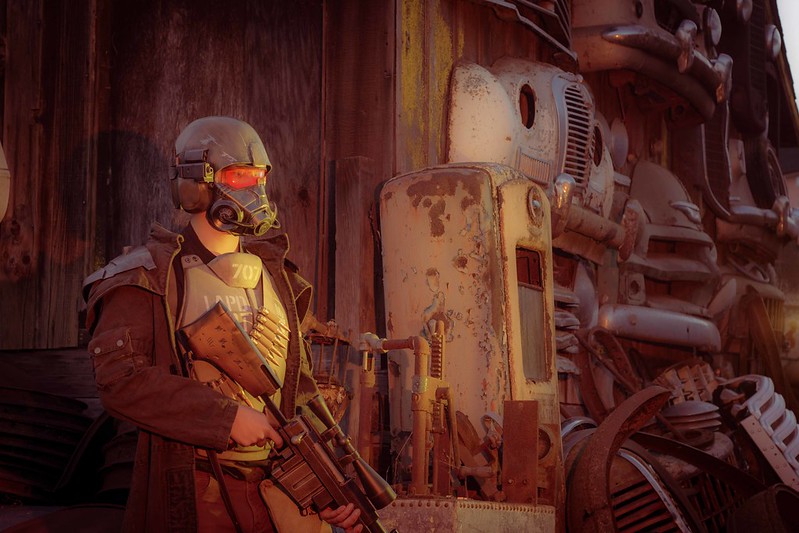
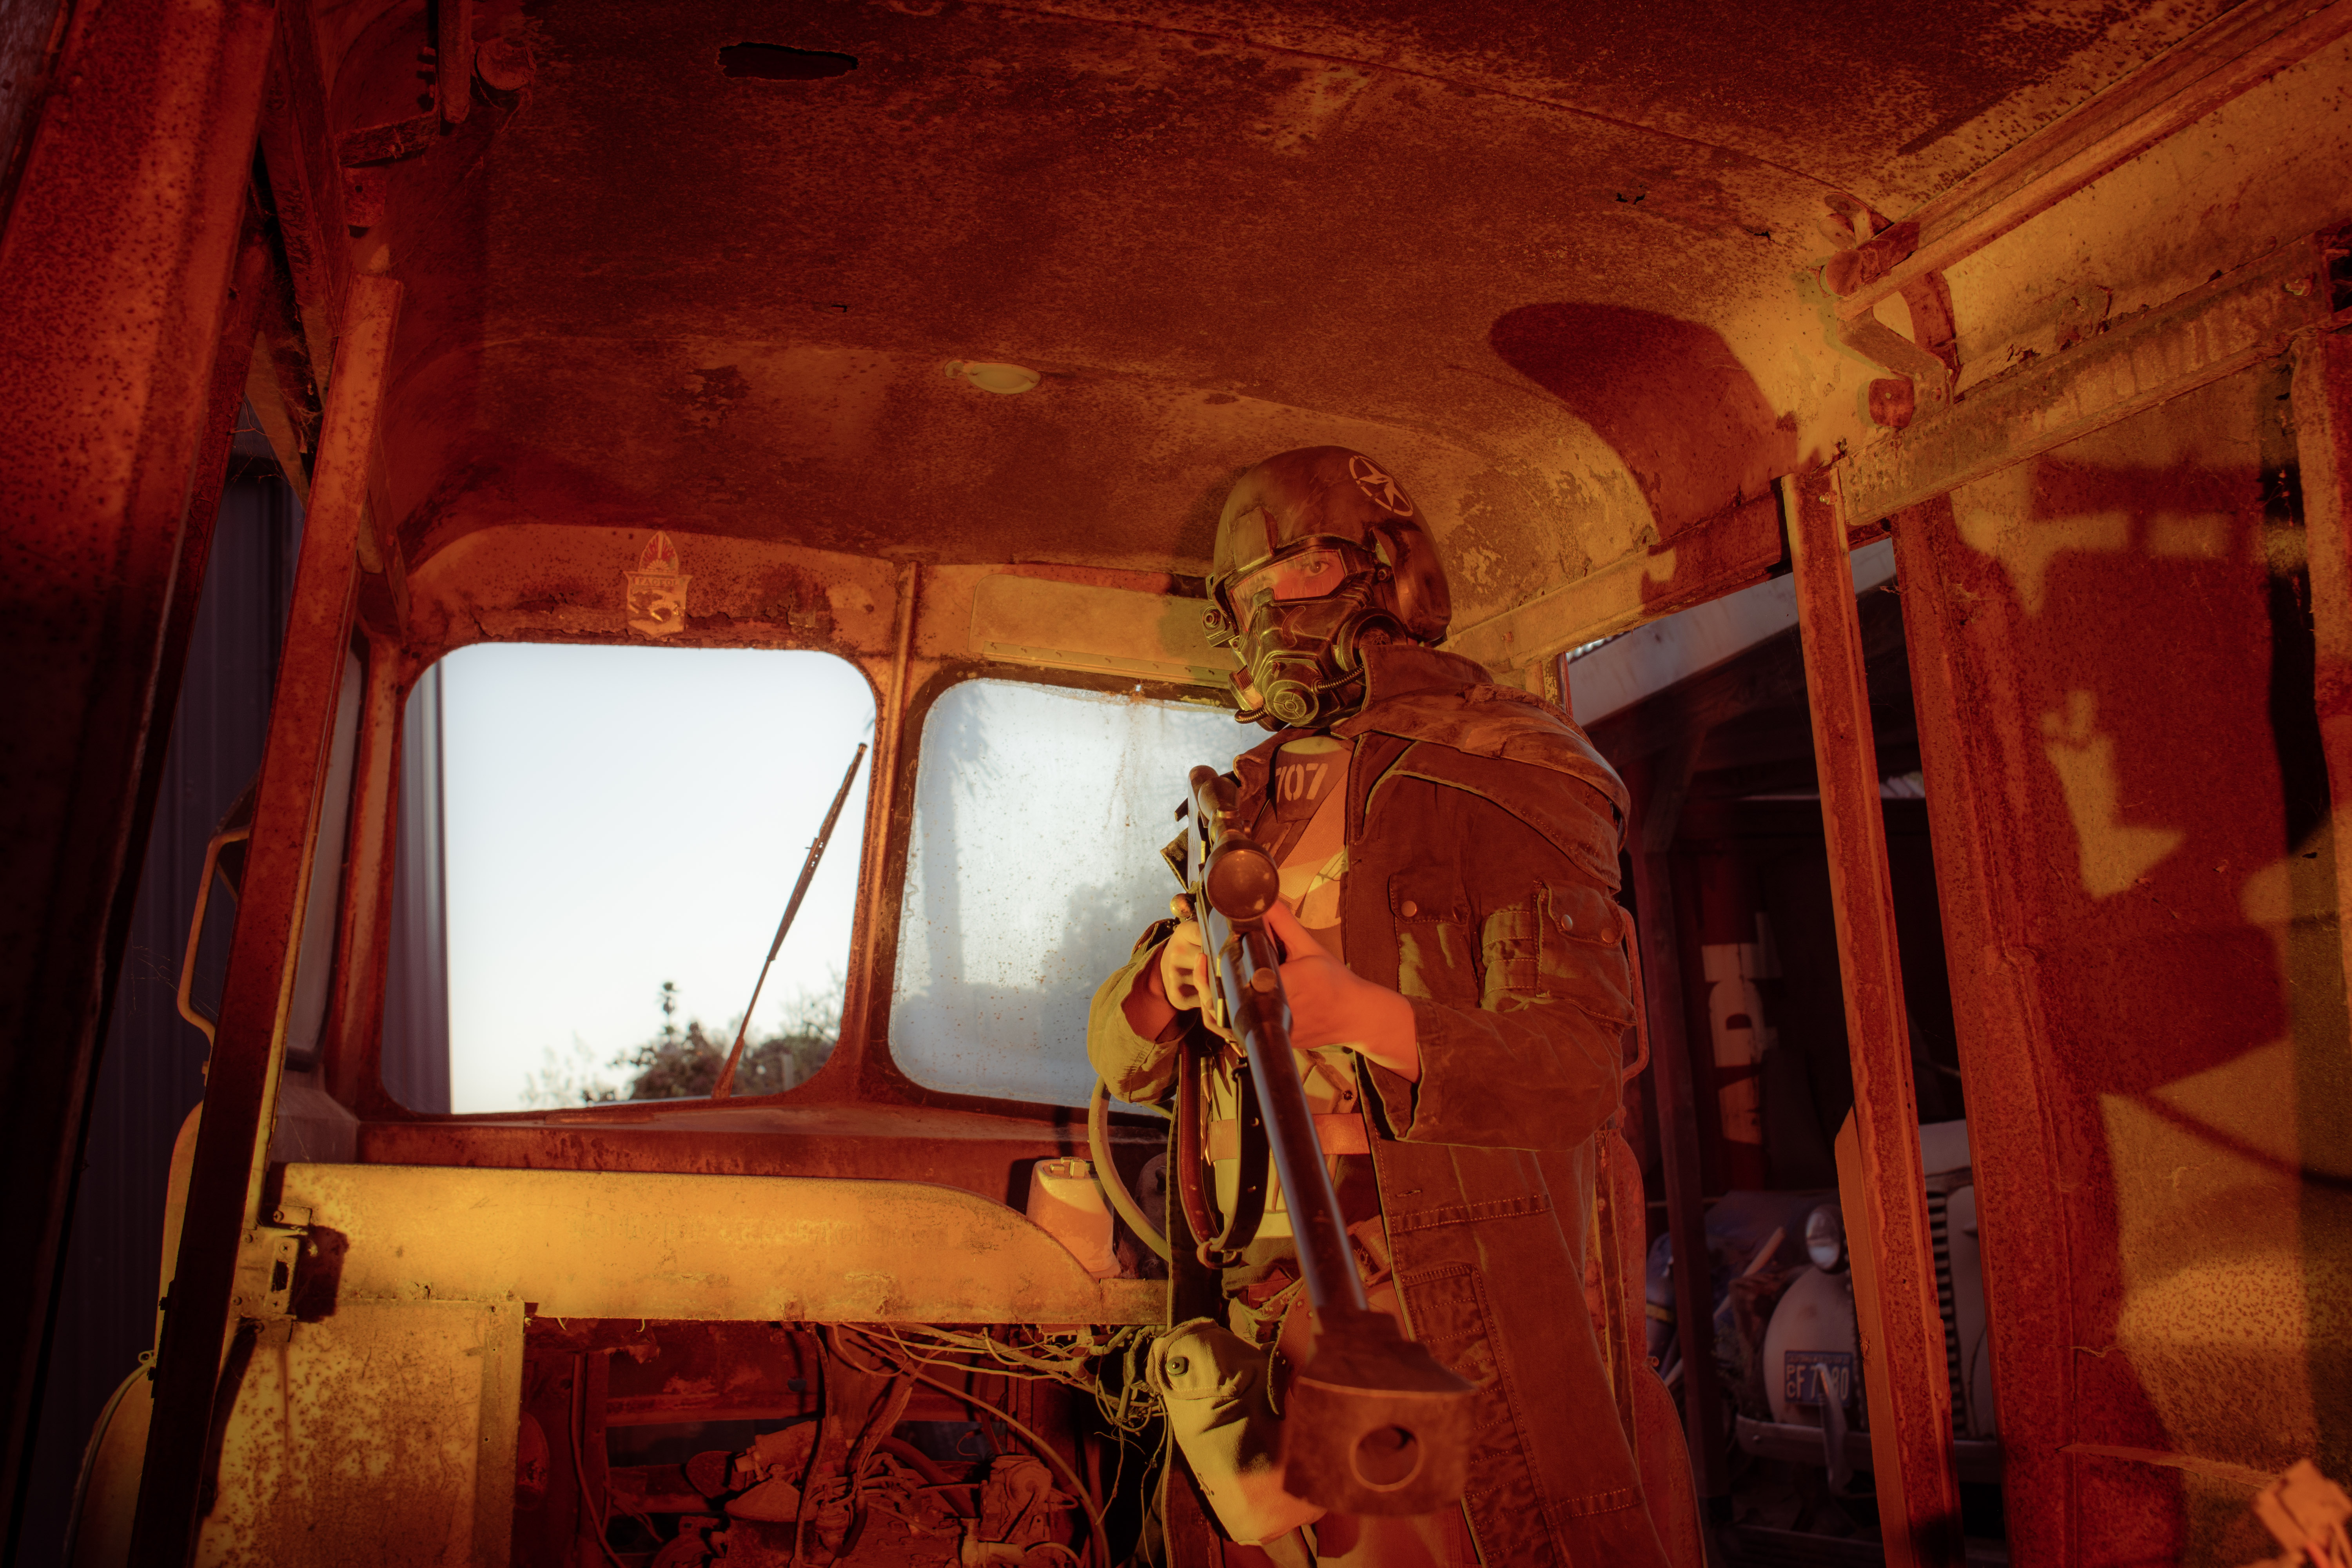
FINAL ASSEMBLY
Now it was just time to put it all on and find a photographer and a decent backdrop for photos. Fortunately for me, I'm friends with the immensely talented Hep Svadja, and my father maintains a collection of antique car husks that are just deteriorated enough to look like set dressing for a Fallout movie. Here's just a few of the results:

One of these days I'll do a bigger shoot and get this guy next to my T-60 Power Armor. In the meantime, more articles are on the way as I catch up on my ridiculously large backlog of bloggage.
Stay tuned...
Stay tuned...
2 questions, the short one: You used Plasti-Dip under another paint? Plasti-Dip makes sense because it's flexible, but doesn't Krylon crack? Especially if over something flexible like rubber? Q2: I thought resin printers would need a clean room to be in? I thought my dusty apartment or girlfriend's place with cats wouldn't work, but you're using one in a shop that has sanding going on. Is it not a big concern in general, or more because you're finishing the parts after they're printed anyway?
ReplyDeleteThe Krylon will crack, yes. So it needs to be laid on in a very light coat and then covered with something else flexible. In hindsight, an acrylic paint would've been better, but I was rushing and excited.
DeleteThe resin printers should be in a cleaner room than my shop, yeah, but they seem to be doing just fine so far. The concern is in keeping the dust and debris out of the resin tray. Once the parts are printed, they get washed and post cured, so it really doesn't matter at that point.
super
ReplyDelete