
A while back someone asked me if I 3D print everything I make or if I do any sculpting by hand. The answer: both and then some.
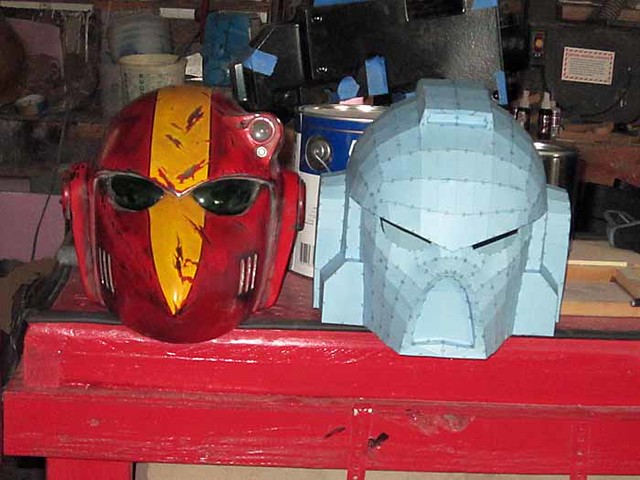
Take for example these helmets:

If you want to see all of the various processes, tools, and convoluted thinking that went into making them, read on...
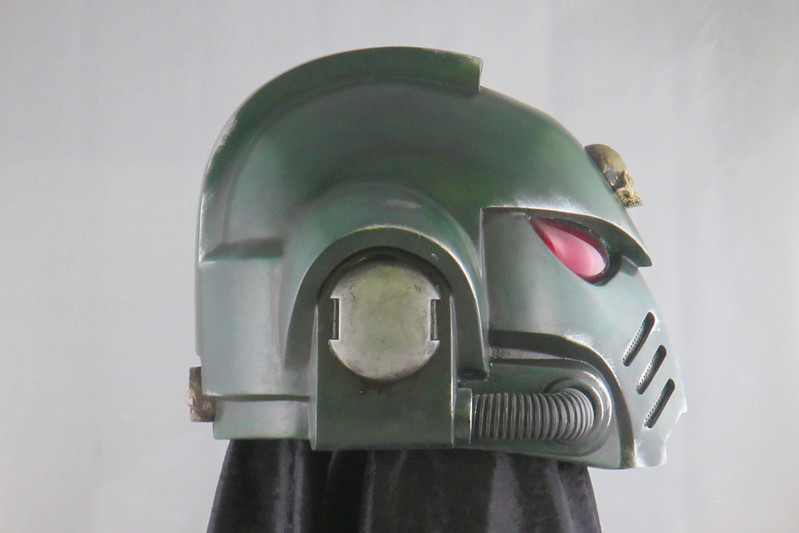
These particular helmets have a fun history. In a way, they started way back when I just started tinkering with prop making as a hobby, I sculpted out a lifesize version of one of an old-school "beaky" Space Marine helmet. I used to build and paint the miniatures when I was a kid and this seemed like a fun project. The hand sculpted master was molded in silicone and rotocast in urethane resin. I learned a lot along the way and I'm still proud of the end result all these years later:

Because I wanted these helmets to have custom-formed, bubble-shaped, tinted lenses, I made up a vacforming contraption that would form heated acrylic to shape:

All it was was a slightly too thick cast of the eye hole area of the helmet that was cut out and built into a nearly airtight wooden box. The box was fitted with a shop vac attachment like so:
To make the helmet lenses, a tinted piece of acrylic was cut to shape on the scroll saw, heated in a toaster oven until it's soft and floppy, then placed over the eye holes in the box. When the shop vac is plugged into the fitting and turned on, it sucks the acrylic into the holes. The acrylic bulges its way into the holes a bit and when it cools it becomes the just-right convex shape that I need for the curved bubble lenses that go into the helmet.
Neat.
Fast forward a few years and some friends and I had started making lifesize Space Marine armor. You can read about that project in detail here: LINK or a shorter, sweeter version here: LINK
Originally the helmets started as a Pepakura model. The model was ripped from the Space Marine FPS game that came out back in 2011. The assembled pep model looked pretty good:
If you want a detailed tutorial on how to build a helmet from pepakura, pick up a copy of my book, Make: Props and Costume Armor here: LINK.
Once the Pepakura model was built, I modded it a bit by hand to fit the vacformed lenses I had made for my hand-sculpted beaky helmets way back when. I figured there was no real good reason to go through the trouble of making a new box for a different version of lenses. I also reasoned that the manufacturers of these helmets in the 40K universe might also carry over design elements from one generation of equipment to the next, so it all made a great deal of sense to me.
Once the mods were done and the improved Pepakura helmet was shined up and ready, we molded it so I could make a handful of copies to go with the armor we were building. I was never really happy with the bug-eyed look they ended up with though:
So it wasn't long until I got around to modifying one of the casts to make the helmet a bit taller and give the face better proportions. That made them match the miniatures more than the videogame models and I liked them a lot better:
This is the version that went on all of my Space Marine suits after that: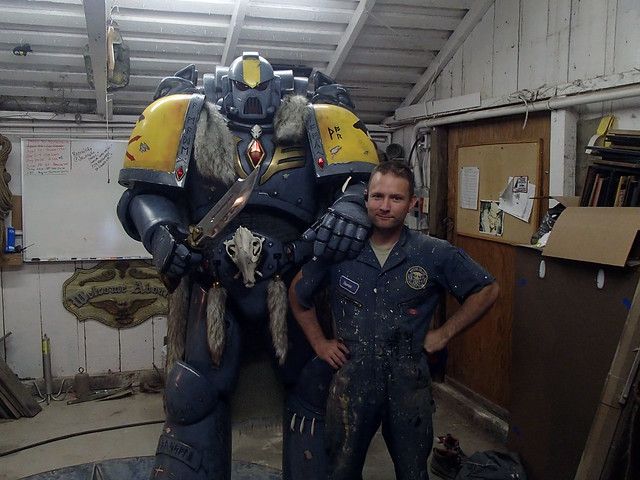
A couple years later I wandered into Fundemonium to visit my ED-209 replica and saw a 7-foot tall cardboard standee that looked like this:

This eye-catcher was advertising the new edition of Warhammer 40K. The new edition introduced a bigger, badder, better Space Marine; the Primaris Space Marine. According to the in-game lore, they have all kinds of genetic improvements and upgraded Mark X Tacticus Power Armor which is all just an excuse to take full advantage of improvements in modelling and moldmaking technology which have been introduced since the days of the first Space Marine miniatures:

Yes, this is what Space Marine miniatures looked like when I first saw them. I thought they were the coolest thing ever when I was a kid.*
The new version was so much better-looking, in my opinion, than the previous versions. There were more details, better proportions, an overall aesthetic overhaul that still kept the spirit of the earlier designs. I immediately wanted to build one, but I resisted this urge. I had enough on my plate and no room to store such a thing.
Then earlier this year I was working on an unrelated project and got a wild hair.
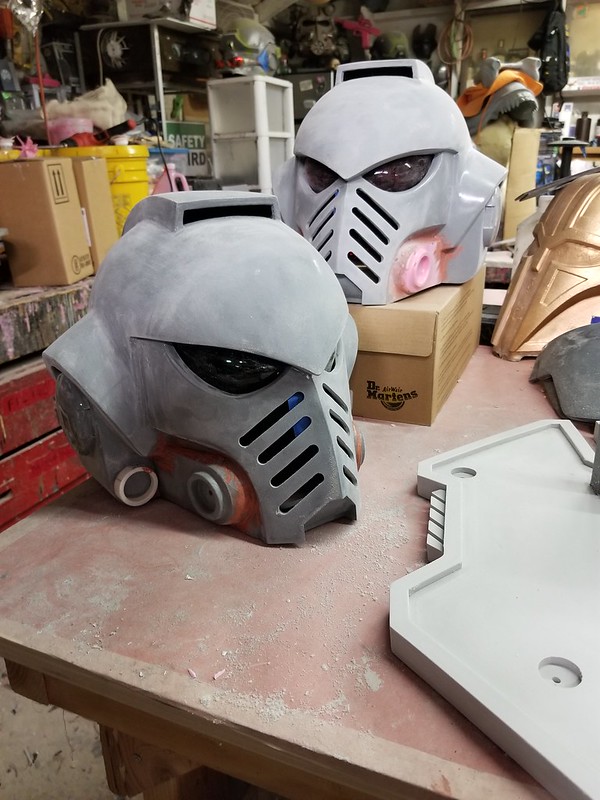
I pulled the v2 mold for the Mk8 helmet out of storage, cast a couple of copies, and started modifying one of them to make the Primaris helmet.
The nose section was 3D printed, then grafted onto the nose of the older-style helmet with a bit of CA glue and an exorbitant amount of Bondo: 
By keeping the same eye shape, I'd still be able to use the same lens former that I'd made for my old beaky helmets. Because I'm lazy.**
The back of the helmet was cut and reattached in order to make the correct step and notch arrangement:
The ears were resculpted by hand with the help of even more Bondo:


I also widened the mohawk vent by hand as well:

With most of the rough shaping done and smoothing nearly completed, the edges were feathered in with a bit of spot putty and a lot of sanding:


After another round or two of filling and sanding, the prototype was ready for a gloss coat:

If you're a 40K fan, you're probably wondering where the cheek details and vent grooves are. Well at this stage I hadn't quite decided which version of the helmet I wanted to make. There are so many:


After building up a clay jacket, I laid up a fiberglass mothermold: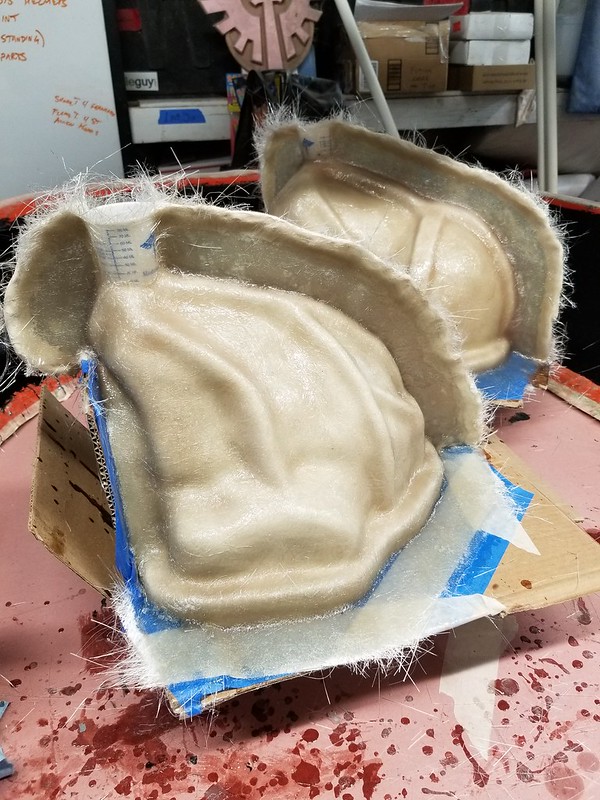
The other helmet mold in progress in some of these pics is my First Order TIE Pilot helmet mold. My original mold had finally worn out, so I remastered one of the helmet casts, tweaked a few details I've noticed I originally got wrong, and made a replacement mold. That's not important right now, but I know you were wondering.
Once the fiberglass had cured, I pried it off, removed the clay, and set up the registration keys on the parting wall:
Then the mothermold was mounted in place and I used hot glue to seal around the edges before filling the void with silicone rubber:
Once that cured, I repeated the process for the back side:
With the rubber cured, it was time to remove the mothermold and demold the prototype:
The mold halves separated cleanly with no problems;
That done, it was a simple matter of reassembling the mold and it was time to start casting:
Here's the first cast after a bit of trimming: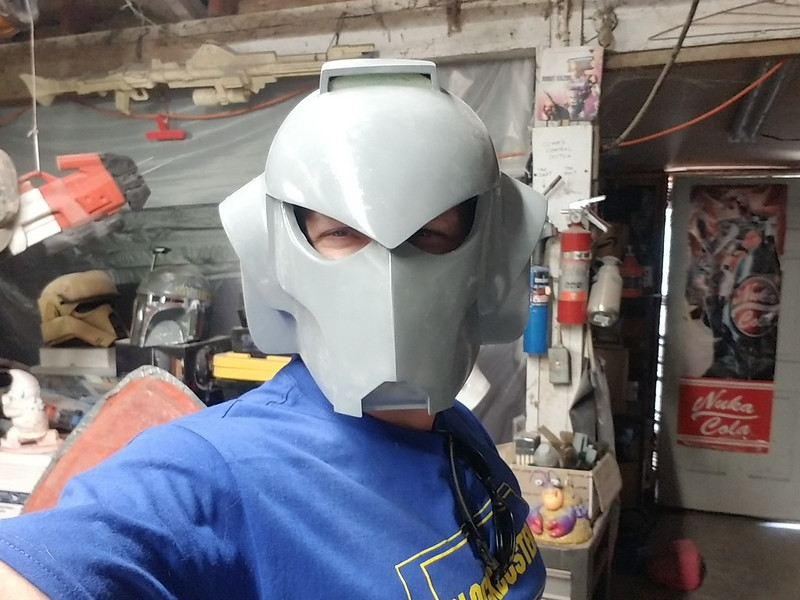
The ear caps would be separately cast. Here's the 3D printed prototype in place to test the sizing:
Happy with the sizing, I just needed to polish them up and make a mold:
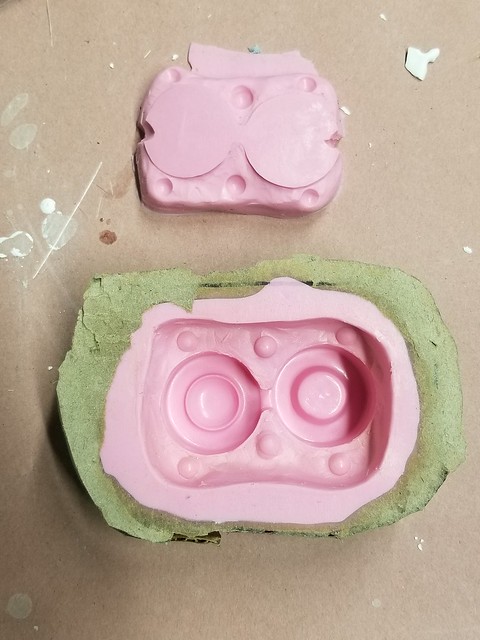
The last detail that all of the variations of these helmets seem to have in common are the rear socket details at the back of the helmet. These were mostly 3D printed. But since the helmet body was not from a 3D model, it would take some finesse to make sure they'd fit properly. I started by covering the curved area where they sit on the helmet body with a layer of masking tape. Then slathered on a generous layer of Vaseline. A large dollop of Bondo was applied to the backside of the printed widget before pressing it into place:


Silicone rubber was poured in an left to cure. Then the next day, the whole thing was inverted, the clay blob was removed, release agent was sprayed in, and a bit of silicone was poured into the void left behind by the clay blob.
This made a handy, two-part mold that I call a "smoosh mold." Here's the whole thing laid out and ready to pour:
Note the notches cut into the sides of the insert piece on the top. Those are vents that will allow bubbles to rise up out of the mold later.
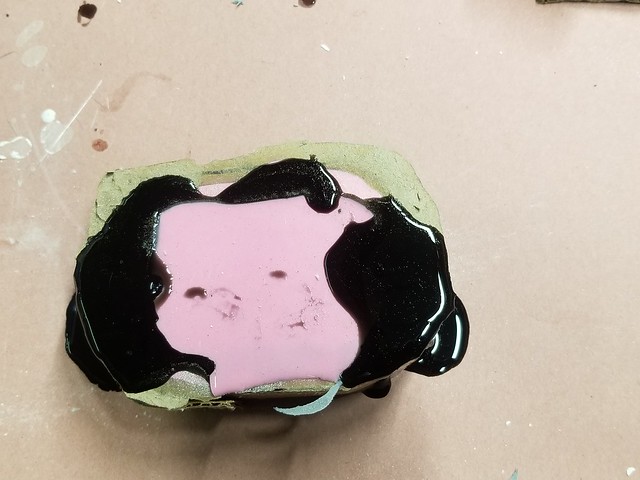
To make a casting, resin is poured into the mold hollow as usual, filling just enough to cover the whole part:

Then the plug is smooshed in to form the curved backside:
Here's the first demolded part:

With the necessary curve to fit the back of the helmet:

Beautiful:

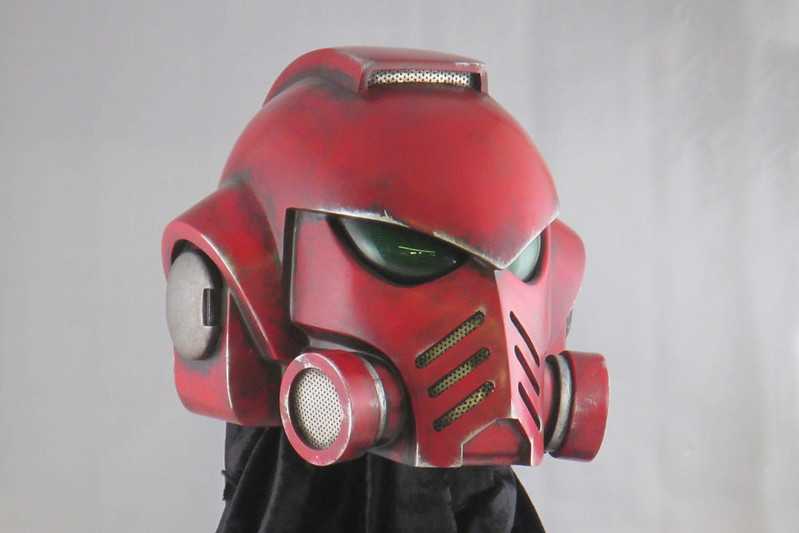
With that done, all of the basic parts each of the variants have in common was molded and cast. Since then, I've been tinkering with making the various add-on bits that can be glued onto the castings in order to make each of the different versions. I started with a separate cheek insert to attach hoses or gas mask filters. These were bits of Sintra that were cut to shape in pairs before placing them on a bed of Bondo in order to make the backside conform to the shape of the cheek hollow: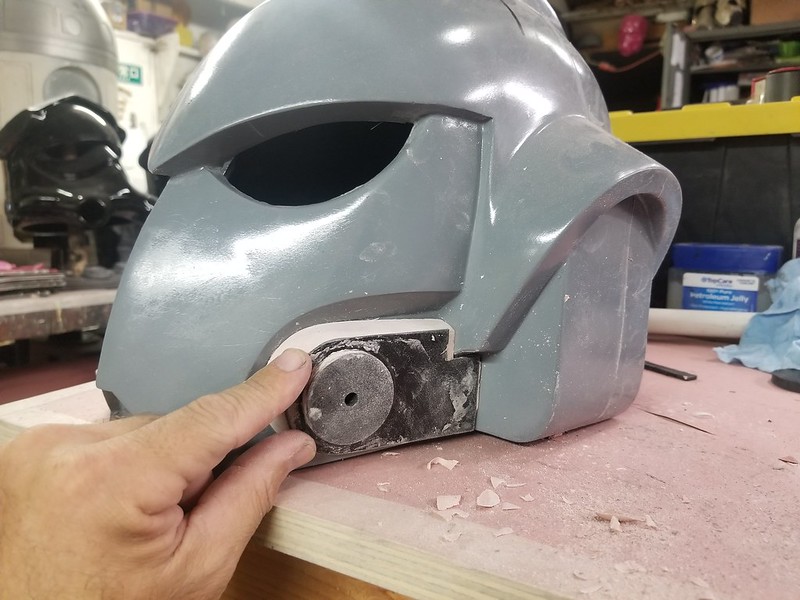

Because there are variable vent patterns cut into the snout of the various helmets, I decided it was a good idea to leave them off of the prototype. This means I could make whatever kind of vent arrangement I wanted on the cast helmets. I started by laying out the pattern and drilling holes for the ends of each vent notch:

Then I used a cut-off wheel to connect the dots:
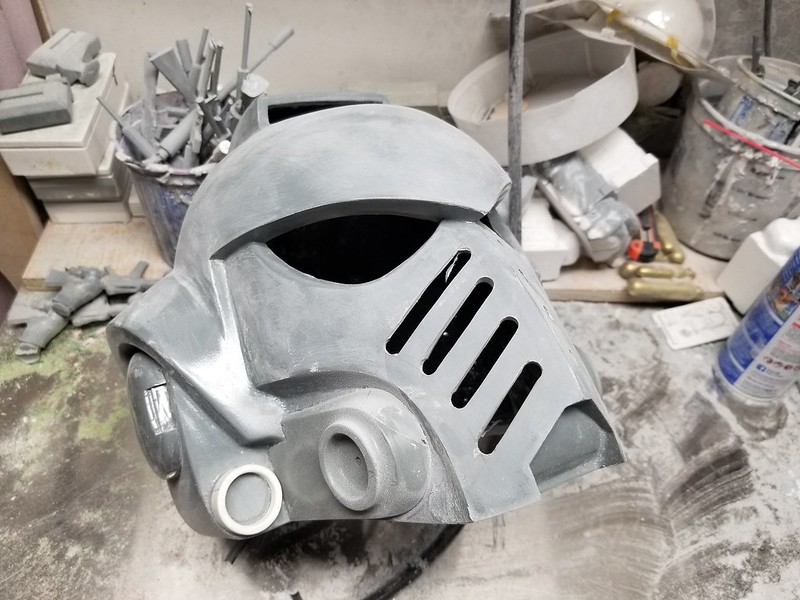
With a little bit of seam filling, it was starting to look pretty good:

The second casting was progressing right behind it:
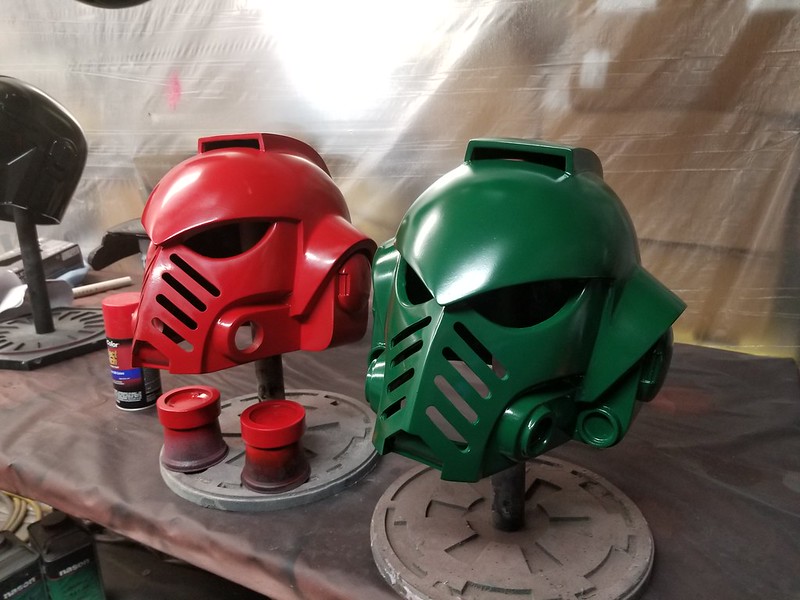

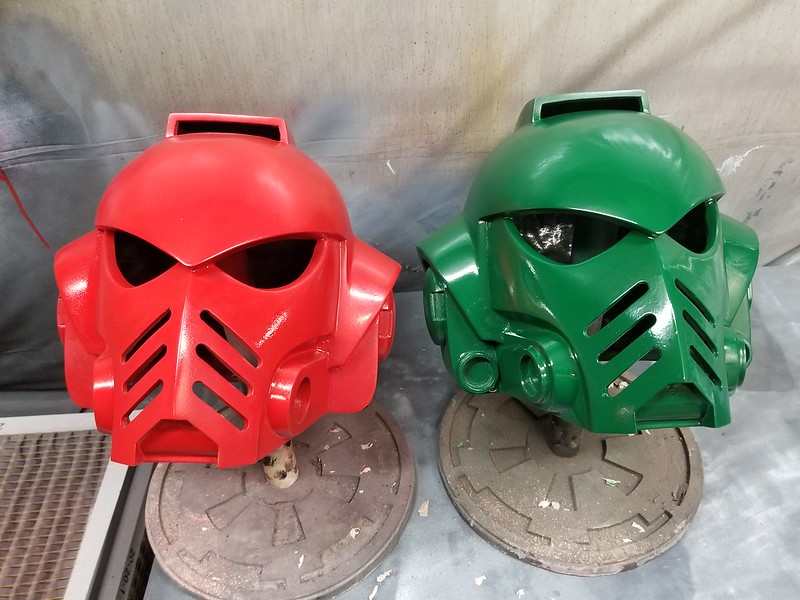


So far so good:

To solve these problems, I insert some shiny metal screen door mesh inside the lenses:

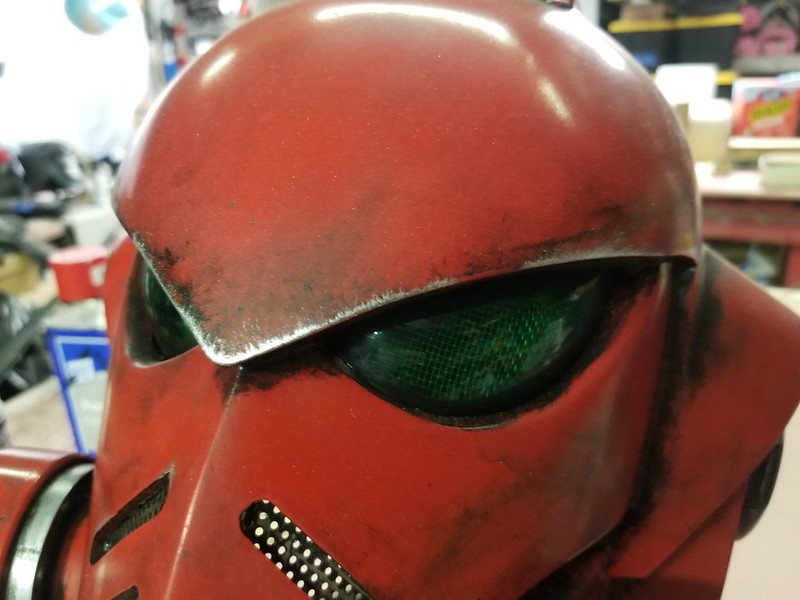


With the weathering done, I'll usually give the whole thing a satin or flat clear coat to lock everything in place and give it a bit of wear protection. If this dulls the silver scratches, it's just a matter of drybrushing on a bit more silver to brighten them up again.
So that's two done helmets:


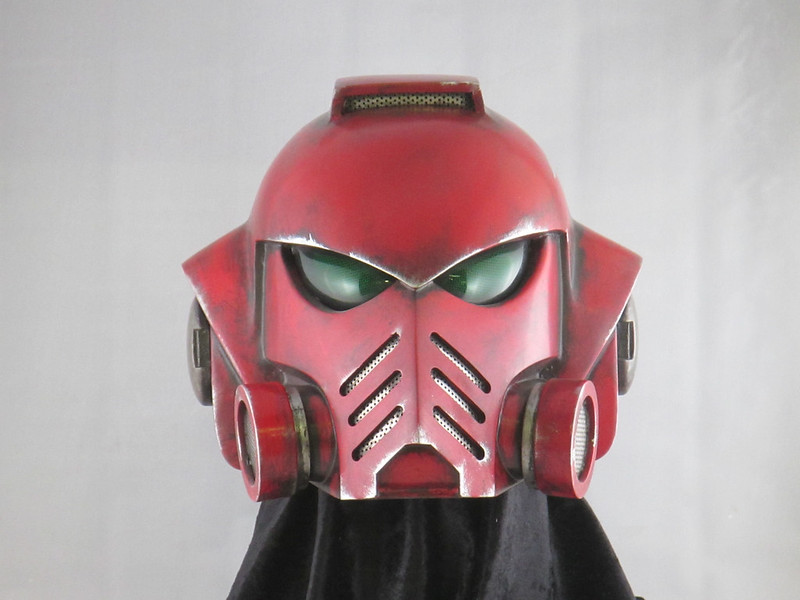
Of course, that's just the first two variants. Games Workshop has released quite a few other versions already:

Photo by Paul Norton.
No comments:
Post a Comment