About Me

My photo
I make toys for kids who don't want to grow up. I'm on the lookout for new projects. If you're interested in commissioning me to build something ridiculous, shoot me an email.

Tuesday, August 20, 2024

Genestealer Build Update 16: Slow Going on the Teeth, Lower Legs, and Lower Hands

 I've been a little busy these past few weeks and as a result we haven't made too much progress on the Genestealer build.   I've also fallen into the trap I swore I'd avoid where I don't feel like writing up a blog article to show a bunch of unfinished stuff.  I keep waiting for good-looking milestones to post instead of posting regardless of how unfinished everything is.

I'll get back to regular updates.  I promise.

The mainest thing I've been working on is this:

Stealer Gramps' Skull

That's the fiberglass underskull which has one major problem:  It's got no teeth.

So I went ahead and cut a little piece of MDF to fit on the mandible and another little piece to fit on the maxillary.  Each one was drilled out for teeth holes and whittled a bit to start the shapes I needed.  So here's the genestealer's wooden gums:
Gums

Those were fitted up with a bunch of epoxy putty blobs that were roughly teeth shaped:
Toof Globs

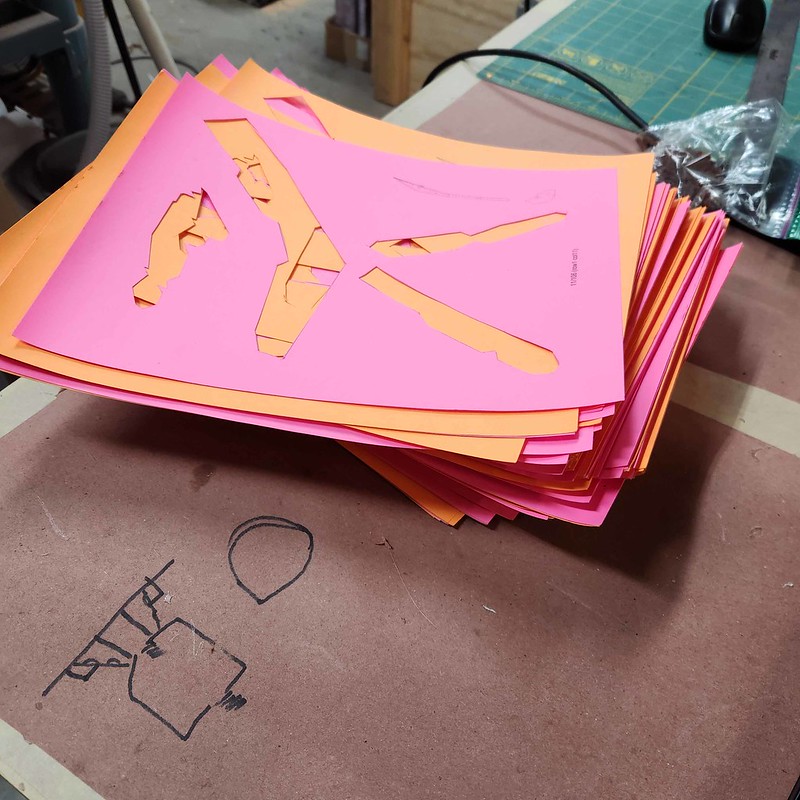
I did a lot of trial and error test fitting to make sure the teeth wouldn't have to break for the mouth to close:
Toof Test Fits

Then the MDF part was soaked with super thin CA glue to harden it and the teeth were filed down to sharper, less mammalian shapes:
Primered TEeEfs

Once I was satisfied that they looked appropriately creepy, they were given a glossy coat:
Pink Shiny TEEFS

After molding, the teeth were cast in white resin:
Resin TEEF for Placeholders

Those are just placeholders for now.  Next I'll sculpt the gums and we'll mold those as well.

Meanwhile, I finished the sculpt for the lower hands.  I didn't take enough photos of the finalized sculpts, so this is the best you'll get:
Sculpts in Progress

Once they were completely smoooved and detailed, I went ahead and built up parting walls with WED clay:
Hand Mold Begins

Then layered on some epoxy gelcoat:
Epoxy Gelcoat on Both Hands

I built up some thickness on top of that using plasti-paste, then fiberglassed over that for strength.  I didn't take any photos of that process though, because my hands were covered in gloves which were covered in sticky goo and glass fibers.  You'll have to imagine that part.

Once that had all set up, I removed the WED clay parting walls, applied a generous coat of release agent, and gelcoated the other side:
Applying Epoxy Gelcoat

That gelcoat was also covered with a significant buildup of Plasti-Paste prior to fiberglassing.  Then they were set on the bench amidst all of the other distractions:
Neglected Hand Molds

I haven't touched them since.  Hopefully the mold worked out okay and we'll be able to get good casts out of it.

As luck would have it, this creature also has a whole 'nother pair of hands.  But those hands only have three fingers, so we started with a pair of lifecasts of my friend Ian's hands posed like so:
3=Fingered Hands Epoxy Coated

The fingers were wrapped in masking tape and I sculpted the claws out of Free Form Air like so:
Claw Shaping

When we did the lower hands, we made molds for all ten claws.  Then Rachel pointed out to me that that was a bit wasteful and we probably could've gotten away with using the one set of five claws cast twice.  She's right.  I'm an idiot.

So I smoothed out one set of these claws, made sure their hollows would fit either of the hands, got them all shiny and polished, and then pulled a mold off of them.  The only photo I took of the moldmaking process was this giggle-worthy bit:
hehehe

That's the plug that goes into the smoosh mold to make the hollow end hollow.  Here's a shot of the resin being poured into the mold:
Pouring Fingers

And the plug being inserted:
Plugging Finger Molds

The result was a very wearable resin copy (left) of the hand-sculpted original claws (right):
GS Claws

They'll end up being cast in some sort of rubber to make them less dangerous when flailing around, but in the meantime, I'm happy with them:
GS Thumbs Up

Next I'll need to sculpt the three-fingered hands to go with them.

The last thing we've made progress on was the lower leg forming bucks.  That's mostly because Jeff put in a few hours gluing the maddening 3D jigsaw puzzle back together:
20240801_203313

Here's the calves rough assembled prior to fairing and smoothing:
Big Ole Calves

And the calves and shins on the bench awaiting some bodyshop work:
Lower Leg Forming Bucks Assembled

I know I said that's the last thing we made progress on, but Jeff also spent some time smoothing the seam where the bottom riblet will attach to the chest:
Riblet Seaming Nearly Done

So that's where this thing stands right now.  Stay tuned for more...


Tuesday, August 6, 2024

Aidan's Magic Wheelchair

So we had us a bit of a lull in the workshop schedule and I went ahead and volunteered to take on another build for the folks at Magic Wheelchair.*  As usual it took a while to sort out which kid we'd be building for and what event we'd be doing the unveiling at, but eventually it all got sorted.

Meet Aidan:

Aidan wanted to be Sonic the Hedgehog:

Magic Wheelchair was able to get the digital assets used to render Sonic and his racecar in the upcoming video game so we could use them to build the car for Aidan.  They gave us a great starting point:


The main challenge:  by the time we'd gotten confirmation that Aidan could make it to the event and Sega had provided the digital assets and everything was finally lined up for us to begin building, we only had twelve days to complete the build and have it up on stage for a live reveal at the Licensing Expo in Las Vegas.

Fun.

So this project was going to start in crunch time and continue to be a mad scramble all the way through.  At one point, while we were talking through the build plan in the shop and deciding on what processes and materials we could use to turn these bits and bytes into pieces and parts, I said something which I instantly knew I'd regret:

"There's not enough time for rapid prototyping, we're going to have to build the whole body by hand."

Sometimes irony can be painful.
 
The next step was for me to take the car apart digitally, remove Sonic, and alter the proportions a bit so we could fit Aidan's wheelchair inside the cockpit while still keeping the whole build small enough to fit through a doorway.  The grey cylinder below shows our earliest approximation of the wheels on his wheelchair to give us an idea of how it would fit.
Aidan Sonic Build 089

I had my guy Jeff Santos make a few more changes since he's better with digital sculpting than I am.  He made the cockpit wider and the body a bit less tall.  Then he dialed in a few other details and made the wheel wells circular again since we'd gone and stretched and skewed the body shape.  The end result was a cutesy, chibi version of the car that still retained the key features that made it recognizable:

This ate up one of our twelve days.

Then, for the first time in a long time, we went ahead and cleared off both of the bigger benches in the shop.  The emptiness was almost eerie:
Empty Bench for a Minute

Then, harking back to fabrication methods I haven't really used in half a decade, I went ahead and took Jeff's altered version of the car model, cut it in half, imported it into Pepakura, and unfolded it:


I spent most of a day trying to lay out the parts and arrange the seams in a way that would make sense.  Given the size and complexity of the model, I would've liked to spend more time refining it at this stage, but we really needed to get to work on the physical parts of the build.  According to the software, it was going to take 106 sheets of letter-sized paper to print each half of the body.  Each half would contain 434 parts.  Each of those parts would have to be cut out, scored along the fold lines, folded, and then glued to the adjacent pieces.

So the next day I printed a full set of the parts on orange cardstock and another full set on pink cardstock so we would be able to tell them apart.  Here's the orange parts printed out:
Aidan Sonic Build 008

We set the orange printed stack on one side of the table and the pink stack on the other side of the table and got to cutting:
Aidan Sonic Build 005

The pages were separated into sequential 20-page stacks in order to make sure we didn't lose any of the parts:
Aidan Sonic Build 006

It was slow going at first, but a few hours later we had the whole team working on it:
Aidan Sonic Build 091

On one end of the table I set up two laptops so we could refer back to the original model and page layout in order to identify which part needed to be cut out next:
Aidan Sonic Build 092

Then we'd find the corresponding page, cut out the required part, score and fold it, and glue it onto the rest of the assembly in progress:
Aidan Sonic Build 007

By the end of day one, we had assembled a big chunk of the rear end:
Aidan Sonic Build 014

At the end of day two we had a pretty good chunk of the rear fenders done as well:
Aidan Sonic Build 015

The next day was a Monday and most of the volunteers had to go back to their regularly scheduled day jobs.  Fortunately, Tia was still available to help me with the paper build:
Aidan Sonic Build 018

Here's a shot of me slowly losing my mind as we made progress on the front fenders:
Aidan Sonic Build 019

The end of the third day of papercrafting had two pieces that looked like so:
Aidan Sonic Build 017

Here's an overall shot of our workspace as I was leaving that night:
Aidan Sonic Build 020

At some point on the fourth day of pepakura building, all of the parts were cut out and glued together.

Here's the stack of leftover paper with all of the parts cut out:
Aidan Sonic Build 022

It was not small:
Aidan Sonic Build 027

But there was only so much time to reflect on that part of things.  Instead we got to work attaching the halves together:
Aidan Sonic Build 096

Things were really coming together at this point:
Aidan Sonic Build 097

In order to keep the wheel wells circular, we wedged a five gallon bucket into each one.  Then we stapled the paper car body down onto the tabletop and applied an epoxy hard coat over the whole thing:
Aidan Sonic Build 021

Then the hardcoat was left to cure overnight:
Aidan Sonic Build 100

Aidan Sonic Build 099

The next morning we removed the buckets and the whole thing was still standing:
Aidan Sonic Build 025

Even after we removed the buckets from the wheel wells:
Aidan Sonic Build 024

The hardcoat would do a lot to keep the paper from crumpling, but we'd need the body to be stiffer in order to do the bodyshop work we'd need in order to fair it all out.  So the next step was to layer over the whole exterior with fiberglass:
Aidan Sonic Build 028

Once that had set up, we added a coat of expanding foam over the outside and started carving it to shape:
Aidan Sonic Build 029

This filled the recesses in the paper build and allowed us to turn the faceted, low-polygon model into the smooth, curved body we needed it to be without adding too much weight:
Aidan Sonic Build 030

Initial shaping was done with saws, then body rasps and files, then finally sanding blocks:
Aidan Sonic Build 102

With the foam mostly carved to the shape we needed, it was time to layer on the Bondo.  Here's Tia during the initial application:
Aidan Sonic Build 033

Here's Jeff smoothing one of the layers:
Aidan Sonic Build 035

Meanwhile, the rest of us smoothed out the body and got it in primer:
Aidan Sonic Build 112

At this point we had two days left in the shop before we had to hit the road.

The next morning we got to fine sanding on the primered body:
Aidan Sonic Build 044

After a quick coat of sealer, it was time to start painting.

This would've been a great opportunity to try out the new paint booth.  Unfortunately, since it's a nice, clean space full of horizontal surface, it had a few cars parked in it and I didn't have time to solve the slide puzzle and get enough space to start spraying.  Instead, I opted for laying down the color coat in the field outside the shop:
Aidan Sonic Build 113

Yeah:
Aidan Sonic Build 114

Once the color coat had flashed off, I masked and sprayed the black portions:
Aidan Sonic Build 047

Then the white:
Aidan Sonic Build 048

Here it is in the shop waiting on the absolute minimum amount of cure time before I could spray on the clearcoat:
Aidan Sonic Build 049

Then, under cover of darkness, I applied the clearcoat:
Aidan Sonic Build 115

It's so shiny:
Aidan Sonic Build 050

So shiny:
Aidan Sonic Build 051

Somewhere in the midst of all that madness, Jeff made me digital models of the tires and rims.  These were fed to my Carvewright CNC machine to make vacforming bucks:
Aidan Sonic Build 036

It turns out they were exactly all I could fit on the 2x2 forming platen:
Aidan Sonic Build 056

Fortunately, the parts came out beautifully in high impact polystyrene:
Aidan Sonic Build 054

We could've done them as single parts, but making the rims separate made painting them a lot easier and faster: 
Aidan Sonic Build 057

Once the paint had firmed up, we got to adding the last little detail bits.  For example, we scrapped four little flashlights and used their innards to make the headlights:
Aidan Sonic Build 060

Tia took some time to touch up the edges of the paint before we sealed the headlights behind a formed plastic lens:
Aidan Sonic Build 061

The headlight lens and the windshield were both formed out of PETG, the same kind of plastic used to make plastic soda bottles.  The dashboard and steering yoke were 3D printed and that was just about a done thing:
Aidan Sonic Build 063

Here's me and the crunch time crew on the last night in the shop:
Aidan Sonic Build 064

Then, moving as delicately as possible to avoid damaging the soft paint, we went ahead and loaded into the back of a large SUV we'd rented for the trip to Vegas.

If you're wondering where Rachel was during the latter portion of the build, she was sequestered in the other room, losing her mind while making a really big, custom Sonic plush toy:
Aidan Sonic Build 016

We had hoped we could find an off-the-shelf version that we could put in the car for display when it wasn't on the wheelchair, but everything we found was way too small.  So Rachel started pulling one together from scratch:
Aidan Sonic Build 037

This is pretty much how she looked for most of the project:
Aidan Sonic Build 052

There was a wire armature built into the arms and legs so it would be poseable and a pipe spine to hold the weight of the head:
Aidan Sonic Build 053

Aidan Sonic Build 062

Rachel made everything except for the 3D printed feets which we painted to match the rims on the wheels:
Aidan Sonic Build 059


Anyway, with all that done, we set out the following morning.  Just me, Jeff, Rachel, and the open road:
Aidan Sonic Build 066

Rachel spent the bulk of the drive in the passenger seat putting finishing touches on the Sonic plush:
Aidan Sonic Build 065

We arrived at the Mandalay Bay Convention Center and finally got a hold of Aidan's wheelchair for the first time.  This gave us a chance to build the final bracket that would be lashed onto the bottom of his chair so the car could be mounted in place on top:
Aidan Sonic Build 068

The next day we did the reveal:
Aidan Sonic Build 117

Aidan seemed a little overwhelmed:
Aidan Sonic Build 116

To further celebrate this little guy, he got to lead a parade of all of the mascot characters that were at the event:
Aidan Sonic Build 070

There were a lot of costumed characters.  Here's about half of them:
Aidan Sonic Build 071

In the end it seems like he had a good time:
Aidan Sonic Build 075

Later that afternoon I finally had a chance to catch my breath and see the view from our hotel room:
Aidan Sonic Build 076

Then, with all said and done, enjoyed a glass of water more than anything else I'd drank in the past year:
Cool, refreshing water!

That was right before getting the first full night's sleep I had had in two weeks.

And so, with our work done, we made our way home to get ready for the next big thing.

Stay tuned...

*I've done a few of these kids' costume projects for Magic Wheelchair over the past few years.  It's a really great organization with a pretty straightforward mission to help promote inclusion and empowerment for kids who use wheelchairs.  If you'd like to know more about the organization and how to get involved, check out their website at www.magicwheelchair.org