About Me

My photo
I make toys for kids who don't want to grow up. I'm on the lookout for new projects. If you're interested in commissioning me to build something ridiculous, shoot me an email.

Wednesday, October 6, 2010

HALO EVA Helmet Visor Project

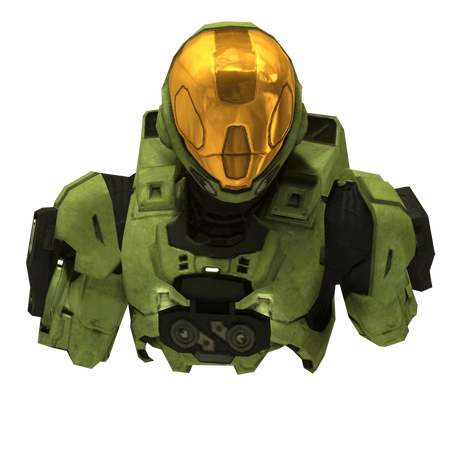
When they came out with HALO3, the folks at Bungie included a lot of options for customizing the look of your armor in the game.  Among the many permutations avalable is the "EVA" version, shown here:


I think the helmet is pretty snazzy, even if the large gold dome would work best as a sniper magnet.  Still, I haven't liked it enough to spend the time building one from scratch. 

A while back I acquired a raw casting of this helmet in a trade with another maker.  The main challenge for this particular helmet though is to get the gold-tone, full-head faceshield to have the proper metallic sheen and still be transparent enough to see through.

I came up with this plan knowing it would not be perfect. I did expect it'd look the part though.  Here's how I went about it...


Step one, cut out the recessed areas:


Step two, cut out pieces of 1/8" amber acrylic, cook them in the oven until they're soft and flexible, and press them into the holes with a rag so that they become convex:


Step three, spray the helmet with black primer and test fit:


Step four, tack the acrylic pieces in place with CA adhesive and test fit again:


Step five, caulk around th edges with clay:


Step six, mask off the inside of the acrylic where you'll need to see through:


Step seven, pour a batch of black casting resin inside and coat everything:


Step eight, after the resin has started to cure and before it is fully hardened, peel out the masking tape to uncover the acrylic viewports:


Step nine, mask off the viewports, pack the edges with filler putty. Then, when the putty has dried, spray the visor gloss black:


Step ten, spray on a coat of Mirrachrome, allow to dry, and then remove the masking tape:


Step eleven, test fit:


Step twelve, wipe down the inside of the acrylic parts with acetone and/or rubbing alcohol:


Step thirteen, dry out and remove fumes from inside the helmet:


Step fourteen, lightly spray the inside of the acrylic parts with Mirrachrome:


Step fifteen, smile for the camera:


Step sixteen, test fit:


Step seventeen, spray on a coat of Tamiya "clear orange" acrylic:


The color looks about right in sunlight, but it loses a bit indoors:


Still, it seems to fit in with the rest of the stack okay:


Sooner or later, someone's going to ask about visibility. Here's a shot from the inside of the helmet:

The dark spot is where I put the Mirrachrome on a bit too thick. Otherwise, it's a bit cloudy but it works.


Step eighteen, mask off all of the metallic parts and spray on a coat of satin white paint (the primary color I've chosen for this helmet):
EVA Visor 19

Step nineteen, hand paint the brown portion (the secondary color I've chosen):
EVA Visor 20

Step twenty, test fit:
EVA Visor 21

Step twenty-one, hand-paint the black details:
Black details

Step twenty-two, sit back and marvel at what you've wrought:
Finished

Now I just need to find a very large friend with a very small head to dress up as the Meta from Red vs. Blue...

Saturday, October 2, 2010

Past Projects: Stormtrooper Costume

I've had a few people ask me what got me started in making all of my over-the-top movie and video game costumes. While I had other, earlier projects that were very involved, I'd have to say that this is the one that really set the hook for me.

Here was my end result:
Stormtrooper Test Fit

If you'd like to see how I arrived at this point, there's more after the jump.

Friday, October 1, 2010

Past Projects: 300 Spartan Costume

This year for Halloween I'm planning on dressing as a Spartan from the HALO video games. Since I'm dusting off old projects and writing about them again, it's worth writing about my last Spartan project from 2007.


I've written up the entire process, so if you've got the time to sit and look through the thorough description of self-abuse and chemical processes that went into making this happen, read on...

HALO Sniper Rifle cont'd

When I last updated this project, I had built the main body and the magazine. 


Since then, I had Lopez carve out the muzzle brake:
Muzzle cut out


Stacked together, it looked about like so:
Muzzle


Then I had him cut out all of the pieces to make the scope housing:
Scope Cutouts


Here's the scope housing glued and clamped sitting alongside the muzzle brake:
Scope and Muzzle


Here's the scope housing in place on top of the rifle body:
Sniper with Scope


It definitely looks the part:
Sniper with Scope closeup


Jumping the gun again, here's the new parts getting a quick coat of black primer:
Sniper Scope and small parts


At this point, Lopez had done all he could do for this project.  Now it was time to move on to the lathe:
Fat Barrel 001


Fat Barrel 005


The first part I turned on the lathe was the wide section of the barrel:
Fat Barrel 010


Then dad stopped by the workshop and, with a little finesse and a router table, we were able to make the fluted section of the barrel.  Here it is glued into the thick part:
Lower Barrel Assembly


And here's a shot of the whole barrel assembly coming together:
Barrel Assembly total


With the barrel done, it was time to turn the recoil suppressor on the lathe.  My friend Matt had stopped by to help about the same time as I was chucking a piece of poplar dowel into the lathe.  Here's a shot of the rough shape:
Recoil Suppressor started


When I made the thick base of the barrel, the biggest challenge proved to be making the square cuts toward the back end.  The recoil suppressor would need a lot more square cuts, making it a huge pain in the butt.

After a bit of discussion, Matt and I decided it would be easier to cut grooves wherever I would need the square cuts and then add in bits of foamed PVC plastic sheet, then cut them down to the same height as the rest of the surface.

Here you can see the first piece of plastic being added to the groove at the forward end:
Recoil Suppressor Addition


Here's the finished product with its first coat of primer:
Recoil Suppressor primed


Over the next couple of hours it was primed, sanded, filled, sanded, primed, sanded, and primed again.  Once had stopped looking like wood and started looking like parkerized steel, we put some black primer on it.

At that point I had to assemble all of the parts I had on hand:
Sniper assembled


Then I had to try it on for size:
Sniper Size Test 1


Turns out it's HUGE:
Sniper Size Test


I also had to line it up with the rest of the arsenal:
Arsenal

As I continued tweaking the prototype, I took many more pictures:


Here's the scope viewfinder assembled:


At this point, all that was left was the bolt, scope mounts, and the optical scope.  Both of them were pretty simple to throw together.

Here's the bolt and the scope mounts in place:

Sniper rifle details


I decided that my first attempt at making the optical scope was too small, so here's the larger one on the lathe:
Larger Scope Prototype


Here's all of the pieces laid out on the table:
Sniper Parts


The upper guard in the picture above was just a placeholder that I threw together using some 1/4" stainless rod I had laying around.  It turns out it's too thin and (because I just bent it witout looking at the reference images) way too tall.  I'll make another one from 3/8" rod soon.

Meanwhile, a very capable propmaking friend of mine has agreed to make the molds of the main body and the barrel in exchange for keeping the first few castings.  I shipped those two pieces off to him the other day, so I won't have any more pics of them for a while.

Next up: molding and casting the small parts of this beast.  Stay tuned...