A while back I was asked by MAKE Magazine to come out to their headquarters and teach a quick lesson as part of their Maker Camp, a virtual summer camp conducted via Google Hangouts. Each day they host a number of hangouts to discuss different projects their virtual campers are working on as well as a demonstration of various tools or techniques for making all sorts of interesting things.
My demonstration: making a couple of simple molds for prop building. You can watch the whole thing right here:
I did a detailed write-up about the one-sided mold a few days ago, but I'll also be doing an in-depth article about the two-sided mold just as soon as I get a chance to get a few more photos of the molds in progress.
Stay tuned!
About Me

- THORSSOLI
- I make toys for kids who don't want to grow up. I'm on the lookout for new projects. If you're interested in commissioning me to build something ridiculous, shoot me an email.
Monday, August 19, 2013


Wednesday, August 14, 2013
Prop Building 101: Making a One-Sided Silicone Mold
A while back, the folks at MAKE Magazine asked me to do a quick moldmaking demonstration as part of their "Maker Camp," a virtual summer camp program conducted via Google+ Hangouts. I was happy to oblige. I usually have a handful of simple projects on my get-around-to-it list and this was an excuse to knock a couple of them out.
The first type of mold I demonstrated was a one-sided mold occasionally referred to as a "block mold." This is the type of mold you make when you need to replicate something with a flat side that has no details. When laid on that side, the piece has to have no significant undercuts where bubbles will be trapped.
I decided that the perfect candidate for reproduction would be a simple barbell plate. I started by carving out a quick prototype on my CNC machine:

Here it is after a light sanding:
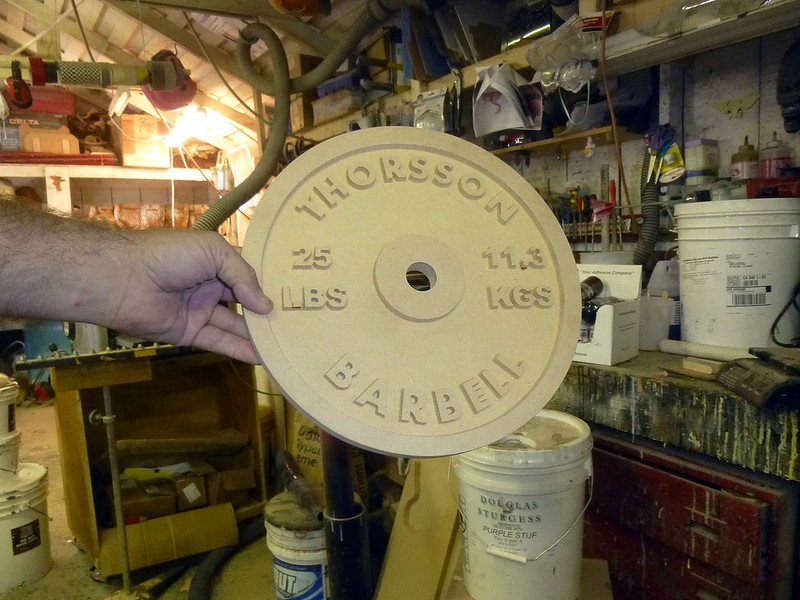
I gave it a couple of coats of primer to seal up the surface and then it was time to set it up for molding.
First, I glued it down to a piece of cardboard so it wouldn't float away once I poured silicone over it. Then I used more cardboard to glue together a watertight wall around the plate with an approximate standoff of one inch.
Here's a shot of the painted prototype with mold box built around it:

After double-checking to be sure that the box wouldn't leak, I mixed up a batch of silicone RTV moldmaking rubber and began pouring:
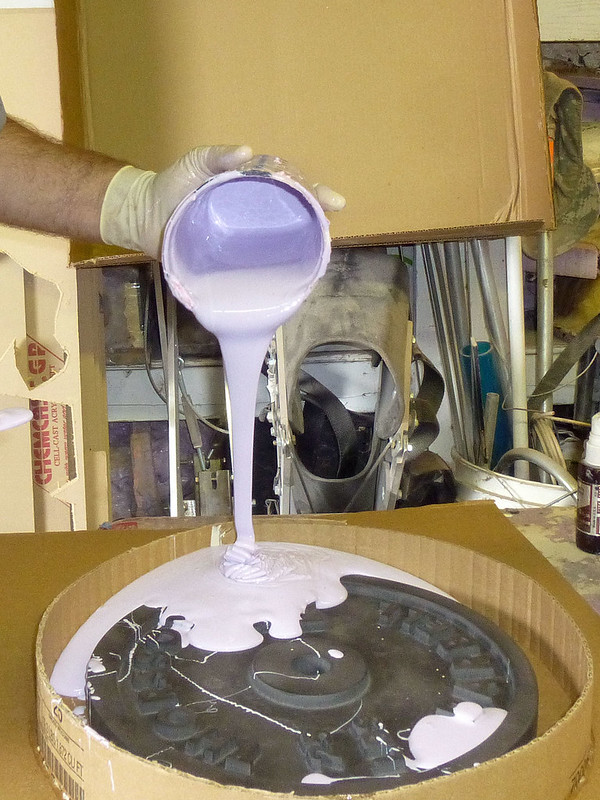
When pouring the rubber, it's a good idea to start pouring into a low part of the mold. This way the rubber will flow up and over the part in the mold without trapping as many bubbles against the surface of the part.
After filling the mold box so that there was at least 1/2" of silicone over the top of the part, I left it overnight to cure. You want that half inch of rubber so that any bubbles will have a chance to rise up and away from the surface of the piece you're replicating. Any bubbles in the rubber now will become warts on the copies when it comes time to make castings.
Once the rubber had completely cured, the next step was to flip the mold over and remove the cardboard:
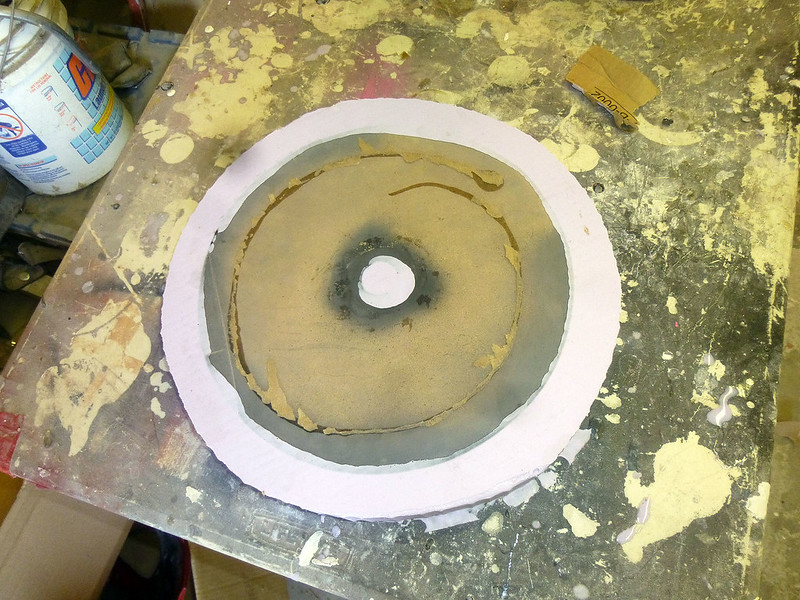
With the cardboard peeled off, you can peel the rubber off of the prototype:
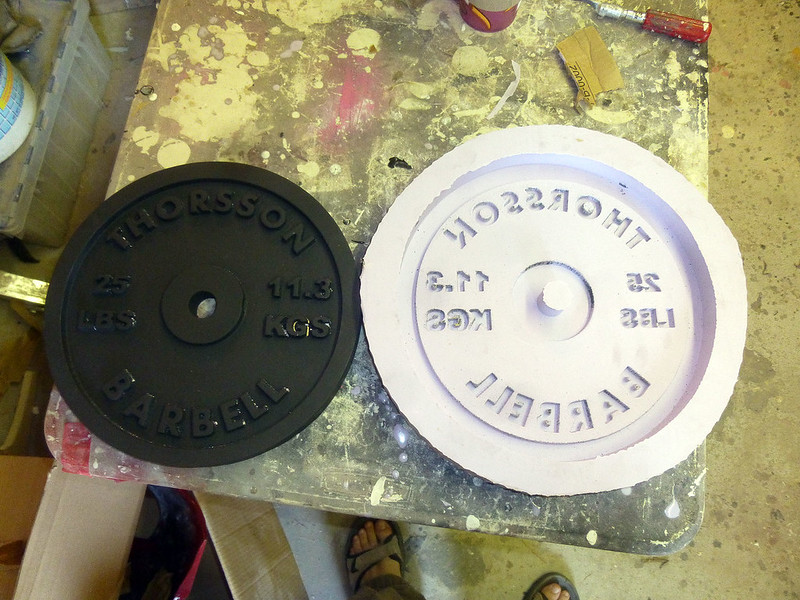
To make a copy of the prototype, it's just a quick matter of filling the silicone mold with a lightweight casting resin or expanding foam:
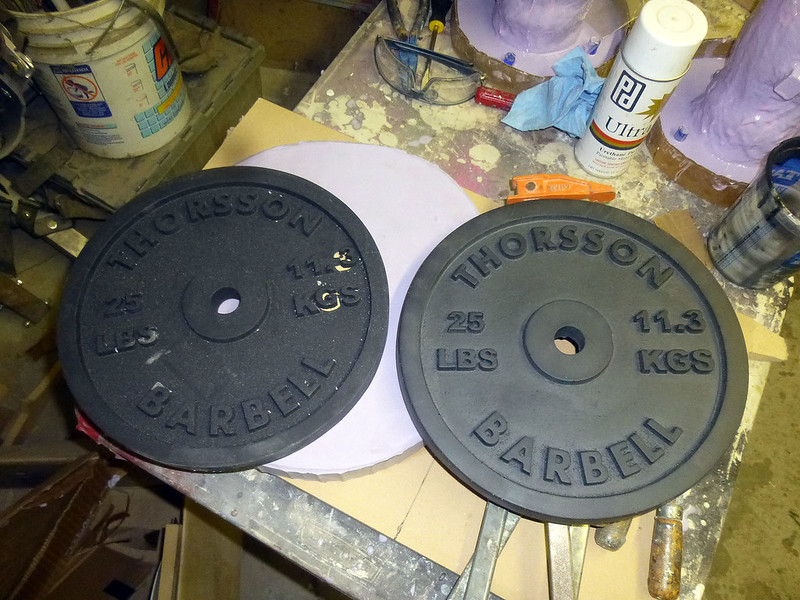
Depending on the quality of the silicone rubber you use, you can get anywhere from twenty to sixty castings out of a mold like this.
While it looks just like any other 25-lb barbell plate, this particular casting weighs about 4 ounces. It makes it look like I have really strong fingers:
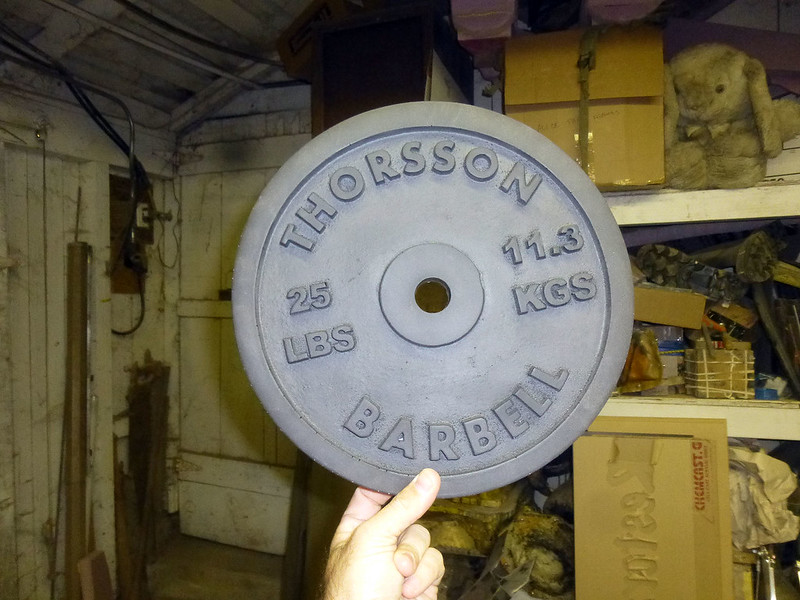
Since I cast this particular plate in flexible foam, it'll bounce when you throw it at someone.
Fun!
The first type of mold I demonstrated was a one-sided mold occasionally referred to as a "block mold." This is the type of mold you make when you need to replicate something with a flat side that has no details. When laid on that side, the piece has to have no significant undercuts where bubbles will be trapped.
I decided that the perfect candidate for reproduction would be a simple barbell plate. I started by carving out a quick prototype on my CNC machine:
Here it is after a light sanding:
I gave it a couple of coats of primer to seal up the surface and then it was time to set it up for molding.
First, I glued it down to a piece of cardboard so it wouldn't float away once I poured silicone over it. Then I used more cardboard to glue together a watertight wall around the plate with an approximate standoff of one inch.
Here's a shot of the painted prototype with mold box built around it:
After double-checking to be sure that the box wouldn't leak, I mixed up a batch of silicone RTV moldmaking rubber and began pouring:
When pouring the rubber, it's a good idea to start pouring into a low part of the mold. This way the rubber will flow up and over the part in the mold without trapping as many bubbles against the surface of the part.
After filling the mold box so that there was at least 1/2" of silicone over the top of the part, I left it overnight to cure. You want that half inch of rubber so that any bubbles will have a chance to rise up and away from the surface of the piece you're replicating. Any bubbles in the rubber now will become warts on the copies when it comes time to make castings.
Once the rubber had completely cured, the next step was to flip the mold over and remove the cardboard:
With the cardboard peeled off, you can peel the rubber off of the prototype:
To make a copy of the prototype, it's just a quick matter of filling the silicone mold with a lightweight casting resin or expanding foam:
Depending on the quality of the silicone rubber you use, you can get anywhere from twenty to sixty castings out of a mold like this.
While it looks just like any other 25-lb barbell plate, this particular casting weighs about 4 ounces. It makes it look like I have really strong fingers:
Since I cast this particular plate in flexible foam, it'll bounce when you throw it at someone.
Fun!
Friday, August 2, 2013
Gnomes in Stock
The votes are in and the results were overwhelmingly in favor of sculpting the Mortar Launcher as the next Combat Garden Gnome. Here's a few snapshots of the sculpt in progress:


There's still a few details to sort out, then I'll be ready to start making the mold for this guy. Meanwhile, I've got a lot of other gnomes in stock:
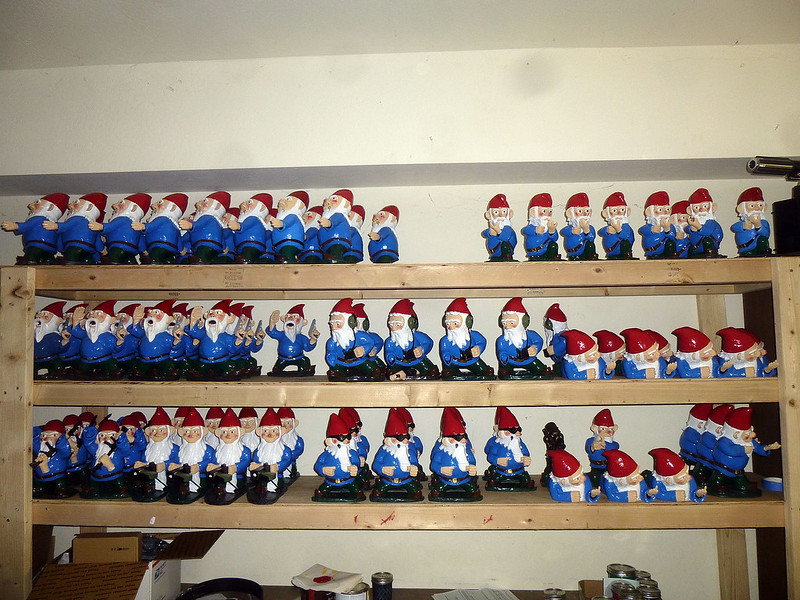
You can pick up one (or many) of your very own at http://etsy.com/shop/thorssoli right now. Use the coupon code "BLOGGER" at checkout for 10% off your order.
Also, I had someone ask me a while back if it's possible to buy prints of the photos I use in the Etsy listings. So I went ahead and set up my Deviant Art gallery to offer prints. You can check it out here: http://thorssoli.deviantart.com/gallery/
I've got four or five big projects that are rapidly approaching their finish lines. Be sure to check back soon for updates.
There's still a few details to sort out, then I'll be ready to start making the mold for this guy. Meanwhile, I've got a lot of other gnomes in stock:
You can pick up one (or many) of your very own at http://etsy.com/shop/thorssoli right now. Use the coupon code "BLOGGER" at checkout for 10% off your order.
Also, I had someone ask me a while back if it's possible to buy prints of the photos I use in the Etsy listings. So I went ahead and set up my Deviant Art gallery to offer prints. You can check it out here: http://thorssoli.deviantart.com/gallery/
I've got four or five big projects that are rapidly approaching their finish lines. Be sure to check back soon for updates.
Saturday, July 20, 2013
Recent UFO Sightings in the Workshop
I haven't been posting enough lately, so here's the latest round of UnFinished Objects I've been tinkering with in the shop...
Pip-Boy 3000 from Fallout 3:
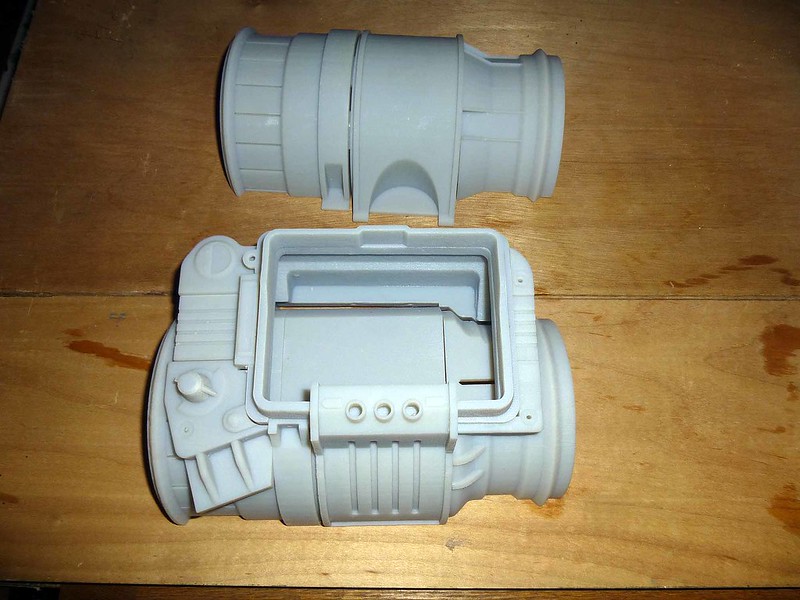
Printed out using the files in posted by "dragonator" on instructables.com. Get your own here: http://www.instructables.com/id/A-3D-printable-Pip-Boy-3000/
25-lb barbell plate:
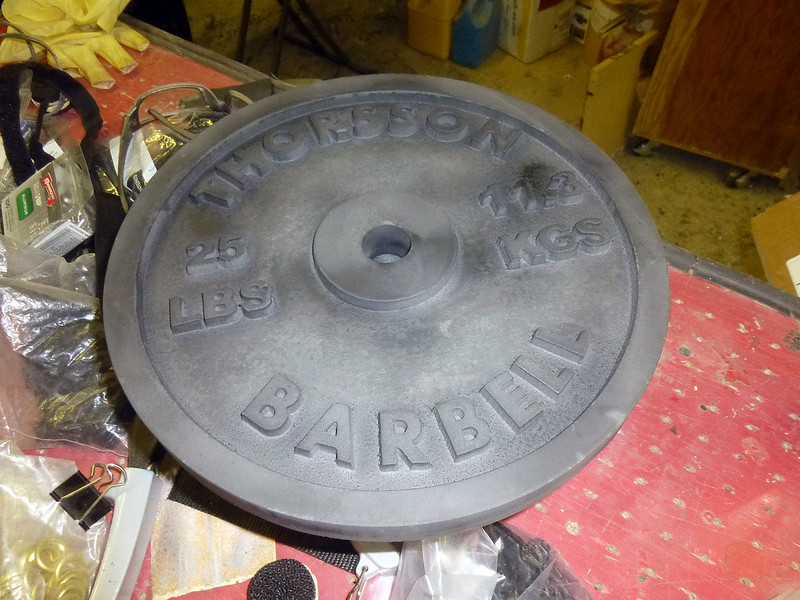
I'll be doing a moldmaking demonstration as part of the Maker Camp on Google+ next month and decided this would be as good a project as any for molding. I'll also be making a variety of hammers.
The biggest thing that's eating up my time lately is the Ironman build:
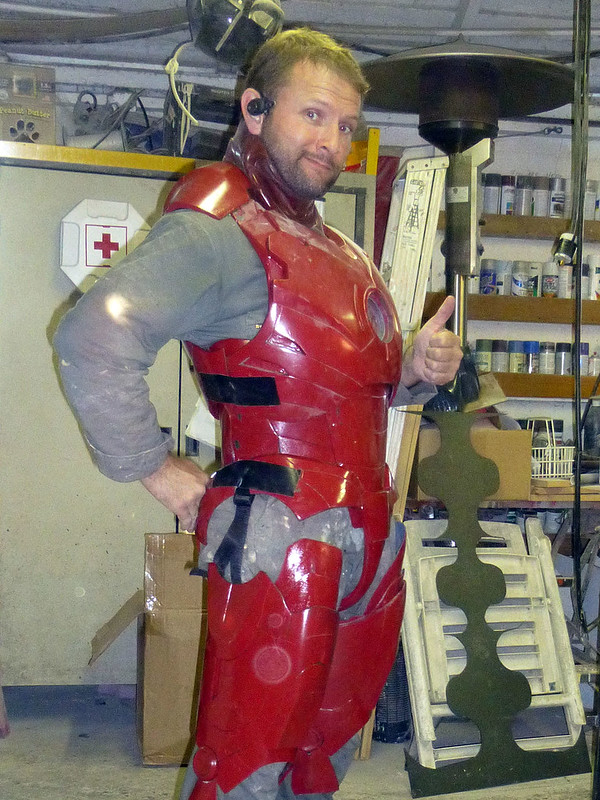
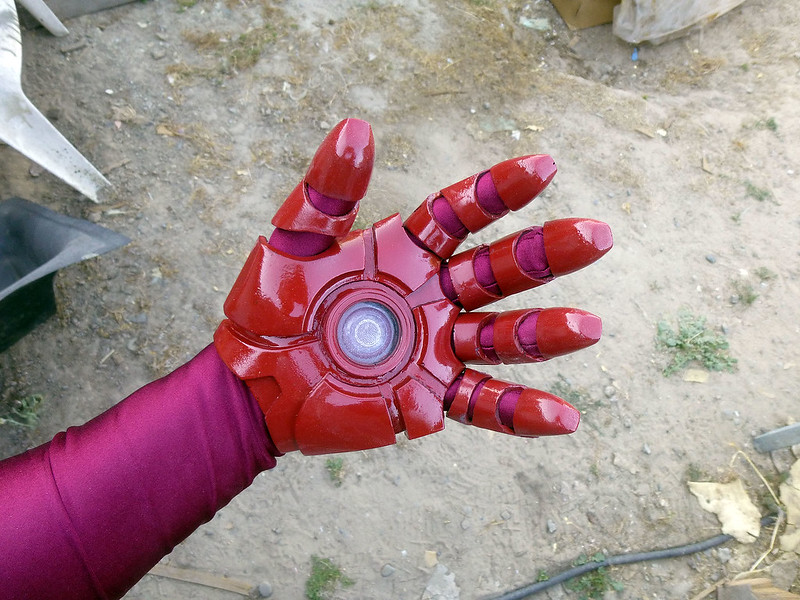
It's going to be pretty damned cool when it's finished, but first I've got a lot of detail work to do:
Since I've been long overdue for the opportunity to call something finished, I dusted off a kit that I picked up from another maker a while back and put together a replica of the mask worn by Karl Ruprecht Kroenen, one of the key villains in the first Hellboy movie:
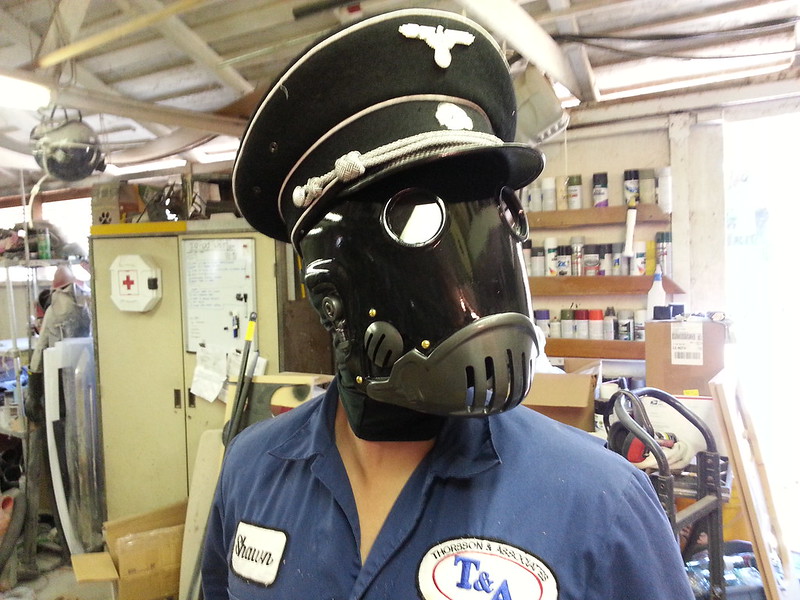
I'd call it done, but for some reason I suddenly want to make the whole costume instead.
I've also got one more very exciting project I'm working on, but I'm not allowed to show it off just yet:

Stay tuned...
Pip-Boy 3000 from Fallout 3:
Printed out using the files in posted by "dragonator" on instructables.com. Get your own here: http://www.instructables.com/id/A-3D-printable-Pip-Boy-3000/
25-lb barbell plate:
I'll be doing a moldmaking demonstration as part of the Maker Camp on Google+ next month and decided this would be as good a project as any for molding. I'll also be making a variety of hammers.
The biggest thing that's eating up my time lately is the Ironman build:
It's going to be pretty damned cool when it's finished, but first I've got a lot of detail work to do:
Since I've been long overdue for the opportunity to call something finished, I dusted off a kit that I picked up from another maker a while back and put together a replica of the mask worn by Karl Ruprecht Kroenen, one of the key villains in the first Hellboy movie:
I'd call it done, but for some reason I suddenly want to make the whole costume instead.
I've also got one more very exciting project I'm working on, but I'm not allowed to show it off just yet:
Stay tuned...
Saturday, June 29, 2013
Help Me Choose the Next Pose for Combat Garden Gnomes
I'm finally getting caught up on a couple of other projects, so it's time to start sculpting the next variation of my Combat Garden Gnomes. Here's the options I'm considering:

To weigh in, look for the poll in the upper left side of this page and cast your vote. Voting ends in the middle of July. I should be ready to start sculpting by then.
In the meantime, if you'd like to pick up one of the existing poses, you can see what I have in stock by visiting my Etsy shop at http://etsy.com/shop/thorssoli.
If you've got other suggestions, please add them in the comments section.
If you've got other suggestions, please add them in the comments section.
Subscribe to:
Posts (Atom)