You've got to love this:
About Me

- THORSSOLI
- I make toys for kids who don't want to grow up. I'm on the lookout for new projects. If you're interested in commissioning me to build something ridiculous, shoot me an email.
Friday, September 30, 2011
Monday, September 26, 2011
Past Project: Warhammer 40,000 Space Marine Bolter
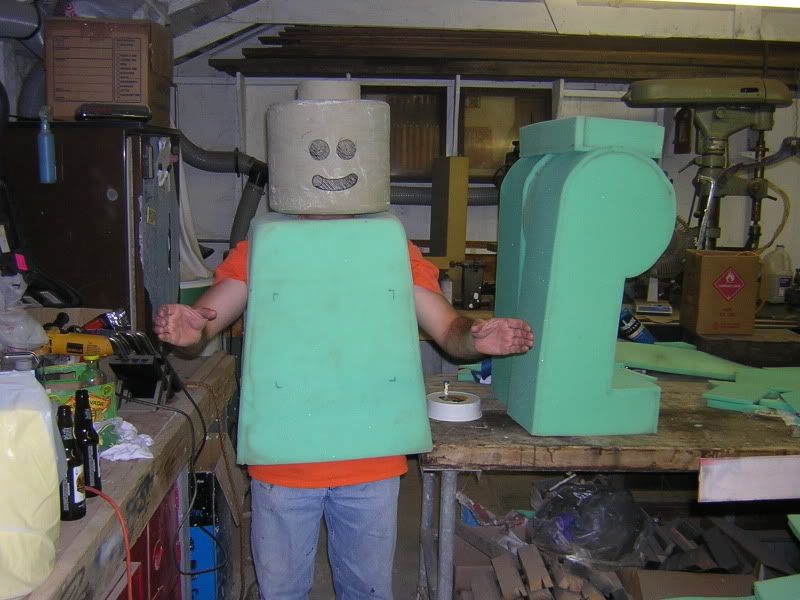
When I was in junior high school, I spent countless hours and almost all of my money collecting, building, and painting Space Marine miniatures from the tabletop wargame known as Warhammer 40,000. Years later, after finishing my stormtrooper armor and my Predator costume (and failing to finish my LEGO minifig costume) I finally had the skills and tools to build a costume that would really do justice to the characters of the WH40K universe. With the release of the new Warhammer 40k: Space Marine video game, I'm back to working on it.
With that in mind, here's the parts I've made years ago...
With that in mind, here's the parts I've made years ago...
Over quite a long time, I manage to make a couple of helmets for the Mk6 version of the armor:

The next logical step (for someone like me) was making sure that these characters would be properly armed whenever I got around to building the rest of the costume. I took on this project back before I really knew anything about what I was doing, so I made a lot of mistakes learned a lot along the way.
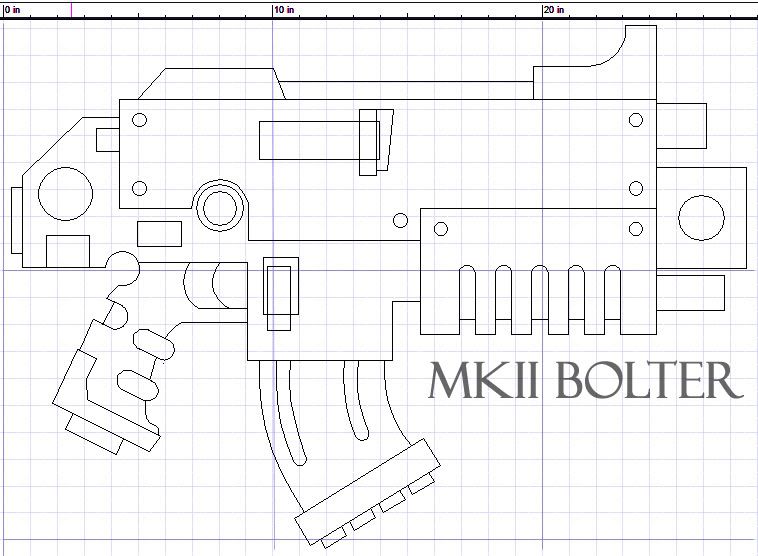
I start with a 1/1 scale drawing of the bolter. I finished this late at night with the assistance of TurboCAD and most of a bottle of wine, but I think it looked okay:
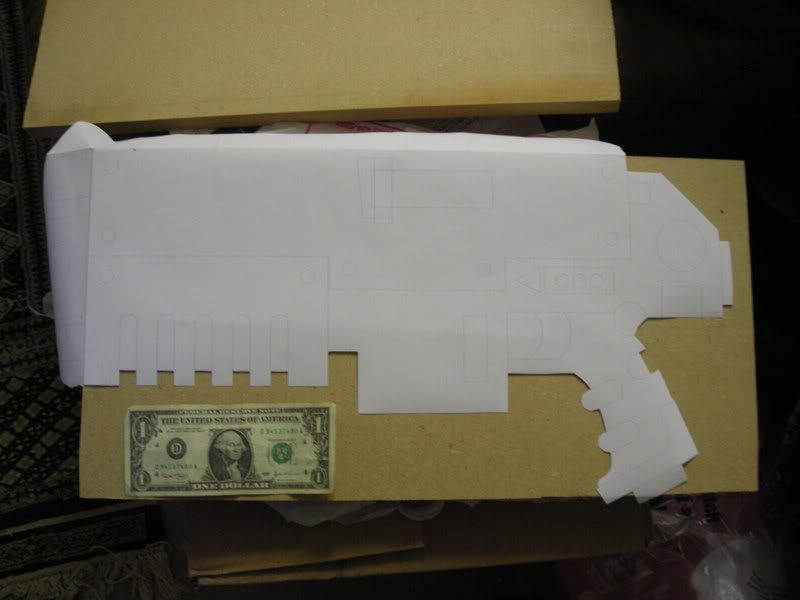
Then I convinced an engineer friend of mine to print it out on his plotter and transferred the drawing to a piece of 3/4" MDF like so:
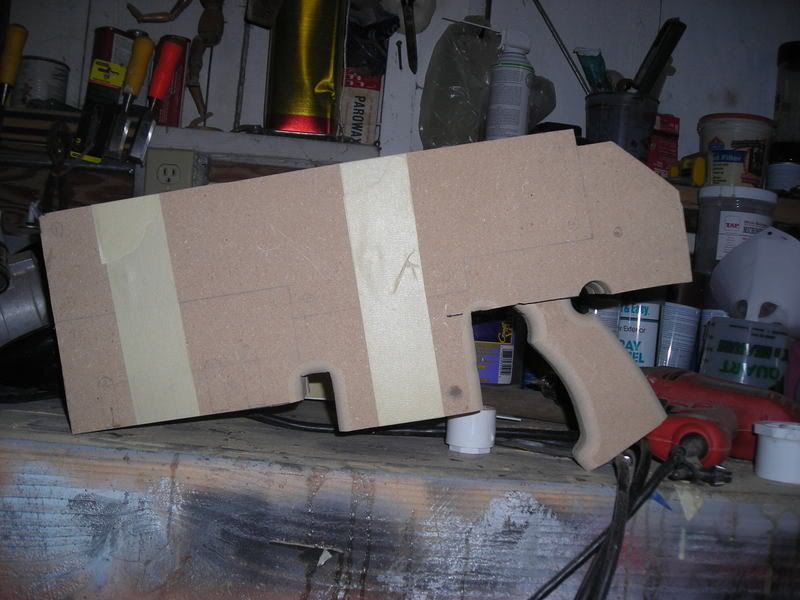
Then I screwed together four pieces of it (making the whole piece 3 inches thick) and cut it all out on the band saw. After that I cut the grip off of the two outside pieces and did some work with the router which got it here:
Digging through my pile of scraps in the workshop, I found some sheet styrene and fiberboard scraps that I added to the outside:
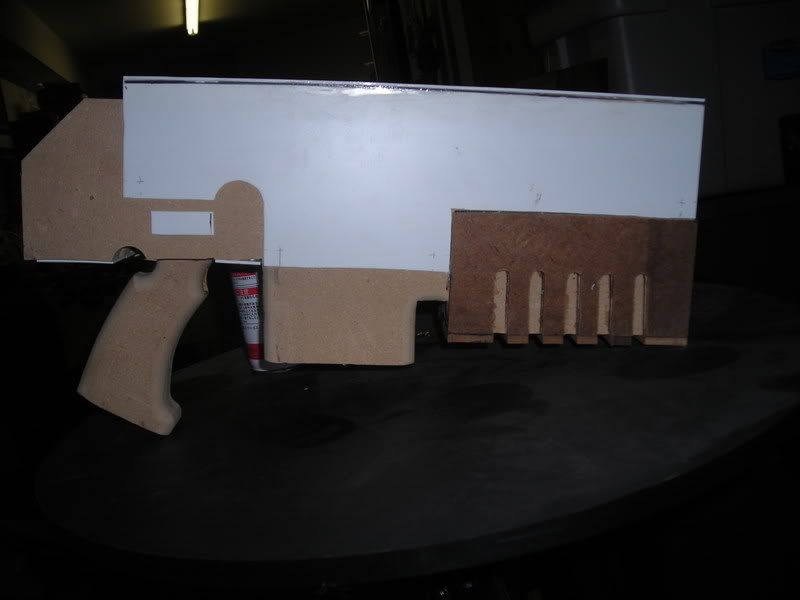
Here's the bottom:
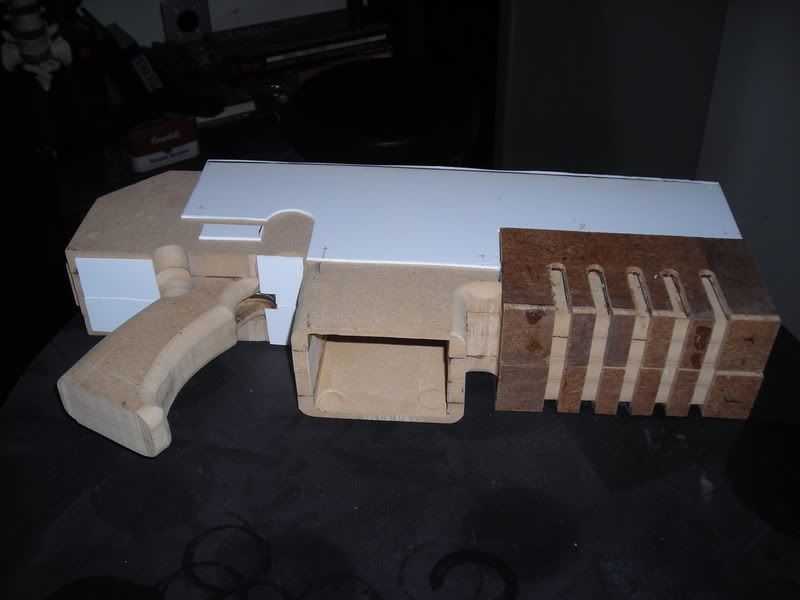
With a bit more work things were really starting to shape up:
The magazine was made using more MDF and skinning the sides with foam PVC sheet. Then I turned down three faux bullets on the lathe to be visible at the top. Here's the magazine removed:
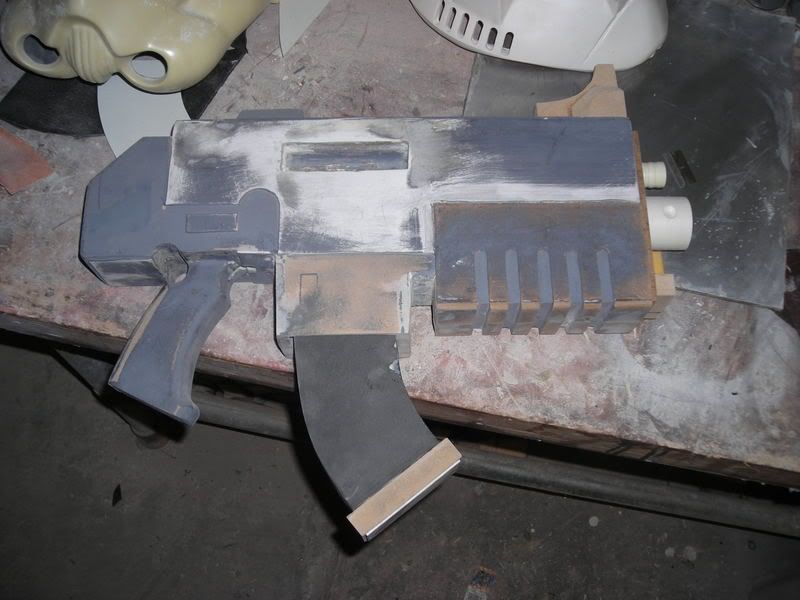
Once I was happy with the overall appearance of the piece, I went ahead and gave it a coat of satin black paint:
That done, it was time to block it up for molding. Let me say up front that this was one of my earliest experiences with moldmaking and that I've since learned many ways to make the same mold cheaper, lighter, stronger, and faster. Still, here's how I began:

The clay it's bedded in in the above picture is intended to establish a parting line for a two-piece mold. Here's the whole arrangement boxed up and ready to pour silicone in:

In order to prevent bubbles from being stuck in the silicone, I mixed each batch and then poured it into a bucket with a hole in the bottom. Then the bucket was suspended over the mold box so it was high enough that the silicone would stretch out into a thread, popping any bubbles along the way:

It worked, but only so well. Here's the mold box with the beginning of silicone poured in:

Here's the huge chunk of rubber that made up the most of the mold:

With the clay removed from the other end:

The next step was to apply a mold release to the cured silicone and then pour more silicone into the void left behind by the clay plug in order to make the second half of the mold. It turns out I used the wrong mold release. Either that or I didn't use enough. Or maybe I forgot altogether. In any case, the second pour bonded to the rest of the rubber and the only way to move forward to was to cut the silicone open instead. It worked well enough though. Here's a shot of the first casting coming out of the mold:

The end result was a block of silicone that weighs upwards of 40lbs and is an absolute bear to use for rotocasting. I can do it, it's just labor intensive. The better answer (I've since learned) would be to do a matrix mold like I did with my HALO Assault Rifle to minimize the amount of (very expensive) silicone needed and make the whole thing easier to handle. Such is life.
I made one for me and one for a friend who was also into Space Marines back in the day. Here they are after a bit of prep work and cleanup:

In the midst of the rest of this project, I also sculpted out some winged skull details for the sides of the body. Here they are with some of the other small details all ready for molding:

The mold was a simple block mold for one-sided castings:

The castings were made with cold cast bronze:

If they look to you like they're made of actual bronze, that's because they are. I'll write a how-to about cold casting later on.
I used the same process to make an imperial eagle logo as well as a plain skull. It's good to have options.
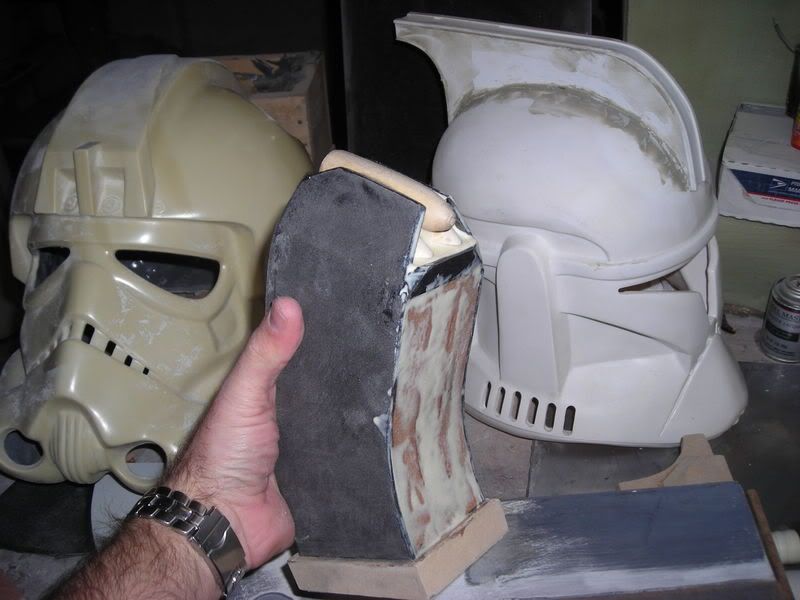
The muzzle details were also modeled and molded separately. Here's a shot showing all of the parts that I cast in order to build the whole rifle:

Here you can see the whole thing tacked together:

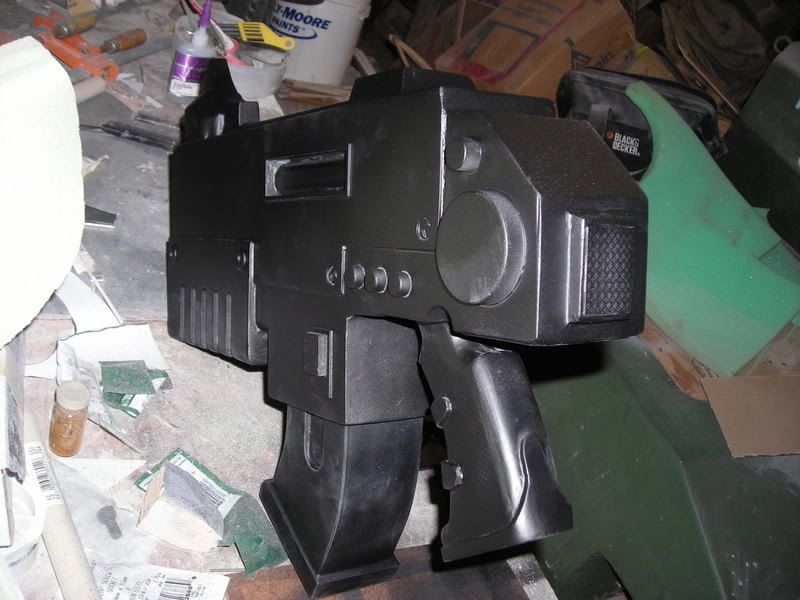
Here you can see the main portion with most of the paint job done:

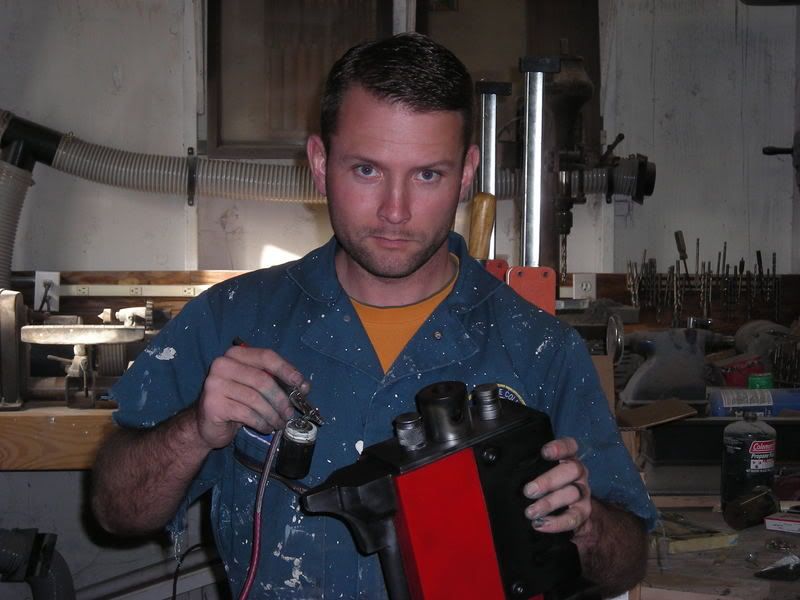
I made quite a few of the magazines. The worn edges and visible rounds are painted with Model Masters metalizer paints and the airbrush:

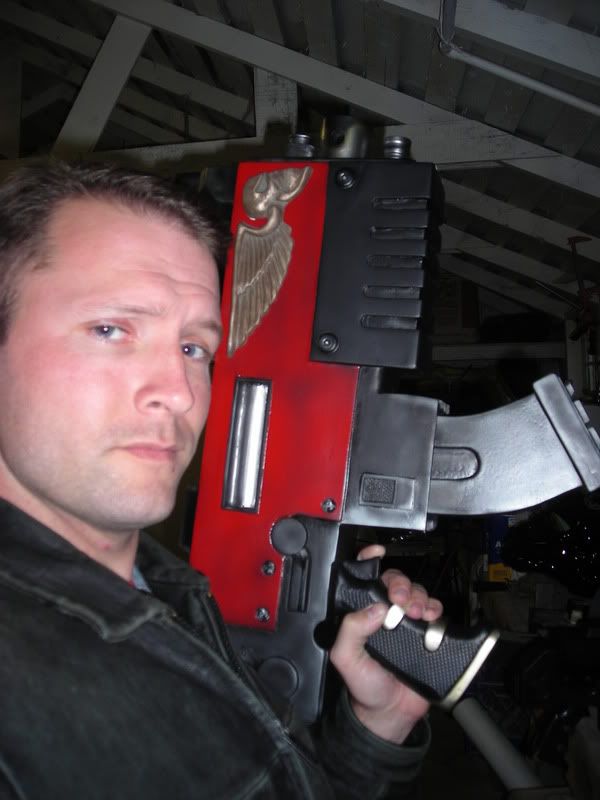
Action shot:
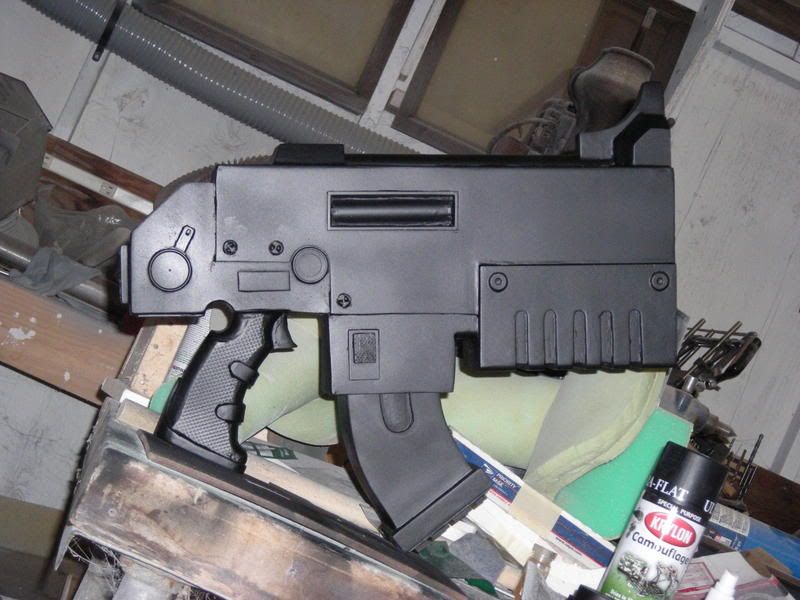
Here's the end result:
It's rather large.
I'm especially proud of the job I did on the muzzle. I was trying to make it look like a nicely polished piece of metal that has seen some abusive heat (think motorcycle exhaust pipe):
I think it goes really well with the helmet:

I still need to make the rest of the outfit though...
EDIT: I have also been asked to add the following:
This web site is completely unofficial and in no way endorsed by Games Workshop Limited.Adeptus Astartes, Blood Angels, Bloodquest, Cadian, Catachan, the Chaos devices, Cityfight, the Chaos logo, Citadel, Citadel Device, Codex, Daemonhunters, Dark Angels, Dark Eldar, 'Eavy Metal, Eldar, Eldar symbol devices, Eye of Terror, Fire Warrior, Forge World, Games Workshop, Games Workshop logo, Genestealer, Golden Demon, Gorkamorka, Great Unclean One, Inquisitor, the Inquisitor logo, the Inquisitor device, Inquisitor:Conspiracies, Keeper of Secrets, Khorne, Kroot, Lord of Change, Necron, Nurgle, Ork, Ork skull devices, Sisters of Battle, Slaanesh, Space Hulk, Space Marine, Space Marine chapters, Space Marine chapter logos, Tau, the Tau caste designations, Tyranid, Tyrannid, Tzeentch, Ultramarines, Warhammer, Warhammer 40k Device, White Dwarf, the White Dwarf logo, and all associated marks, names, races, race insignia, characters, vehicles, locations, units, illustrations and images from the Warhammer 40,000 universe are either ®, TM and/or © Copyright Games Workshop Ltd 2000-2011, variably registered in the UK and other countries around the world. Used without permission. No challenge to their status intended. All Rights Reserved to their respective owners.
Saturday, September 24, 2011
Trouble with the Lopez the Robot Whittler
I've been having all sorts of troubles with "Lopez," my Craftsman Carvewright carving machine. Several times along the way I've had him up and running only to shut down seemingly without cause. My troubleshooting efforts seem to come to nothing each time but sooner or later I'll get him to finish a project. It seems there are too many variables for me to predict exactly how this machine will operate.
In the hopes of preventing anything else new from going wrong, I've added a new warning label:
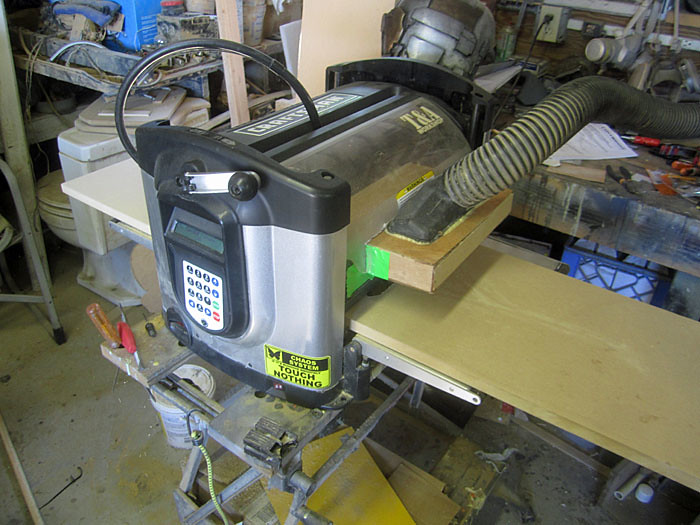
Here's a close-up shot:
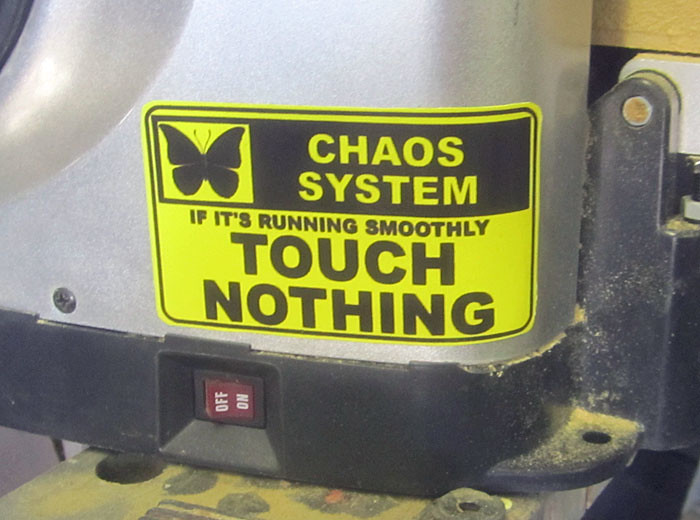
Hopefully this helps...
.
In the hopes of preventing anything else new from going wrong, I've added a new warning label:
Here's a close-up shot:
Hopefully this helps...
.
Friday, September 23, 2011
Pepakura Model Building
Yesterday afternoon, Matt and I sat down and did a quick build of one of the arms for our ongoing Space Marine armor project. I decided it would be a good idea to set up a camera and catch the magic in time-lapse. Check it out:
This is a small part of one of four major builds I've got going right now. Stay tuned...
.
This is a small part of one of four major builds I've got going right now. Stay tuned...
.
Wednesday, September 21, 2011
Brief Stop at Billetproof
This past weekend was my monthly dose of naval reserve time. On Saturday afternoon, I bolted as soon as we were cut loose in order to catch the tail end of Billetproof Northern California, billed as "The world's least important car show."
I caught just about the same amount of last years Billetproof as well. It's held at the fairgrounds in Antioch, California and the criteria for entry are very specific:
By the time I got there, cars were already starting to trickle out. Still, there were quie a few eye-catchers. I only had my little point-and-click camera, but I managed to get a few good pics all the same:
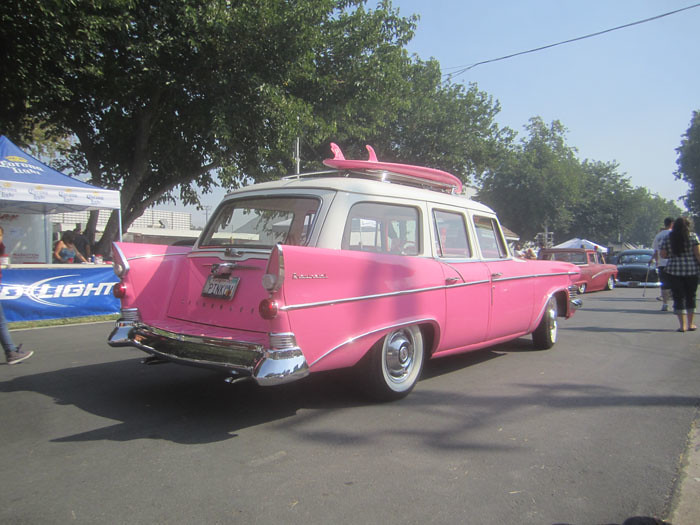
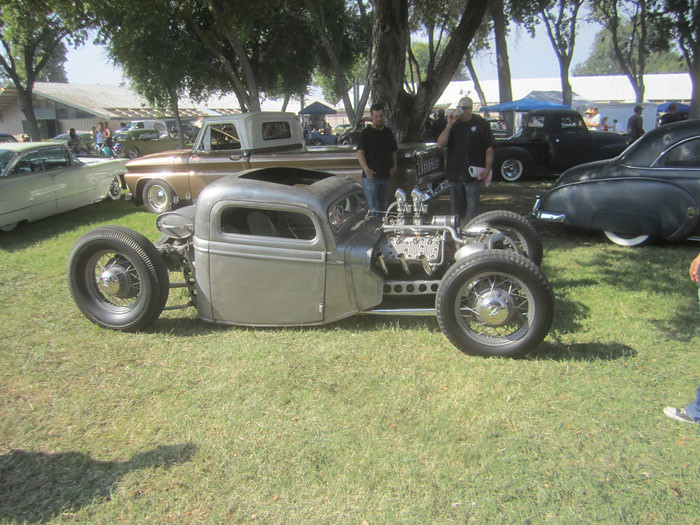
This one I saw last year, but I still like it. I guess I'm a sucker for bare metal finishes:
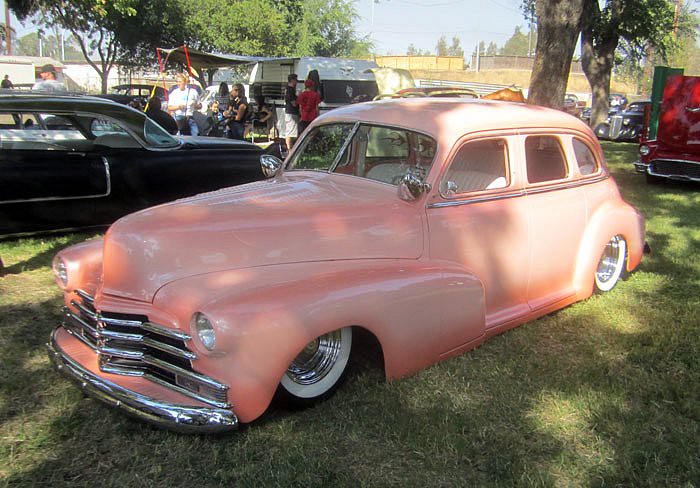
I walked around the whole show and was amazed at some of the very bold color decisions a few of the owners had made:
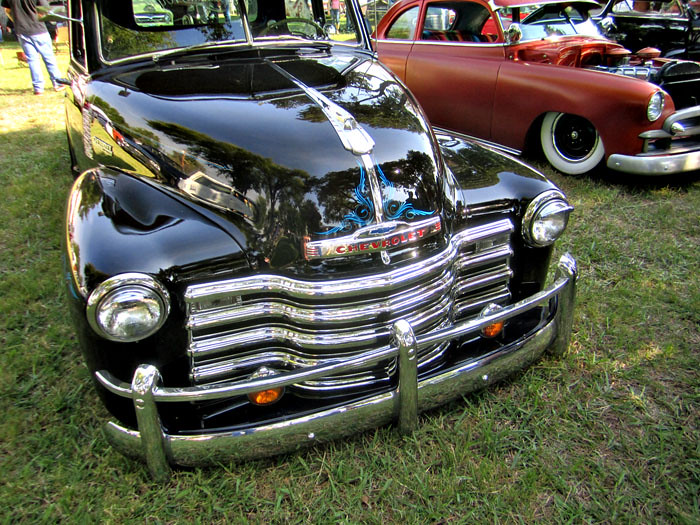
There were tons of beautifully painted cars and trucks, but I really loved the pinstriping on this one:
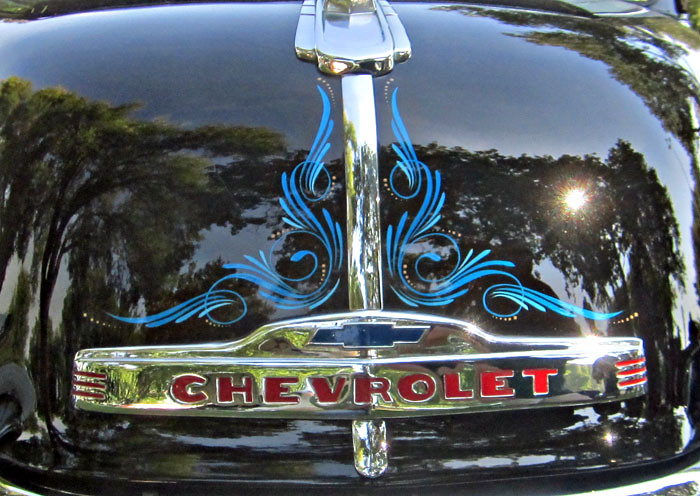
Here's a closeup shot:
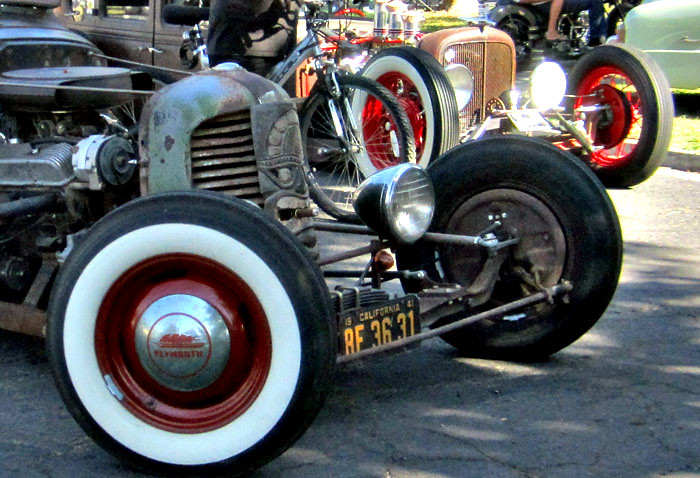
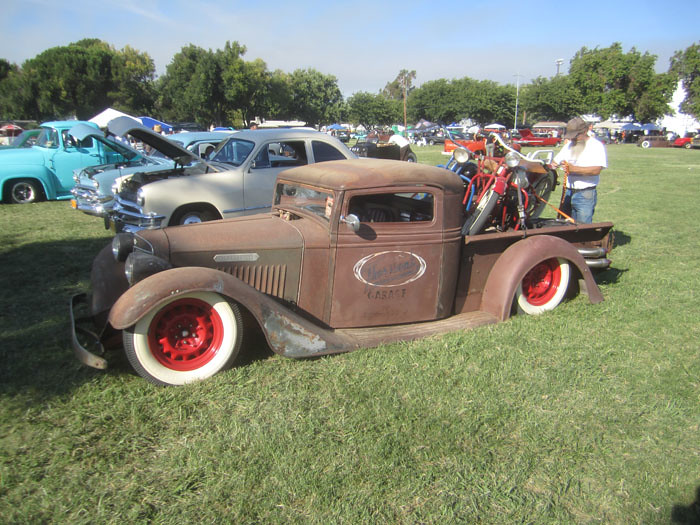
At the opposite end of the spectrum there were a few really interesting rat rods:
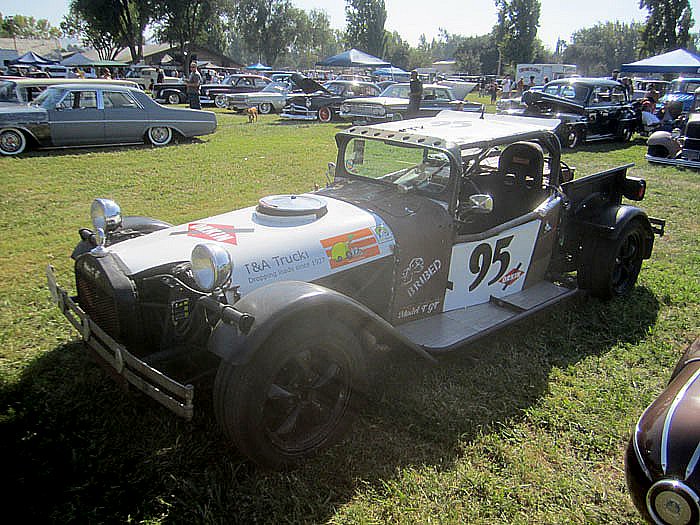
The rat rods are interesting to look at, but the real fun is found in the details. Like the cigar-smoking Tiki god in the grill of this one:
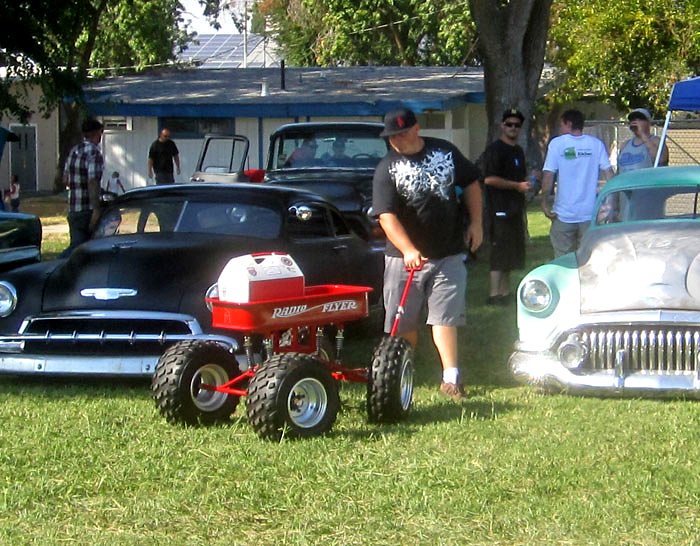
There were plenty of other creations rolling around too, like this monster truck styled Radio Flyer:
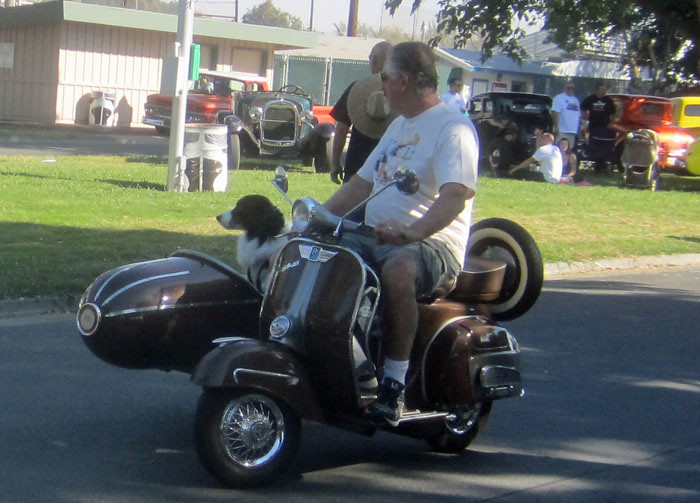
Or this vintage scooter with sidecar:
Almost as much fun as the cars was the crowd. The people who show up at these things are always intriguing. Take for example this guy who has found the ultimate solution to male-pattern baldness:

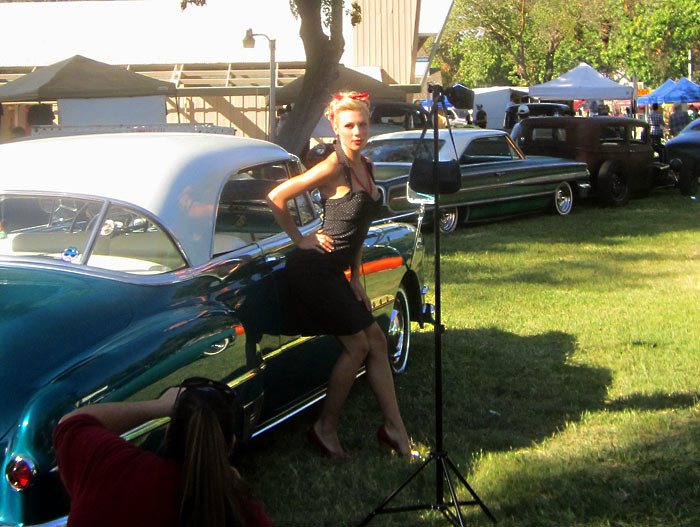
There were plenty of women walking around in pinup couture all glammed up and posing for pictures. The best looking one by far was this young lady:
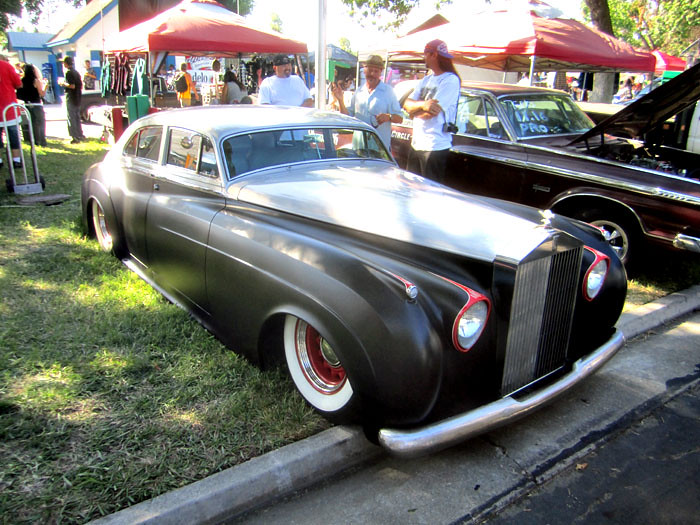
The best-looking car by far was this chopped and lowered Rolls Royce:
After I'd been there for almost two hours, I caught this shot of Dad loading his Simplex Servi-Cycles into the back of his rat rod:
So I missed most of it, but hopefully I got to see the best of it.
.
I caught just about the same amount of last years Billetproof as well. It's held at the fairgrounds in Antioch, California and the criteria for entry are very specific:
- 1964 and prior TRADITIONAL style rods and customs ONLY
- No visible billet anything! Especially wheels!
- No digital gauges
- No IFS on fenderless cars
- No trailer queens
- No mag wheels made after the 60's
- No high tech styled, pastel heart beat graphic, tweed interior, fenderless IFS sporting hot rods
- Traditional looking choppers and bobbers ONLY! (No modern West Coast Choppers, OCC style bikes)
By the time I got there, cars were already starting to trickle out. Still, there were quie a few eye-catchers. I only had my little point-and-click camera, but I managed to get a few good pics all the same:
This one I saw last year, but I still like it. I guess I'm a sucker for bare metal finishes:
I walked around the whole show and was amazed at some of the very bold color decisions a few of the owners had made:
There were tons of beautifully painted cars and trucks, but I really loved the pinstriping on this one:
Here's a closeup shot:
At the opposite end of the spectrum there were a few really interesting rat rods:
The rat rods are interesting to look at, but the real fun is found in the details. Like the cigar-smoking Tiki god in the grill of this one:
There were plenty of other creations rolling around too, like this monster truck styled Radio Flyer:
Or this vintage scooter with sidecar:
Almost as much fun as the cars was the crowd. The people who show up at these things are always intriguing. Take for example this guy who has found the ultimate solution to male-pattern baldness:
There were plenty of women walking around in pinup couture all glammed up and posing for pictures. The best looking one by far was this young lady:
The best-looking car by far was this chopped and lowered Rolls Royce:
After I'd been there for almost two hours, I caught this shot of Dad loading his Simplex Servi-Cycles into the back of his rat rod:
So I missed most of it, but hopefully I got to see the best of it.
.
Tuesday, September 20, 2011
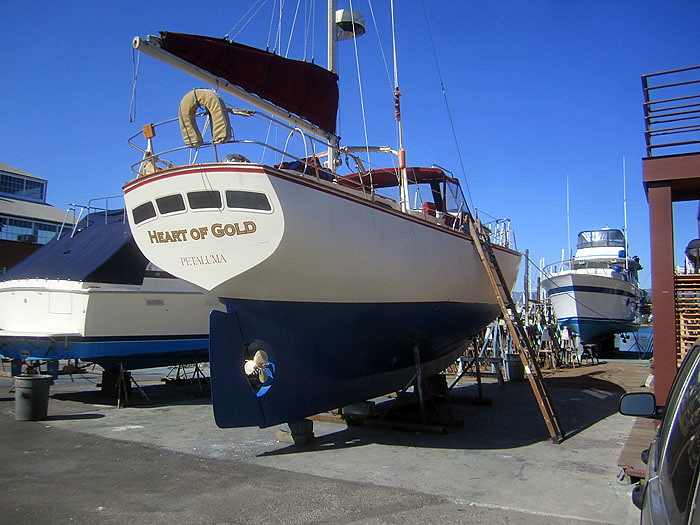
Heart of Gold Repair Update
No, I still don't have my boat back. Yes, it's been over three months since I brought her to the yard.
The good news is that the new mast has arrived. The bad news is that this was an apparent surprise for the rigging shop and they're neck-deep in work for an upcoming racing series or some such noise.
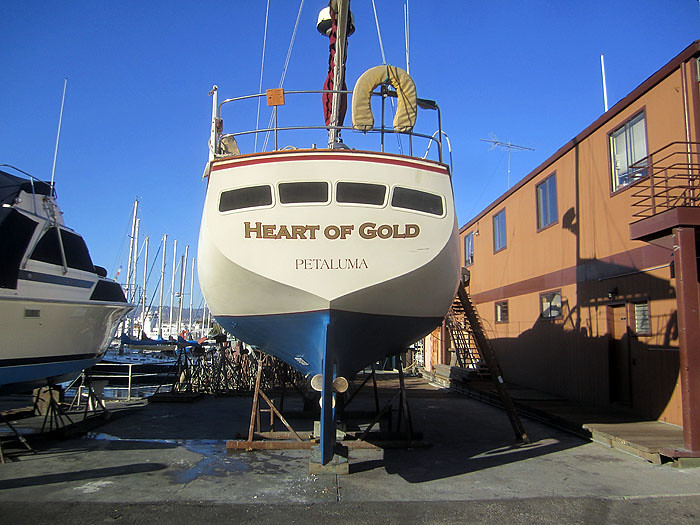
While I'm waiting, I asked the folks at the boatyard to go ahead and pull the boat out of the water to repaint the bottom and get a periodic survey. So on Friday when I stopped by, I was thrilled to find her looking like so:
The bottom has been stripped of its layer of slime and the occasional barnacle, and the sacrificial zincs are all new:
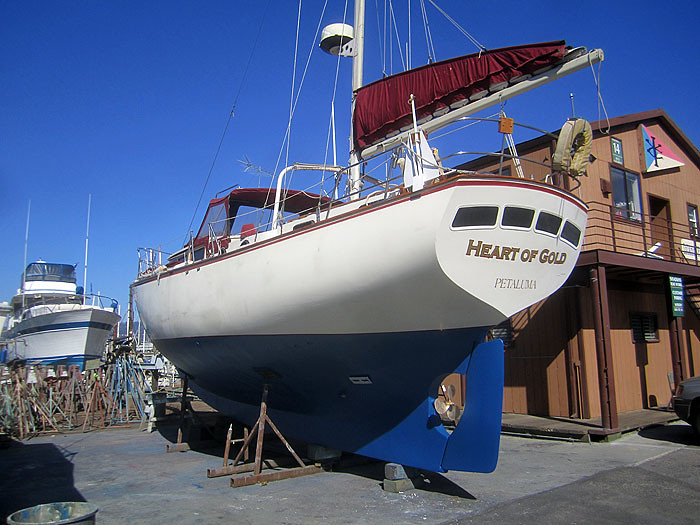
Even the propeller is all polished and new looking:
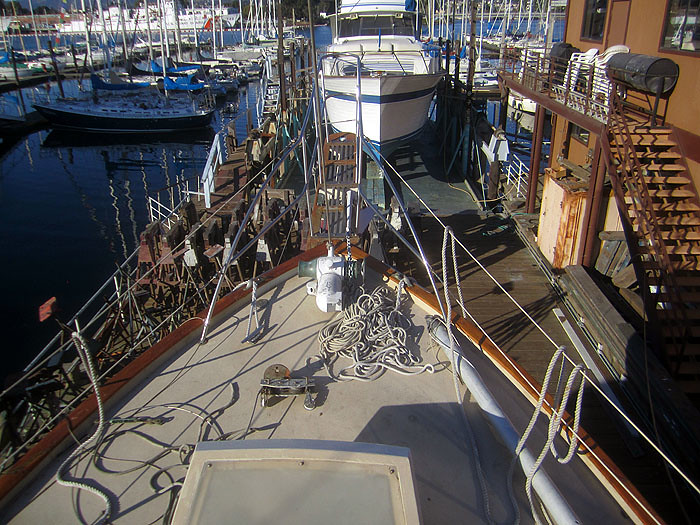
The view from on deck is a bit more disconcerting though:
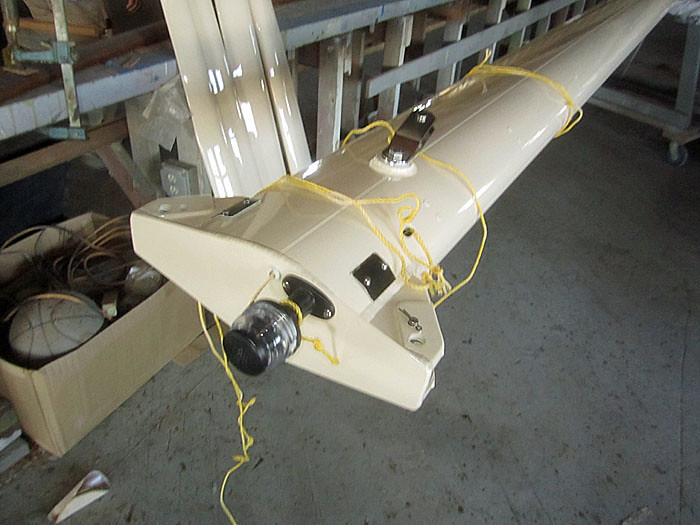
While I was there, I asked to see the new mast. I found it in the rigging loft with a shiny new coat of paint:
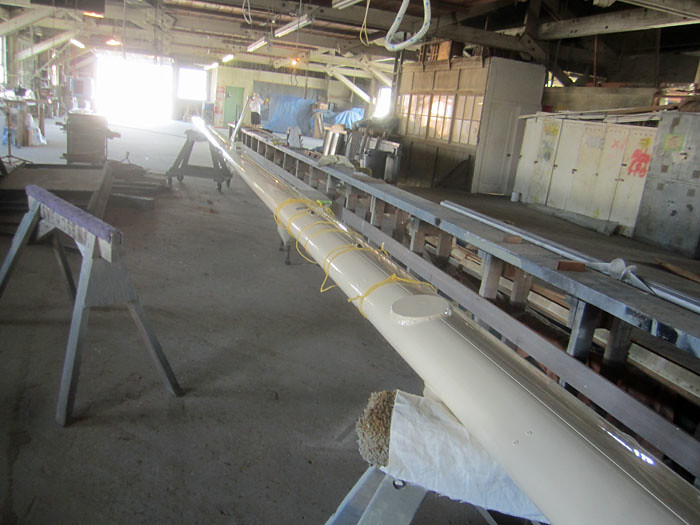
It turns out that the patina on my mizzen mast makes the color nearly impossible to match, so they did the best they could. This mostly just tells me that I ought to look into replacing the mizzen sometime soon too.
Here's a shot of the shiny new masthead:
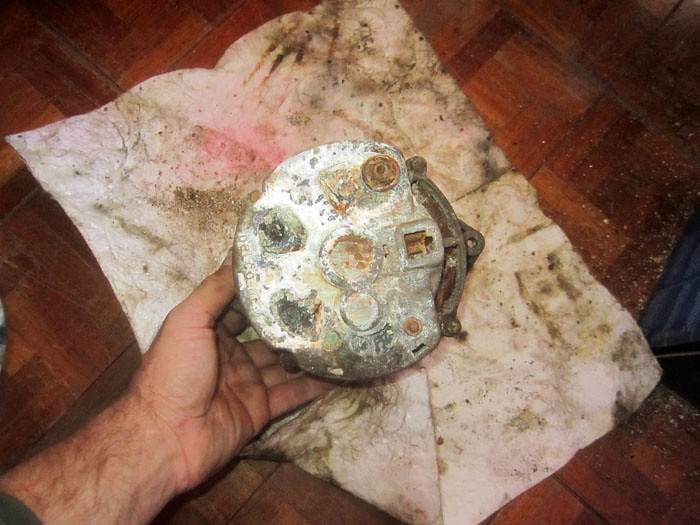
With all the shiny newness aloft, it only stands to reason that the engine room is getting even uglier. When the surveyor was poking around, he found a number of through-hull valves that were inoperable. I added those to my work list with the boatyard and set to work replacing the alternator and starter after their most recent submergence. You can see why I needed a new alternator:
Later today I'll be going down to the yard to dismantle the dead generator and remove it piece by piece from the boat. That'll give me an excuse to go ahead and remove the hundreds of pounds of lead bricks in various lockers that were loaded in to offset the weight of the generator.
Subscribe to:
Posts (Atom)